Home>Home Appliances>Lighting Appliances>How To Add A Ceiling Light Without Wiring
Lighting Appliances
How To Add A Ceiling Light Without Wiring
Published: February 14, 2024
Learn how to easily add a ceiling light without wiring using innovative lighting appliances. Upgrade your space with minimal effort and maximum impact.
(Many of the links in this article redirect to a specific reviewed product. Your purchase of these products through affiliate links helps to generate commission for Storables.com, at no extra cost. Learn more)
Introduction
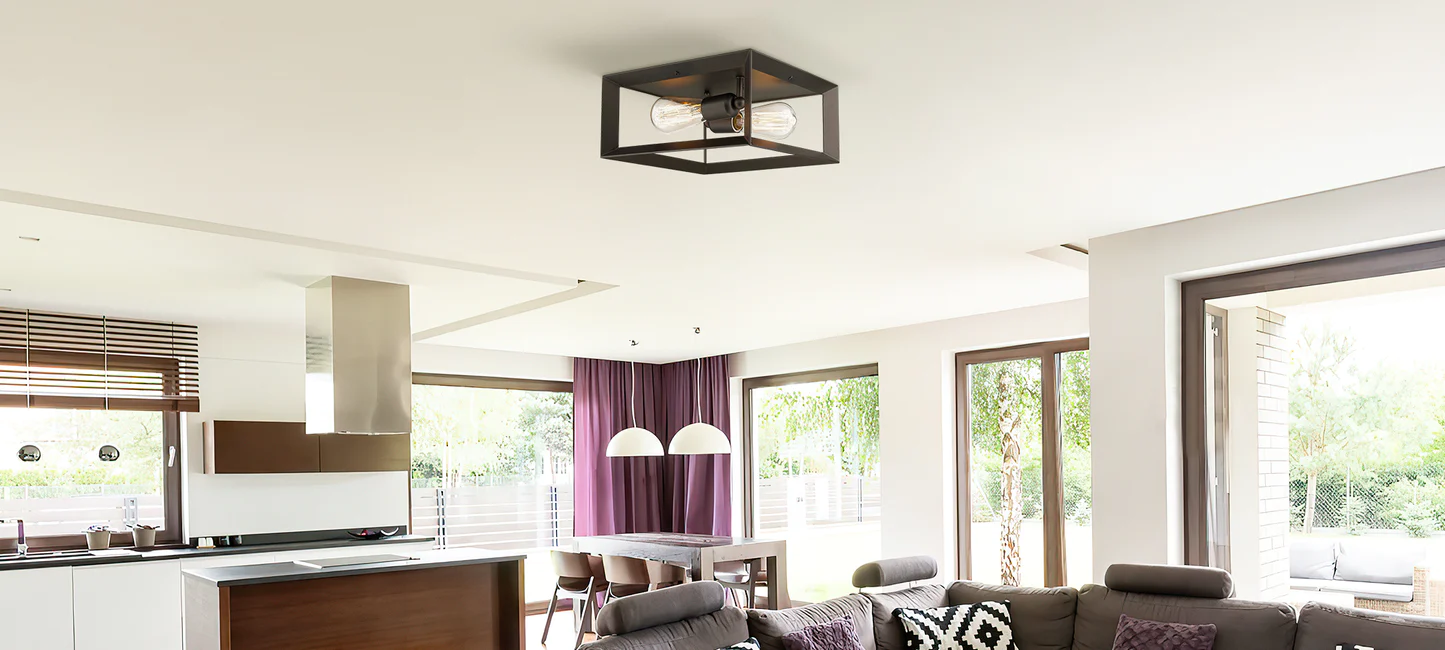
Adding a ceiling light without wiring may seem like a daunting task, especially if you're not familiar with electrical work. However, with the advancements in lighting technology, it's now possible to illuminate your space without the need for complex wiring. Whether you want to brighten up a dark corner, enhance the ambiance of a room, or simply avoid the hassle of wiring, battery-powered light fixtures offer a convenient solution.
In this comprehensive guide, we'll explore the step-by-step process of adding a ceiling light without wiring. From choosing the ideal location for your light fixture to installing and testing it, you'll gain valuable insights into transforming your space with minimal effort and maximum impact.
By the end of this guide, you'll have the knowledge and confidence to seamlessly integrate a battery-powered ceiling light into your home or workspace. So, let's embark on this illuminating journey and discover how you can effortlessly enhance your environment with a touch of radiant brilliance.
Key Takeaways:
- Easily add battery-powered ceiling lights without wiring by choosing the right location, selecting a suitable fixture, and following simple installation steps. Enjoy versatile and efficient lighting solutions with minimal effort and maximum impact.
- Transform your space with battery-powered ceiling lights that offer customizable illumination, easy installation, and convenient testing. Enhance your environment with radiant brilliance and seamless integration, no complex wiring required!
Read more: How To Install Ceiling Lights Without Wiring
Step 1: Choose a Location
Selecting the right location for your battery-powered ceiling light is crucial to ensure optimal illumination and aesthetic appeal. When choosing a location, consider the purpose of the light fixture and the specific area you intend to illuminate. Here's a detailed breakdown of the factors to consider when selecting the ideal location for your ceiling light:
Assess the Lighting Needs
Begin by assessing the lighting needs of the space. Determine whether you require focused task lighting for activities such as reading or cooking, or if you prefer ambient lighting to create a warm and inviting atmosphere. Understanding the lighting requirements will guide you in choosing the most suitable location for the ceiling light.
Consider the Room Layout
Evaluate the layout of the room to identify areas that would benefit from additional lighting. Whether it's a dimly lit corner that needs brightening up or a central space that requires enhanced illumination, the room's layout will influence the location of the ceiling light.
Evaluate Accessibility
Ensure that the chosen location is easily accessible for installing and maintaining the light fixture. Accessibility is essential, especially if you plan to reposition or replace the battery-powered light in the future. Additionally, consider the proximity to power sources if you're using a rechargeable fixture.
Harmonize with the Décor
Take into account the overall décor and design elements of the room. The chosen location should harmonize with the existing décor and complement the aesthetic appeal of the space. Whether you opt for a sleek, modern fixture or a vintage-inspired design, the location should enhance the visual appeal of the room.
Test Different Positions
Before finalizing the location, experiment with different positions for the ceiling light. Use temporary lighting solutions such as portable lamps to test the impact of various positions on the overall lighting and ambiance. This experimentation will help you determine the most effective location for the battery-powered light fixture.
By carefully considering these factors, you can confidently choose the perfect location for your battery-powered ceiling light, ensuring that it seamlessly integrates into your space while meeting your specific lighting needs.
Step 2: Select a Battery-Powered Light Fixture
When it comes to adding a ceiling light without wiring, the selection of a battery-powered light fixture plays a pivotal role in achieving the desired illumination and ambiance. With a wide array of options available, choosing the right fixture involves considering factors such as design, functionality, and power source. Here's a detailed exploration of the key considerations when selecting a battery-powered light fixture for your space:
Assess the Design and Style
Begin by assessing the design and style of the battery-powered light fixture. Whether you prefer a modern, minimalist design or a vintage-inspired aesthetic, the fixture should seamlessly integrate with the existing décor of the room. Consider the shape, color, and materials used in the construction of the fixture to ensure it complements the overall ambiance of the space.
Read more: How To Wire A Ceiling Light
Evaluate the Lighting Features
Next, evaluate the lighting features offered by the battery-powered fixture. Determine the type of illumination it provides, such as soft ambient light or focused task lighting. Additionally, consider adjustable brightness settings and color temperature options to cater to diverse lighting needs. The versatility of the lighting features will allow you to customize the ambiance according to different activities and moods.
Consider the Installation Method
When selecting a battery-powered light fixture, consider the installation method that best suits your requirements. Some fixtures are designed for easy surface mounting, while others offer versatile installation options such as magnetic attachment or adhesive backing. Assess the installation method to ensure it aligns with the chosen location and provides a secure and stable mounting solution.
Explore Power Source Options
Explore the power source options available for battery-powered light fixtures. While traditional disposable batteries are commonly used, consider the long-term cost and environmental impact. Alternatively, rechargeable fixtures powered by lithium-ion batteries offer a sustainable and cost-effective solution. Assess the convenience and sustainability of the power source to make an informed decision.
Prioritize Durability and Quality
Prioritize durability and quality when selecting a battery-powered light fixture. Opt for fixtures constructed from high-quality materials that offer longevity and resilience. Weather-resistant features are essential for outdoor or semi-outdoor applications, ensuring the fixture withstands environmental elements while maintaining optimal performance.
Read more: How To Wire A Ceiling Light To A Switch
Seek Energy-Efficient Solutions
Look for energy-efficient features in battery-powered light fixtures to minimize power consumption and extend battery life. LED technology is renowned for its energy efficiency and longevity, making it an ideal choice for battery-powered ceiling lights. By prioritizing energy-efficient solutions, you can reduce environmental impact and operational costs while enjoying long-lasting illumination.
By carefully considering these factors, you can confidently select a battery-powered light fixture that aligns with your aesthetic preferences, lighting requirements, and sustainability goals. The chosen fixture will serve as a versatile and convenient lighting solution, enhancing the ambiance of your space without the need for complex wiring.
Step 3: Install the Light Fixture
Installing a battery-powered light fixture is a straightforward process that allows you to effortlessly illuminate your space without the complexities of wiring. Whether you're enhancing a specific area or adding ambient lighting to a room, the installation of the light fixture is a pivotal step in bringing your vision to life. Here's a detailed guide on how to seamlessly install the battery-powered light fixture:
Gather the Necessary Tools
Before commencing the installation, gather the necessary tools and equipment to ensure a smooth and efficient process. Typical tools required for installing a battery-powered light fixture may include a screwdriver, measuring tape, level, and any specific hardware provided with the fixture. Having the tools readily available will streamline the installation process and minimize interruptions.
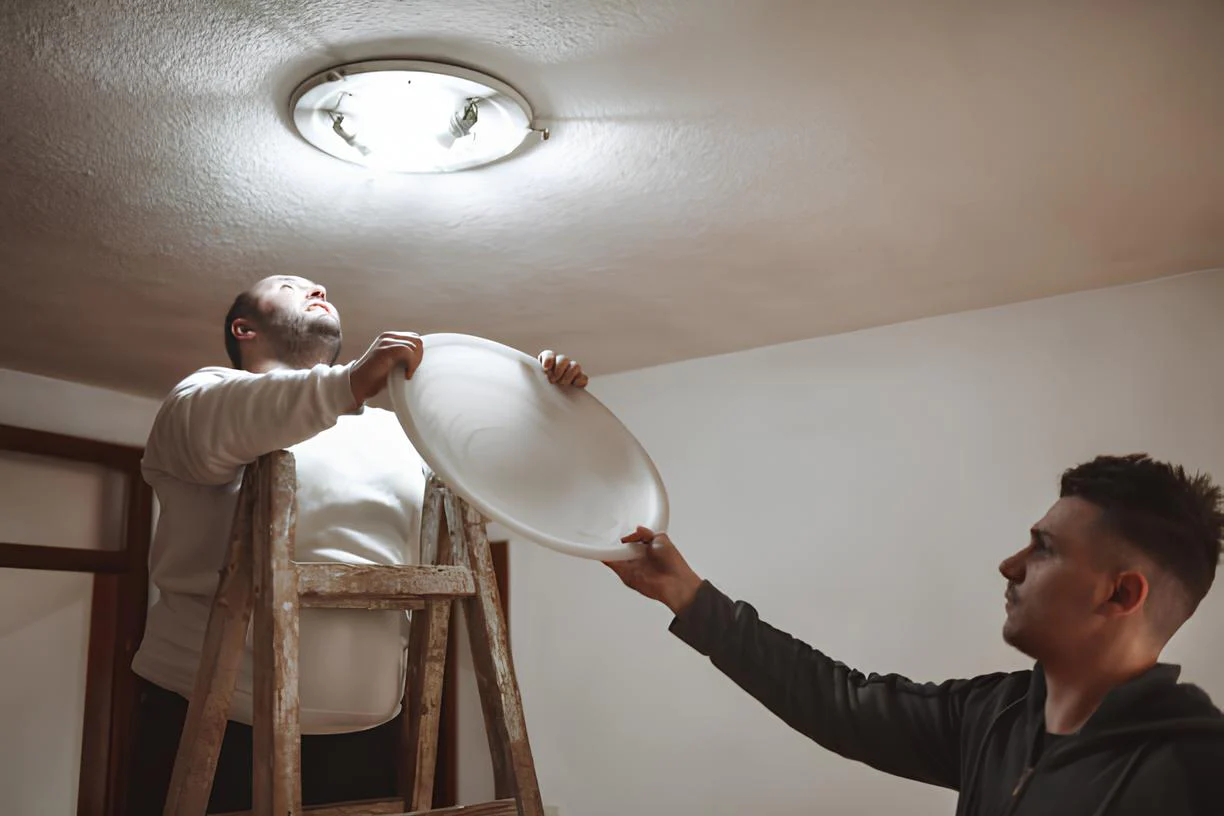
Positioning and Mounting
Begin by positioning the light fixture at the chosen location and assessing the mounting options. Depending on the design of the fixture, it may offer versatile mounting solutions such as adhesive backing, magnetic attachment, or screw-in brackets. Follow the manufacturer's instructions to securely mount the fixture, ensuring it is level and stable.
Read more: What Is The Red Wire On A Ceiling Light
Secure Battery Installation
If the battery-powered light fixture utilizes disposable or rechargeable batteries, carefully follow the instructions to install the batteries in the designated compartment. Ensure the batteries are inserted in the correct orientation to guarantee proper functionality. For rechargeable fixtures, connect the fixture to a power source to initiate the charging process as per the manufacturer's guidelines.
Adjust Settings and Orientation
Once the light fixture is securely mounted, adjust any settings or orientation features to customize the illumination according to your preferences. Some fixtures offer adjustable brightness levels, motion-sensing capabilities, or directional lighting options. Take advantage of these features to tailor the lighting to suit specific activities and enhance the ambiance of the space.
Test Functionality
After installing and adjusting the light fixture, perform a thorough functionality test to ensure it operates as intended. Activate the fixture and assess its illumination, ensuring it effectively lights up the desired area. Test any additional features such as motion sensors or remote control functionality to verify their seamless operation.
Fine-Tuning and Alignment
Fine-tune the positioning and alignment of the light fixture to achieve optimal illumination and aesthetic appeal. Make any necessary adjustments to the orientation or angle of the fixture to maximize its impact. Additionally, ensure that the fixture harmonizes with the surrounding décor and complements the overall visual appeal of the space.
By following these detailed steps, you can confidently install a battery-powered light fixture, transforming your environment with effortless illumination and versatile lighting solutions. The installation process empowers you to seamlessly integrate the light fixture into your space, enhancing both functionality and visual allure.
Step 4: Test the Light Fixture
Once the battery-powered light fixture is installed, it's essential to conduct a comprehensive testing process to ensure its functionality and performance align with your lighting needs. Testing the light fixture allows you to verify its illumination, operational features, and overall impact on the designated area. Here's a detailed exploration of the testing phase, guiding you through the essential steps to validate the effectiveness of the installed light fixture.
Illuminate the Designated Area
Activate the light fixture to illuminate the designated area and assess the spread and intensity of the illumination. Observe how effectively the fixture brightens the space, taking note of any areas that may require additional lighting or adjustments to the fixture's positioning. By visually inspecting the illuminated area, you can gauge the fixture's initial impact and identify any potential areas for improvement.
Evaluate Adjustable Settings
If the battery-powered light fixture offers adjustable settings such as brightness levels or color temperature, experiment with these features to customize the illumination. Assess the versatility of the fixture in catering to different lighting preferences, from soft ambient lighting for relaxation to brighter illumination for task-oriented activities. By exploring the adjustable settings, you can tailor the lighting to suit diverse needs and create the desired ambiance.
Test Additional Features
If the light fixture incorporates additional features such as motion sensors, remote control functionality, or timer settings, thoroughly test these capabilities. Activate the motion sensors to ensure they effectively detect movement and trigger the illumination as intended. If the fixture includes remote control functionality, verify its responsiveness and range. Testing these additional features allows you to leverage the full potential of the light fixture's capabilities.
Read more: How To Wire Dimmable LED Ceiling Lights
Verify Battery Performance
For battery-powered fixtures utilizing disposable or rechargeable batteries, monitor the performance and longevity of the power source. If the fixture offers rechargeable capabilities, assess the charging process and the duration of illumination on a single charge. For fixtures powered by disposable batteries, keep track of the battery life and plan for timely replacements. Verifying the battery performance ensures consistent and reliable illumination over time.
Assess Overall Impact
Step back and assess the overall impact of the installed light fixture on the space. Evaluate how the illumination enhances the ambiance, functionality, and visual appeal of the area. Consider the fixture's contribution to the room's atmosphere and its ability to fulfill the intended lighting requirements. By assessing the fixture's overall impact, you can confirm its successful integration into the environment.
By meticulously testing the light fixture, you can validate its functionality, versatility, and contribution to the illuminated space. The testing phase serves as a crucial step in ensuring that the installed battery-powered light fixture aligns with your lighting preferences and effectively enhances the designated area with radiant illumination.
Conclusion
In conclusion, the process of adding a ceiling light without wiring has been demystified, offering a seamless and versatile approach to illuminating your space. By following the step-by-step guide, you can confidently integrate a battery-powered light fixture into your home or workspace, enhancing both functionality and ambiance.
The journey begins with choosing the ideal location for the ceiling light, considering factors such as lighting needs, room layout, accessibility, and décor harmonization. This thoughtful selection ensures that the light fixture seamlessly integrates into the space while fulfilling specific lighting requirements.
The subsequent step involves selecting a battery-powered light fixture that aligns with your aesthetic preferences, lighting features, and sustainability goals. By assessing design, lighting features, installation methods, power source options, durability, and energy efficiency, you can make an informed decision that enhances the visual allure and functionality of the space.
The installation process empowers you to effortlessly mount the light fixture, adjust its settings, and fine-tune its positioning to achieve optimal illumination. By following the detailed installation steps and conducting a thorough testing phase, you can validate the functionality and performance of the installed light fixture, ensuring it aligns with your lighting needs and enhances the designated area.
Ultimately, the addition of a battery-powered ceiling light without wiring offers a convenient and versatile lighting solution, enabling you to transform your environment with radiant brilliance. Whether you seek focused task lighting, ambient illumination, or a decorative accent, the flexibility of battery-powered fixtures empowers you to customize the lighting according to diverse activities and moods.
By embracing this innovative approach to lighting, you can elevate the ambiance of your space while enjoying the convenience and aesthetic appeal of battery-powered ceiling lights. With the knowledge and insights gained from this guide, you are well-equipped to embark on your illuminating journey, seamlessly integrating versatile and efficient lighting solutions into your surroundings.
Frequently Asked Questions about How To Add A Ceiling Light Without Wiring
Was this page helpful?
At Storables.com, we guarantee accurate and reliable information. Our content, validated by Expert Board Contributors, is crafted following stringent Editorial Policies. We're committed to providing you with well-researched, expert-backed insights for all your informational needs.


0 thoughts on “How To Add A Ceiling Light Without Wiring”