Home>Home Appliances>Lighting Appliances>How To Turn A Ceiling Light Into A Plug-In

Lighting Appliances
How To Turn A Ceiling Light Into A Plug-In
Modified: October 19, 2024
Learn how to easily convert a ceiling light into a plug-in fixture for added convenience and versatility. Explore our step-by-step guide for lighting appliances.
(Many of the links in this article redirect to a specific reviewed product. Your purchase of these products through affiliate links helps to generate commission for Storables.com, at no extra cost. Learn more)
Introduction
Turning a ceiling light into a plug-in fixture can offer a convenient and flexible lighting solution for various spaces. Whether you're looking to illuminate a room without the need for hardwiring or seeking a temporary lighting setup, this DIY project provides a practical and cost-effective alternative. By following a few simple steps, you can transform a standard ceiling light into a plug-in fixture that can be easily installed and moved as needed.
This guide will walk you through the process of converting a ceiling light into a plug-in fixture, providing detailed instructions and insights to help you accomplish this task with confidence. From gathering the necessary materials to testing the plug-in ceiling light, each step is designed to ensure a smooth and successful transformation. With the right tools and a clear understanding of the process, you can create a versatile lighting solution that meets your specific needs.
By learning how to turn a ceiling light into a plug-in fixture, you can expand your lighting options and enhance the functionality of your living or working space. Whether you're a DIY enthusiast or simply looking for a practical lighting solution, this project offers a creative way to customize your lighting setup without the constraints of traditional hardwiring. So, let's dive into the step-by-step process and discover how you can easily convert a ceiling light into a plug-in fixture to brighten up your surroundings.
Key Takeaways:
- Transforming a ceiling light into a plug-in fixture allows for easy installation and flexibility, making it ideal for renters and temporary spaces. It offers a convenient lighting solution without the constraints of traditional hardwiring.
- By following a step-by-step process, you can convert a standard ceiling light into a plug-in fixture, providing a practical and cost-effective alternative. This DIY project empowers individuals to customize their lighting setup with ease and creativity.
Read more: Ceiling Light Flickers When Turned Off
Step 1: Gather the necessary materials
Before embarking on the process of turning a ceiling light into a plug-in fixture, it's essential to gather all the required materials. By ensuring that you have everything at hand, you can streamline the conversion process and minimize interruptions. Here's a comprehensive list of the necessary materials for this DIY project:
-
Ceiling Light Fixture: Select a suitable ceiling light fixture that you want to convert into a plug-in fixture. Ensure that it is in good working condition and compatible with the plug-in adapter.
-
Plug-in Adapter: Acquire a high-quality plug-in adapter specifically designed for converting hardwired fixtures into plug-in fixtures. The adapter should be UL-listed for safety and reliability.
-
Wire Strippers: A pair of wire strippers will be essential for removing the insulation from the wires, allowing you to connect the plug-in adapter securely.
-
Screwdriver Set: Prepare a set of screwdrivers, including flathead and Phillips head screwdrivers, to facilitate the disassembly and reassembly of the ceiling light fixture.
-
Electrical Tape: Have electrical tape on hand to insulate and secure the wire connections, ensuring safety and preventing any exposed wires.
-
Wire Nuts: These small, insulated connectors are crucial for joining and securing the wires during the conversion process.
-
Extension Cord: Select a heavy-duty extension cord of sufficient length to provide flexibility in placing the plug-in ceiling light in various locations.
-
Stud Finder: If you plan to mount the plug-in fixture to the ceiling, a stud finder will help locate the ceiling joists for secure installation.
-
Ladder or Step Stool: Depending on the height of the ceiling, a stable ladder or step stool will be necessary to access the ceiling light fixture safely.
-
Safety Gear: Prioritize safety by wearing appropriate gear, including work gloves and safety glasses, to protect yourself during the installation process.
By gathering these essential materials, you can set the stage for a successful transformation of your ceiling light into a plug-in fixture. With everything in place, you'll be well-prepared to proceed to the next steps and bring your DIY lighting project to fruition.
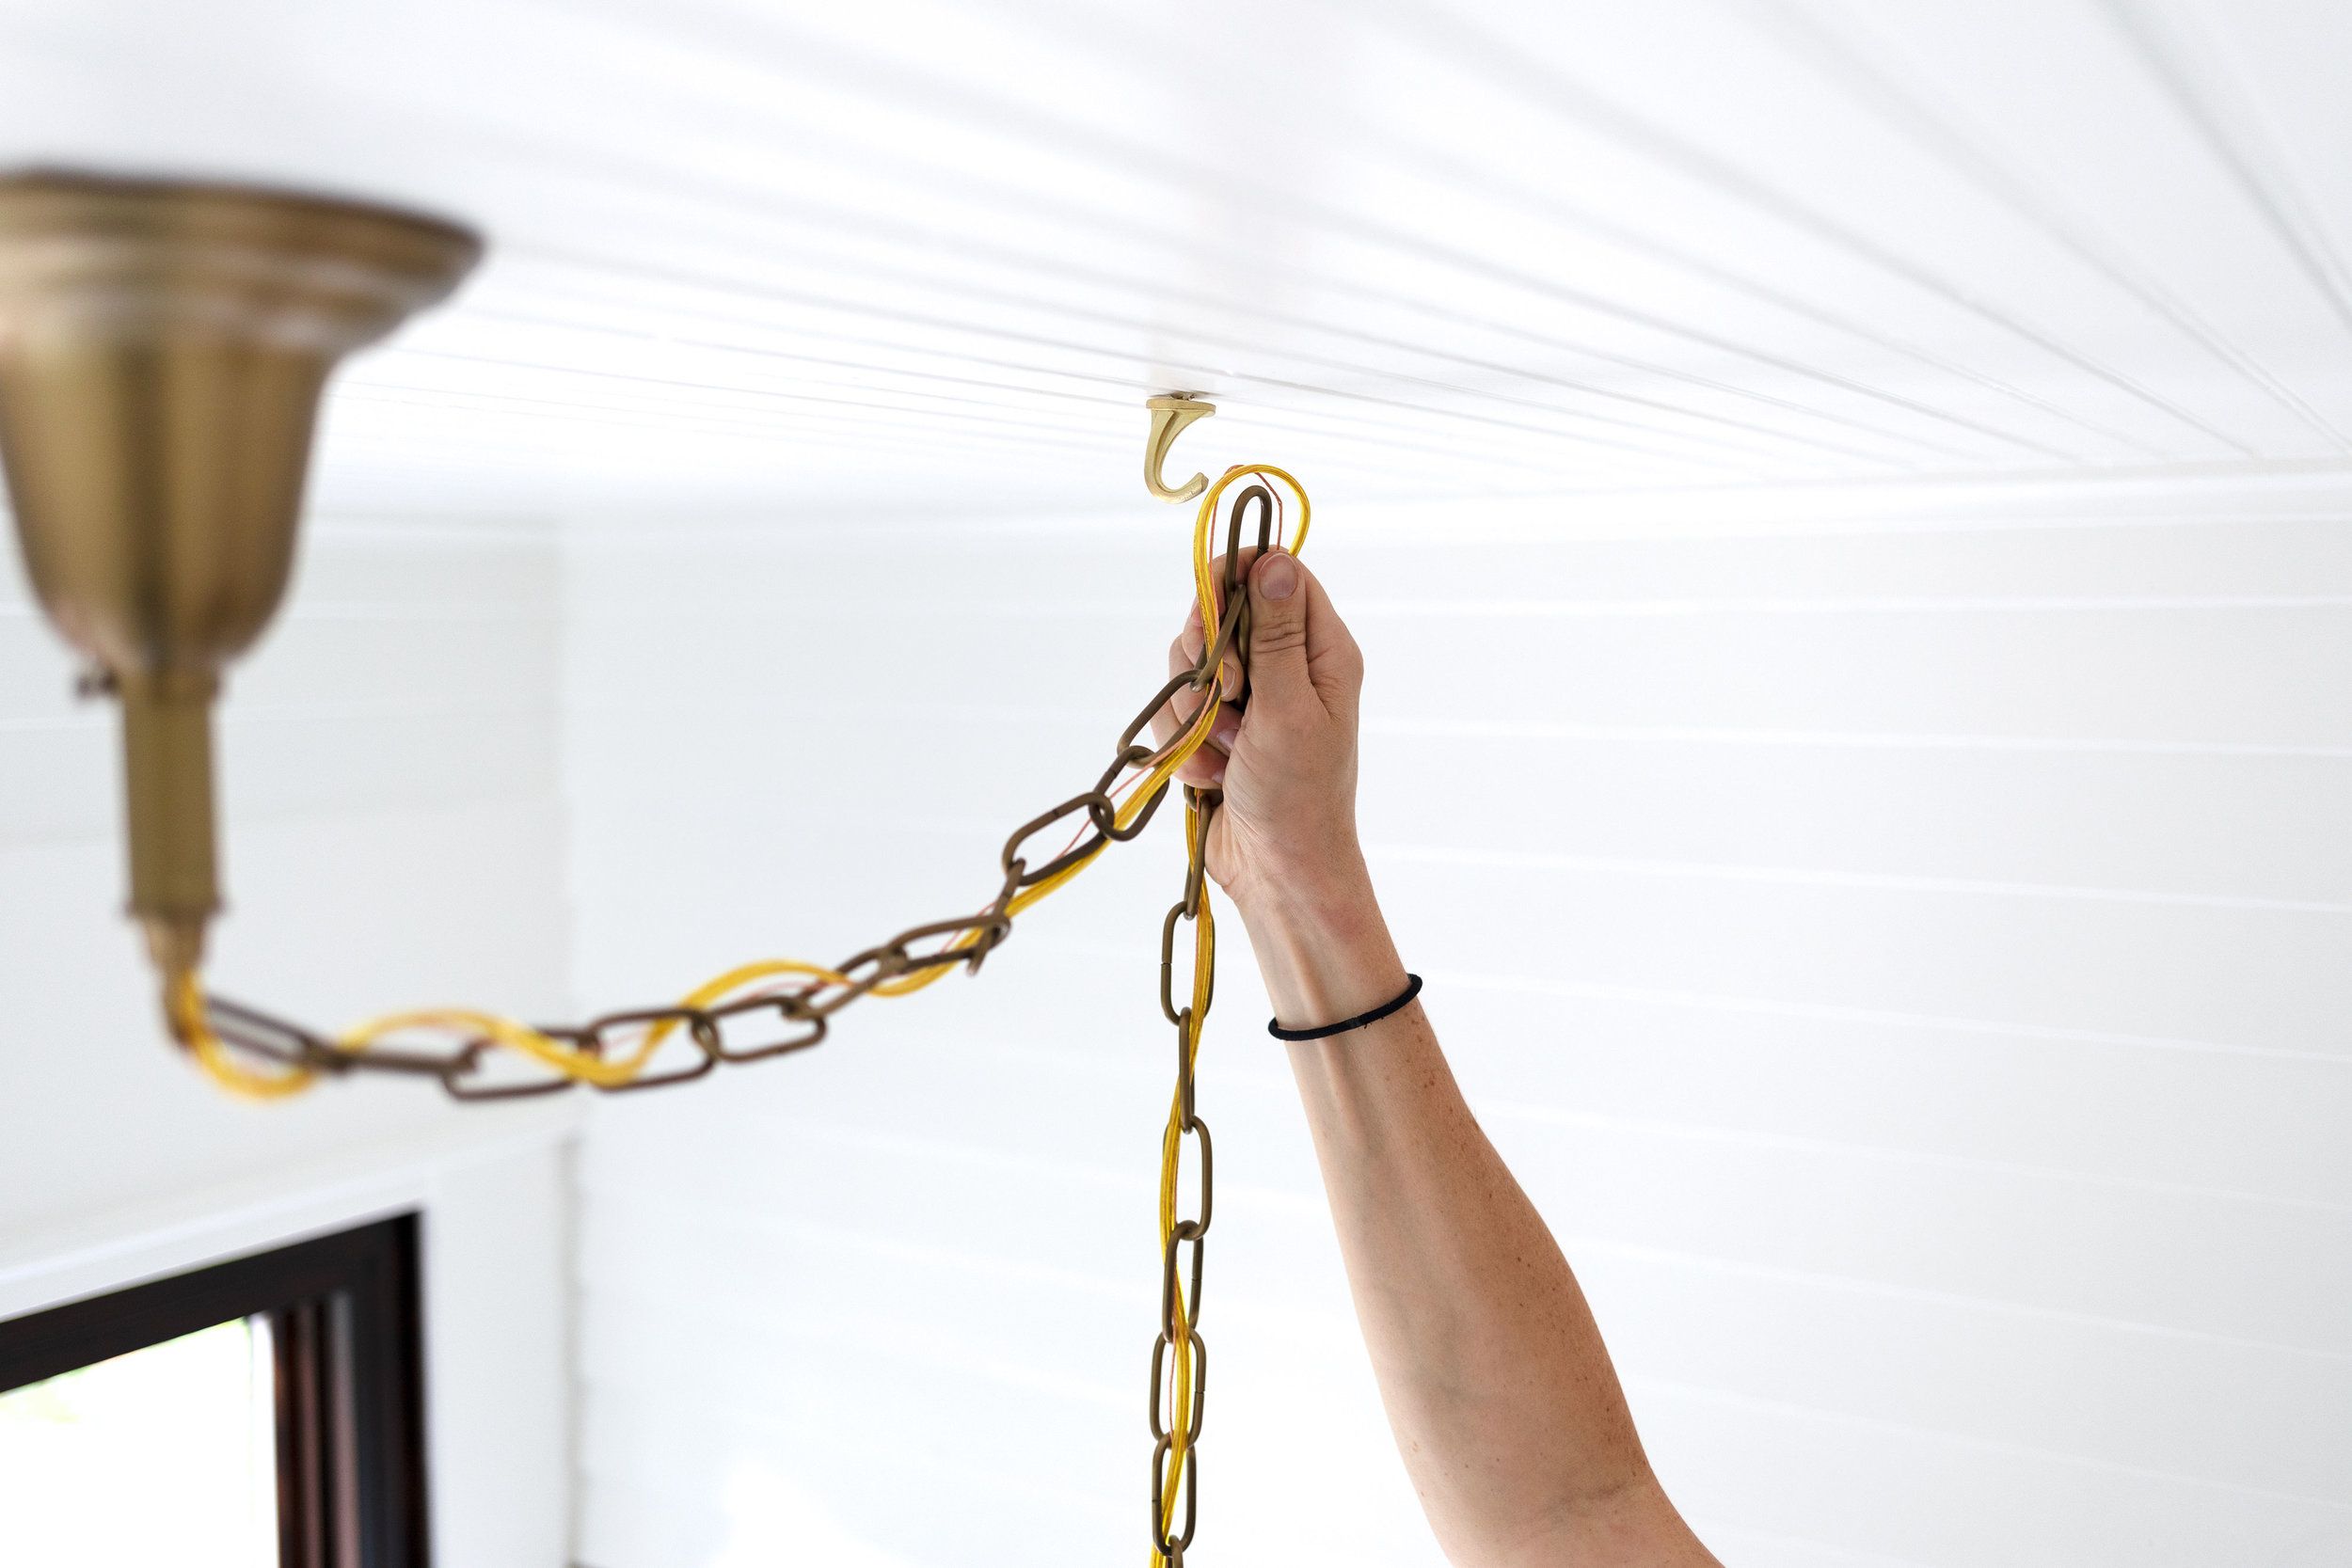
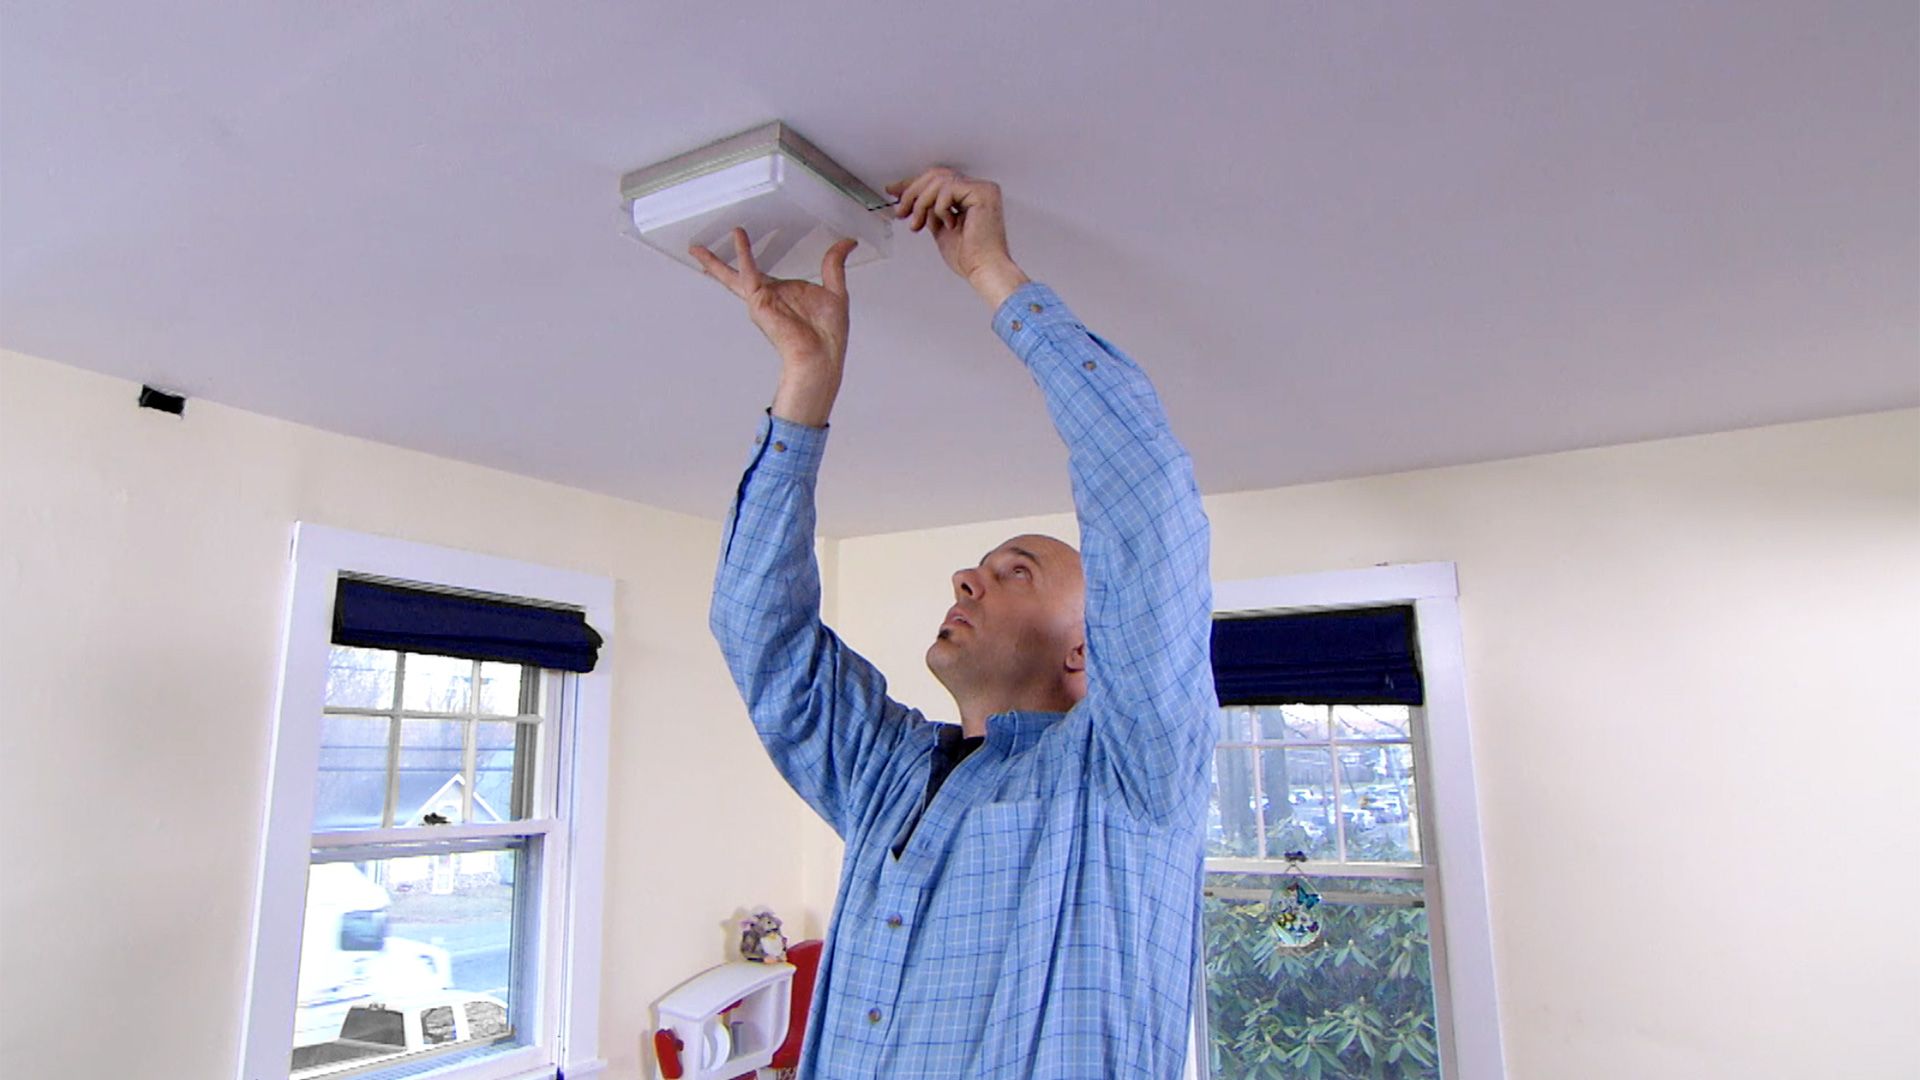
Step 2: Prepare the ceiling light
Preparing the ceiling light for the conversion process is a crucial step that sets the foundation for transforming it into a plug-in fixture. This phase involves careful disassembly of the existing hardwired components and making the necessary adjustments to accommodate the plug-in adapter. Here's a detailed guide on how to prepare the ceiling light for the conversion:
-
Turn Off Power: Before starting any work, ensure the power to the ceiling light is turned off at the circuit breaker. This precautionary measure is essential for safety and prevents the risk of electrical shock during the preparation process.
-
Remove the Existing Fixture: Using the appropriate screwdrivers, carefully remove the screws or fasteners that secure the existing ceiling light fixture to the electrical box. Once the screws are removed, gently lower the fixture to access the wiring connections.
-
Disconnect Wires: With the fixture lowered, identify the wire connections between the electrical box and the fixture. Untwist the wire nuts that secure the wires and disconnect the fixture from the electrical wiring. Keep in mind the color coding of the wires, typically black (hot), white (neutral), and green or bare (ground), to ensure proper reconnection later.
-
Assess the Wiring: Take a moment to inspect the condition of the electrical wiring and the fixture's mounting bracket. Ensure that the wires are in good condition without any signs of damage or wear. Additionally, check the mounting bracket to confirm its stability and suitability for the plug-in conversion.
-
Prepare the Wires: Using wire strippers, carefully strip off a small portion of insulation from the end of each wire to expose the conductive metal. This step is essential for creating clean and secure connections with the plug-in adapter.
-
Secure the Wires: After stripping the wires, twist the exposed conductors to ensure they are tightly bound and free from frayed ends. If necessary, trim any excess wire to maintain a neat and manageable length for connecting to the plug-in adapter.
By meticulously preparing the ceiling light and its wiring for the plug-in conversion, you can lay the groundwork for a successful transition to a plug-in fixture. This careful preparation ensures that the subsequent installation of the plug-in adapter and testing of the plug-in ceiling light proceed smoothly and effectively.
You can turn a ceiling light into a plug-in by using a conversion kit. First, turn off the power to the light. Then, remove the light fixture and install the conversion kit according to the instructions. Finally, plug the light into an outlet and enjoy your new plug-in light.
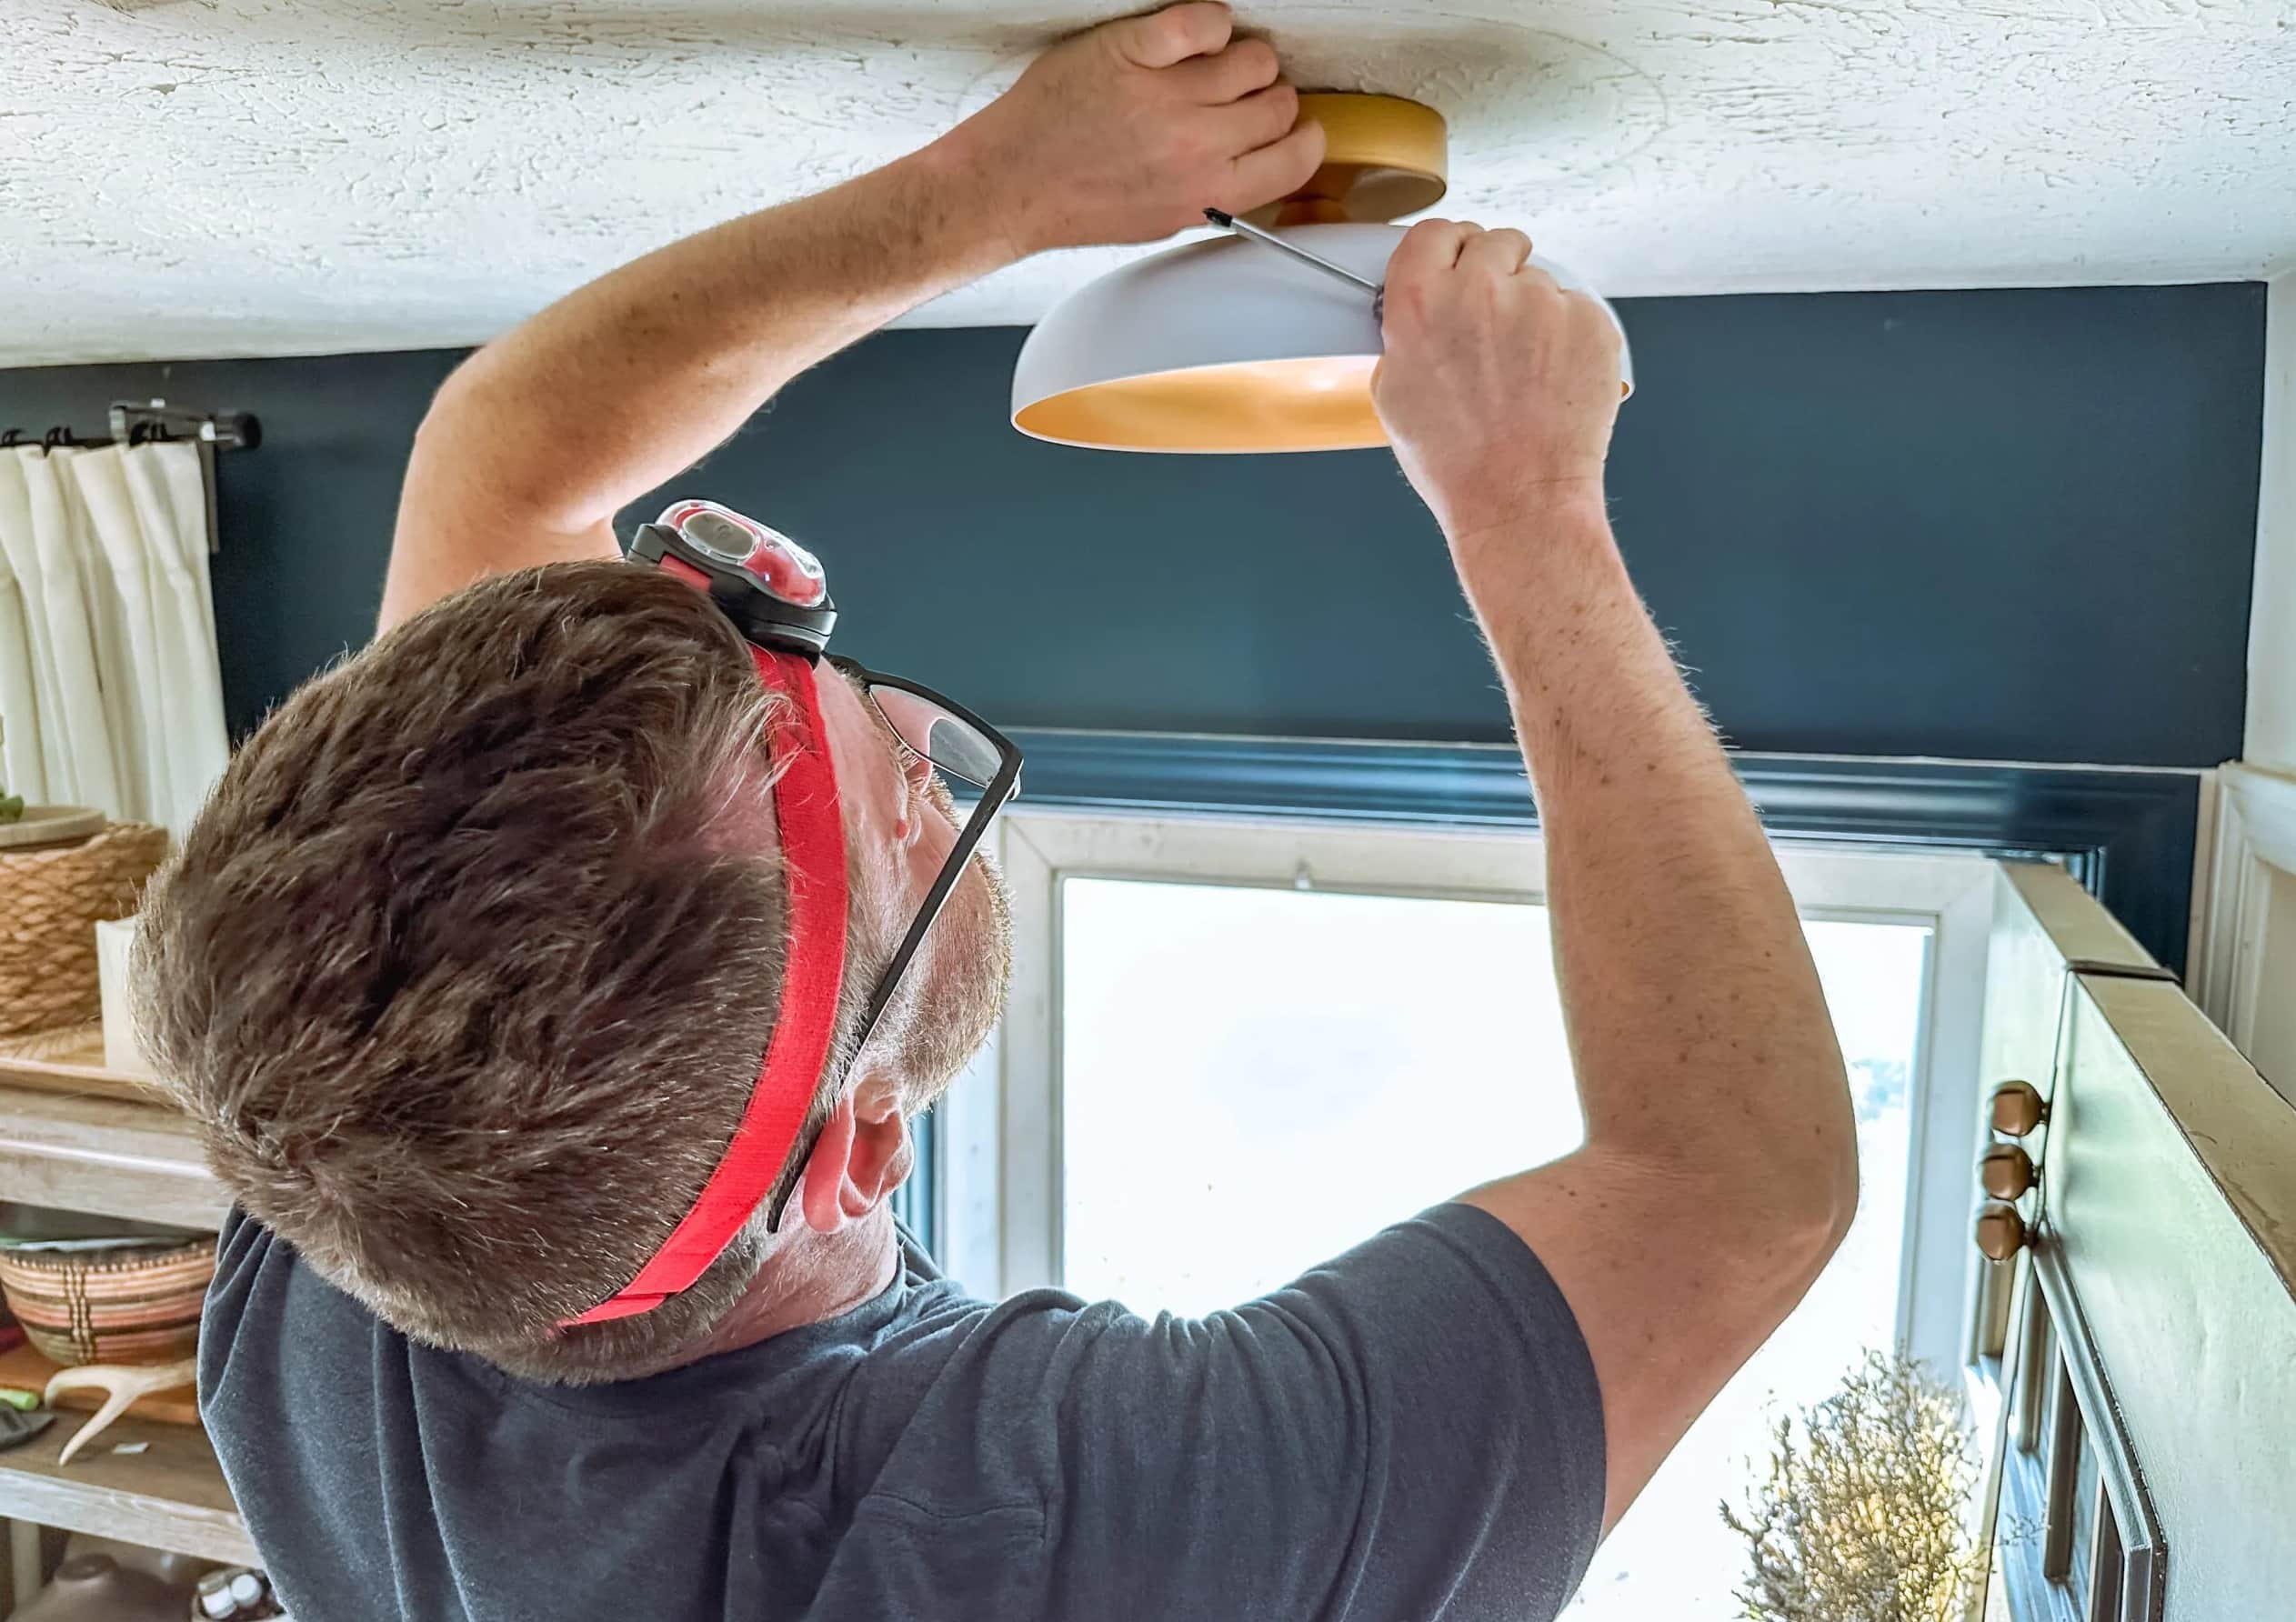
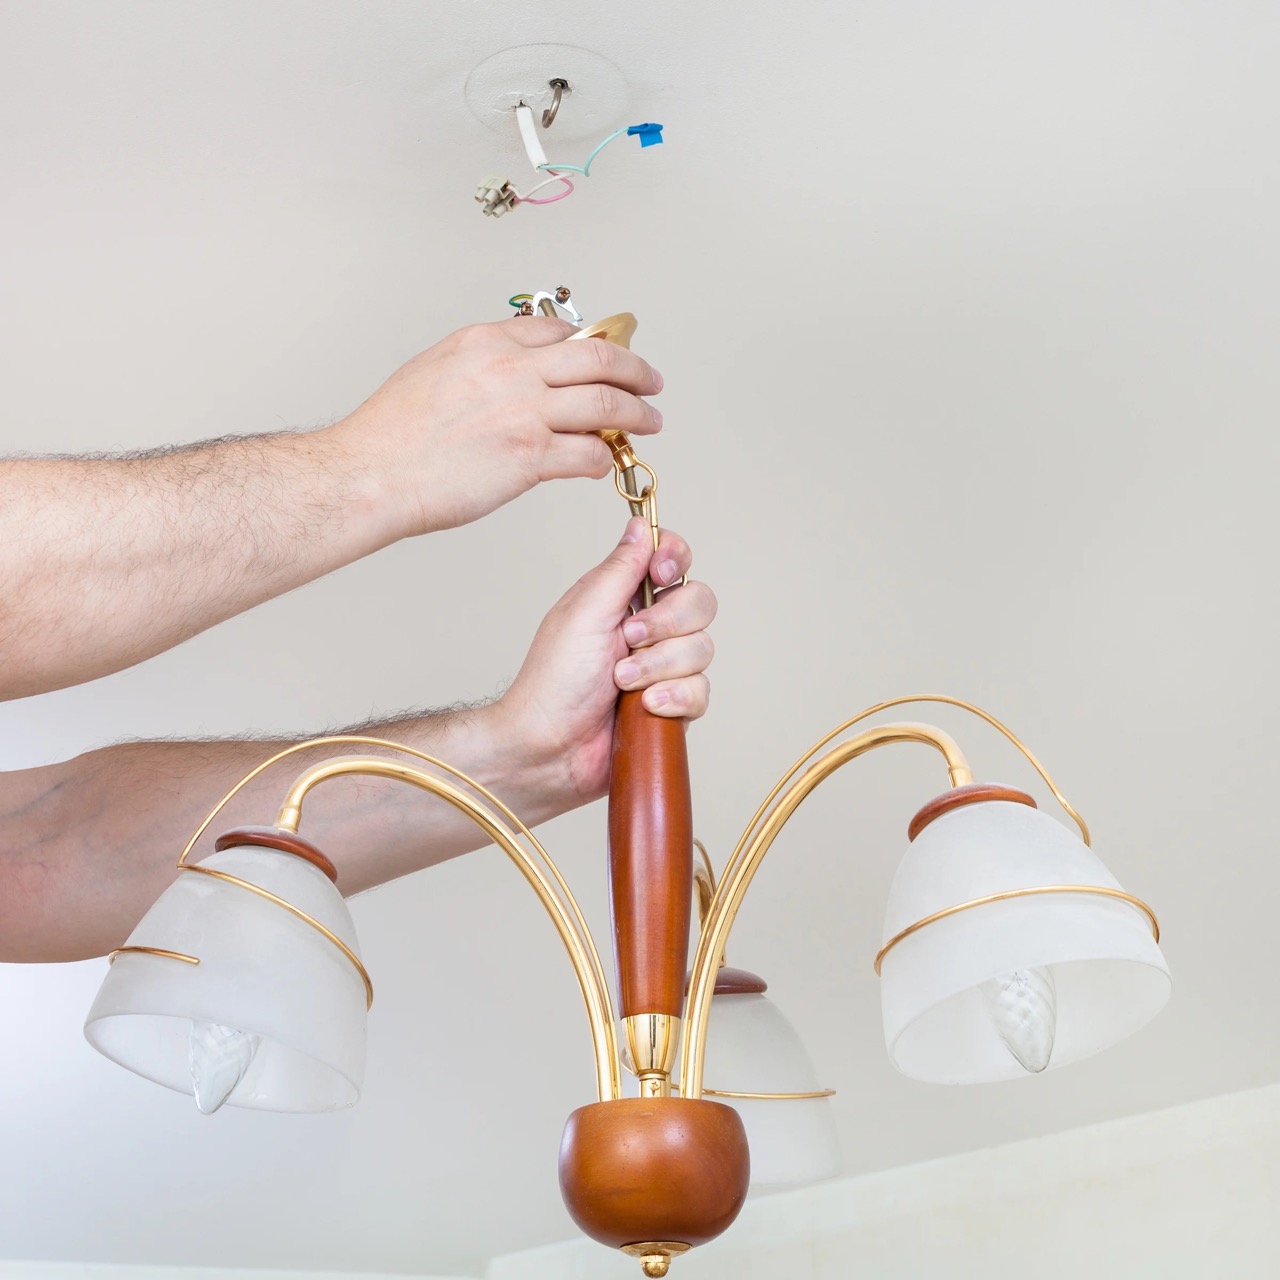
Step 3: Install the plug-in adapter
With the ceiling light prepared for the conversion, the next critical step is to install the plug-in adapter, which serves as the bridge between the existing fixture and the power source. This pivotal component enables the ceiling light to function as a plug-in fixture, offering versatility and ease of installation. Here's a comprehensive guide on how to install the plug-in adapter seamlessly:
-
Select a Suitable Location: Identify a suitable location on the ceiling light fixture or its mounting bracket to install the plug-in adapter. This location should allow for easy access to the adapter and its connections while ensuring that it does not interfere with the functionality or aesthetics of the fixture.
-
Attach the Plug-in Adapter: Securely attach the plug-in adapter to the chosen location using the provided screws or fasteners. Ensure that the adapter is positioned in a stable and accessible manner, allowing for straightforward connection to the prepared wires.
-
Connect the Wires: Begin by connecting the wires from the plug-in adapter to the corresponding wires of the ceiling light fixture. Match the color-coded wires, typically black to black (hot), white to white (neutral), and green or bare to green or bare (ground), ensuring a secure and proper connection.
-
Secure the Connections: Once the wires are connected, use wire nuts to secure and insulate each connection. Twist the wire nuts firmly onto the joined wires, covering the exposed conductors completely with electrical tape for added safety and protection.
-
Position the Extension Cord: If using an extension cord to power the plug-in ceiling light, carefully position and secure the extension cord to the adapter, ensuring that it can reach a nearby power outlet with ease. Conceal any excess cord length to maintain a neat and tidy appearance.
-
Test the Connections: Before proceeding with the final installation, perform a thorough inspection of the connections to verify that they are secure and properly insulated. This step is crucial for ensuring the safety and functionality of the plug-in ceiling light.
By following these detailed steps, you can effectively install the plug-in adapter and establish the necessary connections to transform the ceiling light into a plug-in fixture. This pivotal phase sets the stage for the subsequent testing of the plug-in ceiling light, allowing you to confirm its functionality and safety before finalizing the installation.
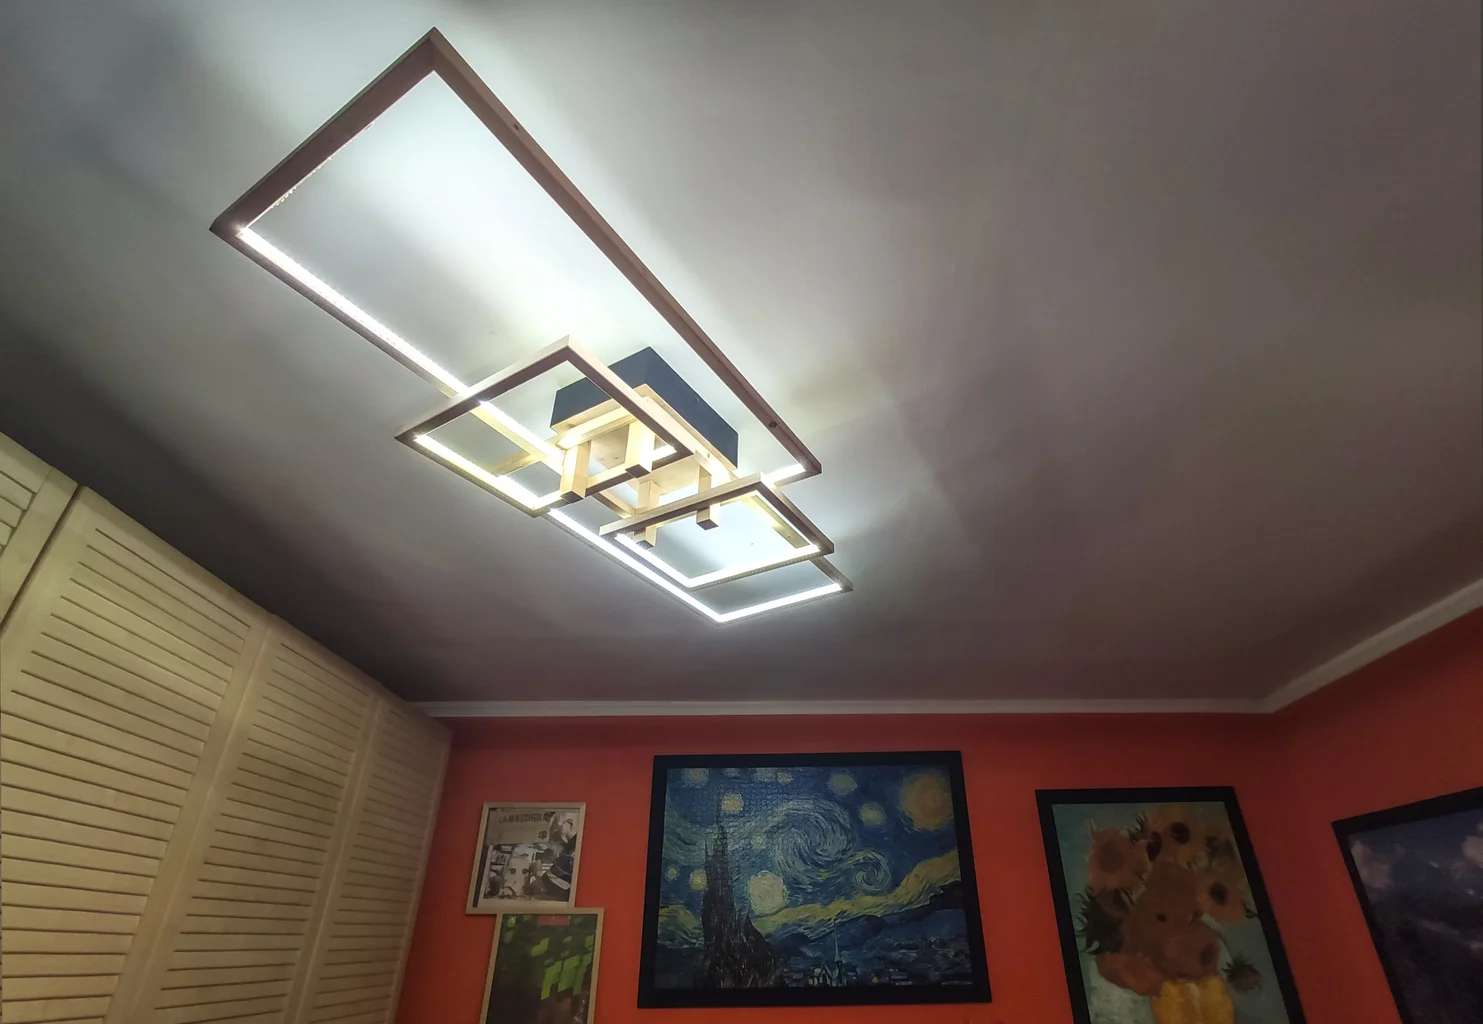
Step 4: Test the plug-in ceiling light
After completing the installation of the plug-in adapter, it's crucial to thoroughly test the plug-in ceiling light to ensure that it functions safely and effectively. This critical step allows you to verify the integrity of the connections, assess the lighting performance, and address any potential issues before finalizing the installation. Here's a detailed guide on how to test the plug-in ceiling light and confirm its functionality:
-
Power On: Begin by plugging the extension cord connected to the plug-in adapter into a nearby power outlet. Ensure that the power outlet is in good working condition and that the extension cord is free from any damage or fraying. Once the extension cord is securely plugged in, switch on the power to supply electricity to the plug-in ceiling light.
-
Visual Inspection: Observe the plug-in ceiling light closely to confirm that it illuminates as expected. Check for any flickering, dimming, or irregularities in the light output, as these may indicate potential wiring issues or connectivity problems. Additionally, assess the stability of the light fixture and the plug-in adapter to ensure that they are securely installed and functioning properly.
-
Functionality Test: Test the functionality of the plug-in ceiling light by toggling the on/off switch or pull chain, if applicable. Verify that the light responds promptly to the controls and maintains consistent illumination without any interruptions. This step allows you to assess the overall performance of the plug-in fixture and identify any operational concerns that require attention.
-
Safety Assessment: While the plug-in ceiling light is operational, conduct a safety assessment to ensure that all components, including the plug-in adapter, wiring connections, and extension cord, remain cool to the touch and free from unusual odors or signs of overheating. These observations are essential for identifying potential safety hazards and addressing them promptly.
-
Adjustments and Fine-tuning: If any issues or irregularities are detected during the testing phase, take the necessary steps to address them. This may involve rechecking the wiring connections, adjusting the positioning of the plug-in adapter, or troubleshooting any performance-related concerns. Make any required adjustments to optimize the functionality and safety of the plug-in ceiling light.
-
Repeat Testing: After addressing any identified issues or making adjustments, repeat the testing process to confirm that the plug-in ceiling light operates reliably and consistently. By conducting multiple rounds of testing, you can ensure that the installation is robust and that the plug-in fixture meets your expectations in terms of lighting performance and safety.
By meticulously testing the plug-in ceiling light, you can validate the success of the conversion process and address any potential concerns before finalizing the installation. This comprehensive testing phase allows you to achieve peace of mind, knowing that your newly transformed plug-in fixture is safe, functional, and ready to illuminate your space effectively.
Read more: How To Get Smart Plug To Turn TV On
Conclusion
In conclusion, the process of turning a ceiling light into a plug-in fixture offers a practical and versatile solution for enhancing the lighting options in various settings. By following the step-by-step guide outlined in this article, you can successfully convert a standard ceiling light into a plug-in fixture, unlocking the benefits of easy installation, portability, and flexibility. From gathering the necessary materials to testing the plug-in ceiling light, each phase of the transformation process contributes to the seamless integration of the plug-in fixture into your living or working space.
This DIY project empowers individuals to customize their lighting setup without the constraints of traditional hardwiring, making it an ideal option for renters, temporary spaces, or areas where hardwiring is impractical. The ability to convert a ceiling light into a plug-in fixture provides a convenient lighting solution that can be easily installed, moved, and adapted to different environments, offering unparalleled convenience and adaptability.
Furthermore, the successful conversion of a ceiling light into a plug-in fixture underscores the importance of meticulous preparation, precise installation of the plug-in adapter, and thorough testing to ensure safety and functionality. By prioritizing these key aspects, DIY enthusiasts and homeowners can achieve a reliable and efficient plug-in lighting solution that meets their specific needs and preferences.
As you embark on your journey to transform a ceiling light into a plug-in fixture, remember to prioritize safety, attention to detail, and adherence to electrical standards and best practices. Whether you're seeking to illuminate a cozy living space, create ambient lighting in a bedroom, or enhance the functionality of a workspace, the versatility of a plug-in ceiling light offers endless possibilities for personalized lighting solutions.
In essence, the process of turning a ceiling light into a plug-in fixture empowers individuals to take control of their lighting setup, offering a blend of functionality, convenience, and creative freedom. By embracing this DIY project, you can elevate the ambiance of your surroundings and enjoy the benefits of a customized lighting solution that aligns with your lifestyle and preferences.
Frequently Asked Questions about How To Turn A Ceiling Light Into A Plug-In
Was this page helpful?
At Storables.com, we guarantee accurate and reliable information. Our content, validated by Expert Board Contributors, is crafted following stringent Editorial Policies. We're committed to providing you with well-researched, expert-backed insights for all your informational needs.


0 thoughts on “How To Turn A Ceiling Light Into A Plug-In”