Home>Home Appliances>Lighting Appliances>How To Wire A Ceiling Light
Lighting Appliances
How To Wire A Ceiling Light
Modified: October 20, 2024
Learn how to wire a ceiling light with our step-by-step guide. Get expert tips for installing lighting appliances and ensure a safe and efficient setup.
(Many of the links in this article redirect to a specific reviewed product. Your purchase of these products through affiliate links helps to generate commission for Storables.com, at no extra cost. Learn more)
Introduction
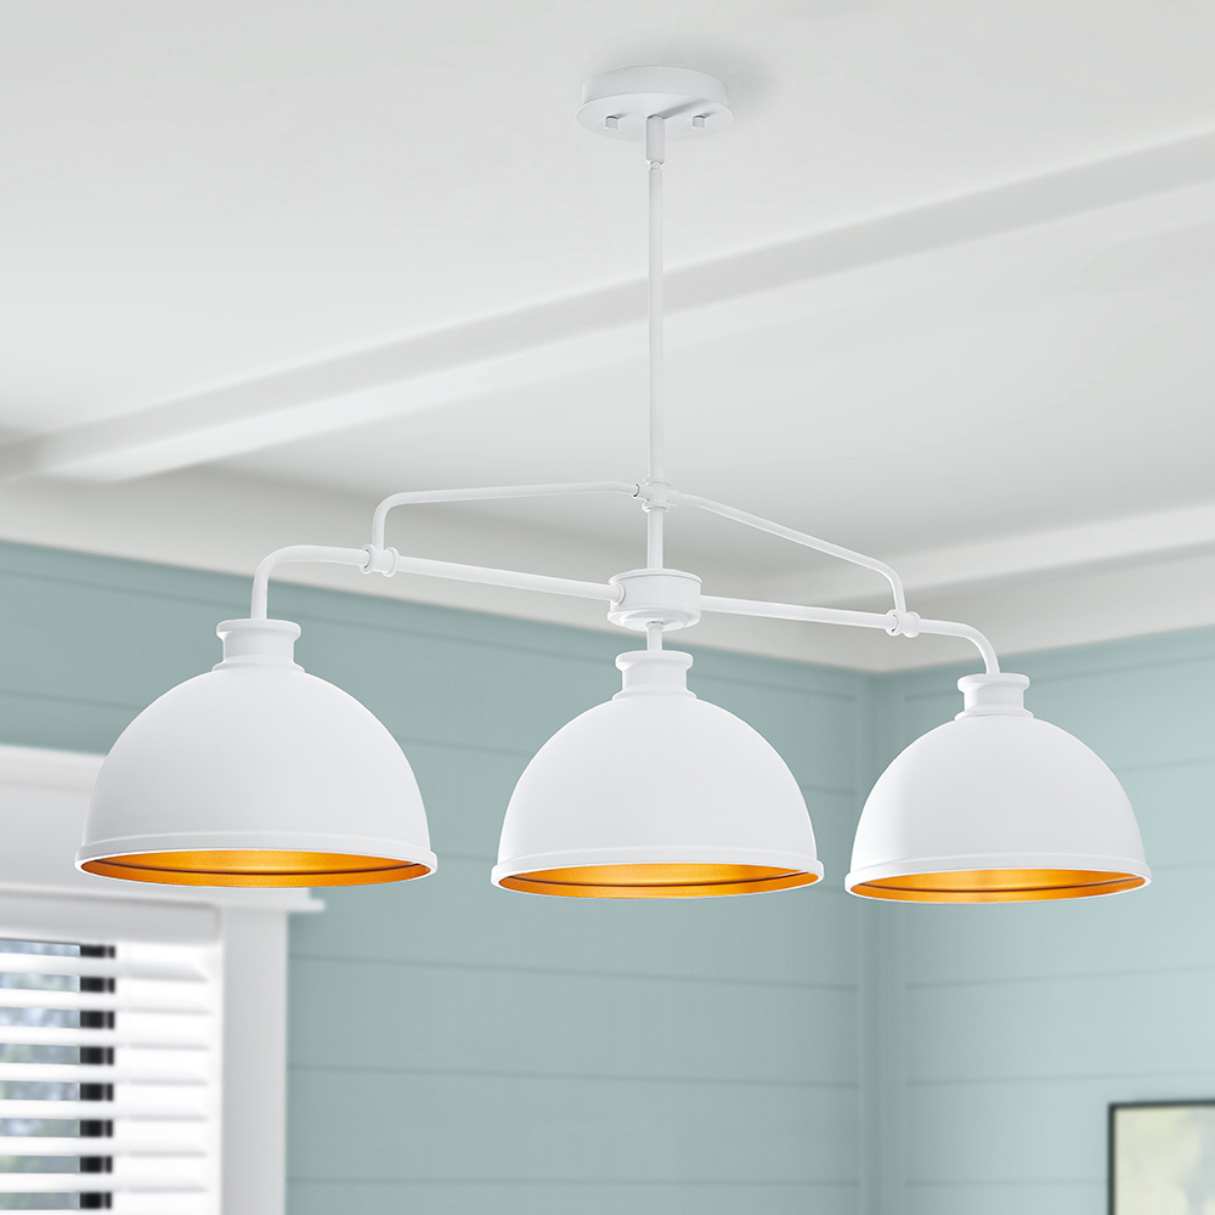
Wiring a ceiling light can be a rewarding and practical DIY project that enhances the ambiance and functionality of a room. Whether you're replacing an outdated fixture or installing a new one, understanding the process of wiring a ceiling light is essential for a successful outcome. By following the steps outlined in this guide, you can confidently tackle this task and illuminate your living space with a stylish and functional lighting solution.
Installing a ceiling light involves several key steps, from turning off the power to connecting the wires and securing the fixture in place. Each stage of the process plays a crucial role in ensuring the safety and effectiveness of the lighting installation. With the right tools, a basic understanding of electrical wiring, and a methodical approach, you can complete this project with ease.
Before embarking on the installation, it's important to gather the necessary tools and materials, including a voltage tester, wire strippers, a screwdriver, wire nuts, and, of course, the new ceiling light fixture. Additionally, it's advisable to have a stable stepladder on hand to facilitate safe access to the ceiling.
As with any electrical project, safety should always be the top priority. Before starting the installation, it's crucial to turn off the power to the existing light fixture at the circuit breaker to prevent the risk of electric shock. Verifying that the power is indeed off using a voltage tester is a critical step that should never be overlooked.
By following the subsequent steps in this guide, you'll learn how to safely and effectively wire a ceiling light, transforming the lighting in your space and adding a touch of elegance to your home. Whether you're a seasoned DIY enthusiast or a novice looking to expand your skills, this guide will equip you with the knowledge and confidence to complete the task successfully. Let's dive into the step-by-step process of wiring a ceiling light and brighten up your living space!
Key Takeaways:
- Safety First!
Before wiring a ceiling light, always turn off the power at the circuit breaker and use a voltage tester to ensure it’s off. This crucial step reduces the risk of electrical accidents and sets the foundation for a safe installation. - Step-by-Step Success
Removing the old fixture, installing the mounting bracket, connecting the wires, and attaching the new fixture are key steps in wiring a ceiling light. Each step sets the stage for a successful and visually appealing lighting solution.
Read more: How To Wire A Ceiling Light To A Switch
Step 1: Turn off the Power
Before beginning any work on the ceiling light, it is crucial to ensure that the power supply to the existing fixture is completely turned off. This step is essential for personal safety and to prevent any electrical mishaps during the installation process.
To start, locate the circuit breaker or fuse box in your home. It is typically situated in the basement, garage, or a utility room. Once you have located the circuit breaker, identify the switch that controls the power supply to the room where the ceiling light is located.
Switch off the circuit breaker by flipping the corresponding switch to the "off" position. It is advisable to use a flashlight if the area is dimly lit to ensure clear visibility. Additionally, it's a good practice to inform other household members about the ongoing electrical work to prevent accidental power restoration while you are working on the ceiling light.
After turning off the circuit breaker, it's important to verify that the power is indeed off before proceeding further. This can be done using a voltage tester, which is a handheld device designed to detect the presence of electrical current. To perform the test, carefully place the voltage tester on the wires connected to the existing ceiling light fixture. If the tester indicates no voltage, it is safe to proceed with the installation. However, if the tester shows any voltage reading, do not proceed and recheck the circuit breaker to ensure it is switched off.
By diligently following these steps to turn off the power and verify its absence, you are taking a critical safety measure that significantly reduces the risk of electrical accidents. This precautionary approach sets the foundation for a safe and successful ceiling light installation, allowing you to proceed to the next steps with confidence and peace of mind.
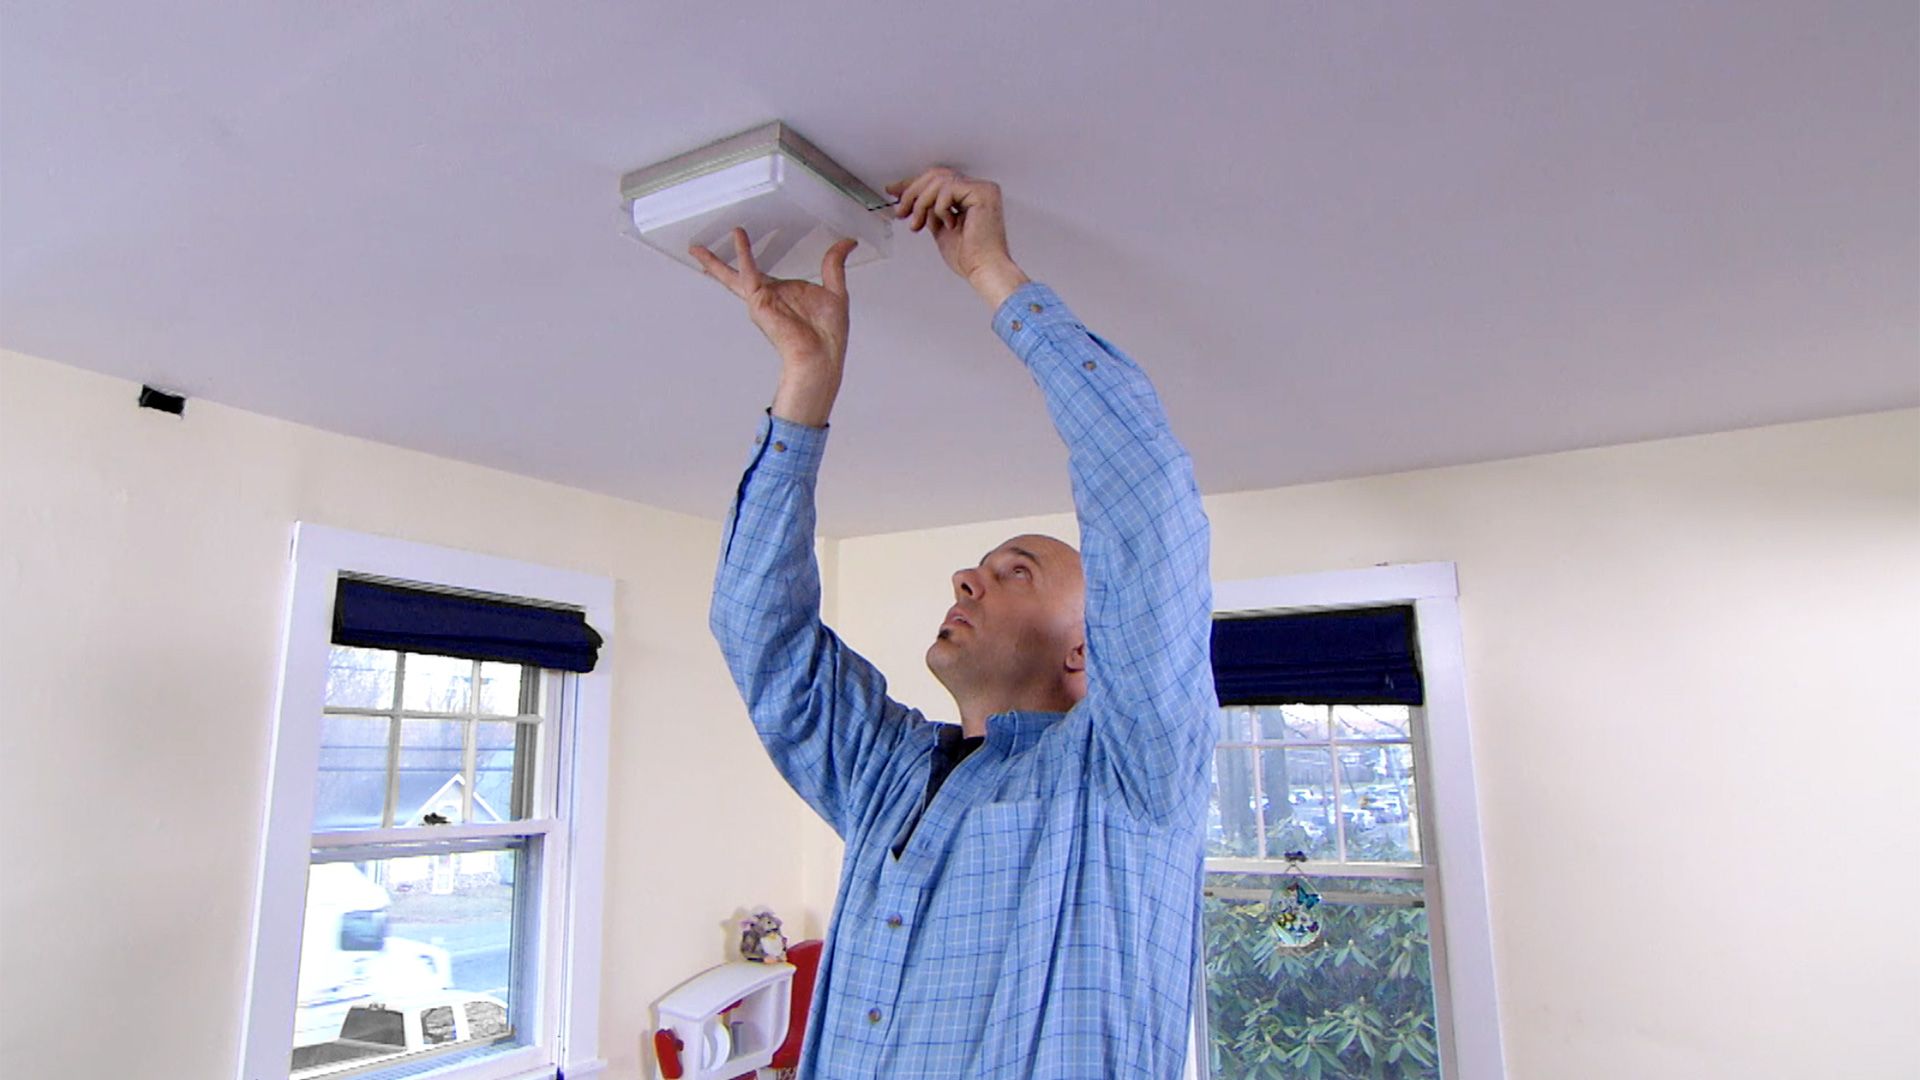
Step 2: Remove the Old Fixture
Removing the old ceiling light fixture is a pivotal step in the process of installing a new one. Whether you're upgrading to a more modern fixture or simply replacing a worn-out light, this step sets the stage for the fresh installation. Here's a detailed guide on how to effectively remove the old fixture and prepare for the new one.
-
Prepare the Workspace: Before starting the removal process, it's essential to create a clear and safe workspace. Lay down a drop cloth or old sheet beneath the fixture to catch any debris or small parts that may fall during the removal. This simple precaution helps to minimize mess and makes the cleanup process more manageable.
-
Remove the Cover or Canopy: Most ceiling light fixtures feature a cover or canopy that conceals the wiring and mounting bracket. To access the internal components, carefully remove the cover by unscrewing any visible screws or twisting it counterclockwise, depending on the fixture's design. Once the cover is detached, set it aside in a safe place to prevent damage.
-
Disconnect the Wiring: With the cover removed, you'll have access to the wiring connections. Before proceeding, it's crucial to ensure that the power is still switched off at the circuit breaker to prevent any electrical hazards. Using a screwdriver, carefully loosen the wire nuts that secure the electrical wires. Once the wire nuts are removed, gently separate the wires, taking note of their colors and positions for future reference.
-
Unscrew the Mounting Bracket: The mounting bracket, which secures the fixture to the ceiling, is typically attached with screws. Using a screwdriver, carefully loosen and remove the screws that hold the mounting bracket in place. As you do this, it's important to provide support for the fixture to prevent it from falling unexpectedly.
-
Lower and Remove the Fixture: With the mounting bracket detached, carefully lower the old fixture from the ceiling. It's advisable to have a helper assist with this step, especially if the fixture is bulky or heavy. Once the fixture is safely lowered, set it aside, ensuring it is placed in a secure location to prevent any accidental damage.
By following these detailed steps to remove the old ceiling light fixture, you are effectively preparing the space for the installation of the new fixture. This process sets the stage for the subsequent steps, allowing you to seamlessly transition to the next phase of the installation with confidence and clarity.
Step 3: Install the Mounting Bracket
Installing the mounting bracket is a crucial step in the process of wiring a ceiling light. The mounting bracket serves as the anchor point for the new fixture, providing stability and support once the installation is complete. Here's a detailed guide on how to effectively install the mounting bracket, setting the foundation for the successful installation of the new ceiling light.
-
Prepare the Mounting Bracket: Begin by unpacking the new ceiling light fixture and locating the mounting bracket included in the package. Ensure that all the necessary components, including screws and any additional hardware, are readily accessible. Lay out the parts in an organized manner to facilitate a smooth installation process.
-
Position the Bracket: With the mounting bracket in hand, position it against the ceiling, aligning it with the electrical box. The electrical box, typically made of metal or plastic, serves as the connection point for the electrical wiring and provides structural support for the fixture. Align the screw holes on the mounting bracket with the holes on the electrical box, ensuring a secure and flush fit.
-
Secure the Bracket: Using the provided screws or the ones that came with the fixture, fasten the mounting bracket to the electrical box. It's important to use the appropriate screws and ensure they are tightened securely to create a stable foundation for the new ceiling light. A screwdriver or a power drill with the appropriate bit can be used to drive the screws into place, ensuring a snug and secure fit.
-
Check for Stability: Once the mounting bracket is securely attached to the electrical box, perform a brief stability check to ensure that it is firmly in place. Gently apply pressure to the bracket to verify that it does not wobble or shift. A stable and properly installed mounting bracket is essential for the safe and secure attachment of the new ceiling light fixture.
By meticulously following these steps to install the mounting bracket, you are laying the groundwork for a successful and secure ceiling light installation. The mounting bracket serves as the anchor point for the new fixture, providing the stability and support necessary for a safe and visually appealing lighting solution. With the mounting bracket securely in place, you are ready to proceed to the next phase of the installation process, bringing you one step closer to illuminating your living space with a stylish and functional ceiling light.
Make sure to turn off the power at the circuit breaker before starting. Use a voltage tester to double-check that the power is off before touching any wires. Always follow the manufacturer’s instructions for your specific light fixture.
Step 4: Connect the Wires
Connecting the wires is a pivotal stage in the process of wiring a ceiling light, as it establishes the electrical connections necessary for the fixture to function effectively and safely. This step requires careful attention to detail and a methodical approach to ensure that the wiring is correctly aligned and secured. Here's a comprehensive guide on how to effectively connect the wires, setting the stage for the successful installation of the new ceiling light.
-
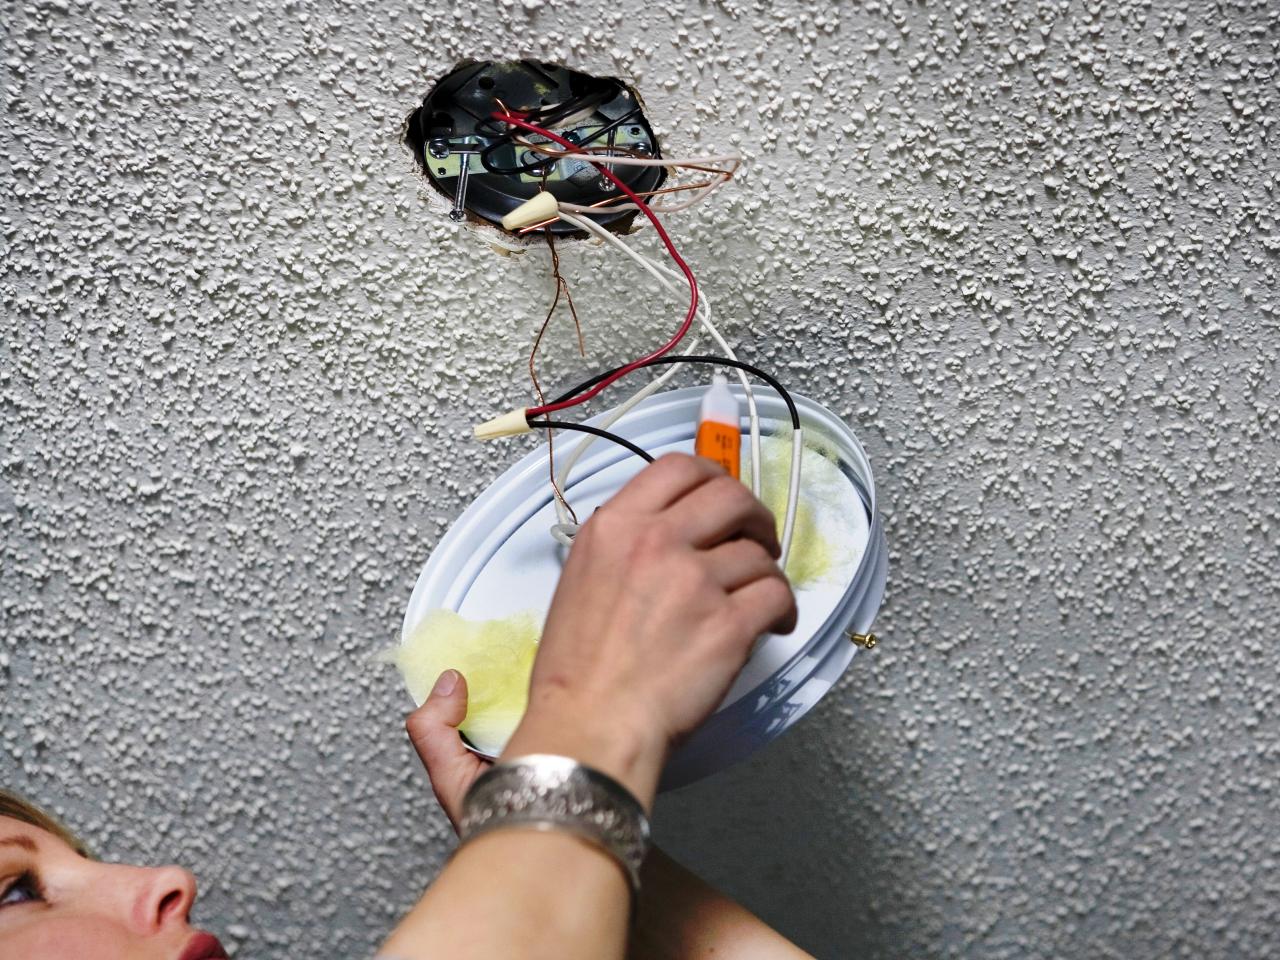
Prepare the Wires: Begin by identifying the electrical wires protruding from the ceiling. Typically, there will be a black (hot) wire, a white (neutral) wire, and a green or bare copper (ground) wire. It's essential to ensure that the power supply to the room is still switched off at the circuit breaker before proceeding with the wiring.
-
Strip the Wire Ends: Using wire strippers, carefully strip off approximately 3/4 inch of insulation from the ends of the black and white wires. This exposes the conductive metal strands, allowing for a secure connection with the corresponding wires from the new ceiling light fixture.
-
Match and Connect the Wires: With the wire ends exposed, match the black wire from the ceiling to the black or hot wire from the new fixture. Secure the connection by twisting a wire nut over the joined wires in a clockwise direction until it is snug and secure. Repeat this process for the white wires, connecting the neutral wires in the same manner. If the fixture includes a ground wire, connect it to the bare copper or green ground wire from the ceiling using a wire nut.
-
Double-Check the Connections: Once the wires are connected and secured with wire nuts, gently tug on each wire to ensure that the connections are tight and stable. It's crucial to verify that the wires are firmly joined to prevent any future issues with the electrical connections.
-
Tuck the Wires: After confirming that the connections are secure, carefully tuck the connected wires into the electrical box in the ceiling. It's important to ensure that the wires are neatly arranged and do not interfere with the installation of the new ceiling light fixture.
By meticulously following these steps to connect the wires, you are establishing the essential electrical connections required for the new ceiling light to function safely and efficiently. This meticulous approach ensures that the wiring is correctly aligned and secured, setting the stage for the successful completion of the installation process. With the wires securely connected, you are ready to proceed to the next phase of the installation, bringing you one step closer to illuminating your living space with a stylish and functional ceiling light.
Read more: What Is The Red Wire On A Ceiling Light
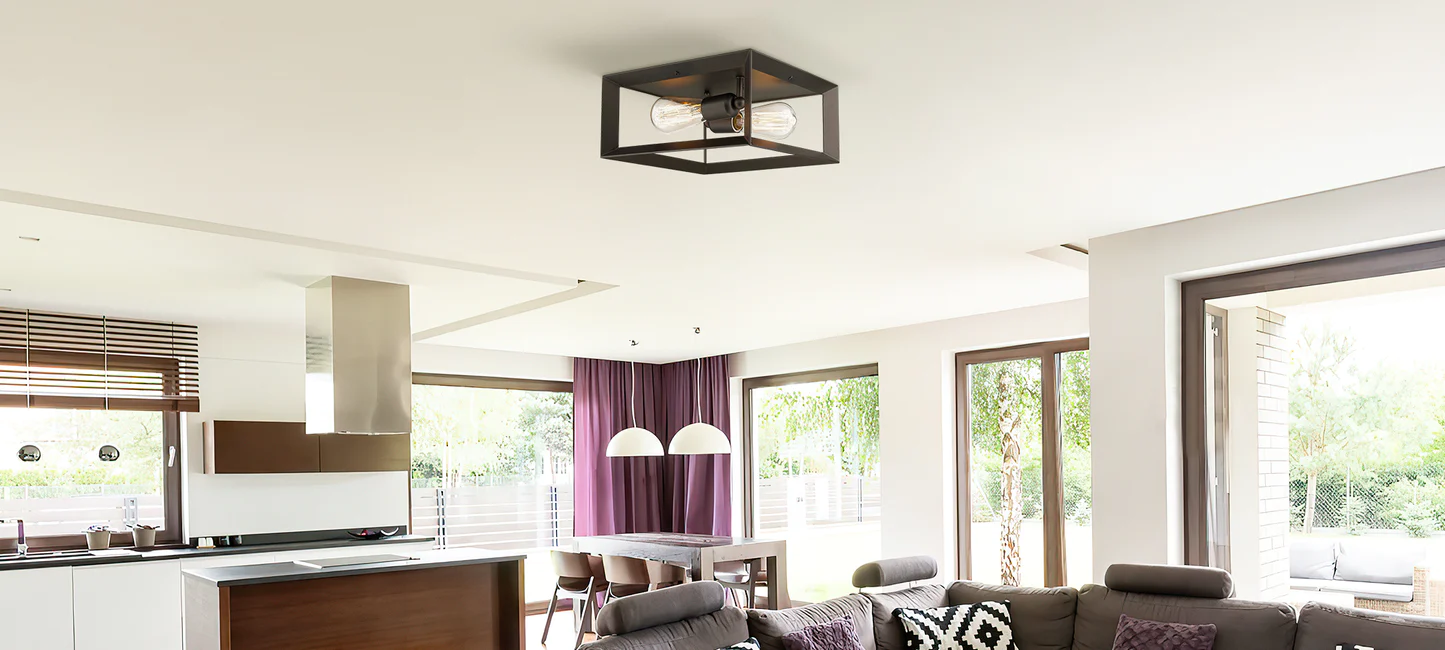
Step 5: Attach the Fixture
Attaching the fixture is a pivotal step that brings the installation of the new ceiling light one step closer to completion. This phase involves securing the light fixture to the mounting bracket, ensuring a stable and visually appealing placement. Here's a detailed guide on how to effectively attach the fixture, bringing you closer to illuminating your living space with a stylish and functional ceiling light.
-
Position the Fixture: With the wiring connections in place, carefully position the new ceiling light fixture against the mounting bracket. Align the holes on the fixture's canopy or base with the screws on the mounting bracket, ensuring a snug and flush fit.
-
Secure the Fixture: Using the provided screws or hardware, fasten the fixture to the mounting bracket. It's essential to follow the manufacturer's instructions regarding the appropriate screws and installation method. A screwdriver or power drill can be used to drive the screws into place, ensuring that the fixture is securely attached to the ceiling.
-
Double-Check Stability: Once the fixture is attached, perform a brief stability check to ensure that it is firmly in place. Gently apply pressure to the fixture to verify that it does not wobble or shift. A stable and properly attached fixture is essential for the safe and visually appealing completion of the installation.
-
Install the Light Bulbs: With the fixture securely in place, install the appropriate light bulbs based on the fixture's specifications. Whether it requires standard bulbs, LED bulbs, or any other type, carefully insert the bulbs into their respective sockets, ensuring a secure fit.
-
Attach the Cover or Canopy: If the fixture includes a cover or canopy, carefully position it over the fixture and secure it in place according to the manufacturer's instructions. This step adds a finishing touch to the installation, concealing the internal components and providing a polished look to the ceiling light.
By meticulously following these steps to attach the fixture, you are bringing the installation of the new ceiling light to its final stages. The secure attachment of the fixture to the mounting bracket ensures a visually appealing and functional lighting solution for your living space. With the fixture securely in place, you are ready to proceed to the next phase of the installation process, bringing you one step closer to enjoying the enhanced ambiance and functionality of your newly installed ceiling light.
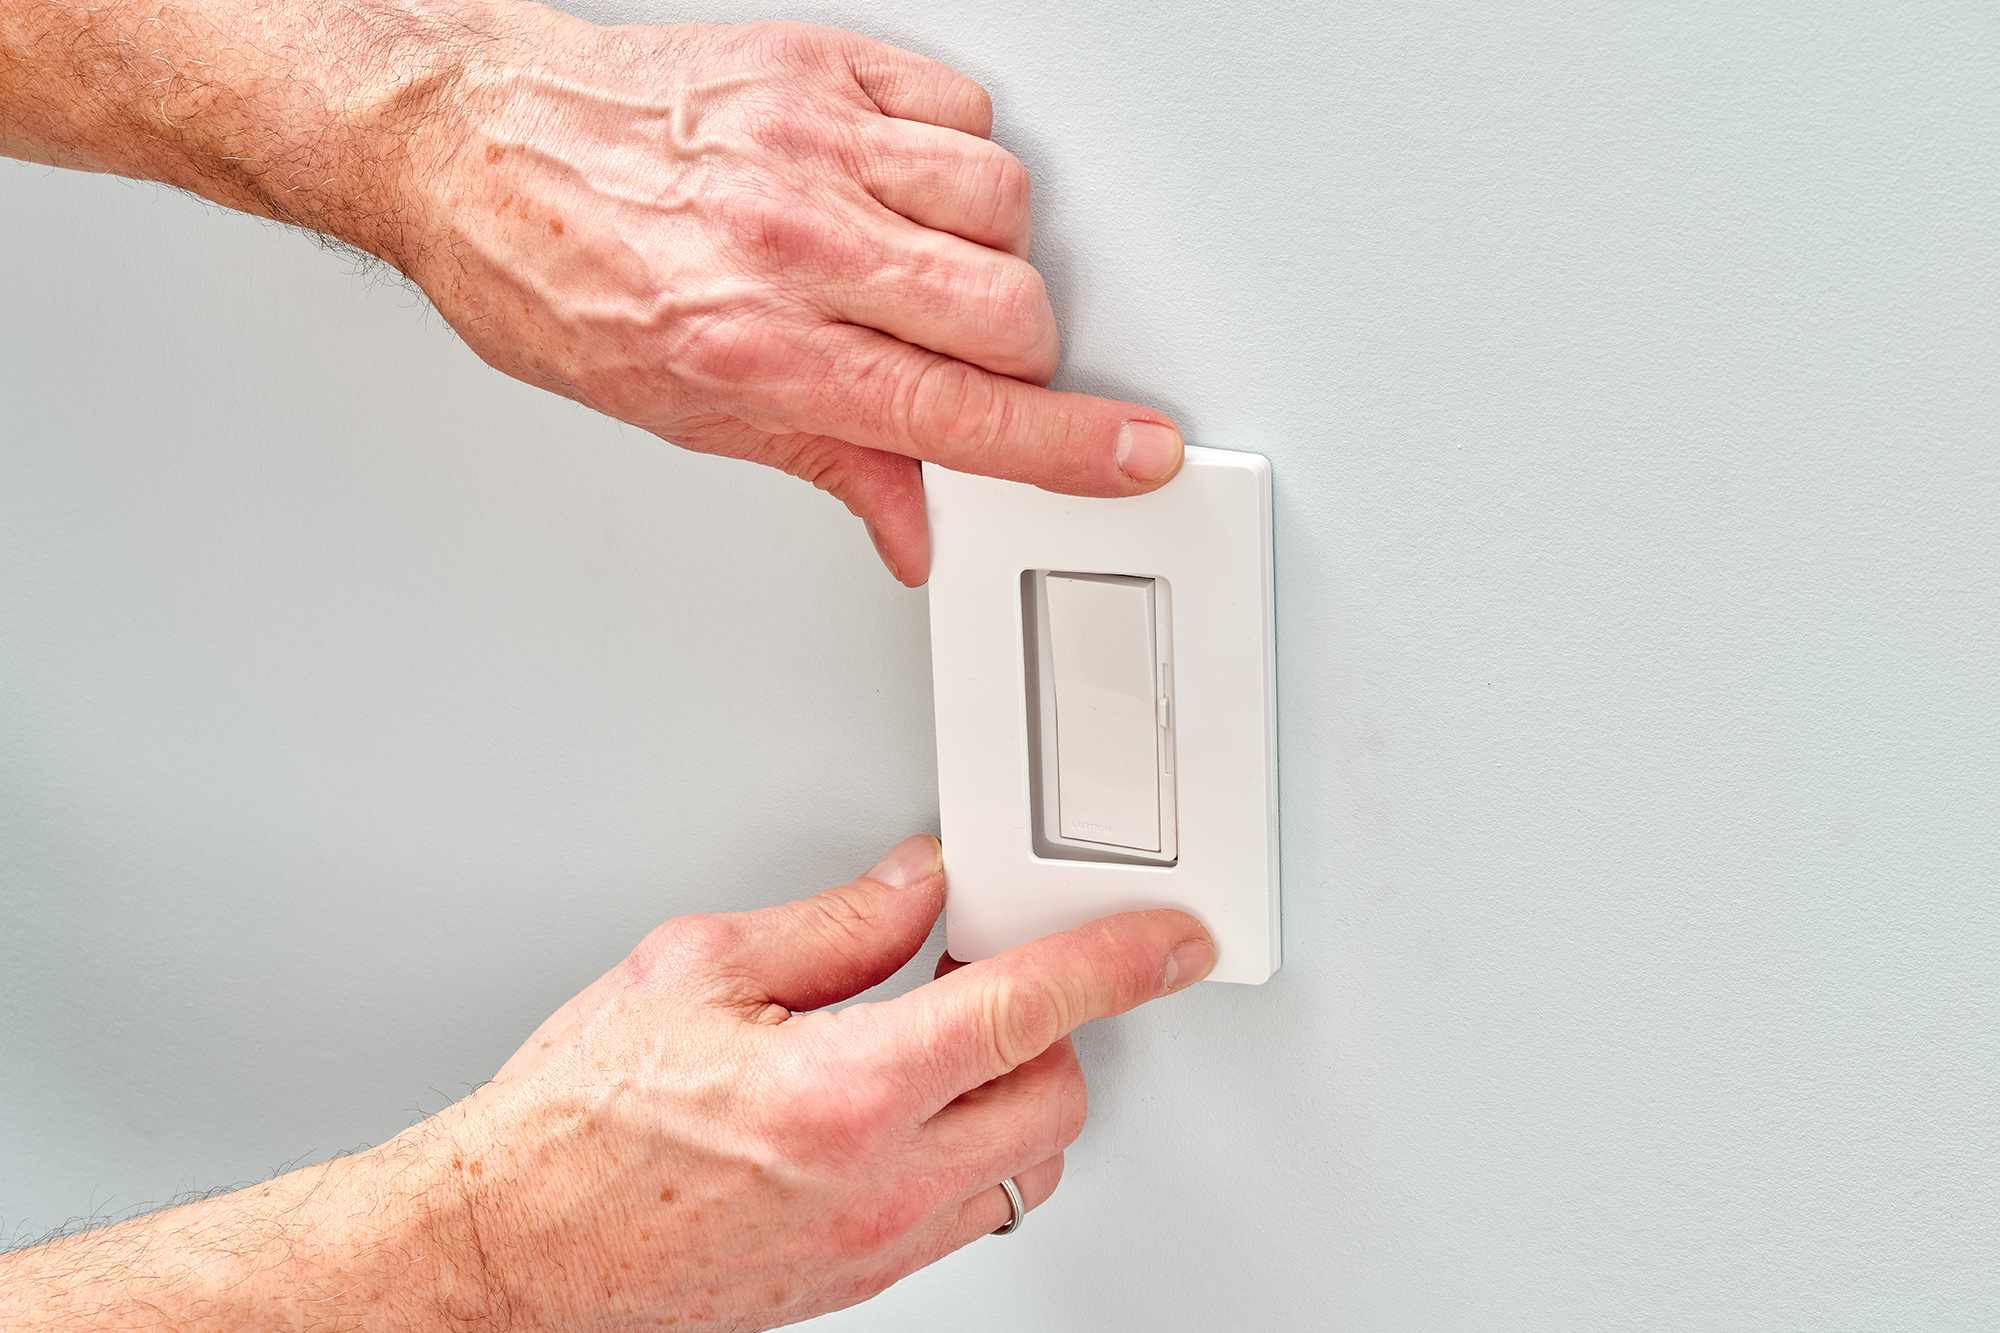
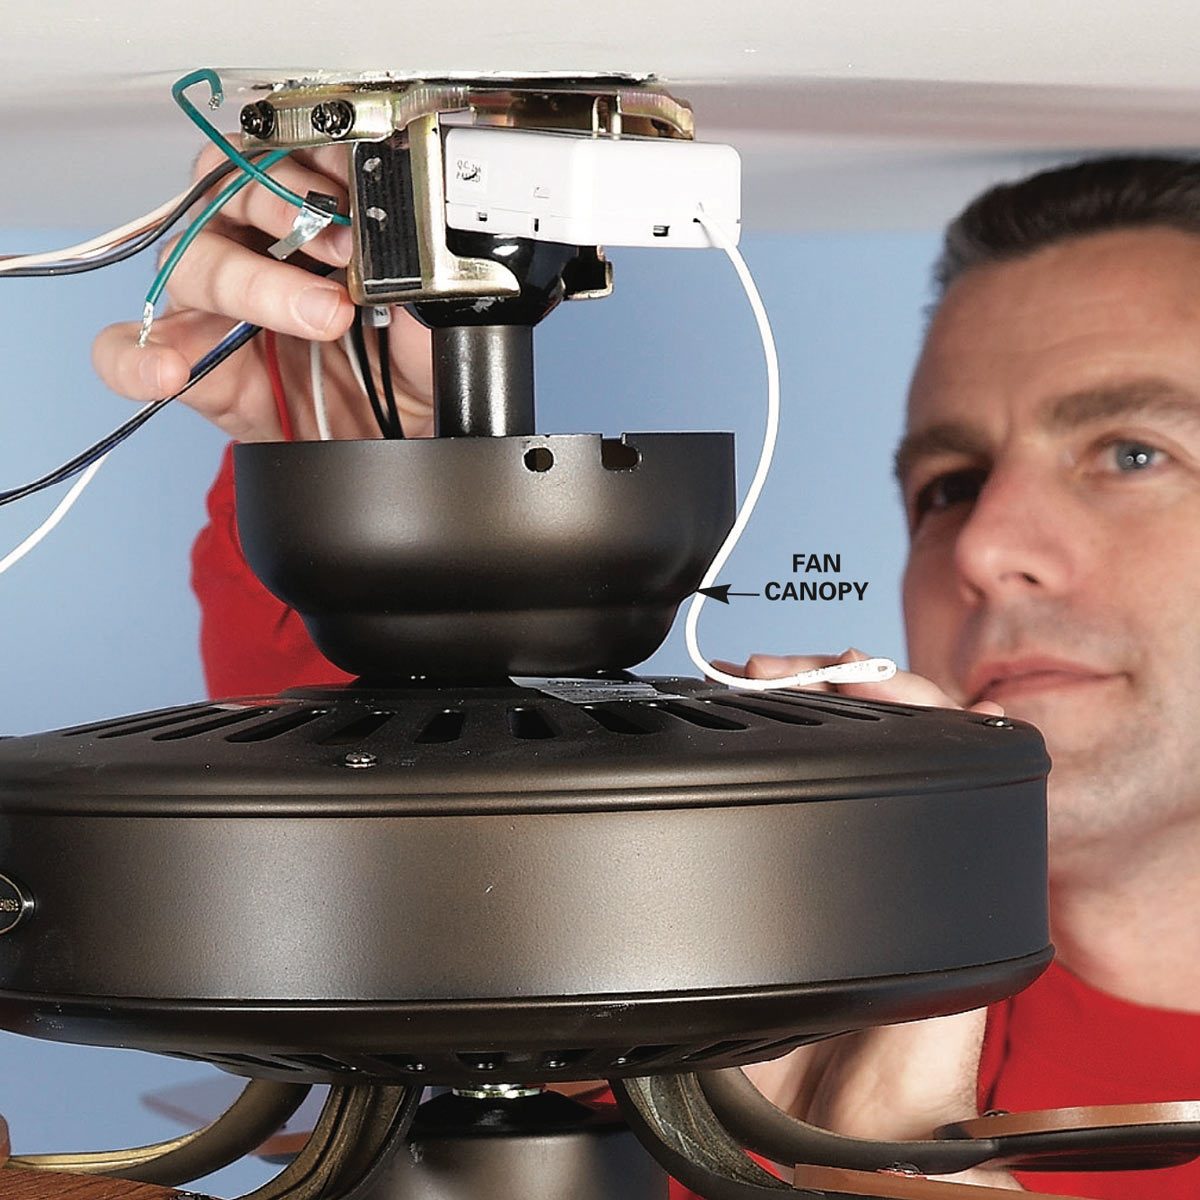
Step 6: Secure the Canopy
Securing the canopy is a crucial step that adds the final touch to the installation of a new ceiling light fixture. The canopy, also known as the cover, serves both functional and aesthetic purposes, concealing the internal wiring and providing a polished, finished look to the ceiling light. Here's a detailed guide on how to effectively secure the canopy, bringing the installation process to its completion.
-
Position the Canopy: Begin by holding the canopy against the ceiling, aligning it with the base of the installed fixture. Ensure that the screw holes on the canopy align with the corresponding screws or fastening points on the fixture's base. This initial positioning sets the stage for a seamless and secure attachment.
-
Secure the Canopy: Using the provided screws or fasteners, carefully attach the canopy to the base of the fixture. Depending on the design of the fixture, the canopy may feature a twist-lock mechanism or require the insertion of screws to secure it in place. Follow the manufacturer's instructions to ensure the canopy is firmly attached and aligned with the fixture.
-
Verify Stability: Once the canopy is secured, perform a brief stability check to ensure that it is firmly in place. Gently apply pressure to the canopy to verify that it does not wobble or shift. A stable and properly attached canopy adds to the overall safety and visual appeal of the ceiling light installation.
-
Inspect the Alignment: Take a moment to inspect the alignment and positioning of the canopy. Ensure that it sits flush against the ceiling and complements the overall aesthetic of the room. A well-aligned canopy contributes to a cohesive and polished look, enhancing the visual impact of the newly installed ceiling light.
-
Final Adjustments: If necessary, make any final adjustments to the canopy to ensure that it is securely fastened and visually aligned with the fixture. This may involve tightening screws or making minor positioning tweaks to achieve the desired look and stability.
By meticulously following these steps to secure the canopy, you are adding the final element to the installation of the new ceiling light. The canopy not only conceals the internal components but also contributes to the overall aesthetic and functionality of the lighting solution. With the canopy securely in place, the installation process is brought to its completion, allowing you to enjoy the enhanced ambiance and illumination provided by your newly installed ceiling light.
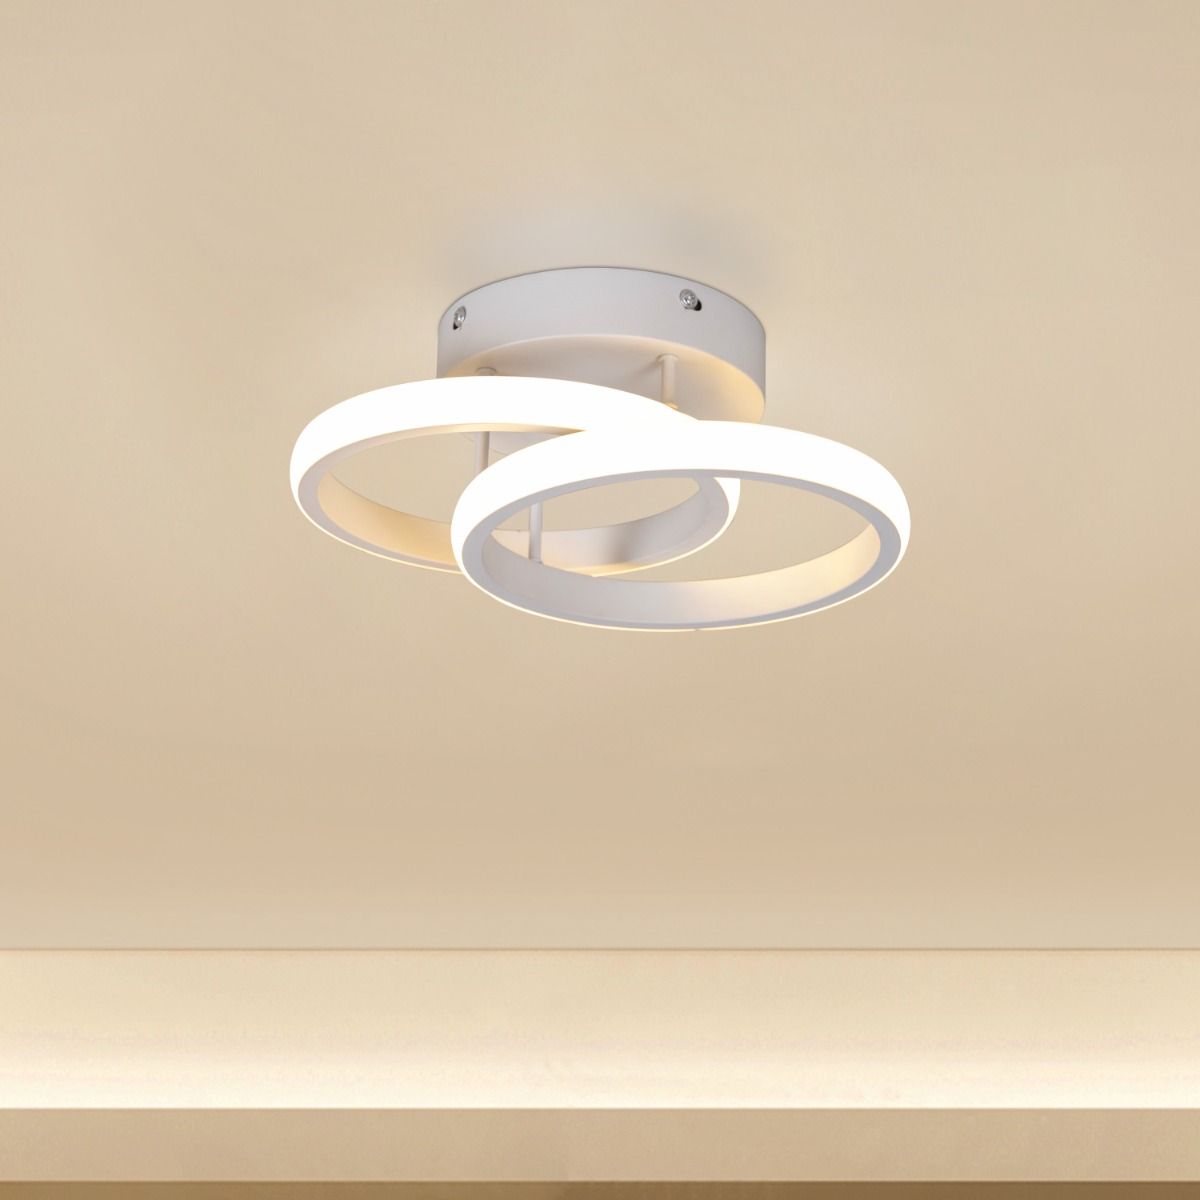
Step 7: Turn on the Power and Test the Light
After successfully completing the installation of the new ceiling light fixture, the final step involves turning on the power and testing the light to ensure that it functions as intended. This critical phase allows you to verify the electrical connections, assess the functionality of the fixture, and make any necessary adjustments before fully enjoying the newly installed ceiling light.
To begin, return to the circuit breaker or fuse box in your home where the power supply to the room was previously switched off. Locate the corresponding switch or breaker that controls the electrical circuit for the ceiling light. With caution and attentiveness, switch the circuit breaker back to the "on" position or replace the fuse if applicable. It's important to do this step deliberately and with full awareness of the power being restored to the fixture.
Once the power is restored, take a moment to stand back and visually inspect the newly installed ceiling light. Look for any signs of flickering, dimming, or irregular behavior in the light output. Additionally, observe the fixture for any unusual sounds or odors that may indicate a potential issue with the electrical connections or the fixture itself.
After visually assessing the fixture, it's time to test the functionality of the light. Stand directly beneath the fixture and switch it on using the designated wall switch or control. Observe the light as it illuminates the room, paying attention to the brightness, color temperature, and overall performance of the fixture. If the fixture includes multiple light bulbs or adjustable settings, test each component to ensure that they operate as expected.
As the light illuminates the room, take note of any areas that may appear dim or unevenly lit. This observation allows you to identify potential adjustments or additional lighting solutions that may be necessary to achieve optimal illumination in the space. Additionally, check for any signs of overheating or abnormal behavior in the fixture, such as excessive heat emission or flickering.
If the light functions as intended and illuminates the space effectively, congratulations are in order for successfully installing and testing the new ceiling light fixture. However, if any issues or irregularities are observed during the testing phase, it's essential to address them promptly. This may involve rechecking the wiring connections, adjusting the positioning of the fixture, or seeking professional assistance if necessary.
By diligently following the steps to turn on the power and test the light, you are ensuring that the newly installed ceiling light functions safely and effectively, providing enhanced illumination and ambiance to your living space. This final phase of the installation process allows you to fully appreciate the results of your efforts and enjoy the transformative impact of the stylish and functional ceiling light in your home.
Frequently Asked Questions about How To Wire A Ceiling Light
Was this page helpful?
At Storables.com, we guarantee accurate and reliable information. Our content, validated by Expert Board Contributors, is crafted following stringent Editorial Policies. We're committed to providing you with well-researched, expert-backed insights for all your informational needs.


0 thoughts on “How To Wire A Ceiling Light”