Home>Home Maintenance>How To Add Drainage To A Garden
Home Maintenance
How To Add Drainage To A Garden
Modified: March 7, 2024
Learn how to improve your garden's drainage with these simple home maintenance tips and prevent waterlogged soil and plant damage.
(Many of the links in this article redirect to a specific reviewed product. Your purchase of these products through affiliate links helps to generate commission for Storables.com, at no extra cost. Learn more)
Introduction
Welcome to the world of home maintenance! Today, we’ll be diving deep into the topic of adding drainage to your garden. Whether you’re a seasoned gardener or just starting out, understanding the importance of proper drainage is crucial for the health and vitality of your plants. Excessive moisture can lead to root rot, mold, and other plant diseases, while insufficient drainage can result in dry soil and stunted growth. But fear not! With the right knowledge and tools, you can easily create an effective drainage system that will keep your garden thriving.
In this comprehensive guide, we’ll cover everything you need to know about adding drainage to your garden. We’ll start by assessing the need for drainage and understanding the factors that contribute to poor drainage. Then, we’ll delve into the different types of drainage systems available and guide you through the process of installing them. From underground pipes to French drains and dry wells, we’ll explore each option in detail, providing step-by-step instructions and useful tips along the way.
But it doesn’t end there! We’ll also explore alternative methods for improving drainage, including building raised beds and using sump pumps. Additionally, we’ll touch on the importance of regular maintenance and cleaning of your drainage systems to ensure their longevity and efficiency.
By the end of this article, you’ll have all the knowledge you need to tackle your garden drainage issues head-on and create a garden that thrives in any weather conditions. So grab your gardening gloves and let’s get started!
Key Takeaways:
- Proper drainage is crucial for a healthy garden. Signs of poor drainage include standing water, soggy soil, and plant health issues. Choose the right drainage system based on your garden’s specific needs.
- Regular maintenance and cleaning of drainage systems are essential. Inspect, remove debris, and flush with water to ensure optimal performance. Proper care will protect your garden and promote plant health.
Assessing the Need for Drainage
Before you dive into adding drainage to your garden, it’s important to assess whether you actually need it. Poor drainage can be caused by a variety of factors, such as compacted soil, a high water table, or a lack of slope in the landscape. Here are a few signs that indicate your garden may have drainage issues:
- Puddles and standing water: If you notice water pooling in certain areas of your garden after rain or irrigation, it’s a clear indication that your garden has drainage problems. Plants dislike standing water, as it leads to root rot and suffocation.
- Soggy soil: If your soil feels constantly wet or squishy to the touch, even when it hasn’t rained recently, it’s a sign of poor drainage. This is especially common in heavy clay soils that hold water for extended periods.
- Plant health issues: If your plants are struggling to thrive, with wilted leaves, yellowing foliage, or stunted growth, it could be a result of waterlogged soil. Plants need oxygen to survive, and waterlogged soil deprives their roots of this vital element.
- Erosion and runoff: If you notice soil erosion, washing away of mulch or topsoil, or excessive runoff during heavy rain, it’s a sign that water is not effectively draining from your garden. This can lead to further issues, such as nutrient loss and damage to your landscape.
By identifying these signs, you can determine whether your garden requires additional drainage. Keep in mind that some areas may naturally have poor drainage due to the landscape, such as low-lying areas or areas with a high water table. Understanding these factors will help you choose the right drainage solutions for your garden.
In the next section, we will explore the different types of drainage systems available, so you can make an informed decision on the best solution for your specific needs.
Choosing the Right Drainage System
When it comes to adding drainage to your garden, selecting the right drainage system is crucial for its effectiveness. There are various types of drainage systems available, each designed to address specific drainage issues. Here are a few factors to consider when choosing the right drainage system for your garden:
- Soil Type: The type of soil in your garden plays a significant role in determining the appropriate drainage system. For example, if you have heavy clay soil that retains water, you may need a more robust drainage system compared to well-draining sandy soil.
- Slope: The slope of your garden is another critical factor to consider. If your garden has a significant slope, you may need to incorporate terraces or retaining walls to prevent erosion and direct water flow properly.
- Water Source: Understanding the source of excess water in your garden is crucial for selecting the right drainage system. If the majority of the water is coming from rainfall or surface runoff, you’ll need a system that effectively channels water away. In contrast, if the water is coming from a high water table, you’ll need a system that prevents water seepage into your garden.
- Cost and Maintenance: Consider your budget and the ongoing maintenance requirements of the drainage system. Some systems may require periodic cleaning, while others may involve regular checks and repairs.
Now that you have a better idea of the factors to consider, let’s explore some of the commonly used drainage systems:
- Underground Pipes: This system involves installing underground pipes that collect and channel water away from your garden. It’s especially useful for managing surface runoff and preventing water accumulation.
- French Drains: French drains are trenches filled with gravel and a perforated pipe, allowing water to flow freely through and away from your garden. They are effective in areas with high water tables or heavy clay soils.
- Dry Wells: Dry wells are large underground pits filled with gravel that collect and slowly release water into the surrounding soil. They are ideal for managing excess water from heavy rains or downspouts.
- Sump Pumps: Sump pumps are commonly used in basements or areas prone to flooding. They collect water and pump it away from your garden, ensuring the area remains dry.
- Raised Beds: Building raised beds can improve drainage by creating a well-drained environment for your plants. The elevated soil level allows water to drain away more effectively.
Consider the specific drainage needs of your garden and consult with a professional if you’re unsure about the best drainage system to choose. In the next sections, we’ll provide detailed instructions on how to install some of these drainage systems so you can implement them in your garden.
Types of Drainage Systems
When it comes to adding drainage to your garden, there are several types of drainage systems you can consider. Each system is designed to address different drainage issues and works best in specific situations. Let’s explore some of the most commonly used types of drainage systems:
- Surface Drains: Surface drains are designed to manage excess water on the surface of your garden. They consist of shallow channels or catch basins that collect water and direct it away from your garden. Surface drains are effective in areas with heavy rainfall or where surface runoff is an issue.
- French Drains: French drains are underground trenches filled with gravel and a perforated pipe. They are designed to intercept and redirect water away from your garden. French drains are excellent for managing excess water from high water tables or areas with poor soil drainage.
- Channel Drains: Channel drains, also known as trench drains, are long, narrow drains that are typically installed in driveways, patios, or other hardscaped areas. These drains collect and channel water away, preventing it from pooling or causing damage to your hardscape.
- Dry Wells: Dry wells are large underground pits filled with gravel that act as a reservoir for excess water. They collect water from downspouts, French drains, or surface drains and slowly release it into the surrounding soil. Dry wells are particularly useful for managing heavy rainfall or areas prone to flooding.
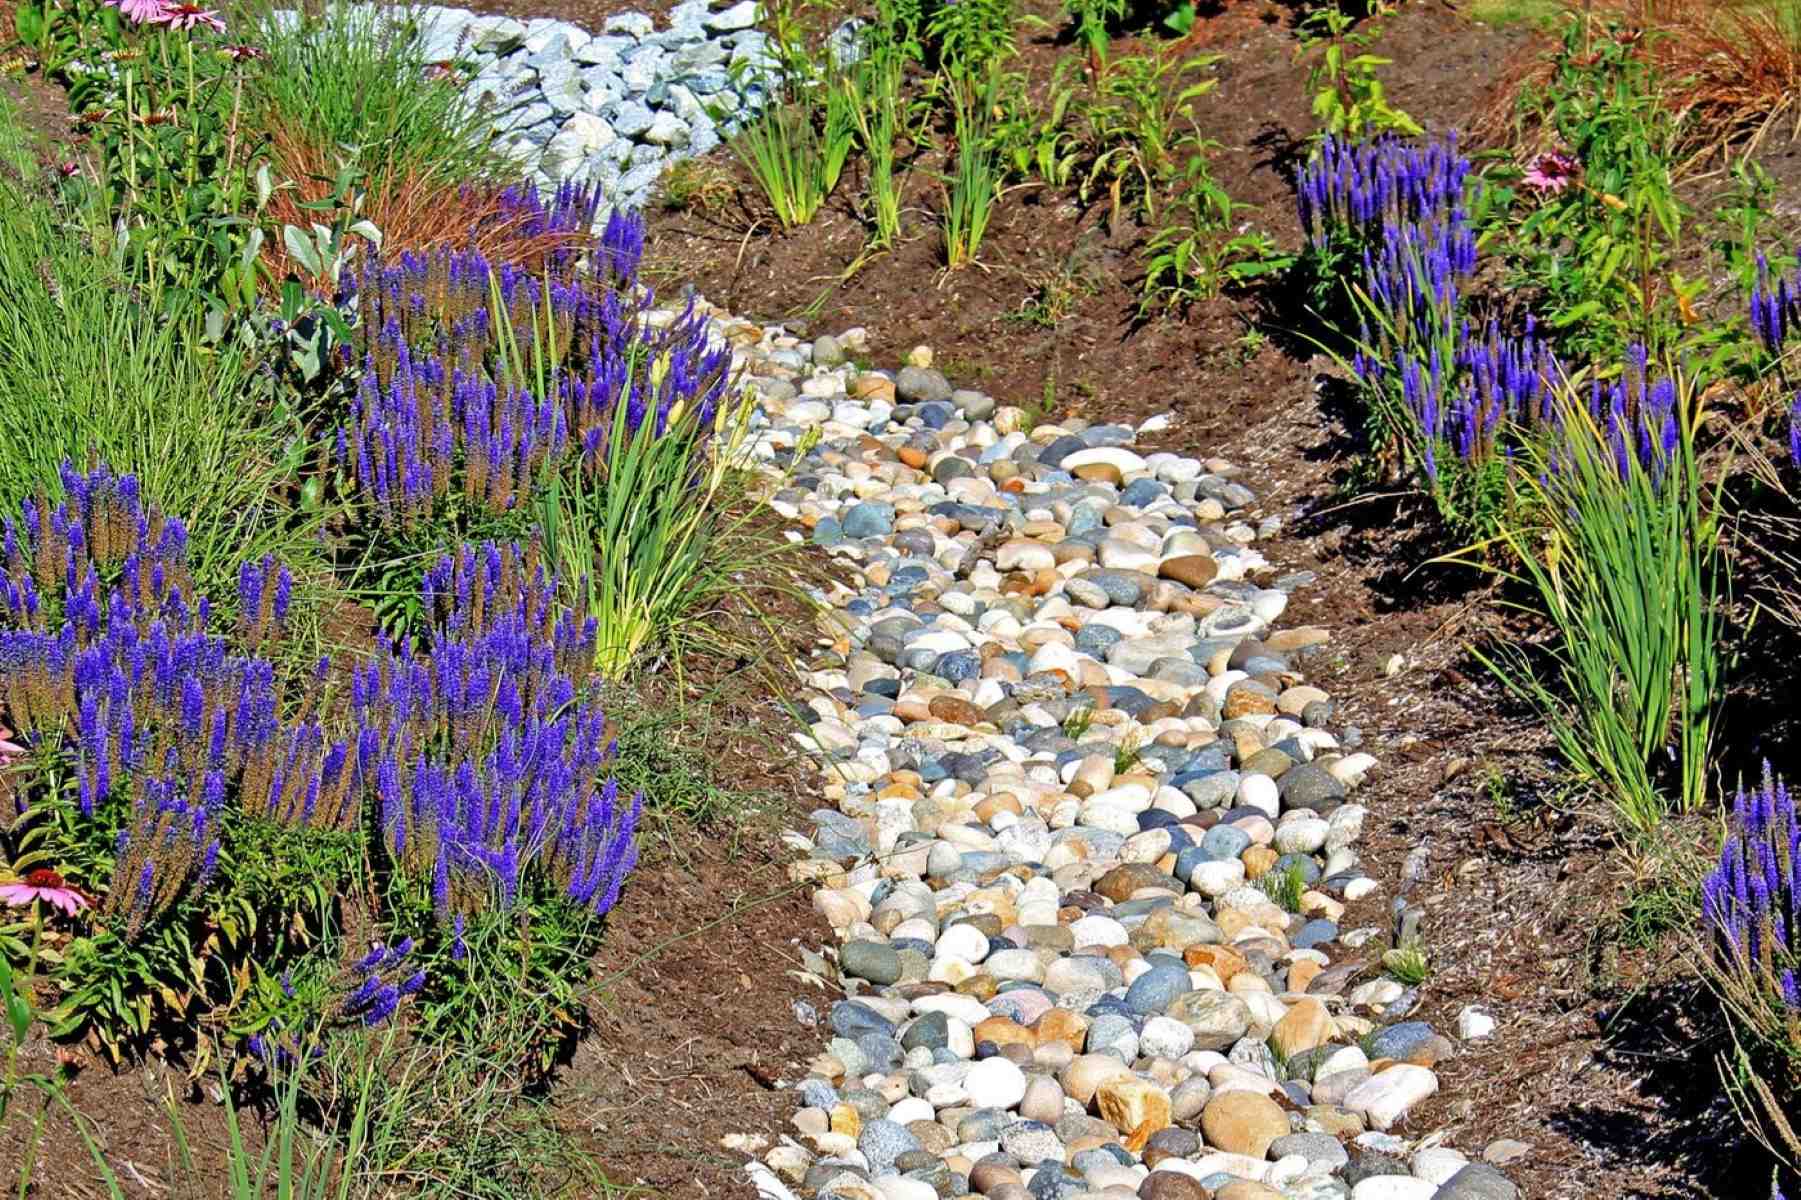
- Swales: Swales are shallow ditches or depressions designed to collect and channel water away from your garden. They are typically used in larger landscapes or areas with gentle slopes. Swales help slow down the flow of water, allowing it to percolate into the soil gradually.
- Sump Pumps: Sump pumps are commonly used in areas where water accumulation is a significant issue, such as basements or low-lying areas. They collect water and pump it away from your garden to prevent flooding or water damage.
Each of these types of drainage systems has its own unique benefits and considerations. It’s essential to assess your specific drainage needs and consult with a professional if necessary to determine the most suitable system for your garden.
In the following sections, we’ll provide step-by-step instructions on how to install some of these drainage systems, including underground pipes, French drains, and dry wells. So let’s roll up our sleeves and get ready to create a well-drained and flourishing garden!
Installing Underground Pipes
Installing underground pipes is an effective way to manage excess water and prevent it from pooling in your garden. This drainage system involves burying perforated pipes underground to collect and redirect water away from your garden. Here’s a step-by-step guide on how to install underground pipes:
- Assess the drainage needs: Determine the areas of your garden that require drainage. Look for spots where water tends to accumulate or areas with poor soil drainage.
- Map out the drainage route: Identify the best route for the underground pipes to collect water and direct it away from your garden. Consider natural slopes or existing drainage patterns to determine the optimal flow direction.
- Get the necessary materials: Gather the materials needed for the project, including perforated pipes, connectors, PVC glue, gravel, and a shovel.
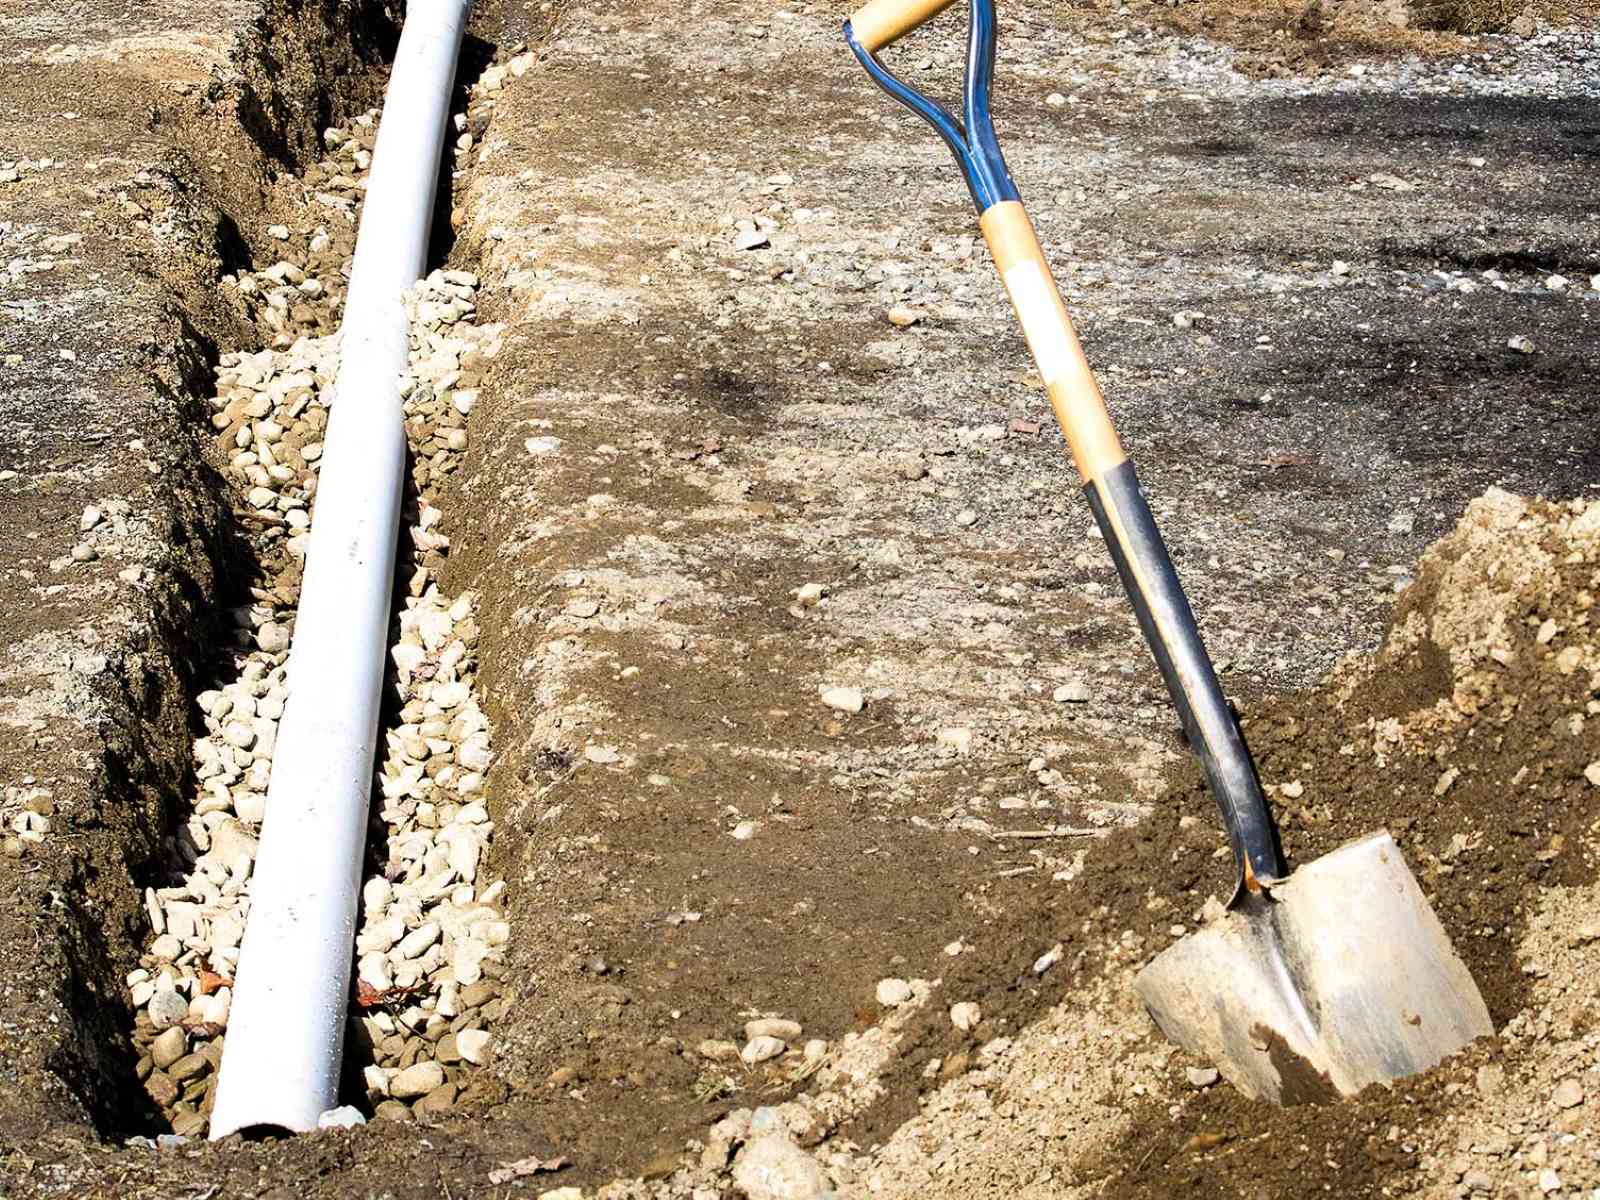
- Start digging the trench: Dig a trench along the planned route for the underground pipes. The trench should be deep enough to accommodate the pipes and allow for proper water flow. Aim for a depth of at least 12 inches, but you may need to adjust based on local regulations or specific drainage requirements.
- Add a layer of gravel: Once the trench is dug, add a layer of gravel at the bottom. This helps to provide stability and promotes proper drainage by allowing water to flow freely through the pipes.
- Place the pipes: Lay the perforated pipes on top of the gravel bed in the trench. Ensure that the perforations are facing downward to allow water to enter the pipes easily. Connect the pipes using the appropriate connectors or fittings.
- Cover with gravel: Once the pipes are in place, cover them with a layer of gravel. This helps to protect the pipes from debris and soil while still allowing water to flow into them.
- Backfill the trench: Gently backfill the trench with the excavated soil, ensuring that the pipes are fully covered and the trench is level. Tamp down the soil lightly to provide stability.
- Extend the pipes to an outlet: Extend the underground pipes to a suitable outlet area, such as a drainage ditch or a lower part of your property. Make sure the outlet area allows for proper water dispersal and is within local regulations.
- Test the drainage system: Once the pipes are installed, test the drainage system by allowing water to flow into it. Check for any leaks or issues with water flow. Make adjustments as necessary to ensure proper function.
Installing underground pipes may require some physical labor and the help of a few tools, but it can greatly improve the drainage of your garden, preventing water accumulation and potential damage to your plants. Ensure that you follow local regulations and guidelines for digging and installing underground pipes, and consider consulting with a professional if you’re uncertain about any aspect of the installation process.
In the next section, we’ll explore another popular drainage system: French drains.
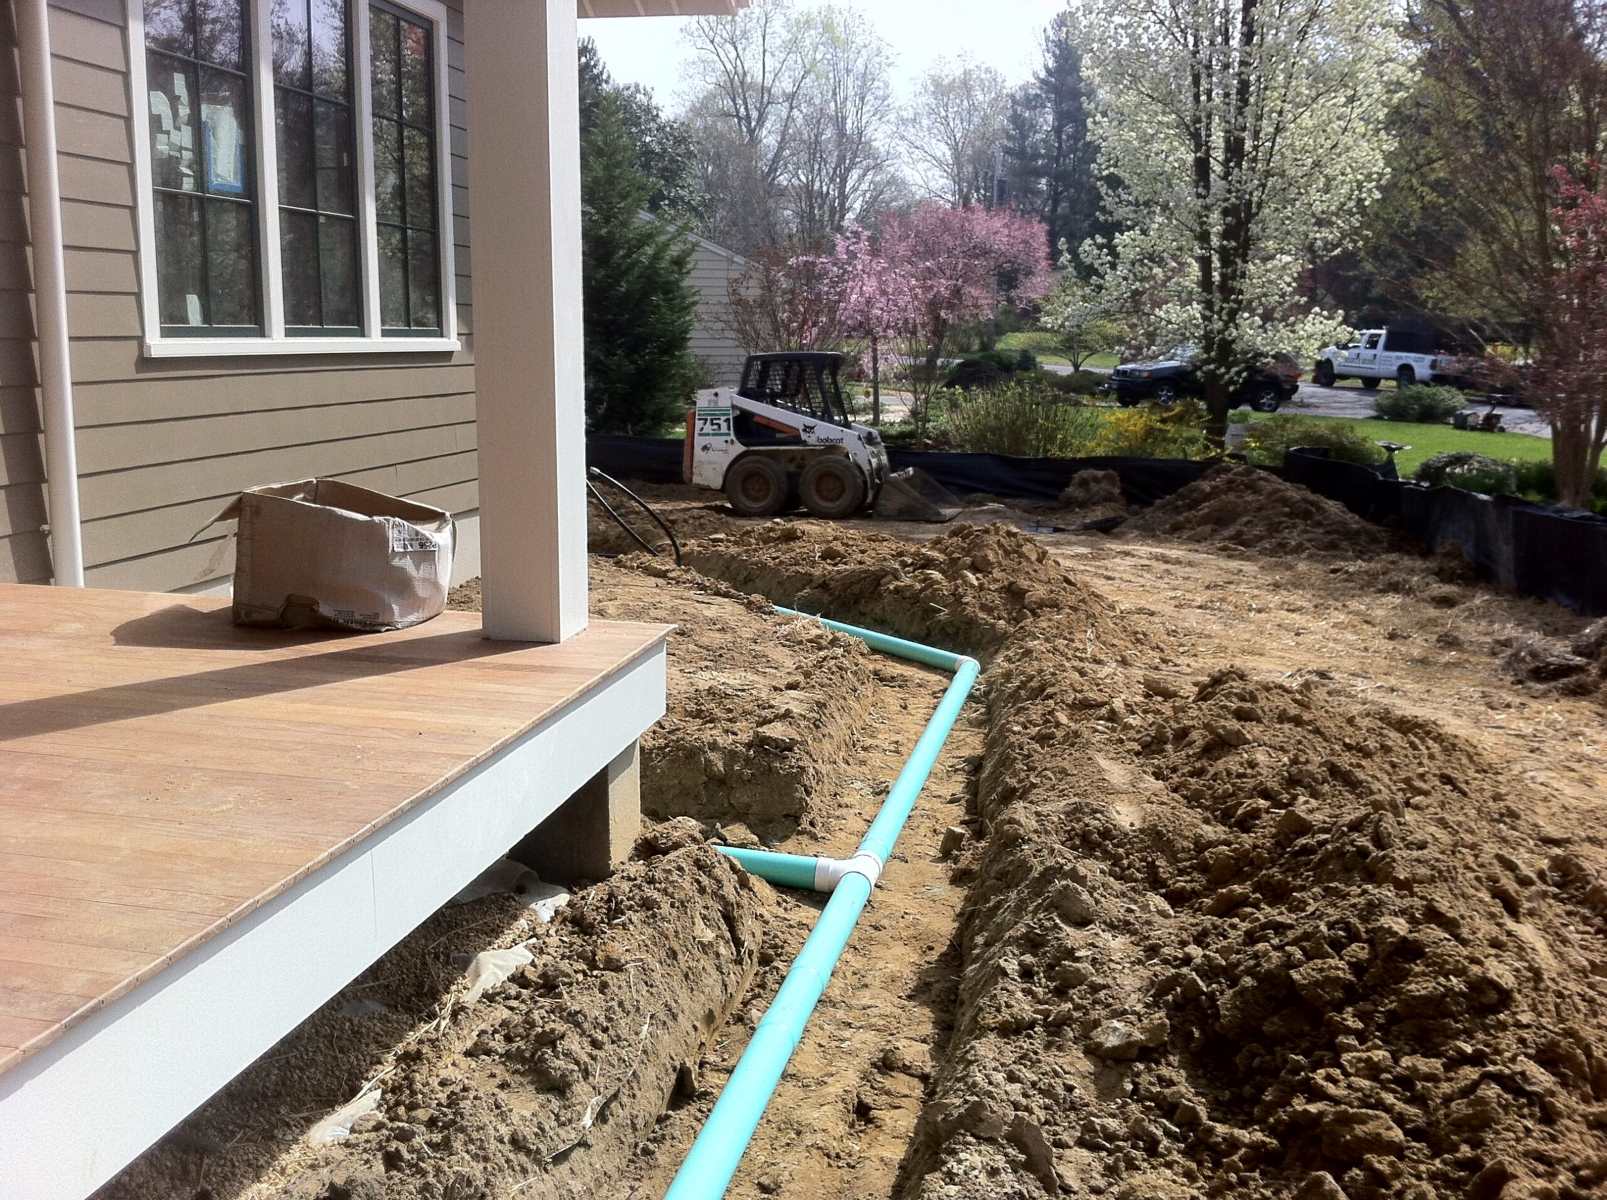
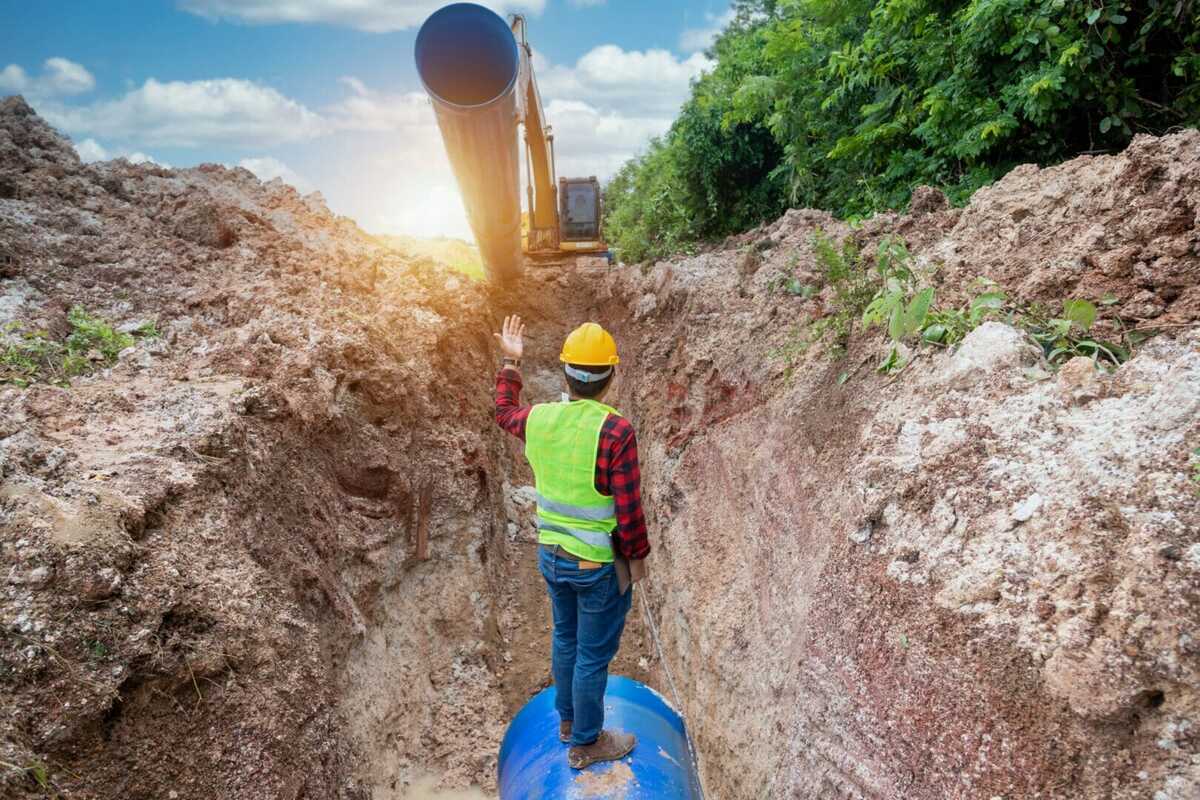
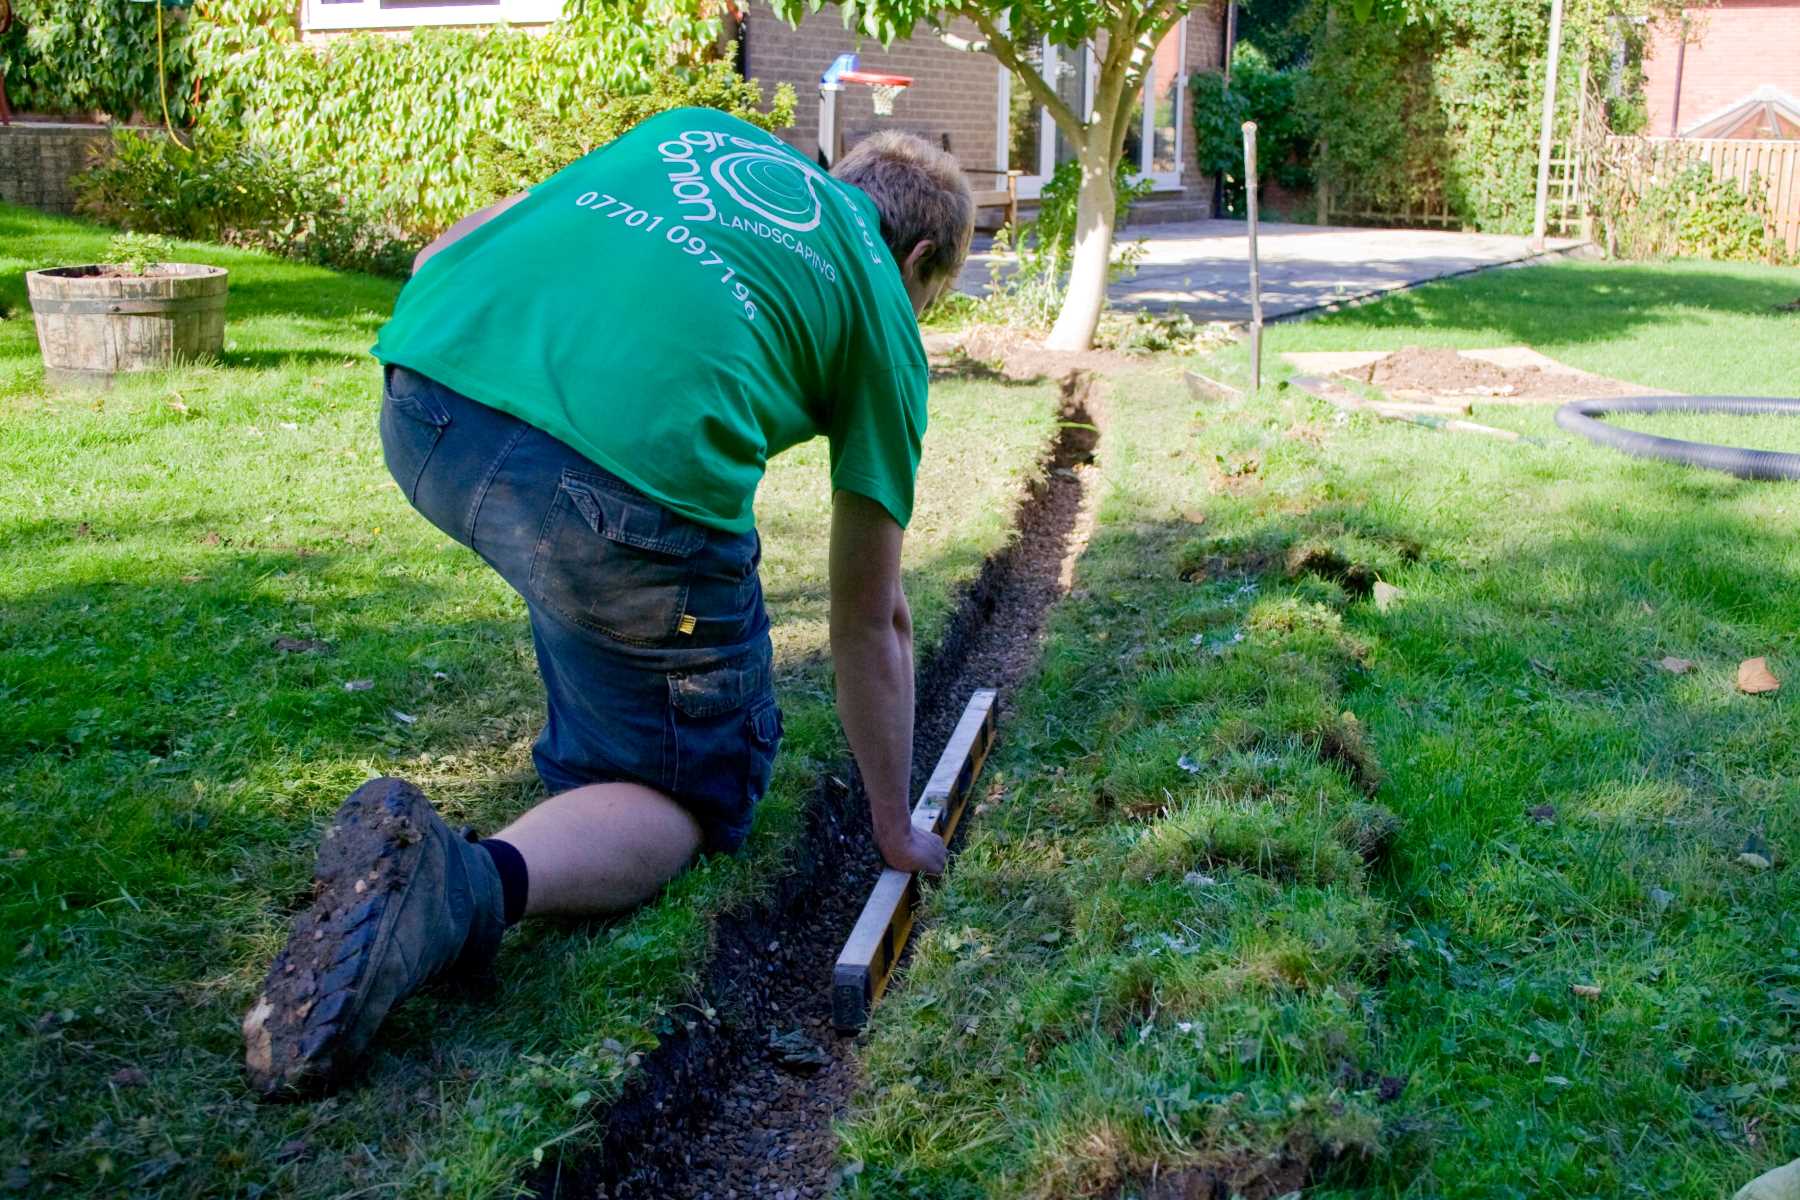
Digging Trenches for Drainage Pipes
Digging trenches is an essential part of installing various drainage systems, such as underground pipes and French drains. Trenches provide a pathway for water to flow and are crucial for ensuring proper drainage in your garden. Here’s a step-by-step guide on how to dig trenches for drainage pipes:
- Plan the trench route: Determine the best route for the trench to effectively redirect water away from your garden. Consider factors such as slope, existing drainage patterns, and areas that commonly have standing water.
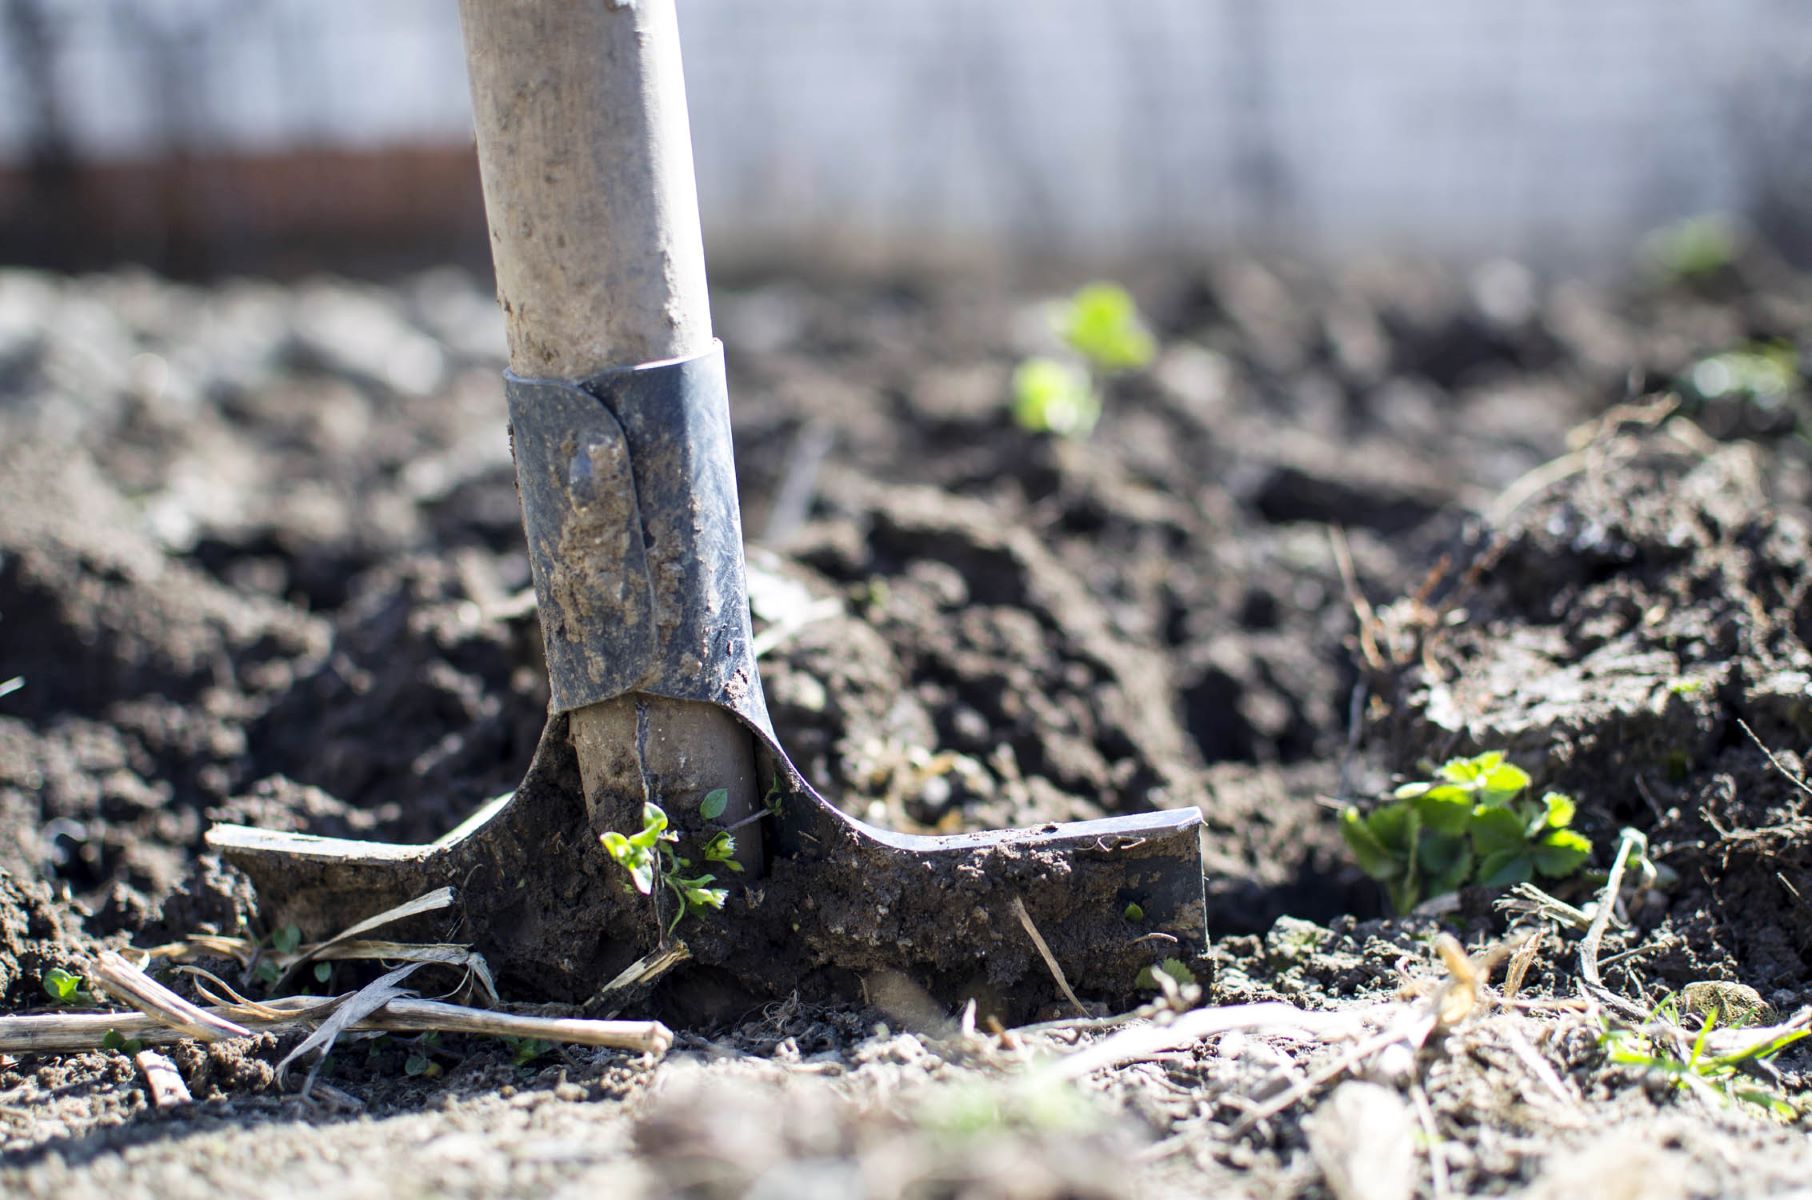
- Gather the necessary tools: Equip yourself with the right tools for digging the trench. Depending on the size and depth of the trench, you may need a shovel, a trenching spade, a digging bar, or a mini-excavator for larger projects.
- Mark the trench boundary: Use stakes and string to mark the boundaries of the trench. This will help guide your digging and ensure a straight and even trench.
- Start digging: Begin by digging a shallow trench along the marked boundary. Remove the top layer of grass, sod, or vegetation to expose the soil. Set this aside to use later for backfilling the trench.
- Dig deeper: Once the shallow trench is dug, continue to dig deeper, reaching the desired depth for your drainage pipes. The depth will depend on the specific drainage system and soil conditions. Aim for a depth of at least 12 inches, or as specified by local regulations.
- Make the trench wide enough: Ensure that the trench is wide enough to accommodate the drainage pipes and allow for proper installation. The width will depend on the diameter of the pipes and any additional materials used, such as gravel or fabric.
- Smooth the trench bottom: Smooth out the bottom of the trench to provide a level surface for the installation of the drainage system. This will help ensure proper water flow through the pipes.
- Add necessary materials: Depending on the specific drainage system being installed, you may need to add a layer of gravel or landscape fabric to the trench. These materials help with water flow and prevent soil from entering the pipes.
- Install the drainage system: Once the trench is prepared, it’s time to install the drainage system. This could involve placing underground pipes, laying a French drain, or positioning other drainage components as needed. Follow the manufacturer’s instructions or consult with a professional for proper installation techniques.
- Backfill the trench: After the drainage system is in place, carefully backfill the trench with the soil that was removed earlier. Compact the soil gently as you go to provide stability and prevent settling.
- Restore the surface: Finally, restore the surface of the trench area by replacing the grass, sod, or vegetation that was removed. Water the area thoroughly to help the soil settle and establish proper growth.
When digging trenches, it’s important to be mindful of any underground utilities, such as water lines, gas lines, or electrical cables. Always call your local utility companies to identify the location of any underground utilities before digging.
Digging trenches for drainage pipes may require some physical effort, but it is essential for proper water management in your garden. Take your time and ensure that the trenches are straight, level, and sized correctly to accommodate the specific drainage system being installed.
In the next section, we’ll dive into installing another popular drainage system: French drains.
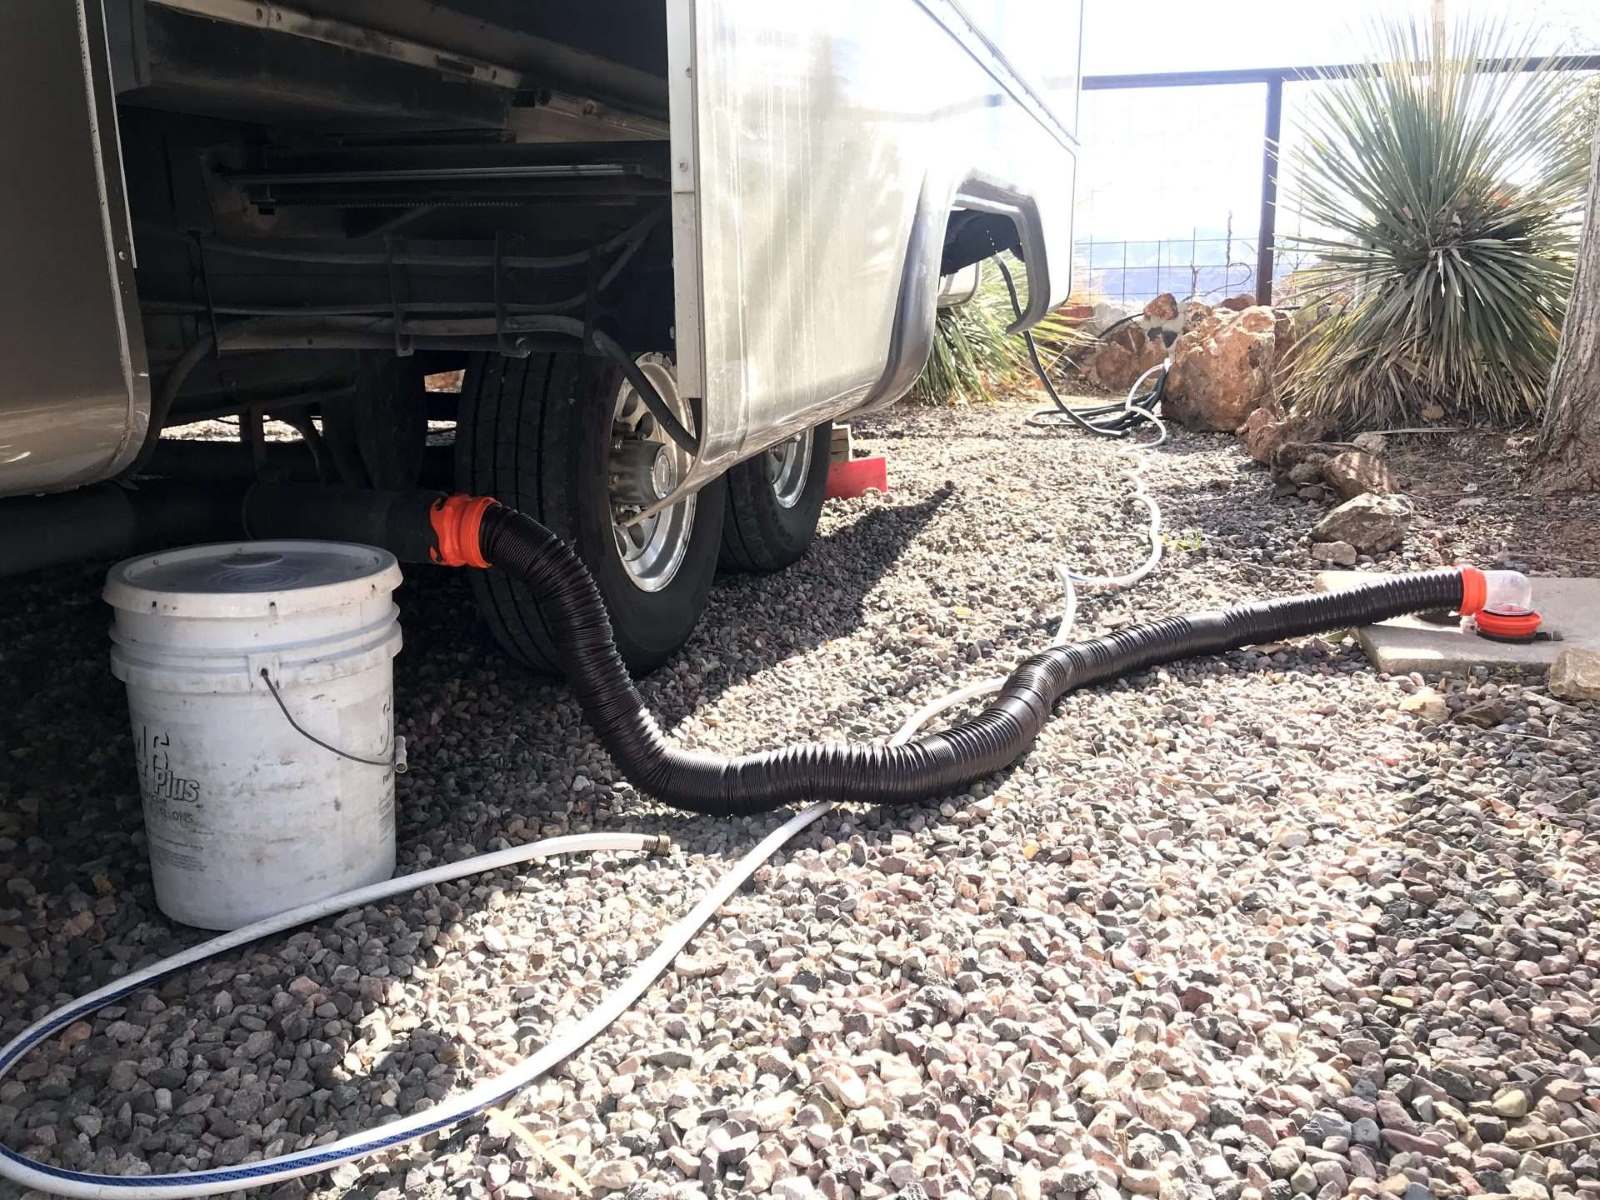
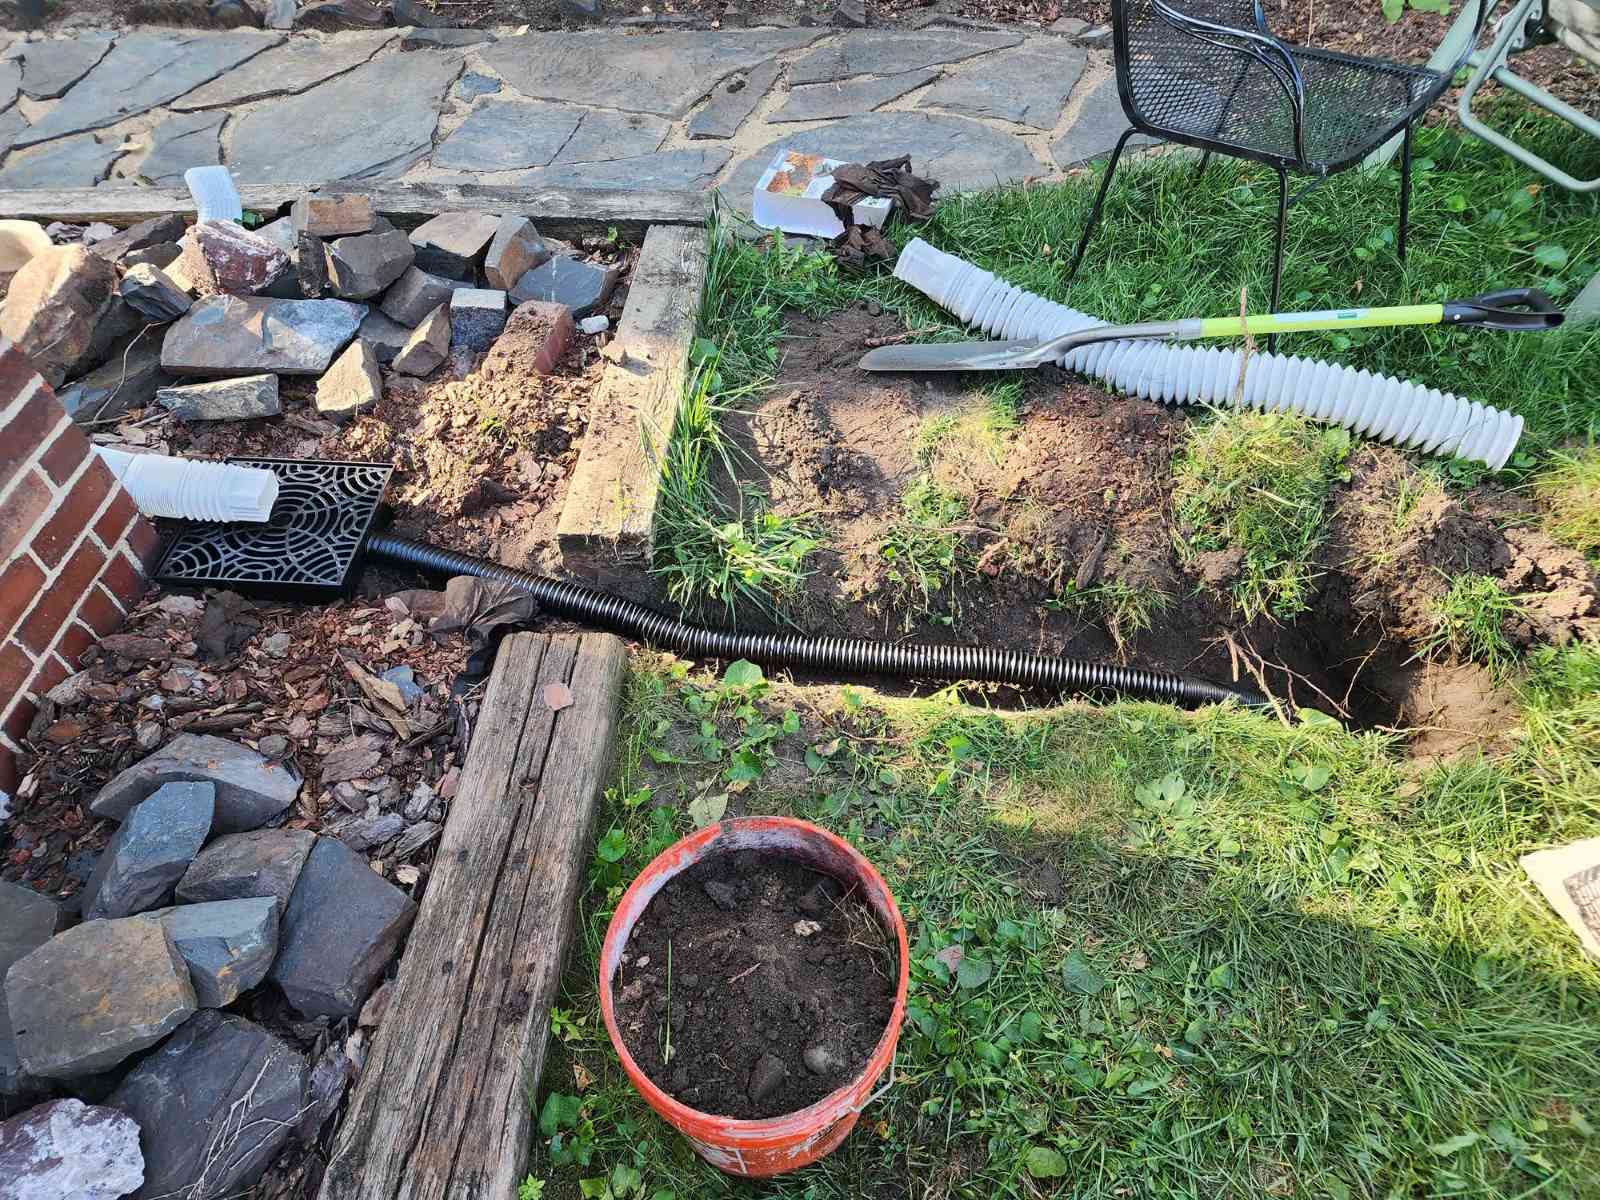
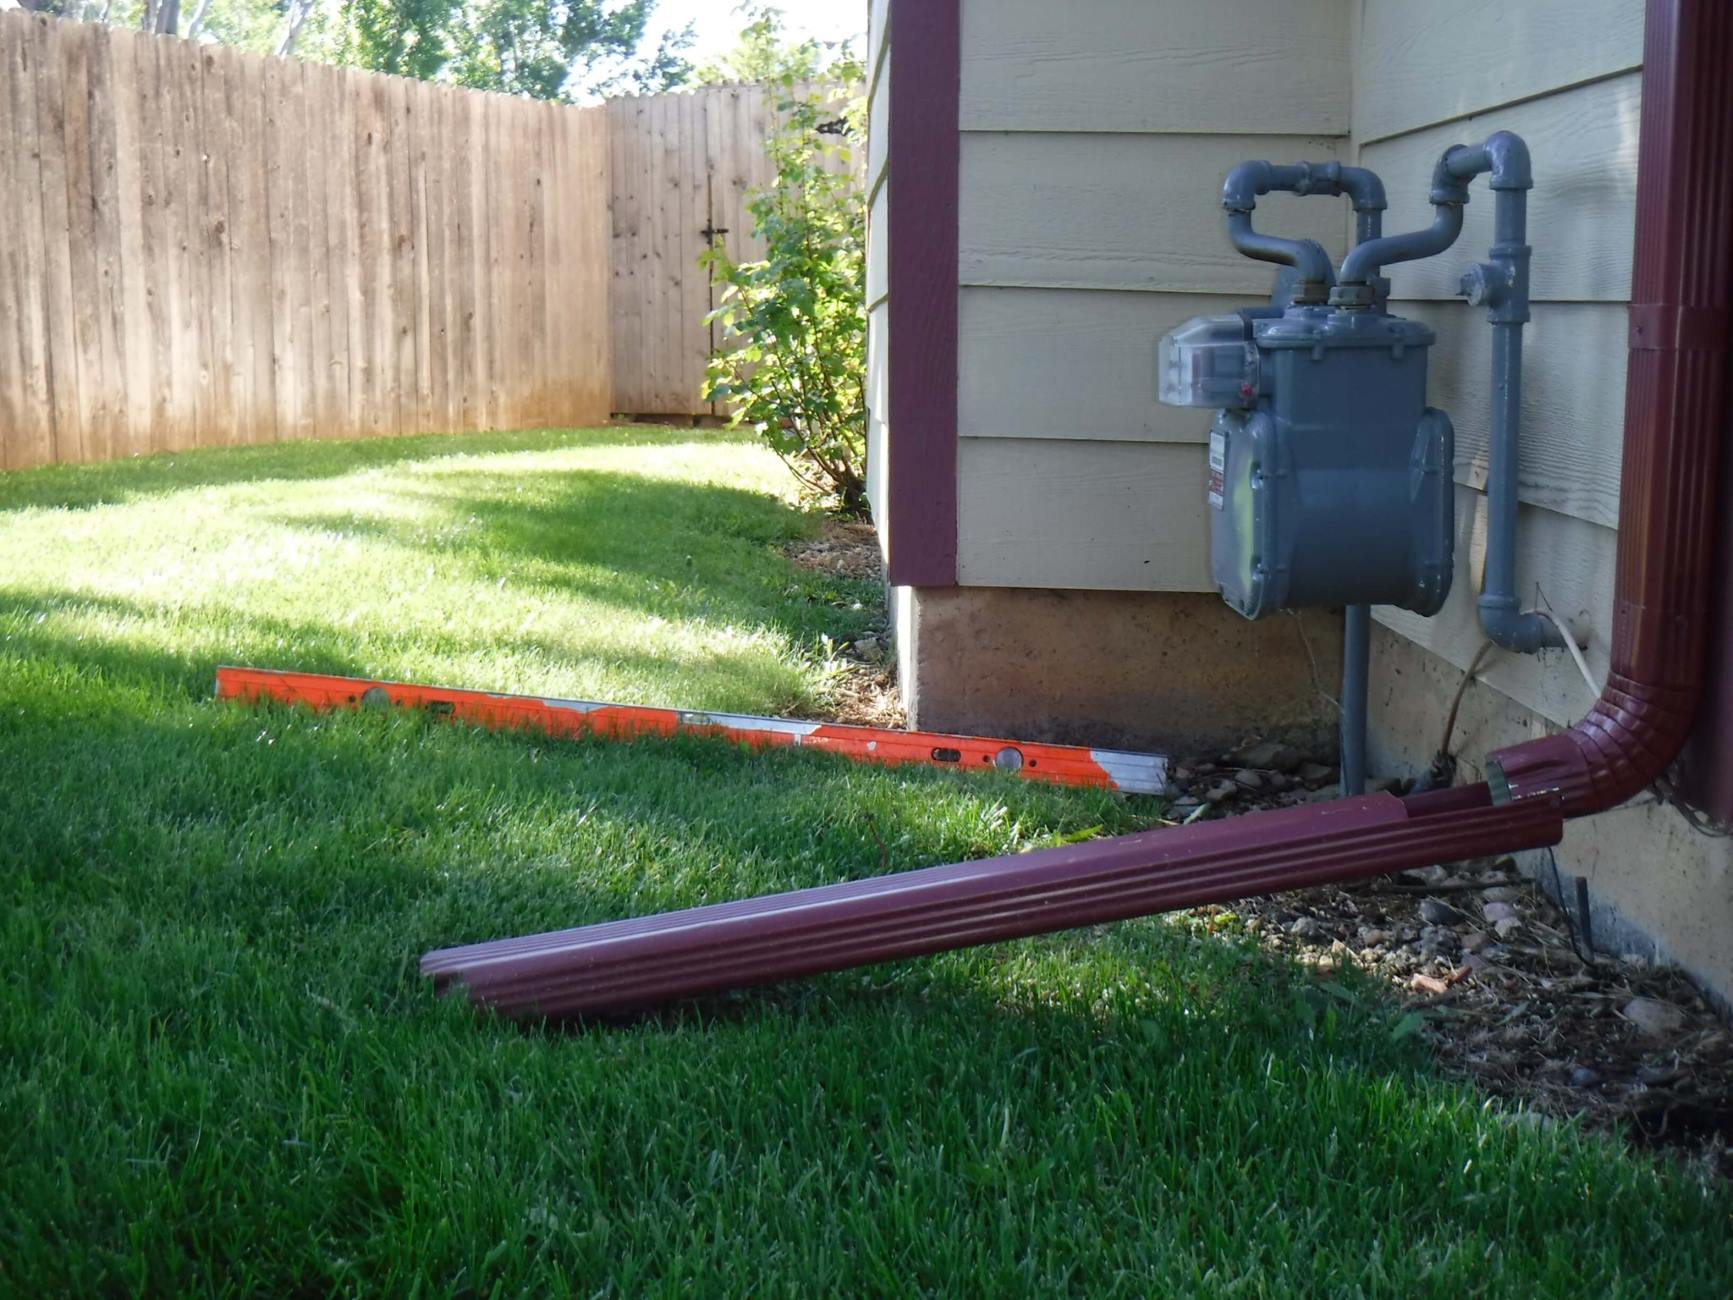
Connecting Drainage Pipes to Downspouts
Connecting drainage pipes to downspouts is a crucial step in diverting water away from your home’s foundation and preventing water damage. Downspouts are designed to collect rainwater from your gutters and efficiently channel it away from your home. By connecting drainage pipes to downspouts, you can redirect this water to a suitable drainage system in your garden. Here’s a step-by-step guide on how to connect drainage pipes to downspouts:
- Assess the drainage needs: Determine the areas in your garden where water needs to be directed, such as existing drainage systems, dry wells, or French drains.
- Locate downspouts: Identify the downspouts that are closest to the desired drainage areas. Typically, downspouts are located at the corners of your home or where the gutters end.
- Choose the appropriate drainage pipe: Select the correct type and size of drainage pipe for connecting to the downspouts. Common options include PVC pipes or corrugated plastic pipes. Ensure that the chosen pipe fits securely onto the downspout outlet.
- Measure and cut the drainage pipe: Measure the distance from the downspout outlet to the desired drainage area in your garden. Use a saw or pipe cutter to carefully cut the drainage pipe to the appropriate length.
- Attach the drainage pipe to the downspout outlet: Slide the cut end of the drainage pipe onto the downspout outlet. Ensure that it fits securely and snugly, but also allows for easy removal for maintenance purposes.
- Secure the connection: Use screws or clamps specifically designed for this purpose to secure the connection between the downspout outlet and the drainage pipe. This will prevent the pipe from detaching and ensure a reliable connection.
- Direct the drainage pipe: Position the drainage pipe in the desired direction to ensure that the water flows away from your home and towards the intended drainage area in your garden.
- Add an elbow fitting (if needed): Depending on the layout of your downspout and the drainage area, you may need to add an elbow fitting to redirect the water flow. Elbows are typically used to change the direction of the pipe by 90 degrees or more.
- Bury or conceal the drainage pipe: If desired, you can bury the drainage pipe in a shallow trench or conceal it using landscaping materials to blend it with your garden’s aesthetics. Ensure that it remains accessible for inspection and maintenance.
- Test the drainage system: Run water through the downspout and drainage pipe to ensure proper flow and identify any leaks or blockages. Make any necessary adjustments or repairs to ensure the system functions effectively.
Connecting drainage pipes to downspouts is a relatively straightforward process but requires attention to detail and proper measurements. By properly directing rainwater away from your home, you can protect your foundation and landscaping from potential water damage.
Remember to check local building codes and regulations regarding drainage systems and ensure that the water is directed to suitable drainage areas that comply with local guidelines. If you’re unsure about any aspect of connecting drainage pipes to downspouts, consult with a professional or seek advice from a local home improvement store.
In the next section, we’ll explore another popular drainage system: French drains.
To add drainage to a garden, consider creating a gentle slope away from the area, adding a layer of gravel or rocks at the bottom of the planting area, and using raised beds or containers for plants that need well-drained soil.
Installing French Drains
If your garden suffers from poor drainage or you’re looking for an effective solution to prevent water accumulation, installing French drains is an excellent option. French drains are trenches filled with gravel and a perforated pipe that allows water to flow freely, redirecting it away from your garden. Here’s a step-by-step guide on how to install French drains:
- Assess the drainage needs: Determine the areas of your garden that require drainage. Look for spots where water tends to pool or where soil drainage is poor.
- Plan the drain route: Map out the route for the French drain. Consider the natural flow of water and the desired outlet point where the water will be directed.
- Gather the necessary materials: Collect the materials needed for the project, including a shovel, gravel, a perforated pipe, landscape fabric, and fittings.
- Start digging the trench: Dig a trench along the planned route for the French drain. The trench should slope downward to encourage water flow. Aim for a depth of 12 to 18 inches and a width of at least 6 to 8 inches.
- Add a layer of gravel: Once the trench is dug, add a layer of gravel at the bottom. This layer will provide a stable base for the drain and promote proper drainage.
- Place the perforated pipe: Position the perforated pipe on top of the gravel bed in the trench. Ensure that the perforations face downwards to allow water to enter the pipe easily.
- Wrap the pipe in landscape fabric: Wrap the perforated pipe with landscape fabric to prevent soil and debris from clogging the pipe over time. This will help maintain the efficiency of the French drain.
- Add more gravel: Cover the pipe and landscape fabric with additional gravel, ensuring that the trench is filled evenly. The gravel will act as a filter and allow water to flow freely into the pipe.
- Cover with landscape fabric (optional): To further prevent soil from entering the gravel and clogging the drain, you can add a layer of landscape fabric on top of the gravel before backfilling the trench.
- Backfill the trench: Gently backfill the trench with the excavated soil, ensuring that the French drain is fully covered. Compact the soil lightly as you go to provide stability.
- Create a proper outlet: Direct the French drain to a suitable outlet point, such as a drainage ditch, dry well, or another drainage system. Verify that the outlet complies with local regulations and effectively disperses the water.
- Test the French drain: Once the French drain is installed, test its effectiveness by running water through it from a garden hose or waiting for rainfall. Check for proper drainage and make any necessary adjustments to ensure optimal performance.
French drains are an effective solution for managing excess water in your garden and preventing water-related issues. They can help protect plants, prevent soil erosion, and minimize the risk of water damage to your home’s foundation.
It’s advisable to consult with a professional if you have any concerns or questions during the installation process. They can offer guidance specific to your garden’s needs and ensure that the French drain is correctly installed.
In the next section, we’ll explore another method of managing excess water: creating a dry well.
Creating a Dry Well
Creating a dry well is a great solution for managing excess water in your garden, particularly during heavy rainfall. A dry well is an underground chamber that collects and stores water, allowing it to slowly percolate into the surrounding soil. By creating a dry well, you can effectively prevent water accumulation and potential flooding. Here’s a step-by-step guide on how to create a dry well:
- Assess the drainage needs: Determine the areas in your garden that experience water pooling or where excess water needs to be managed.
- Choose the dry well location: Select a suitable location for the dry well. Consider factors such as the proximity to the water source, the slope of the land, and any potential obstructions like underground utilities.
- Dig the hole: Dig a hole for the dry well. The size and depth will depend on the volume of water that needs to be managed. As a general rule of thumb, a dry well should have a minimum depth of 3 feet and a diameter of at least 3 to 4 feet.
- Add drainage gravel: Line the bottom of the hole with a layer of drainage gravel. This layer will help with water infiltration into the surrounding soil.
- Install the dry well chamber: Place the dry well chamber, which can be a pre-made plastic structure or a concrete ring, into the hole. Ensure that the chamber is stable and level on the gravel base.
- Connect the drainage pipes: Connect the drainage pipes from the desired drainage area to the inlet of the dry well chamber. This will redirect the excess water into the dry well.
- Secure the chamber lid: Place the lid on top of the dry well chamber and secure it to prevent debris from entering and clogging the well.
- Backfill the hole: Carefully backfill the hole with soil, ensuring that the dry well chamber remains stable and level. Compact the soil gently as you go.
- Create an overflow outlet (optional): In case of heavy rainfall or excessive water, consider creating an overflow outlet to divert water away from the dry well. This can be a secondary drainage pipe connected to an alternative outlet point.
- Test the dry well: Once the dry well is installed, test its effectiveness by redirecting water into it. Observe the percolation rate and ensure that water drains properly into the surrounding soil.
Creating a dry well can significantly reduce water accumulation in your garden, preventing drainage issues and potential flooding. It’s important to consult with local regulations and guidelines when creating a dry well, as permits or specific requirements may be necessary.
If you’re unsure about any aspect of creating a dry well, consider seeking advice from a professional landscaper or drainage expert. They can provide guidance tailored to your specific needs and help ensure the successful implementation of a dry well in your garden.
Next, we will explore another method of managing excess water: installing a sump pump.
Installing a Sump Pump
If you have a basement or an area in your home that is prone to flooding, installing a sump pump can be an effective solution to manage excess water. A sump pump is a device that collects water from the surrounding area and pumps it away, preventing water damage and ensuring a dry environment. Here’s a step-by-step guide on how to install a sump pump:
- Assess the area: Identify the area in your home where water tends to accumulate or where flooding is a recurring issue. This is typically the lowest point of the basement or the area where water seepage is most prevalent.
- Choose the sump pump location: Select a suitable location for the sump pump. Ideally, it should be positioned in the lowest part of the area to collect water effectively.
- Prepare the sump pit: Dig a pit or a hole that will accommodate the sump pump and collect water. The size of the pit will depend on the size of the sump pump and the amount of water that needs to be managed.
- Add gravel: Fill the bottom of the sump pit with a layer of gravel. This helps prevent soil and sediment from entering the sump pump and ensures proper drainage.
- Install the sump pump: Place the sump pump inside the sump pit, ensuring that it sits securely on the gravel layer. Connect the sump pump to a suitable power source.
- Attach the discharge pipe: Connect the discharge pipe to the outlet of the sump pump. The pipe should be directed away from your home, preferably downhill, to ensure the water is pumped far enough to prevent it from seeping back into the area.
- Add a check valve: Install a check valve on the discharge pipe. This valve prevents water from flowing back into the sump pit once it is pumped out, ensuring optimum efficiency.
- Secure the sump pump lid: Place the lid on top of the sump pit to prevent debris from entering and interfering with the sump pump’s operation.
- Test the sump pump: Fill the sump pit with water and test the function of the sump pump. Ensure that it activates automatically when the water reaches a certain level and effectively pumps the water out of the pit.
- Regular maintenance: It is important to regularly inspect and maintain your sump pump to ensure its effectiveness. Clear any debris or sediment from the pit, test the pump’s operation periodically, and consider installing a backup power system to safeguard against power outages.
Installing a sump pump can help prevent basement flooding and protect your home from water damage. If you’re unsure about the installation process or need assistance, consult with a professional plumber or sump pump specialist. They can provide expert advice and ensure the proper installation and functioning of your sump pump.
In the next section, we’ll explore another method of improving garden drainage: building raised beds.
Building Raised Beds for Better Drainage
If you’re looking to improve drainage in your garden while also creating a visually appealing and organized space, building raised beds is a fantastic option. Raised beds not only provide better control over soil composition and moisture levels but also promote excellent drainage. Here’s a step-by-step guide on how to build raised beds for better drainage:
- Select a location: Choose a suitable area in your garden for the raised beds. Consider factors such as sunlight exposure, convenience, and accessibility for watering and maintenance.
- Decide on the size and shape: Determine the size and shape of the raised beds based on the available space and your gardening needs. Raised beds can be rectangular, square, or customized to fit your preferences.
- Prepare the ground: Clear the area of any vegetation, rocks, or debris. Level the ground and ensure it is free of any obstructions that could hinder the construction of the raised beds.
- Mark the perimeter: Use stakes and string to mark the perimeter of the raised beds. This will guide you during the construction process and help ensure straight lines or desired curves.
- Build the frame: Depending on your chosen material, construct the frame of the raised bed. Common materials include wood, composite boards, or even recycled materials like cinder blocks or old tires. Ensure the frame is sturdy and level.
- Add a bottom layer: To improve drainage, add a layer of coarse gravel or small rocks at the bottom of the raised bed frame. This acts as a drainage layer and prevents water from pooling at the base.
- Add a weed barrier: Lay a weed barrier, such as landscape fabric, on top of the gravel layer. This prevents weeds from growing up through the raised bed while still allowing water to drain through.
- Fill with well-draining soil mix: Fill the raised bed frame with a well-draining soil mix. Aim for a mixture of organic matter, such as compost, and well-draining materials like sand or perlite.
- Smooth and level the soil: After filling the raised beds with soil, smooth and level the surface using a rake or garden tool. This provides an even planting surface and promotes proper water distribution.
- Plant and mulch: Once the raised beds are prepared, you can begin planting your desired plants, herbs, or vegetables. Apply a layer of mulch around the plants to regulate soil temperature, conserve moisture, and suppress weed growth.
- Water and maintain: Regularly water the raised beds as needed, ensuring that the soil remains moist but not waterlogged. Monitor the drainage and adjust watering frequencies accordingly.
Building raised beds not only improves drainage in your garden but also provides better soil aeration and allows for greater control over nutrient levels. Additionally, raised beds can create a visually appealing and organized garden space that is easy to maintain and work in.
Remember to choose appropriate plants for your raised beds, considering their specific drainage requirements and sunlight preferences. If you have any concerns or questions, consult with a local gardening expert for guidance and advice.
In the next section, we’ll explore the importance of maintaining and cleaning your drainage systems.
Maintaining and Cleaning Drainage Systems
Once you have installed drainage systems in your garden, it’s important to regularly maintain and clean them to ensure their effectiveness and longevity. Over time, debris, soil particles, and plant matter can accumulate, potentially causing blockages and reducing the efficiency of your drainage systems. Here are some key steps to maintain and clean your drainage systems:
- Inspect regularly: Regularly inspect your drainage systems to identify any signs of blockage, damage, or deterioration. Look for clogged pipes, standing water, or areas of poor drainage in your garden.
- Remove debris: Clear any debris, such as leaves, twigs, or stones, that may have accumulated in your drainpipes or around the drainage system. Use a garden rake or a hose with high-pressure water to dislodge and remove the debris.
- Unclog blockages: If you encounter a blockage in your drainage system, try using a plumber’s snake or a drain auger to dislodge the obstruction. Alternatively, for surface drains, removing the grate and manually clearing the blockage can be effective.
- Flush with water: Flush your drainage systems with a hose or pressure washer to remove any remaining debris or silt build-up. Start from the highest point of the system and work your way downward, allowing the water to naturally flow and carry away the debris.
- Inspect underground pipes: If you have underground drainage pipes, periodic inspection is crucial. Use a drain camera or hire a professional service to check the condition of the pipes and identify any potential issues, such as cracks, leaks, or root infiltration.
- Maintain catch basins and grates: Clean catch basins and grates regularly, removing any dirt or debris that may hinder proper water flow. Ensure that the grates are securely in place and functioning correctly.
- Trim vegetation: Trim back any overgrown vegetation or plants that may obstruct the flow of water in your drainage systems. This includes removing branches, shrubs, or roots that could invade and clog the pipes.
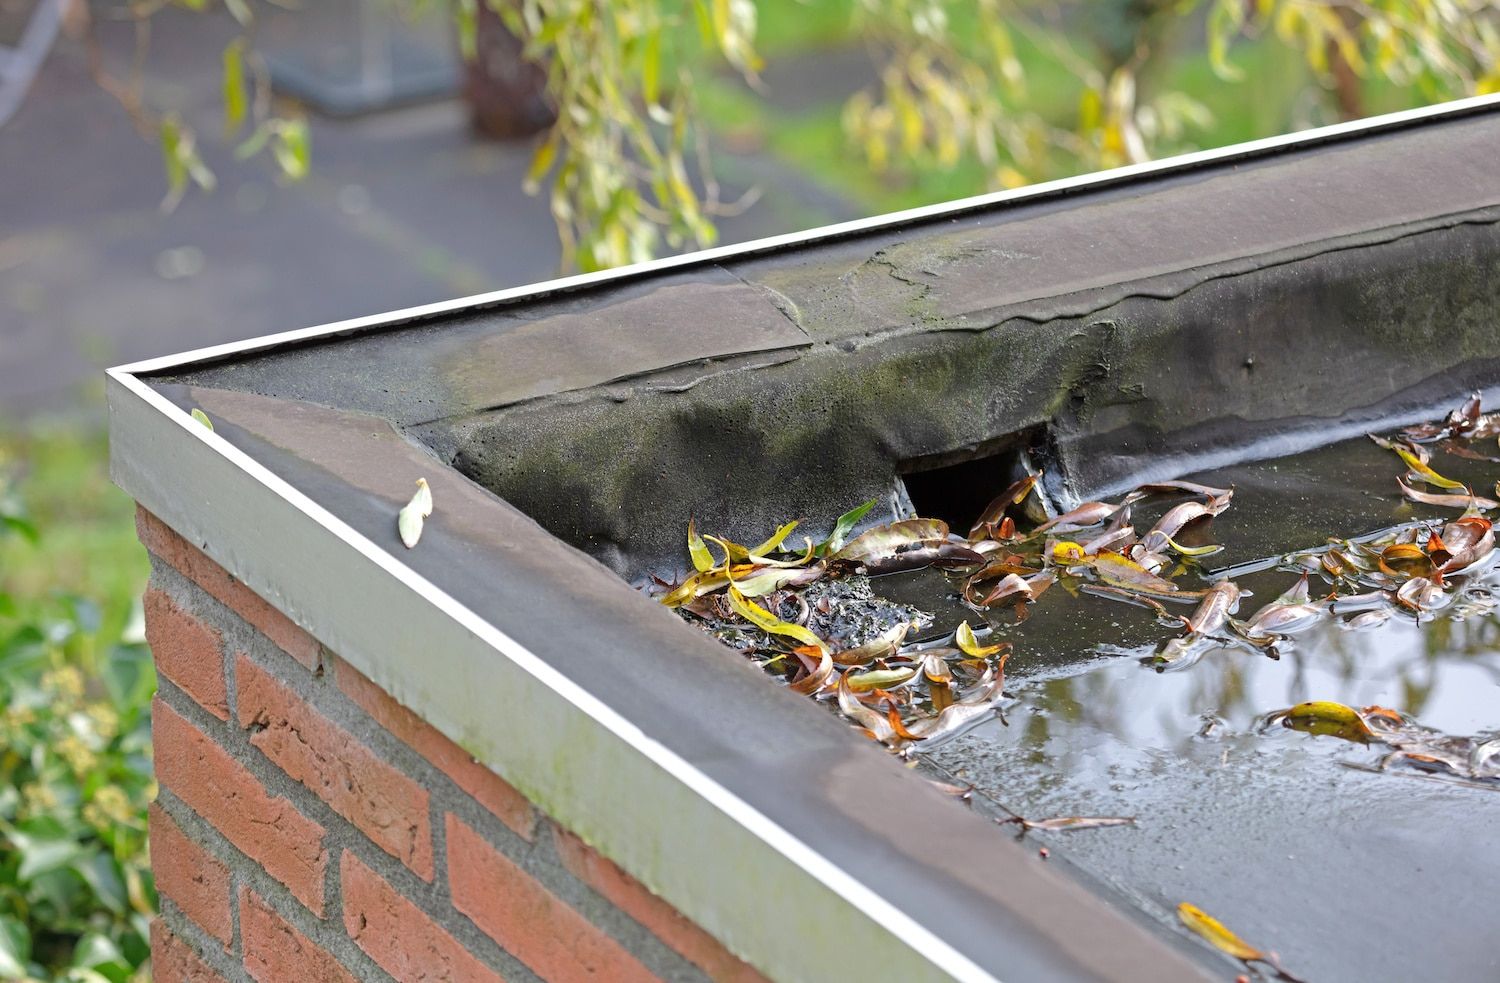
- Check and maintain gutters and downspouts: Regularly inspect your gutters and downspouts to ensure they are clear of any debris. Consider installing gutter guards or screens to minimize the amount of debris entering the drainage system.
- Monitor soil erosion: Keep an eye on any signs of soil erosion around your drainage systems. If you notice excessive erosion, consider adding erosion control measures, such as mulch, rocks, or retaining walls, to prevent further damage.
- Consider professional maintenance: In some cases, it may be beneficial to hire a professional drainage maintenance service to inspect and clean your drainage systems, especially if you have complex underground systems or are unsure of proper maintenance techniques.
By implementing regular maintenance and cleaning practices, you can ensure that your drainage systems function effectively and prevent any potential issues from arising. Taking care of your drainage systems will help protect your garden, prevent water damage, and preserve the health and vitality of your plants.
Remember to consult with professionals if you encounter any complex drainage issues or need assistance in maintaining specific systems. They can provide expert advice and guidance to ensure the optimal performance of your drainage systems.
With regular maintenance and proper care, your drainage systems will continue to provide efficient water management and contribute to a healthy and thriving garden.
Now that you have a comprehensive understanding of adding drainage to your garden and maintaining your drainage systems, you’re equipped with the knowledge to address drainage issues and create an environment where your plants can flourish. Enjoy your garden with confidence, knowing that you have taken the necessary steps to ensure proper drainage and optimal plant health!
Conclusion
Congratulations! You have now completed a comprehensive journey into the world of adding drainage to your garden. Understanding the importance of proper drainage and implementing effective drainage systems is essential for maintaining a healthy and thriving garden. By following the steps outlined in this guide, you can address drainage issues, prevent water accumulation, and create an environment where your plants can flourish.
We began by assessing the need for drainage and identifying common signs of poor drainage, such as standing water, soggy soil, and plant health issues. Next, we explored different types of drainage systems, including underground pipes, French drains, dry wells, and sump pumps. Each system has its benefits and considerations, so it’s important to choose the one that best suits your garden’s specific needs.
We then delved into the process of installing drainage systems, including digging trenches, connecting drainage pipes to downspouts, and building raised beds. Through step-by-step instructions, you learned how to create effective drainage solutions that redirect water away from your garden and prevent potential water damage.
Furthermore, we emphasized the importance of maintaining and cleaning your drainage systems. Regular inspections, clearing debris, and flushing with water are essential maintenance practices to ensure optimal performance. Taking care of your drainage systems will not only prevent blockages but also promote proper water flow and longevity.
Remember, each garden is unique, and the optimal drainage solution may vary. Consider factors such as soil type, slope, and water source when selecting the right drainage system for your garden. If you encounter complex drainage issues or need guidance, don’t hesitate to consult with professionals who can offer expertise and tailored advice.
With the knowledge gained from this guide, you are now equipped to address drainage challenges, create an environment conducive to plant growth, and enjoy a healthy and thriving garden. By implementing effective drainage solutions and proper maintenance, you can ensure that your garden remains vibrant and free from water-related issues.
So, roll up your sleeves, put on your gardening gloves, and make your garden a haven of proper drainage, lush greenery, and blooming flowers. Happy gardening!
Frequently Asked Questions about How To Add Drainage To A Garden
Was this page helpful?
At Storables.com, we guarantee accurate and reliable information. Our content, validated by Expert Board Contributors, is crafted following stringent Editorial Policies. We're committed to providing you with well-researched, expert-backed insights for all your informational needs.


0 thoughts on “How To Add Drainage To A Garden”