Articles
How To Run A Dryer Vent Through The Attic
Modified: October 20, 2024
Learn the proper way to run a dryer vent through your attic with our informative articles. Ensure optimal airflow and prevent fire hazards.
(Many of the links in this article redirect to a specific reviewed product. Your purchase of these products through affiliate links helps to generate commission for Storables.com, at no extra cost. Learn more)
Introduction
Running a dryer vent through the attic is a common solution when the laundry room is not located on an exterior wall. It allows for proper ventilation and prevents moisture buildup, reducing the risk of mold and other related issues. However, the installation process can be challenging and requires careful planning and execution. This article will guide you through the steps of running a dryer vent through the attic, ensuring a safe and efficient setup.
Before starting the installation process, it’s crucial to prioritize safety. Always follow manufacturer guidelines and local building codes to ensure the vent is installed correctly and won’t pose any fire hazards. Additionally, proper insulation and airflow are essential to maintain optimal drying performance and prevent energy wastage.
In this article, we’ll cover everything you need to know about running a dryer vent through the attic. We’ll discuss safety precautions, assessing the attic space, planning the vent route, gathering necessary tools and materials, removing existing vents, measuring and cutting vent holes, installing vent ducts, securing them in the attic, connecting the vent to the dryer, insulating the ducts, and testing the vent system.
We’ll provide step-by-step instructions and valuable tips to make the installation process more manageable and effective. By the end of this article, you’ll have the knowledge and confidence to run a dryer vent through your attic without any trouble.
So let’s get started, ensuring your dryer operates safely and efficiently, while achieving optimal drying results for your laundry.
Key Takeaways:
- Ensure safety by following building codes, using fire-resistant materials, and maintaining proper clearances. Regularly clean and inspect the vent to prevent blockages and ensure efficient operation.
- Thoroughly plan the vent route, gather necessary tools, and secure the duct in the attic. Test the vent system for proper airflow and consider professional maintenance for optimal performance.
Safety Precautions
When running a dryer vent through the attic, it’s crucial to prioritize safety to prevent fire hazards and ensure proper ventilation. Here are some essential safety precautions to keep in mind:
- Follow building codes: Familiarize yourself with local building codes and regulations regarding dryer vent installation. Ensure that your vent system complies with these guidelines to ensure safety and avoid any potential legal issues.
- Use fire-resistant materials: Opt for rigid or semi-rigid aluminum ducts for your dryer vent. These materials are fire-resistant and less likely to accumulate lint, reducing the risk of fire hazards.
- Properly insulate the duct: The ducts running through the attic should be properly insulated to prevent condensation and minimize heat loss. Use insulation sleeves or duct insulators to ensure energy efficiency and reduce the risk of moisture-related problems.
- Maintain proper clearances: The dryer vent should have appropriate clearances from combustible materials and insulation. Make sure the vent is clear from obstructions and avoid running the vent near electrical wiring or plumbing pipes to prevent any potential hazards.
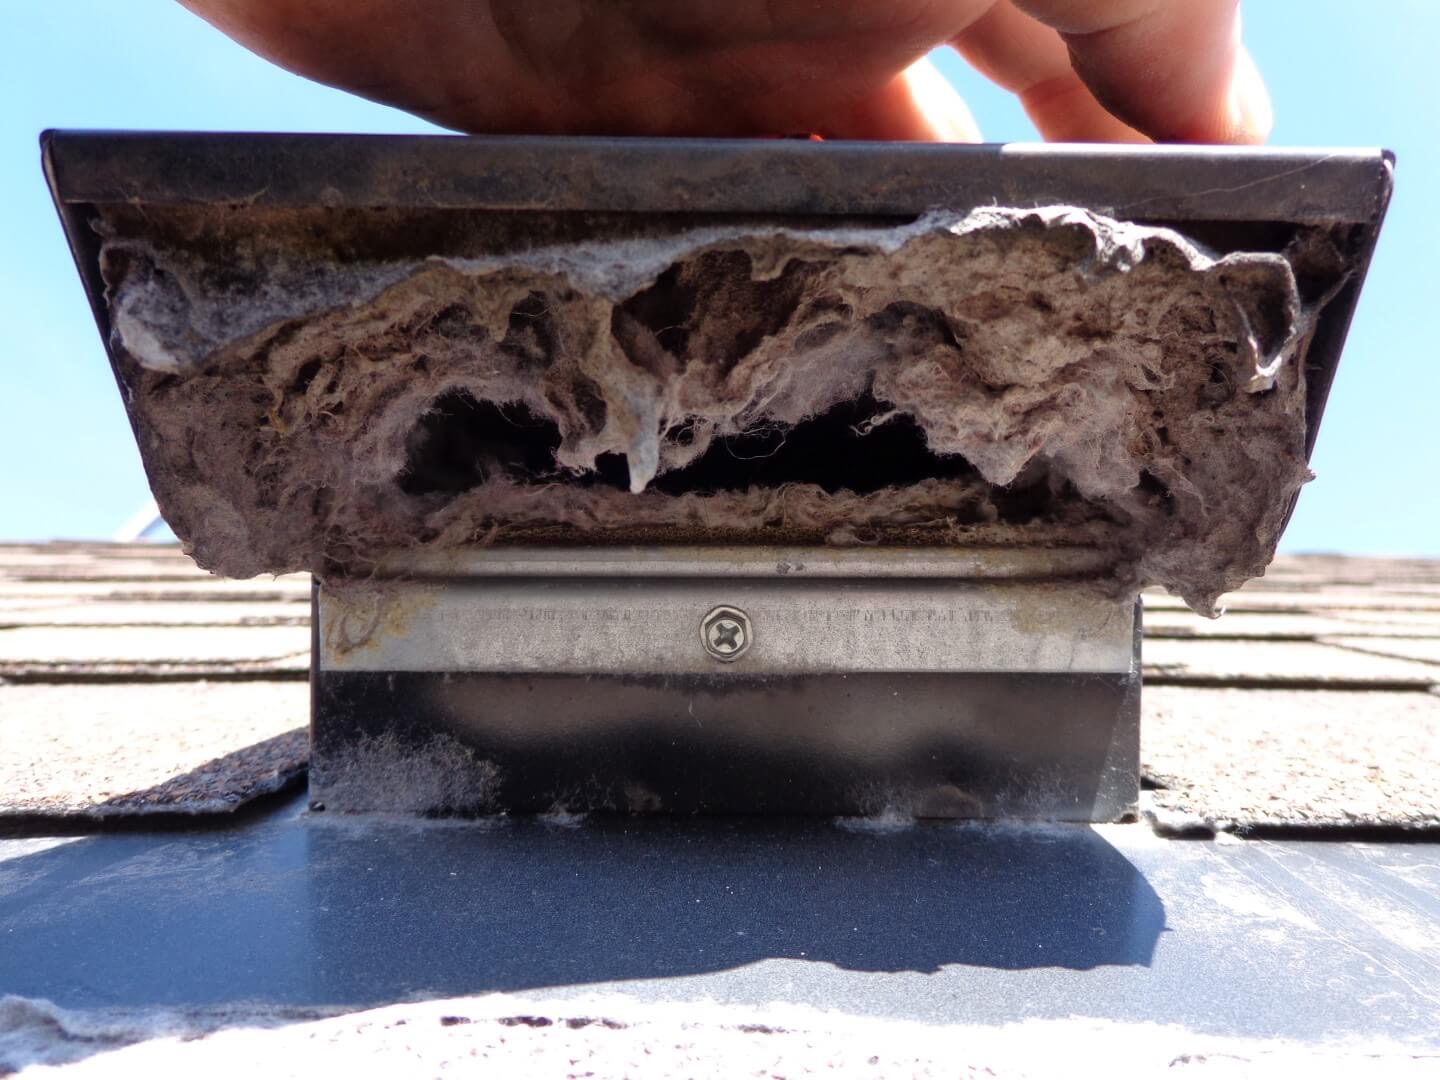
- Regularly clean and inspect: Regularly clean the dryer vent and inspect it for any signs of blockage, damage, or deterioration. Built-up lint or debris can restrict airflow and increase the risk of fire. Consider hiring a professional to perform a thorough cleaning at least once a year.
- Install a backdraft damper: To prevent outside air from entering the vent and reduce the risk of pests or debris entering your home, install a backdraft damper at the exterior vent termination. This device ensures that the vent opens only when the dryer is in use.
- Keep the attic well-ventilated: Proper attic ventilation is crucial to prevent moisture buildup and mold growth. Ensure the attic has adequate air circulation and ventilation to maintain a healthy and dry environment.
By adhering to these safety precautions, you can ensure a safe and effective installation of a dryer vent through your attic. It’s always better to take the necessary precautions and invest in the appropriate materials and practices to safeguard your property and loved ones.
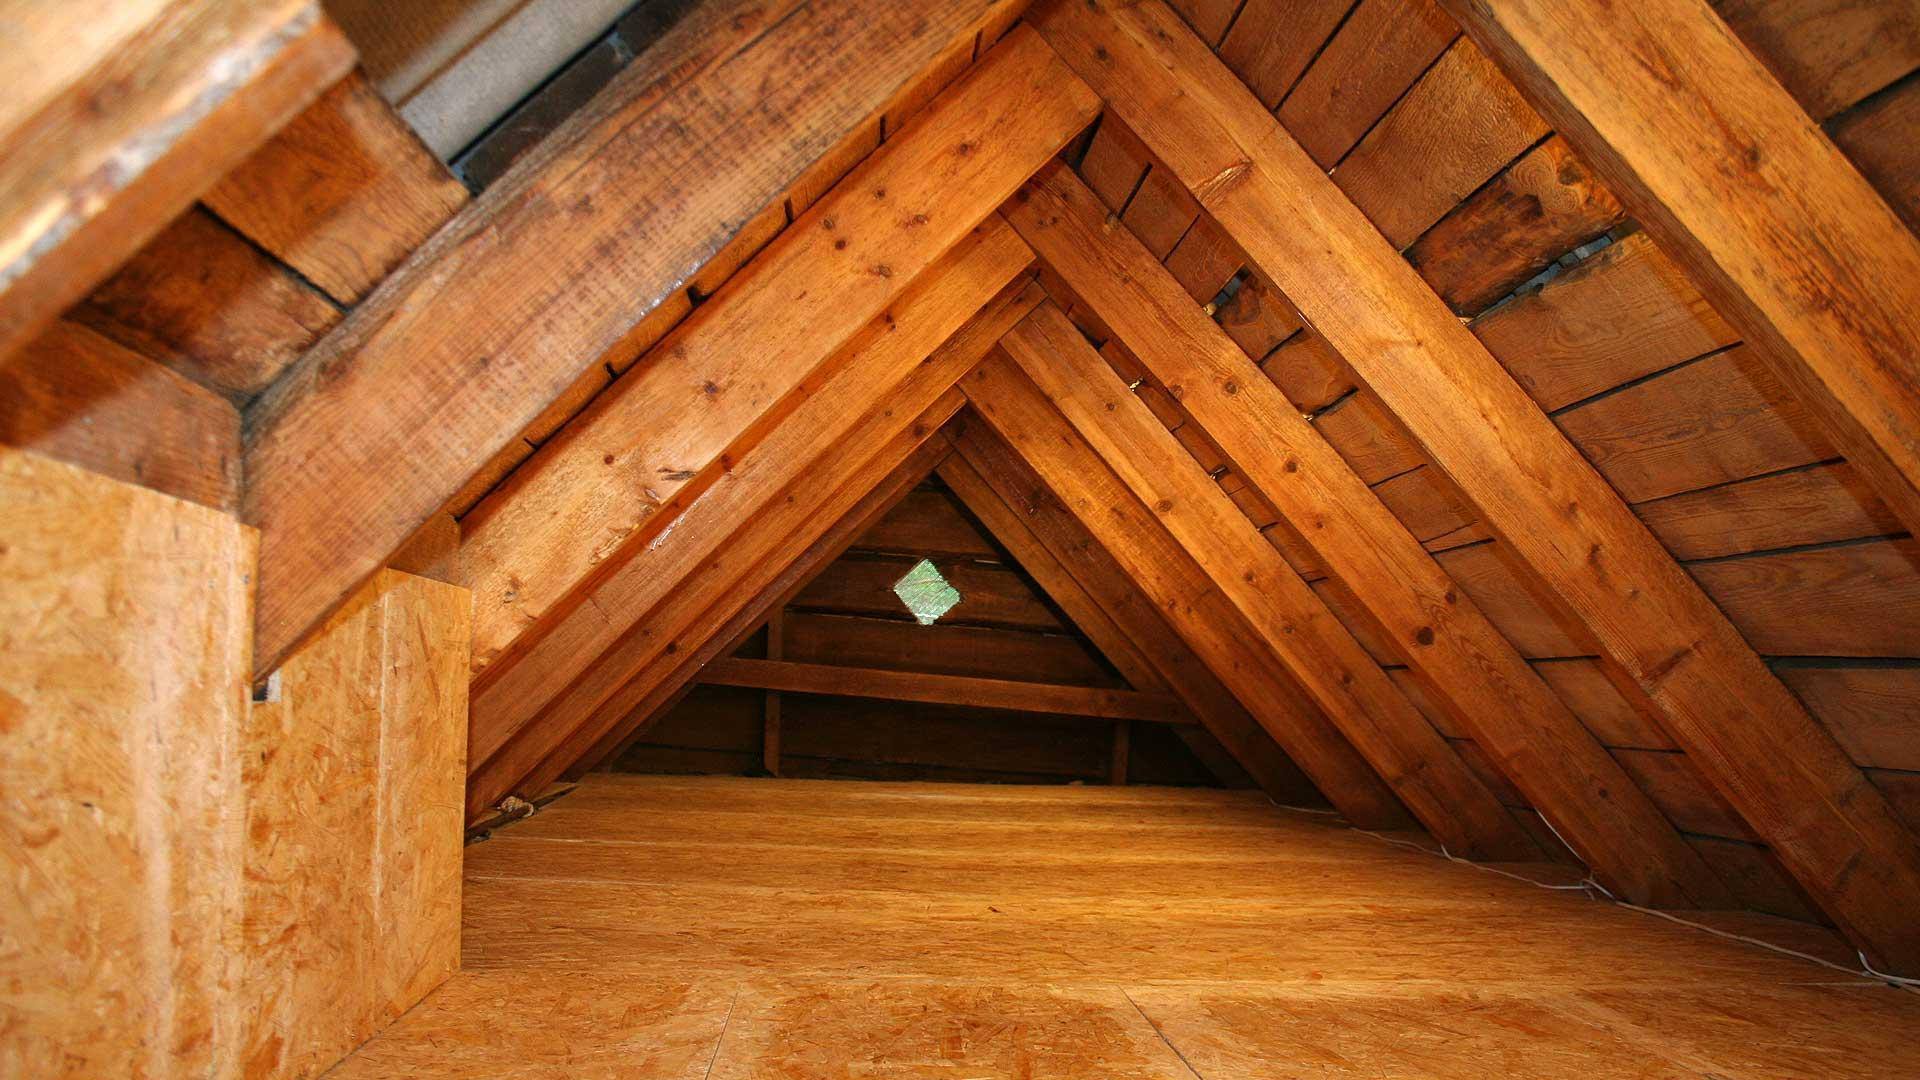
Assessing the Attic Space
Before running a dryer vent through the attic, it’s important to assess the attic space to determine the best route for the vent. Here are the key steps to follow during this assessment process:
- Locate a suitable area: Identify an area in the attic where the dryer vent can be easily routed to the exterior. Look for a space that is accessible and allows for a straight and efficient path.
- Consider the distance: Measure the distance from the location of the dryer in the laundry room to the area in the attic where the vent will exit. This will help you determine the length of the vent duct required.
- Check for obstructions: Inspect the attic for any potential obstructions such as beams, joists, electrical wiring, or plumbing pipes that could interfere with the placement of the vent. Make sure there is enough clearance to run the vent without causing damage or restriction of airflow.
- Assess the roof: Take a look at the roof structure to determine the best place for the vent to exit. Consider factors such as the slope of the roof, exposure to weather elements, and any existing vents or chimneys that could affect the placement. Ensure that the chosen spot is in a location that allows for proper ventilation and prevents moisture buildup.
- Check for access: Assess whether there is a dedicated access point in the attic for routing the vent. This could be an existing attic vent, an access hatch, or a designated area specifically designed for vent installations. Having easy access will make the installation process more straightforward.
By thoroughly assessing the attic space before starting the installation, you will have a clear understanding of the layout and any potential challenges. This will help you plan the route and ensure a smooth and efficient installation of the dryer vent.
Planning the Vent Route
Planning the vent route is a critical step when running a dryer vent through the attic. It involves determining the path the vent will take from the dryer to the exterior of the house. Here are the key factors to consider during the planning process:
- Straightest and shortest path: Aim for a vent route that is as straight and direct as possible. Avoid unnecessary bends or twists, as they can restrict airflow and increase the chances of lint buildup. The shorter the route, the better the dryer’s performance will be.
- Avoiding obstacles: Take note of any obstructions in the attic, such as beams, joists, or electrical wiring, that may hinder the vent route. Plan to go around or through these obstacles while maintaining the integrity of the vent system.
- Consider the roof structure: Assess the type of roof you have, whether it’s flat or sloped. For sloped roofs, plan for the vent to exit through an appropriate roof penetration, such as a vent cap or flashing, while ensuring it is properly sealed to prevent water leaks.
- Choose the correct duct size: Determine the size of the vent duct based on the specifications of your dryer. Follow the manufacturer’s guidelines to ensure the duct is adequately sized for optimal airflow and ventilation.
- Avoid vents near windows or doors: When planning the vent route, ensure that the vent termination point is away from windows, doors, or areas where the exhaust could potentially enter the house. This will prevent any unwanted odors or moisture from entering your living space.
- Consider insulation and air sealing: Insulate and air seal the vent ducts properly to prevent condensation and heat loss. Use insulation sleeves or duct insulators to maintain energy efficiency while protecting against moisture-related issues.
It’s important to create a detailed plan for the vent route before starting the installation. Sketch out the intended path, considering these factors, and make any necessary adjustments to ensure optimal airflow and safety. Taking the time to plan ahead will help facilitate a smooth and successful installation of the dryer vent through the attic.
Gathering the Necessary Tools and Materials
Before you begin the installation process of running a dryer vent through the attic, it’s essential to gather all the necessary tools and materials. Having everything on hand will ensure a smoother and more efficient installation. Here are the items you’ll need:
- Tape measure: Use a tape measure to accurately measure and mark the vent route, as well as determine the length of the vent duct needed.
- Pencil or marker: You’ll need a pencil or marker to mark the locations for cutting the vent holes and making guide marks along the vent route.
- Circular saw or reciprocating saw: A circular saw or reciprocating saw will be necessary for cutting the vent holes in the walls, ceilings, or roof as required.
- Hole saw or vent hole cutter: Depending on the diameter of the vent duct, you may need a hole saw or vent hole cutter specifically designed for cutting larger holes for the vent termination points.
- Power drill: A power drill will be needed to create pilot holes for the vent hole cutter or to drill screws for securing the vent duct.
- Screwdriver: Use a screwdriver to remove the existing vent cover, fasten screws, or secure the vent duct in the attic.
- Dryer vent duct: The vent duct is a crucial component that transports the exhaust air from the dryer to the exterior. Ensure you have the correct size and type of duct that complies with local building codes.
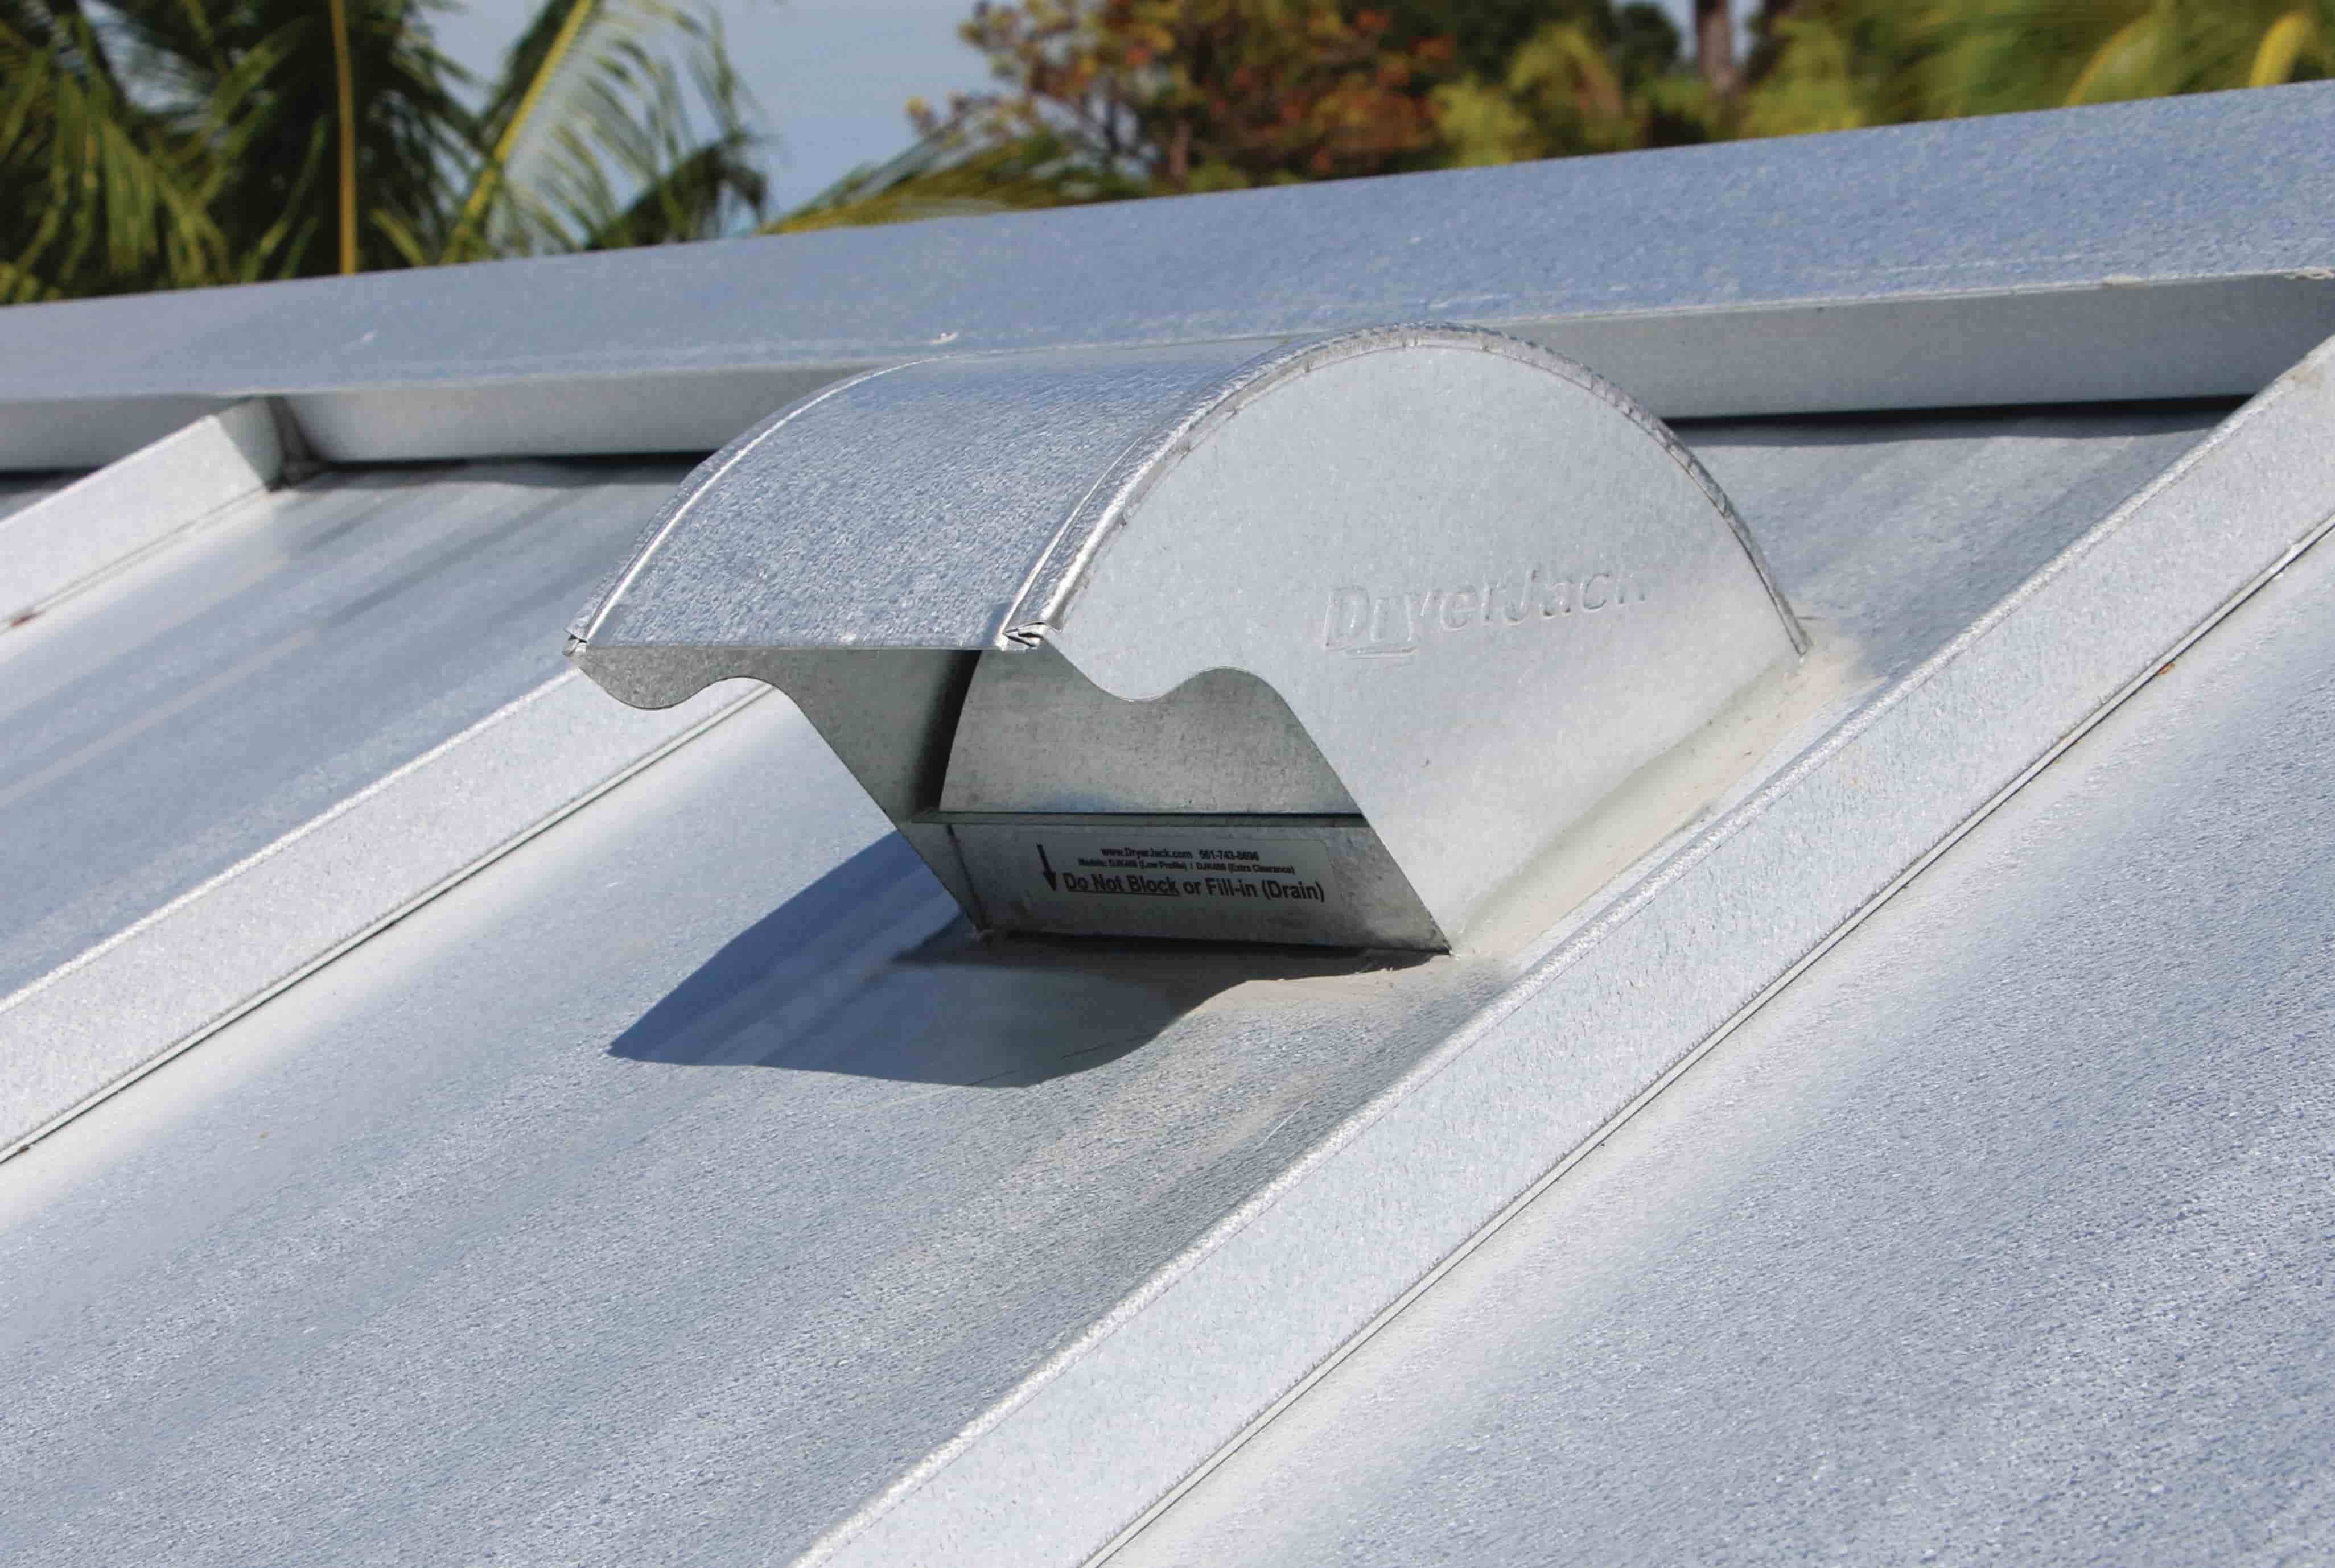
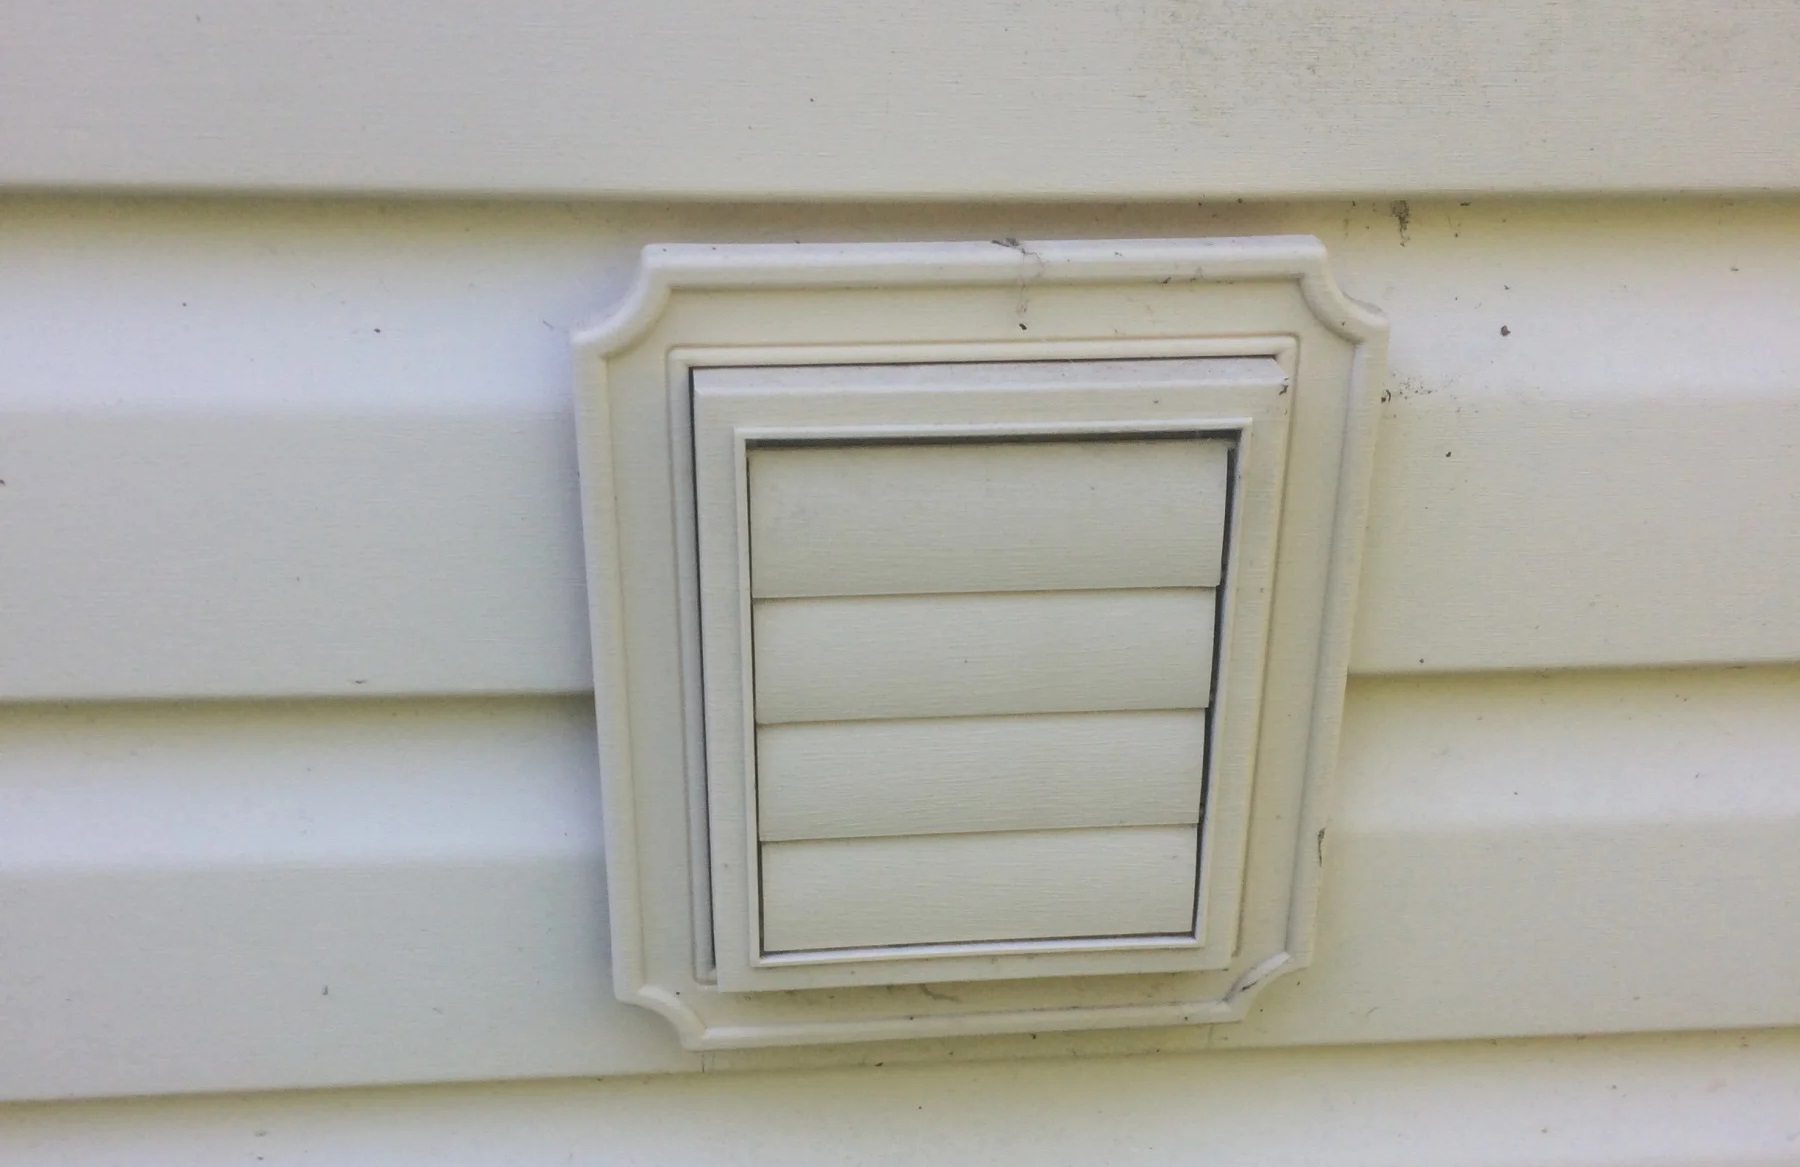
- Vent caps or terminations: Choose appropriate vent caps or terminations for both the exterior and attic ends of the vent. This will ensure proper ventilation and protection against weather elements.
- Duct tape or foil tape: Duct tape or foil tape can be used to seal joints and connections between duct sections, ensuring an airtight and secure installation.
- Insulation sleeves or duct insulators: Insulating the vent ducts helps prevent condensation and maintain energy efficiency. Insulation sleeves or duct insulators should be used to cover the ducts in areas where they pass through unconditioned spaces.
- Protective gear: Don’t forget to wear safety goggles, gloves, and a dust mask to protect yourself from any potential hazards during the installation process.
By gathering all the necessary tools and materials in advance, you’ll be well-prepared to tackle the installation of the dryer vent through the attic efficiently and effectively.
Read more: How To Vent A Dryer Through The Roof
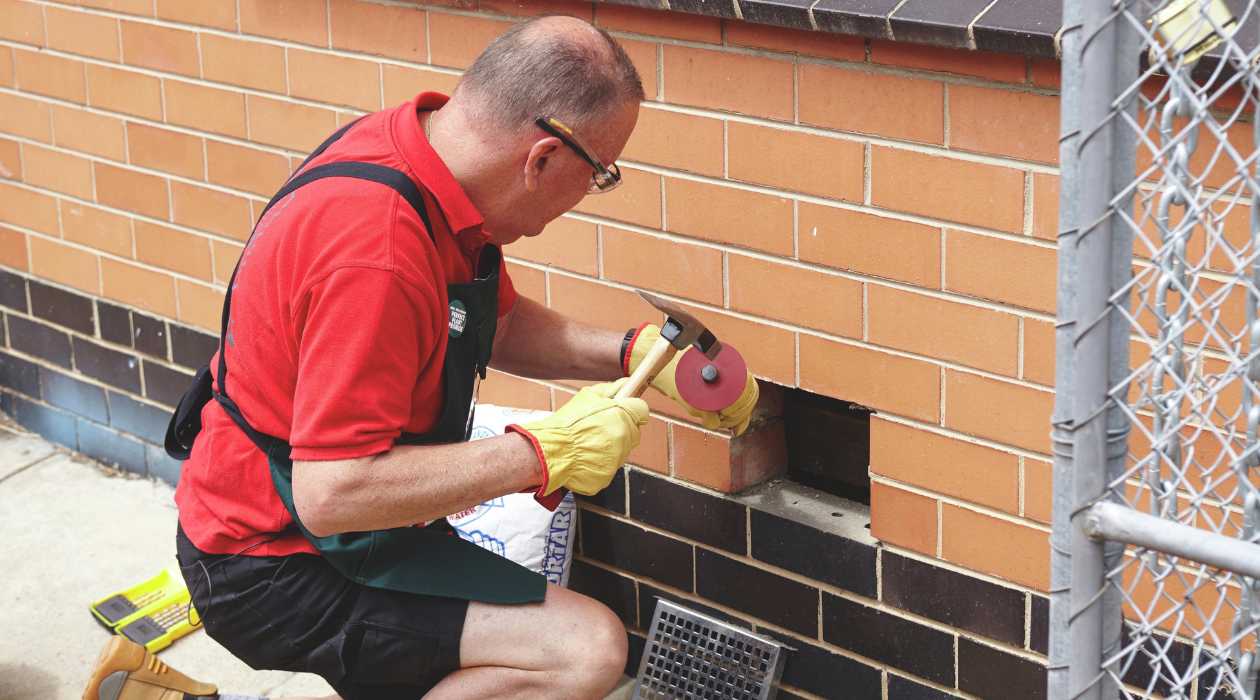
Removing the Existing Vent
Before installing a new dryer vent through the attic, it’s important to remove any existing vent that may be in place. Here are the steps to follow when removing the existing vent:
- Power off the dryer: Ensure the dryer is turned off and unplugged from the power source to avoid any accidents during the removal process.
- Remove the vent cover: Use a screwdriver to remove the screws or fasteners securing the vent cover on the exterior of the house. Carefully take off the cover and set it aside.
- Inspect the vent connection: Take a look at the area where the vent connects to the back of the dryer. This connection may involve a clamp or a flexible duct. Loosen the clamp or disconnect the duct to separate the vent from the dryer.
- Assess the vent duct pathway: Follow the vent duct from the dryer to the wall or ceiling where it exits. Inspect the duct for any signs of damage, such as kinks, holes, or excessive lint buildup. If necessary, clean the duct using a vent cleaning brush to remove any accumulated debris.
- Remove the vent duct: Unscrew or detach any fasteners securing the vent duct along its pathway. Slide the duct out of the wall or ceiling, taking care not to damage any surrounding structures in the process.
- Inspect the vent termination point: Once the vent duct is removed, inspect the wall or ceiling opening where the duct previously terminated. Check for any damage or deterioration and make any necessary repairs or replacements.
- Secure or cover the opening: If you’re not going to immediately install a new vent, make sure to secure or cover the opening. This will prevent any unwanted critters, debris, or weather elements from entering your home.
By carefully removing the existing vent, you’ll create a clean and clear path for the installation of the new dryer vent through the attic. Take your time to inspect the vent components and address any issues or repairs before proceeding with the installation process.
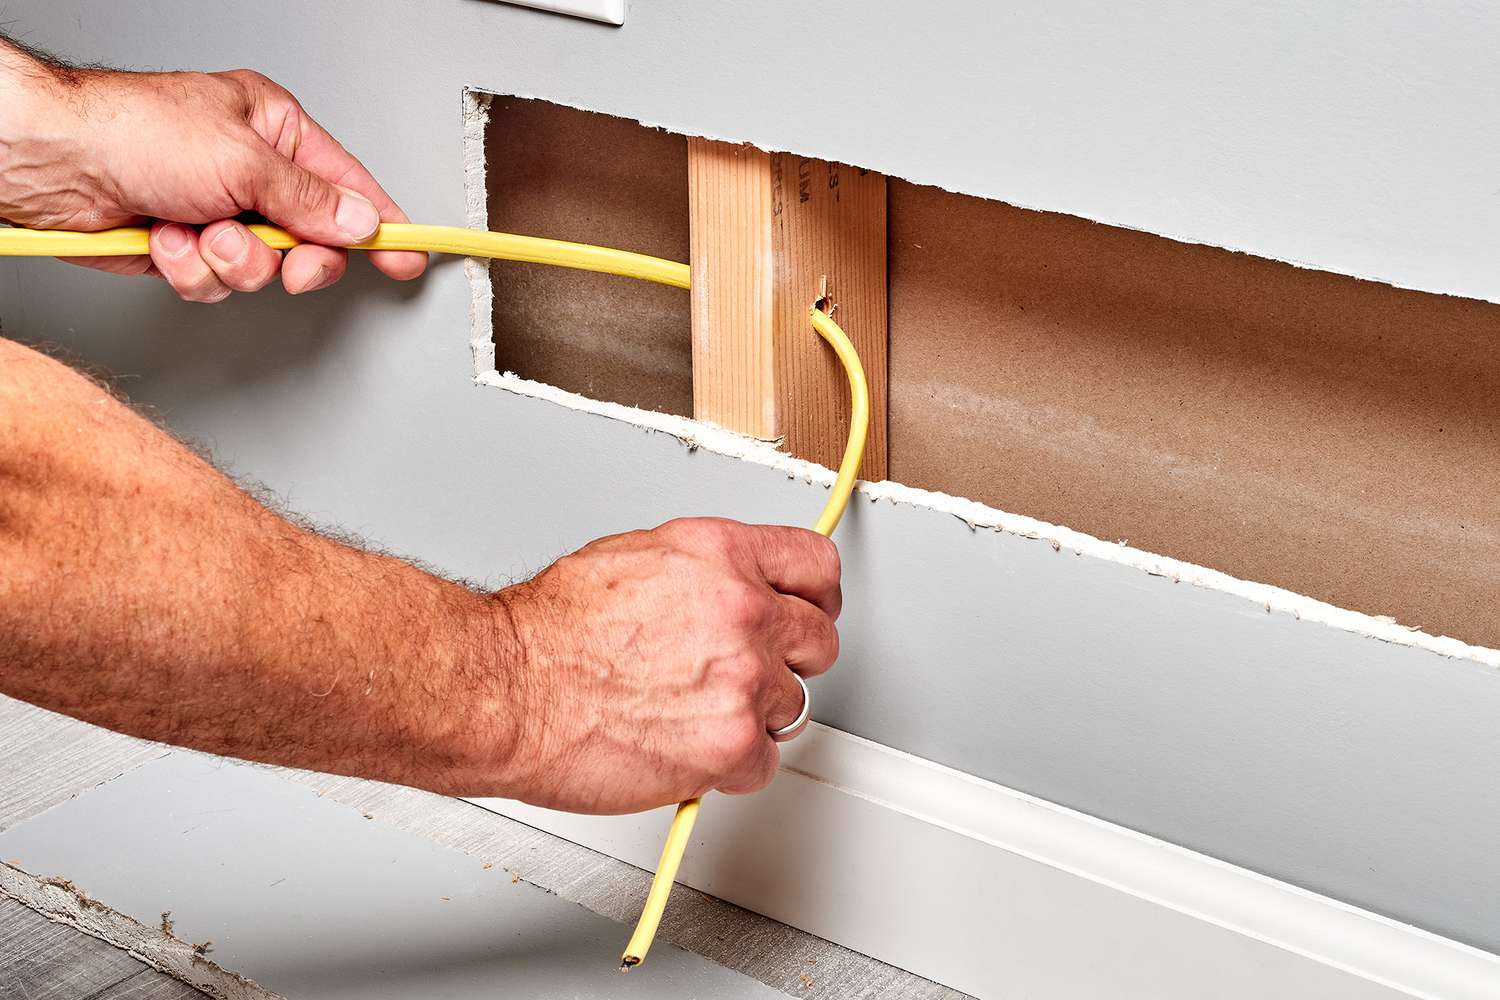
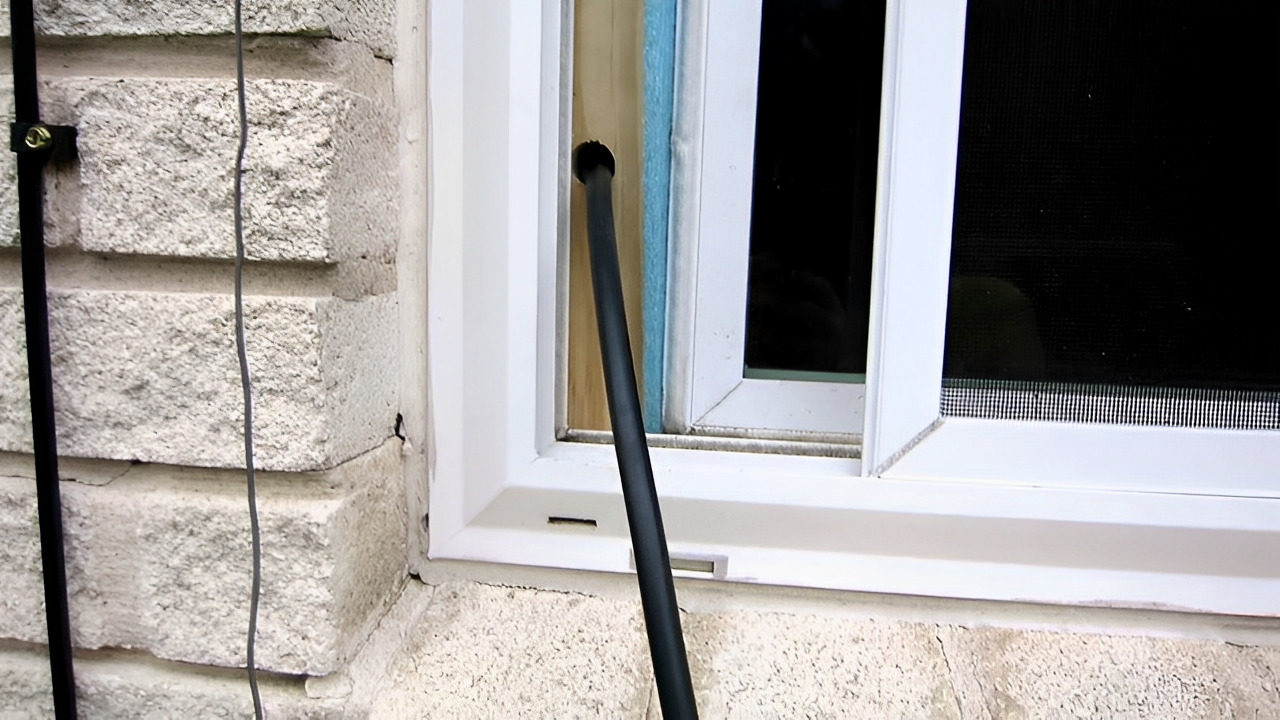
Measuring and Cutting the Vent Hole
Once the existing vent has been removed, the next step in running a dryer vent through the attic is measuring and cutting the vent hole. This hole will provide the opening for the new vent duct to pass through the wall, ceiling, or roof. Here’s how to do it:
- Decide on the best location: Determine the most suitable location for the vent hole, considering factors such as the proximity to the dryer, the accessibility in the attic, and any existing obstructions or structural elements.
- Measure the duct diameter: Measure the diameter of the vent duct you’re using. This will help determine the size of the vent hole you need to cut.
- Mark the center of the vent hole: Use a pencil or marker to mark the center of the vent hole on the wall, ceiling, or roof. Ensure the mark is level and in the desired location.
- Use appropriate tools: Choose the appropriate tools for cutting the vent hole based on the material you’re working with. For walls and ceilings, a reciprocating saw or circular saw may be suitable. For roofs, a hole saw or vent hole cutter is typically used.
- Cut the vent hole: Carefully follow the marked guide and use the chosen tool to cut the vent hole. Take your time and make precise cuts, ensuring the hole is clean and free of any debris.
- Inspect the cut: After cutting the vent hole, inspect it for any rough edges or burrs. Use sandpaper or a file to smooth out any sharp edges that could damage or restrict the vent duct.
It’s important to take accurate measurements and make clean cuts when creating the vent hole. A properly-sized and well-cut hole will ensure a secure and efficient installation of the vent duct through the attic. Remember to wear appropriate safety gear and follow all safety precautions when using power tools.
With the vent hole in place, you’re now ready to move on to the next steps of installing the vent duct and securing it in the attic.
Make sure to use rigid metal ducting to run the dryer vent through the attic to minimize the risk of lint buildup and potential fire hazards. Insulate the ducting to prevent condensation and energy loss.
Installing the Vent Duct
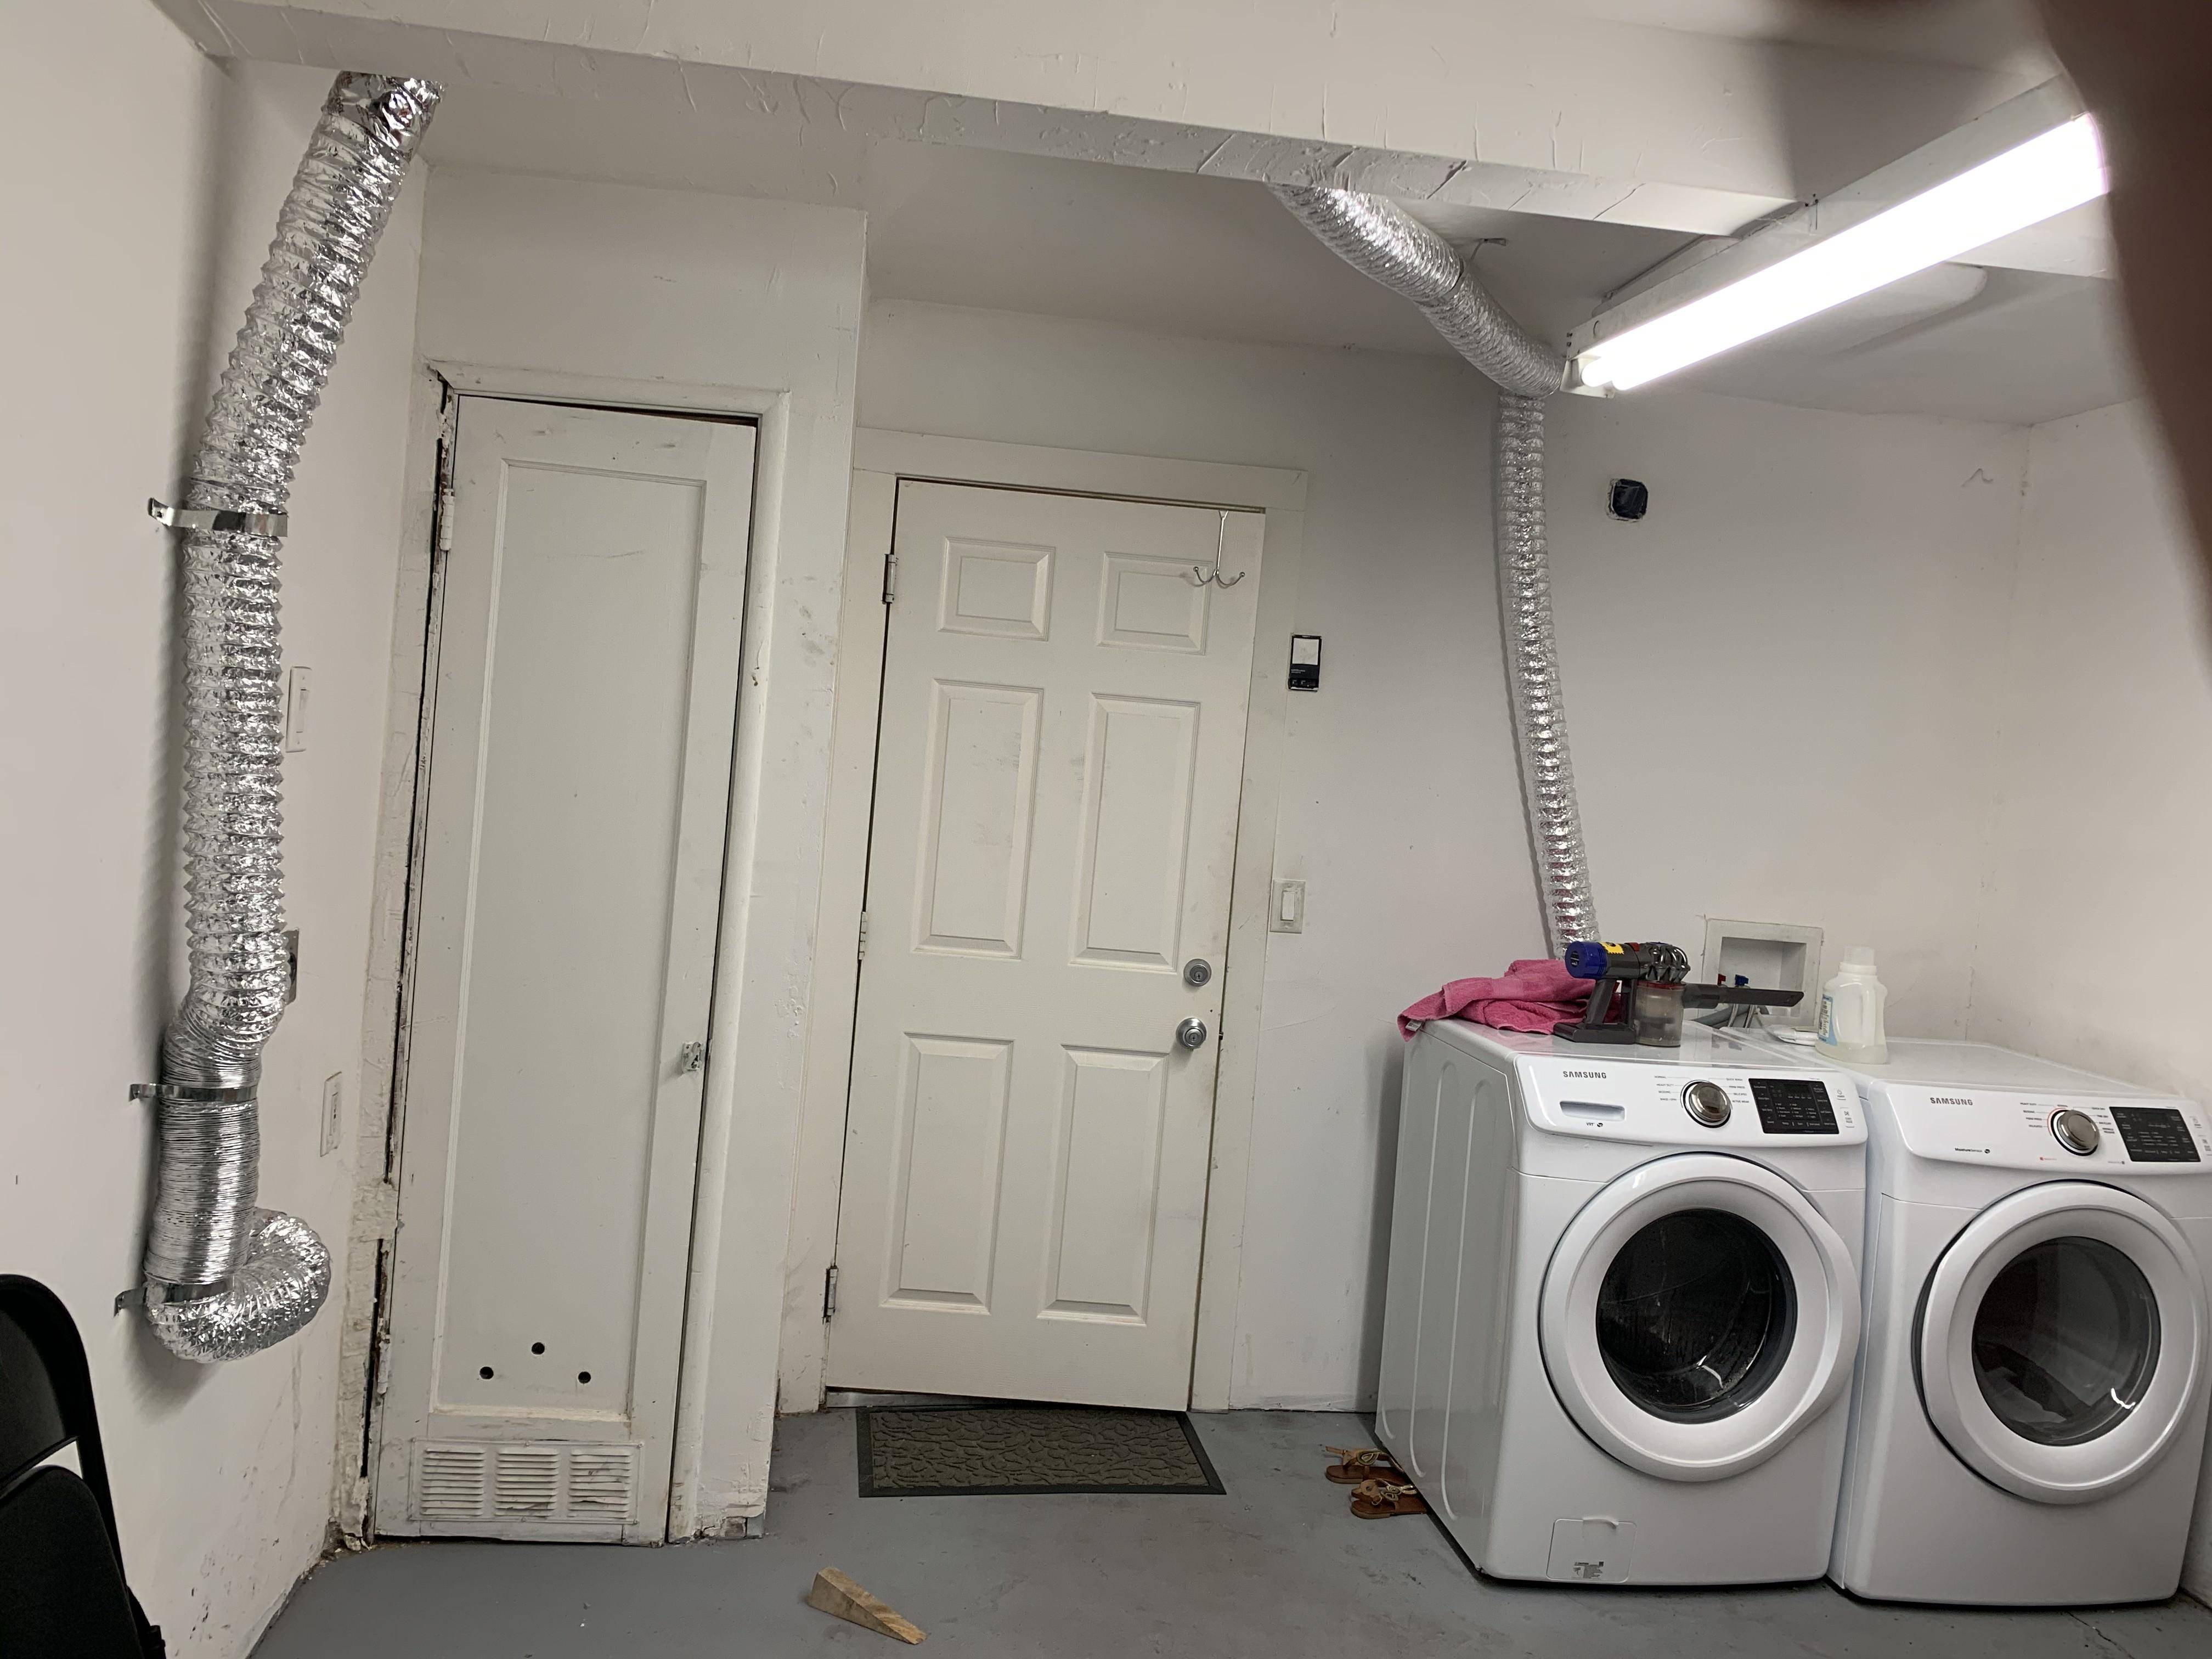
After measuring and cutting the vent hole, the next crucial step in running a dryer vent through the attic is installing the vent duct. This duct will route the exhaust air from the dryer to the exterior, ensuring proper ventilation. Here’s how to install the vent duct:
- Position the vent duct: Position the vent duct at the back of the dryer, ensuring it is securely attached. Use a clamp or duct tape to fasten the duct to the dryer’s vent outlet. Make sure the connection is tight to prevent any air leaks.
- Feed the duct through the vent hole: Carefully guide the other end of the vent duct through the vent hole in the wall, ceiling, or roof. Ensure that the duct is properly aligned and centered in the hole.
- Secure the duct: Once the duct is through the vent hole, secure it in place using appropriate fasteners or clamps. This will prevent the duct from shifting or coming loose over time.
- Connect additional duct sections: If the length of your vent duct requires multiple sections, connect them securely using duct connectors or metal foil tape. Ensure the connections are airtight to prevent any leaks.
- Extend the duct to the vent termination point: Extend the vent duct through the attic, ensuring it follows the planned route. Avoid any sharp bends or kinks that could restrict airflow. Use adjustable elbows or flexible ducts as needed to navigate around obstacles.
- Secure the duct in the attic: Use straps or hangers specifically designed for securing ductwork to fasten the vent duct in the attic. Ensure the duct is well-supported and anchored in place to prevent any sagging or movement.
- Inspect for proper alignment and clearance: Once the vent duct is installed, inspect it to ensure it is aligned correctly and has sufficient clearance from any surrounding structures. Make any necessary adjustments to ensure optimal airflow and prevent any potential obstructions.
It’s important to follow the manufacturer’s guidelines and local building codes when installing the vent duct. Be sure to use the appropriate materials and techniques to ensure a secure and efficient installation.
With the vent duct properly installed, you’re one step closer to completing the dryer vent installation through the attic. The next step is securing the vent duct in the attic to ensure its stability and proper function.
Securing the Vent Duct in the Attic
Securing the vent duct in the attic is a vital step in running a dryer vent through the attic. Properly securing the duct ensures its stability, prevents sagging or movement, and promotes optimal airflow. Here’s how to secure the vent duct in the attic:
- Use duct straps: Duct straps are commonly used to secure ductwork in place. Wrap a duct strap around the vent duct at regular intervals (typically every 4-6 feet) and secure it tightly using screws or nails. Ensure the duct straps are tight enough to hold the duct firmly but not so tight as to crush or deform it.
- Attach hangers or brackets: Use hangers or brackets specifically designed for supporting ductwork. Attach them to the rafters or ceiling joists in the attic and then secure the vent duct to these hangers or brackets using screws or adjustable metal straps.
- Avoid sharp bends or kinks: Ensure the vent duct is properly aligned and doesn’t have any sharp bends or kinks that could restrict airflow. Use adjustable elbows or flexible ducts as needed to navigate around obstacles without compromising proper airflow.
- Leave room for expansion and contraction: Allow some space between the vent duct and any surrounding structures to accommodate thermal expansion and contraction. This will prevent the duct from becoming stressed or damaged over time.
- Avoid touching other objects: Ensure the vent duct is not in contact with any electrical wiring, plumbing pipes, or combustible materials in the attic. Maintain proper clearances to prevent any potential hazards or obstructions.
- Inspect for proper alignment: After securing the vent duct, inspect it to ensure it is properly aligned and level. Make any necessary adjustments to ensure that the duct follows an optimal and efficient path towards the vent termination point.
- Check for any sagging or movement: Periodically inspect the vent duct in the attic to ensure there is no sagging or movement. If you notice any issues, readjust or reinforce the supports to maintain the stability and integrity of the vent duct.
By securely fastening and supporting the vent duct in the attic, you can ensure proper airflow, prevent any damage to the duct, and maintain the efficiency of your dryer. Taking the time to properly secure the duct will contribute to a safe and effective installation of the dryer vent through the attic.
The next step is connecting the vent to the dryer, which will allow for the proper exhaust of air from the appliance.
Read more: How To Install A Dryer Vent Through Brick
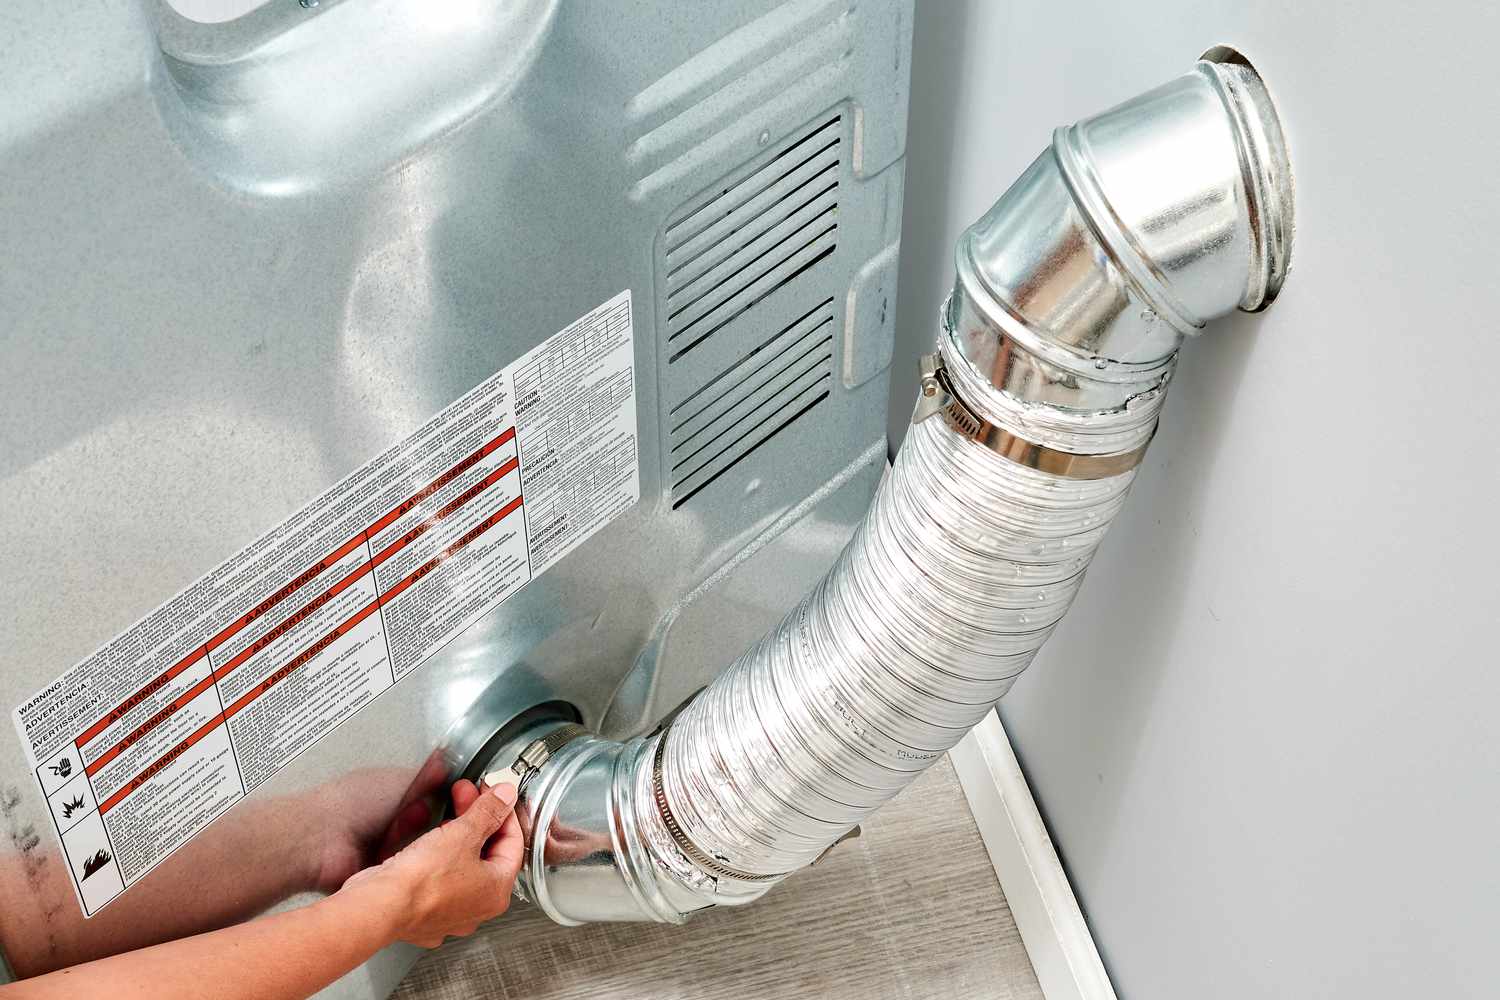
Connecting the Vent to the Dryer
Connecting the vent duct to the dryer is a crucial step in running a dryer vent through the attic. This connection ensures that the exhaust air from the dryer is properly directed out of your home. Here’s how to connect the vent to the dryer:
- Position the dryer: Move the dryer into its final position, ensuring that it is close to the vent duct opening in the wall or floor.
- Secure the vent to the dryer: Attach the vent duct to the dryer’s vent outlet using a clamp or duct tape. Slide the duct over the outlet and tighten the clamp or secure it tightly with duct tape. Ensure a snug and secure connection to prevent any air leaks.
- Align the duct: Check that the connected duct is properly aligned and does not have any kinks or obstructions that could impede airflow. Straighten the duct as needed and ensure it has a clear path to the vent hole.
- Test for air leaks: Once the duct is connected, test for any air leaks. Run the dryer for a few minutes and feel around the connection to check for any escaping air. If you detect any leaks, tighten the clamp or apply additional duct tape to seal the connection.
- Ensure proper clearance: Make sure that the vent duct and the dryer have a sufficient clearance from any walls, furniture, or other objects. This ensures proper airflow and minimizes the risk of restrictions or blockages.
- Secure the duct at the vent termination point: At the exterior vent termination point, ensure that the duct is properly secured. Fasten the duct to the vent cap or termination using screws or clamps to prevent it from coming loose or being affected by wind or weather.
- Inspect the entire connection: Once the connection is complete, inspect the entire length of the vent duct from the dryer to the vent termination point. Check for any signs of damage, loose connections, or potential issues that may need attention.
By properly connecting the vent to the dryer, you ensure that the exhaust air is directed outside, minimizing the risk of lint buildup and improving the overall efficiency of your dryer. Regularly inspect and maintain this connection to ensure its integrity and prevent any potential issues.
The next step is to insulate the vent duct to maintain energy efficiency and prevent condensation.
Insulating the Vent Duct
Insulating the vent duct is an important step in running a dryer vent through the attic. Insulation helps to prevent heat loss, maintain energy efficiency, and minimize the risk of condensation and moisture-related issues. Here’s how to insulate the vent duct:
- Determine the insulation type: Choose insulation sleeves or duct insulators suitable for your application. Look for insulation specifically designed for ductwork and rated for high-temperature environments.
- Measure and cut the insulation: Measure the length of the vent duct that needs to be insulated. Cut the insulation sleeves or duct insulators to the appropriate size using a sharp utility knife or scissors.
- Wrap the insulation around the duct: Wrap the insulation sleeves or duct insulators around the vent duct, starting at one end and moving towards the other. Ensure that the insulation is wrapped tightly to prevent gaps or sagging.
- Secure the insulation: Use duct tape or foil tape to secure the insulation in place. Wrap the tape around the insulation at regular intervals to ensure it stays in position. Make sure all seams and edges are properly sealed.
- Seal any gaps or joints: Inspect the insulation and duct for any gaps or joints that need sealing. Use duct tape or foil tape to seal these areas and ensure an airtight and insulated assembly.
- Avoid covering the vent termination point: Ensure that the insulation does not cover the vent termination point on the exterior of your house. Leave enough clearance for proper ventilation and to prevent any potential obstructions.
- Inspect the insulation regularly: Periodically inspect the insulation to check for any signs of damage, deterioration, or displacement. Repair or replace any insulation that shows signs of wear to maintain its effectiveness.
By properly insulating the vent duct, you can minimize heat loss, reduce condensation risks, and ensure better energy efficiency. Insulating the duct also helps to prevent the exterior of the duct from becoming too cold during colder seasons, reducing the potential for moisture condensation.
Remember, maintaining insulation integrity is important for the efficiency and safety of your dryer vent system. Regularly inspect and maintain the insulation to ensure its effectiveness over time.
The final step is to test the vent system to confirm its proper operation.
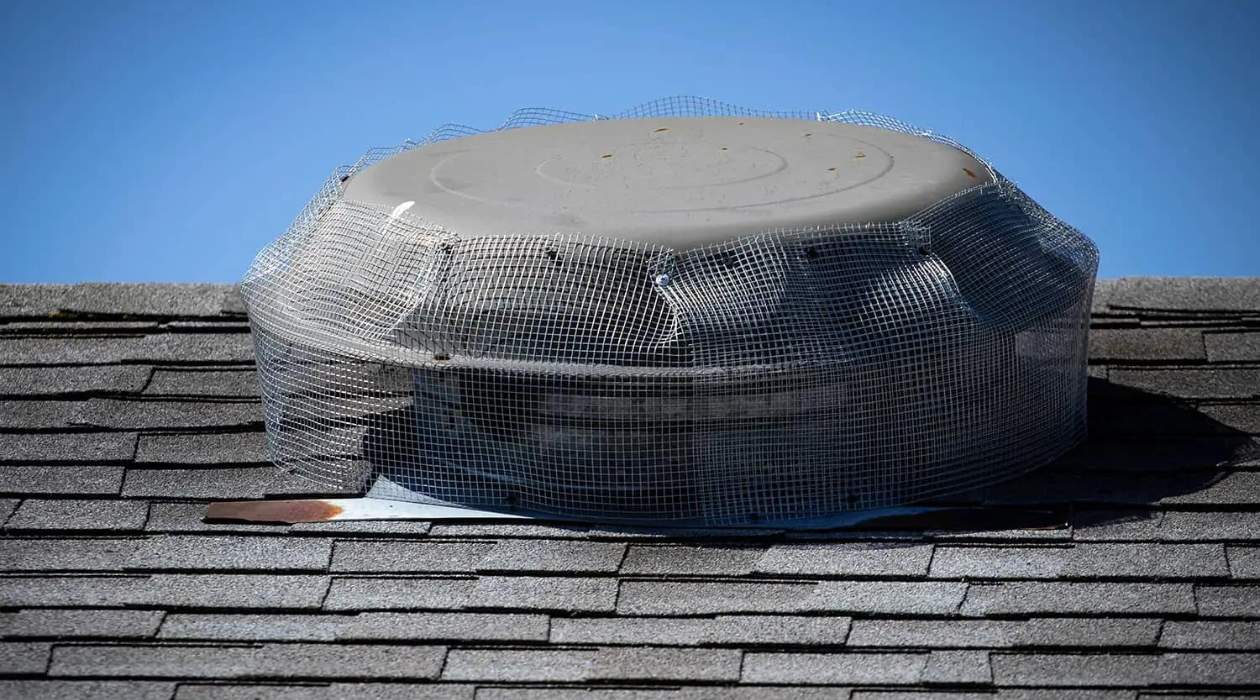
Testing the Vent System
Testing the vent system is the final step in running a dryer vent through the attic. Testing ensures that the vent is properly installed, adequately ventilating the dryer, and effectively expelling the exhaust air to the exterior. Here’s how to test the vent system:
- Ensure the dryer is connected and ready: Make sure the dryer is properly connected to the vent duct, and the electrical and gas connections are secure. Ensure the lint filter is clean before proceeding.
- Turn on the dryer: Turn on the dryer and run a full cycle, ensuring it operates normally. Pay attention to any unusual noises, vibrations, or malfunctions that could indicate an issue.
- Check for proper airflow: Place your hand near the vent termination point outside your home. You should feel a steady flow of warm air being expelled. If there is weak or no airflow, it indicates a potential blockage or restriction in the vent system.
- Inspect the vent termination point: Take a closer look at the vent termination point. Ensure that the flap or louvers of the vent cap are opening properly when the dryer is in operation. If they’re stuck or not functioning correctly, clean or replace the vent cap to ensure proper ventilation.
- Monitor the dryer temperature: During operation, monitor the temperature of the dryer. It should stay within the manufacturer’s recommended range. If the dryer becomes excessively hot, it could be a sign of improper ventilation or a clogged vent.
- Check for signs of moisture or lint buildup: Inspect the area around the vent termination point and inside the attic for any signs of moisture or lint accumulation. Excessive moisture or lint can indicate inadequate ventilation or a need for further inspection and cleaning.
- Consider professional inspection and maintenance: It’s a good idea to have a professional inspect and clean the vent system regularly, typically once a year. They can thoroughly clean the vent ducts, check for any potential issues or damage, and ensure the system is operating at its best.
Testing the vent system ensures that it is effectively removing moisture and lint from the dryer and expelling them outside your home. Regular testing and maintenance will help prevent potential hazards, improve the efficiency of your dryer, and prolong its lifespan.
If you notice any issues during testing or have concerns about the performance of your dryer vent system, consult a professional to address any necessary repairs or adjustments.
Congratulations! You have successfully completed the installation and testing of your dryer vent system running through the attic. Now, you can enjoy a properly functioning and efficient dryer while maintaining a safe and well-ventilated laundry area.
Conclusion
Running a dryer vent through the attic can be a challenging but necessary solution when your laundry room is not located on an exterior wall. By following the steps outlined in this article, you can successfully install a dryer vent through the attic, ensuring proper ventilation and minimizing the risk of mold and other related issues.
Throughout the installation process, it’s essential to prioritize safety by adhering to building codes, using fire-resistant materials, and regularly inspecting and cleaning the vent system. Proper insulation, secure attachment of the vent duct, and avoiding obstructions are also critical for an effective and efficient setup.
Gathering the necessary tools and materials, accurately assessing the attic space, and carefully planning the vent route are crucial steps that contribute to a smooth installation. By measuring and cutting the vent hole precisely, installing and securing the vent duct correctly, and connecting it to the dryer properly, you can ensure a reliable and functional dryer vent system.
Insulating the vent duct helps prevent heat loss, maintain energy efficiency, and minimize condensation. Regularly monitoring and testing the vent system is necessary to ensure proper airflow, check for blockages, and ensure the efficient operation of your dryer. Professional inspection and maintenance can provide an extra layer of assurance and help keep your vent system in optimal condition.
By successfully running a dryer vent through the attic, you can enjoy safe and efficient drying of your laundry without compromising on proper ventilation. Remember to follow the manufacturer’s guidelines, local building codes, and safety precautions throughout the installation and maintenance process.
With this comprehensive guide, you are now equipped with the knowledge and steps needed to run a dryer vent through the attic. So go ahead, embark on your dryer vent installation project, and enjoy the benefits of a well-ventilated and efficient laundry area.
Frequently Asked Questions about How To Run A Dryer Vent Through The Attic
Was this page helpful?
At Storables.com, we guarantee accurate and reliable information. Our content, validated by Expert Board Contributors, is crafted following stringent Editorial Policies. We're committed to providing you with well-researched, expert-backed insights for all your informational needs.


0 thoughts on “How To Run A Dryer Vent Through The Attic”