Articles
How To Run Electrical Wire Through Walls
Modified: October 20, 2024
Learn how to run electrical wire through walls with our informative articles. Find step-by-step guides and expert tips for a successful installation.
(Many of the links in this article redirect to a specific reviewed product. Your purchase of these products through affiliate links helps to generate commission for Storables.com, at no extra cost. Learn more)
Introduction
Running electrical wire through walls is a necessary task when it comes to installing or extending electrical outlets, switches, or other electrical fixtures. While it may initially seem like a daunting and complex process, with the right tools, materials, and knowledge, you can safely and efficiently run electrical wire through walls in your home.
Before embarking on this project, it’s crucial to prioritize safety. Make sure you have a basic understanding of electrical systems and follow all local building codes and regulations. If you are unsure or uncomfortable working with electricity, it is always best to consult a professional electrician.
In this article, we will provide a step-by-step guide on how to run electrical wire through walls. We will cover the tools and materials needed, how to assess and plan the wire path, turning off the power, drilling holes, fishing the wire through the walls, installing electrical boxes, and connecting the wire to outlets and switches. By following these steps, you’ll be able to safely and effectively complete this electrical project.
Remember to always take the necessary precautions and work methodically. Safety should be your utmost priority, whether you are a seasoned DIYer or a beginner. So let’s dive in and learn how to run electrical wire through walls!
Key Takeaways:
- Planning and preparation are crucial when running electrical wire through walls. From assessing the wire path to turning off the power and making secure connections, attention to detail and safety measures are essential for a successful installation.
- Testing and ensuring safety are vital steps in the electrical installation process. From polarity tests to inspecting for visible damage, thorough testing and professional inspection, if needed, can provide peace of mind and a safe electrical system.
Read more: How To Fish Electrical Wire Through Walls
Tools and Materials Needed
Before you start running electrical wire through walls, gather the necessary tools and materials. Having these items on hand will make the process smoother and more efficient. Here is a list of the essential tools and materials:
- Measuring tape: This will help you measure distances accurately.
- Stud finder: Used to locate the studs in the wall, which will help determine the path for running the wire.
- Drill: A corded or cordless drill with drill bits is needed for drilling holes through the walls.
- Fish tape or wire coat hanger: Used to guide the electrical wire through the drilled holes.
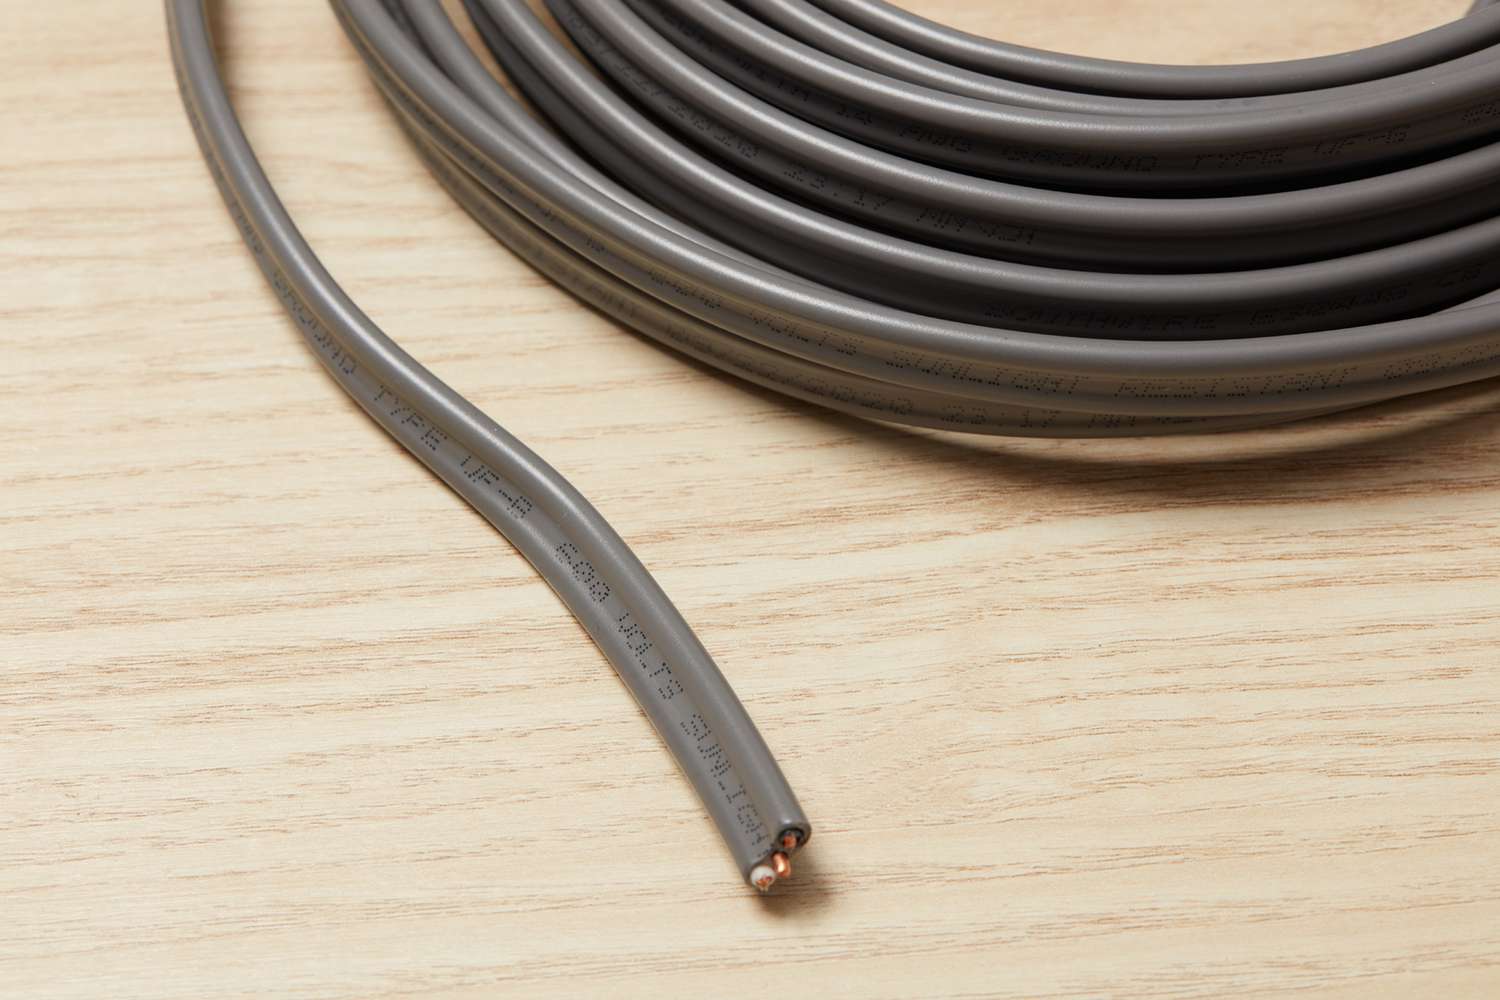
- Electrical wire: Choose the appropriate gauge and type of wire for your specific project.
- Electrical boxes: These boxes provide a secure enclosure for electrical connections.
- Screwdriver: Necessary for attaching electrical boxes to the wall.
- Wire cutters/strippers: Used to cut and strip the insulation off the electrical wire.
- Voltage tester: Used to ensure the power is off before working with the electrical wiring.
- Masking tape: Helpful for marking the drill holes and labeling the wires.
- Level: Ensures that the electrical boxes are mounted correctly and level.
- Pencil or marker: Used for marking measurements and making notes on the walls.
- Wire nuts: These connectors are used to join wires and ensure secure connections.
- Electrical tape: Used to insulate exposed wires and provide added protection.
Additionally, you may need a ladder or step stool, depending on the height of the wall you’re working on. It’s also important to have safety equipment such as gloves and safety glasses to protect yourself during the process.
By having these tools and materials readily available, you’ll be well-prepared to start running electrical wire through walls. Make sure to gather everything before you begin the project to avoid interruptions and delays.
Assessing and Planning the Path for Electrical Wire
Before you start drilling holes and running electrical wire through walls, it’s essential to carefully assess and plan the path for the wire. This step will ensure that you take into consideration any obstacles, such as studs or other wiring, and determine the most efficient and safe route.
Here are the steps to assess and plan the path for electrical wire:
- Identify the desired location: Determine where you want the electrical outlet or switch to be placed. Consider factors such as convenience and accessibility in deciding the location.
- Check for existing wiring and obstacles: Use a stud finder to locate any existing electrical wiring or obstacles behind the wall. This will help you avoid drilling into them and potentially causing damage.
- Plan the route: Map out the path that the wire will take from the electrical panel to the desired outlet or switch location. Take into account the shortest and most direct route, avoiding any potential obstacles.
- Measure and mark the stud locations: Use a measuring tape to mark the locations of the studs along the planned wire path. This will help you determine where to drill the holes and avoid hitting the studs when fishing the wire through the wall.
- Consider the electrical code requirements: Research and ensure compliance with local electrical codes and regulations regarding wire placement and spacing. This is crucial for the safety and functionality of the electrical system.
- Create a detailed plan: Draw a diagram or make notes on the wall to visualize and document the planned wire path. This will serve as a reference during the installation process.
By meticulously assessing and planning the path for the electrical wire, you can minimize the chances of errors and complications during the installation process. Taking the time to thoroughly plan will make the actual wire running process more efficient and successful. Remember to always prioritize safety and adhere to electrical codes and regulations.
Turning off the Power
Before starting any electrical work, it is absolutely crucial to turn off the power to the circuit you will be working on. This step ensures your safety and prevents electrical shock or other accidents. Follow these steps to turn off the power:
- Identify the correct circuit: Locate the circuit breaker or fuse box that controls the circuit you will be working on. It is important to isolate the specific circuit to avoid disrupting power to other areas of your home.
- Switch off the circuit breaker: Open the circuit breaker panel and find the corresponding circuit breaker for the circuit you are working on. Flip the switch to the “Off” position.
- Test the power: With the circuit breaker switched off, use a voltage tester to confirm that there is no power running through the wires. This step is essential to ensure your safety before proceeding with any electrical work.
- Lock the circuit breaker: To prevent accidental switching of the circuit breaker, you can secure it with a lockout device or padlock. This precautionary measure adds an extra layer of safety while you work.
- Double-check the power: It’s always a good idea to verify once again that the power is indeed turned off before continuing with the installation. Use the voltage tester to test the circuit and ensure there is no electrical current running through the wires.
By diligently following these steps, you can safely and confidently work on the electrical wiring without any risk of electric shock or injury. It’s important to remember that electricity is extremely dangerous, and only a qualified professional should handle electrical work if you are unsure or uncomfortable in any way.
Once you have confirmed that the power is off, you can proceed with drilling holes and running the electrical wire through the walls. Always exercise caution and wear appropriate safety gear throughout the process.
Drilling Holes for Wire Path
Once you have planned the path for the electrical wire and ensured that the power is turned off, the next step is to drill holes through the walls for the wire to pass through. Drilling holes requires precision and care to avoid damaging the wall or other components behind it. Here is a step-by-step guide to drilling holes for the wire path:
- Locate the stud: Use a stud finder to locate the studs within the wall along your planned wire path. This will help you avoid drilling into them and ensure that the holes are positioned correctly.
- Mark the hole locations: Use a pencil or marker to mark the spots where the holes will be drilled. Take note of the stud locations, as you will want to drill the holes in between them.
- Choose the drill bit: Select a drill bit size that matches the diameter of the electrical wire you will be running. It’s important to choose a bit that is wide enough to accommodate the wire without causing any damage or friction.
- Drill the holes: Attach the appropriate drill bit to your drill, making sure it is securely tightened. Position the drill on one of the marked hole locations and apply steady pressure to drill through the wall. Repeat this process for all the marked hole locations.
- Clear debris: After drilling each hole, use a utility knife or a small brush to clear away any debris or drywall dust that may have accumulated. This will ensure a clear and clean path for the wire to pass through.
- Protect the wires: If you are drilling through multiple layers of drywall or passing the wire through a horizontal stud, it’s a good idea to use protective bushings. These plastic or rubber sleeves will prevent the wire from rubbing or getting damaged as it moves through the drilled holes.
Remember to be gentle and maintain control over the drill to prevent any unnecessary damage to the wall or the surrounding area. Take your time and be mindful of the depth of each hole to avoid accidentally drilling through any hidden wiring or plumbing.
Once the holes are drilled, you are ready to start fishing the electrical wire through the walls and completing the installation process. Take caution to handle the wire carefully to prevent any kinks or damage.
When running electrical wire through walls, always use the correct gauge wire for the circuit and ensure it is secured properly to prevent damage or hazards.
Read more: How To Run Electrical Wire On Concrete Wall
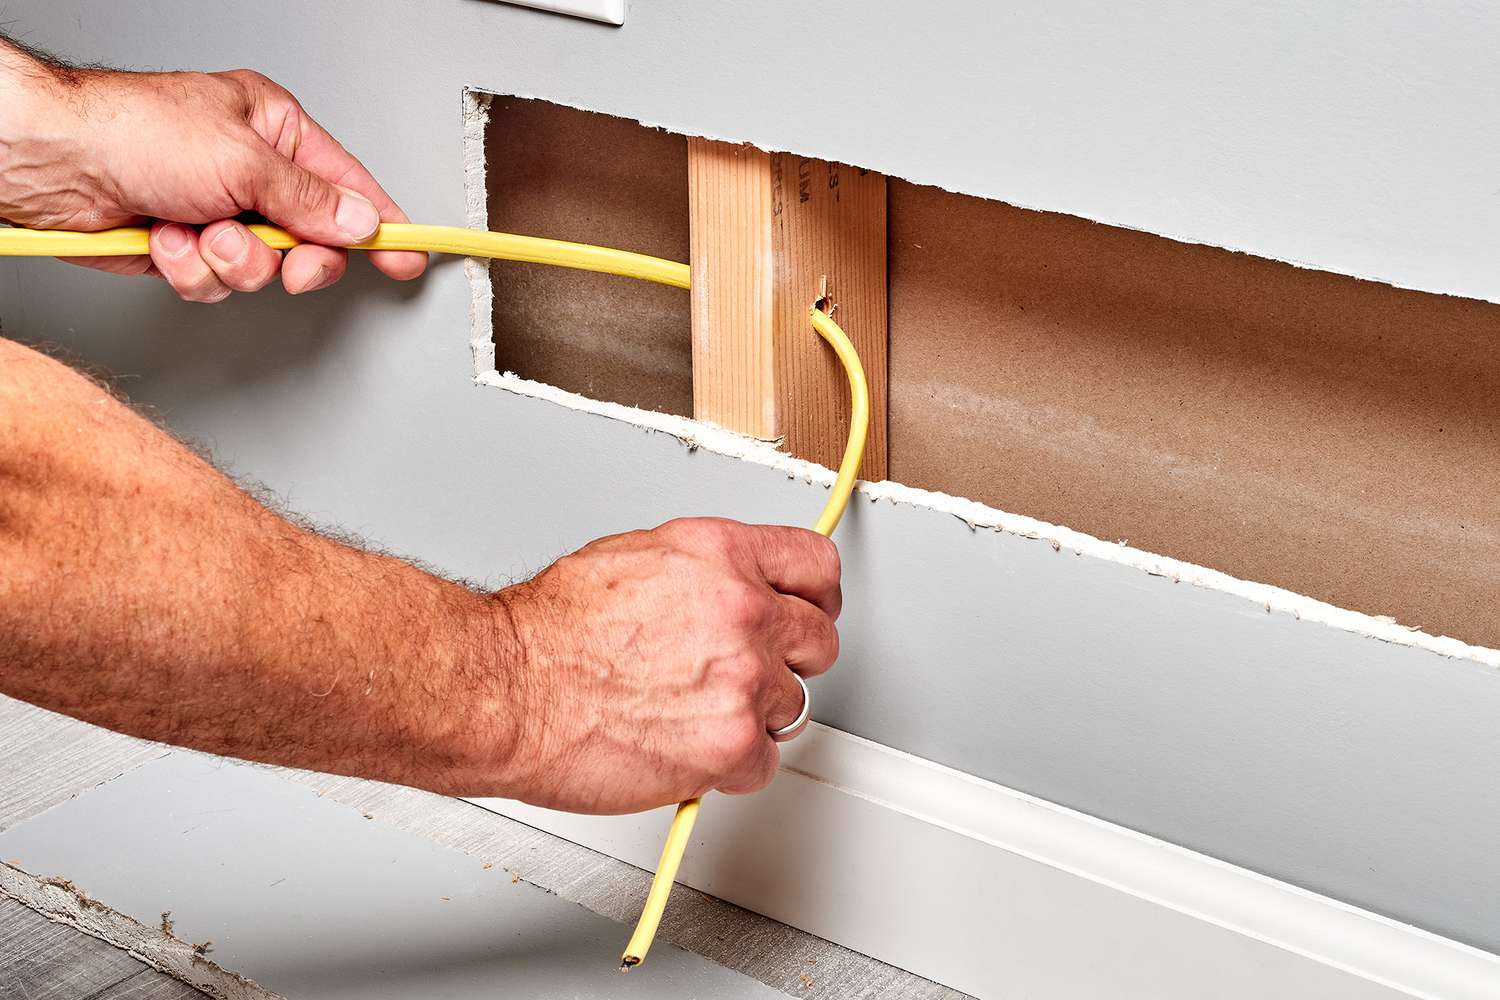
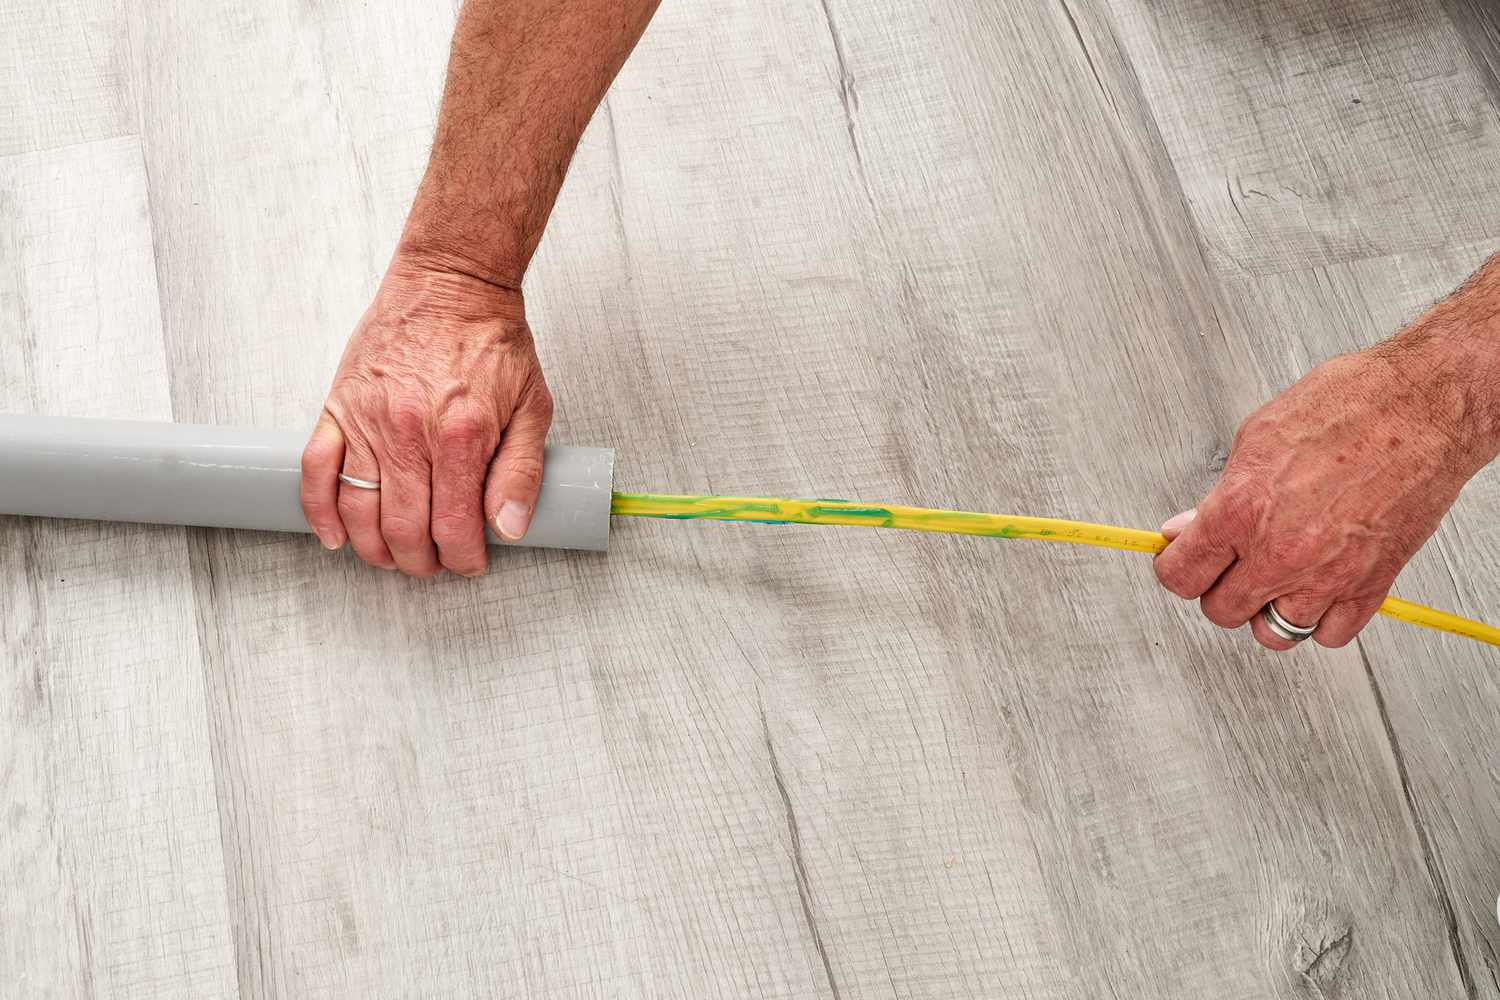
Fishing the Wire through the Wall
After drilling the necessary holes in the wall, the next step is to fish the electrical wire through these holes. This process requires patience and precision to ensure the wire is properly routed without getting stuck or damaged. Here is a step-by-step guide to fishing the wire through the wall:
- Prepare the wire: Strip the ends of the electrical wire to expose the conductors. You may also want to attach a small loop or hook at the end to make the wire easier to grab and guide through the holes.
- Locate the entry and exit points: Determine where you will start feeding the wire into the wall and where it will eventually come out. These points should align with the drilled holes and the planned wire path.
- Guide the wire through the wall: Insert the wire into the first hole and push it carefully through the wall cavity. Use a fish tape or a wire coat hanger to guide and pull the wire through the interior of the wall. Be patient and maintain control over the wire to avoid any bends or kinks.
- Continue feeding the wire: Feed the wire through each subsequent hole along the planned path until you reach the exit point. If the wire gets stuck, gently twist and push it while guiding it through.
- Retrieve the wire: Once the wire is through all the holes, firmly hold the end at the exit point and carefully pull it out of the wall. Ensure the wire is properly positioned and not tangled with any other cables or obstructions.
- Secure the wire: Use electrical tape or cable clips to secure the wire to the wall studs or other structural components. This will help prevent any movement or strain on the wire connections.
It is important to be patient during the fishing process to avoid damaging the wire or the wall. If you encounter any obstacles along the way, carefully assess the situation and make adjustments as necessary. Take extra care when pulling the wire out of the wall to avoid any accidental damage to the wall or the wire itself.
Once the wire is successfully fished through the wall, you can proceed with the next step of installing electrical boxes and connecting the wire to outlets and switches. Always double-check for any twists, kinks, or damage to the wire before proceeding.
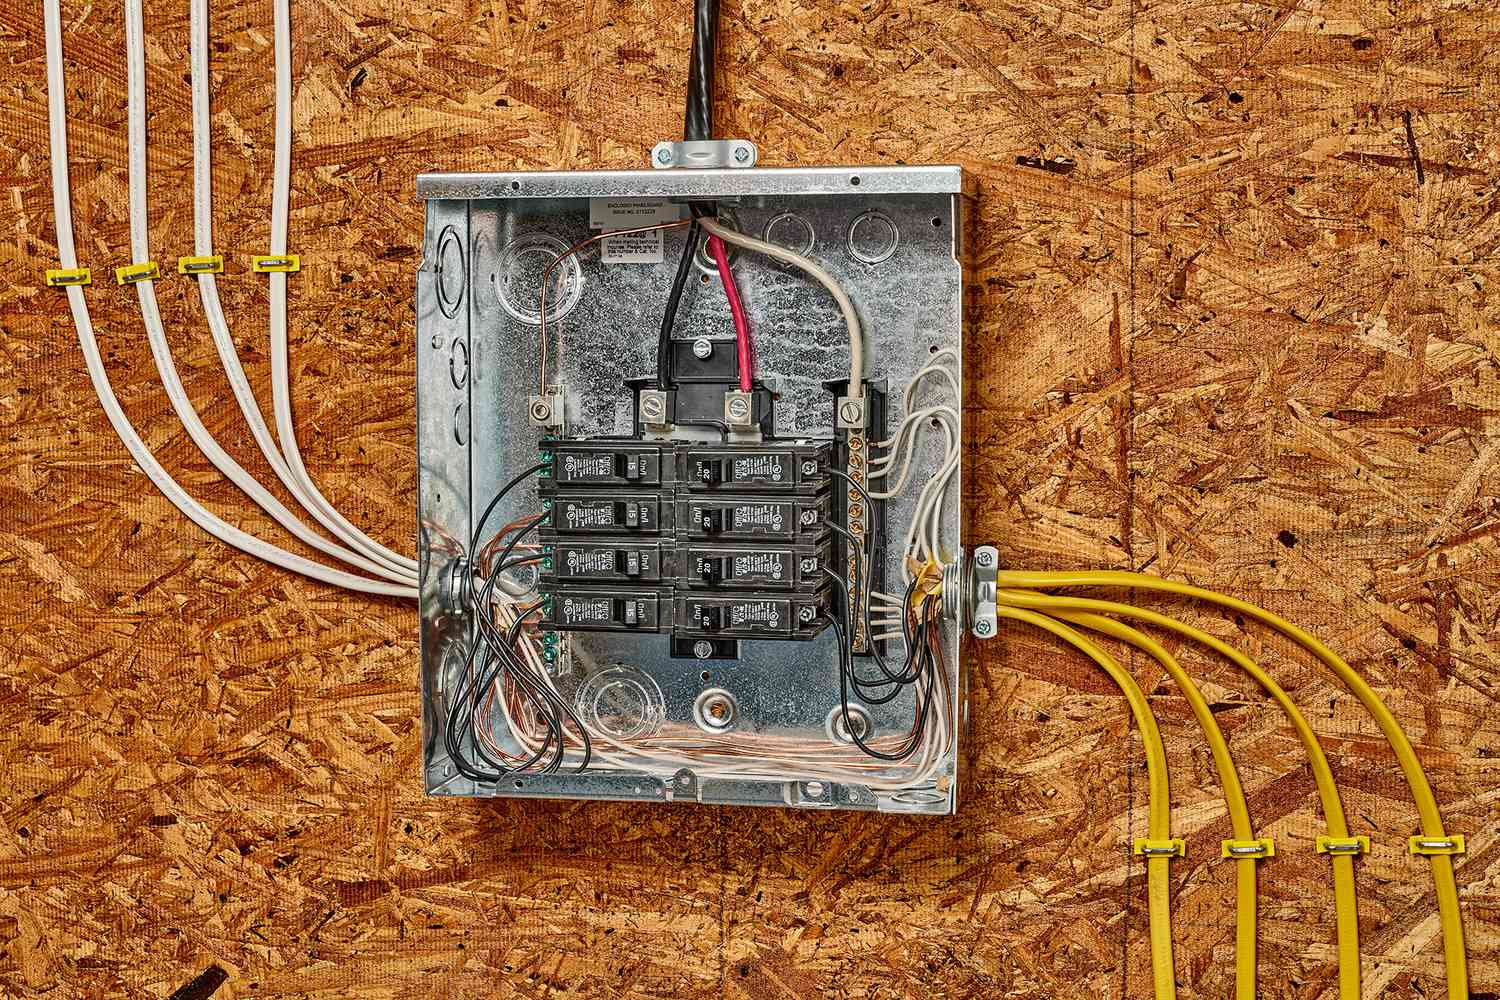
Installing Electrical Boxes
Once the wire has been successfully fished through the wall, the next step is to install electrical boxes. Electrical boxes provide a secure and code-compliant enclosure for connecting outlets, switches, or other electrical fixtures. Follow these steps to install electrical boxes:
- Choose the right box: Select an electrical box that suits the specific needs of your project. Consider factors such as the size of the wire, the type of devices you will be installing, and any regulatory requirements.
- Position the box: Determine the desired location for the electrical box and mark its placement on the wall. Ensure that the box is mounted at the appropriate height and level.
- Trace the box outline: Hold the electrical box against the wall and trace its outline with a pencil or marker. This will serve as a guide for cutting out the opening in the wall.
- Cut the opening: Use a drywall saw or utility knife to carefully cut along the traced lines and create the opening for the electrical box. Take your time and work slowly to avoid any excessive damage to the wall.
- Insert the box: Align the electrical box with the opening in the wall and insert it into the wall cavity. Make sure the box sits flush with the wall surface.
- Secure the box: Use screws or nails provided with the electrical box to fasten it securely to the wall. Tighten the screws or drive the nails until the box is firmly held in place.
- Adjust the box depth: If necessary, adjust the depth of the box to accommodate the thickness of the wall. Some electrical boxes have adjustable brackets or extensions that can be used to ensure a proper fit.
During the installation process, pay attention to any specific instructions or guidelines outlined by the manufacturer of the electrical box. These may include additional steps or considerations to ensure a safe and secure installation.
Repeat these steps for each electrical box that needs to be installed along the wire path. This may include boxes for outlets, switches, or other devices. Properly installed electrical boxes are essential for maintaining the integrity of the electrical system and ensuring compliance with building codes.
Once all the electrical boxes are securely installed, you can proceed with connecting the wire to outlets and switches, following the appropriate methods and safety protocols.
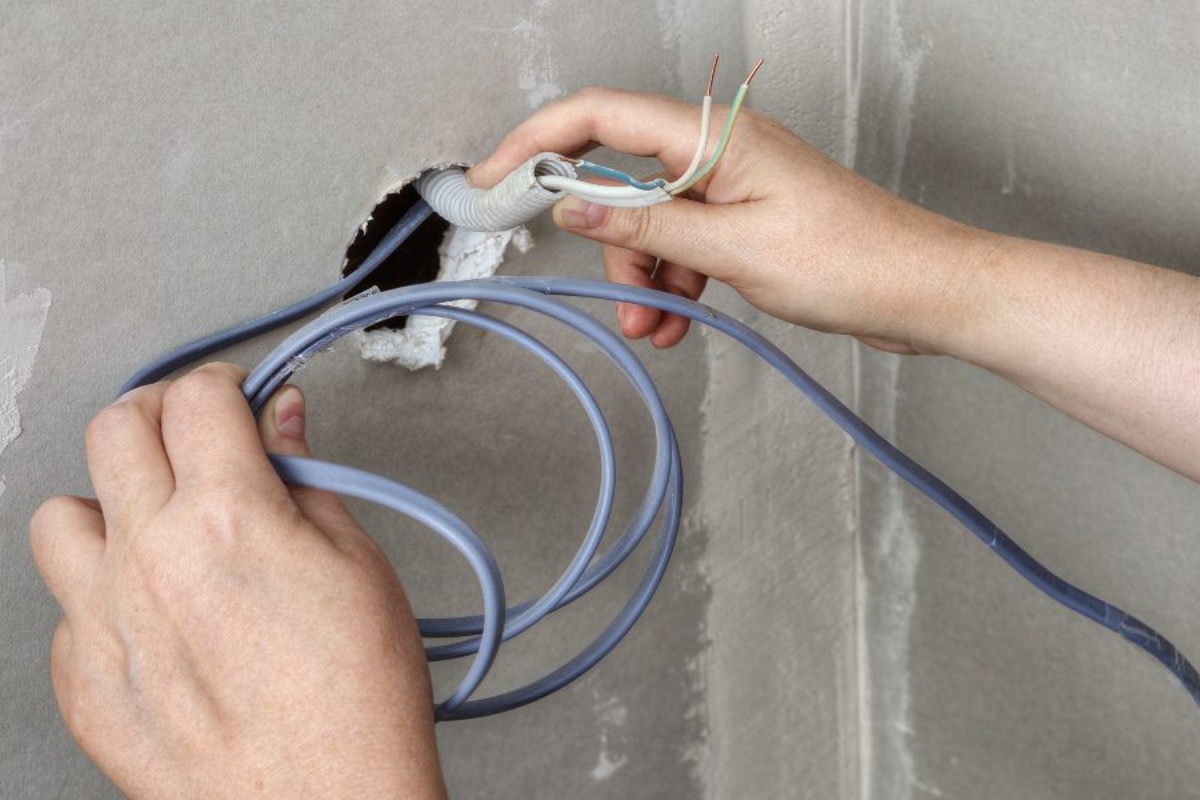
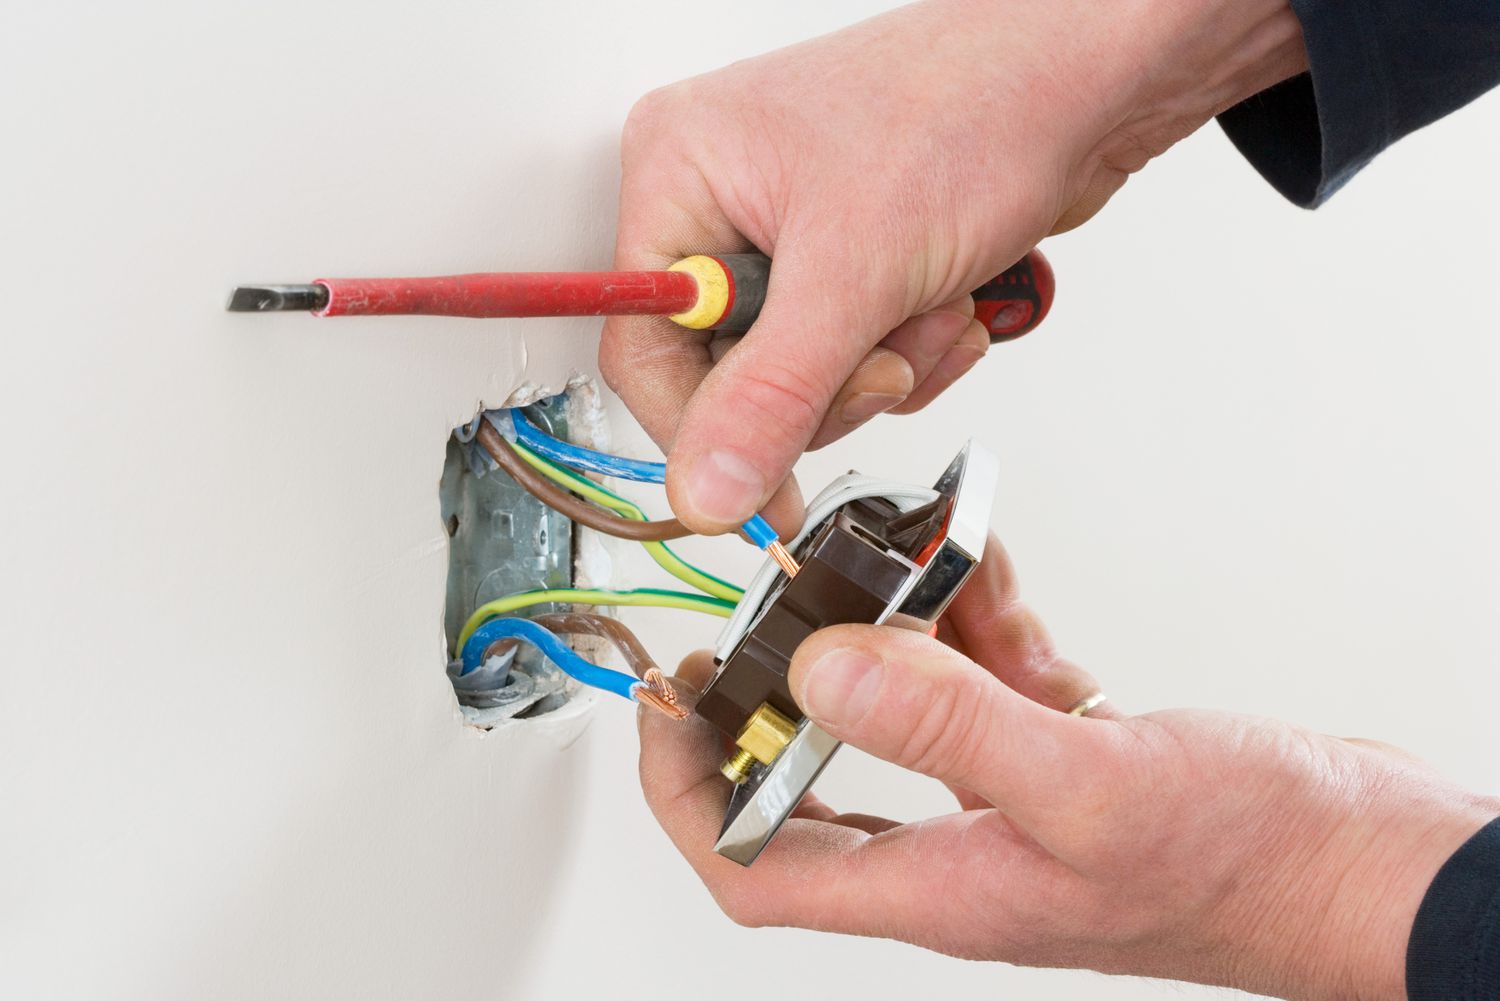
Connecting the Wire to Outlets and Switches
After installing the electrical boxes, the next step is to connect the wire to outlets and switches. This process involves making proper electrical connections and ensuring all connections are secure and compliant with electrical codes. Follow these steps to connect the wire to outlets and switches:
- Prepare the wire: Strip the ends of the electrical wire to expose the conductors. Use wire cutters/strippers to remove the appropriate length of insulation from each wire.
- Identify the hot, neutral, and ground wires: Typically, electrical wiring consists of a black (hot), white (neutral), and bare copper (ground) wire. Identify the purpose of each wire to make the correct connections.
- Connect the grounding wire: Attach the bare copper ground wire to the green grounding screw in the electrical box. If there is no grounding screw, use a grounding clip or terminal provided with the electrical box.
- Connect the neutral wire: Connect the white neutral wire to the silver-colored terminal on the outlet or switch. This is usually indicated as the “neutral” or “white” terminal.
- Connect the hot wire: Connect the black hot wire to the brass or gold-colored terminal on the outlet or switch. This is typically labeled as the “hot” or “black” terminal.
- Secure the connections: Use wire nuts to twist and secure the wire connections. Ensure that the wire nuts are tight and all wires are securely joined together.
- Test the connections: Use a voltage tester to verify that the connections are secure and there is no power running through the wires. This is an essential safety step to avoid potential electric shock.
- Attach the outlet or switch: Carefully push the electrical outlet or switch into the electrical box. Secure it to the box using the screws provided. Ensure that the outlet or switch is flush with the wall surface.
It’s important to follow the manufacturer’s instructions for each specific outlet or switch you are working with, as the wiring configuration may vary slightly. Take your time and double-check that all connections are secure before moving on to the next one.
Repeat these steps for each outlet or switch along the wire path. If you are installing multiple outlets on the same circuit, you can use “pigtail” connections to ensure a safe and efficient wiring setup.
Once you have made all the necessary connections, you can proceed with testing the outlets and switches to ensure they are functioning properly before restoring power.
Testing and Ensuring Safety
After completing the wiring connections, it is crucial to test the electrical installation and ensure that everything is functioning correctly and safely. This step will help identify any potential issues or errors before restoring power and prevent accidents or electrical hazards. Follow these steps to test and ensure safety:
- Double-check the connections: Take a final look at all the wiring connections to ensure they are secure, properly connected, and in accordance with electrical codes. Verify that all wire nuts are tight and that there are no loose or exposed wires.
- Conduct a polarity test: Use a polarity tester or a multimeter to check the polarity of the electrical outlet or switch. This test will ensure that the hot and neutral wires are correctly connected and that the outlet is properly grounded.
- Test the outlets: Plug a lamp, phone charger, or small device into each outlet to test its functionality. Ensure that power is being supplied and that there are no sparks, overheating, or unusual sounds or smells.
- Test the switches: Flip each switch on and off to test their functionality. Verify that the connected lights or appliances respond accordingly to the switching action.
- Check for ground faults: Install a ground fault circuit interrupter (GFCI) outlet or breaker in areas such as bathrooms, kitchens, and outdoor locations. Test the GFCI by pressing the “Test” button and ensuring that the power is immediately cut off. Press the “Reset” button to restore power.
- Inspect for any visible damage: Thoroughly inspect the electrical boxes, outlets, switches, and wiring for any signs of damage, such as cracks, burns, or exposed wires. Address any issues promptly to prevent potential hazards.
- Consider a professional inspection: If you are uncertain or have concerns about the installation, it is advisable to consult a licensed electrician for a thorough inspection. They can ensure that all connections are safe and up to code.
- Restore power: Once you are confident in the safety and functionality of the electrical installation, you can restore power. Go back to the circuit breaker panel and switch on the corresponding circuit breaker. Test all outlets and switches again to confirm their proper operation.
Remember, electrical work can be dangerous, and it is always better to err on the side of caution. If you encounter any issues during the testing process or feel unsure about any aspect of the installation, it is best to seek professional assistance.
By diligently testing the electrical installation and ensuring safety measures are in place, you can have peace of mind knowing that your wiring is functioning safely and efficiently.
Read more: How To Run Doorbell Wire Through Brick
Conclusion
Running electrical wire through walls may seem like a daunting task, but with the right tools, materials, and knowledge, it can be accomplished safely and effectively. By following the step-by-step guide outlined in this article, you have learned the essential techniques for running electrical wire through walls.
Remember that safety should always be your top priority. Before beginning any electrical work, ensure that you have a basic understanding of electrical systems and adhere to all local building codes and regulations. If you are unsure or uncomfortable working with electricity, it is best to consult a professional electrician.
Throughout the process, take the time to assess and plan the wire path, turn off the power, drill holes carefully, fish the wire through the walls, install electrical boxes, and make secure connections to outlets and switches. Testing and ensuring safety are crucial steps to identify any issues and prevent potential hazards.
By meticulously following these steps and taking the necessary precautions, you can successfully run electrical wire through walls and complete your electrical installation project. Remember to work methodically, double-check all connections, and test the outlets and switches before restoring power.
Should you encounter any challenges or uncertainties, it is always wise to consult a professional electrician who can provide guidance and expertise. Taking the time to do the job right will result in a safe and reliable electrical system in your home.
We hope that this article has provided you with the knowledge and confidence to tackle your electrical wiring project. Now, go ahead and transform your living spaces with the power of properly installed electrical outlets and switches!
Frequently Asked Questions about How To Run Electrical Wire Through Walls
Was this page helpful?
At Storables.com, we guarantee accurate and reliable information. Our content, validated by Expert Board Contributors, is crafted following stringent Editorial Policies. We're committed to providing you with well-researched, expert-backed insights for all your informational needs.

0 thoughts on “How To Run Electrical Wire Through Walls”