Home>Home Security and Surveillance>How To Install A Ring Security Camera
Home Security and Surveillance
How To Install A Ring Security Camera
Modified: August 17, 2024
Learn how to easily install a Ring security camera for home security and surveillance. Enhance your home's safety with our step-by-step guide.
(Many of the links in this article redirect to a specific reviewed product. Your purchase of these products through affiliate links helps to generate commission for Storables.com, at no extra cost. Learn more)
Introduction
With the rise in home burglaries and security threats, ensuring the safety of your home and loved ones has become a top priority for homeowners. One effective way to protect your property is by installing a home security camera system. Among the most popular options available today is the Ring security camera.
Ring cameras offer a range of features and benefits, including live video monitoring, motion detection, two-way audio communication, and cloud storage for recorded footage. What’s more, Ring cameras are designed for easy installation, making them a popular choice for homeowners of all technical levels.
In this article, we will provide a step-by-step guide on how to install a Ring security camera. Whether you’re looking to install an outdoor camera to monitor your front porch or an indoor camera to keep an eye on your living room, we’ve got you covered. So, let’s dive in and learn how to set up your Ring camera for maximum home security.
Key Takeaways:
- Installing a Ring security camera involves gathering equipment, choosing the right location, and connecting to power. Adjusting settings and testing functionality ensures optimal home security.
- Regular maintenance and troubleshooting are essential for a successful Ring camera setup. Enjoy peace of mind knowing your property is secure with remote monitoring and motion detection alerts.
Step 1: Gather the Necessary Equipment
Before you begin the installation process, it’s crucial to ensure that you have all the necessary equipment. Here’s a list of the items you’ll need:
- Ring security camera
- Mounting bracket and screws
- Drill and drill bit
- Screwdriver
- Power source (outlet or battery)
- Mobile device with the Ring app installed
- Stable Wi-Fi connection
It’s important to note that the specific equipment required may vary depending on the model of your Ring camera. Therefore, it’s essential to refer to the manufacturer’s instructions and ensure you have all the necessary components.
Once you have gathered all the equipment, make sure you have a clear understanding of where you want to install the camera. This will help you determine the appropriate tools required for the next steps.
Now that you have all the necessary equipment ready, it’s time to move on to the next step: choosing the ideal mounting location for your Ring security camera.
Step 2: Choose the Ideal Mounting Location
Choosing the ideal mounting location for your Ring security camera is crucial to ensure optimal surveillance coverage. Here are some factors to consider when selecting the perfect spot:
- Entry Points: Identify the main entry points to your home, such as the front door, back door, or windows, that you want to monitor. These areas are typically the most vulnerable to break-ins and should be the primary focus of your camera placement.
- Visibility: Ensure that the camera has a clear line of sight to the areas you want to monitor. Avoid obstructions that may hinder the camera’s view, such as trees, bushes, or walls.
- Elevation: Consider the height at which you want to install the camera. Higher placements may provide a wider field of view but may reduce facial recognition capabilities. Lower placements, on the other hand, may provide more detailed footage of faces but may have a more limited view.
- Weatherproofing: If you’re installing an outdoor camera, make sure the chosen location is protected from harsh weather conditions, such as rain, snow, or intense sunlight. Look for areas that have some natural cover, such as eaves or awnings.
- Power Source: Determine if the chosen location has access to a power source or if your camera requires a battery-powered installation. Ensure that the power source is easily accessible or consider using extension cables if needed.
Once you have considered these factors, take some time to test the camera’s field of view from different potential mounting locations. This will help you determine the angle and coverage provided by each spot.
Keep in mind that the specific mounting requirements and recommendations may vary depending on the model of your Ring camera. Refer to the manufacturer’s instructions for any additional guidelines related to the mounting process.
Now that you have chosen the ideal mounting location, it’s time to move on to the next step: installing the mounting bracket.
Step 3: Install the Mounting Bracket
Now that you have chosen the ideal mounting location for your Ring security camera, it’s time to install the mounting bracket. The mounting bracket provides stability and ensures that the camera is securely attached to the desired surface. Follow these steps:
- Prepare the Mounting Surface: Clean the chosen mounting surface and ensure it is free from any dirt, debris, or moisture. A clean surface will provide better adhesion and stability.
- Position the Mounting Bracket: Hold the mounting bracket against the wall or surface in the desired location. Ensure that it is level and aligned with your intended field of view.
- Mark the Hole Placement: Use a pencil or marker to mark the screw hole positions on the mounting surface. These markings will serve as a guide for drilling the holes.
- Drill Pilot Holes: Use a drill and an appropriate drill bit to create pilot holes at the marked positions. The size of the drill bit should match the size of the screws provided with the mounting bracket.
- Attach the Mounting Bracket: Align the mounting bracket with the pilot holes and secure it to the surface using the provided screws. Ensure that the bracket is tightly secured to provide stability for the camera.
Double-check the stability of the mounting bracket and make any necessary adjustments before proceeding to the next step. It’s crucial to ensure that the bracket is securely attached to the surface to prevent any camera movement or instability.
Now that you have successfully installed the mounting bracket, it’s time to move on to the next step: connecting the camera to power.
Step 4: Connect the Camera to Power
Now that you have installed the mounting bracket, it’s time to connect your Ring security camera to a power source. The power source you choose will depend on the specific model of your camera. Here are the two common power options:
- Wired Power: If your camera requires a wired power connection, locate the nearest power outlet to your chosen mounting location. Use the provided power cable to connect the camera to the outlet. Ensure that the cable is securely connected and free from any damage.
- Battery Power: If your camera is battery-powered, insert the charged battery into the camera. Make sure the battery is fully charged to ensure uninterrupted operation. Battery-powered cameras offer more flexibility in terms of placement options, as they are not reliant on a nearby power outlet.
Regardless of the power option, ensure that the camera is receiving a stable power supply. Check the camera’s LED indicator lights to confirm that it is properly powered. If the camera doesn’t power on, double-check the connection and troubleshoot any potential issues.
If you are using a wired power connection, make sure to tuck away any excess cable to keep the installation neat and tidy.
With the camera connected to power, it’s time to move on to the next step: setting up the Ring camera in the Ring app.
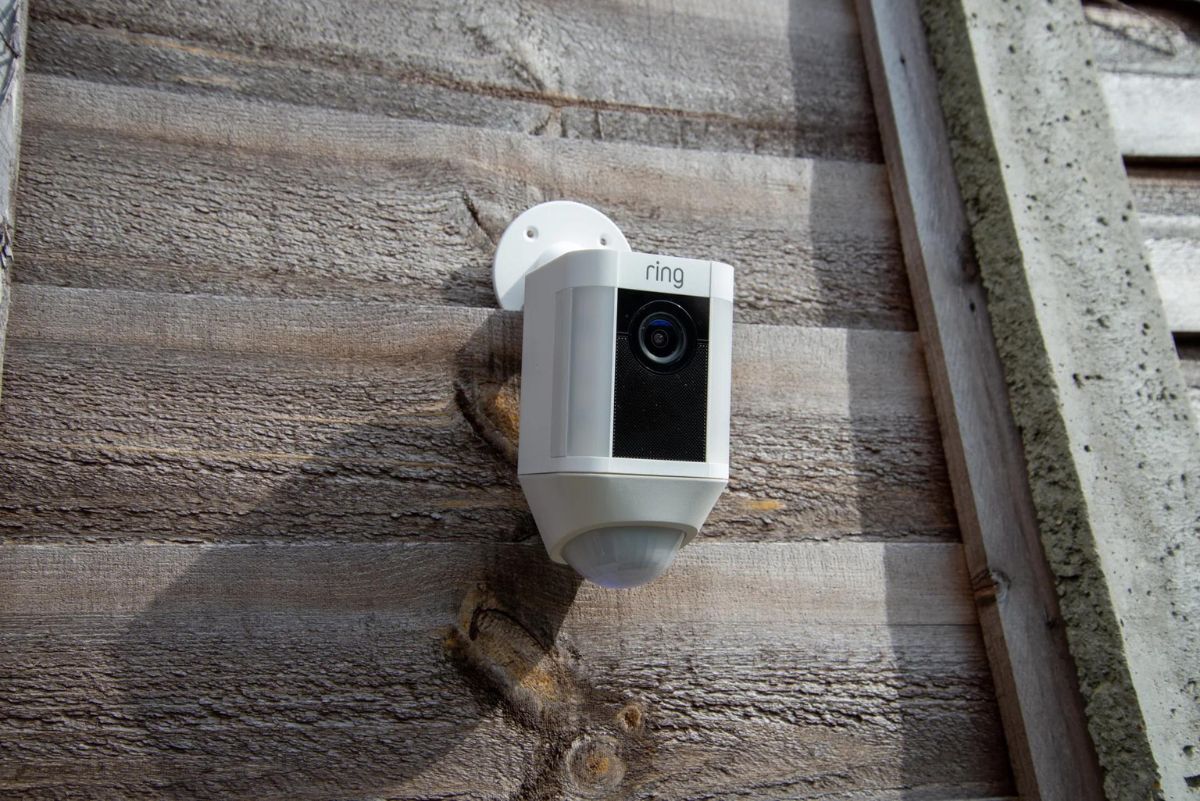
When installing a Ring security camera, make sure to place it high enough to avoid tampering, but low enough to capture faces. Also, ensure it’s within range of your Wi-Fi signal for a strong connection.
Read more: How To Install A Ring Camera Outdoor
Step 5: Set up the Ring Camera in the Ring App
Now that you have connected your Ring security camera to power, it’s time to set it up in the Ring app. The Ring app allows you to control and customize your camera settings, receive notifications, and access live video feeds. Follow these steps to complete the setup process:
- Download and Install the Ring App: If you haven’t already, download and install the Ring app on your mobile device. The app is available for both iOS and Android platforms.
- Create an Account or Log In: Launch the Ring app and create a new Ring account or log in to your existing account. Ensure that you have a stable internet connection before proceeding.
- Add a Device: In the app, navigate to the Devices section and click on “Add a Device.” Select “Security Cameras” and choose the specific model of your Ring camera. Follow the on-screen instructions to initiate the setup process.
- Connect the Camera to Wi-Fi: During the setup process, you will be prompted to connect your camera to your home Wi-Fi network. Follow the instructions in the app to connect the camera to your Wi-Fi network. Make sure to enter the correct Wi-Fi credentials to ensure a successful connection.
- Test the Connection: Once your camera is connected to Wi-Fi, the app will verify the connection. It may take a few moments to establish the connection. If the connection is successful, you will be able to proceed to the next step. If not, double-check your Wi-Fi settings and try again.
- Customize Settings: After the camera is successfully connected, you can customize various settings in the app, such as motion detection sensitivity, notification preferences, and camera modes. Take some time to explore the different options and adjust the settings according to your preferences.
Once you have completed the setup process in the Ring app, your Ring security camera is ready to use. The app will now provide you with full control over your camera’s features and functionalities.
In the next step, we will discuss how to adjust the camera settings to ensure optimal performance and security.
Step 6: Adjust Camera Settings
Now that you have set up your Ring security camera in the Ring app, it’s important to adjust the camera settings to ensure optimal performance and security. Here are some essential settings to consider:
- Motion Detection: Adjust the motion detection settings to specify which areas you want your camera to monitor for activity. You can set up motion zones and define the sensitivity level to avoid receiving unnecessary notifications.
- Privacy Settings: Configure privacy settings to avoid capturing video footage of private areas, such as windows or neighboring properties. This will help respect privacy boundaries while still monitoring essential areas of your property.
- Camera Modes: Set up different camera modes based on your specific needs. For example, you can create a “Home” mode for when you’re present at home, and an “Away” mode for when you’re away. Each mode can have different motion detection and notification settings.
- Notification Preferences: Customize your notification preferences to receive alerts for specific events, such as motion detection or doorbell rings. You can choose to receive notifications on your mobile device or through other connected devices, such as smart speakers.
- Video Recording and Storage: Determine whether you want to enable continuous video recording or only record when motion is detected. Additionally, consider subscribing to a cloud storage plan offered by Ring to save and access recorded footage conveniently.
- Two-Way Audio: Enable and configure the two-way audio feature to communicate with visitors or potential intruders. Adjust the microphone and speaker volume to ensure clear and effective communication.
Take the time to explore and fine-tune these settings according to your preferences and monitoring needs. Regularly check the settings to make any necessary adjustments based on changes in your environment or security requirements.
With the camera settings adjusted, you’re now ready for the final step: testing the camera and troubleshooting if necessary.
Step 7: Test the Camera and Troubleshoot if Necessary
Once you have completed the setup and adjusted the settings of your Ring security camera, it’s essential to test its functionality and troubleshoot any potential issues. Here’s what you should do:
- Live Video Feed: Access the live video feed in the Ring app to ensure that the camera is capturing clear and crisp footage. Verify that the camera’s field of view covers the desired areas and that the camera angle provides the best vantage point.
- Motion Detection: Test the motion detection feature by moving within the camera’s range. Check if you receive timely notifications for detected motion and verify that the camera records when motion is detected.
- Two-Way Audio: Use the two-way audio feature to test the communication capabilities of the camera. Speak through the mobile app and listen for sound quality issues. Ensure that the microphone and speaker are functioning correctly.
- Night Vision: If your camera has night vision capabilities, test it in low-light conditions to ensure that it captures clear footage. Adjust the camera settings accordingly to enhance night vision performance if needed.
- Connectivity: Ensure that your camera maintains a stable connection to your Wi-Fi network. If you experience any connection issues, try moving the camera closer to your router or consider boosting your Wi-Fi signal using extenders or a mesh network.
- Cloud Storage: If you have subscribed to a cloud storage plan, verify that recorded footage is being saved and can be accessed when needed. Test playback of recorded videos to confirm that they are stored properly.
If you encounter any issues during the testing process or while using your Ring security camera, consult the troubleshooting guides provided by Ring or reach out to their customer support for assistance. They can provide you with further guidance on resolving specific issues or escalating any hardware-related problems.
Remember to regularly maintain and update the firmware of your camera to ensure it operates with the latest features and security patches. Additionally, keep an eye on battery life (if applicable) and power supply to ensure uninterrupted surveillance.
Congratulations! You have successfully set up and installed your Ring security camera. By following these steps and performing regular maintenance, you can enjoy enhanced home security and peace of mind.
Disclaimer: The information provided in this article is for general informational purposes only. Always refer to the manufacturer’s instructions and guidelines for your specific Ring camera model.
Conclusion
Installing a Ring security camera is a proactive step towards enhancing the security of your home. By following the step-by-step guide outlined in this article, you can successfully set up and install your Ring camera, ensuring optimal surveillance coverage and peace of mind.
We began by gathering the necessary equipment, including the Ring camera itself, mounting bracket, screws, power source, and the Ring app installed on your mobile device. Then, we moved on to choosing the ideal mounting location for your camera, considering factors such as entry points, visibility, elevation, weatherproofing, and power source availability.
Next, we learned how to install the mounting bracket securely, ensuring stability for the camera. Following that, we connected the camera to a power source, whether it be a wired connection to a nearby outlet or a battery-powered setup, and verified its successful power supply.
We then progressed to setting up the camera in the Ring app, connecting it to your home Wi-Fi network, and adjusting various settings to personalize your monitoring preferences. These settings included motion detection, privacy, camera modes, notification preferences, video recording and storage, and two-way audio communication.
After completing the setup and adjusting the settings, we emphasized the importance of testing the camera’s functionality. This involved verifying the live video feed, motion detection, two-way audio, night vision (if applicable), connectivity, and cloud storage to ensure that everything is functioning as expected.
Lastly, we highlighted the importance of troubleshooting any issues that may arise during the testing process. We encouraged reaching out to Ring’s customer support for assistance and reminded users to regularly maintain and update their camera’s firmware.
By diligently following these steps and maintaining your Ring camera, you can achieve greater home security and enjoy the benefits of remote monitoring, motion detection alerts, and peace of mind knowing that your property is being monitored. Remember to regularly review and adjust your camera settings as needed and stay informed about any updates or new features released by Ring.
Investing in a Ring security camera is a valuable addition to your home security system, providing you with an extra layer of protection and control. Take the time to set up and install your camera properly, and enjoy the peace of mind that comes with knowing your home and loved ones are safe and secure.
Disclaimer: The information provided in this article is for general informational purposes only. Always refer to the manufacturer’s instructions and guidelines for your specific Ring camera model.
Frequently Asked Questions about How To Install A Ring Security Camera
Was this page helpful?
At Storables.com, we guarantee accurate and reliable information. Our content, validated by Expert Board Contributors, is crafted following stringent Editorial Policies. We're committed to providing you with well-researched, expert-backed insights for all your informational needs.