Home>Construction & Tools>Building Materials>How To Install Ring Camera On Brick Wall
Building Materials
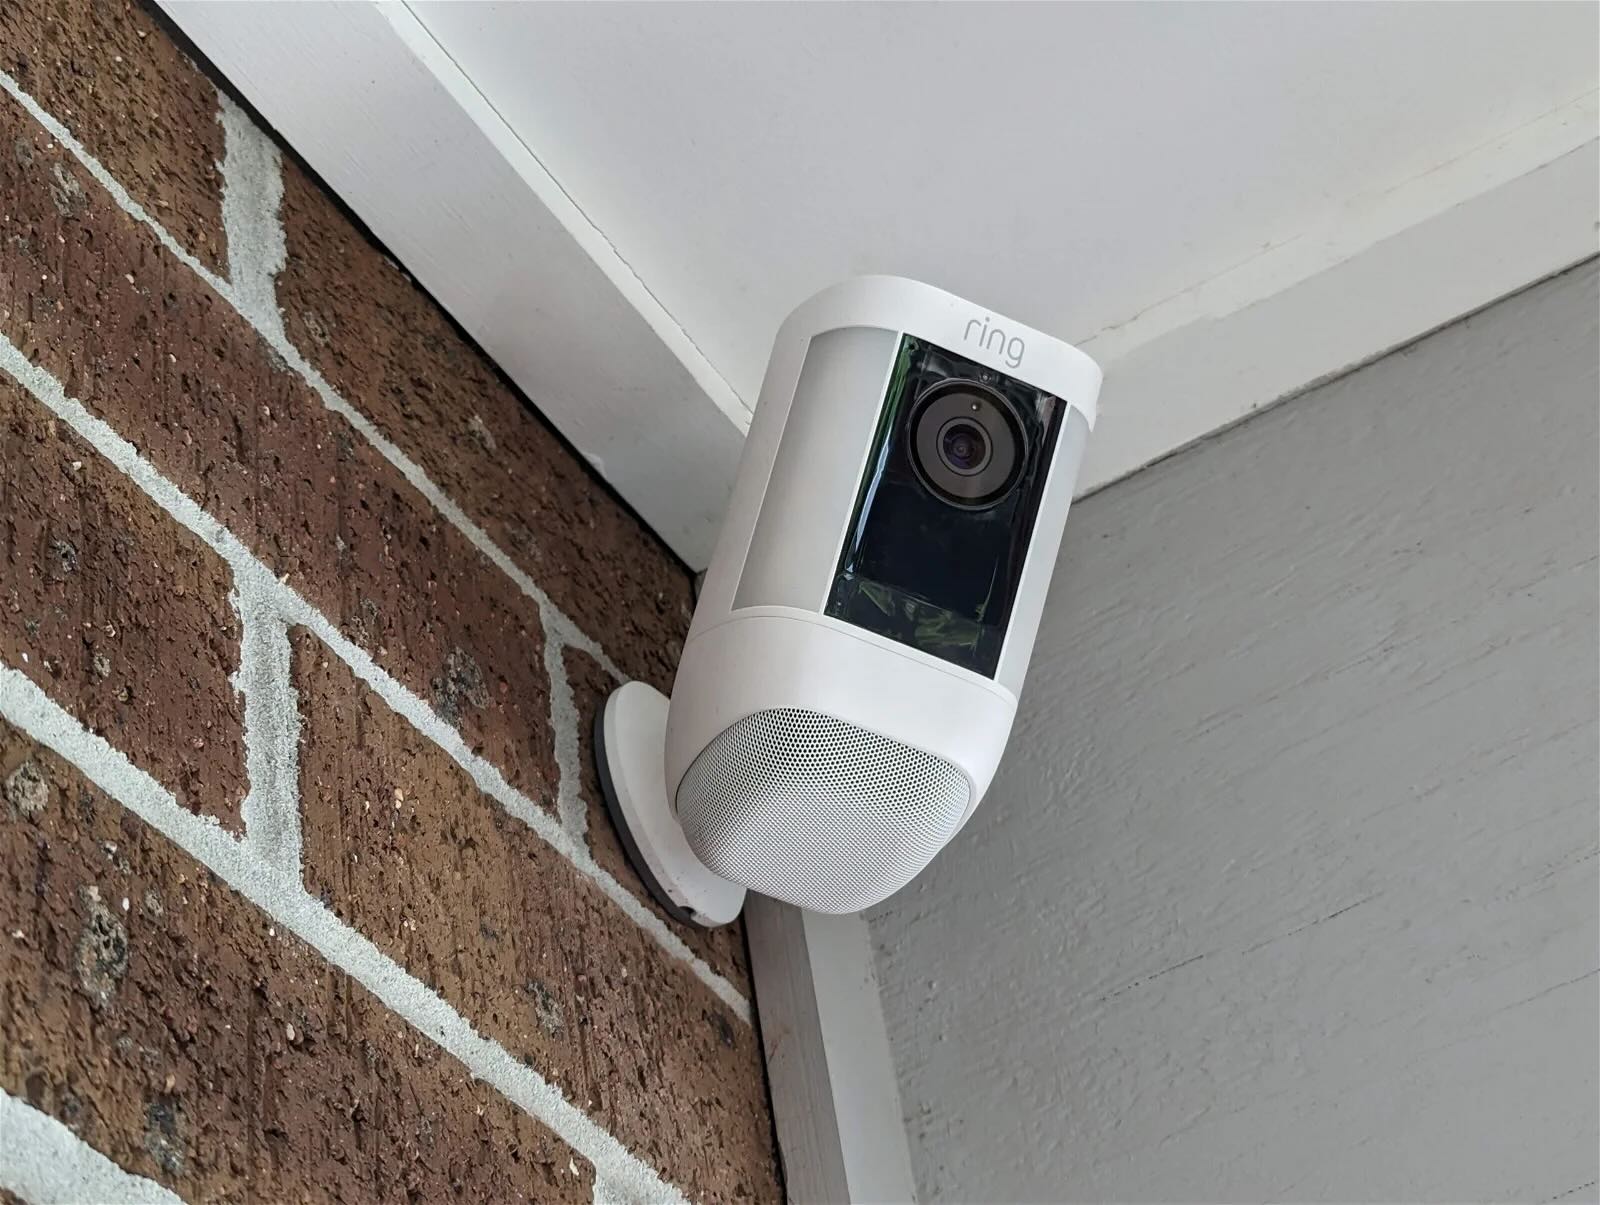
How To Install Ring Camera On Brick Wall
Modified: August 16, 2024
Learn how to install a ring camera on a brick wall with our step-by-step guide. Find the right building materials and follow our expert tips for a secure installation.
(Many of the links in this article redirect to a specific reviewed product. Your purchase of these products through affiliate links helps to generate commission for Storables.com, at no extra cost. Learn more)
Introduction
Installing a Ring camera on a brick wall can be a great way to enhance the security of your home while also adding convenience and peace of mind. Whether you’re looking to monitor your property, deter potential intruders, or simply keep an eye on your surroundings, a Ring camera can provide valuable surveillance and functionality. In this comprehensive guide, we’ll walk you through the step-by-step process of installing a Ring camera on a brick wall, ensuring that you can achieve a secure and reliable mounting that meets your specific needs.
Before diving into the installation process, it’s essential to gather the necessary tools and materials to ensure a smooth and efficient setup. By following the steps outlined in this guide, you’ll be able to position and secure your Ring camera with confidence, knowing that it’s optimally placed to capture the footage you need. Let’s get started on this exciting journey to bolstering your home security and embracing the convenience of modern technology.
Key Takeaways:
- Installing a Ring camera on a brick wall requires gathering essential tools and materials, choosing the right mounting location, and carefully marking and drilling holes for secure and reliable installation.
- After attaching the Ring camera to the mounting bracket, adjusting its position for optimal surveillance coverage and connecting it to power and Wi-Fi are crucial final steps for seamless functionality and peace of mind.
Read more: How To Install Ring Doorbell On Brick
Step 1: Gather the Necessary Tools and Materials
Before embarking on the installation process, it’s crucial to assemble all the essential tools and materials. By having everything readily available, you can streamline the installation and minimize any potential delays. Here’s a list of the items you’ll need:
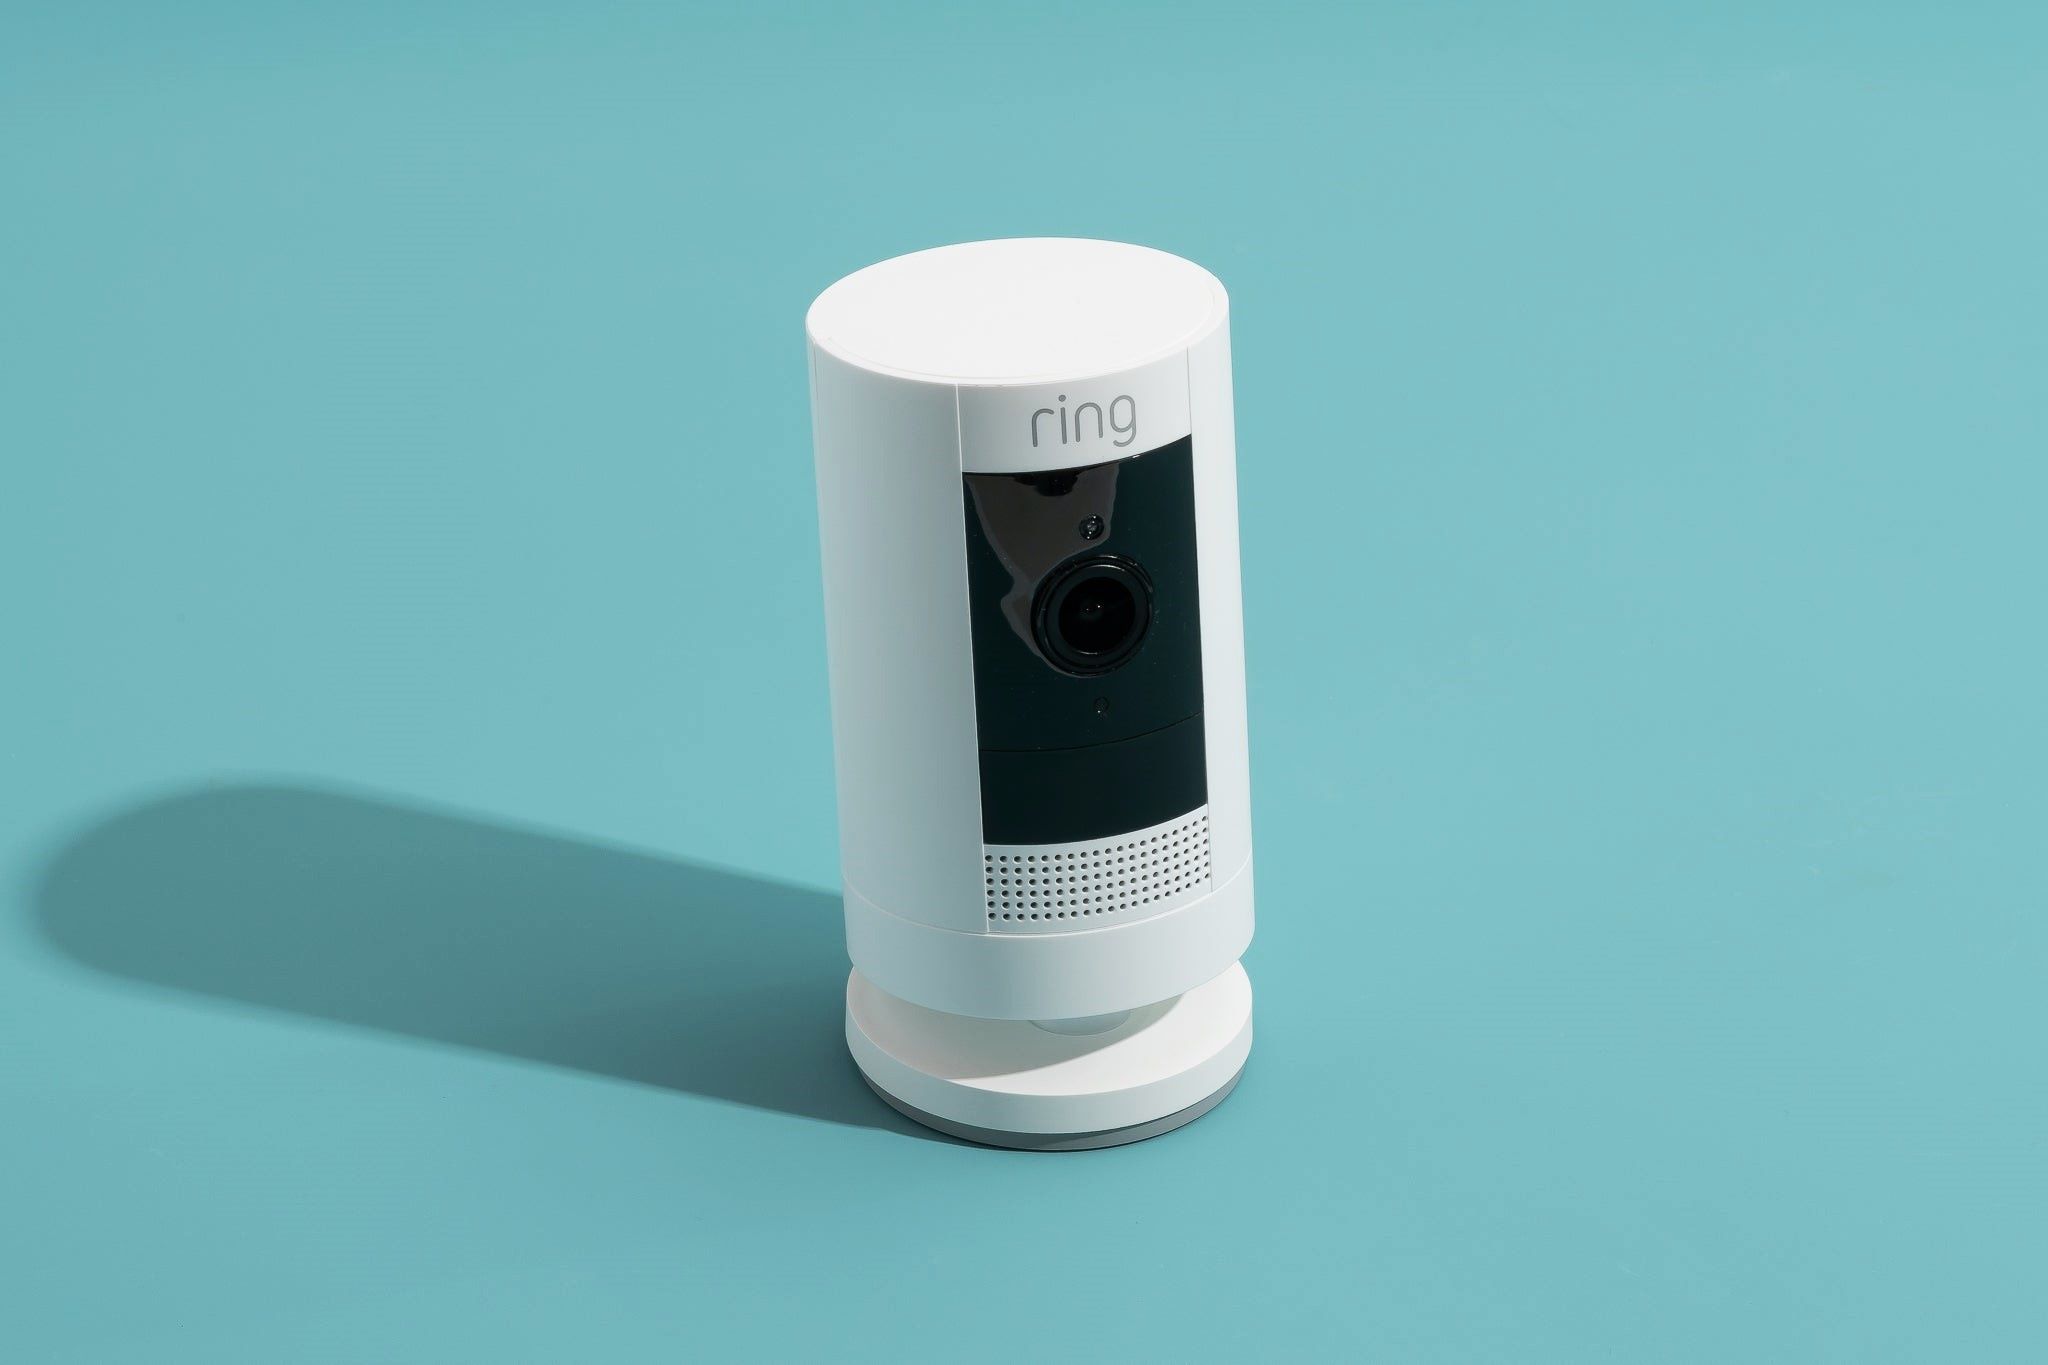
- Ring Camera: Ensure that you have the Ring camera model you intend to install. It’s essential to have the camera on hand to accurately measure and position the mounting bracket.
- Mounting Bracket: Depending on the specific Ring camera model, you may need a compatible mounting bracket. Check the camera’s packaging or manual to identify the correct bracket for your installation.
- Drill and Drill Bits: A power drill with masonry drill bits is essential for creating holes in the brick wall. Ensure that the drill bits are suitable for drilling into masonry to achieve precise and secure holes.
- Screwdriver: A screwdriver, ideally with interchangeable heads, will be necessary for securing the mounting bracket and attaching the Ring camera.
- Anchors and Screws: Depending on the mounting bracket and the surface of the brick wall, you may require anchors and screws designed for masonry installations. These components are crucial for securely fastening the mounting bracket to the wall.
- Level: To ensure that the mounting bracket is positioned correctly, a level will help you align it accurately before securing it in place.
- Tape Measure: Precise measurements are essential for positioning the mounting bracket at the desired height and ensuring that it is level. A tape measure will facilitate accurate placement.
- Power Source: Depending on the Ring camera model, you may need an outdoor power outlet or access to power for the camera’s setup and ongoing operation.
- Wi-Fi Connection: Ensure that you have a stable Wi-Fi connection within range of the installation site to enable the Ring camera to connect to your home network.
By gathering these tools and materials, you’ll be well-equipped to proceed with the installation process smoothly and efficiently. With everything in hand, you can confidently move on to the next step of choosing the location for mounting your Ring camera on the brick wall.
Step 2: Choose the Location for Mounting
When selecting the location for mounting your Ring camera on a brick wall, several factors come into play. The chosen placement should offer an optimal vantage point to capture the desired surveillance footage while considering practical considerations such as power source accessibility and Wi-Fi connectivity. Here are essential aspects to consider when choosing the mounting location:
- Visibility and Coverage: Identify areas that require surveillance coverage, such as entry points, driveways, or outdoor living spaces. The mounting location should offer clear visibility of these areas to ensure comprehensive monitoring.
- Height and Angle: Determine the ideal height and angle for the camera to achieve the best viewing perspective. Mounting the camera at an appropriate height can enhance its effectiveness in capturing relevant footage while minimizing obstructions.
- Accessibility to Power: Ensure that the chosen location is within reach of a power source if your Ring camera requires a direct power connection. If no nearby power outlet is available, you may need to consider alternative power options, such as outdoor-rated extension cords or professional electrical installation.
- Wi-Fi Signal Strength: Verify that the mounting location maintains a strong and stable Wi-Fi signal to facilitate seamless connectivity between the Ring camera and your home network. This ensures reliable video streaming and access to the camera’s features.
- Protection from Weather Elements: Consider the exposure of the mounting location to weather conditions. Select a spot that offers adequate protection from direct sunlight, rain, and other environmental factors to prolong the longevity of the camera and maintain clear footage quality.
- Legal and Privacy Considerations: Be mindful of local regulations and privacy concerns when choosing the mounting location. Avoid pointing the camera towards areas where privacy could be compromised, such as neighboring properties or public spaces.
By carefully evaluating these factors, you can pinpoint the most suitable location for mounting your Ring camera on the brick wall. Once you’ve identified the optimal spot, you can proceed to the next step of marking the drill holes to prepare for the installation process.
Step 3: Mark the Drill Holes
Before drilling into the brick wall, it’s crucial to accurately mark the locations for the drill holes to ensure precise alignment and secure mounting. Here’s a step-by-step guide to marking the drill holes for your Ring camera installation:
- Position the Mounting Bracket: Hold the mounting bracket against the selected mounting location on the brick wall. Ensure that it is level and align it according to your preferred angle for camera coverage. Enlist the assistance of a level to confirm that the bracket is perfectly horizontal or angled as desired.
- Mark the Hole Locations: With the mounting bracket held firmly in place, use a pencil or marker to mark the positions of the drill holes on the brick wall. The bracket should have pre-drilled holes or slots that guide the marking process. Make clear and visible marks to indicate where the drill holes will be located.
- Verify Hole Spacing: Double-check the spacing and alignment of the marked drill holes to ensure that they correspond accurately to the holes on the mounting bracket. Confirm that the markings align with the bracket’s hole pattern, as precise alignment is crucial for secure attachment.
- Mark Cable Entry Point: If your Ring camera requires a power cable or wiring for connectivity, consider marking the entry point for the cables near the bottom of the mounting location. This ensures that the cables can be neatly routed and connected without compromising the camera’s stability.
By meticulously marking the drill holes and cable entry point, you’ll establish a clear guide for the subsequent drilling and installation steps. Accurate markings contribute to a seamless and professional-looking mounting, ensuring that the Ring camera is securely affixed to the brick wall with precision and stability.
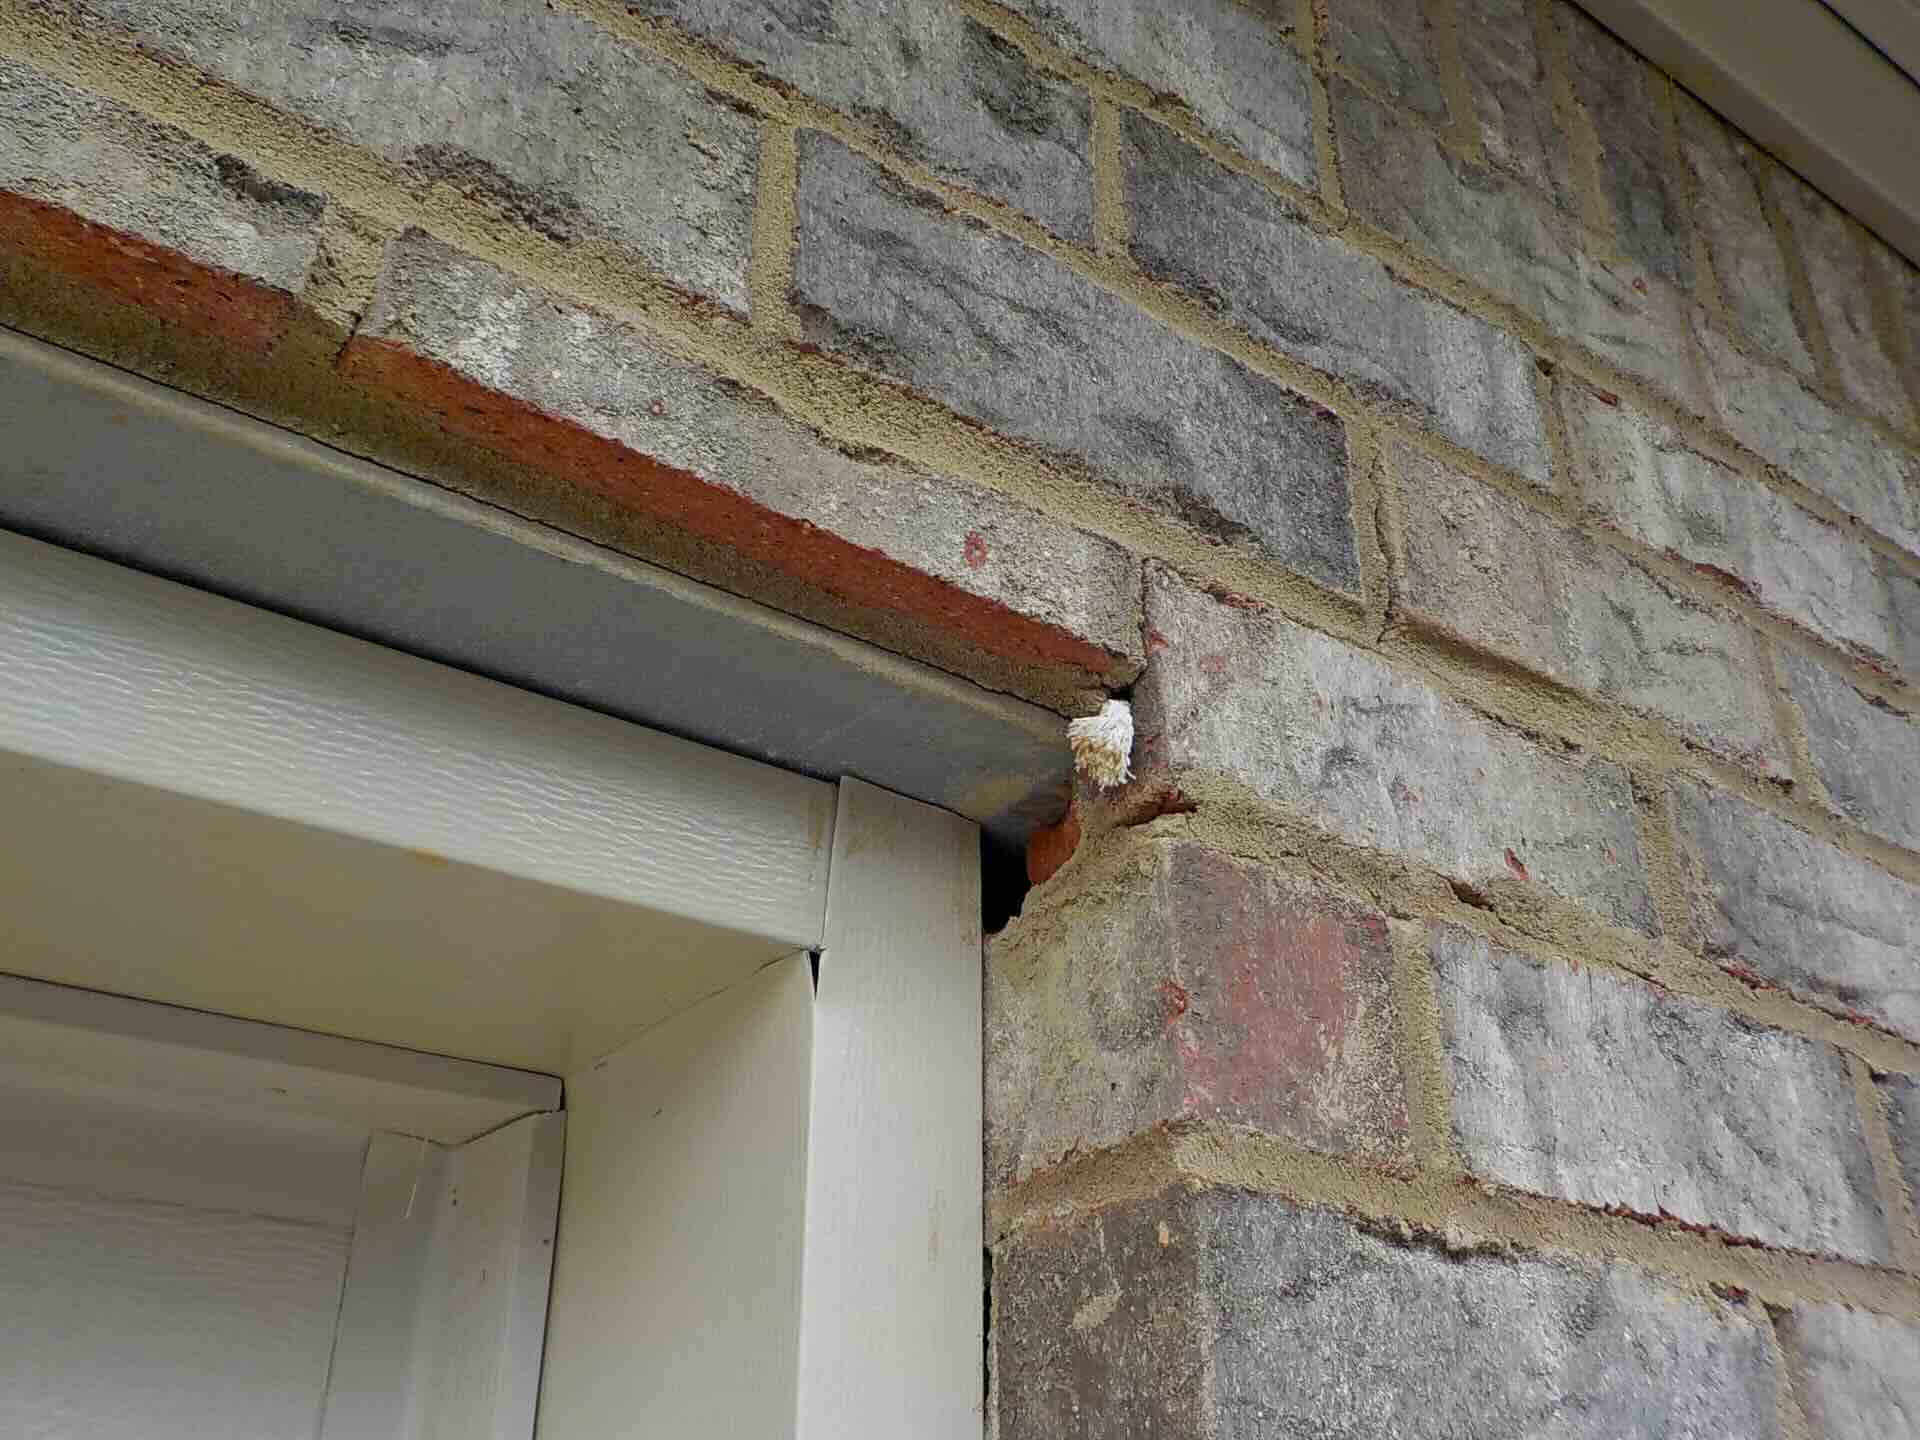
Step 4: Drill Holes in the Brick Wall
Drilling holes in a brick wall requires careful precision and the appropriate tools to ensure accurate and clean perforations. Before proceeding with the drilling process, it’s essential to take the necessary precautions and follow a systematic approach to achieve optimal results. Here’s a detailed guide for drilling holes in the brick wall for your Ring camera installation:
- Select the Right Drill Bit: Choose a masonry drill bit that matches the diameter of the mounting screws or anchors provided with the mounting bracket. The drill bit should be designed for drilling into brick or concrete to facilitate smooth and efficient hole creation.
- Wear Safety Gear: Prior to drilling, don safety goggles to protect your eyes from any debris or particles that may be generated during the drilling process. Additionally, consider wearing a dust mask to prevent inhalation of brick dust.
- Position the Drill: Hold the drill steady and position it perpendicular to the marked drill hole locations on the brick wall. Ensure that the drill is set to the appropriate rotation direction for drilling into masonry, typically in the forward or clockwise direction.
- Apply Even Pressure: With a firm grip on the drill, apply steady and even pressure as you begin drilling into the brick wall. Avoid excessive force, as the drill bit’s cutting edges are designed to gradually penetrate the brick material with consistent pressure.
- Create Clean Holes: Maintain a controlled and steady drilling pace to produce clean and uniform holes. Periodically withdraw the drill to clear away any accumulated dust and debris from the hole, allowing for smoother drilling progress.
- Monitor Depth and Cleanliness: Drill to the required depth as specified by the mounting bracket’s instructions, ensuring that the holes accommodate the screws or anchors securely. Verify that the holes are clean and free of obstructions to facilitate smooth insertion of the mounting hardware.
By following these guidelines and exercising caution throughout the drilling process, you can effectively create precise and well-prepared holes in the brick wall for mounting your Ring camera. With the holes in place, you’re ready to proceed to the next step of installing the mounting bracket securely onto the wall.
Before installing a ring camera on a brick wall, make sure to use a masonry drill bit to create pilot holes for the screws. Use wall anchors for added support and ensure the camera is securely attached to the wall.
Read more: How To Install A Ring Security Camera
Step 5: Install the Mounting Bracket
With the drill holes prepared in the brick wall, it’s time to proceed with installing the mounting bracket for your Ring camera. Proper installation of the bracket is essential for ensuring a secure and stable foundation for mounting the camera. Here’s a comprehensive guide to installing the mounting bracket onto the brick wall:
- Insert Anchors or Screws: Depending on the specific mounting hardware provided with the bracket, insert anchors or screws into the drilled holes in the brick wall. Ensure that the anchors are seated firmly and that the screws are positioned for attaching the bracket securely.
- Align the Bracket: Position the mounting bracket over the installed anchors or screws, aligning it with the drilled holes. Verify that the bracket is level and correctly oriented according to your preferred angle for camera coverage.
- Secure the Bracket: Utilize a screwdriver to fasten the mounting bracket to the brick wall by tightening the screws into the anchors. Apply even pressure to ensure that the bracket is securely affixed and does not wobble or shift once installed.
- Double-Check Alignment: After securing the bracket, reconfirm that it is level and properly aligned. Making any necessary adjustments at this stage ensures that the Ring camera will be mounted at the intended angle for optimal surveillance coverage.
- Test Stability: Apply gentle pressure to the mounted bracket to assess its stability. A properly installed bracket should remain firmly in place without loosening or shifting. Confirm that the bracket is securely attached before proceeding to the next installation steps.
By following these steps, you can effectively install the mounting bracket onto the brick wall, providing a sturdy and reliable base for mounting your Ring camera. With the bracket securely in place, you’re ready to proceed with attaching the Ring camera and adjusting its position to achieve the desired surveillance coverage.
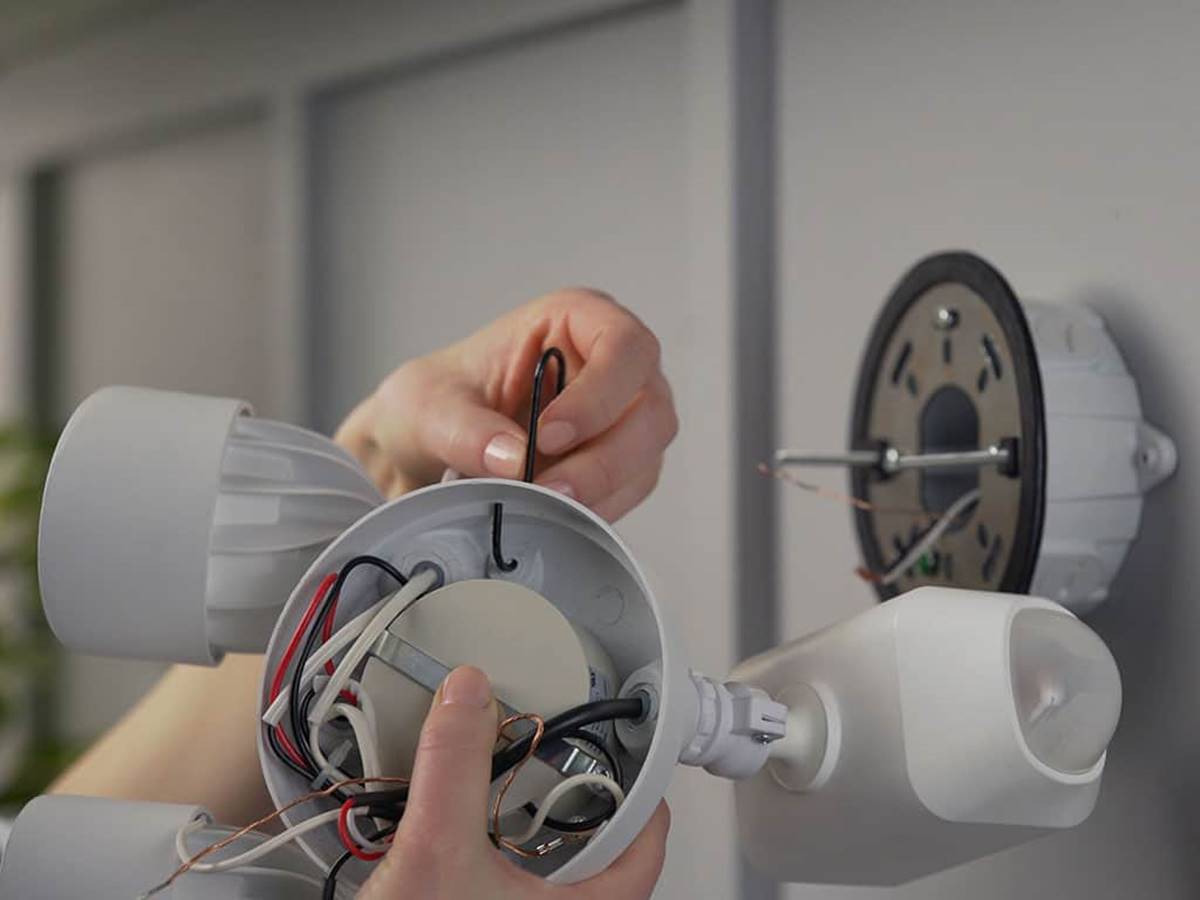
Step 6: Attach the Ring Camera to the Bracket
With the mounting bracket securely installed on the brick wall, it’s time to proceed with attaching the Ring camera to the bracket. Properly securing the camera ensures that it is positioned for optimal surveillance coverage and functionality. Here’s a detailed guide to attaching the Ring camera to the mounting bracket:
- Position the Camera: Hold the Ring camera near the mounting bracket, aligning it with the bracket’s mounting plate or slots. Ensure that the camera is oriented according to your preferred angle for capturing surveillance footage.
- Engage the Mounting Mechanism: Depending on the specific design of the Ring camera and mounting bracket, engage the mounting mechanism to affix the camera securely to the bracket. Follow the camera’s instructions for locking it into place on the bracket.
- Verify Stability: Once the camera is attached to the bracket, verify its stability and alignment. Gently adjust the camera’s position if necessary to achieve the desired angle and coverage. Confirm that the camera is securely fastened and does not sway or shift once attached to the bracket.
- Test Camera Functions: Before finalizing the camera’s position, test its functionality to ensure that it captures clear footage and maintains a reliable connection to your home network. Verify that the camera’s features, such as motion detection and audio capabilities, are operational and optimized for your surveillance needs.
- Secure Any Cables: If the Ring camera requires a power cable or wiring for connectivity, secure and route the cables neatly to prevent obstructions and maintain a tidy installation. Ensure that the cables do not interfere with the camera’s positioning or stability.
By following these steps, you can confidently attach the Ring camera to the mounting bracket, setting the stage for adjusting its position and ensuring that it effectively captures the surveillance footage you require. With the camera securely in place, you’re ready to proceed to the next step of fine-tuning its position for optimal coverage and functionality.
Step 7: Adjust the Camera Position
After attaching the Ring camera to the mounting bracket, it’s essential to fine-tune its position to ensure optimal surveillance coverage and functionality. Adjusting the camera’s angle and orientation allows you to customize its viewing perspective and address specific monitoring needs. Here’s a comprehensive guide to adjusting the position of the Ring camera on the brick wall:
- Assess Surveillance Coverage: Stand back and assess the camera’s current positioning to evaluate the coverage of the monitored area. Identify any blind spots or areas that require enhanced visibility, and consider adjusting the camera’s angle accordingly.
- Utilize the Camera’s App: If your Ring camera is equipped with a mobile app for remote control and monitoring, use the app to view the camera’s live feed and adjust its position in real time. This allows for precise adjustments without the need to physically interact with the camera.
- Optimize Viewing Angle: Fine-tune the camera’s angle to capture the desired surveillance footage. Ensure that critical areas, such as entry points or outdoor spaces, are within the camera’s field of view, providing comprehensive monitoring of your property.
- Consider Sunlight and Glare: Account for potential issues related to sunlight and glare that may affect the camera’s visibility. Adjust the camera’s position to minimize glare and ensure that direct sunlight does not obstruct the captured footage during specific times of the day.
- Test Motion Detection: Activate the camera’s motion detection feature and test its responsiveness to movement within the monitored area. Adjust the camera’s position as needed to optimize motion detection sensitivity and accuracy, reducing false alerts and enhancing security.
- Secure the Adjusted Position: Once the camera’s position is fine-tuned to your satisfaction, ensure that it is securely fastened in its adjusted orientation. Confirm that the camera remains stable and aligned with the mounting bracket to maintain consistent surveillance coverage.
By following these steps, you can effectively adjust the position of the Ring camera on the brick wall, ensuring that it captures the surveillance footage you require while addressing specific monitoring considerations. With the camera optimally positioned, you’re ready to proceed to the final steps of connecting the camera to power and Wi-Fi for seamless operation.
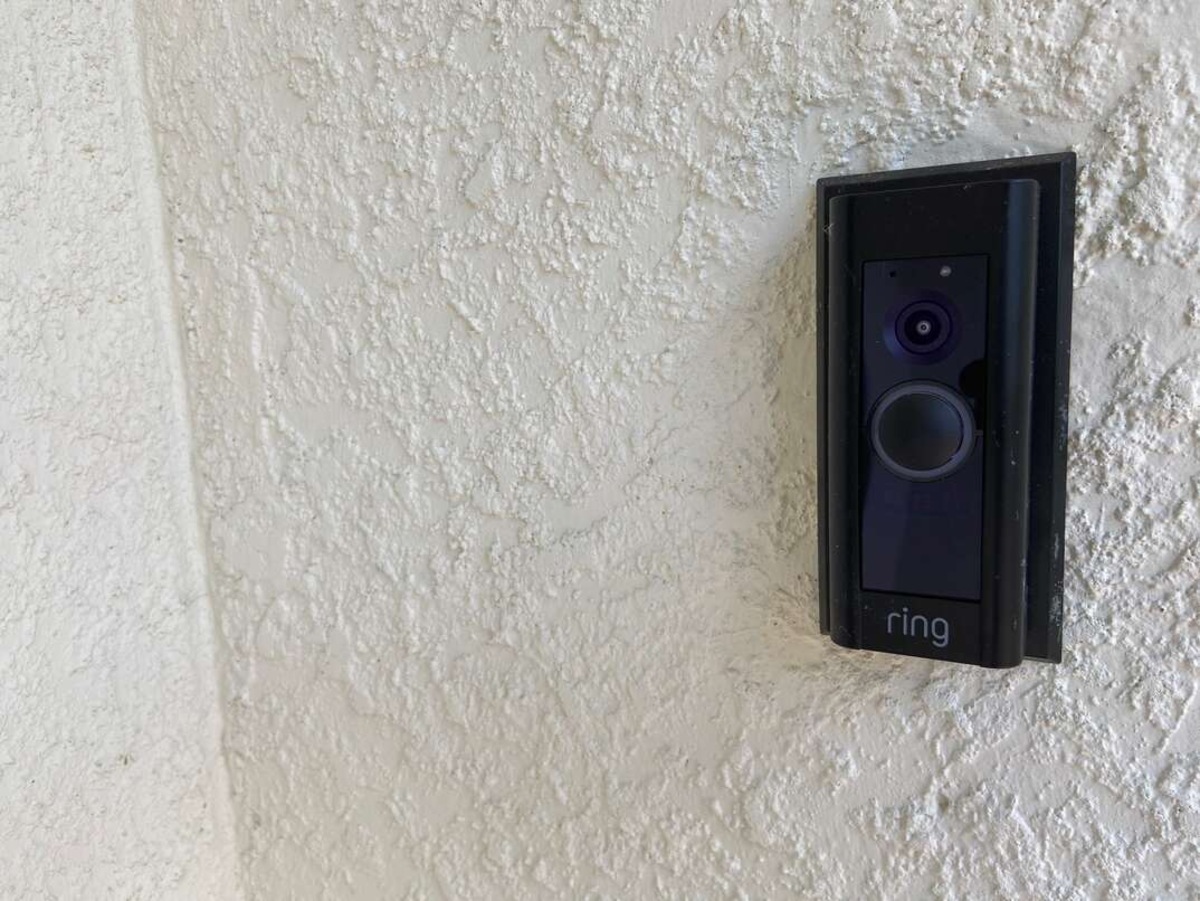
Step 8: Connect the Camera to Power and Wi-Fi
Connecting your Ring camera to power and Wi-Fi is the final crucial step in the installation process, enabling the camera to function seamlessly and provide reliable surveillance capabilities. Here’s a comprehensive guide to connecting the Ring camera to power and Wi-Fi for optimal performance:
- Locate the Power Source: Identify the nearest outdoor power outlet or power source suitable for your Ring camera’s requirements. Ensure that the selected power source is accessible and within reach of the camera’s location on the brick wall.
- Use Outdoor-Rated Power Cable: If your Ring camera requires a direct power connection, use an outdoor-rated power cable that is designed to withstand outdoor conditions and provide a secure and weatherproof connection to the camera.
- Connect the Power Cable: Plug the power cable into the Ring camera, ensuring a snug and secure connection. Route the cable neatly along the wall or through a conduit to maintain a tidy and unobtrusive installation while protecting the cable from environmental elements.
- Verify Power Supply: Confirm that the power supply to the camera is stable and operational. Test the camera’s functionality to ensure that it powers on and remains consistently powered, allowing for uninterrupted surveillance and video recording.
- Access the Wi-Fi Settings: Utilize the Ring camera’s mobile app or interface to access the Wi-Fi settings. Follow the provided instructions to connect the camera to your home Wi-Fi network, ensuring a secure and reliable connection for video streaming and remote access.
- Test Connectivity: Verify that the Ring camera successfully connects to your home Wi-Fi network. Monitor the camera’s status within the app to confirm a stable connection and seamless integration with your existing home security system, if applicable.
- Configure Camera Settings: Customize the camera’s settings, such as motion detection sensitivity, video recording preferences, and notification alerts, to align with your specific surveillance requirements and personal preferences.
- Perform a Test Recording: Initiate a test recording or live stream to ensure that the Ring camera captures clear and reliable footage while connected to power and Wi-Fi. Confirm that the camera’s features and functionalities are fully operational and optimized for monitoring your property.
By following these steps, you can effectively connect your Ring camera to power and Wi-Fi, ensuring that it is fully integrated into your home security system and ready to provide comprehensive surveillance capabilities. With the camera successfully powered and connected, you can enjoy the peace of mind and convenience offered by modern security technology.
Read more: How To Install A Ring Camera Outdoor
Conclusion
Congratulations! You’ve successfully navigated the process of installing a Ring camera on a brick wall, enhancing the security and surveillance capabilities of your property. By following the comprehensive steps outlined in this guide, you’ve positioned the camera for optimal coverage, connected it to power and Wi-Fi, and fine-tuned its settings to align with your specific monitoring needs.
With the Ring camera in place, you can now enjoy the peace of mind that comes with advanced home security technology. Whether you’re monitoring entry points, outdoor spaces, or specific areas of interest, the camera’s reliable performance and seamless integration with your home network ensure that you can stay connected and informed about your property’s surroundings.
As you continue to explore the features and functionalities of your Ring camera, consider customizing its settings to maximize its effectiveness in safeguarding your home. From adjusting motion detection sensitivity to scheduling recording times, the camera offers a range of options to tailor its surveillance capabilities to your preferences.
Remember to periodically review and maintain your Ring camera’s installation to ensure that it remains securely mounted and fully operational. Regularly checking for firmware updates and optimizing its positioning based on changing surveillance needs can further enhance its performance over time.
By embracing modern security solutions such as the Ring camera, you’ve taken a proactive step in safeguarding your home and prioritizing the safety of your loved ones and property. With reliable surveillance and remote monitoring at your fingertips, you can enjoy greater peace of mind and convenience in managing your home security.
Thank you for investing the time and effort to install your Ring camera with care and precision. May it continue to serve as a valuable asset in fortifying the security of your home for years to come.
Now that you've mastered installing your Ring camera, why not dive deeper into upgrading your home with the latest technology? If you're eager to transform your living space into a smarter, more efficient haven, our detailed guide on home automation is just what you need. For those looking to integrate cutting-edge technology into every corner of their household, our insights on smart home technology will open doors to new possibilities. Both guides are packed with practical tips that'll make your home both safer and more intuitive.
Frequently Asked Questions about How To Install Ring Camera On Brick Wall
Was this page helpful?
At Storables.com, we guarantee accurate and reliable information. Our content, validated by Expert Board Contributors, is crafted following stringent Editorial Policies. We're committed to providing you with well-researched, expert-backed insights for all your informational needs.


0 thoughts on “How To Install Ring Camera On Brick Wall”