Home>Interior Design>Pine Cone Christmas Craft Ideas: 21 Seasonal Makes
Interior Design
Pine Cone Christmas Craft Ideas: 21 Seasonal Makes
Modified: October 20, 2024
Looking to bring some festive cheer to your home? Check out these 21 creative Christmas craft ideas using pine cones. Perfect for interior design enthusiasts.
(Many of the links in this article redirect to a specific reviewed product. Your purchase of these products through affiliate links helps to generate commission for Storables.com, at no extra cost. Learn more)
Introduction
When it comes to Christmas crafts, there’s nothing quite as versatile and charming as pine cones. These natural treasures from the forest can be transformed into beautiful decorations that bring a touch of rustic elegance to your home during the holiday season. Whether you gather pine cones from your backyard or pick up a bag of them from a craft store, the possibilities for creating stunning pine cone Christmas crafts are endless.
In this article, we’ve compiled a list of 21 creative and festive pine cone craft ideas that will inspire you to get crafty this holiday season. From wreaths to ornaments, garlands to centerpieces, we’ve got you covered with a wide range of ideas that will add a cozy and whimsical touch to your Christmas decor.
So grab your glue gun, some glitter, and a dash of creativity, and let’s dive into the wonderful world of pine cone Christmas crafts!
Key Takeaways:
- Embrace the natural beauty of pine cones to create charming and versatile holiday decorations, from wreaths to ornaments, adding a touch of rustic elegance to your home.
- Infuse your holiday decor with the enchanting spirit of the season by crafting a whimsical winter village and transforming pine cones into delightful angel ornaments and fairy lights.
Read more: How To Plant Pine Cone Seeds
Pine Cone Wreath
A pine cone wreath is a classic and timeless decoration that adds a festive and natural touch to your front door or wall. To make a pine cone wreath, you’ll need a foam wreath ring, a hot glue gun, and plenty of pine cones.
Start by applying a small dot of hot glue to the base of each pine cone and attaching it to the wreath ring. Arrange the pine cones in a circular pattern, covering the entire surface of the wreath. You can leave the pine cones in their natural state or spray paint them in colors that complement your holiday theme.
Once the glue has dried and the pine cones are securely attached, you can embellish your wreath with additional elements like ribbon, artificial berries, or even small ornaments. Hang your pine cone wreath on your front door or use it as a festive centerpiece by placing a candle in the center.
Pine cone wreaths can be customized in various ways to suit your personal style. You can create a rustic wreath using only natural materials like twigs and pine cones, or opt for a more glamorous look by adding glitter and metallic accents. Whichever style you choose, a pine cone wreath is sure to make a statement and welcome guests to your home during the holiday season.
Pine Cone Ornaments
Pine cone ornaments are a lovely and budget-friendly way to add a touch of nature to your Christmas tree. These ornaments can be created using both real and faux pine cones, and the possibilities for customization are endless.
To make pine cone ornaments, start by collecting pine cones of various sizes. If you’re using real pine cones, make sure to clean them thoroughly and remove any debris or bugs. To ensure durability, you can also bake the pine cones in the oven at a low temperature for about 30 minutes.
Once your pine cones are prepped, it’s time to unleash your creativity. You can simply add a hook or string to the top of each pine cone for hanging, or you can take it a step further by embellishing them. You can use acrylic paints and glitter to add color and sparkle, or wrap the pine cones with ribbon or twine for a rustic look. For a whimsical touch, glue small ornaments, faux berries, or tiny fairy lights to the pine cones.
Pine cone ornaments can be personalized to reflect your personal style and interests. You can create themed ornaments by painting designs such as snowflakes, reindeer, or Santa hats on the scales of the pine cone. Another idea is to adorn the pine cone with natural elements like dried flowers, feathers, or even small figurines.
Once your pine cone ornaments are complete, hang them on your Christmas tree or use them as unique gift toppers. You can also create a festive display by placing the ornaments in a clear glass bowl or hanging them from a decorative branch.
Pine cone ornaments not only add a natural and rustic touch to your Christmas tree, but they also bring a sense of warmth and nostalgia. So gather your pine cones and let your imagination soar as you create one-of-a-kind ornaments that will become cherished keepsakes for years to come.
Pine Cone Garland
A pine cone garland is a beautiful and versatile decoration that can be used to adorn your mantel, staircase, or even your Christmas tree. Creating a pine cone garland is a fun and simple craft project that adds a touch of natural elegance to your holiday decor.
To make a pine cone garland, you’ll need a string or twine, pine cones of various sizes, and a hot glue gun. Start by measuring the desired length of your garland and cut the string accordingly. Next, attach a small loop of string at each end of the garland to make it easier to hang.
Now comes the fun part – attaching the pine cones to the string. Apply a small dot of hot glue to the base of each pine cone and press it firmly onto the string. Leave a small gap between each pine cone to ensure that they hang nicely. You can alternate the sizes of the pine cones or use a uniform size for a more cohesive look.
If you want to add some sparkle to your pine cone garland, you can dust the pine cones with glitter while the glue is still hot or spray them with a metallic spray paint. You can also tie small bows or ribbons between the pine cones to add a festive touch.
Pine cone garlands can be customized to match your preferred color scheme. You can paint the pine cones in different colors, or wrap them with colored yarn or ribbon. Adding additional elements like faux berries, pine branches, or small ornaments can also enhance the overall look of the garland.
Hang your pine cone garland on your mantel, drape it along your staircase railing, or use it to dress up your Christmas tree. Pine cone garlands bring a natural and rustic charm to any space, infusing it with the warmth and beauty of the holiday season.
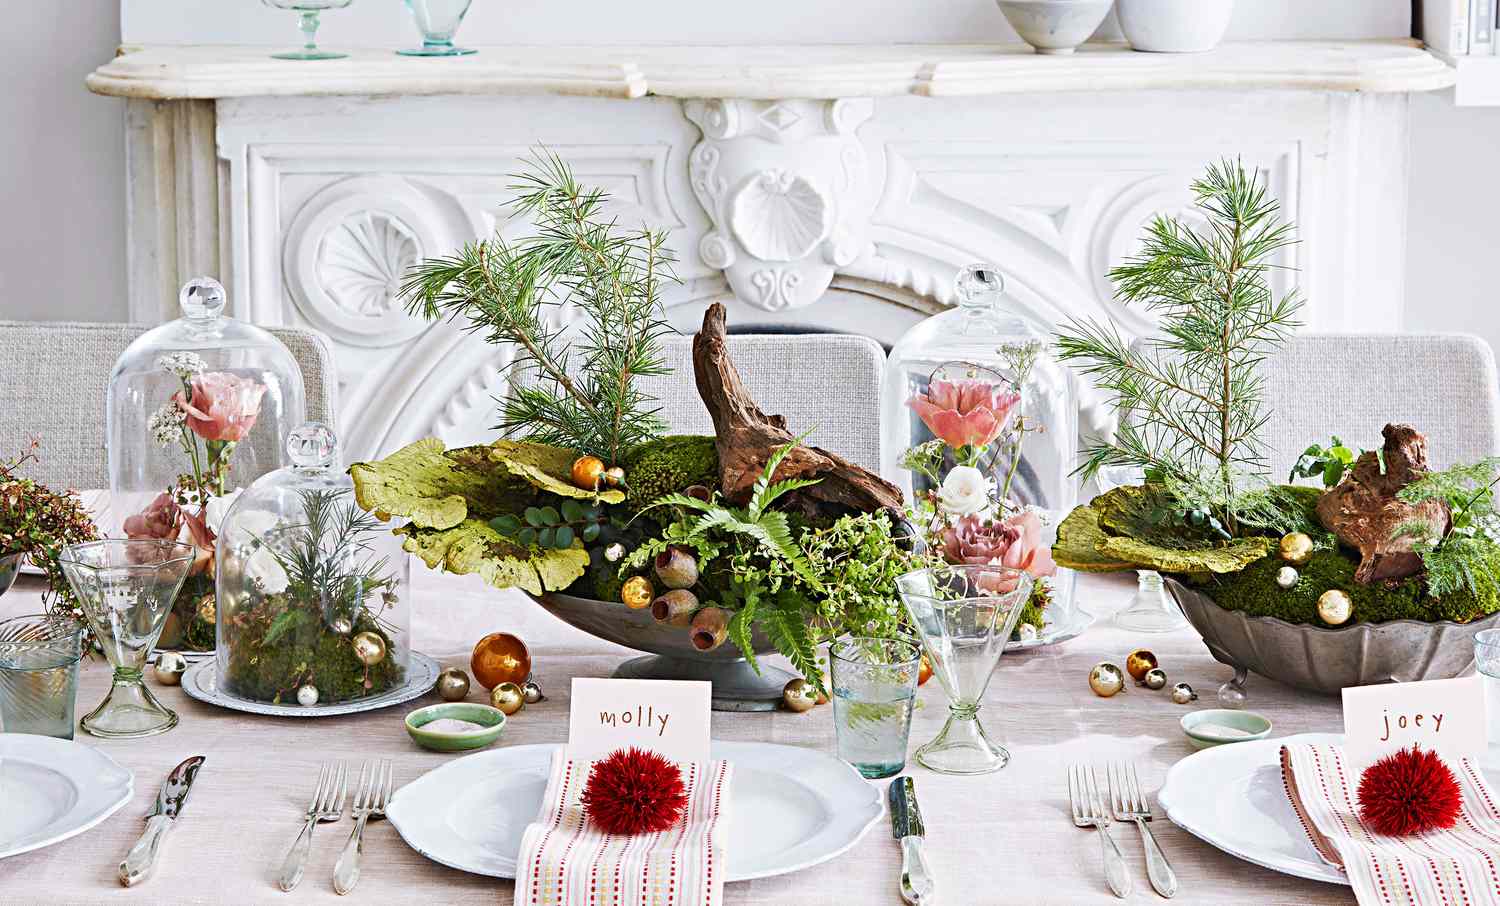
Pine Cone Centerpiece
A pine cone centerpiece is a delightful way to add a touch of nature to your holiday table. This versatile decoration can be as simple or elaborate as you desire, making it the perfect focal point for your dining table or buffet.
To create a pine cone centerpiece, you’ll need a shallow bowl, a foam or floral oasis block, pine cones, and various additional elements such as candles, greenery, or decorative accents. Start by arranging the foam block in the bowl and securing it in place. This will serve as the base for your centerpiece.
Next, gather a selection of pine cones in different sizes and attach them to wooden skewers or floral picks. Insert the picks into the foam block, arranging the pine cones to create a visually pleasing composition. You can arrange them in a cluster in the center or scatter them evenly throughout the foam base.
To enhance the centerpiece, you can add other natural elements like greenery, such as pine branches or sprigs of holly, or pine needles. You can also incorporate other holiday-themed accents like small ornaments, festive bows, or faux berries. If you want to add a warm glow to the centerpiece, insert candles of varying heights among the pine cones.
For a more rustic look, you can sprinkle the pine cones with a light dusting of glitter or spray them with a metallic paint. You can also tie a rustic bow around the bowl or incorporate natural materials like twigs or burlap into the design.
The beauty of a pine cone centerpiece lies in its versatility. You can customize it to match your desired color scheme or theme, whether it’s a traditional red and green holiday palette or a more modern and minimalist approach. Experiment with different elements and arrangements to create a centerpiece that reflects your personal style.
A pine cone centerpiece not only adds a natural and earthy touch to your holiday table, but it also serves as a conversation starter and focal point. Your guests will be impressed by the thought and creativity that goes into creating such a unique and beautiful centerpiece.
Read more: Where Are The Seeds In A Pine Cone
Pine Cone Tree Decorations
Pine cone tree decorations are a charming and rustic addition to your Christmas tree. These natural accents bring a touch of the outdoors inside your home, creating a warm and cozy holiday atmosphere.
To create pine cone tree decorations, you’ll need pine cones of varying sizes, string or ribbon for hanging, and any additional embellishments you desire. Start by attaching a loop of string or ribbon to the top of each pine cone, making it easy to hang them on the branches of your Christmas tree.
For a simple and elegant look, you can leave the pine cones in their natural state. However, if you want to add a touch of festive flair, you can brush the tips of the pine cones with white or silver paint to mimic the look of snowy branches.
For a more whimsical and colorful tree, you can decorate the pine cones with acrylic paint in various shades. Create patterns like stripes, polka dots, or even paint them to resemble little Christmas characters like snowmen or reindeer.
If you want to add some sparkle, you can apply a layer of glue to the edges of the pine cone scales and sprinkle them with glitter. You can also wrap the pine cones with ribbon or twine, creating a pretty bow at the top for a festive touch.
For an extra special touch, consider adding small ornaments or faux berries to the pine cones. Hot glue these little decorations onto the pine cone scales for a secure hold.
When decorating your Christmas tree with pine cone ornaments, it’s important to distribute them evenly throughout the branches. Mix different sizes together and vary the placement to create a balanced and visually appealing look. Mixing in other ornaments, lights, and garlands will complete the overall design of your tree.
Pine cone tree decorations add a timeless beauty and a touch of nature to your Christmas tree. They beautifully complement any theme or color scheme, and their versatility allows you to create a unique and personalized tree that reflects your style and festive spirit.
Pine Cone Advent Calendar
A pine cone advent calendar is a creative and interactive way to count down the days until Christmas. This DIY project combines the natural beauty of pine cones with the excitement of opening a daily surprise.
To make a pine cone advent calendar, you will need 24 pine cones, small envelopes or boxes, number stickers or labels, and a display board or frame. Start by preparing the pine cones – clean them thoroughly and let them dry completely.
Next, attach a small envelope or box to the back of each pine cone using hot glue or double-sided tape. You can find miniature envelopes or small boxes at craft stores or online. These will serve as compartments for the surprises or treats that correspond to each day of December leading up to Christmas.
Add a number sticker or label to each pine cone to indicate the corresponding date. You can use stickers, adhesive labels, or even write the numbers directly on the pine cones with a marker or paint.
Arrange the pine cones in a random or numerical order on a display board or frame. You can use a corkboard, a piece of fabric, or a decorative frame with wires or clips to hold the pine cones in place.
Fill each envelope or box with a small surprise or treat. This can include candies, chocolates, small toys, or handwritten notes with festive activities or messages. Get creative with what you include, tailoring it to the preferences and interests of those who will be enjoying the advent calendar.
Beginning on December 1st, each day, open the designated pine cone to reveal the surprise or treat inside. The anticipation and joy of discovering what awaits each day will add an extra layer of excitement to the holiday season.
A pine cone advent calendar not only adds a decorative touch to your home during the Christmas season but also creates a memorable and interactive experience for both children and adults. It’s an opportunity to slow down, savor the holiday moments, and build anticipation for the big day.
Pine Cone Place Card Holders
Pine cone place card holders are a charming and unique way to add a personal touch to your holiday table setting. These natural and rustic decorations serve a dual purpose – they beautifully display your guests’ names and add a touch of nature to the table.
To make pine cone place card holders, you will need pine cones of similar size, a hot glue gun, small wooden or cardstock rectangles, and markers or calligraphy pens.
Start by selecting pine cones that are proportionate to the size of the place cards you will be using. If necessary, trim the stem of the pine cone to ensure it sits flat on the table.
Next, attach one end of a small wooden or cardstock rectangle to the base of each pine cone using hot glue. This will serve as the place card holder and provide a stable base for the pine cone to stand upright.
Write or print the names of your guests onto the wooden or cardstock rectangles. You can use a calligraphy pen for an elegant look or simply use a marker for a more casual style. Get creative with your font choices and colors to match the overall aesthetic of your table setting.
Once the place cards are ready, insert them into the slot at the base of each pine cone. Adjust the angle of the place card as needed to ensure it is easily readable for your guests.
Pine cone place card holders can be further personalized and decorated to suit your style and theme. You can leave the pine cones in their natural state for a rustic look or spray paint them in colors that match your table decor. Adding small decorative elements like faux berries, twine bows, or greenery can also enhance the visual appeal of the place card holders.
Place the pine cone card holders at each guest’s seat, positioning them at the top of the plate or on the napkin. Your guests will not only appreciate the effort you put into creating the unique place card holders but will also feel special and welcomed as they find their designated seats.
Pine cone place card holders add a whimsical and natural touch to your holiday table. They not only serve as functional decor but also make for great conversation starters and memorable keepsakes for your guests to take home.
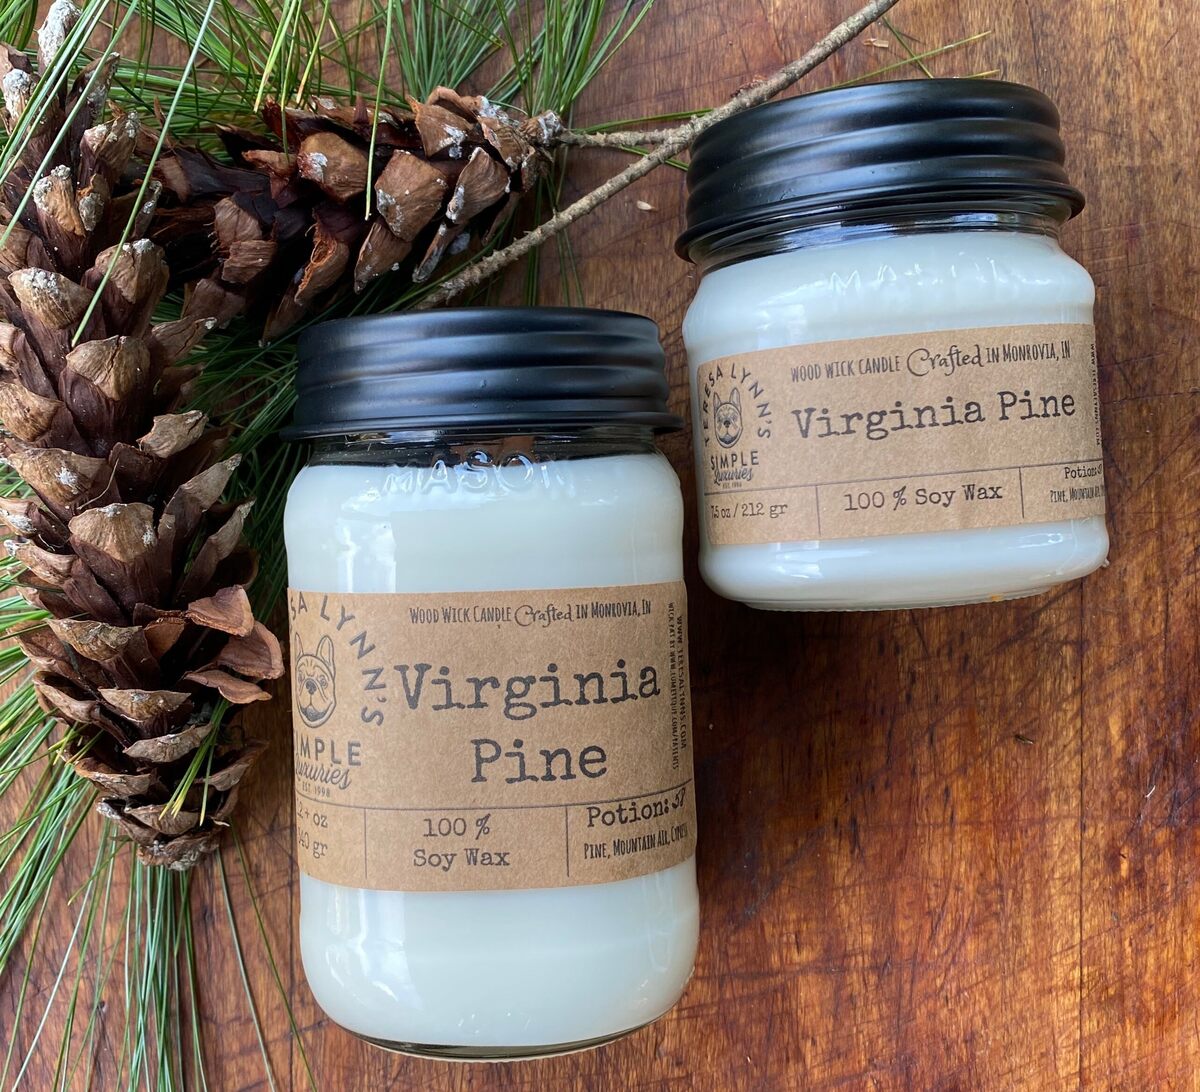
Pine Cone Fire Starters
Pine cone fire starters are not only practical but also make for a beautiful and aromatic addition to your fireplace or wood-burning stove. These DIY fire starters are easy to make and can be a great way to upcycle pine cones while adding a touch of natural charm.
To create pine cone fire starters, you will need pine cones of varying sizes, candle wax or soy wax flakes, a double boiler or microwave-safe container, and a wick or cotton twine.
Start by preparing the pine cones – make sure they are clean and dry. You can also bake them in the oven at a low temperature for about 30 minutes to remove any moisture and open the pine cone scales.
Melt the candle wax or soy wax flakes in a double boiler or microwave-safe container according to the manufacturer’s instructions. If using a microwave, heat the wax in short intervals, stirring in between, until it has completely melted.
While the wax is melting, attach a wick or cotton twine to the bottom of each pine cone. You can use a small dot of hot glue to secure the wick in place.
Dip each pine cone into the melted wax, making sure to coat all the scales. You may need to hold the wick or twine to facilitate the dipping process. Allow any excess wax to drip off and place the pine cone on a parchment paper-lined tray or cooling rack to cool and harden.
Once the wax has completely hardened, you can trim the wick or twine to a suitable length. Your pine cone fire starters are now ready to be used.
To use the pine cone fire starters, simply place them in your fireplace or wood-burning stove, among the kindling and logs. When you light the wick or twine, the wax will slowly melt and help ignite the fire, providing a beautiful flickering flame and a pleasant scent from the burning pine cone.
Pine cone fire starters not only make starting a fire more convenient but also add a lovely ambiance and fragrance to your home. They can be a great addition during the holiday season or any time you want to enjoy a cozy and warm fire.
Remember to exercise caution and follow fire safety guidelines when using pine cone fire starters or any fire-related products.
Read more: How To Harvest Pine Cone Seeds
Pine Cone Gift Toppers
Pine cone gift toppers are a charming and rustic way to add a natural touch to your holiday gift wrapping. These DIY toppers can turn a simple gift into a beautifully adorned present, delighting your loved ones before they even open it.
To make pine cone gift toppers, you will need pine cones of various sizes, craft wire or twine, small decorative elements, and hot glue.
Start by selecting pine cones that are proportionate to the size of your gifts. Clean them thoroughly and let them dry completely before proceeding.
Next, attach a piece of craft wire or twine to the base of each pine cone using hot glue. Make sure the wire or twine is securely attached so that the topper stays in place on the gift.
You can now get creative with decorating the pine cones. You can leave them in their natural state or add some festive flair by dusting the edges with glitter or spray painting them in gold or silver.
For a more decorative look, attach small embellishments like artificial berries, leaves, or small ornaments to the pine cones using hot glue. You can also tie a colorful ribbon or twine around the base of the pine cone for an extra pop of color.
Once your pine cone gift toppers are complete, attach them to your wrapped gifts by wrapping the wire or twine around the ribbon or tape on the package. Arrange them to your liking, and make sure they are secure.
Pine cone gift toppers not only add a natural and rustic touch to your gift wrapping but also serve as a lovely keepsake that can be used as a decorative ornament after the gift has been opened.
They are especially fitting for gifts that have an outdoorsy or nature-inspired theme. Your friends and family will appreciate the thoughtfulness and creativity that went into making their gifts extra special.
So next time you’re wrapping a gift, consider adding a pine cone gift topper for a unique and charming finishing touch.
Pine Cone Napkin Rings
Pine cone napkin rings are a simple and elegant way to elevate your table setting. These DIY napkin rings add a touch of nature and sophistication, creating a beautiful and cohesive look for your dining experience.
To make pine cone napkin rings, you will need pine cones of similar size, craft wire or twine, small decorative elements, and hot glue.
Start by selecting pine cones that are proportionate to the size of your napkins. Clean them thoroughly and let them dry completely before moving on to the next step.
Next, wrap a piece of craft wire or twine around the base of each pine cone, leaving enough excess to form a loop or secure it around your napkin. Twist or tie the ends of the wire or twine to secure it in place.
Now, it’s time to add some decorative elements to your napkin rings. You can keep them simple and natural by leaving the pine cones as they are, or you can enhance their beauty by dusting the edges with glitter or spraying them with metallic paint.
For a more elaborate look, attach small embellishments such as artificial leaves, berries, or small ornaments to the pine cones using hot glue. You can also incorporate additional elements like ribbon, twine, or fresh greenery to enhance the overall design.
Once your pine cone napkin rings are complete, slide them onto your folded napkins, making sure they are secure. Arrange them on your table to add a rustic and festive touch.
Pine cone napkin rings not only bring a natural and earthy element to your table setting but also serve as a conversation starter and memorable detail for your guests. They can be used for any occasion, whether it’s a formal dinner party, a casual get-together, or a holiday celebration.
Your guests will appreciate the thoughtfulness and creativity that went into creating these unique napkin rings. They are sure to leave a lasting impression and make your table setting truly special.
So, bring a touch of nature and elegance to your table with pine cone napkin rings, and enjoy a dining experience that is both visually stunning and environmentally friendly.
Pine Cone Snowflake Decorations
Pine cone snowflake decorations are a beautiful and whimsical addition to your holiday decor. These DIY ornaments capture the essence of winter and bring a touch of enchantment to any space.
To create pine cone snowflake decorations, you will need pine cones of varying sizes, white spray paint, craft glue, glitter, and small decorative elements like beads or sequins.
Start by selecting pine cones that have distinct and open scales, resembling the shape of a snowflake. Thoroughly clean and dry the pine cones before beginning the decorating process.
Once the pine cones are ready, lay them on a protected surface and apply a coat of white spray paint, covering them evenly. Allow the paint to dry completely.
Next, using craft glue, selectively apply glue to certain areas of the pine cone scales to create a snowy effect. You can choose to highlight the edges of the scales or create a dusting of snow across the entire pine cone.
While the glue is still wet, sprinkle glitter over the areas coated with glue. Use a small brush or your fingers to gently press the glitter into the glue and ensure it adheres well.
For added sparkle and a decorative touch, you can glue small beads or sequins onto the pine cone snowflakes, placing them at the center of each scale or along the edges.
Allow the glue to dry completely before handling the pine cone snowflakes. Once dry, these delicate ornaments are ready to be displayed.
You can hang the pine cone snowflakes on your Christmas tree, create a snowflake-themed garland, or even glue them onto a wreath for a unique winter touch. They can also be used to decorate windows, walls, or tabletops.
Pine cone snowflake decorations bring a touch of winter wonderland inside your home. Their natural beauty, combined with the shimmering snow and glitter, evokes a sense of magic and tranquility during the holiday season.
So, put on your creative hat and let the pine cone snowflakes transform your space into a sparkling winter paradise.
When using pine cones for Christmas crafts, make sure to clean and dry them thoroughly to remove any dirt or sap. This will ensure that your finished crafts look clean and professional.
Pine Cone Table Runner
A pine cone table runner is a unique and eye-catching centerpiece that adds a natural and rustic touch to your dining table. This DIY project allows you to create a stunning display using pine cones and other natural elements.
To make a pine cone table runner, you will need a burlap or fabric table runner, pine cones, hot glue, and optional additional elements like greenery or small ornaments.
Start by laying out the burlap or fabric table runner on your dining table. You can choose a plain and neutral color or opt for a festive pattern that complements your holiday decor.
Next, prepare the pine cones by cleaning them thoroughly and letting them dry completely. You may also want to bake them in the oven at a low temperature for about 30 minutes to remove any moisture and open the scales.
Once the pine cones are ready, arrange them along the length of the table runner, starting from one end and working your way to the other. Leave an equal amount of space between each pine cone to ensure a balanced and visually pleasing design.
Secure each pine cone onto the table runner by applying hot glue to the base and pressing it firmly onto the fabric. Be careful not to use too much glue to avoid any damage to the fabric.
If desired, you can enhance the pine cone table runner by adding additional natural elements like greenery, such as pine branches, holly leaves, or sprigs of eucalyptus. Tuck them in between the pine cones and secure them with hot glue if necessary.
Add a touch of festive charm by incorporating small ornaments or decorative elements throughout the pine cone table runner. This can include mini baubles, cinnamon sticks, or even faux berries.
Once the pine cone table runner is complete, place it in the center of your dining table. It will instantly become a focal point and conversation starter for your guests, bringing the beauty of nature indoors and creating a warm and inviting atmosphere.
A pine cone table runner is not only a stunning centerpiece but also a versatile decor item. It can be used for various occasions and easily customized to match your desired theme or color scheme.
So, gather your materials, embrace your creativity, and let a pine cone table runner become a standout element in your holiday decor.
Read more: How To Germinate A Redwood From A Pine Cone
Pine Cone Candle Holders
Pine cone candle holders are a beautiful and natural way to add a warm and cozy ambiance to your home decor. These DIY candle holders bring together the rustic charm of pine cones and the flickering glow of candles for a truly enchanting display.
To create pine cone candle holders, you will need large, sturdy pine cones, a hot glue gun, tea light candles, and optional additional decorations like ribbon or greenery.
Start by selecting pine cones that can securely hold a tea light candle. You can choose pine cones that have wide and open scales to accommodate the candle.
Thoroughly clean the pine cones to remove any dirt or debris. You can use a brush or compressed air to gently clean out the crevices between the scales.
Once your pine cones are clean and dry, place a small dot of hot glue in the center of each scale. Press the tea light candle onto the glue, ensuring it is firmly attached to the pine cone.
Allow the hot glue to dry completely before handling the pine cone candle holders. This will ensure that the candles are securely fixed and won’t loosen or detach.
If desired, you can further embellish the pine cone candle holders by tying a ribbon around the base of the pine cone or adding sprigs of greenery or faux berries for a festive touch.
To display your pine cone candle holders, place them on a heat-resistant surface, such as a tray or decorative plate. Be sure to keep them away from flammable materials and never leave them unattended while lit.
When you light the tea light candles, the soft glow will illuminate the intricate details of the pine cones, creating a cozy and intimate atmosphere in your home.
Pine cone candle holders make stunning centerpieces for dining tables, mantels, or coffee tables. They can also be used to create a warm and inviting atmosphere during special occasions or holiday gatherings.
Whether you’re enjoying a quiet evening at home or hosting a festive celebration, the natural beauty and warm glow of pine cone candle holders will add a touch of elegance and charm to any space.
Pine Cone Christmas Trees
Pine cone Christmas trees are a delightful and creative way to bring the spirit of the holiday season into your home. These DIY decorations capture the essence of nature and add a whimsical touch to your festive decor.
To make pine cone Christmas trees, you will need pine cones of various sizes, paint or spray paint, a foam cone or sturdy base, hot glue, and optional decorative elements like beads or small ornaments.
Start by selecting pine cones that gradually decrease in size, resembling the shape of a tree. Clean them thoroughly and let them dry completely before moving on to the next step.
Once the pine cones are ready, you can choose to paint them in traditional green hues or experiment with different colors to match your desired theme. You can use acrylic paint or spray paint for easy and even coverage.
Paint the pine cones and allow them to dry completely. You may need to apply multiple coats for a vibrant and opaque finish. If using spray paint, be sure to work in a well-ventilated area or outdoors.
While the paint is drying, prepare the foam cone or base. If using a foam cone, secure it upright on a flat surface. If you don’t have a foam cone, you can create a sturdy base using cardboard or a small wooden block.
Once the paint on the pine cones is dry, start attaching them to the foam cone or base using hot glue. Begin from the bottom and work your way up, arranging the painted pine cones in a tree-like formation. Ensure that each pine cone is securely glued in place.
If desired, you can further embellish the pine cone Christmas tree by adding small decorative elements like beads or mini ornaments. Use hot glue to secure these additional decorations to the pine cones, creating a festive and personalized touch.
Once you’ve completed the arrangement, take a step back and admire your masterpiece. Your pine cone Christmas tree will add a natural and whimsical element to your holiday decor.
Display your pine cone Christmas tree on a tabletop or mantel, or even as a centerpiece for your holiday dinner. You can also place it on a decorative tray or inside a glass cloche for an elegant and magical display.
A pine cone Christmas tree is not only a creative and eco-friendly decoration, but it also serves as a symbol of the beauty of nature and the joy of the holiday season. Enjoy the festive spirit that these charming trees bring to your home.
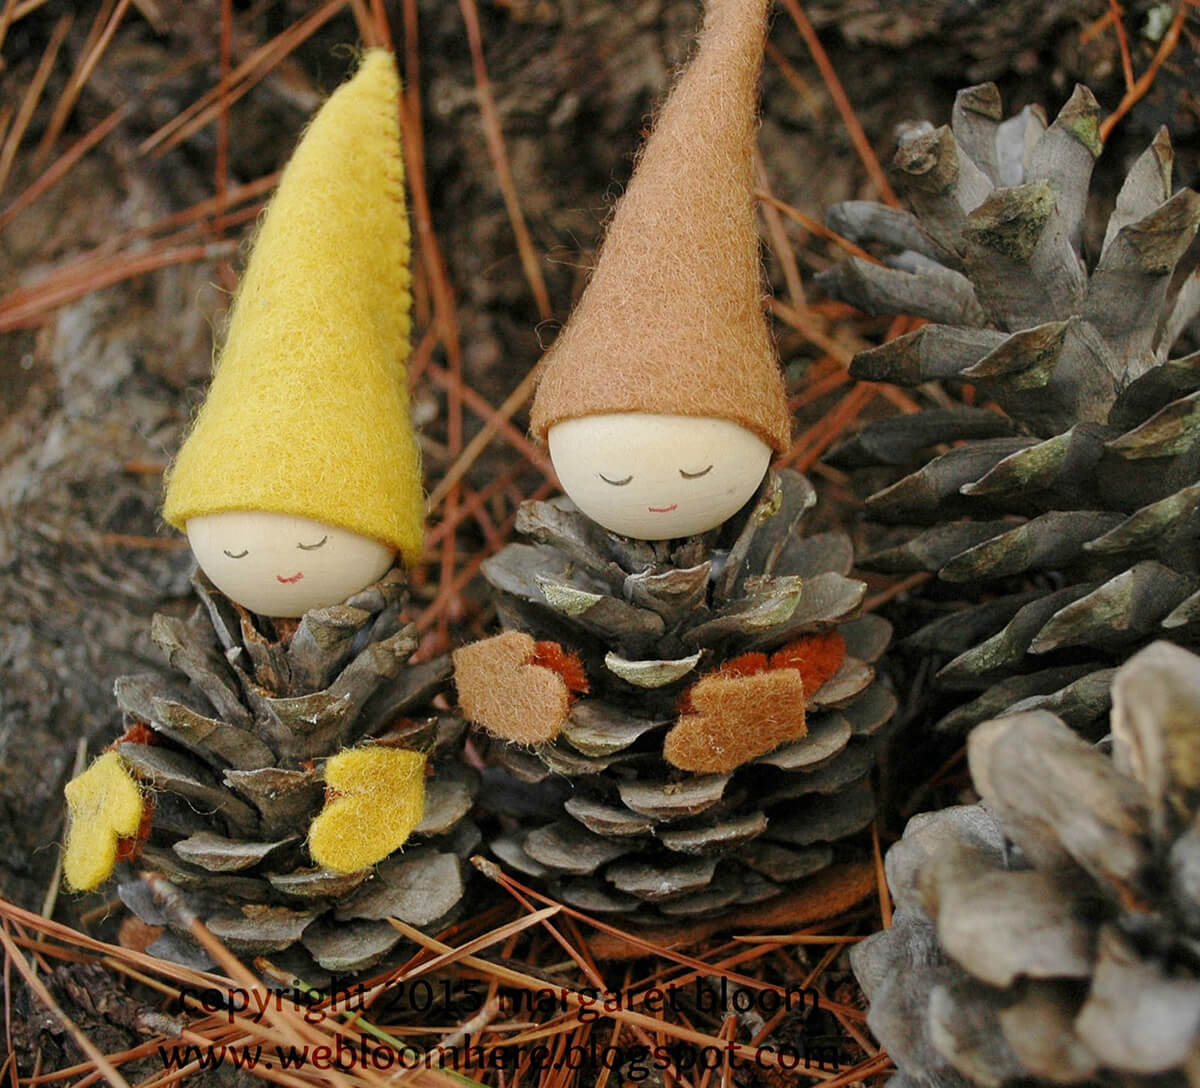
Pine Cone Reindeer Crafts
Pine cone reindeer crafts are an adorable and whimsical way to incorporate the holiday spirit into your home decor. These DIY creations are not only fun to make but also add a touch of charm and playfulness to your Christmas decorations.
To create pine cone reindeer crafts, you will need pine cones, googly eyes, small pom-poms, brown pipe cleaners, craft glue, and optional additional elements like ribbon or bells.
Start by selecting pine cones that have a distinct shape resembling the body of a reindeer. Ensure the pine cones are clean and dry before proceeding.
Once you have your pine cones ready, it’s time to bring the reindeer to life. Begin by attaching googly eyes to the top of the pine cone using craft glue. Position them toward the front to give the reindeer a cute and animated expression.
Next, take a small pom-pom and glue it just below the eyes to create the reindeer’s nose. Red is a popular choice for Rudolph, but you can use other colors like black or brown for a unique twist.
To make the antlers, cut two lengths of brown pipe cleaner and shape them into antler curves. Insert them into the top of the pine cone, using a dab of craft glue if necessary to secure them in place.
For extra festive flair, you can tie a small ribbon around the reindeer’s “neck” or attach a small bell to its collar using a thin ribbon. These additional touches add a touch of whimsy to the finished craft.
Once you have completed the assembly, allow the glue to dry completely. Your pine cone reindeer crafts are now ready to be displayed.
You can place your pine cone reindeer on a mantel, as a centerpiece on a holiday table, or as part of a festive arrangement. They can also be hung on the Christmas tree as charming and unique ornaments.
Get creative with your pine cone reindeer crafts by experimenting with different sizes and styles. Add accessories like miniature scarves or tiny santa hats to personalize them further.
Pine cone reindeer crafts are not only a delightful addition to your holiday decor but also make for wonderful handmade gifts or a fun activity to enjoy with children. Regardless of where you place them, these cute and festive creatures are sure to bring smiles and holiday cheer to all who see them.
Pine Cone Santa Crafts
Pine cone Santa crafts are a charming and festive way to celebrate the holiday season. These DIY creations bring the joy and magic of Santa Claus into your home, adding a touch of whimsy to your Christmas decorations.
To make pine cone Santa crafts, you will need pine cones, red paint or fabric, white faux fur or cotton balls, googly eyes, red pom-poms, craft glue, a black marker, and optional additional elements like small Santa hats or miniature presents.
Start by selecting pine cones that have a rounded shape resembling the body of Santa Claus. Make sure the pine cones are clean and dry before proceeding.
Once you have your pine cones ready, it’s time to transform them into Santa Claus. Begin by painting the bottom half of the pine cone with red paint or wrapping it with red fabric. This will be Santa’s iconic red suit.
Next, glue white faux fur or cotton balls to the top of the pine cone to create Santa’s beard. Position it just below the red suit to ensure Santa’s face is visible.
Attach googly eyes above the white beard using craft glue. Glue a red pom-pom just below the eyes to create Santa’s nose.
To give Santa his signature smile, use a black marker to draw a small curve below the nose. Add rosy cheeks by gently dabbing pink paint or using pink chalk pastels.
If desired, you can add additional elements to your pine cone Santa crafts. Attach a small Santa hat to the top of the pine cone using craft glue. You can also glue miniature presents or gifts to Santa’s side for an extra festive touch.
Once the glue is dry and all the components are securely in place, your pine cone Santa crafts are ready to be displayed.
You can arrange your adorable pine cone Santas on a mantel, as a centerpiece on a holiday table, or even use them as whimsical ornaments on the Christmas tree.
These delightful Santa Claus decorations are not only a fun craft project but also make for wonderful handmade gifts or a creative activity to enjoy with children. They bring the spirit of Christmas to life and infuse your home with the magic of Santa Claus.
So, gather your materials, let your creativity shine, and watch your pine cone Santa crafts spread holiday cheer throughout your home.
Read more: What Does A Pine Cone Seed Look Like
Pine Cone Snowmen Crafts
Pine cone snowmen crafts are a delightful and whimsical way to decorate your home during the winter season. These DIY creations bring the charm of snowmen indoors, adding a touch of playfulness and joy to your Christmas decorations.
To make pine cone snowmen crafts, you will need pine cones of various sizes, white paint or spray paint, craft glue, small googly eyes, orange felt or foam, small pom-poms, buttons, twigs, and optional additional elements like scarves or miniature hats.
Begin by selecting pine cones of different sizes that resemble the body of a snowman. Ensure the pine cones are clean and dry before starting the crafting process.
Paint the entire surface of the pine cones with white paint or use white spray paint for easy and even coverage. Allow the paint to dry completely.
Once the paint is dry, it’s time to give your pine cone snowmen faces. Glue googly eyes to the top portion of the pine cone. Cut small triangular shapes out of orange felt or foam and glue them below the eyes to create carrot-shaped noses.
Attach small pom-poms or buttons in a line to represent the snowman’s mouth, using craft glue to secure them in place.
For arms, glue small twigs to the sides of the snowman’s body. You can trim and shape the twigs to make them look more like arms.
If desired, you can further personalize your pine cone snowmen by adding accessories. Glue tiny scarves around the necks of the snowmen using colorful ribbons or strips of fabric. You can also use miniature hats or top hats to give them a stylish look.
Once your pine cone snowmen are assembled and decorated, allow the glue to dry completely. Make sure all the components are securely in place before displaying them.
You can arrange your pine cone snowmen in various ways – place them on a mantel or windowsill, create a snowman family tableau, or even use them as whimsical ornaments on the Christmas tree.
Pine cone snowmen crafts are not only a fun and creative activity but also make for wonderful handmade gifts or a cute addition to winter-themed parties and gatherings. They bring a smile to everyone’s face and create a festive and lighthearted atmosphere in your home.
So, gather your materials, unleash your creativity, and let your pine cone snowmen bring the magic of winter to life in your holiday decor.
Pine Cone Angel Ornaments
Pine cone angel ornaments are a beautiful and angelic addition to your holiday decorations. These DIY ornaments bring a sense of serenity and grace to your Christmas tree, adding a touch of celestial charm to your festive display.
To make pine cone angel ornaments, you will need pine cones, gold or silver spray paint, craft glue, white or ivory ribbon, gold or silver pipe cleaners, small wooden balls or beads, a small wooden bead for the head, and optional additional elements like glitter or small wings.
Start by selecting pine cones that have a tapered shape, resembling the body of an angel. Ensure the pine cones are clean and dry before proceeding.
Spray the entire surface of the pine cones with gold or silver paint, or any other metallic color of your choice. The paint will give the angels a celestial and ethereal appearance. Allow the paint to dry completely.
Once the paint is dry, measure and cut a piece of ribbon to create the angel’s halo. Form the ribbon into a circle and attach the ends together using craft glue. Attach the halo to the top of the pine cone, just above the area where the scales meet.
Next, create the angel’s wings using gold or silver pipe cleaners. Bend the pipe cleaners into wing shapes, making two separate wings. Attach the wings to the back of the pine cone using craft glue. Alternatively, you can use small pre-made angel wings and attach them in the same manner.
For the head, attach a small wooden bead to the top of the pine cone using craft glue. This will be the angel’s face. You can paint a simple face using markers or paint pens, or glue on googly eyes and draw on a mouth with a marker.
If you have small wooden balls or beads, you can use them to create the angel’s hands. Attach them to the sides of the pine cone using craft glue.
Allow the glue to dry completely before handling the pine cone angel ornaments. If desired, you can sprinkle some glitter onto the angel’s wings or paint a coat of clear glue on them and sprinkle the glitter on top while it is still wet.
To hang the pine cone angel ornaments on your Christmas tree, attach a loop of ribbon or string to the top of the angel’s halo or create a loop with the ribbon and attach it to the back of the ornament.
Your pine cone angel ornaments are now ready to be displayed on your Christmas tree or hung around your home. These delicate and heavenly decorations will add a touch of celestial beauty and tranquility to your holiday decor.
Enjoy the sight of these angelic ornaments shimmering on your tree, reminding you of the peace and joy of the holiday season.
Pine Cone Nativity Scene
A pine cone nativity scene is a beautiful and meaningful representation of the birth of Jesus. This DIY project offers a creative way to honor the Christmas story and create a centerpiece that captures the spirit of the holiday season.
To create a pine cone nativity scene, you will need pine cones of various sizes, craft paint in various colors, a small wooden stable or base, small figurines representing the Holy Family and other characters, craft glue, and optional decorations like moss or small twigs.
Start by selecting a pine cone to represent the Holy Family. Paint the pine cone in white or cream color to symbolize Joseph, Mary, and the Baby Jesus. Let the paint dry completely.
Position the pine cone Holy Family in the center of the small wooden stable or base. You can secure it in place using craft glue if needed.
Next, paint additional pine cones to represent other characters in the nativity scene. Use different colors to differentiate between the shepherds, angels, and the three wise men. You can also paint small wooden peg dolls or use pre-made figurines for these characters.
Place the painted pine cone figures on the wooden stable or base around the Holy Family, arranging them to create the desired scene. You can include shepherds, angels, the three wise men, animals, and any other significant characters.
If desired, you can further enhance the scene by adding natural elements like moss or small twigs to create a landscape around the nativity figures.
Once everything is in place, allow the craft glue to dry completely to ensure the stability of the pine cone nativity scene.
Display your pine cone nativity scene on a mantel, tabletop, or as a centerpiece on your holiday table. It captures the essence of the Christmas story while also adding a touch of rustic elegance to your decor.
The pine cone nativity scene serves as a wonderful reminder of the true meaning of Christmas and the joyous event it represents. It can be a cherished decoration and a meaningful part of your holiday traditions.
As you admire your pine cone nativity scene, take a moment to reflect on the miracle of Christmas and the message of love, peace, and hope that it brings to the world.
Pine Cone Fairy Lights
Pine cone fairy lights are a magical and enchanting way to illuminate your home during the holiday season. These DIY lights combine the rustic beauty of pine cones with the warm glow of fairy lights, creating a cozy and whimsical atmosphere.
To make pine cone fairy lights, you will need pine cones, string lights with small LED bulbs, craft glue, and optional additional elements like glitter or ribbon.
Start by collecting pine cones of various sizes. Clean them thoroughly and let them dry completely before starting the crafting process.
If desired, you can enhance the natural beauty of the pine cones by adding a touch of sparkle. Apply a thin layer of craft glue to the scales of each pine cone and sprinkle glitter on top. Shake off any excess glitter and allow the glue to dry completely.
Once the glue is dry, it’s time to attach the string lights to the pine cones. Carefully insert the LED bulbs between the scales of the pine cone, making sure the wires are hidden. Use craft glue to secure the lights in place if necessary.
Continue attaching the string lights to each pine cone until you have covered the desired length of the lights. Be sure to evenly distribute the pine cones along the string to create a balanced and visually appealing display.
You can customize your pine cone fairy lights further by tying small ribbons or bows around the base of each pine cone for a festive touch.
Once you have finished attaching the pine cones, plug in the string lights and enjoy the warm and magical glow they emit.
Display your pine cone fairy lights in various ways – drape them along a mantel, wind them around a staircase railing, or create a beautiful centerpiece for your holiday table. They can also be hung as a charming and unique decoration on walls or wrapped around the Christmas tree.
Pine cone fairy lights not only add a cozy and festive ambiance to your home but also serve as a conversation starter and a beautiful focal point. Your guests will be captivated by the whimsical and rustic charm of these unique lights.
So, gather your pine cones, string lights, and a dash of creativity, and let the pine cone fairy lights bring a touch of magic and wonder into your holiday decor.
Read also: 9 Amazing Pine Cone Towel Rack For 2025
Pine Cone Winter Village Decoration
A pine cone winter village decoration is a charming and nostalgic way to create a miniature winter wonderland in your home. This DIY project allows you to transform plain pine cones into adorable little houses, adding a touch of whimsy and enchantment to your holiday decor.
To create a pine cone winter village decoration, you will need pine cones, craft paint in various colors, a small brush, craft glue, artificial snow or white glitter, small decorative elements like miniature figurines or tiny trees, and optional additional elements like moss or twigs.
Start by selecting pine cones of different shapes and sizes, as these will serve as the houses in your winter village. Ensure the pine cones are clean and dry before starting the crafting process.
Paint the pine cones with craft paint in various colors to create the appearance of rooftops and walls. Use a small brush to add intricate details like doors and windows. You can also experiment with different patterns and designs to give each house its own unique look.
Let the paint dry completely before moving on to the next step.
Once the paint is dry, it’s time to add some wintry charm. Apply craft glue to the tips of the pine cone scales and sprinkle artificial snow or white glitter on top. This will give the appearance of a dusting of snow on the rooftops.
If desired, you can further adorn your pine cone winter village with small decorative elements. Glue miniature figurines, tiny trees, or other festive props to create a lively scene. You can also add moss, twigs, or small rocks to create natural landscapes and add depth to your winter village.
Arrange the painted and decorated pine cones on a tabletop, mantel, or windowsill to create your own winter village scene. You can also create a visually pleasing composition by varying the sizes and colors of the pine cone houses.
Enjoy the sight of your pine cone winter village decoration, as it brings a sense of nostalgia and winter wonder into your home. The intricate details and magical ambiance will transport you to a snowy, idyllic village.
Feel free to get creative with your winter village by adding twinkling fairy lights or incorporating other elements like cotton batting to resemble snowdrifts.
A pine cone winter village decoration not only adds a festive touch to your holiday decor but also sparks imagination and wonder. It’s a unique and personalized display that will captivate the hearts of both young and old.
Create your own miniature winter world with pine cones and watch as your winter village becomes a cherished and cherished part of your holiday traditions.
Conclusion
The beauty and versatility of pine cones make them a perfect crafting material for adding a natural and enchanting touch to your holiday decor. From wreaths to ornaments, garlands to centerpieces, and even creating entire winter villages, there’s no end to the creativity and charm that can be achieved with pine cone crafts.
As we’ve explored in this article, pine cones can be transformed into stunning and visually appealing decorations that bring the spirit of the holidays into your home. Whether you’re looking to create a rustic and cozy atmosphere or want to infuse a touch of whimsy and playfulness, pine cone crafts offer a wide range of possibilities.
With a little creativity and some basic crafting supplies, you can turn simple pine cones into beautiful wreaths that greet guests at your front door, ornaments that adorn your Christmas tree, garlands that grace your mantel, or table centerpieces that become the focal point of your holiday festivities.
By incorporating pine cones into your holiday decor, you bring the beauty of nature indoors and celebrate the charm of the winter season. These DIY crafts also provide an opportunity for personalized and handmade creations that can become cherished keepsakes or thoughtful gifts for loved ones.
So, grab your pine cones, paint, glue, and any other materials that inspire you, and let your imagination run wild. Whether you choose to create a specific craft or combine different ideas to develop your own unique creation, remember to have fun and enjoy the process of bringing the natural beauty of pine cones to life.
As you embark on your pine cone crafting journey, may your home be filled with the warmth, joy, and the magical spirit of the holiday season.
Frequently Asked Questions about Pine Cone Christmas Craft Ideas: 21 Seasonal Makes
Was this page helpful?
At Storables.com, we guarantee accurate and reliable information. Our content, validated by Expert Board Contributors, is crafted following stringent Editorial Policies. We're committed to providing you with well-researched, expert-backed insights for all your informational needs.


0 thoughts on “Pine Cone Christmas Craft Ideas: 21 Seasonal Makes”