Home>Garden Essentials>How To Plant Pine Cone Seeds
Garden Essentials
How To Plant Pine Cone Seeds
Modified: May 6, 2024
Learn how to plant pine cone seeds in your garden and grow beautiful pine trees. Step-by-step instructions and expert tips to ensure successful planting.
(Many of the links in this article redirect to a specific reviewed product. Your purchase of these products through affiliate links helps to generate commission for Storables.com, at no extra cost. Learn more)
Introduction
Welcome to the wonderful world of gardening! If you’re interested in growing your own plants, why not start with something unique and fascinating, like pine cone seeds? Planting pine cone seeds is not only a rewarding experience but also a great way to add natural beauty to your garden or outdoor space.
When you think of pine cones, you may envision them scattered on the forest floor or used as decorative elements during the holiday season. But did you know that inside these humble cones are tiny seeds waiting to sprout into magnificent pine trees?
In this article, we’ll guide you through the process of planting pine cone seeds, from gathering the cones to caring for the seedlings. By the end, you’ll have the knowledge and confidence to grow your own beautiful pine trees!
Key Takeaways:
- Gathering healthy pine cones and selecting the best seeds are crucial for successful pine tree growth. Proper preparation and care from seed to seedling are essential for a beautiful garden.
- Patience, attention, and love for nature are key to growing magnificent pine trees. From planting the seeds to nurturing the seedlings, each step contributes to a garden filled with natural beauty.
Read more: How To Harvest Pine Cone Seeds
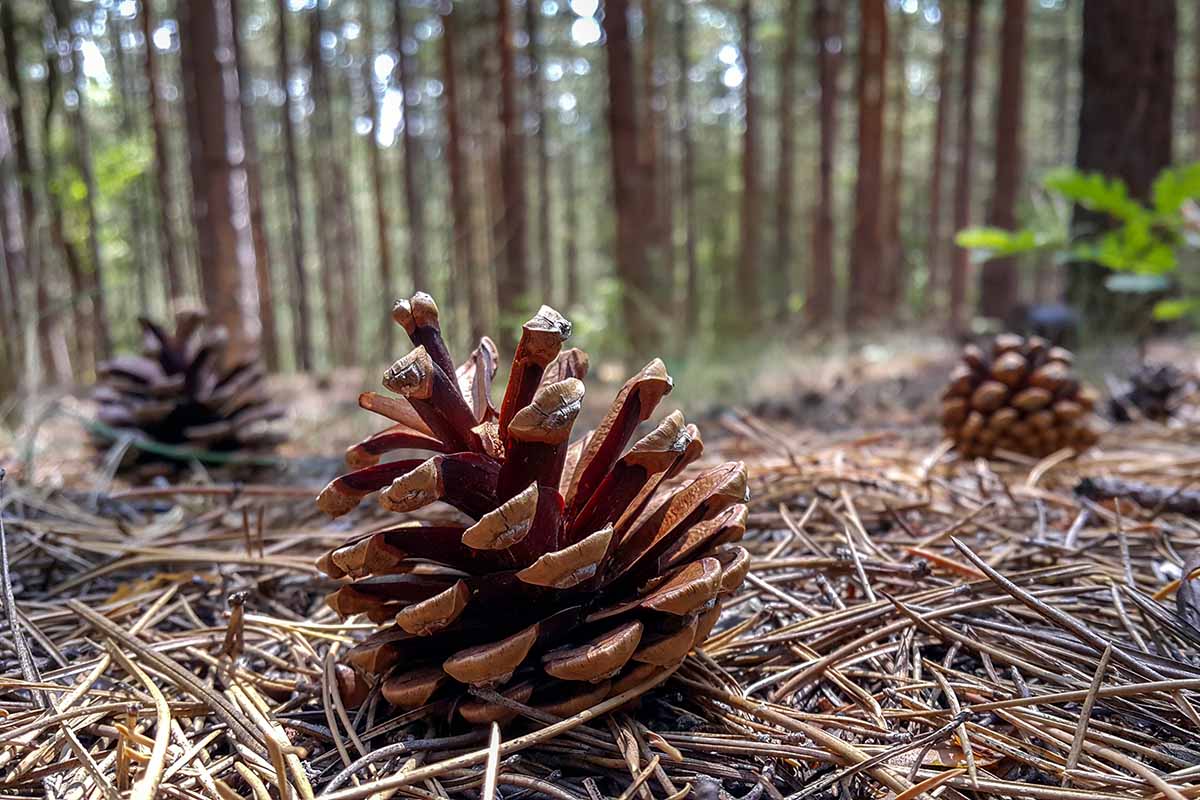
Gathering Pine Cones
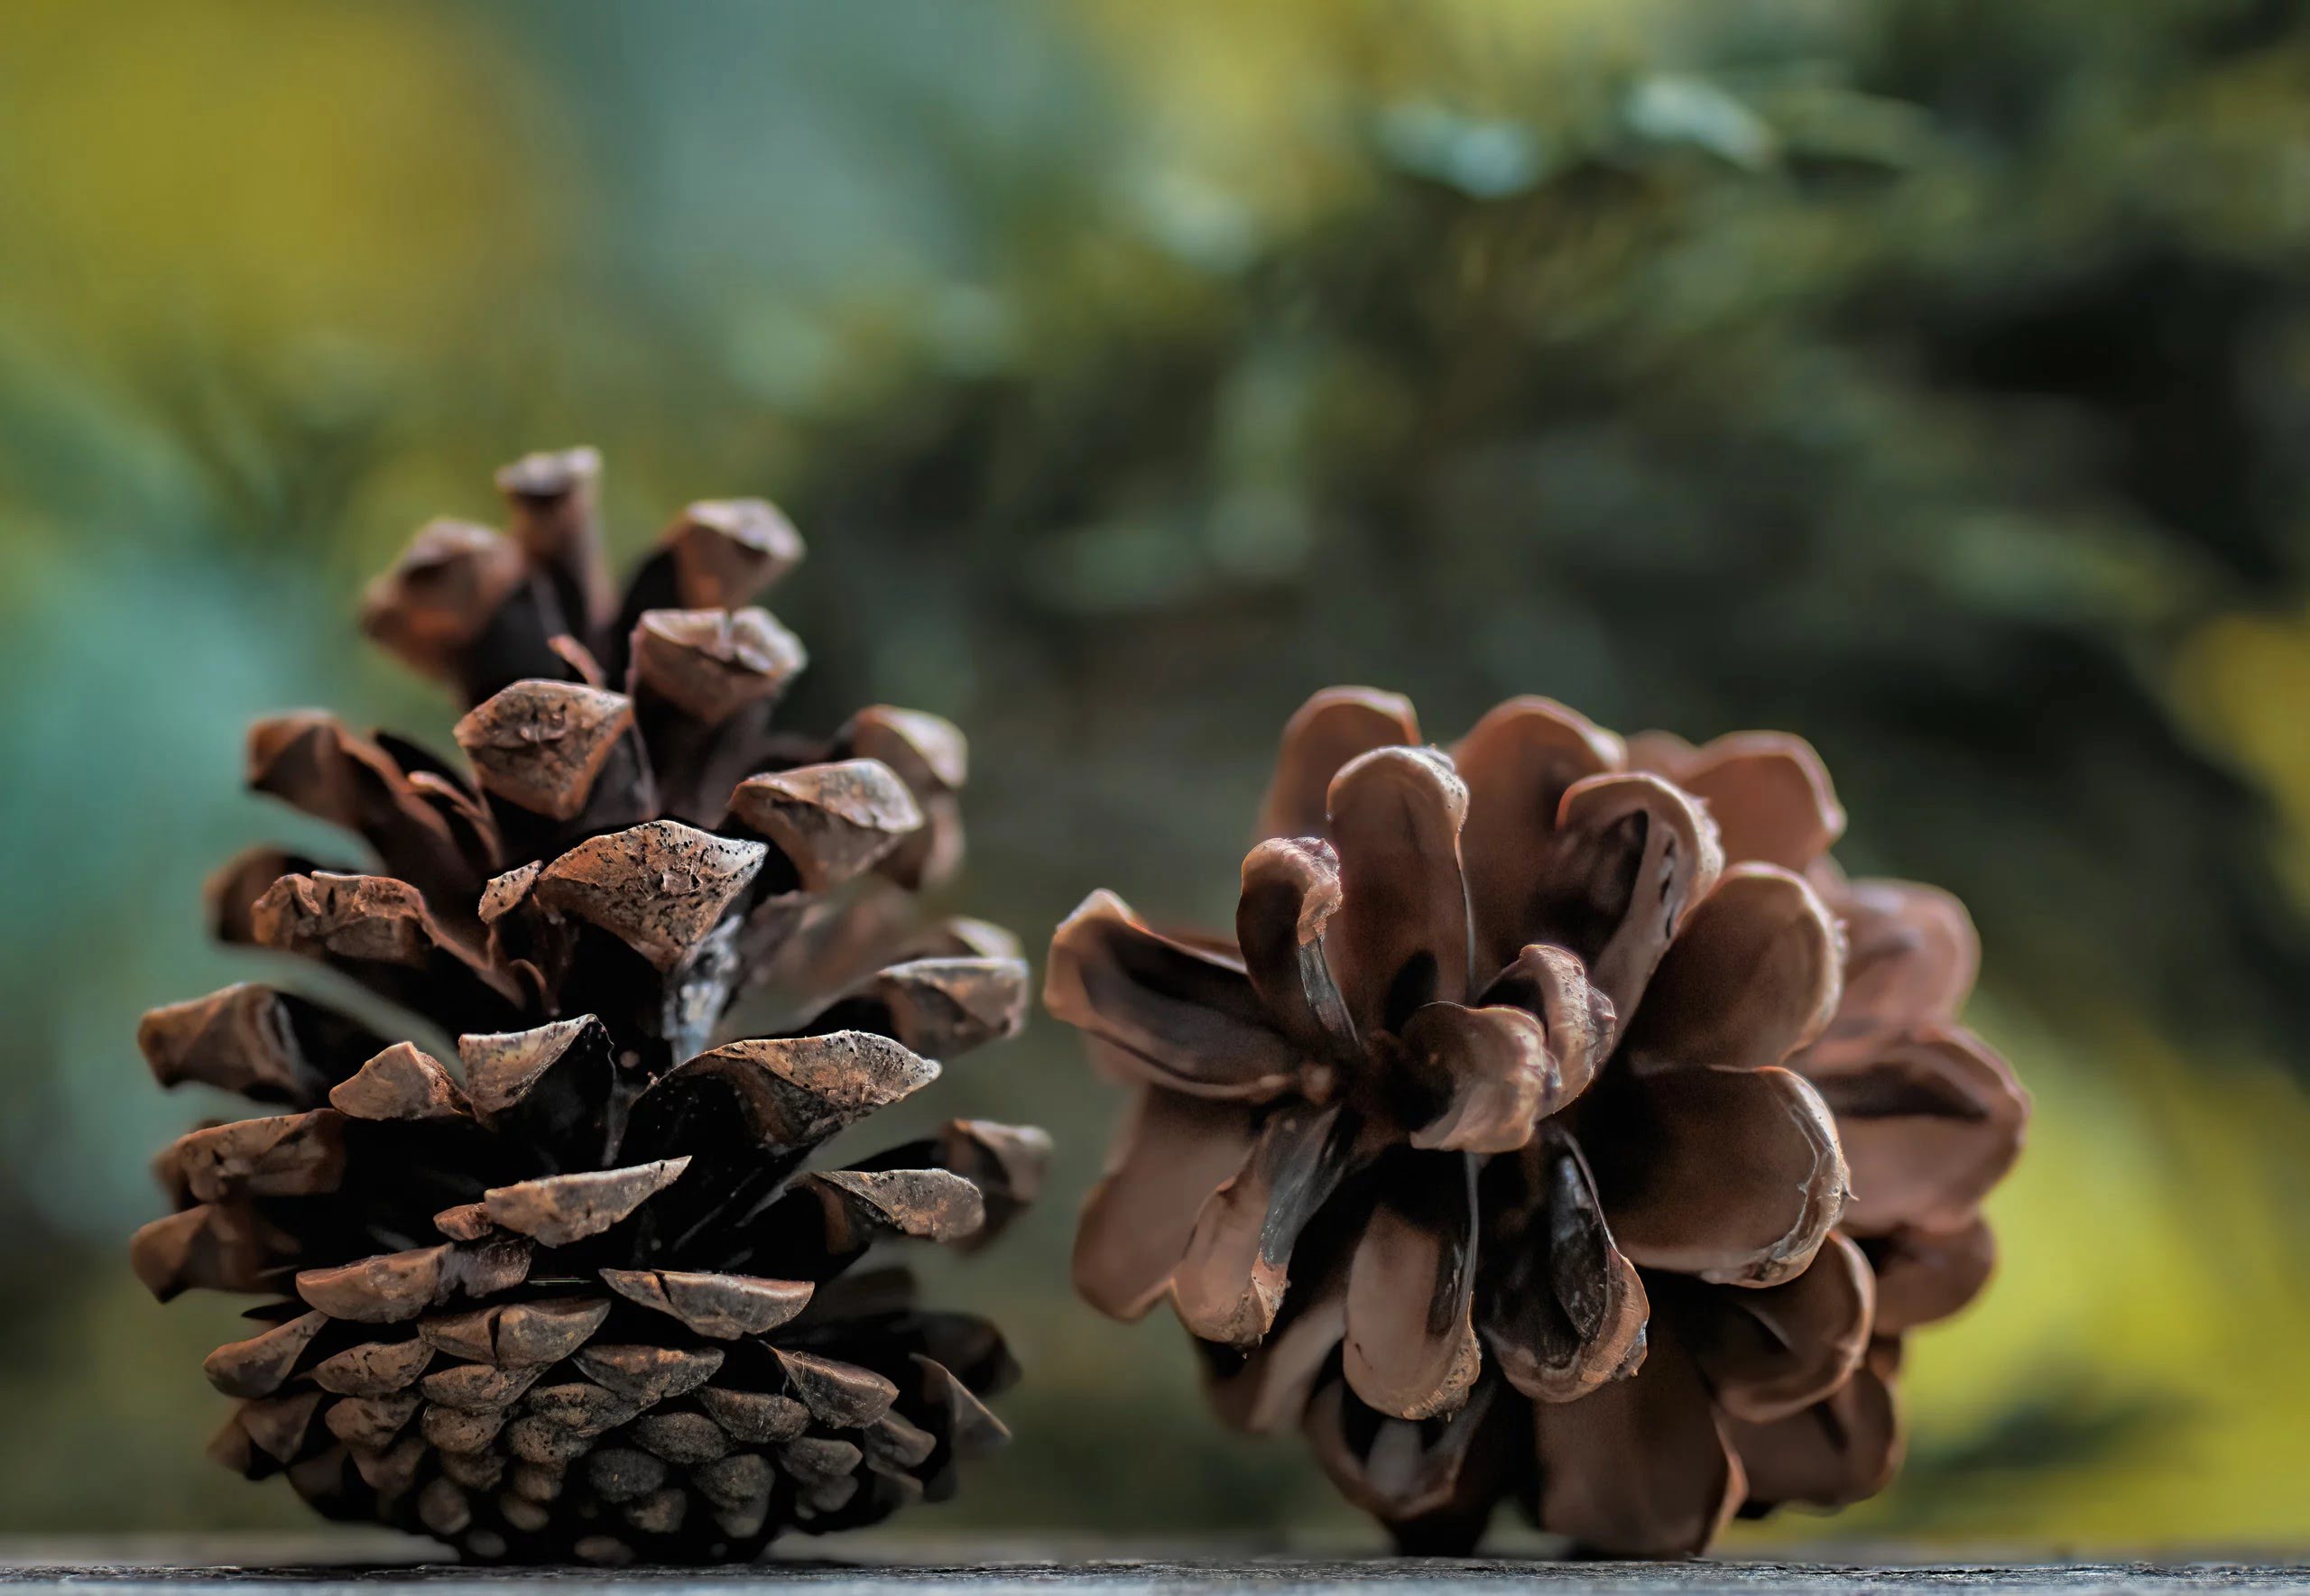
The first step in planting pine cone seeds is, of course, to gather the cones. You can find pine cones in various places, such as forests, parks, or even in your own backyard if you have pine trees. It is important to choose healthy and fully matured cones for the best chances of successful seed germination.
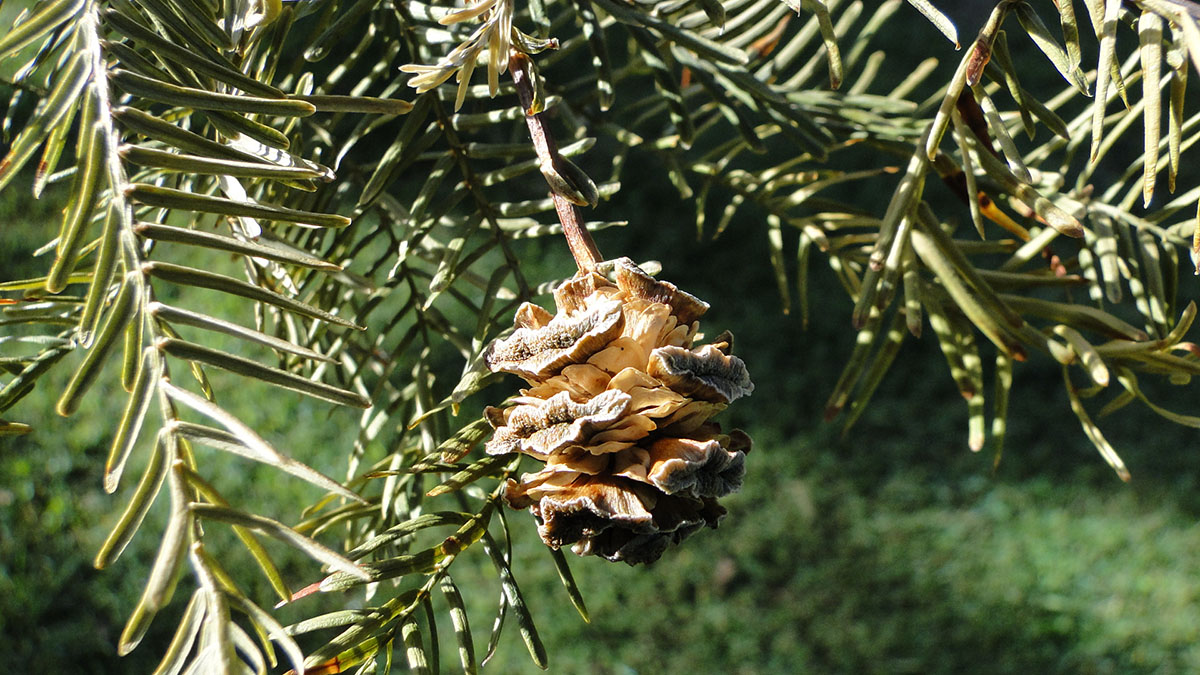
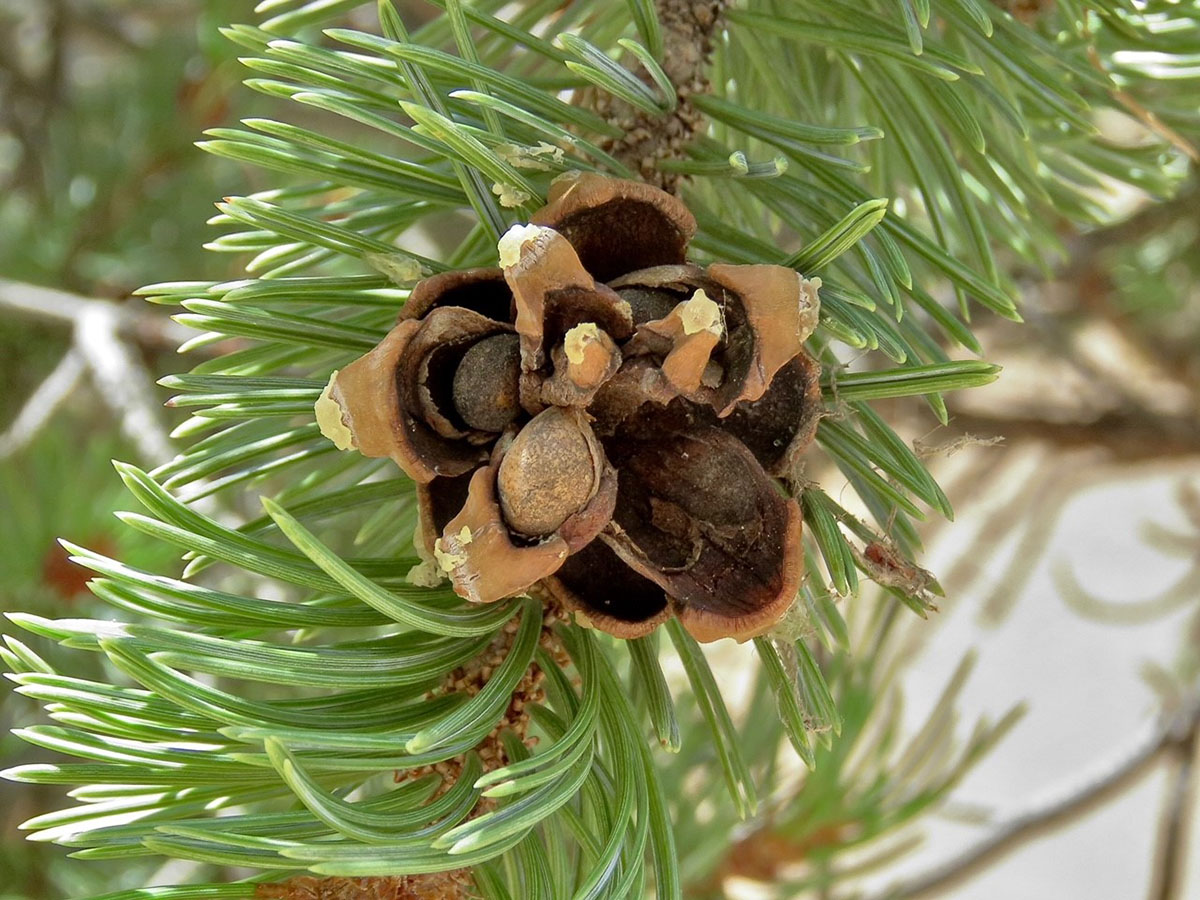
When collecting pine cones, look for ones that are fully closed and intact. Avoid cones that are damaged, moldy, or have already opened, as they may not contain viable seeds. It’s also a good idea to pick cones from different trees to increase genetic diversity in your pine tree population.
Once you have gathered the pine cones, place them in a well-ventilated area to allow them to dry completely. This will make it easier to extract the seeds later. Ideally, the cones should be kept in a warm and dry location for a few weeks until they are fully dried out.
Keep in mind that some pine cones may need some assistance to open. To do this, you can place the cones in a paper bag and store them in a warm area, such as near a heater or in direct sunlight. The heat will cause the cone to open and release the seeds. Check the cones regularly to see if they have opened, and remove the seeds once they are accessible.
Once you have collected and prepared your pine cones, you are ready to move on to the next step: selecting the seeds.
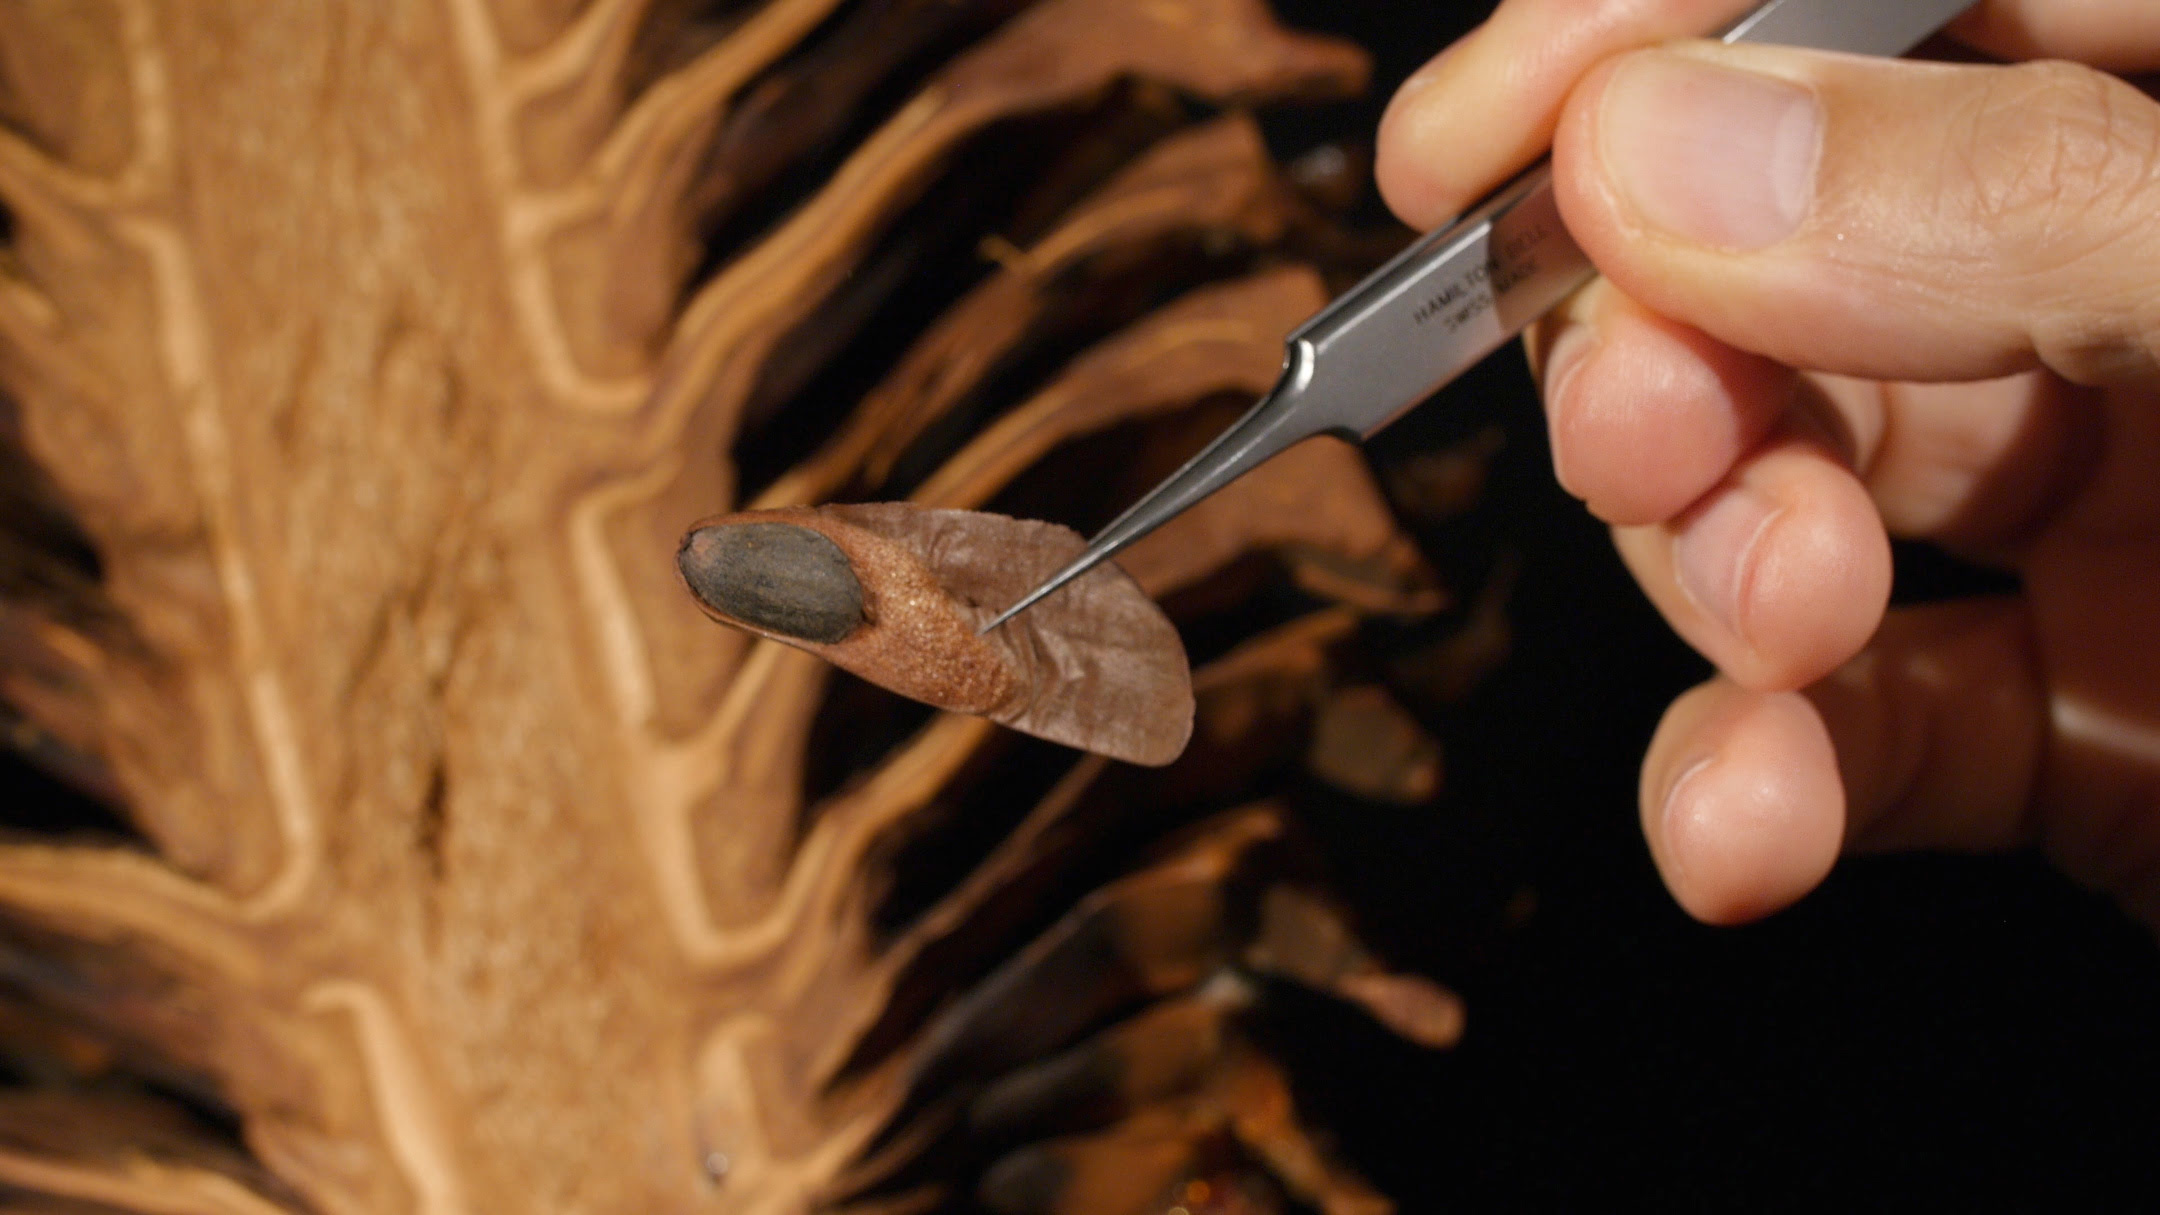
Selecting Seeds
Now that you have dried pine cones, it’s time to extract the seeds and select the ones that are most likely to produce healthy seedlings. To do this, carefully break open the pine cones and remove the seeds from inside. You can use your fingers or tweezers to gently separate the seeds from the cone scales.
When selecting seeds, look for ones that are plump, firm, and have a good color. Avoid seeds that are discolored, shriveled, or damaged, as they may not have the vitality to germinate and grow. It’s also beneficial to choose seeds from different cones and different trees to ensure genetic diversity and increase the chances of robust growth.
Once you have selected the seeds, it’s a good idea to give them a gentle washing to remove any debris or residue that may be clinging to them. Fill a bowl or container with lukewarm water and add a small amount of mild dish soap. Place the seeds in the soapy water and swirl them around gently for a few minutes. Rinse the seeds thoroughly with clean water and pat them dry with a paper towel.
After selecting and cleaning the seeds, it’s time to prepare them for planting. But before we delve into that, let’s talk about preparing the soil to create an ideal environment for your pine cone seedlings.
Preparing the Seeds
Preparing the pine cone seeds for planting is an important step in ensuring successful germination and healthy growth. By providing the seeds with the right conditions, you can increase their chances of sprouting into thriving seedlings.
One method to prepare the seeds is called stratification. Stratification mimics the natural processes that occur when pine cones fall to the ground and go through periods of cold temperatures during the winter months. This cold stratification helps to break the seed’s dormancy and stimulates germination.
To stratify your pine cone seeds, you can use the moist stratification method. Begin by dampening a layer of paper towels or a paper napkin. Place the seeds in a single layer on the damp paper towel, making sure they are spaced out. Fold the damp paper towel over the seeds to enclose them.
Next, place the folded paper towel with the seeds into a sealable plastic bag or container. Make sure to label the bag or container with the date and seed variety. Store the seeds in the refrigerator, as this will provide the necessary cold temperatures for stratification.
Leave the seeds in the refrigerator for at least four to six weeks. During this time, check the moisture level of the paper towel periodically and remoisten if needed. After the stratification period is over, the seeds are ready to be planted.
Another method to prepare the seeds is scarification. Scarification is the process of breaking or weakening the outer seed coat to allow water and air to penetrate and promote germination. Pine cone seeds have a hard outer coat that can benefit from scarification.
To scarify your seeds, you can use sandpaper or a nail file to gently rub the outer seed coat. Be careful not to apply too much pressure, as you don’t want to damage the inner embryo. The goal is to create small abrasions on the seed coat, which will make it easier for water to penetrate and initiate germination.
Now that you have prepared your pine cone seeds, it’s time to move on to preparing the soil for planting.
Preparing the Soil
The quality of the soil plays a crucial role in the growth and development of your pine cone seedlings. It’s important to create a favorable environment that provides the necessary nutrients, drainage, and aeration for the young plants to thrive.
Start by selecting a location in your garden or outdoor space that receives ample sunlight. Most pine trees prefer full sun exposure to ensure optimal growth. Once you have chosen the location, it’s time to prepare the soil.
Remove any weeds, rocks, or debris from the planting area. This will help prevent competition for nutrients and ensure a clean and organized space for your seedlings. Loosen the soil using a garden fork or a tiller to a depth of around 12 inches. This will promote better root penetration and drainage.
Pine trees prefer well-draining soil that is slightly acidic. You can test the pH level of your soil using a soil testing kit available at your local garden center. Aim for a pH level between 5.5 and 6.5 for optimal growth.
If the soil is too alkaline, you can amend it by adding organic matter such as peat moss, pine needles, or compost. These materials will help lower the pH level and improve the soil’s ability to retain moisture. Mix the amendments thoroughly with the existing soil to ensure a uniform blend.
It’s also beneficial to add a slow-release fertilizer to provide essential nutrients for your pine cone seedlings. Choose a fertilizer specifically formulated for trees and follow the instructions on the package for application rates. Distribute the fertilizer evenly throughout the planting area and mix it into the soil.
Once the soil is prepared, it’s time to move on to planting the pine cone seeds and starting your journey towards growing your own pine trees!
To plant pine cone seeds, collect mature cones, place them in a warm, dry area to open and release seeds. Plant seeds in well-draining soil and keep moist. Expect slow growth.
Read more: Where Are The Seeds In A Pine Cone
Planting the Seeds
Now that you have gathered and prepared your pine cone seeds, and the soil is ready, it’s time to start planting! Proper planting techniques will provide the best conditions for your seeds to germinate and grow into healthy pine tree seedlings.
Begin by creating small holes in the prepared soil. The holes should be deep enough to accommodate the size of the seeds. A general guideline is to make the holes about twice as deep as the seeds themselves.
Place one seed in each hole and cover it with soil. Gently press down on the soil to ensure good seed-to-soil contact. Avoid burying the seeds too deeply, as they need access to oxygen to germinate.
Space the seeds apart to allow adequate room for each seedling to grow. Pine tree seedlings can become quite large, so spacing them at least a few feet apart will give them enough space to thrive as they mature.
After planting, water the area thoroughly to ensure the soil is evenly moist. Avoid excessive watering, as it can lead to waterlogging and root rot. Regularly check the moisture level of the soil and water as needed to keep it consistently moist but not saturated.
It’s important to note that pine cone seeds can take some time to germinate. Be patient and continue to care for the planted seeds with regular watering and monitoring.
Now that your pine cone seeds are in the ground, it’s time to learn about the essential care needed to nurture your pine cone seedlings and help them grow into strong and beautiful pine trees.
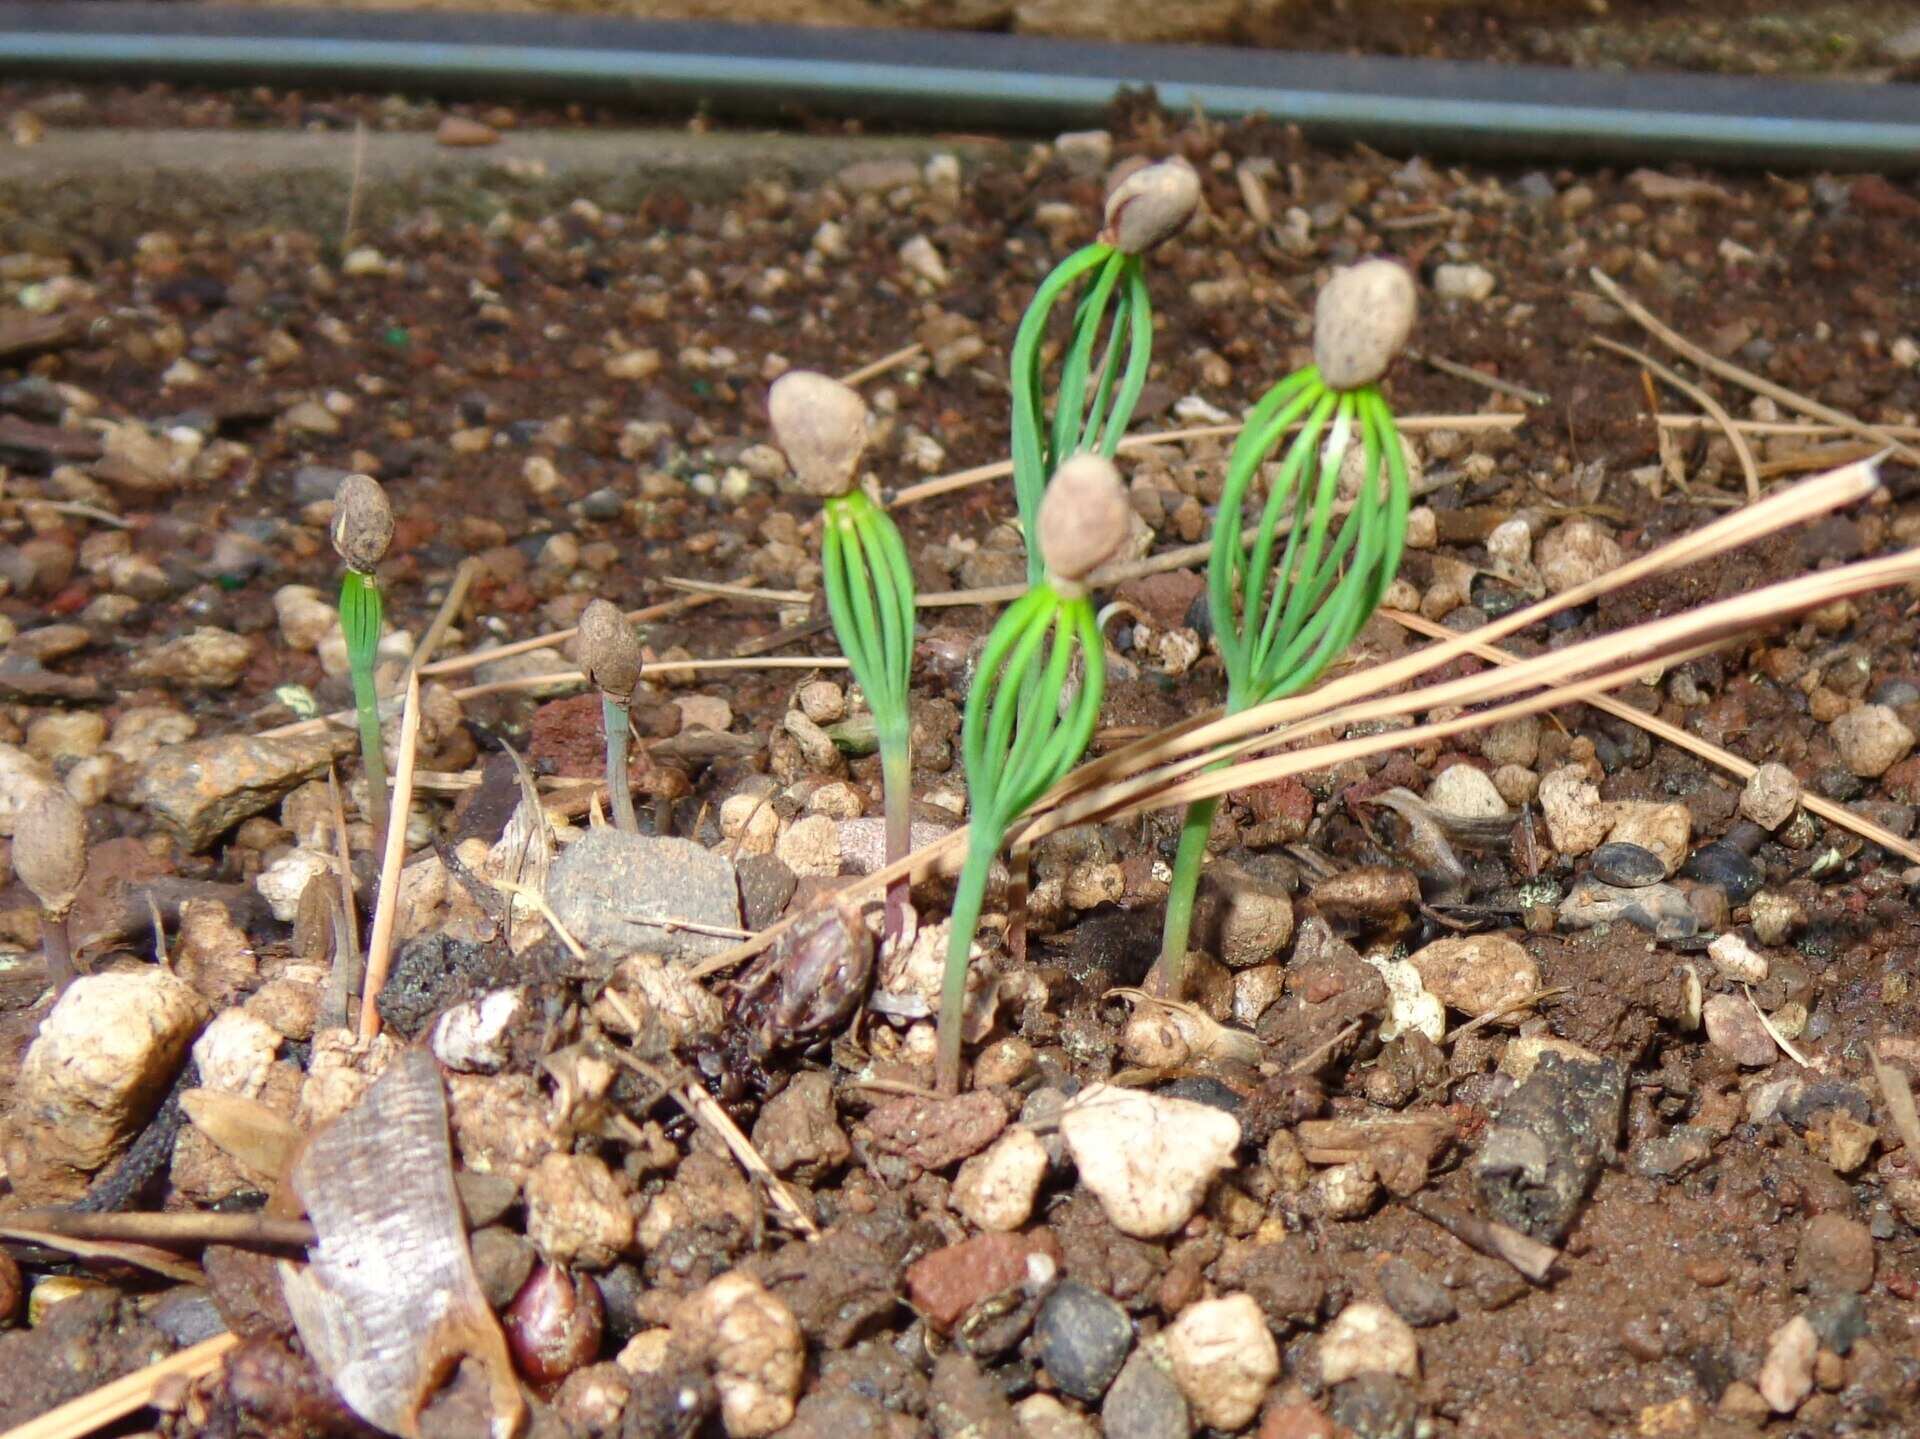
Caring for Pine Cone Seedlings
Once the pine cone seeds have germinated and the seedlings begin to emerge, it’s important to provide them with proper care to ensure their healthy growth and development. Here are some essential tips for caring for your pine cone seedlings:
- Watering: Seedlings have delicate root systems that require consistent moisture. Water your pine cone seedlings regularly, keeping the soil consistently moist but not waterlogged. Avoid letting the soil dry out completely, as this can cause stress to the young plants.
- Mulching: Applying a layer of organic mulch around the base of the seedlings can help regulate soil moisture, control weeds, and protect the roots from extreme temperatures. Use materials such as wood chips, straw, or pine needles as mulch.
- Protection: Protect the young seedlings from harsh weather conditions such as strong winds, heavy rains, or extreme temperatures. Consider using temporary protective coverings, such as fabric or plastic, to shield the plants until they become more established.
- Pruning: As the pine cone seedlings grow, periodically prune any damaged or diseased branches to promote healthy growth and shape the tree’s structure. It’s best to prune during the dormant season to minimize stress on the plants.
- Fertilizing: Once the seedlings have established a few sets of true leaves, you can start feeding them with a balanced, slow-release fertilizer formulated for trees. Follow the instructions on the fertilizer package for the recommended application rates and timing.
- Weeding: Regularly remove weeds or grass that grow near the pine cone seedlings. Weeds compete for nutrients and can hinder the growth of your young plants. Be careful when weeding to avoid damaging the delicate roots of the seedlings.
- Monitoring: Keep a close eye on the seedlings for any signs of pests or diseases. Early detection and intervention can prevent serious damage and preserve the health of the plants. Consult with a local garden center or extension office for guidance on specific pest and disease control measures.
Remember to be patient and consistent with your care. Over time, with proper nurturing, your pine cone seedlings will grow into magnificent pine trees, adding beauty and charm to your garden or landscape.
Transplanting the Seedlings
As your pine cone seedlings continue to grow and develop, there may come a time when they outgrow their current pots or planting space and require transplantation to a more permanent location. Transplanting is an important step in providing ample space for the seedlings to establish deep roots and continue their growth into mature pine trees.
Here are some guidelines to follow when transplanting your pine cone seedlings:
- Timing: The best time to transplant pine cone seedlings is during their dormant period, typically in late fall or early spring. Transplanting during these times allows the seedlings to establish roots before the onset of the growing season.
- Site selection: Choose a suitable location for transplanting your seedlings. Consider factors such as sunlight, soil conditions, and available space. Pine trees generally prefer full sun and well-draining soil.
- Preparing the new hole: Dig a hole that is wider and slightly deeper than the root ball of the seedling. Ensure that the hole is large enough to accommodate the entire root system without overcrowding or bending the roots.
- Transplanting process: Gently remove the seedling from its current pot or location, being careful not to damage the roots. Place the seedling into the prepared hole, ensuring that it is positioned at the same depth it was previously planted.
- Backfilling and firming the soil: Fill the hole with soil around the seedling, taking care to eliminate any air pockets. Gently firm the soil around the base of the seedling to provide stability and ensure good soil-to-root contact.
- Irrigation: After transplanting, water the seedlings thoroughly to help settle the soil around the roots. Ensure that the soil remains consistently moist, but avoid overwatering, as it can lead to root rot.
- Staking: If the seedling is tall or vulnerable to strong winds, consider staking it to provide support. Use stakes and soft ties to secure the trunk without causing friction or damage.
- Care after transplanting: Continue to monitor the seedlings closely after transplanting. Water them regularly, especially during dry periods, and provide protection from extreme weather conditions.
Remember, transplanting can be stressful for young seedlings, so it’s essential to provide proper care and attention during the process. With time and the right care, your transplanted pine cone seedlings will establish themselves in their new environment and continue to grow into majestic pine trees.
Conclusion
Planting pine cone seeds and nurturing them into thriving pine trees is a fulfilling and rewarding endeavor for any garden enthusiast. From gathering the pine cones to caring for the seedlings, each step in the process brings you closer to creating a beautiful and natural landscape.
Starting with the gathering of healthy and fully matured pine cones, you ensure that your seeds have the best chance of successful germination. Selecting the plump and firm seeds further enhances the potential for robust growth.
Preparing the seeds through stratification or scarification encourages germination and breaks seed dormancy. Properly preparing the soil provides a nutrient-rich environment for the seedlings to take root and grow.
Planting the seeds with care and maintaining consistent moisture levels are crucial for their successful transformation into seedlings. These seedlings need regular attention, including watering, mulching, protection from harsh weather conditions, and periodic pruning for optimal growth.
As the seedlings mature, the time may come for transplanting. This step allows the young trees to establish deep roots and continue their growth in a more permanent location, ensuring their longevity and natural beauty.
Throughout the entire process, patience, consistency, and attention to detail are key. From the moment you gather the pine cones to the moment you plant the seeds and nurture the seedlings, each action contributes to the growth and development of magnificent pine trees.
So, roll up your sleeves, gather those pine cones, and embark on the journey of planting pine cone seeds. With care, dedication, and a love for nature, you can create a garden filled with the beauty and majesty of pine trees for generations to come.
Ready to spruce up your garden's boundaries while ensuring privacy? Dive into our article on stylish garden fence ideas, perfect for giving your outdoor space a personal touch and charm. If you're curious about the origins of your garden's pine trees, don't miss our detailed guide on finding seeds within pine cones. Both articles are packed with useful tips and fascinating insights, ensuring your gardening projects are both enjoyable and successful.
Frequently Asked Questions about How To Plant Pine Cone Seeds
Was this page helpful?
At Storables.com, we guarantee accurate and reliable information. Our content, validated by Expert Board Contributors, is crafted following stringent Editorial Policies. We're committed to providing you with well-researched, expert-backed insights for all your informational needs.


0 thoughts on “How To Plant Pine Cone Seeds”