Home>Renovation & DIY>Home Renovation Guides>How To Fix A Leak Around A Dormer
Home Renovation Guides
How To Fix A Leak Around A Dormer
Modified: August 17, 2024
Learn how to fix a leak around a dormer with our comprehensive home renovation guide. Expert tips and step-by-step instructions to solve the issue. Ideal for DIY enthusiasts.
(Many of the links in this article redirect to a specific reviewed product. Your purchase of these products through affiliate links helps to generate commission for Storables.com, at no extra cost. Learn more)
Introduction
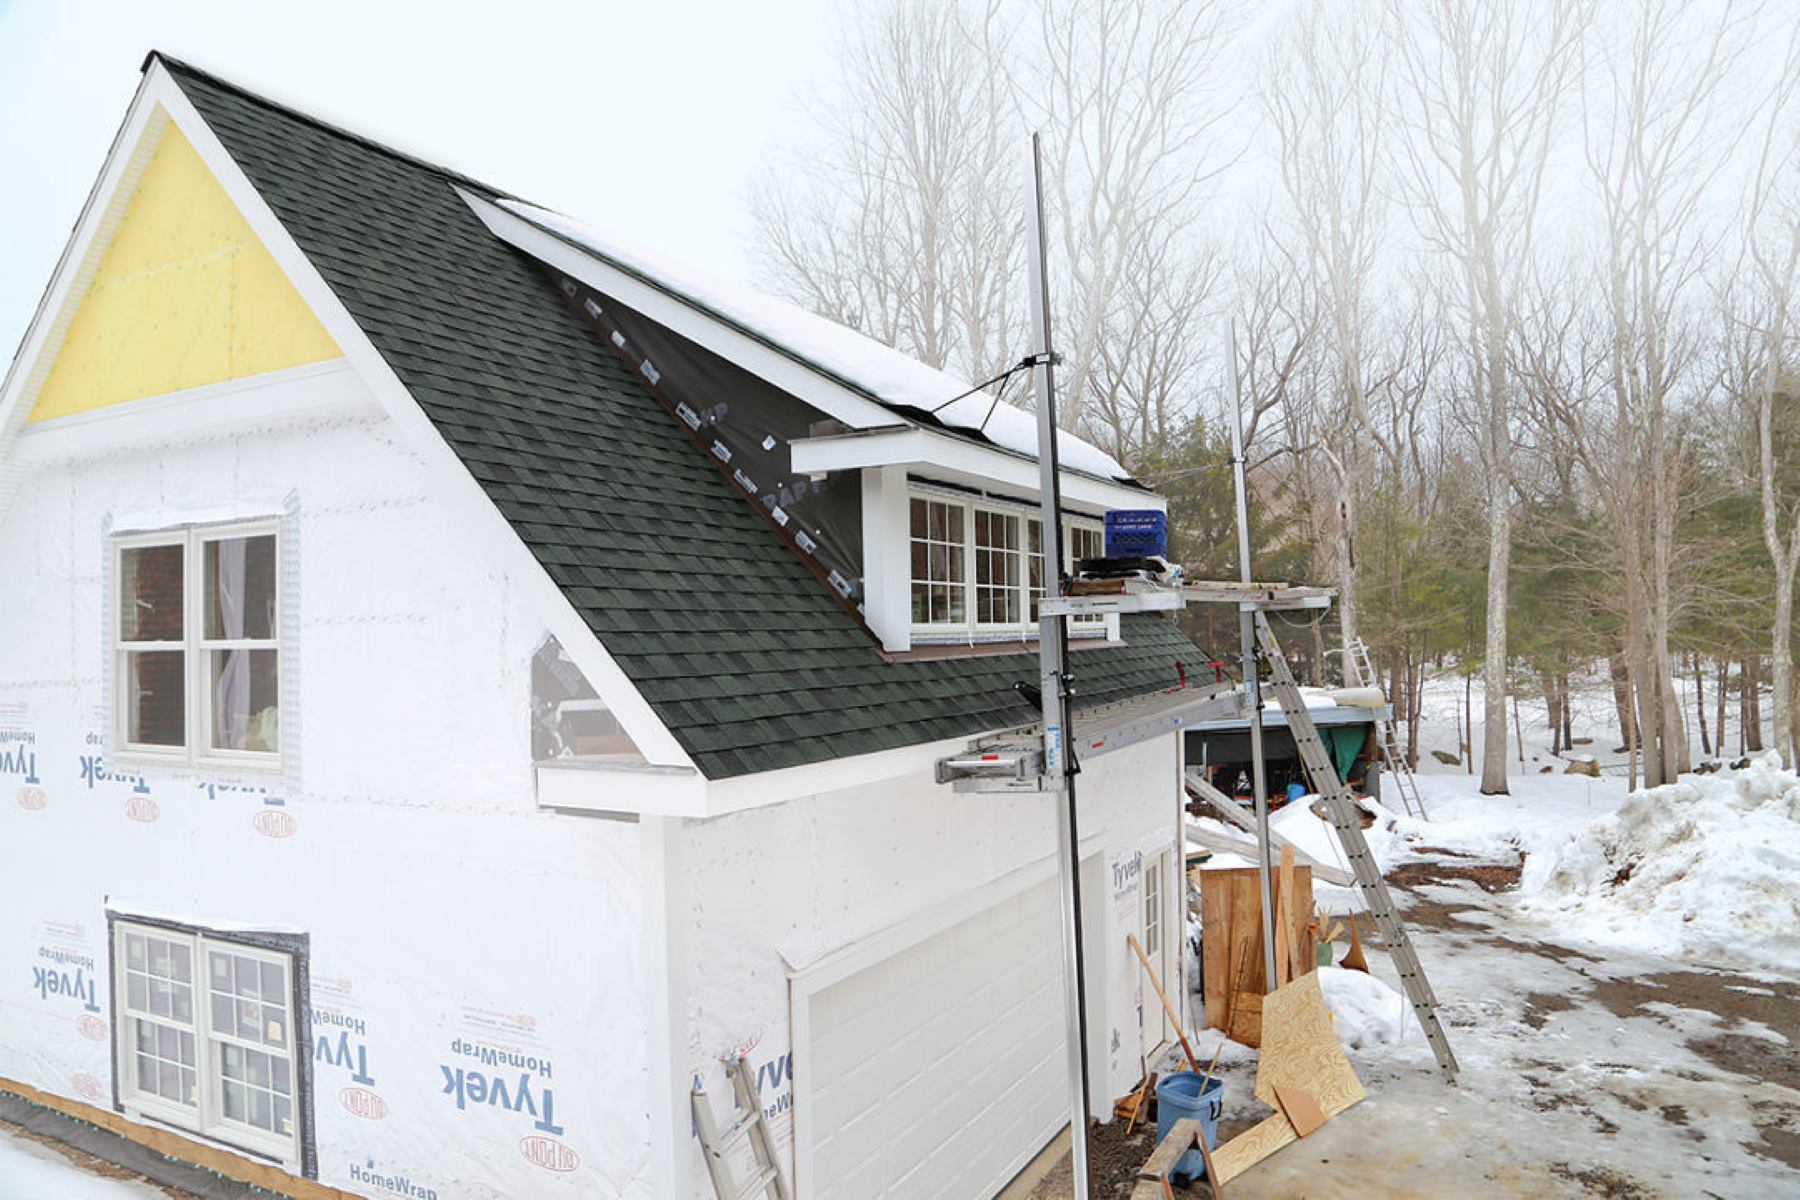
Dealing with a leak around a dormer can be a frustrating and worrisome experience for homeowners. A dormer, with its charming and distinctive architectural features, adds character and functionality to a home. However, when a leak occurs, it can lead to water damage, mold growth, and structural issues if not promptly addressed. Understanding how to identify and repair a leak around a dormer is crucial for maintaining the integrity of your home.
In this comprehensive guide, we will explore the common causes of leaks around dormers and provide practical steps to effectively address and prevent them. Whether you're a seasoned DIY enthusiast or a homeowner seeking insights before consulting a professional, this guide will equip you with the knowledge and confidence to tackle dormer leaks head-on.
Leaking dormers can stem from various factors, such as deteriorating flashing, damaged shingles, improper installation, or even structural movement. By delving into the root causes and implementing targeted solutions, you can safeguard your home against the detrimental effects of water infiltration.
Join us as we embark on a journey to demystify the complexities of dormer leaks, empowering you to safeguard your home and preserve its beauty and functionality for years to come. Let's roll up our sleeves and dive into the world of dormer leak repairs!
Key Takeaways:
- Identifying the Source of the Leak
Don’t let a leaky dormer rain on your parade! Look inside, check the attic, and inspect outside to find where the water is sneaking in. If all else fails, call in a pro to save the day! - Repairing and Preventing Future Leaks
Fixing a leaky dormer is a breeze! Replace shingles, seal gaps, and keep up with maintenance to stop leaks in their tracks. With a little TLC, your dormer will stay dry and happy.
Read more: How To Fix A Leaking Washer
Identifying the Source of the Leak
When faced with a leak around a dormer, pinpointing the exact source of the issue is paramount to implementing an effective solution. Here are the key steps to identify the source of the leak:
-
Interior Inspection: Begin by examining the interior of the affected area during or immediately after rainfall. Look for water stains, dampness, or active dripping. These indicators can provide valuable clues about the entry point of the water.
-
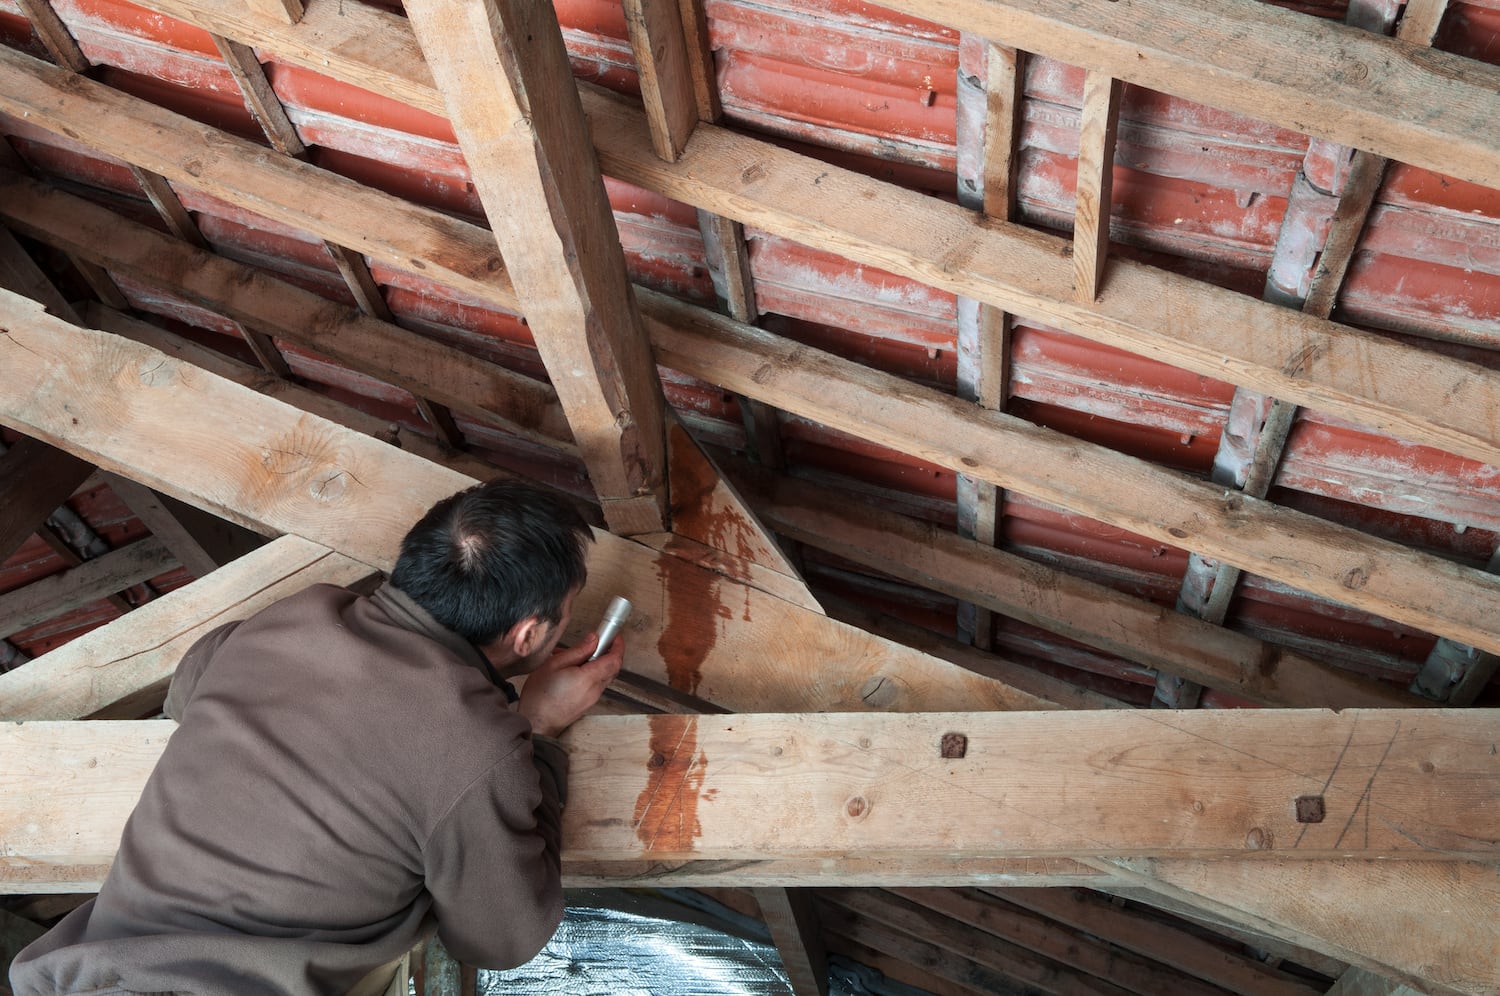
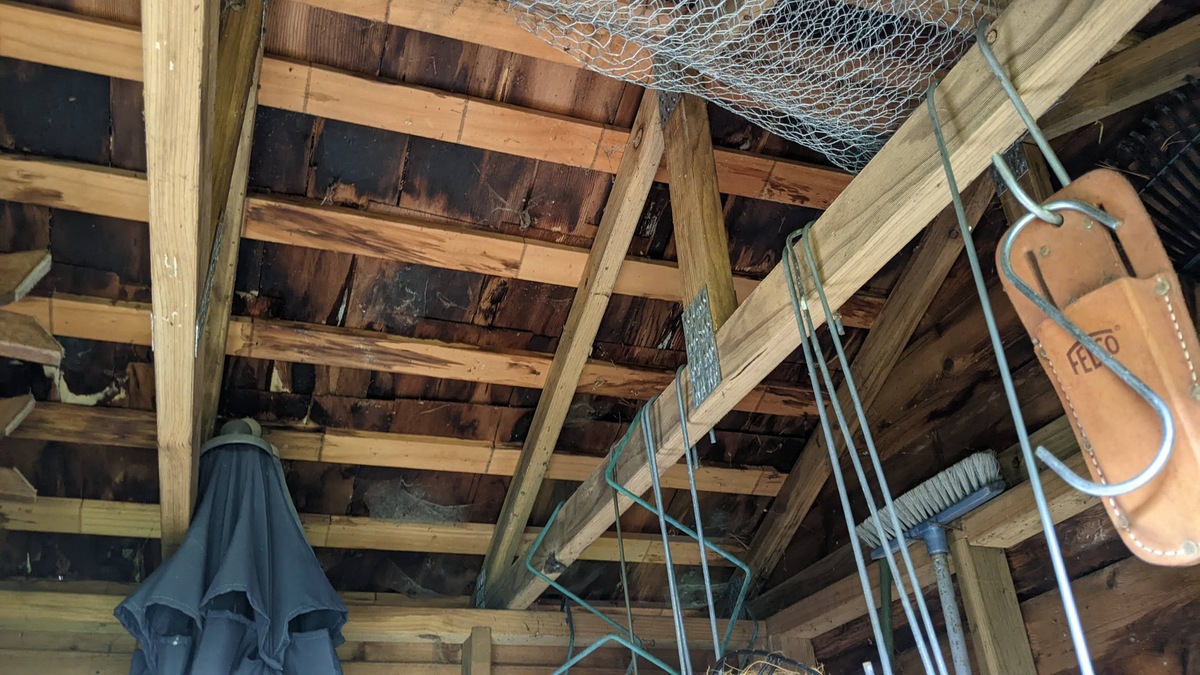
Attic Examination: If accessible, venture into the attic space during or after rainfall to search for signs of water intrusion. Use a flashlight to inspect the underside of the dormer roof, paying close attention to the area where the dormer meets the main roof. Look for water trails, damp insulation, or rotting wood, as these can reveal the path of the leak.
-
Exterior Assessment: Weather permitting, conduct an exterior inspection of the dormer and its surrounding roof. Look for damaged or missing shingles, deteriorated flashing, gaps in the caulking, or any other visible signs of wear and tear. These external clues can offer valuable insights into the potential entry points for water.
-
Water Testing: In cases where the source of the leak remains elusive, consider enlisting a helper to simulate rainfall using a garden hose. Start at the lowest point of the dormer and work your way up, directing the water flow along the junctions, seams, and potential trouble spots. Meanwhile, have your assistant monitor the interior for any signs of water infiltration. This method can help replicate the conditions that lead to the leak, aiding in the identification process.
-
Professional Consultation: If the above steps do not yield conclusive results or if you are uncertain about the findings, consider seeking the expertise of a qualified roofing professional. Their trained eye and experience can provide invaluable insights into the source of the leak, ensuring a thorough and accurate assessment.
By meticulously carrying out these steps, you can gain a clearer understanding of the origin of the dormer leak, laying the groundwork for targeted and effective repair strategies. Identifying the source of the leak is the crucial first step toward restoring the integrity of your dormer and safeguarding your home against water damage.
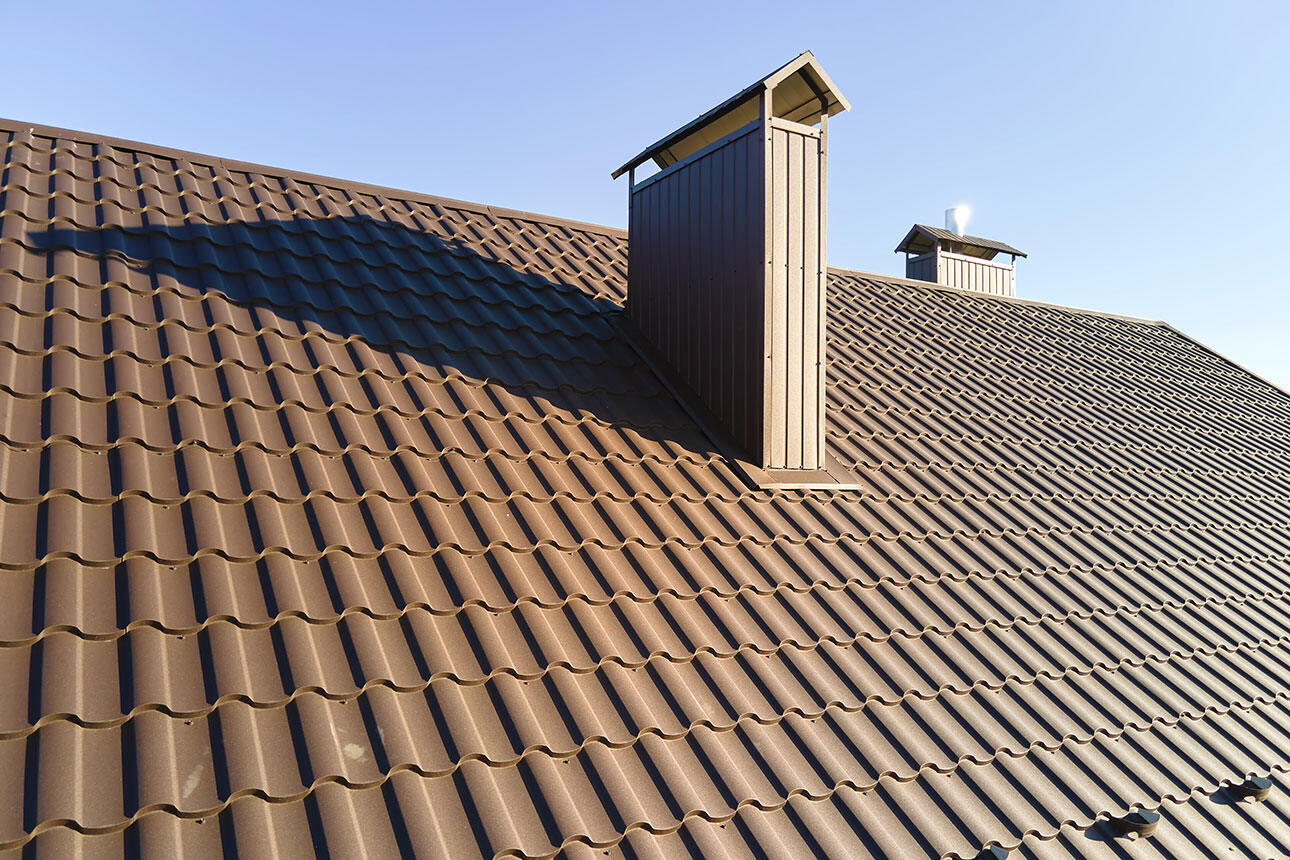
Inspect the flashing around the dormer for any cracks or gaps. Use roofing cement to seal any areas where water could be getting in. Make sure to also check the shingles and replace any damaged ones.
Repairing the Leak
Once the source of the dormer leak has been identified, prompt and precise repair is essential to prevent further water infiltration and mitigate potential damage. Here's a detailed guide on how to effectively repair the leak around a dormer:
-
Replacing Damaged Shingles: If the leak stems from compromised or missing shingles, carefully remove the damaged ones and replace them with new, high-quality shingles. Ensure that the replacement shingles are securely fastened and properly aligned to create a seamless barrier against water intrusion.
-
Repairing Flashing: Damaged or improperly installed flashing can be a common culprit behind dormer leaks. To address this, carefully remove the old flashing and replace it with new flashing made of durable, weather-resistant material. Properly seal the flashing to create a watertight barrier between the dormer and the main roof.
-
Sealing Gaps and Joints: Use a high-quality roofing sealant to fill any gaps, cracks, or joints around the dormer. Pay close attention to areas where different materials meet, such as where the dormer meets the main roof or where the siding meets the dormer walls. Thoroughly apply the sealant to create a robust and impermeable seal.
-
Addressing Structural Issues: In cases where the leak is attributed to structural movement or settling, it's crucial to address the underlying structural issues. Consult a qualified contractor or structural engineer to assess the situation and implement appropriate measures to stabilize and reinforce the affected areas.
-
Interior Repairs: If the leak has caused interior damage, such as water stains or compromised drywall, address these issues promptly. Replace any water-damaged materials, thoroughly dry the affected area, and apply mold-resistant primer and paint to prevent mold growth and restore the aesthetic appeal of the space.
-
Professional Assistance: For complex or extensive leaks, or if you're uncertain about the repair process, consider engaging the services of a reputable roofing contractor. Their expertise and specialized tools can ensure that the repair is carried out with precision and in accordance with industry best practices.
By diligently executing these repair steps, you can effectively remedy the dormer leak and fortify your home against future water intrusion. Timely and thorough repair efforts are instrumental in preserving the structural integrity and aesthetic appeal of your dormer, ensuring that it remains a source of pride and functionality for years to come.
Preventing Future Leaks
Preventing future leaks around a dormer is essential for maintaining the long-term integrity and functionality of your home. After addressing the current leak, it's crucial to implement proactive measures to minimize the risk of future water infiltration. Here's a comprehensive guide to preventing future dormer leaks:
-
Regular Maintenance: Schedule routine inspections of your dormer and roof to identify and address potential issues before they escalate. Look for signs of wear and tear, such as damaged shingles, deteriorating flashing, or degraded sealant. Promptly addressing these minor concerns can prevent them from developing into major leaks.
-
Proper Installation: Whether you're installing a new dormer or replacing an existing one, ensure that the installation is carried out by experienced professionals using high-quality materials. Proper installation, including secure flashing, watertight seals, and precise shingle placement, forms the foundation for a leak-resistant dormer.
-
Quality Materials: Opt for durable and weather-resistant materials when repairing or replacing components of your dormer. High-quality shingles, flashing, sealant, and underlayment can significantly enhance the dormer's ability to withstand the elements and resist water penetration.
-
Effective Ventilation: Adequate ventilation in the attic and around the dormer is crucial for preventing moisture buildup, which can contribute to leaks and mold growth. Ensure that the ventilation system is designed to promote proper airflow and moisture control, safeguarding the structural integrity of the dormer.
-
Trim Overhanging Branches: Overhanging tree branches can pose a risk to your dormer, especially during storms. Regularly trim back branches that could potentially scrape against or damage the dormer, reducing the likelihood of impact-related leaks.
-
Gutter Maintenance: Keep gutters and downspouts clear of debris to prevent water from backing up and seeping under the roofline. Properly functioning gutters direct water away from the dormer, minimizing the risk of water pooling and infiltration.
-
Professional Inspections: Periodically enlist the expertise of a qualified roofing professional to conduct thorough inspections of your dormer and roof. Their trained eye can detect early warning signs of potential leaks, allowing for proactive repairs and maintenance.
By proactively implementing these preventive measures, you can fortify your dormer against future leaks, preserving its structural integrity and aesthetic appeal. A proactive approach to maintenance and care ensures that your dormer remains a reliable and enduring feature of your home, free from the worries of water infiltration.
Frequently Asked Questions about How To Fix A Leak Around A Dormer
Was this page helpful?
At Storables.com, we guarantee accurate and reliable information. Our content, validated by Expert Board Contributors, is crafted following stringent Editorial Policies. We're committed to providing you with well-researched, expert-backed insights for all your informational needs.


0 thoughts on “How To Fix A Leak Around A Dormer”