Home>Renovation & DIY>Tools & Equipment>How To Remove Spackle

Tools & Equipment
How To Remove Spackle
Published: December 19, 2023
Learn the best tools and equipment for removing spackle effectively. Discover step-by-step techniques for a smooth and flawless finish.
(Many of the links in this article redirect to a specific reviewed product. Your purchase of these products through affiliate links helps to generate commission for Storables.com, at no extra cost. Learn more)
Introduction
So, you've just finished a home improvement project, and everything looks fantastic—except for that unsightly spackle that's marring the otherwise flawless surface. Not to worry! Removing spackle is a straightforward process that anyone can tackle with the right tools and a bit of know-how.
In this guide, we'll walk you through the step-by-step process of removing spackle and restoring your wall to its former glory. Whether you're a seasoned DIY enthusiast or a first-time fixer-upper, you'll find that with a little patience and the right materials, this task is well within your reach.
Let's dive in and learn how to remove spackle like a pro!
Key Takeaways:
- Removing spackle is a simple process that requires the right tools and materials, including spackle knife, sandpaper, putty knife, joint compound, and paint.
- By preparing the area, sanding the spackle, applying joint compound, and finishing with paint, you can achieve a flawless, professional-looking finish that seamlessly blends with the surrounding wall.
Read more: What Is A Spackle
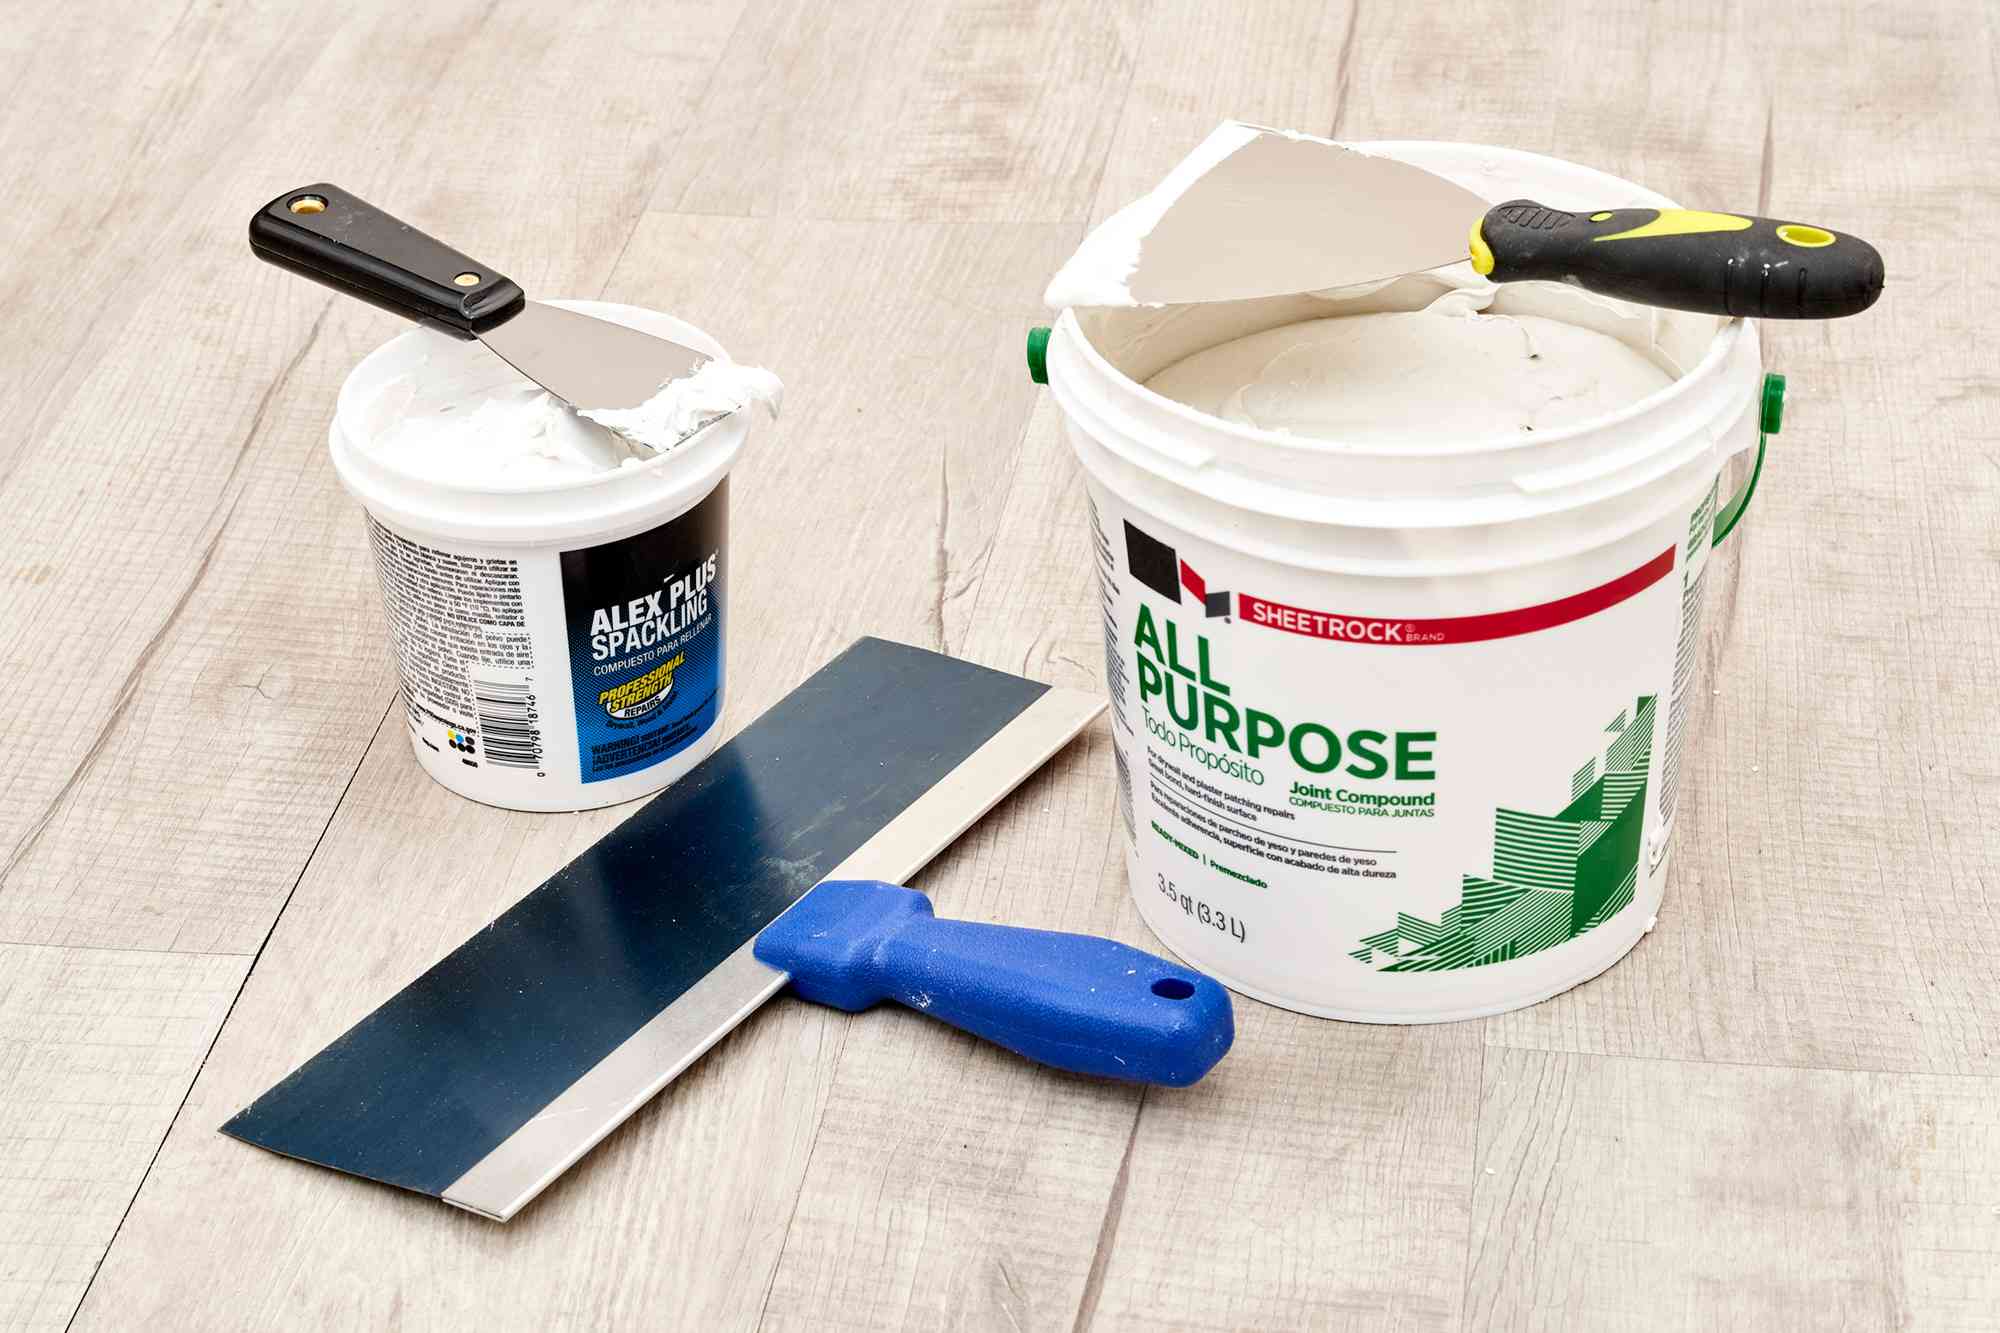
Step 1: Gather the Necessary Supplies
Before you begin the spackle removal process, it’s essential to gather the right tools and materials. Here’s what you’ll need:
- Spackle knife: This tool is crucial for effectively scraping away the spackle from the surface. Look for a spackle knife with a comfortable grip and a sturdy, flexible blade.
- Sandpaper: You’ll need medium-grit sandpaper to smooth out the surface after removing the spackle. Additionally, fine-grit sandpaper will be useful for achieving a polished finish.
- Putty knife: A putty knife is ideal for applying joint compound, which will be used to fill in any remaining imperfections after the spackle has been removed.
- Joint compound: This versatile material is essential for achieving a seamless, professional-looking surface. It will be used to fill in any gaps or uneven areas left behind after spackle removal.
- Paint: Once the surface is smooth and free of spackle, you’ll need paint to match the color of the surrounding area. This will ensure a seamless finish that blends seamlessly with the rest of the wall.
By ensuring that you have all the necessary supplies on hand, you’ll be well-prepared to tackle the spackle removal process efficiently and effectively.
Step 2: Prepare the Area
Before diving into the spackle removal process, it’s essential to prepare the surrounding area to minimize mess and ensure a smooth workflow. Here’s how to get started:
- Lay down a drop cloth: To protect the floor and surrounding surfaces, lay down a drop cloth or a large piece of plastic to catch any debris that may fall during the spackle removal process. This simple step will make cleanup much easier and prevent spackle dust from spreading throughout the room.
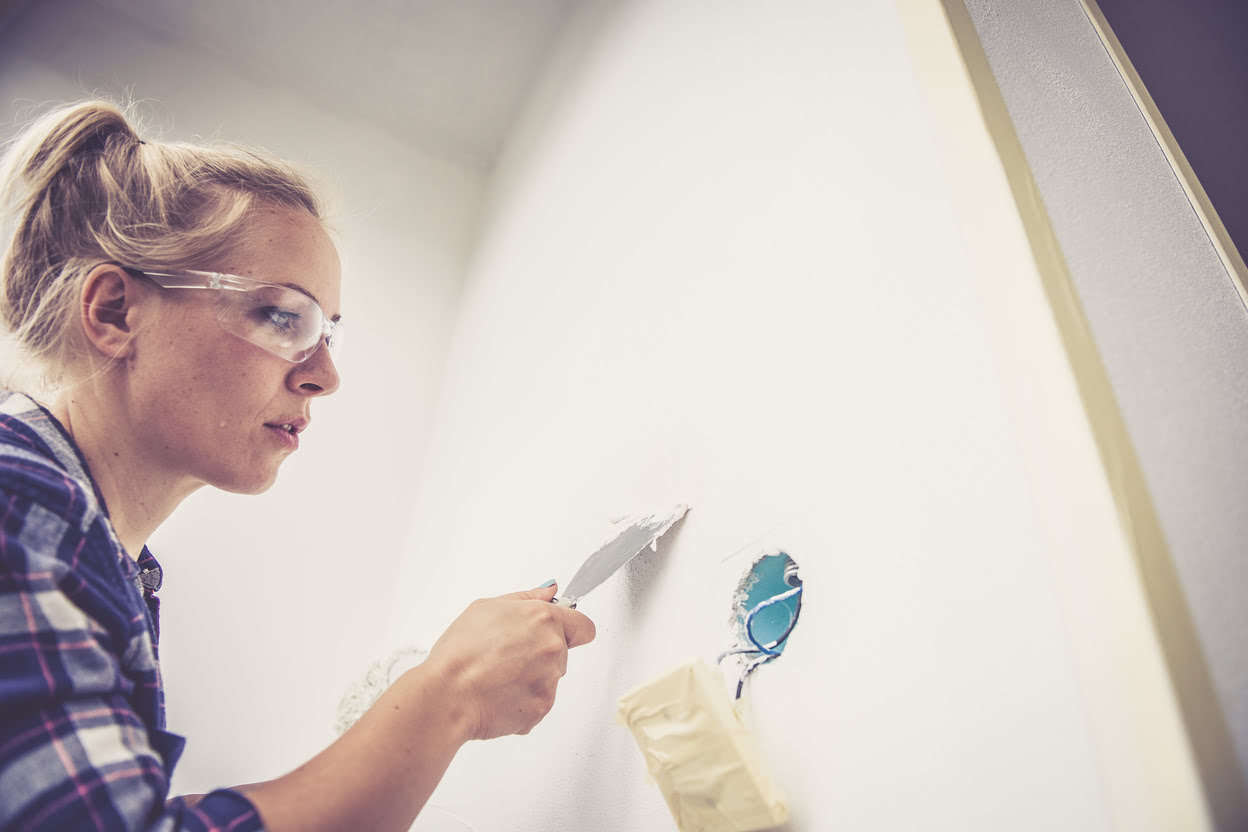
- Remove any loose spackle: Using a spackle knife or putty knife, carefully scrape away any loose or flaking spackle from the surface. By clearing away these areas of compromised spackle, you’ll create a smooth foundation for the next steps in the removal process.
By taking the time to prepare the area properly, you’ll set the stage for a successful spackle removal process and ensure that the surrounding space remains clean and tidy throughout the project.
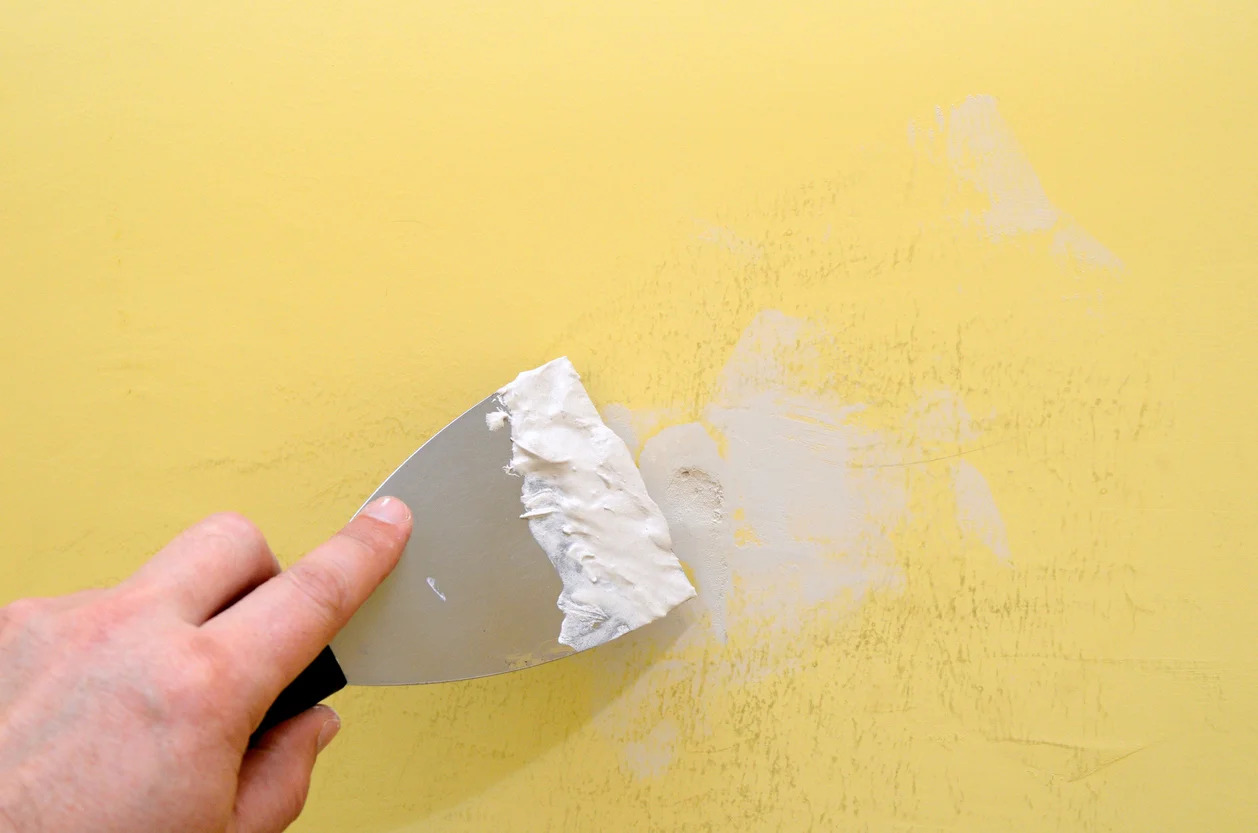
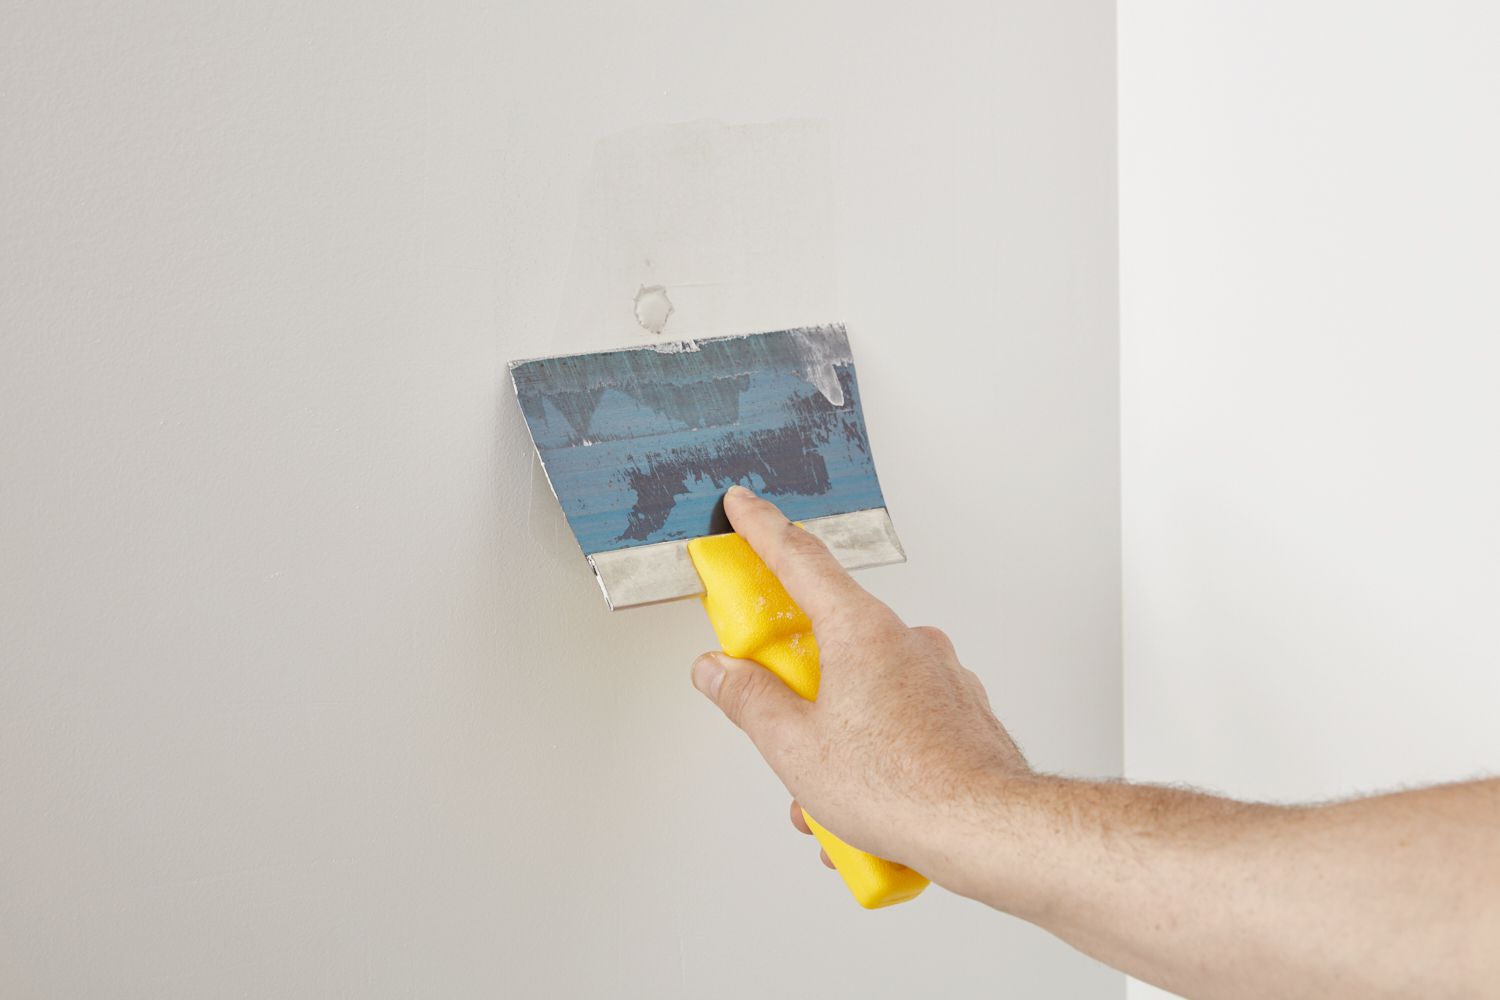
Step 3: Sand the Spackle
Once you’ve prepared the area and removed any loose spackle, it’s time to focus on smoothing out the remaining spackle. Follow these steps to achieve a seamless surface:
- Sand the spackle until smooth: Using medium-grit sandpaper, gently sand the spackled area in smooth, even strokes. The goal is to create a level surface, so take care to sand away any ridges or uneven areas until the spackle blends seamlessly with the surrounding wall.
By carefully sanding the spackle, you’ll ensure that the surface is ready for the next steps in the removal process, setting the stage for a flawless finish.
Use a putty knife to gently scrape away the spackle. If it’s stubborn, dampen it with water first. Sand the area smooth once the spackle is removed.
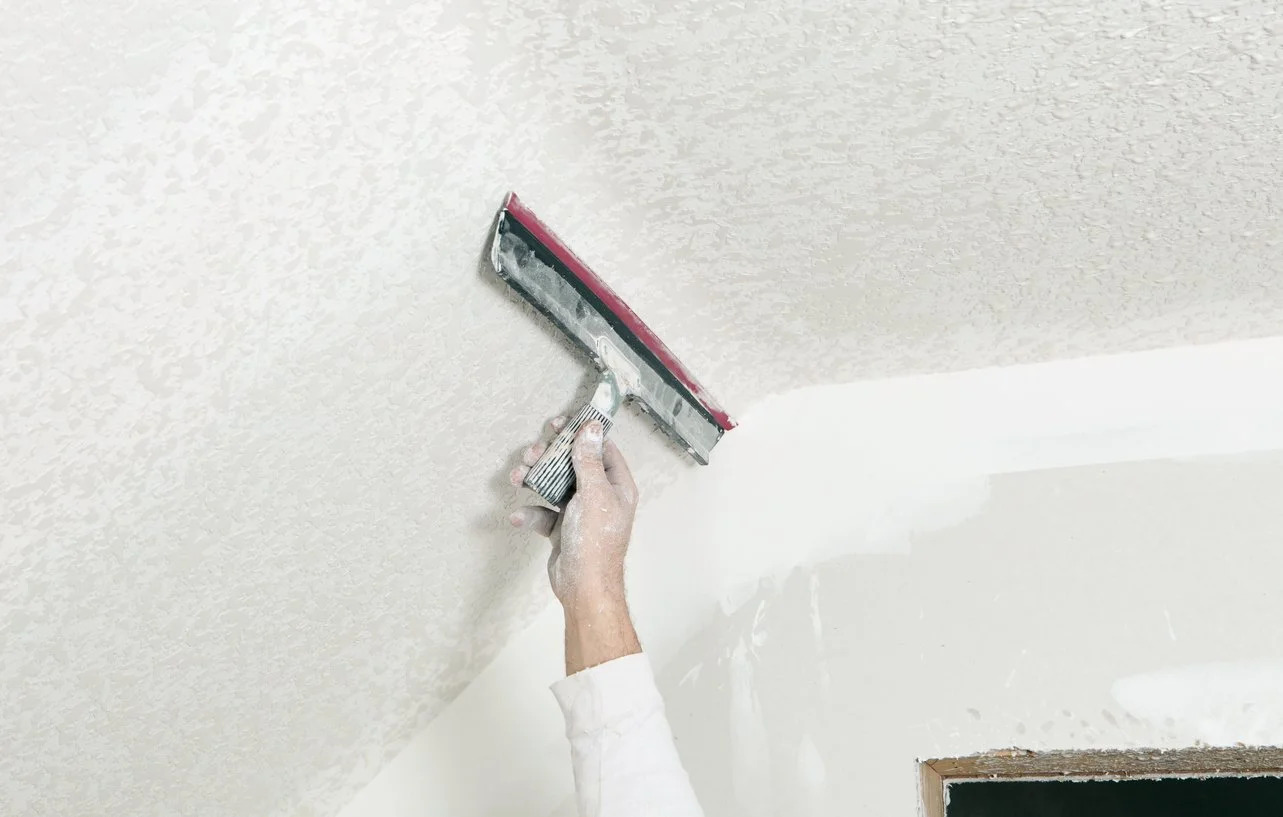
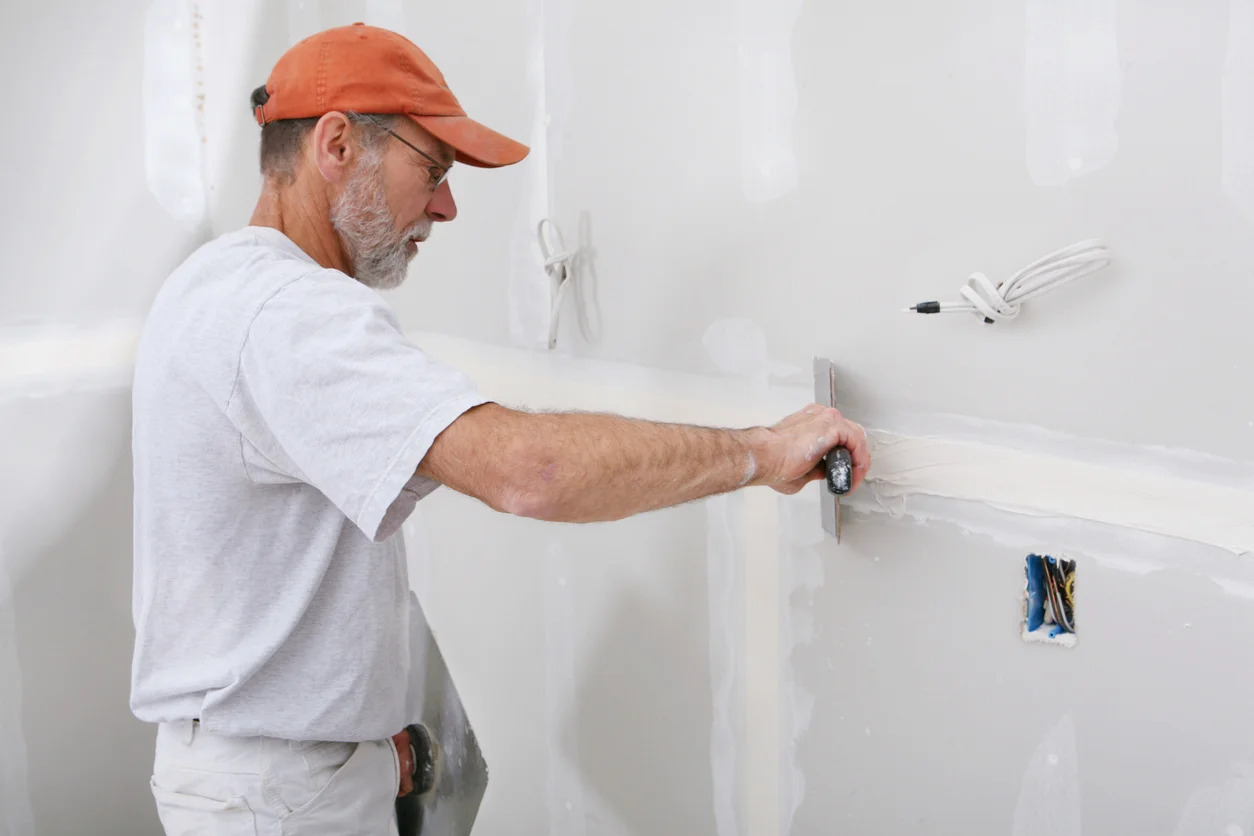
Step 4: Apply Joint Compound
After sanding the spackled area to achieve a smooth surface, the next step is to apply joint compound to fill in any remaining imperfections. Follow these simple guidelines to complete this crucial stage of the spackle removal process:
- Apply a thin layer of joint compound: Using a putty knife, apply a thin, even layer of joint compound over the sanded area. This will help to fill in any small gaps or uneven spots, creating a seamless surface.
- Allow to dry: Once the joint compound has been applied, allow it to dry completely according to the manufacturer’s instructions. This drying time is essential for achieving a smooth, ready-to-paint surface.
By carefully applying and allowing the joint compound to dry, you’ll be one step closer to achieving a flawless finish and restoring the wall to its original condition.
Read more: How To Spackle Corners
Step 5: Sand and Paint
With the joint compound in place and fully dried, it’s time to put the finishing touches on the spackle removal process. Follow these final steps to complete the project with professional-level results:
- Sand the joint compound: Using fine-grit sandpaper, gently sand the dried joint compound to achieve a smooth, seamless finish. Take care to blend the edges of the compound with the surrounding wall, creating a surface that is ready for painting.
- Paint over the area: Once the sanded area is smooth and free of imperfections, it’s time to apply paint that matches the color of the surrounding wall. Use a high-quality paintbrush or roller to carefully paint over the spackled area, ensuring an even application that seamlessly blends with the rest of the wall.
By following these final steps, you’ll achieve a flawless, professional-looking finish that seamlessly integrates with the surrounding wall, leaving no trace of the spackle that once marred the surface.
Conclusion
Congratulations! You’ve successfully navigated the process of removing spackle and restoring your wall to its former glory. By following the steps outlined in this guide and using the right tools and materials, you’ve achieved a seamless, professional-looking finish that seamlessly blends with the surrounding wall.
Remember, patience and attention to detail are key when tackling home improvement projects, and the process of spackle removal is no exception. By preparing the area, carefully sanding the spackle, applying joint compound, and finishing with a fresh coat of paint, you’ve transformed a blemished surface into a pristine, like-new wall.
As you admire your handiwork, take pride in the fact that you’ve acquired valuable skills that will serve you well in future DIY endeavors. The satisfaction of a job well done and a beautifully restored wall is a testament to your dedication and resourcefulness as a DIY enthusiast.
Now, sit back and enjoy the seamless, flawless finish you’ve achieved. Whether you’re preparing your home for a fresh new look or simply maintaining its pristine condition, the knowledge and skills you’ve gained will continue to serve you well in your ongoing home improvement journey.
Well done, and happy DIY-ing!
Frequently Asked Questions about How To Remove Spackle
Was this page helpful?
At Storables.com, we guarantee accurate and reliable information. Our content, validated by Expert Board Contributors, is crafted following stringent Editorial Policies. We're committed to providing you with well-researched, expert-backed insights for all your informational needs.


0 thoughts on “How To Remove Spackle”