Home>Renovation & DIY>Tools & Equipment>How To Fix A Bad Spackle Job
Tools & Equipment
How To Fix A Bad Spackle Job
Modified: October 19, 2024
Discover the best tools and equipment to fix a bad spackle job easily. Get step-by-step instructions and expert tips to achieve a flawless result.
(Many of the links in this article redirect to a specific reviewed product. Your purchase of these products through affiliate links helps to generate commission for Storables.com, at no extra cost. Learn more)
Introduction
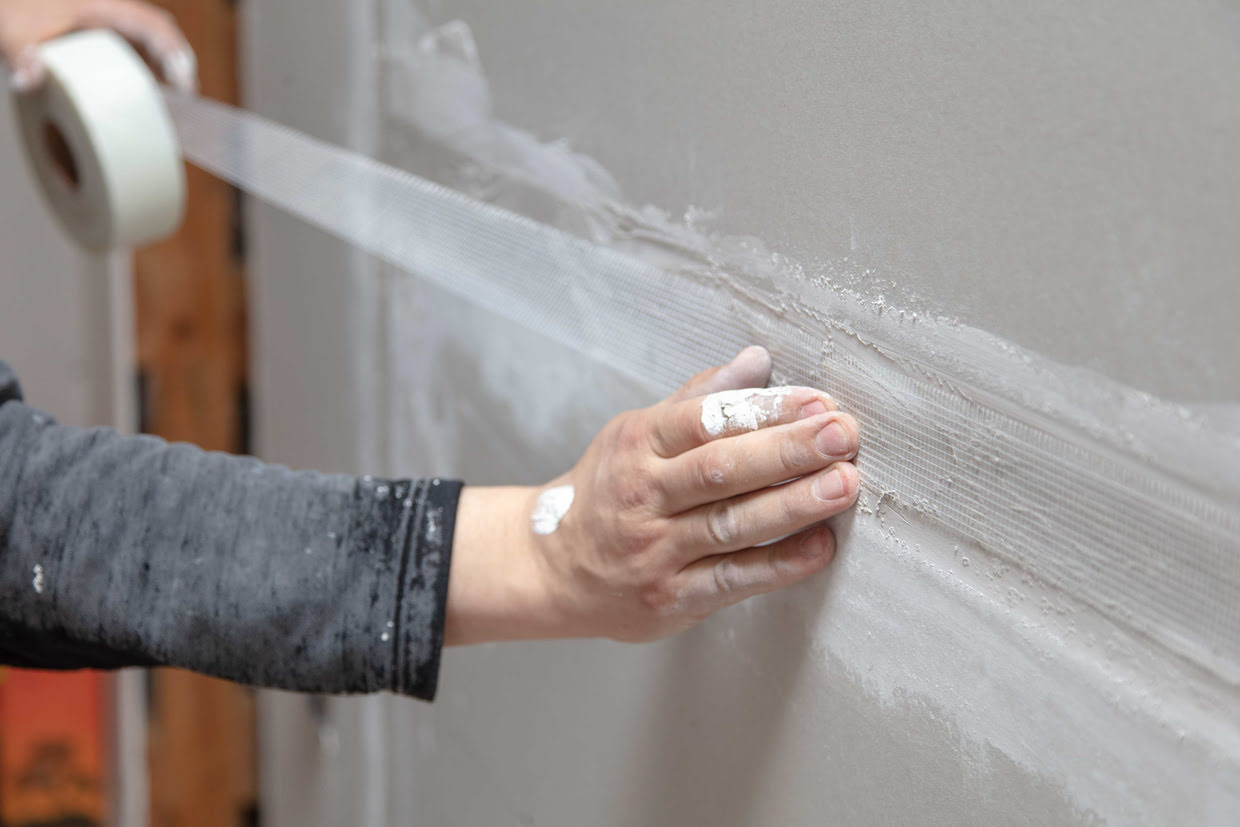
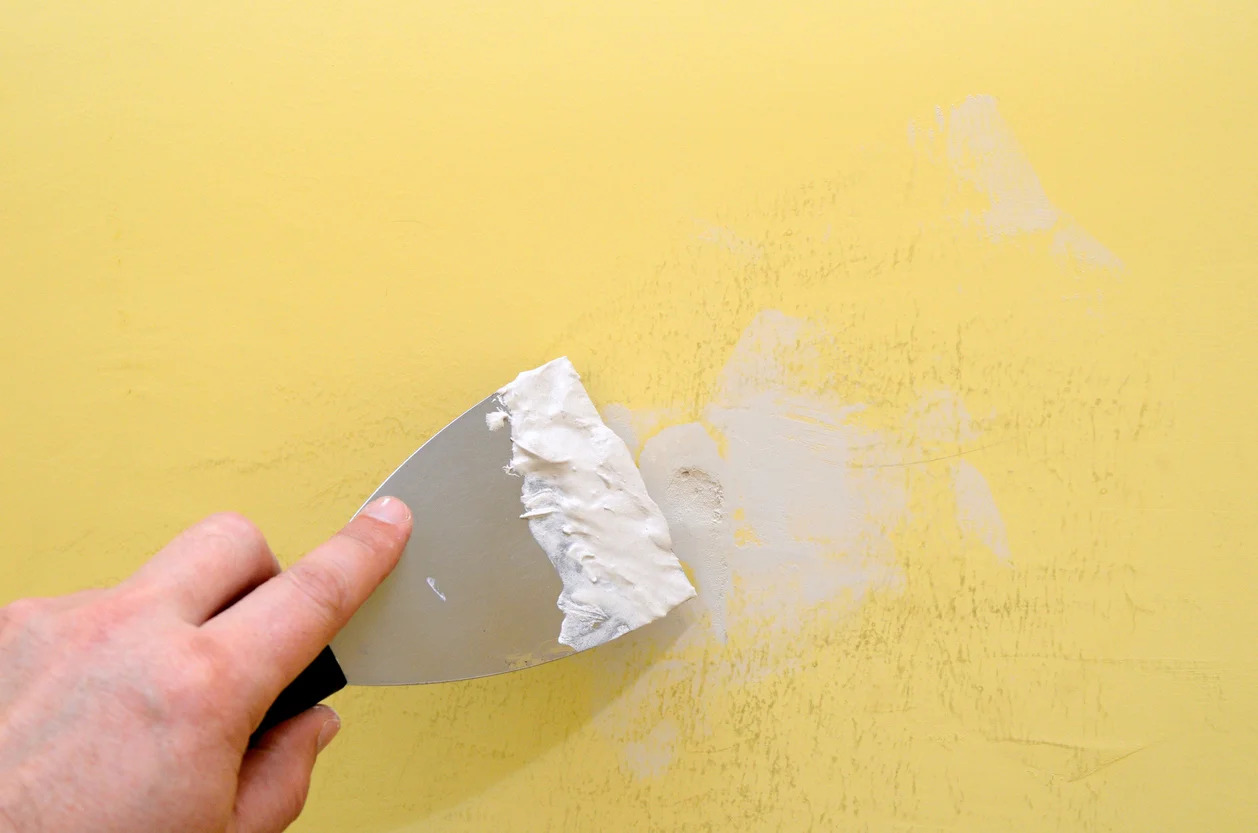
Spackle is a versatile compound commonly used for patching and repairing walls, ceilings, and other surfaces. When applied correctly, it can create a smooth and seamless finish. However, a bad spackle job can leave behind unsightly bumps, cracks, or uneven surfaces. Whether it’s a DIY project gone wrong or the work of an inexperienced contractor, fixing a bad spackle job is essential for achieving a professional-looking result.
In this article, we will guide you through the process of fixing a bad spackle job step-by-step. We’ll provide you with expert tips, insights, and a comprehensive list of tools and materials needed to successfully repair the damaged area. By following our guidelines, you’ll be able to tackle this project with confidence and restore your wall or ceiling to its former glory.
Before we begin, it’s important to note that fixing a bad spackle job requires some intermediate DIY skills. If you feel uncomfortable or uncertain about your ability to complete the task, it’s advisable to seek professional help. However, if you’re up for the challenge and determined to fix the problem yourself, let’s dive into the process.
Key Takeaways:
- Don’t let a bad spackle job ruin your walls or ceilings! With the right tools and step-by-step guidance, you can confidently tackle the repair process and achieve a professional-looking finish.
- From assessing the damage to applying new spackle and performing final touches, each step is crucial for seamlessly restoring your surfaces. Patience, attention to detail, and the right materials are key to a successful repair.
Read more: How To Tell If A Spackle Is Bad
Assessing the Bad Spackle Job
The first step in fixing a bad spackle job is to thoroughly assess the extent of the damage. Take a close look at the spackled area and identify any visible imperfections such as bumps, cracks, or uneven surfaces. Additionally, examine the surrounding areas to determine if there are any signs of peeling paint or other issues.
Use your hands to gently press on the spackled area. If it feels soft or spongy, it may indicate that the spackle wasn’t properly cured or that there are underlying issues. In this case, you may need to remove the entire layer of spackle and start fresh.
It’s also important to consider the cause of the bad spackle job. Was it due to improper application, inadequate drying time, or a lack of preparation? Understanding the root cause will help you avoid similar mistakes in the future and ensure a successful repair.
Once you’ve assessed the extent of the damage and identified the underlying issues, you’re ready to gather the necessary tools and materials to fix the bad spackle job.
Gathering the Necessary Tools and Materials
Before you can begin fixing a bad spackle job, you’ll need to gather the necessary tools and materials. Here’s a comprehensive list of what you’ll need:
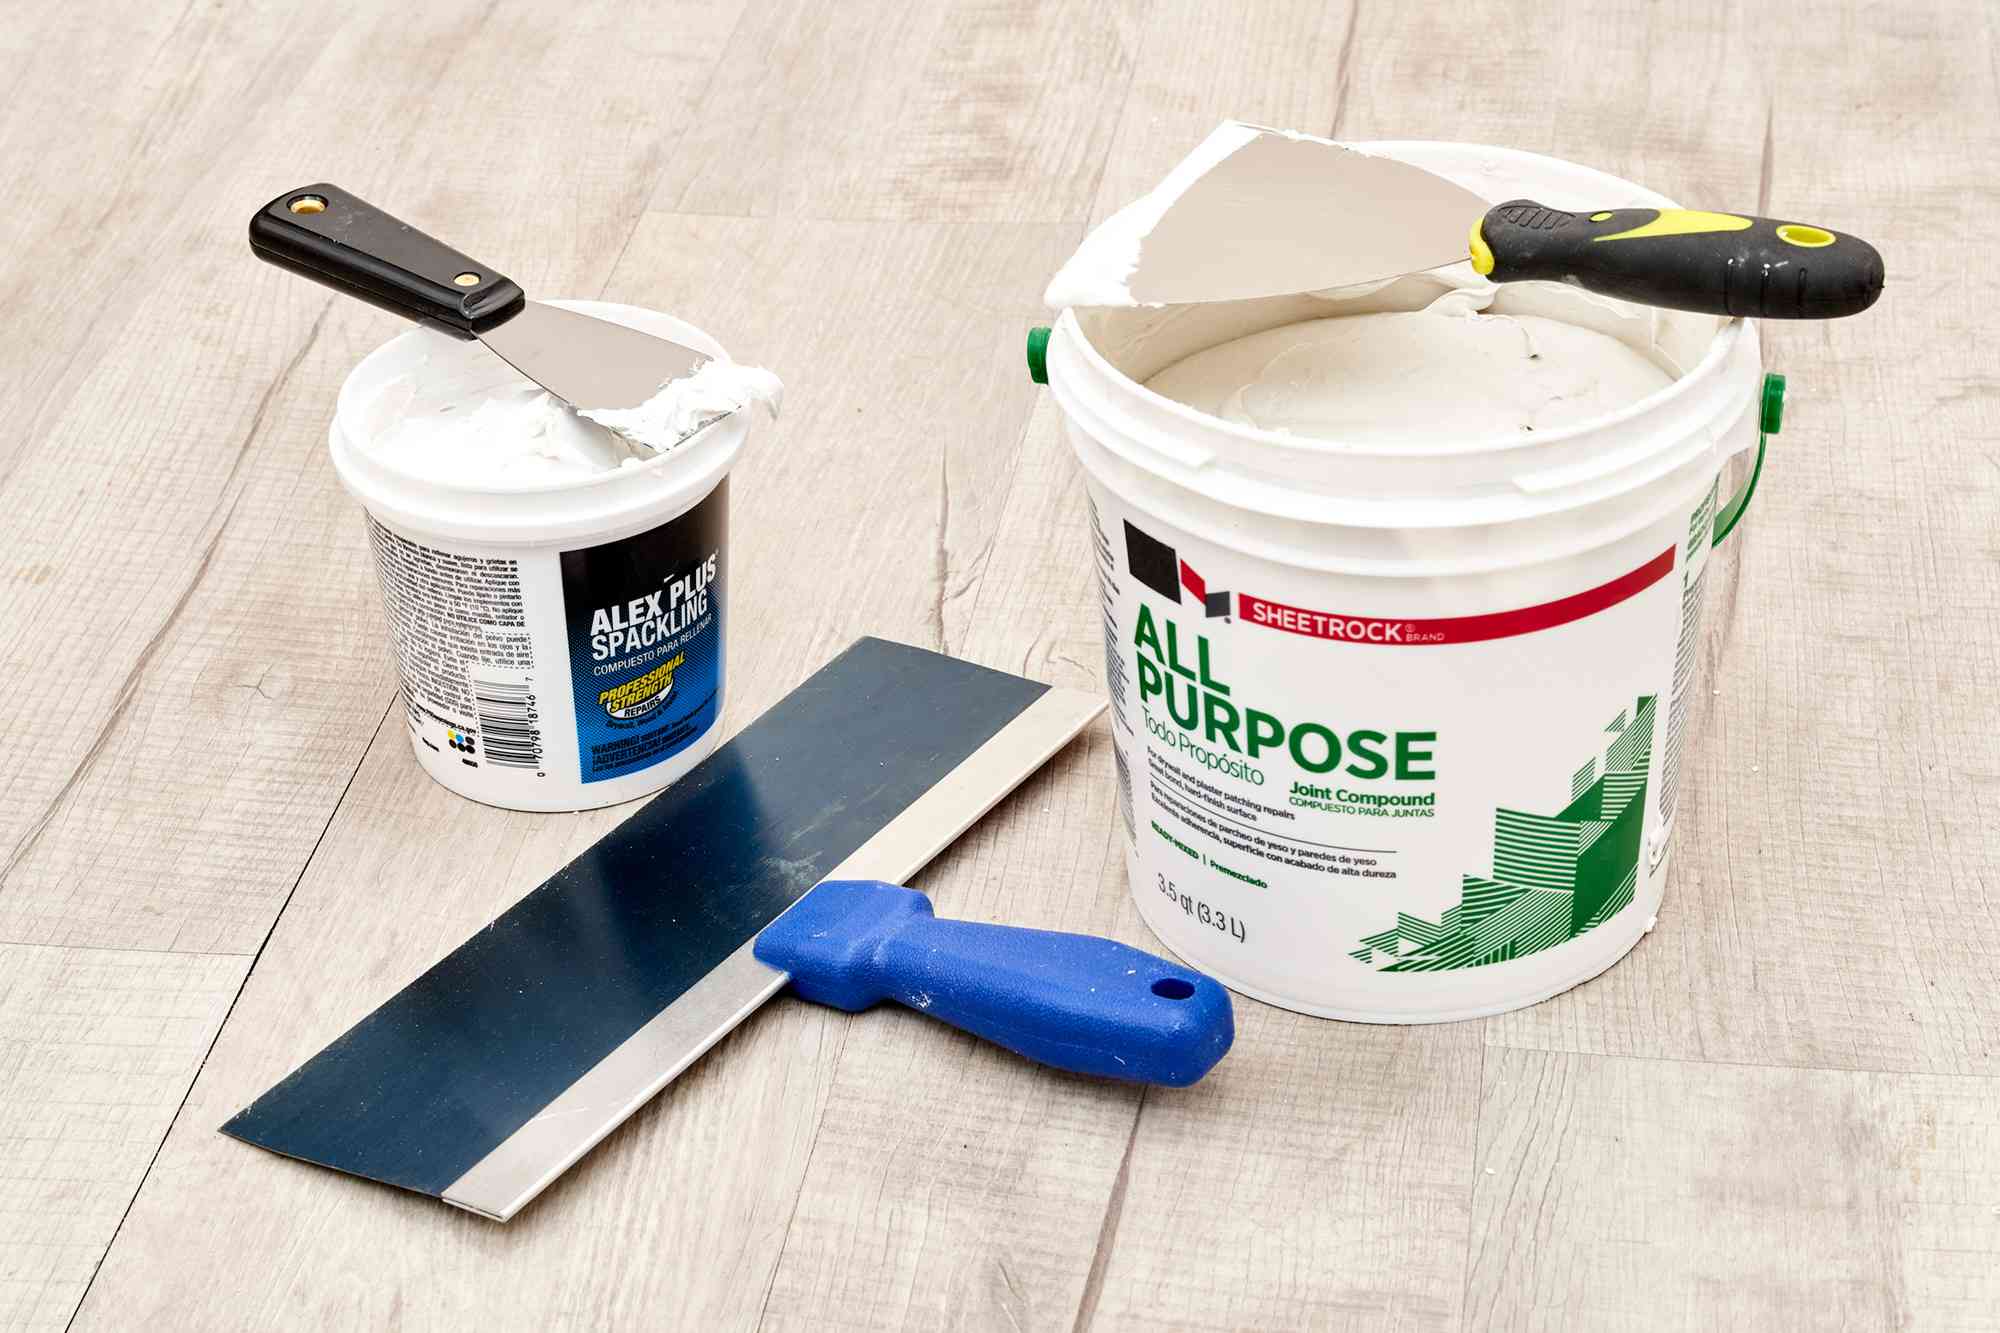
- Putty knife or scraper: Essential for removing the existing spackle.
- Sanding block or sandpaper: Used to smooth the spackle surface after it’s applied.
- Primer: Helps the new spackle adhere to the surface and provides a smooth base for painting.
- Paint: Choose a high-quality paint that matches the surrounding area.
- Drop cloths: Protects the surrounding area from dust and debris.
- Clean cloth or sponge: Used for cleaning the surface before applying new spackle.
- Painter’s tape: Helps create clean lines and protect adjacent surfaces.
- Drywall compound: Can be used to fill larger holes or deeper cracks.
- Paintbrushes or rollers: Used for priming and painting the repaired area.
- Dust mask or respirator: Protects your lungs from dust and fine particles.
- Gloves: Provides hand protection and prevents transfer of oils and dirt onto the surface.
Make sure to gather all the tools and materials listed above before starting the repair process. Having everything prepared will save you time and ensure a smooth workflow.
Once you have everything ready, it’s time to move on to the next step: removing the existing spackle.
Removing the Existing Spackle
Before you can apply new spackle and achieve a seamless repair, it’s important to remove the existing spackle that is causing the issues. Here’s a step-by-step guide on how to remove the old spackle:
- Start by using a putty knife or scraper to gently scrape away the excess spackle from the damaged area. Be careful not to damage the surrounding surfaces.
- If the spackle is thick or stubborn, you may need to apply slight pressure while scraping. Take your time and work in small sections to avoid creating further damage.
- Once you have removed the bulk of the spackle, use sandpaper or a sanding block to smooth out the remaining residue. This will ensure that the surface is even and ready for the new spackle.
- After sanding, wipe the area with a clean cloth or sponge to remove any dust or debris. This will provide a clean surface for the next step.
Remember to take breaks as needed and protect yourself with a dust mask or respirator to avoid inhaling any dust particles. It’s essential to work in a well-ventilated area, particularly if you’re dealing with older spackle that may contain harmful materials.
Once the old spackle has been removed and the surface is smooth, it’s time to move on to the next step: preparing the surface for the new spackle.
Preparing the Surface
Preparing the surface is a crucial step in fixing a bad spackle job. It ensures that the new spackle adheres properly and creates a seamless finish. Follow these steps to prepare the surface before applying the new spackle:
- Inspect the area for any remaining dust or debris. Use a clean cloth or sponge to wipe the surface and remove any particles.
- Check for any loose or flaking paint around the damaged area. Use a scraper or sandpaper to gently remove any loose paint. Smooth the edges of the surrounding paint to create a seamless transition.
- If the surrounding paint is glossy or has a different sheen than the repaired area, lightly sand it to create a smooth surface. This will help the new spackle blend in better when painted.
- Fill any larger holes or deep cracks with drywall compound. Use a putty knife to apply the compound, making sure to fill the gaps completely. Smooth out the surface with the putty knife and let it dry according to the manufacturer’s instructions.
- Once the surface is free of dust, debris, and any necessary repairs have been made, wipe it down once more with a damp cloth to ensure it’s clean and ready for the new spackle.
- Finally, if necessary, use painter’s tape to mask off any adjacent surfaces or trim to protect them from the new spackle and paint.
By properly preparing the surface, you’ll create an ideal base for the new spackle and ensure a seamless repair. With the surface ready, you can now move on to the next step: applying the new spackle.
Read more: What Is A Spackle
Applying New Spackle
Now that you’ve prepared the surface, it’s time to apply the new spackle. Follow these steps to ensure a smooth and even application:
- Start by opening the container of spackle and stirring it well to achieve a homogeneous consistency. This will help you achieve a more even application.
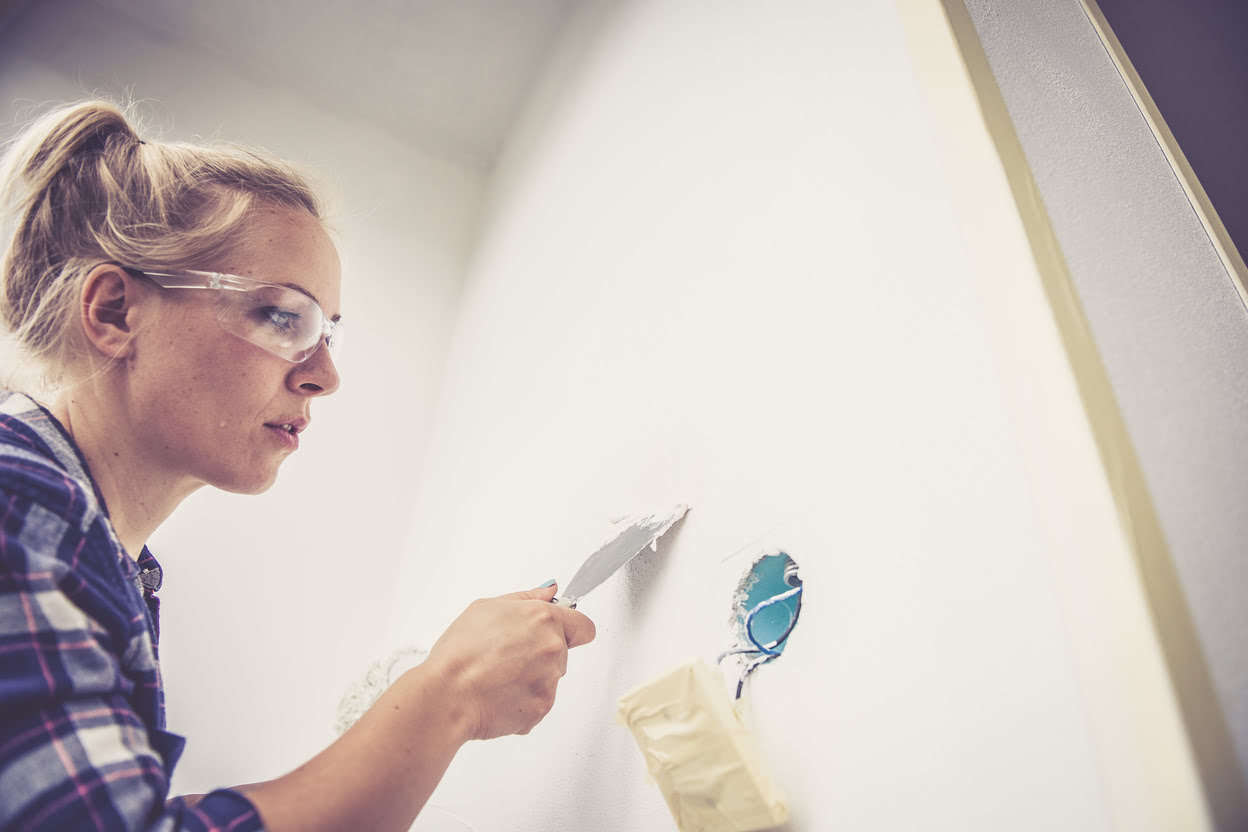
- Using a putty knife, scoop up a small amount of spackle and apply it to the damaged area. Use the edge of the putty knife to spread the spackle evenly, filling any gaps or low spots in the surface.
- For larger holes or deeper cracks, you may need to apply multiple layers of spackle. Allow each layer to dry before applying the next, following the manufacturer’s instructions for drying times.
- As you apply the spackle, aim for a slightly raised surface. This will allow for sanding and blending with the surrounding area later on.
- Continue working in small sections, spreading the spackle evenly until you’ve covered the entire damaged area.
It’s important to note that when working with spackle, it’s best to apply multiple thin layers rather than one thick layer. This will help prevent cracking and ensure a more durable and seamless finish.
Once you’ve applied the new spackle, let it dry completely according to the manufacturer’s instructions. This can take several hours or even overnight. Patience is key during this step to ensure a proper dry and a solid foundation for the next stage: smoothing and sanding the spackle.
Sand the spackled area thoroughly to smooth out any bumps or ridges. Use a fine-grit sandpaper and work in a circular motion until the surface is even. Wipe away any dust before applying a new layer of spackle.
Smoothing and Sanding the Spackle
After the new spackle has dried completely, it’s time to smooth and sand the surface to achieve a seamless finish. Follow these steps to ensure a professional result:
- Start by visually inspecting the spackled area. Check for any raised edges, bumps, or uneven surfaces.
- Using a sanding block or sandpaper with a fine grit, gently sand the spackle in a circular motion. Focus on smoothing out any rough patches or imperfections, being careful not to sand too aggressively and damage the surrounding area.
- Continue sanding until the surface feels smooth and even to the touch. It’s important to create a seamless transition between the spackled area and the surrounding surface.
- As you sand, periodically wipe away the dust with a clean cloth or sponge. This will help you see the progress and prevent the dust from settling back onto the surface.
- For hard-to-reach corners or intricate details, you can use a sanding sponge or a small piece of sandpaper folded into a tight corner.
Remember to take breaks and assess your progress frequently to avoid over-sanding or creating uneven textures. It’s better to go slowly and gradually achieve a smooth surface rather than rush the process and risk damaging the repair.
Once you’re satisfied with the smoothness of the spackled area, use a damp cloth to wipe away any remaining dust. This will prepare the surface for the next step: priming.
Priming the Surface
After smoothing and sanding the spackled area, it’s important to prime the surface before applying paint. Priming helps the new spackle adhere better and provides a uniform base for the paint. Follow these steps to prime the repaired area:
- Choose a high-quality primer suitable for the type of surface you’re working on. Check the manufacturer’s instructions for specific recommendations.
- Stir the primer thoroughly to ensure proper consistency and even distribution of the pigments.
- Using a paintbrush or roller, apply a thin and even coat of primer to the spackled area. Feather out the edges to create a seamless transition to the surrounding surfaces.
- Allow the primer to dry completely. Drying times can vary depending on the type of primer and environmental conditions, so refer to the manufacturer’s instructions for the recommended drying time.
- Once the primer is dry, lightly sand the surface with a fine-grit sandpaper to remove any imperfections or subtle roughness. Wipe away the dust with a clean cloth or sponge.
- Inspect the primed area for any visible imperfections. If necessary, apply an additional coat of primer and repeat the sanding process until you achieve a smooth and flawless surface.
Priming not only enhances the adhesion of the paint, but it also helps to prevent the repaired area from absorbing the paint differently than the surrounding surfaces. This ensures a uniform and professional-looking finish.
With the surface properly primed, you’re now ready to move on to the next step: painting the repaired area.
Painting the Repaired Area
Painting the repaired area is the final step in fixing a bad spackle job. Follow these steps to ensure a seamless and blended finish:
- Select a high-quality paint that matches the color and sheen of the surrounding area. If possible, use the same type of paint that was originally used on the wall or ceiling.
- Stir the paint thoroughly to ensure the pigments are evenly distributed.
- Using a paintbrush or roller, carefully apply a thin layer of paint to the repaired area. Feather the edges to blend it seamlessly with the surrounding surfaces. Be mindful not to apply too much pressure or create visible brush or roller marks.
- Allow the first coat of paint to dry completely. Refer to the manufacturer’s instructions for the recommended drying time.
- If necessary, apply a second coat of paint to achieve full coverage and ensure a uniform finish. Again, feather the edges to seamlessly blend with the surrounding surfaces.
- After the final coat of paint is dry, inspect the repaired area for any touch-ups or imperfections that may need additional attention.
Remember to take your time and apply the paint in thin layers. It’s better to build up the coverage gradually than to apply too much paint at once, which can result in an uneven and unattractive finish.
Once the paint is dry and you’re satisfied with the result, step back and admire your seamless repair. The final step is to tidy up and perform any necessary final touches.
Read more: How To Spackle Corners
Final Touches and Clean-Up
After completing the painting process, it’s time to add the final touches and perform clean-up to ensure a polished and professional outcome. Follow these steps to wrap up the project:
- Inspect the repaired area and surrounding surfaces for any touch-ups needed. Use a small brush to carefully address any imperfections or areas that require further blending.
- Remove any painter’s tape or masking that was used to protect adjacent surfaces. Do this slowly and carefully to avoid accidentally peeling off the newly painted area.
- Wipe down the repaired area and surrounding surfaces with a clean, damp cloth to remove any dust or residue from the painting process.
- Ensure proper ventilation in the room to allow the paint to fully cure. This will help prevent any off-gassing odors and contribute to a healthier indoor environment.
- Properly dispose of any used paint cans, brushes, or other materials following local regulations and guidelines.
- Take a step back and admire your handiwork! The once-bad spackle job should now be seamlessly repaired and visually appealing.
By paying attention to these final touches and thoroughly cleaning up the work area, you’ll ensure a job well done and a space that looks as good as new.
Remember, fixing a bad spackle job requires patience, attention to detail, and a little bit of DIY know-how. With the right tools, materials, and step-by-step guidance, you can successfully repair a bad spackle job and achieve a professional finish. So, roll up your sleeves, be prepared to put in the work, and enjoy the satisfaction of a beautifully restored wall or ceiling.
Congratulations on your successful repair!
Conclusion
Fixing a bad spackle job doesn’t have to be daunting. With the right tools, materials, and a bit of patience, you can restore your wall or ceiling to its former glory. By following the step-by-step guide provided in this article, you’ll be able to tackle this project confidently and achieve a professional-looking result.
From assessing the bad spackle job to gathering the necessary tools and materials, removing the existing spackle, preparing the surface, applying new spackle, smoothing and sanding, priming, painting, and performing final touches and clean-up – each step plays a crucial role in achieving a seamless repair.
Remember, take your time during each phase of the process and pay attention to detail. This will ensure that the repaired area seamlessly blends in with the surrounding surfaces, creating a polished and professional finish.
If at any point you feel unsure or uncomfortable with the task, don’t hesitate to seek professional help. It’s better to have the job done right by a skilled contractor than risking further damage or an unsatisfactory result.
So, next time you encounter a bad spackle job, don’t fret. Armed with the knowledge and guidance provided in this article, you have the tools to take on the challenge and restore your walls or ceilings to their original beauty.
We hope this guide has been helpful to you. Happy repairing!
Frequently Asked Questions about How To Fix A Bad Spackle Job
Was this page helpful?
At Storables.com, we guarantee accurate and reliable information. Our content, validated by Expert Board Contributors, is crafted following stringent Editorial Policies. We're committed to providing you with well-researched, expert-backed insights for all your informational needs.


0 thoughts on “How To Fix A Bad Spackle Job”