Home>Renovation & DIY>Tools & Equipment>How To Spackle Holes
Tools & Equipment
How To Spackle Holes
Published: December 19, 2023
Discover the essential tools and equipment needed to expertly spackle holes with our comprehensive guide. Perfect your technique and achieve flawless results.
(Many of the links in this article redirect to a specific reviewed product. Your purchase of these products through affiliate links helps to generate commission for Storables.com, at no extra cost. Learn more)
**
Introduction
**
So, you've noticed a few unsightly holes and dings in your walls, and you're ready to restore them to their former glory. Whether it's from accidentally bumping into the wall while moving furniture or from removing old nails or screws, these imperfections can detract from the overall appearance of your home. But fear not! With the right tools, a bit of know-how, and a touch of patience, you can easily spackle these blemishes and make your walls look as good as new.
In this comprehensive guide, we will walk you through the step-by-step process of spackling holes in your walls, ensuring that you achieve a seamless and professional finish. From gathering the necessary materials to preparing the surface, applying the spackle, and achieving a smooth, flawless result, we've got you covered. So, roll up your sleeves, put on your DIY hat, and let's dive into the wonderful world of spackling!
**
Key Takeaways:
- Gather the right tools and materials, prepare the surface, apply the spackle with precision, and finish with sanding for a flawless wall repair. Happy spackling!
- Spackling is a versatile DIY skill that can restore the beauty of your walls. With patience and attention to detail, you can achieve professional-quality results and rejuvenate your living space.
Read more: How To Spackle Large Holes
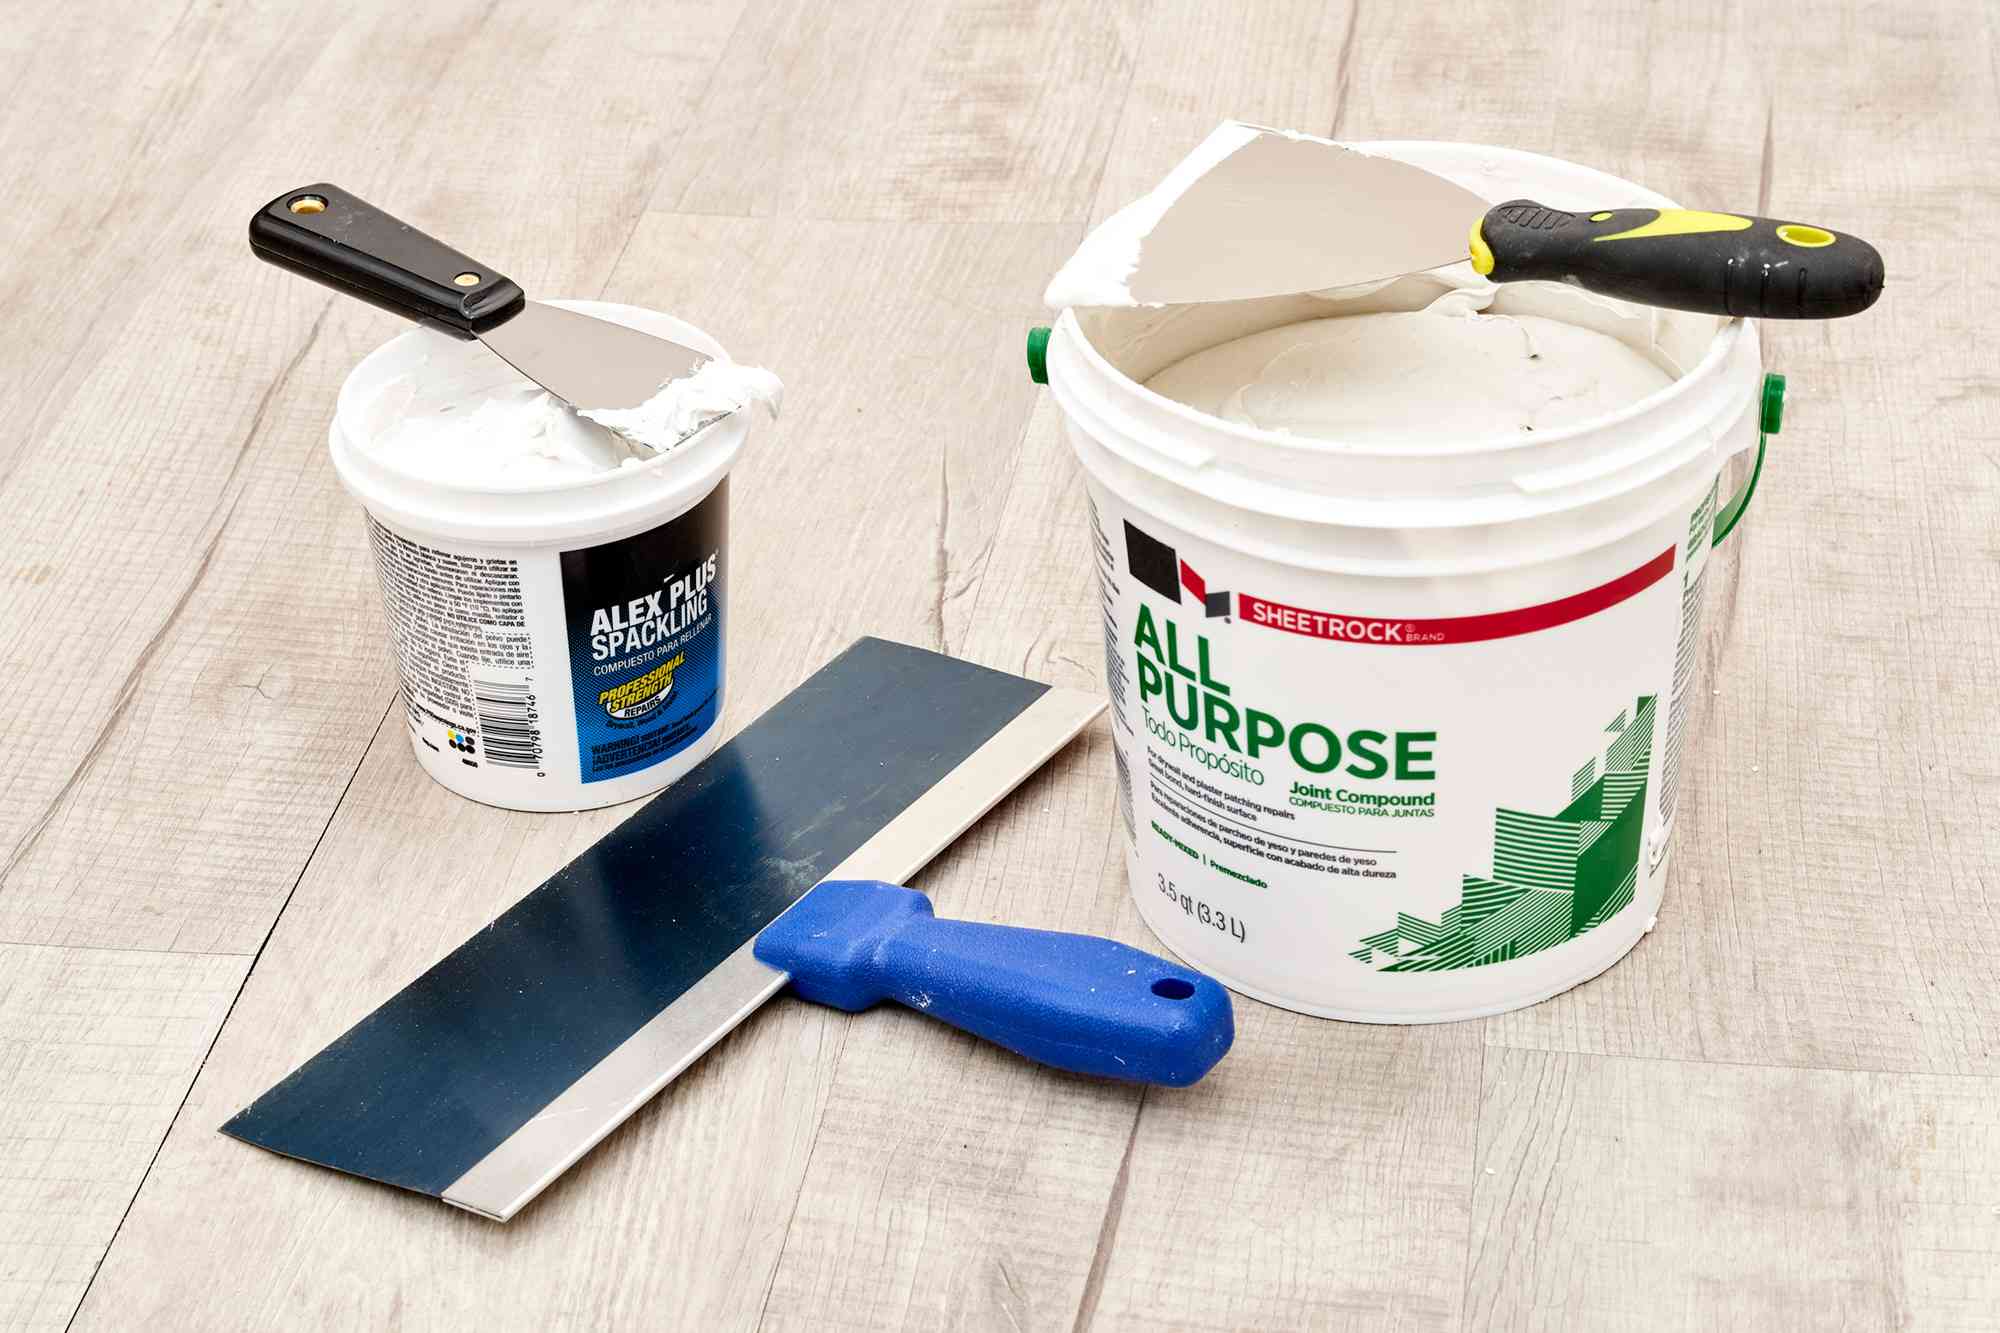
Materials Needed
**
Before you embark on your spackling journey, it's essential to gather the right materials to ensure a successful outcome. Here's a list of items you'll need:
- Spackle: This is the star of the show, a versatile compound specifically designed for filling holes and cracks in walls. It comes in various forms, including lightweight spackle for small repairs and heavyweight spackle for larger jobs.
- Putty Knife: Also known as a spackle knife, this tool is used to apply and smooth the spackle onto the wall. It comes in different sizes, so choose one that suits the scale of your project.
- Sandpaper: You'll need fine-grit sandpaper to sand down the spackled area once it has dried. This will help you achieve a smooth and even surface.
- Primer: While not always necessary, a primer can help ensure that the spackled area blends seamlessly with the rest of the wall. It also provides a better surface for paint to adhere to.
- Paint: If you plan to repaint the wall after spackling, make sure you have matching paint on hand. This will allow you to touch up the spackled area and maintain a uniform appearance.
- Clean Cloth or Sponge: You'll need a cloth or sponge to wipe away any excess spackle and keep your work area tidy.
- Drop Cloth or Tarp: To protect your floors and furniture from dust and debris, lay down a drop cloth or tarp before you begin spackling.
- Safety Gear: While spackling is generally safe, it's always a good idea to wear safety goggles and a dust mask to protect your eyes and respiratory system from any airborne particles.
By ensuring that you have all of these materials at your disposal, you'll be well-prepared to tackle your spackling project with confidence and precision.
**
Preparing the Surface
**
Before you dive into the spackling process, it's crucial to prepare the surface to ensure optimal adhesion and a seamless finish. Here are the steps to follow:
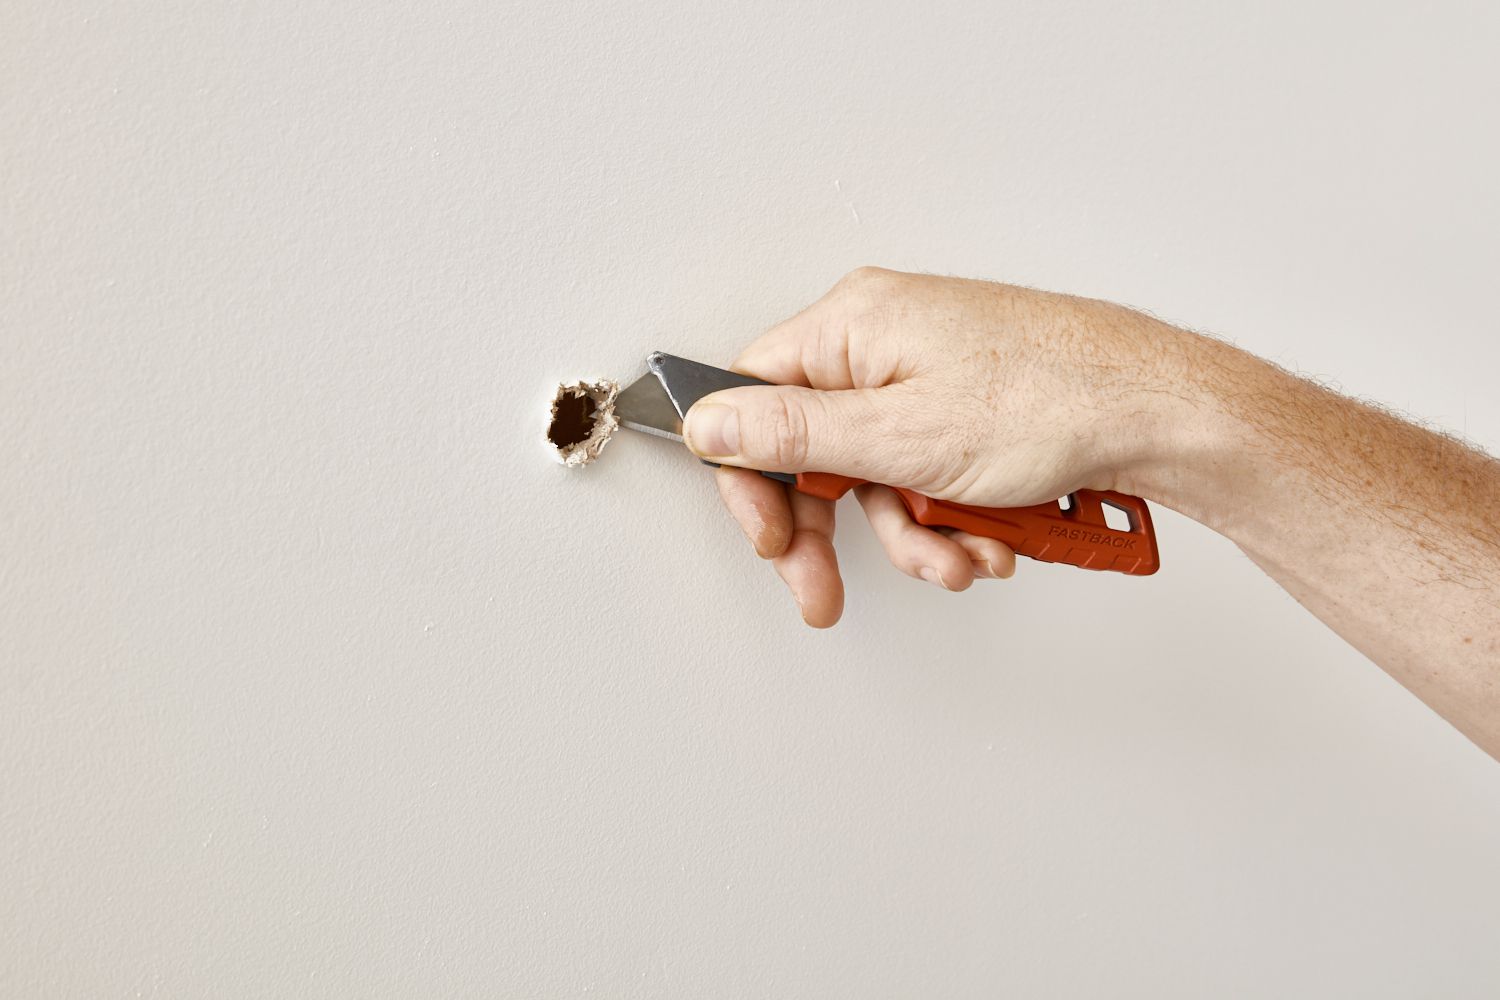
1. Clean the Area: Start by cleaning the area around the hole or imperfection. Use a damp cloth or sponge to remove any dust, dirt, or grease. This will help the spackle adhere better to the surface.
2. Remove Loose Debris: If the hole or crack has any loose debris or chipped paint, gently remove it using a putty knife or sandpaper. Be sure to smooth out the edges of the imperfection to create a flat surface for the spackle.
3. Apply Primer (If Necessary): In some cases, applying a primer to the spackled area can help the spackle blend in seamlessly with the rest of the wall. If you're planning to repaint the wall, using a primer can also improve the paint's adhesion and overall finish.
4. Protect Surrounding Areas: To prevent spackle from getting on adjacent surfaces, such as trim or baseboards, use painter's tape to mask off the area around the imperfection. This will ensure a clean and precise application of the spackle.
By taking the time to prepare the surface properly, you'll set the stage for a successful spackling job. These simple yet crucial steps will help you achieve a professional-looking result and ensure that the spackle adheres securely to the wall.
**
When spackling holes, make sure to clean the area first and use a putty knife to apply the spackle in thin layers. Sand the area between each layer for a smooth finish.
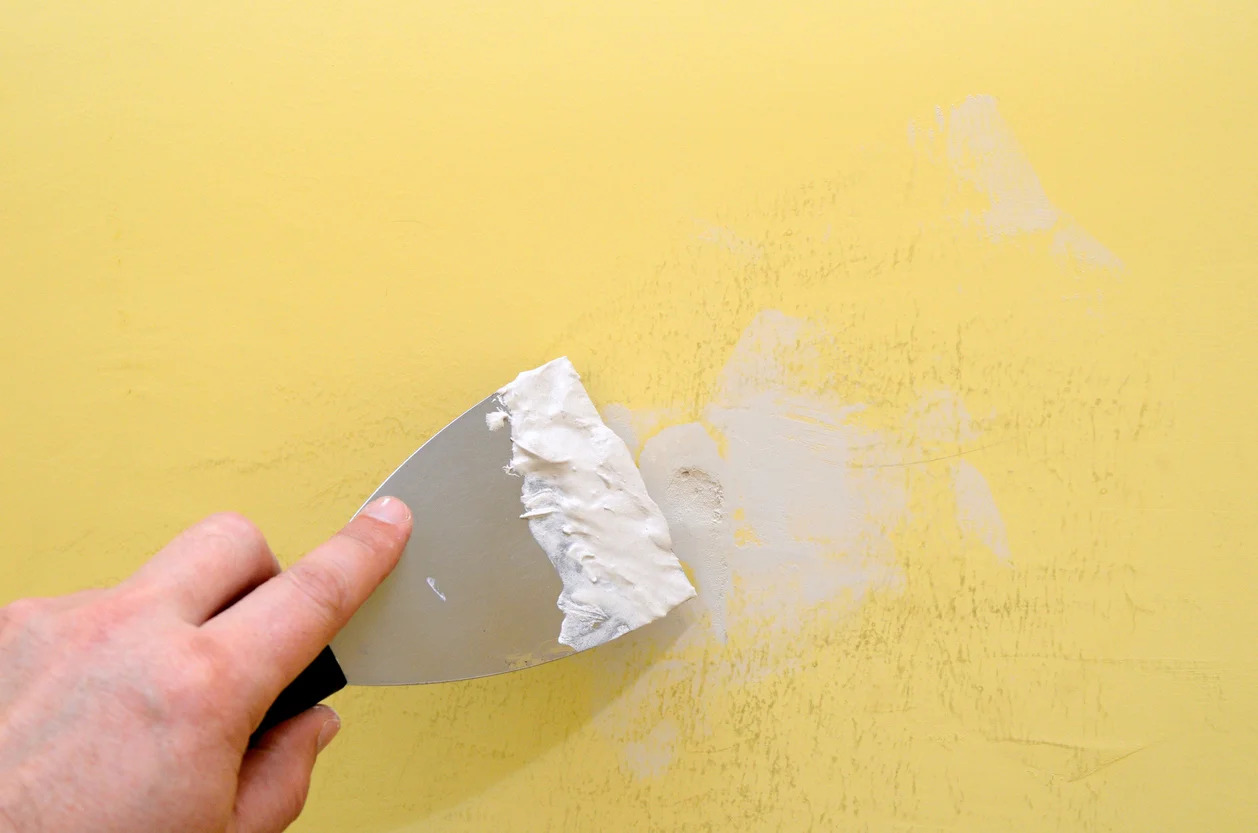
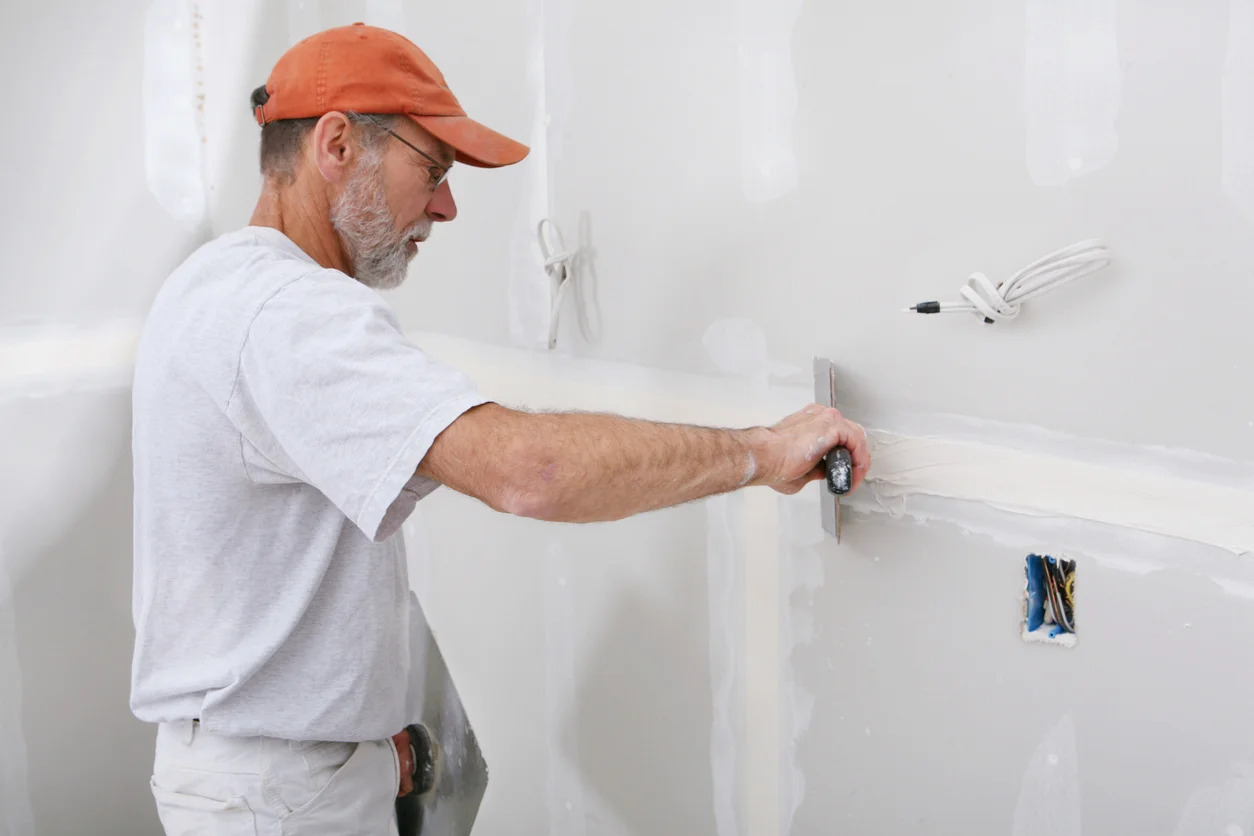
Applying the Spackle
**
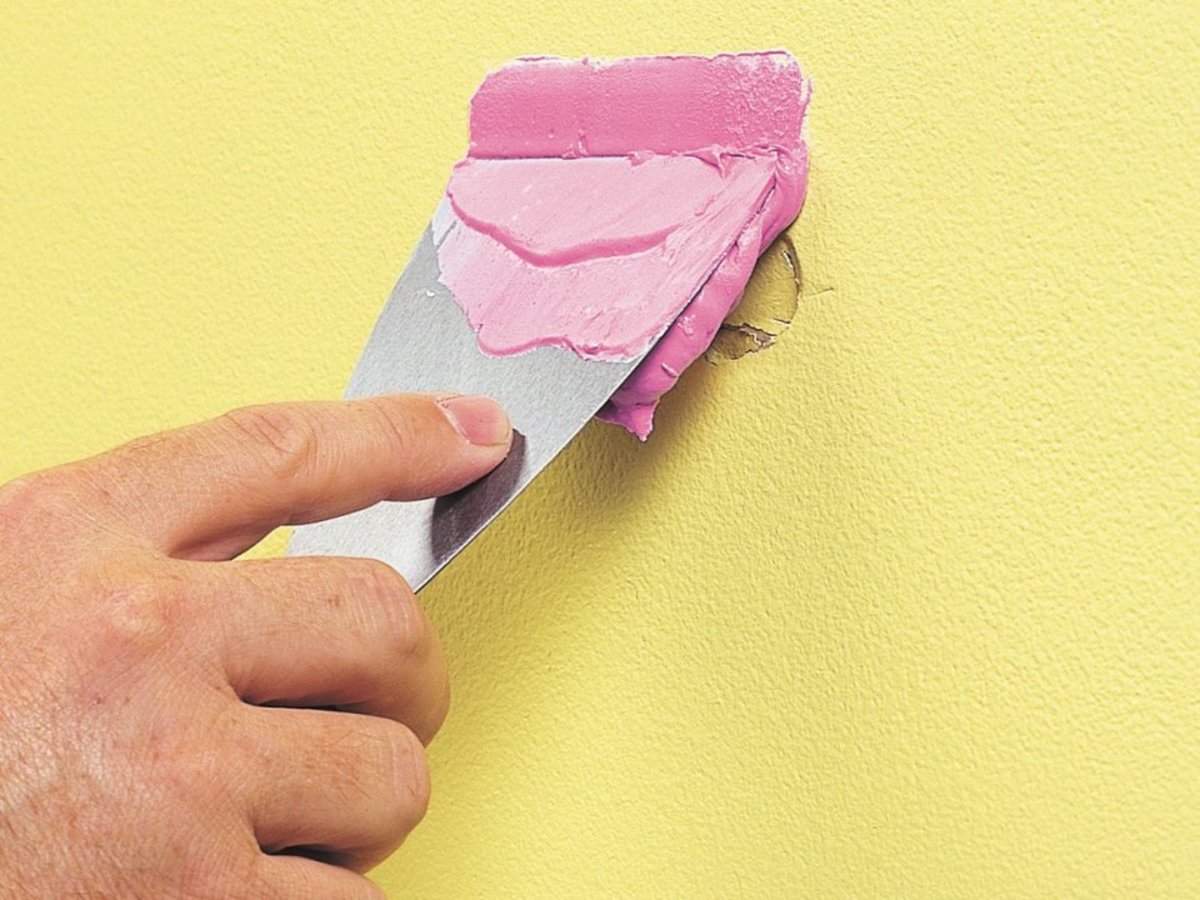
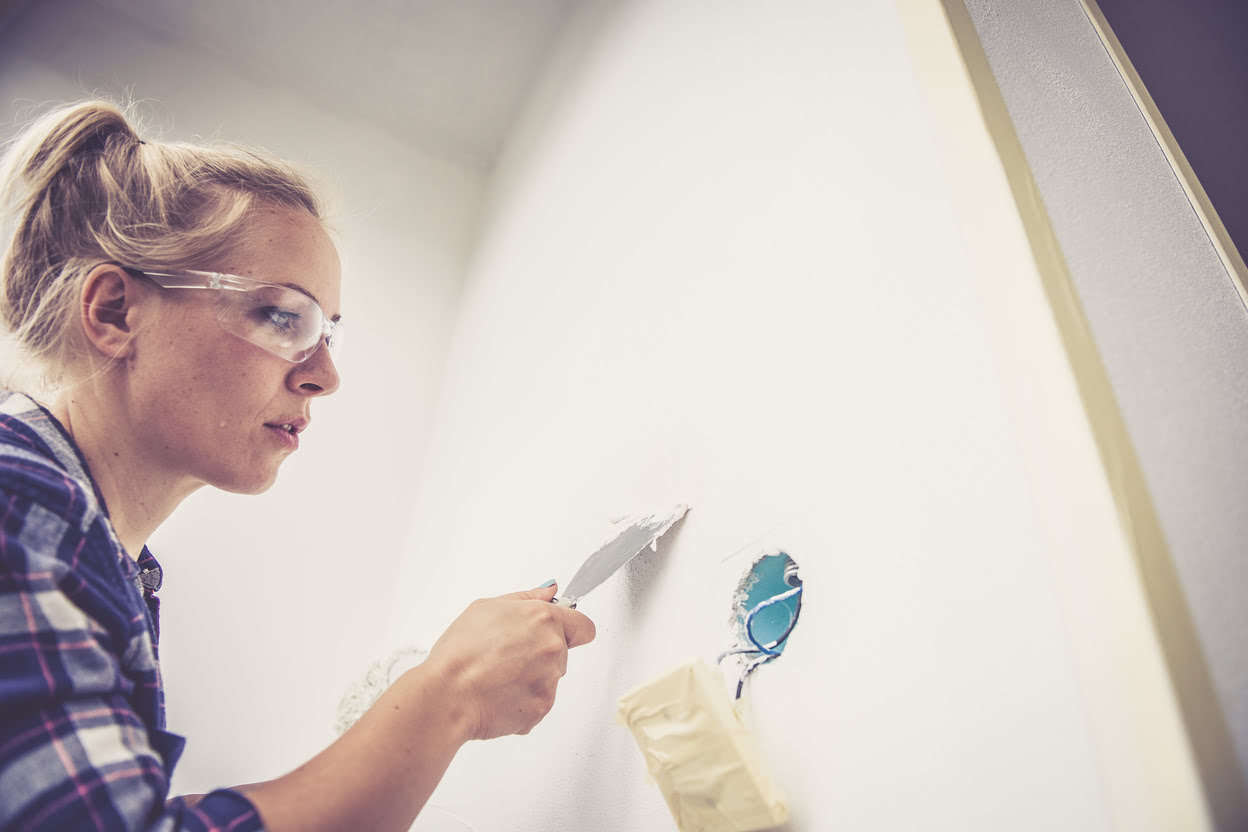
Now that the surface is prepped and ready, it's time to apply the spackle. This step requires precision and attention to detail to ensure a smooth and seamless finish. Here's how to do it:
1. Load the Putty Knife: Using a putty knife, scoop a small amount of spackle onto the blade. For smaller imperfections, a 1-inch putty knife may suffice, while larger areas may require a wider blade for better coverage.
2. Fill the Imperfection: Carefully press the spackle into the hole or crack, ensuring that it fills the entire space and sits slightly proud of the wall's surface. Use a firm, even pressure to achieve a uniform fill.
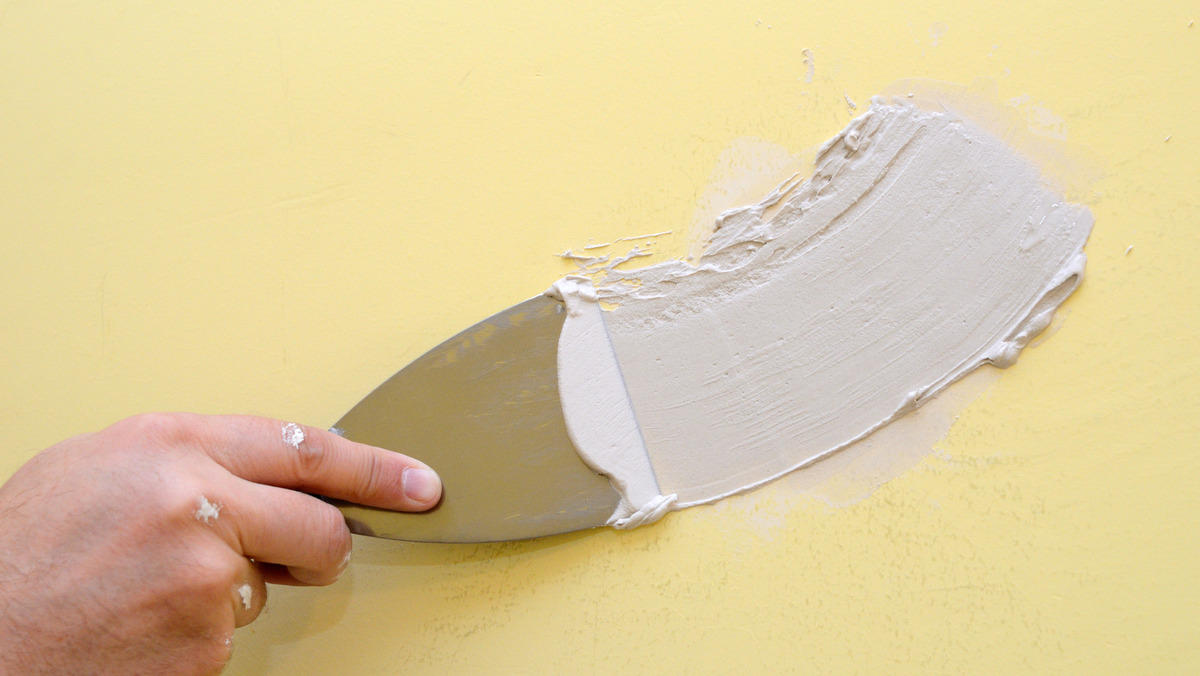
3. Smooth and Feather the Edges: With a clean putty knife, smooth the excess spackle around the imperfection, feathering the edges to blend it seamlessly with the surrounding wall. This technique helps create a gradual transition from the spackled area to the wall, minimizing the need for extensive sanding later on.
4. Remove Excess Spackle: Once the spackle is applied, use the putty knife to remove any excess material, ensuring that the surface is level and free of bumps or ridges. Wipe away any remaining spackle with a clean, damp cloth or sponge.
5. Allow the Spackle to Dry: Depending on the type of spackle used and the depth of the imperfection, the drying time may vary. Follow the manufacturer's recommendations for drying times, ensuring that the spackle is completely dry before proceeding to the next step.
By following these steps, you'll be able to apply the spackle with precision and finesse, setting the stage for a flawless finish. Attention to detail and a steady hand are key to achieving professional results when applying spackle to your walls.
**
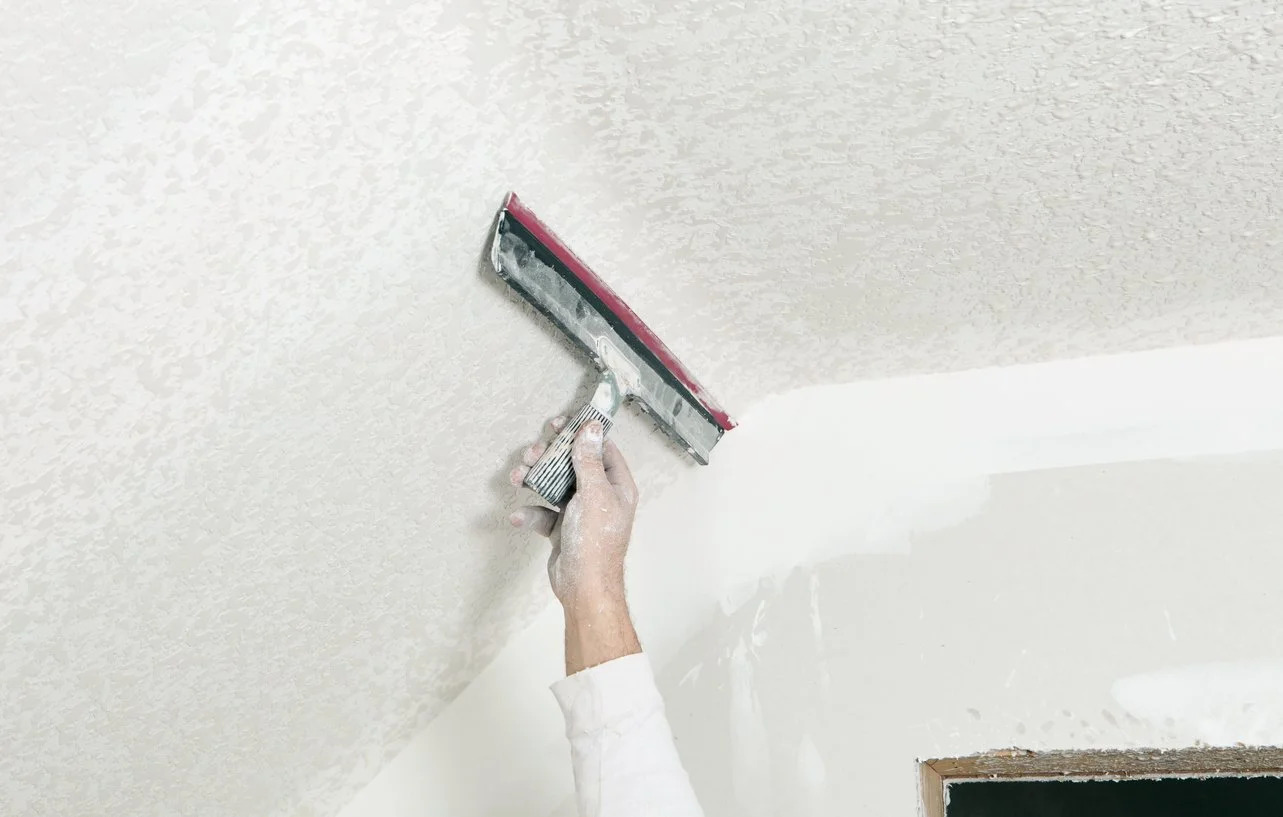
Sanding and Finishing
**
After the spackle has dried, it's time to refine the surface and achieve a seamless finish. Sanding plays a crucial role in smoothing out the spackled area and preparing it for painting or touch-ups. Here's how to approach the sanding and finishing process:
1. Use Fine-Grit Sandpaper: Once the spackle is completely dry, lightly sand the repaired area using fine-grit sandpaper. Gently sand in a circular motion, feathering the edges of the spackled area to blend it with the surrounding wall. Be mindful not to apply excessive pressure, as this could remove too much spackle and result in an uneven surface.
2. Check for Smoothness: Periodically stop sanding to assess the smoothness of the spackled area. Run your hand over the surface to feel for any bumps, ridges, or imperfections. Continue sanding as needed until the repaired area is smooth and level with the rest of the wall.
3. Wipe Away Dust: After sanding, use a clean, damp cloth or sponge to wipe away any dust or debris from the sanded area. This will ensure that the surface is clean and ready for the next steps, whether it involves painting or applying a touch-up coat of spackle.
4. Apply Paint or Touch-Up: If you're planning to repaint the wall, now is the time to apply a coat of paint that matches the existing wall color. Alternatively, if the spackled area requires additional touch-ups, repeat the spackling and sanding process as needed until the surface is flawless.
By carefully sanding and refining the spackled area, you'll achieve a seamless and professional finish that seamlessly blends with the rest of the wall. This step is crucial for ensuring that the repaired area appears seamless and indistinguishable from the surrounding wall, leaving you with a flawless result that enhances the overall aesthetics of your space.
**
Read more: How To Spackle A Nail Hole
Conclusion
**
Congratulations! You've successfully navigated the art of spackling and transformed those unsightly wall imperfections into a smooth, flawless finish. By following the step-by-step process outlined in this guide, you've not only restored the aesthetics of your walls but also gained valuable DIY skills that will serve you well in future home improvement projects.
Remember, spackling is a versatile and essential skill for any homeowner or DIY enthusiast. Whether you're preparing to repaint a room, repairing minor wall damage, or simply maintaining the beauty of your living space, the ability to spackle with precision and finesse is a valuable asset.
As you admire your handiwork, take pride in knowing that you've mastered the art of spackling and have the power to rejuvenate your walls with confidence. With the right materials, careful preparation, and attention to detail, you can achieve professional-quality results that enhance the overall appearance of your home.
So, the next time you encounter those inevitable wall imperfections, armed with your newfound spackling expertise, you can tackle them head-on and restore your walls to their former glory. Embrace the satisfaction of transforming flaws into seamless perfection, one spackled wall at a time!
Happy spackling!
Frequently Asked Questions about How To Spackle Holes
Was this page helpful?
At Storables.com, we guarantee accurate and reliable information. Our content, validated by Expert Board Contributors, is crafted following stringent Editorial Policies. We're committed to providing you with well-researched, expert-backed insights for all your informational needs.


0 thoughts on “How To Spackle Holes”