Home>Gardening & Outdoor>Garden Tools & Equipment>How To Test A Lawnmower Starter
Garden Tools & Equipment
How To Test A Lawnmower Starter
Modified: February 28, 2024
Learn how to effectively test a lawnmower starter with our comprehensive guide. Keep your garden tools and equipment in top condition with our expert tips.
(Many of the links in this article redirect to a specific reviewed product. Your purchase of these products through affiliate links helps to generate commission for Storables.com, at no extra cost. Learn more)
Introduction
Welcome to the comprehensive guide on how to test a lawnmower starter. The starter is a crucial component of any lawnmower, as it initiates the engine's operation. Over time, starters can experience wear and tear, leading to issues such as failure to start or sluggish performance. By understanding the process of testing the lawnmower starter, you can diagnose potential problems and take the necessary steps to ensure your lawnmower operates smoothly.
In this guide, we will walk you through the process of testing both the starter motor and the starter solenoid. By following these steps, you can determine whether the starter requires maintenance, repair, or replacement. Before we delve into the testing process, it's essential to prioritize safety precautions to prevent accidents and injuries. Additionally, we'll outline the tools and materials you'll need to conduct the tests effectively.
Whether you're a seasoned lawnmower enthusiast or a novice looking to expand your knowledge, this guide is designed to provide clear, actionable steps for testing a lawnmower starter. By mastering this essential skill, you can save time and money by diagnosing and addressing starter issues on your own. Let's dive into the testing process, ensuring that your lawnmower's starter is in optimal working condition for a well-maintained lawn.
Key Takeaways:
- Ensure safety by disconnecting the spark plug and wearing protective gear before testing a lawnmower starter. This prevents accidents and creates a secure environment for maintenance.
- Gather essential tools like a multimeter and socket wrench set to effectively test the starter motor and solenoid. This facilitates a smooth and accurate diagnostic process.
Safety Precautions
Prior to testing the lawnmower starter, it’s crucial to prioritize safety precautions to mitigate the risk of accidents or injuries. Working with electrical components and moving parts requires careful attention to safety guidelines. Here are some essential safety measures to observe before proceeding with the testing process:
- Disconnect the Spark Plug: Before conducting any work on the lawnmower, disconnect the spark plug to prevent accidental starts. This step is vital in ensuring that the engine does not start while you are handling the starter components.
- Wear Protective Gear: Utilize appropriate personal protective equipment, including gloves and safety glasses, to shield yourself from potential hazards such as sparks, debris, or electrical shocks.
- Work in a Well-Ventilated Area: When working with the lawnmower, ensure that the testing area is well-ventilated to prevent the accumulation of exhaust fumes or harmful emissions.
- Secure the Work Area: Before commencing the testing process, ensure that the lawnmower is placed on a stable and level surface. This prevents accidental tipping or movement during the procedure.
- Follow Manufacturer’s Guidelines: Always adhere to the manufacturer’s instructions and guidelines for testing the lawnmower starter. These guidelines provide specific details relevant to your lawnmower model.
By adhering to these safety precautions, you can create a secure environment for testing the lawnmower starter. Prioritizing safety not only safeguards you from potential harm but also contributes to a smooth and focused testing process. Now that we’ve established the necessary safety measures, let’s explore the tools and materials required for testing the lawnmower starter.
Tools and Materials Needed
Before embarking on the process of testing a lawnmower starter, it’s essential to gather the necessary tools and materials to facilitate a smooth and effective testing procedure. Having the right equipment at your disposal will enable you to accurately diagnose any issues with the starter. Here’s a comprehensive list of tools and materials you’ll need:
Tools:
- Socket Wrench Set: A socket wrench set with various sizes to remove the starter and access the components.
- Multimeter: An essential tool for testing electrical components, including the starter motor and solenoid.
- Screwdriver Set: Phillips and flathead screwdrivers for disassembling and reassembling the starter components.
- Wire Brush: To clean any corrosion or debris from the starter connections.
- Adjustable Wrench: For loosening and tightening nuts and bolts during the testing process.
- Insulated Pliers: To handle electrical connections safely.
Materials:
- Clean Cloth: For wiping down the starter and components during inspection.
- Electrical Contact Cleaner: To remove any dirt or grime from electrical connections.
- Lubricating Oil: For lubricating moving parts of the starter, if necessary.
- Replacement Solenoid and Motor (if needed): In case the testing reveals irreparable damage to the starter components, having replacements on hand can expedite the repair process.
By ensuring that you have these tools and materials readily available, you can proceed with confidence in testing the lawnmower starter. The next steps will guide you through the process of inspecting the starter, testing the motor and solenoid, and reassembling the components. Let’s move on to the first step: inspecting the lawnmower starter to identify any visible issues or damage.
Read more: How To Test A Lawnmower Battery
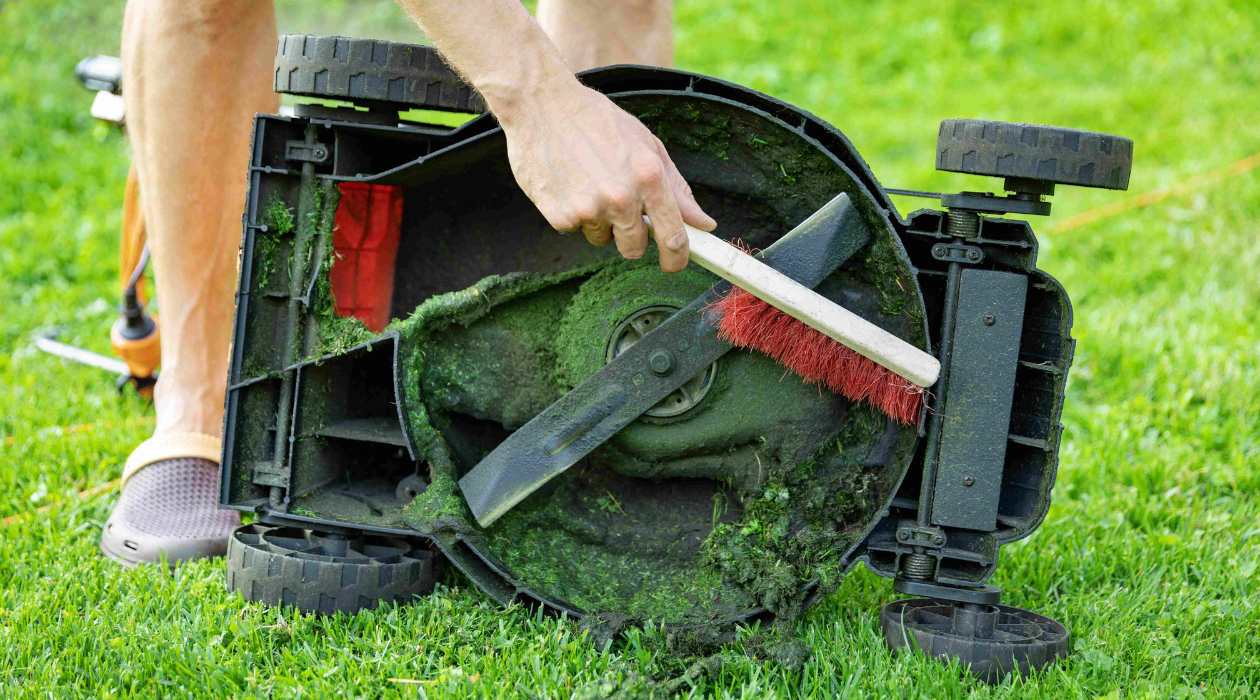
Step 1: Inspect the Starter
Before delving into the testing process, it’s crucial to conduct a thorough inspection of the lawnmower starter. This initial step allows you to visually assess the starter for any visible damage, wear, or loose connections. Here’s a detailed guide on how to conduct a comprehensive inspection:
1. Disconnect the Spark Plug: As a safety precaution, start by disconnecting the lawnmower’s spark plug to prevent accidental starts while inspecting the starter.
2. Remove the Starter: Utilizing a socket wrench set, carefully remove the starter from the lawnmower. Follow the manufacturer’s guidelines for the specific removal process related to your lawnmower model.
3. Visual Examination: Inspect the starter for any signs of corrosion, rust, or physical damage. Check the electrical connections for tightness and signs of wear or fraying in the wires.
4. Clean the Starter: Use a clean cloth and electrical contact cleaner to remove any dirt, grime, or corrosion from the starter and its components. Ensure that the connections are free from debris and are in good condition.
5. Check Moving Parts: Assess the moving parts of the starter for smooth operation. If there is any resistance or unusual noise, it may indicate a need for lubrication or potential mechanical issues.
By meticulously inspecting the lawnmower starter, you can identify any visible issues that may contribute to its malfunction. Once you’ve completed the inspection and addressed any visible concerns, you can proceed to the next crucial step: testing the starter motor to assess its functionality. This will be covered in the following section, guiding you through the process of testing the starter motor to determine its operational status.
Step 2: Test the Starter Motor
Testing the starter motor is a pivotal step in diagnosing potential issues with the lawnmower starter. The starter motor is responsible for initiating the engine’s rotation, and any malfunction can lead to starting problems. By following these steps, you can effectively test the starter motor to determine its operational status:
1. Prepare the Multimeter: Set the multimeter to the resistance (ohms) setting. This allows you to measure the resistance of the starter motor’s windings, providing insight into its condition.
2. Measure Resistance: Place the multimeter’s probes on the terminals of the starter motor. The multimeter should display a specific resistance value. Compare this reading to the manufacturer’s specifications for the acceptable resistance range. Deviations from the specified range may indicate a faulty motor.
3. Test for Continuity: In addition to resistance, test for continuity by placing one multimeter probe on the starter motor’s housing and the other on the motor’s terminal. The multimeter should indicate continuity, confirming that the motor’s internal connections are intact.
4. Inspect Commutator and Brushes: If accessible, visually inspect the commutator and brushes for any signs of wear, damage, or excessive carbon buildup. Worn brushes or a damaged commutator can impede the motor’s functionality.
5. Evaluate Motor Operation: If possible, apply a low-voltage power source directly to the starter motor to observe its operation. The motor should spin freely without unusual noises or resistance.
By meticulously testing the starter motor using these steps, you can gain valuable insights into its condition and functionality. If the motor exhibits abnormal resistance readings, lack of continuity, or visible signs of wear, it may require repair or replacement. The next critical step involves testing the starter solenoid to ascertain its role in the starting process. This will be covered in the subsequent section, guiding you through the process of testing the starter solenoid to determine its functionality.
Before testing a lawnmower starter, make sure the spark plug is disconnected to prevent accidental starts. Then, use a multimeter to check for continuity in the starter motor. If there is no continuity, the starter may need to be replaced.
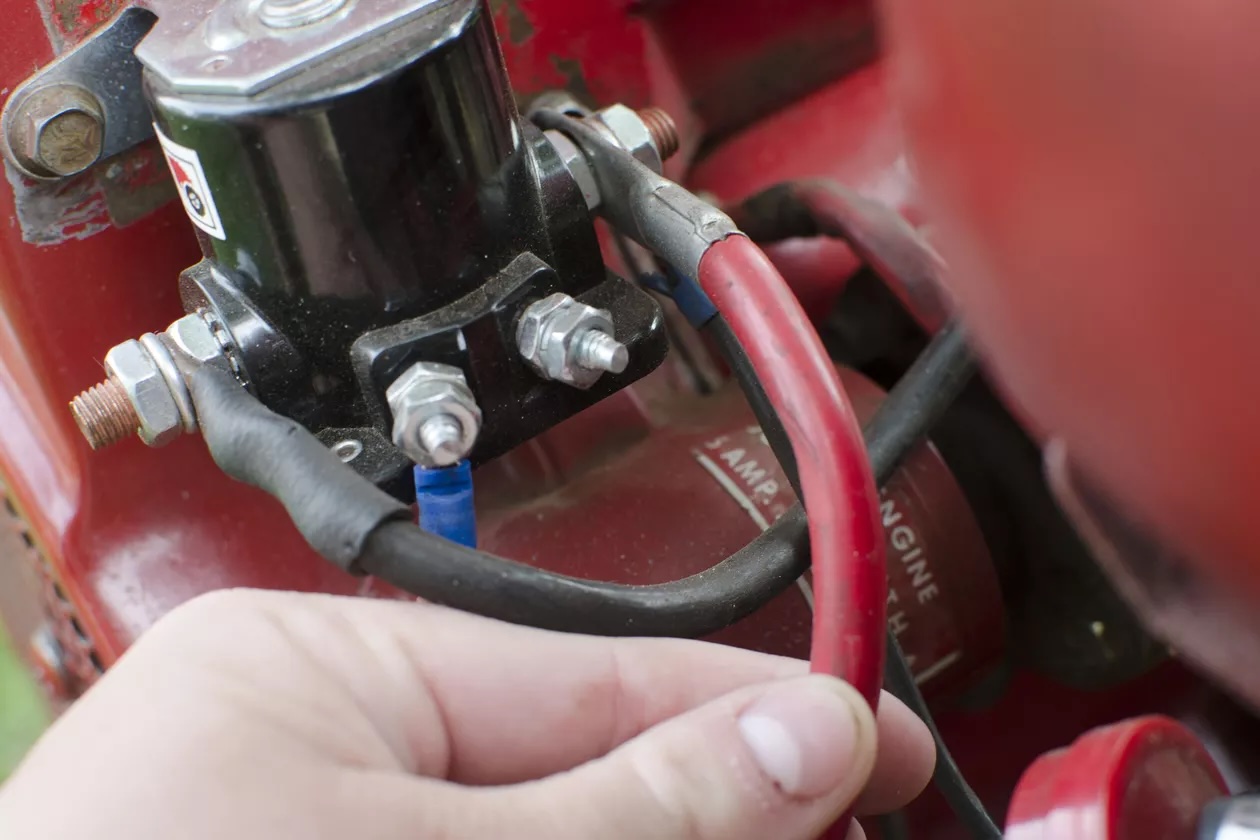
Step 3: Test the Starter Solenoid
Testing the starter solenoid is essential in diagnosing potential issues that may affect the starting process of the lawnmower. The solenoid serves as a crucial intermediary component, engaging the starter motor when the ignition key or button is activated. By following these steps, you can effectively test the starter solenoid to determine its functionality:
1. Multimeter Setup: Set the multimeter to the continuity or resistance setting, depending on the type of solenoid test you intend to perform. This allows you to assess the solenoid’s electrical continuity and resistance.
2. Test for Continuity: Place the multimeter probes on the solenoid’s input and output terminals. The multimeter should indicate continuity when the solenoid is activated. This confirms that the electrical current can flow through the solenoid, engaging the starter motor.
3. Assess Resistance: If conducting a resistance test, measure the resistance across the solenoid’s terminals. Compare the reading to the manufacturer’s specifications for the acceptable resistance range. Deviations from the specified range may indicate a faulty solenoid.
4. Visual Inspection: Visually inspect the solenoid for any signs of corrosion, damage, or loose connections. Ensure that the electrical terminals are clean and securely attached to the solenoid.
5. Activation Test: Apply a low-voltage power source to the solenoid to observe its activation. When power is applied, the solenoid should audibly click, indicating that it is engaging the starter motor. This test confirms the solenoid’s ability to transmit electrical current effectively.
By meticulously testing the starter solenoid using these steps, you can gain valuable insights into its condition and role in the starting process. If the solenoid exhibits lack of continuity, abnormal resistance readings, or fails to activate, it may require repair or replacement. The next step involves reassembling the starter and conducting a final test to ensure its proper function. This will be covered in the following section, guiding you through the process of reassembling and testing the starter to verify its operational status.
Step 4: Reassemble and Test the Starter
After inspecting and testing the individual components of the lawnmower starter, it’s time to reassemble the starter and conduct a final test to ensure its proper function. Follow these steps to reassemble and test the starter:
1. Reassembly: Carefully reattach the starter to the lawnmower, ensuring that all electrical connections are secure and properly fastened. Follow the manufacturer’s guidelines for the specific reinstallation process related to your lawnmower model.
2. Secure Mounting: Ensure that the starter is securely mounted to the lawnmower, and all mounting bolts or screws are tightened to the specified torque, as per the manufacturer’s recommendations.
3. Connect the Spark Plug: Reconnect the lawnmower’s spark plug to restore power to the engine. This step is essential before conducting the final test of the reassembled starter.
4. Test the Starter: Attempt to start the lawnmower to verify the functionality of the reassembled starter. If the engine starts smoothly and the starter engages without issues, it indicates that the reassembly was successful, and the starter is operating as intended.
5. Observe Starter Operation: While the lawnmower is running, observe the starter’s operation for any unusual noises, vibrations, or performance issues. This step ensures that the starter functions consistently during the starting process.
If the starter operates smoothly and the lawnmower starts without hesitation, it indicates that the reassembly and testing process were successful. However, if any issues persist, it may be necessary to revisit the specific components that were identified as problematic during the testing phase. By conducting this final test, you can verify that the lawnmower starter is in optimal working condition, ready to facilitate the efficient operation of your lawnmower.
With the completion of the reassembly and testing process, you have gained valuable insights into diagnosing and addressing issues related to the lawnmower starter. By following the steps outlined in this guide, you have acquired the knowledge and skills to maintain and troubleshoot the starter, ensuring the reliable performance of your lawnmower.
Read more: How To Test A Lawnmower Coil
Conclusion
Congratulations on successfully completing the comprehensive guide on how to test a lawnmower starter. By following the outlined steps, you have gained valuable insights into diagnosing and addressing potential issues related to the starter, ensuring the efficient operation of your lawnmower. Let’s recap the essential points covered in this guide:
- Importance of Starter Testing: Understanding the significance of testing the lawnmower starter enables you to identify and address potential malfunctions, contributing to the overall performance of the lawnmower.
- Safety Precautions: Prioritizing safety measures, such as disconnecting the spark plug and wearing protective gear, is crucial in creating a secure environment for testing the starter.
- Tools and Materials: Gathering the necessary tools and materials, including a multimeter, socket wrench set, and electrical contact cleaner, facilitates a smooth and effective testing process.
- Inspection and Testing: Conducting a visual inspection of the starter, testing the starter motor, and assessing the functionality of the starter solenoid are integral steps in diagnosing potential issues.
- Reassembly and Final Test: Reassembling the starter and conducting a final test ensures that the starter operates smoothly and engages the lawnmower’s engine without hesitation.
By mastering the process of testing a lawnmower starter, you have equipped yourself with the knowledge and skills to maintain, troubleshoot, and address potential issues related to the starter. Whether you’re a seasoned lawnmower enthusiast or a novice seeking to expand your expertise, this guide empowers you to take proactive measures in ensuring the reliable performance of your lawnmower.
Remember, regular maintenance and timely identification of starter issues can prolong the lifespan of your lawnmower and contribute to a well-maintained lawn. By prioritizing the care and maintenance of your lawnmower’s starter, you can enjoy a seamless and efficient lawn mowing experience.
Thank you for embarking on this insightful journey of testing a lawnmower starter. With the knowledge and skills gained from this guide, you are well-prepared to tackle starter-related challenges and uphold the optimal functionality of your lawnmower.
Frequently Asked Questions about How To Test A Lawnmower Starter
Was this page helpful?
At Storables.com, we guarantee accurate and reliable information. Our content, validated by Expert Board Contributors, is crafted following stringent Editorial Policies. We're committed to providing you with well-researched, expert-backed insights for all your informational needs.


0 thoughts on “How To Test A Lawnmower Starter”