Articles
How To Test Doorbell
Modified: October 21, 2024
Learn how to properly test your doorbell with these informative articles. Discover troubleshooting tips and step-by-step guides to ensure your doorbell is functioning correctly and reliably.
(Many of the links in this article redirect to a specific reviewed product. Your purchase of these products through affiliate links helps to generate commission for Storables.com, at no extra cost. Learn more)
Introduction
Welcome to this comprehensive guide on how to test a doorbell. Doorbells are a ubiquitous part of our homes, whether it’s a traditional wired doorbell or a modern wireless version. Over time, doorbells can develop issues that prevent them from functioning properly. Testing your doorbell can help you diagnose and fix any problems, ensuring that it continues to function as intended.
Before we begin, it’s important to mention that safety should always be the top priority when working with any electrical system. If you are unsure about any step or don’t feel confident in your abilities, it is best to consult a professional or an electrician. Following proper safety precautions will help prevent accidents and ensure a smooth testing process.
In this guide, we will provide step-by-step instructions for testing a doorbell to determine if it is functioning correctly. We will cover both wired and wireless doorbells, providing guidance on how to troubleshoot common issues and identify potential sources of problems. By following these steps, you will be able to confidently test your doorbell and find possible solutions to any issues you encounter.
Throughout the testing process, we will mention the tools and equipment needed for each step. It is important to have these items on hand to ensure a smooth testing experience. Additionally, we will outline potential troubleshooting steps for common problems you may come across. Let’s get started and learn how to test a doorbell!
Key Takeaways:
- Prioritize safety by following proper precautions when testing your doorbell, such as turning off the power, using the right tools, and seeking professional help if unsure. Safety first ensures a smooth testing process.
- Regular testing and maintenance of your doorbell, along with troubleshooting common issues, can prolong its lifespan and ensure reliable functionality. With the right tools and knowledge, you can confidently maintain your doorbell system.
Read more: How To Test A Mattress
Safety Precautions
Before you begin testing your doorbell, it is crucial to prioritize safety. Dealing with electrical systems can be hazardous if not approached with caution. Here are some important safety precautions to keep in mind:
- Turn off the power: Before you start working on your doorbell, make sure to turn off the power at the main circuit breaker. This will help prevent any risk of electric shock while conducting the tests. Always double-check that the power is completely off before proceeding.
- Use proper tools: When testing the doorbell, it’s essential to use the right tools for the job. Insulated screwdrivers, wire strippers, and voltage testers are among the tools that may be required. Using the correct tools will ensure your safety and prevent damage to the doorbell or electrical components.
- Wear protective gear: It’s always a good idea to wear personal protective equipment (PPE) when working with electrical systems. Safety glasses, gloves, and insulated footwear can protect against potential accidents, such as electrical shocks or unexpected sparks.
- Keep the area dry: Moisture and electricity do not mix well. Make sure the testing area is dry to avoid any potential electrical hazards. If you notice any wet spots or water damage near your doorbell, it’s best to have a professional inspect and address the issue.
- Follow manufacturer’s instructions: Different doorbell models may have specific safety guidelines provided by the manufacturer. It is important to read and follow these instructions carefully. They often include important information related to installation, testing, and maintenance.
- Ensure proper grounding: Grounding is crucial for electrical safety. During the testing process, ensure that the doorbell and associated electrical components are properly grounded. This reduces the risk of electric shock and helps the doorbell function correctly.
- Seek professional help if unsure: If you are uncertain about any aspect of testing your doorbell or if you encounter a problem you aren’t comfortable addressing, it is advisable to seek assistance from a certified electrician. They have the expertise to handle electrical systems safely and efficiently.
By following these safety precautions, you can minimize the risks associated with testing your doorbell and ensure a safe environment for both yourself and the electrical system. Remember, safety should always come first when dealing with any electrical components or systems.
Tools and Equipment Needed
Before you start testing your doorbell, it is important to gather the necessary tools and equipment. Having the right items on hand will make the testing process easier and more efficient. Here are some tools and equipment you may need:
- Screwdriver set: A set of screwdrivers with various sizes and types will be handy for removing the doorbell cover and accessing the wiring.
- Voltage tester: This tool will help you determine if there is electrical current flowing through the doorbell system. It is essential for safety and troubleshooting purposes.
- Wire strippers: If you need to work with the wiring during the testing process, wire strippers will allow you to remove the insulation from the wires efficiently.
- Electrical tape: Electrical tape is useful for securing and insulating wires during testing or after making any repairs.
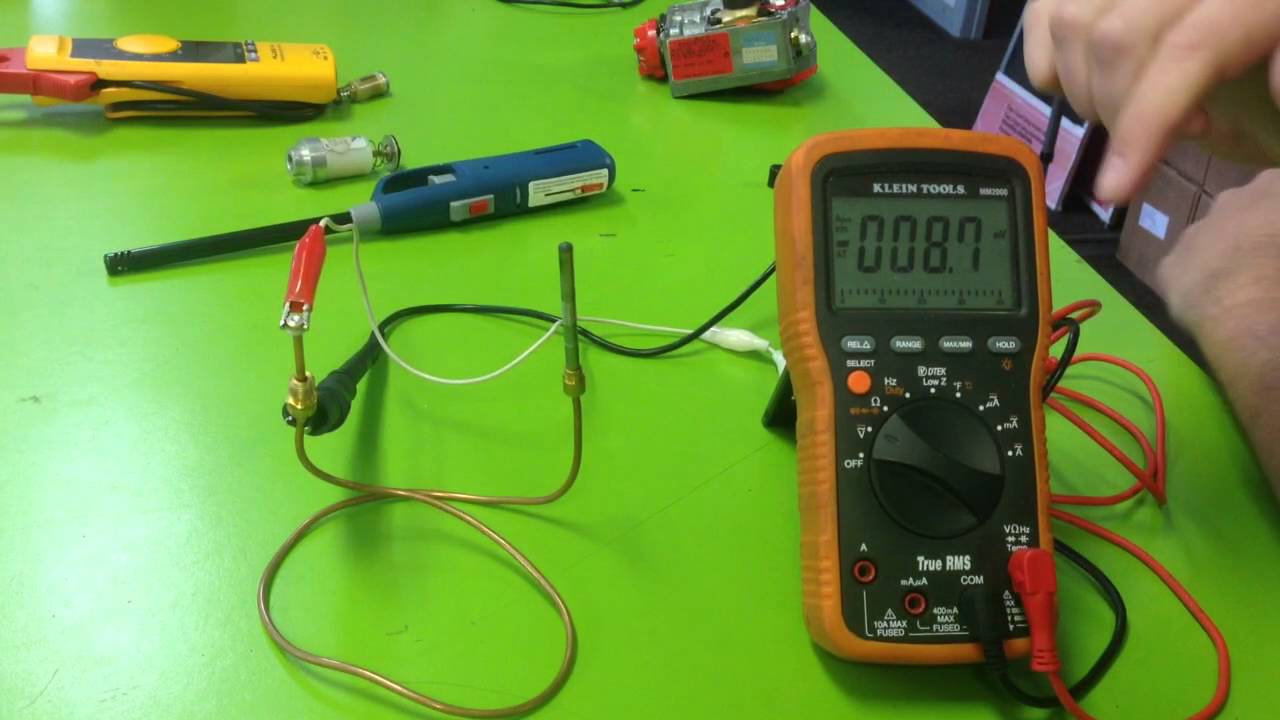
- Multimeter: A multimeter is a versatile tool that can measure voltage, current, and resistance. It can be helpful for more advanced troubleshooting or diagnosing specific issues.
- Batteries: If you have a wireless doorbell, make sure you have the appropriate batteries on hand, as they may need to be replaced during the testing process.
- Replacement parts: If you suspect that certain components of your doorbell are faulty, it can be helpful to have replacement parts ready, such as a new doorbell button or transformer.
- Personal protective equipment (PPE): Ensure you have the necessary safety gear, such as safety glasses and gloves, to protect yourself during the testing process.
Having these tools and equipment readily available will allow you to proceed with the testing process smoothly. Always remember to use the tools correctly and follow safety guidelines to prevent accidents or damage to the doorbell system.
Note: The specific tools required may vary depending on the type and model of your doorbell. Refer to the manufacturer’s instructions or consult a professional if you’re unsure about the tools needed for your particular doorbell.
Step 1: Checking the Power Supply
The first step in testing your doorbell is to check the power supply. This is essential since a lack of power can result in a non-functioning doorbell. To verify the power supply, follow these steps:
- Turn off the power: Before you begin, make sure to turn off the power to the doorbell by switching off the circuit breaker that controls it. This will help prevent any electrical accidents during the testing process.
- Remove the doorbell cover: If your doorbell has a cover, carefully remove it using a screwdriver. This will give you access to the wiring and the internal components of the doorbell.
- Locate the power source: Identify the power source for your doorbell. It could be a transformer, a battery pack, or direct wiring from the electrical panel.
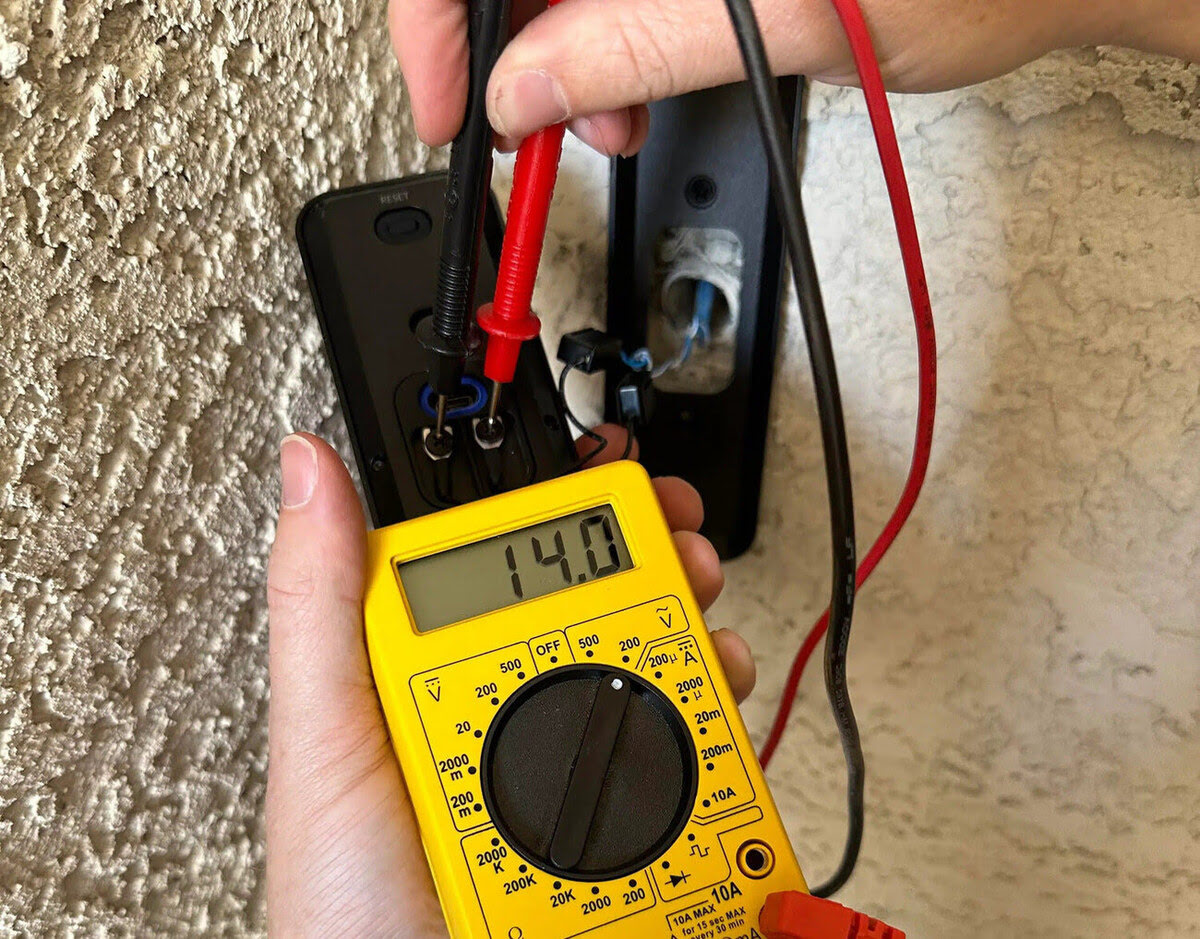
- Check for power: Use a voltage tester to check if there is power flowing to the doorbell. Place one probe of the voltage tester on the power source and the other probe on the doorbell wiring. If the tester indicates voltage, it means there is power supply.
- Verify voltage level: Check the voltage level using the voltage tester. Most doorbell systems operate within a voltage range of 8 to 24 volts. Make sure the voltage reading falls within this range to ensure proper functioning of the doorbell.
If there is no power supply or the voltage reading is outside the acceptable range, it indicates a potential problem with the power source or the wiring. Here are a few troubleshooting steps you can consider:
- Check the circuit breaker or fuse box to ensure it is turned on and functioning properly.
- If the doorbell is wired, inspect the wiring for any loose connections, corrosion, or damage. Tighten any loose connections and replace any damaged wiring.
- If you have a transformer, check its functionality by testing the voltage output using a multimeter. If the transformer is faulty, it may need to be replaced.
- For battery-powered doorbells, make sure the batteries are inserted correctly and have enough charge. Replace them if necessary.
By following these steps and troubleshooting potential power supply issues, you will ensure that your doorbell has the required power to function correctly. If the power supply is not the cause of the problem, move on to the next step to further diagnose and test your doorbell.
Step 2: Testing the Doorbell Button
Once you have verified that there is power supply to your doorbell, the next step is to test the doorbell button. Testing the doorbell button will help determine if it is working properly and sending the signal to activate the doorbell chime. Here’s how you can test the doorbell button:
- Ensure power is still turned off: Before testing the doorbell button, ensure that the power to the doorbell is still switched off. This will prevent any accidental electrical shocks during the testing process.
- Locate the doorbell button: Identify the doorbell button, which is usually situated near the main entrance of your home. It may be a simple push button or a touch-sensitive pad, depending on the type of doorbell you have.
- Inspect the button: Visually inspect the doorbell button for any visible damage, such as cracks or loose wires. If you notice any damage, the button may need to be replaced.
- Apply pressure on the button: Press the doorbell button firmly to test if it activates the doorbell chime. Listen for any sounds or check if the chime receives the signal.
- Observe the doorbell chime: While pressing the button, check the doorbell chime for any signs of activity. Look for visible indicators, such as lights or sound, to confirm that the chime is receiving the signal from the button.
- Repeat the test: Try pressing the doorbell button multiple times to ensure consistent performance. Sometimes, the button may work intermittently, indicating a potential problem.
If the doorbell button does not activate the doorbell chime or if there are issues with consistency, consider the following troubleshooting steps:
- Inspect the wiring connections between the doorbell button and the chime. Ensure they are secure and free from any corrosion or damage. Replace any faulty wiring, if needed.
- If you have a wireless doorbell, check the battery or power source in the button unit. Replace the battery or ensure the power source is functioning properly.
- Clean the contact points of the doorbell button and the chime. Over time, dirt and debris can accumulate on these surfaces, preventing proper signal transmission. Use a clean cloth or a small brush to remove any dirt or residue.
- Consider replacing the doorbell button if it is faulty or damaged beyond repair. Purchase a new button that is compatible with your existing doorbell system.
By testing the doorbell button, you can determine if it is functioning correctly and troubleshoot any problems that may arise. If the button is working fine, move on to the next step to test the doorbell chime.
When testing a doorbell, make sure to check the wiring connections, the chime unit, and the doorbell button for any damage or loose connections. Use a voltage tester to ensure there is power to the doorbell.
Read more: How To Test Hand Tools
Step 3: Testing the Doorbell Chime
After testing the doorbell button, the next step is to test the doorbell chime. The chime is responsible for producing the audible sound when the doorbell button is pressed. Testing the chime will help you determine if it is producing sound correctly and if there are any issues with its functionality. Follow these steps to test the doorbell chime:
- Ensure power is off: Prior to testing the doorbell chime, make sure the power to the doorbell is turned off. This will prevent any electrical accidents during the testing process.
- Locate the doorbell chime: The doorbell chime is typically situated inside your home, near the main entrance. It may be mounted on a wall or placed on a tabletop.
- Inspect the chime: Visually inspect the doorbell chime for any visible damage, such as loose wires or broken components. If there are any visible issues, the chime may need to be replaced.
- Turn the power back on: Switch on the power to the doorbell to activate the chime. If you have a wired doorbell, this can be done by turning the circuit breaker back on. For wireless doorbells, ensure the batteries or power source are connected and functioning correctly.
- Press the doorbell button: Press the doorbell button to send a signal to the chime. Listen for the chime sound to confirm that the chime is working properly. If you don’t hear any sound, there may be an issue with the chime or its connection.
- Observe the chime operation: Pay attention to the chime’s operation when the doorbell button is pressed. Check for any delays or unusual behaviors, such as distorted sound or intermittent operation. These may indicate problems with the chime or the signal reception.
- Test different settings: If your doorbell chime has multiple sound settings or melodies, test each one to ensure they all work correctly. This will help identify any specific issues with certain settings.
If you encounter any issues while testing the doorbell chime, consider the following troubleshooting steps:
- Check the wiring connections between the doorbell button and the chime to ensure they are secure and properly connected.
- Inspect the chime’s internal components for any loose wires or damaged parts. Replace any faulty components as needed.
- If you have a wireless doorbell, check the signal strength between the button and the chime. Weak or intermittent signals may require adjusting the positioning of the chime or replacing the batteries in the button.
- Clean any dirt or debris that may have accumulated inside the chime, as this can affect its performance. Use a can of compressed air or a soft brush to remove any dust or debris.
- If the chime is outdated or beyond repair, consider replacing it with a new chime that is compatible with your doorbell system.
By testing the doorbell chime, you can ensure that it is functioning properly and producing the expected sound when the doorbell button is pressed. If the chime is working fine, proceed to the next step to check the wiring connections.
Step 4: Checking the Wiring
Checking the wiring is an important step in testing your doorbell, as faulty or damaged wiring can cause issues with its functionality. By inspecting the wiring connections, you can identify any loose connections, damaged wires, or corrosion that may be affecting the doorbell’s performance. Follow these steps to check the wiring:
- Turn off the power: Before inspecting the wiring, ensure that the power to the doorbell is switched off. This will help prevent any potential electrical accidents during the process.
- Remove the doorbell cover: If your doorbell has a cover, use a screwdriver to carefully remove it. This will provide access to the wiring and internal components of the doorbell.
- Inspect the wiring connections: Examine the wiring connections within the doorbell carefully. Look for any loose or disconnected wires, as well as signs of damage or corrosion. Loose or damaged wiring can cause intermittent operation or complete failure of the doorbell.
- Tighten loose connections: If you find any loose wiring connections, use a screwdriver or pliers to tighten them. Ensuring that the wires are securely connected will help maintain consistent functionality.
- Repair or replace damaged wiring: If you observe any damage or corrosion on the wiring, it will likely need to be repaired or replaced. Cut out the damaged portion of the wire using wire cutters and splice a new section in its place. Ensure to use wire connectors or electrical tape to secure the connections.
- Check for proper insulation: Inspect the insulation on the wires to ensure it is intact. Any exposed wiring can pose a safety hazard and affect the doorbell’s performance. If you notice any bare wires, wrap them with electrical tape or replace the wiring altogether.
It’s important to note that if you are unsure about working with the wiring or if you encounter complex issues, it is best to consult a professional electrician. They have the expertise to handle electrical systems safely and efficiently.
By checking the wiring connections and addressing any issues, you can ensure that the doorbell’s electrical connections are reliable and secure. Once you have examined and repaired the wiring, proceed to the next step to test the transformer.
Step 5: Testing the Transformer
The transformer is a crucial component of a wired doorbell system as it regulates the voltage from the main electrical supply to the appropriate level for the doorbell. Testing the transformer will help determine if it is functioning correctly and providing the necessary power to the doorbell. Follow these steps to test the transformer:
- Turn off the power: Before testing the transformer, make sure to turn off the power to the doorbell system by switching off the circuit breaker that controls it. This will prevent any potential electrical accidents while working with the transformer.
- Locate the transformer: The transformer is usually located near the electrical panel or in close proximity to the doorbell chime. It may be mounted on a wall or installed within an electrical box.
- Check the voltage rating: Look for the voltage rating of the transformer, which is typically indicated on its label. Common voltages for doorbell transformers are 16V and 24V.
- Inspect the transformer: Visually inspect the transformer for any visible damage such as loose wires, burnt marks, or overheating. If any issues are present, the transformer may need to be replaced.
- Test the voltage output: Use a multimeter set to measure AC voltage. Carefully place the multimeter probes on the secondary side of the transformer, where the low voltage wires connect. Ensure that the probes make contact with the exposed copper wires.
- Read the voltage output: The multimeter will display the voltage reading. Compare this reading to the voltage rating indicated on the transformer. It should be close to the rated voltage, typically within ±10%.
- Verify transformer load: If you have access to the doorbell wiring at the chime or button location, you can test the transformer under load. Use the multimeter in the same voltage measurement mode and have someone press the doorbell button while you check the voltage. The reading should remain relatively stable when the button is pressed.
If the transformer is not providing the correct voltage output or if the voltage fluctuates significantly under load, consider the following troubleshooting steps:
- Check the wiring connections to the transformer and ensure they are secure and properly connected.
- Ensure the transformer is not overloaded. Remove any additional devices or circuits connected to the transformer to reduce the load.
- If the transformer is damaged, overheating, or not functioning correctly, it will likely need to be replaced. Consult a professional electrician for assistance.
Testing the transformer will help ensure that the doorbell is receiving the appropriate voltage for proper operation. If the transformer is functioning correctly, proceed to the next step to troubleshoot common issues that may affect your doorbell.
Step 6: Troubleshooting Common Issues
Even after going through the previous steps, you may still encounter common issues with your doorbell. Troubleshooting these issues can help you identify and resolve any problems that may be affecting the functionality of your doorbell. Here are some common issues and troubleshooting steps:
- No sound from the doorbell chime: If you press the doorbell button but hear no sound from the chime, there may be a few potential causes. Check the wiring connections between the doorbell button and the chime to ensure they are properly connected. Test the transformer output voltage to ensure it is within the expected range. If the voltage is low or fluctuating, consider replacing the transformer.
- Inconsistent operation: If your doorbell works intermittently or inconsistently, it could be due to loose wiring connections or a faulty doorbell button. Ensure all connections are tight and secure. Test the button to ensure it consistently sends a signal to the chime. If necessary, replace the button with a new one that is compatible with your system.
- Weak or distorted sound: If the doorbell sound is weak or distorted, check the chime’s speaker for any obstructions or damage. Remove any debris or obstructions from the speaker and test again. If the problem persists, the chime may need to be replaced.
- Interference or false ringing: If you experience interference or false ringings from your doorbell, it is likely caused by external factors such as nearby electrical devices or radio signals. Move any potential sources of interference away from the doorbell and test again. You can also consider installing an interference-filtering device to reduce the impact of external signals.
- Wireless signal issues: For wireless doorbells, a poor or weak signal can cause connection problems. Ensure that the doorbell button and chime are within the recommended range specified by the manufacturer. If the signal remains weak, consider relocating the chime or installing a signal booster to improve reception.
If you have exhausted all troubleshooting steps and the issues persist, it may be time to consult a professional electrician. They can assess the doorbell system, diagnose any complex issues, and provide expert solutions to restore the functionality of your doorbell.
Remember, troubleshooting common issues is an important aspect of maintaining a properly functioning doorbell. By identifying and resolving these issues, you can enjoy the convenience and reliability of a fully operational doorbell system.
Read more: How To Test Wireless Security
Conclusion
Testing your doorbell is a crucial step in ensuring its proper functionality and addressing any issues that may arise. By following the steps outlined in this guide, you can confidently test your doorbell, identify potential problems, and take the necessary steps to resolve them. Remember to always prioritize safety by following proper safety precautions and, when in doubt, seeking professional assistance.
Throughout the testing process, we covered important steps such as checking the power supply, testing the doorbell button and chime, inspecting the wiring, testing the transformer, and troubleshooting common issues. These steps allowed us to assess various aspects of the doorbell system and pinpoint potential sources of problems.
During the testing process, it is essential to have the right tools and equipment on hand, including screwdrivers, voltage testers, wire strippers, and multimeters. These tools enable you to conduct accurate tests and diagnose any issues effectively.
By testing your doorbell, you can ensure that it is functioning properly, providing a reliable and convenient way for visitors to announce their presence. Whether you have a wired or wireless doorbell system, regular testing and maintenance will help prolong its lifespan and prevent unexpected failures.
Remember, if you encounter any complex issues or if you are unsure about any step of the testing process, it is always advisable to seek the assistance of a certified electrician. They have the expertise to handle electrical systems safely and efficiently, providing you with peace of mind.
So, go ahead and test your doorbell. Enjoy the satisfaction of a fully functional doorbell that adds convenience and security to your home. With the knowledge gained from this guide, you can troubleshoot and resolve any issues, ensuring that your doorbell continues to serve its purpose for years to come.
Frequently Asked Questions about How To Test Doorbell
Was this page helpful?
At Storables.com, we guarantee accurate and reliable information. Our content, validated by Expert Board Contributors, is crafted following stringent Editorial Policies. We're committed to providing you with well-researched, expert-backed insights for all your informational needs.


0 thoughts on “How To Test Doorbell”