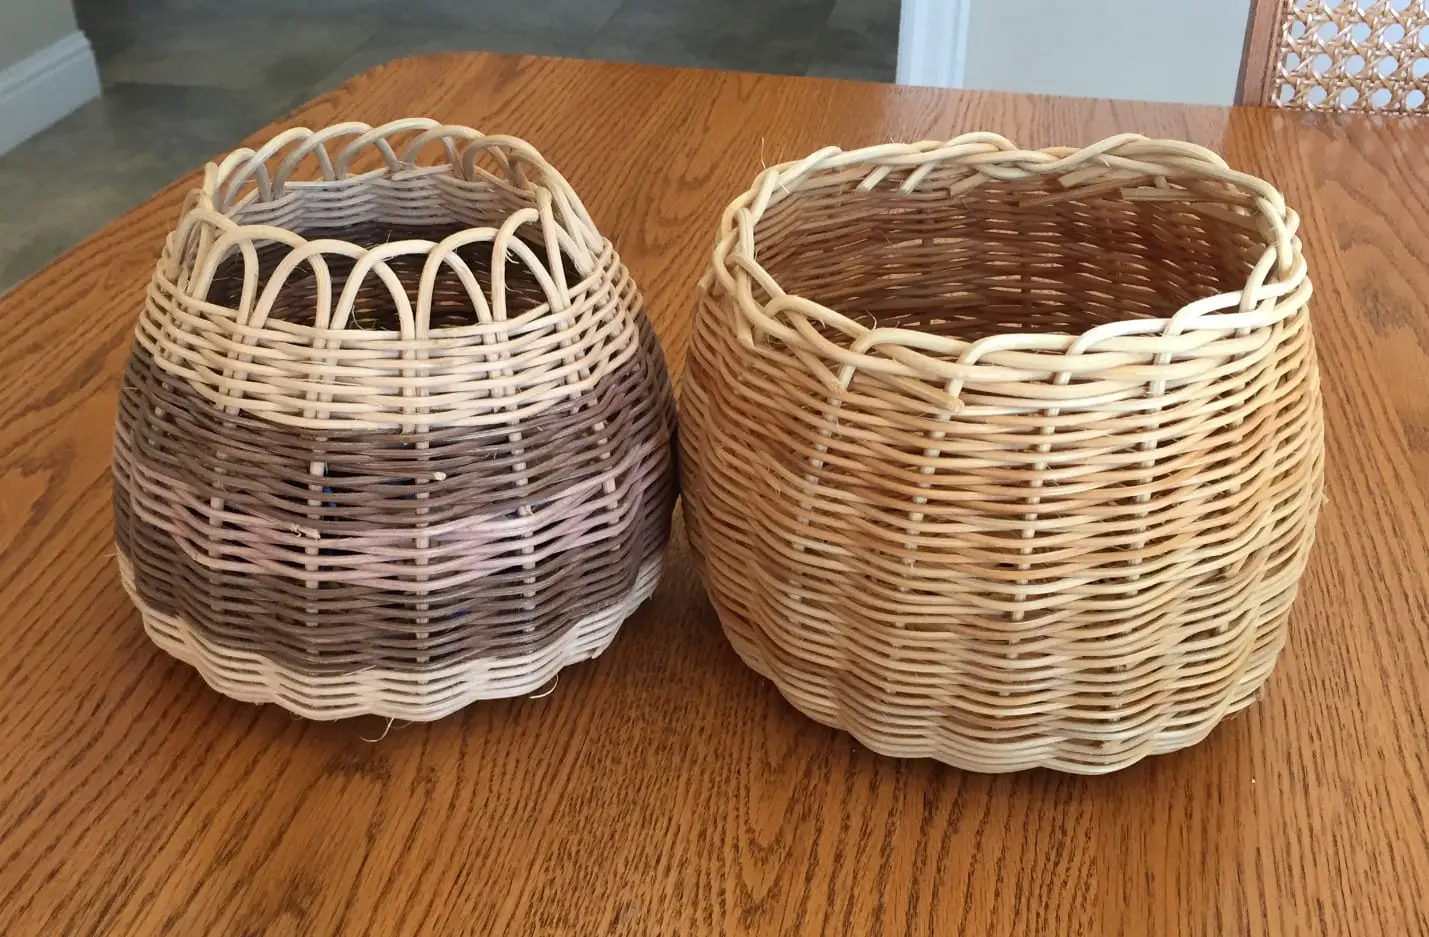
Home>Storage Ideas>Storage Baskets>How To Make Baskets Out Of Pine Needles
Storage Baskets
How To Make Baskets Out Of Pine Needles
Modified: January 20, 2024
Learn how to make stunning storage baskets out of pine needles with this step-by-step guide. Enhance your home organization with these DIY storage solutions.
(Many of the links in this article redirect to a specific reviewed product. Your purchase of these products through affiliate links helps to generate commission for Storables.com, at no extra cost. Learn more)
Introduction
Welcome to the world of handcrafted baskets made from pine needles! This ancient art form not only brings a sense of creativity and beauty, but it also allows us to connect with nature and create practical, functional items. Whether you have a passion for DIY projects or simply want to explore a new hobby, making baskets out of pine needles can be a rewarding and fulfilling experience.
Pine needle baskets have a long history, dating back to Native American cultures who used them for storage, carrying items, and even as decorative items. Over time, the art of pine needle basket making has evolved, incorporating different techniques and materials, but the essence of the craft remains the same – using nature’s bounty to create unique and beautiful baskets.
In this article, we will guide you through the process of making your own pine needle basket. From gathering the needles to adding the finishing touches, we will cover everything you need to know to create a beautiful, handcrafted masterpiece. So, let’s dive in and discover the wonders of creating baskets out of pine needles!
Key Takeaways:
- Embrace the ancient art of pine needle basket making to connect with nature, tap into creativity, and create unique, handcrafted masterpieces that reflect personal style and dedication.
- Gather, prepare, weave, and add finishing touches to pine needle baskets, celebrating the beauty of natural materials and preserving ancient traditions while sharing the joy of creating with others.
Read more: How To Keep Pine Needles Out Of Gutters
Gathering Pine Needles
The first step in creating a pine needle basket is to gather fresh pine needles. Pine trees can be found in various parts of the world, so go out and explore nature to find a suitable source. Look for healthy pine trees with long, sturdy needles.
When gathering pine needles, it’s important to be mindful of the environment and practice sustainable harvesting. Only collect needles that have naturally fallen on the ground or trim a few from the tree without causing any damage. Avoid taking an excessive amount of needles from a single tree, as it can impact its health.
Choose needles that are uniform in color and length, as this will ensure consistency in your basket weaving. Avoid using needles that are too green or too brown, as they might break or not hold their shape well.
It’s recommended to gather more pine needles than you think you’ll need, as some needles may be damaged or unsuitable for weaving. Consider collecting different sizes and lengths to add texture to your basket.
Once you have gathered your pine needles, gently shake off any dirt or debris. Lay them out on a clean, flat surface for a few days to allow them to dry thoroughly. This step is important to prevent mold or mildew from forming on the needles.
Remember, gathering pine needles is an opportunity to connect with nature and appreciate the beauty of the outdoors. Enjoy the process of exploring and gathering these natural materials, and let your creativity and inspiration flow!
Preparing the Pine Needles
Once you have gathered and dried your pine needles, the next step in creating your pine needle basket is to prepare them for weaving. Preparing the pine needles helps to make them more pliable and easier to work with.
Start by sorting through the pine needles and removing any damaged or discolored ones. Use a pair of scissors or a sharp knife to trim off any sharp ends or knots. This will ensure a smooth and even weaving process.
Next, you will need to soften the pine needles to make them more flexible. There are a few different methods you can use to achieve this:
- Soaking: Fill a container with warm water and add a few drops of mild dish soap. Place the pine needles in the water and let them soak for approximately 30 minutes. This will help soften and relax the needles.
- Steaming: If you prefer a quicker method, you can steam the pine needles. Boil some water in a pot and hold the pine needles over the steam for a few minutes. Be careful not to get too close to the steam to avoid burning yourself.
- Microwaving: For a more controlled and efficient process, you can use a microwave. Moisten a paper towel and place the pine needles on top. Microwave them on high for about 20-30 seconds, checking regularly to prevent them from drying out or burning.
Once you have softened the pine needles, carefully remove them from the water, steam, or microwave. Gently pat them dry with a towel, making sure not to bend or twist them excessively.
Now that your pine needles are soft and pliable, you’re ready to start weaving your basket! With the proper preparation, the pine needles will be easier to handle and create a more beautiful and durable finished product.
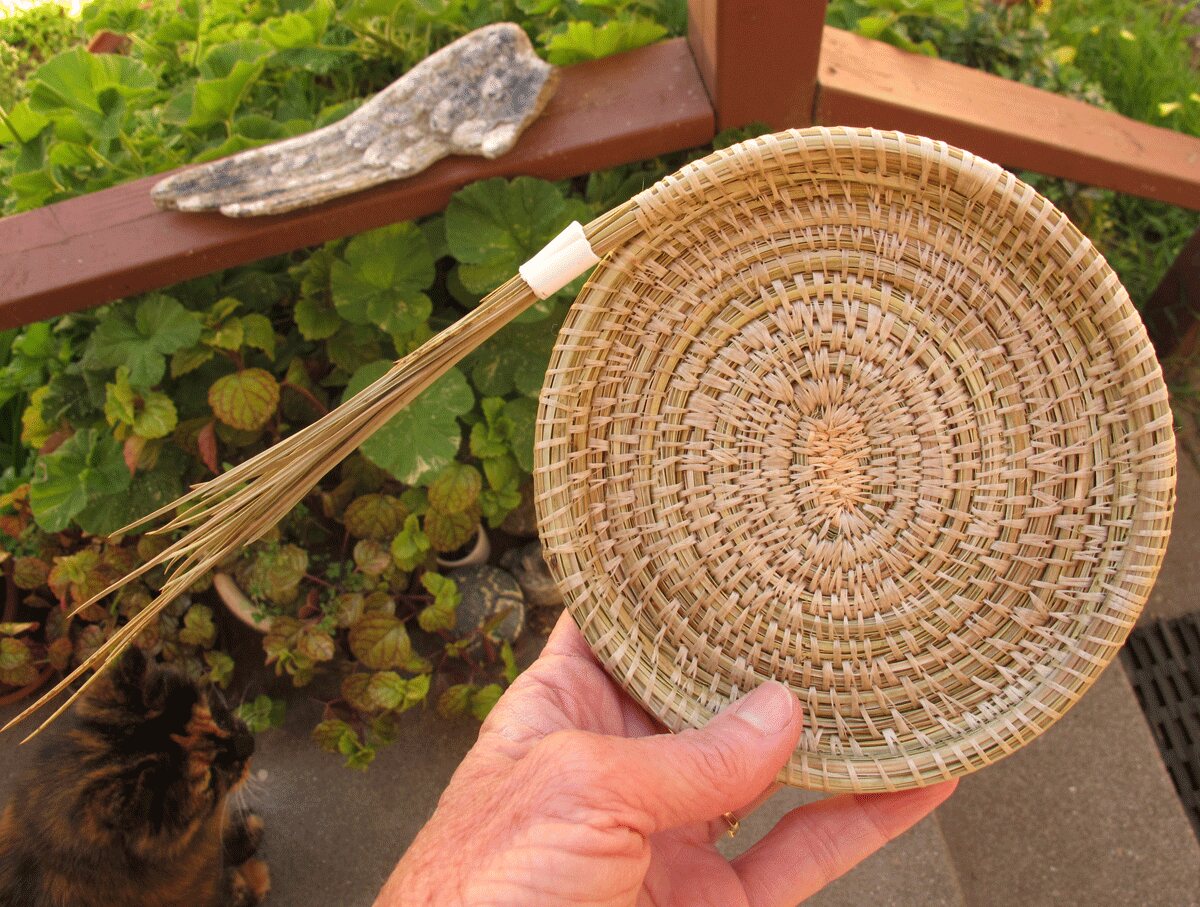
Creating the Base of the Basket
With your prepared pine needles in hand, it’s time to start weaving the base of your basket. The base provides a sturdy foundation for the rest of the weaving process and sets the shape and size of your basket.
To begin, gather a small bundle of pine needles and align them parallel to each other. The number of needles you use will depend on the desired width of your basket’s base. Typically, 12 to 15 needles are a good starting point.
Take a longer, thicker pine needle and place it horizontally across the aligned bundle of needles, about an inch away from one end. This horizontal needle will act as the “starter” or “foundation” for your basket base.
Using a small piece of raffia or thread, tie the horizontal starter needle to the aligned bundle of needles. Make sure to secure it tightly to prevent slipping or unraveling.
Now, you will start the coiling process. Take the starter needle and gently bend it upwards, bringing the bundle of aligned needles with it. Use your fingers to hold everything in place as you start coiling the starter needle around the aligned needles.
As you continue coiling, add more pine needles to the aligned bundle by inserting them between the coils. Each time you add a new needle, ensure it aligns with the previous ones and secure it in place with small stitches using raffia or thread. This will help keep the base stable and prevent it from unraveling.
Continue coiling and adding pine needles until you reach the desired width for your basket’s base. Remember to keep the coils tight and even, maintaining a consistent shape and size.
Once you reach the desired width, secure the last needle with a stitch and trim off any excess length. Congratulations! You have successfully created the base of your pine needle basket.
Creating the base is an essential step in basket weaving, as it provides the structure and stability for the rest of the basket. Take your time and enjoy this foundational part of the process, as it sets the stage for the creativity and beauty that will soon unfold.
Soak the pine needles in water for a few hours before using them to make baskets. This will make them more flexible and easier to work with.
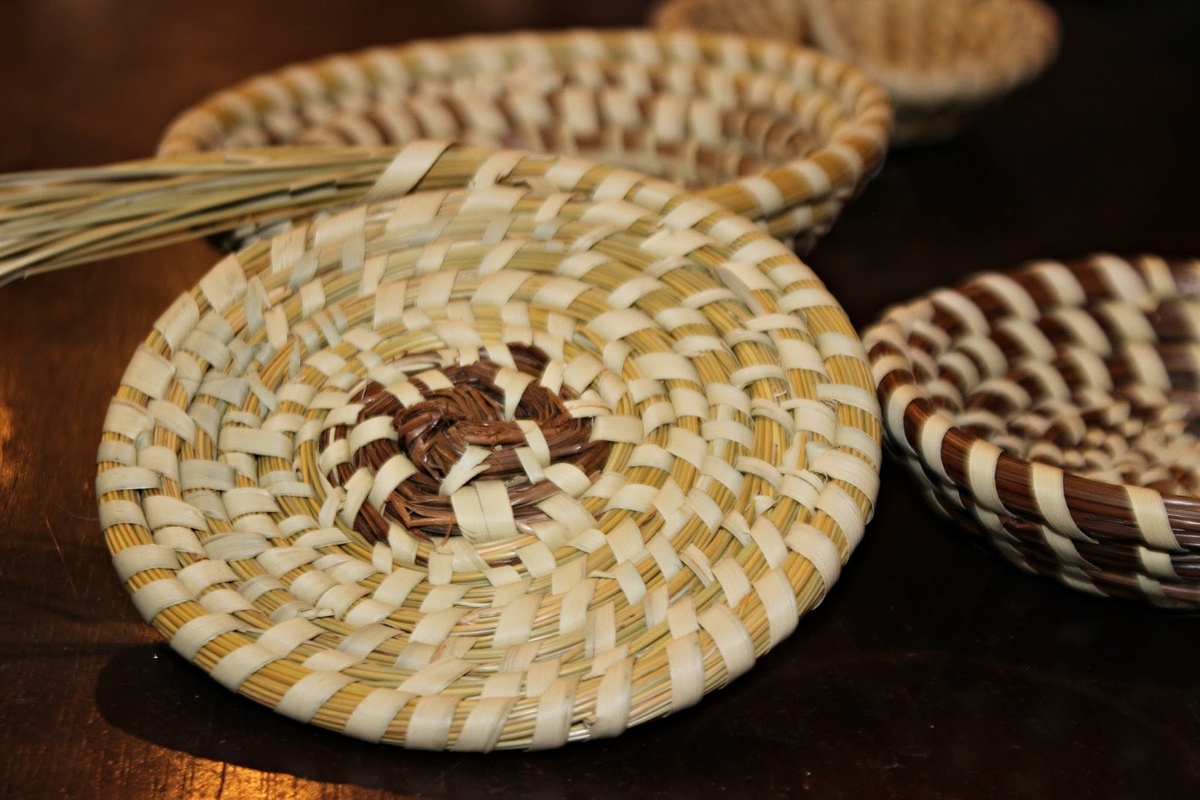
Weaving the Sides of the Basket
Now that you have a solid base for your pine needle basket, it’s time to weave the sides. This is where you can get creative and experiment with different patterns and designs to make your basket unique.
To begin weaving the sides, gather a fresh bundle of pine needles. You can choose to continue using the same size needles or mix in different lengths for added texture and visual interest. Ensure that the needles are still soft and pliable for easier handling.
Take one pine needle from the bundle and position it vertically against the outer edge of the base, aligning it with the coils. Secure the needle in place with a small stitch using raffia or thread. This vertical needle will serve as the starting point for weaving the sides.
With the first needle secured, start weaving in a clockwise direction. Take another pine needle from the bundle and weave it over and under the vertical needle, creating a “V” shape. Continue weaving, adding more pine needles and overlapping them slightly to create a tight and secure weave.
As you weave, gently push the needles down towards the previous row of coils to ensure a tight and even weave. Use your fingers to adjust the tension as needed and maintain a consistent pattern.
Continue weaving the sides of the basket, adding more pine needles as needed and keeping the coils close together. This is a repetitive and rhythmic process, allowing you to get into a meditative state as you watch your basket grow.
Feel free to experiment with different weaving patterns and techniques. You can create simple vertical or diagonal lines, incorporate chevron or diamond patterns, or even add decorative elements like beads or other natural materials.
As you reach the desired height for your basket, secure the last pine needle with a stitch and trim off any excess length. Take a step back and admire your handiwork – you have successfully woven the sides of your pine needle basket!
Weaving the sides is a time-consuming yet fulfilling part of the basket-making process. It allows you to express your creativity and add your personal touch to the final product. Embrace the journey of weaving and enjoy the beauty of each stitch and coil as your basket takes shape.
Read more: How To Store Pine Needles For Tea
Finishing Touches
With the main body of your pine needle basket complete, it’s time to add the finishing touches to give it a polished and professional look. These final steps will ensure that your basket is durable, secure, and ready for use.
First, trim any excess raffia or thread from the weaving process. Use scissors to carefully cut the ends close to the coils, taking care not to cut into the pine needles or the structure of the basket.
Next, you can reinforce the rim of the basket to make it more sturdy. Take a thicker pine needle or a small piece of strong wire and wrap it around the outer edge of the basket. This will provide additional support and prevent the rim from collapsing or bending.
If you prefer a more polished and refined look, you can create a decorative rim or border for your basket. You can do this by adding a braided trim or intertwining colorful threads or ribbons around the rim. Let your creativity guide you in selecting materials and patterns that add a personal touch to your basket.
Once the rim is secure and any decorative elements are in place, it’s a good idea to seal the pine needles to prevent fraying or unraveling. You can use a clear sealant or varnish designed for craft projects. Lightly brush or spray the sealant over the entire surface of the basket, ensuring that all the pine needles are coated. Allow it to dry completely before handling.
Finally, step back and admire your finished pine needle basket! Celebrate your hard work and craftsmanship. Your basket is now ready to be used for storage, as a decorative piece, or even as a unique gift for someone special.
Keep in mind that with time, pine needle baskets may change in color and texture, adding a natural patina that further enhances their beauty. Embrace this evolution and enjoy the uniqueness and charm that each basket develops over time.
Remember, the finishing touches are what truly bring your pine needle basket to life. Embrace your creativity, experiment with different techniques, and allow your basket to become a reflection of your own artistic expression.
Conclusion
Congratulations on completing your journey into the world of pine needle basket making! You have learned the art of gathering pine needles, preparing them, creating the base, weaving the sides, and adding the finishing touches to create a beautiful, handmade basket.
Working with natural materials like pine needles allows us to connect with nature and tap into our creativity. Through the process of basket making, we can appreciate the beauty and simplicity of handcrafted items while also preserving and honoring ancient traditions.
As you continue to refine your skills in basket making, don’t be afraid to experiment with different patterns, materials, and techniques. Each basket you create will be a unique masterpiece, reflecting your own personal style and creativity.
Whether you use your pine needle baskets for storage, as decorative pieces, or as thoughtful gifts, they are sure to bring joy and admiration to those who see them. These baskets are not just functional; they are also a testament to your dedication and craftsmanship.
Remember to share your passion for this ancient art form with others. Teach your friends, family, or even a community group how to make pine needle baskets. Encourage others to explore their creativity and connect with nature. The joy of creating something beautiful with our own hands is meant to be shared.
Now, armed with the knowledge and skills you have gained, you are ready to embark on countless new basket-making adventures. So embrace the process, let your creativity flow, and continue to discover the wonders and possibilities that lie within the art of making baskets out of pine needles.
Frequently Asked Questions about How To Make Baskets Out Of Pine Needles
Was this page helpful?
At Storables.com, we guarantee accurate and reliable information. Our content, validated by Expert Board Contributors, is crafted following stringent Editorial Policies. We're committed to providing you with well-researched, expert-backed insights for all your informational needs.


0 thoughts on “How To Make Baskets Out Of Pine Needles”