Home>Technology>Home Entertainment Systems>How To Connect A Home Theater To A TV
Home Entertainment Systems
How To Connect A Home Theater To A TV
Published: February 15, 2024
Learn how to connect a home theater to a TV for an immersive viewing experience. Get expert tips on setting up your home entertainment system. Discover the best ways to enhance your entertainment setup.
(Many of the links in this article redirect to a specific reviewed product. Your purchase of these products through affiliate links helps to generate commission for Storables.com, at no extra cost. Learn more)
Introduction
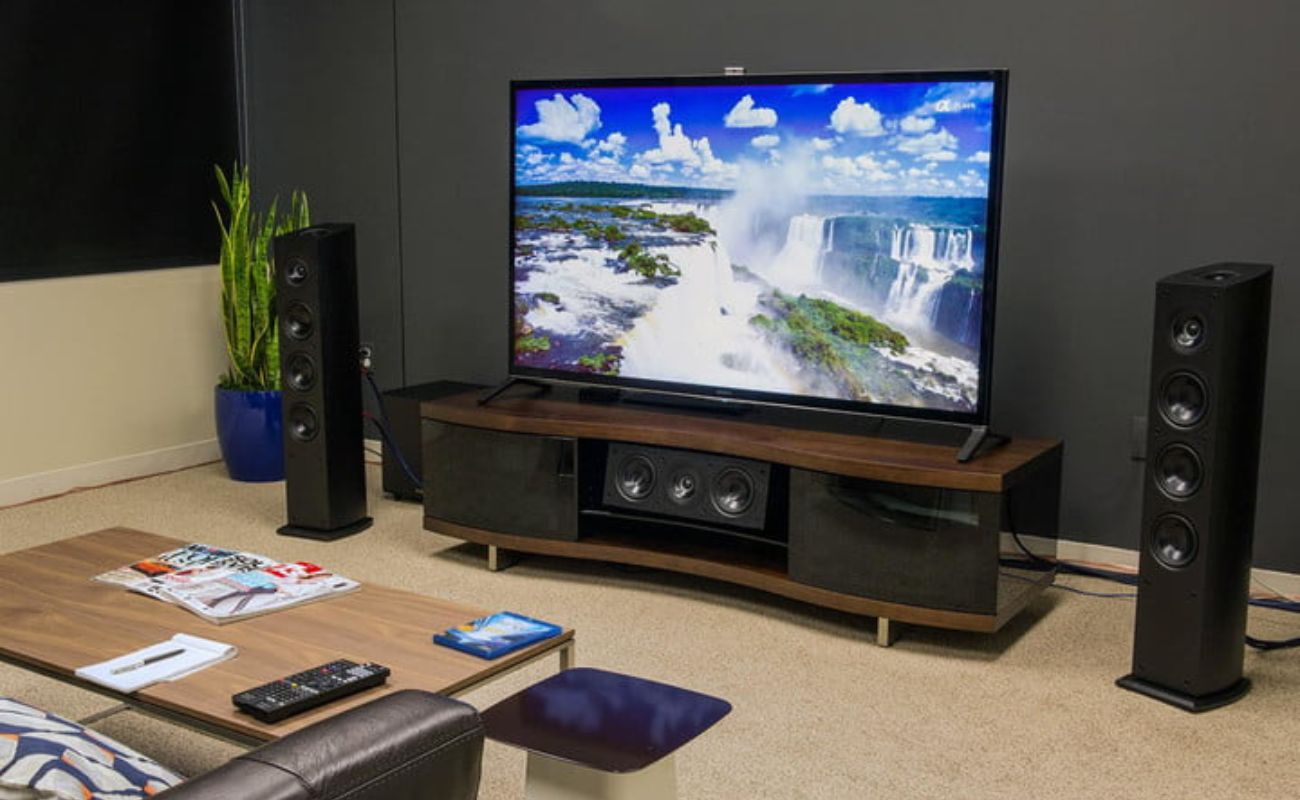
Connecting a home theater system to a TV can significantly enhance your entertainment experience, bringing cinematic audio and visual quality right into the comfort of your living room. Whether you're a movie enthusiast, a gaming aficionado, or a music lover, setting up a home theater system can elevate your viewing and listening pleasure to new heights. By seamlessly integrating your TV with a surround sound system, you can immerse yourself in a captivating audio-visual journey that rivals the experience of a commercial movie theater.
In this comprehensive guide, we will walk you through the step-by-step process of connecting your home theater system to your TV. From gathering the necessary cables and equipment to configuring the audio and video settings, we'll cover everything you need to know to create a seamless and immersive home entertainment setup. By following these instructions, you can unlock the full potential of your home theater system and enjoy a truly immersive audio-visual experience.
So, whether you're a tech-savvy enthusiast looking to optimize your home entertainment setup or a novice seeking to delve into the world of home theater systems, this guide is designed to provide you with the knowledge and confidence to seamlessly connect your home theater to your TV. Get ready to embark on a journey that will transform the way you experience movies, music, and gaming right in the heart of your home. Let's dive into the exciting world of home theater connectivity and unlock the full potential of your entertainment system.
Key Takeaways:
- Transform your living room into a cinematic paradise by connecting your home theater system to your TV. Follow the steps to unlock an immersive audio-visual experience that rivals a commercial movie theater.
- Gather the necessary cables and equipment, connect your home theater receiver to the TV, set up audio and video settings, and test the connection to create a captivating home entertainment experience.
Step 1: Gather the necessary cables and equipment
Before embarking on the process of connecting your home theater system to your TV, it's essential to gather the required cables and equipment to ensure a seamless setup. Here's a comprehensive list of the essential items you'll need:
Cables:
-
HDMI Cable: This is a crucial component for transmitting high-definition audio and video signals between your TV and home theater receiver. Ensure that the HDMI cable is of sufficient length to accommodate the distance between the TV and the receiver.
-
Speaker Wire: Depending on the configuration of your home theater system, you'll need speaker wire to connect the speakers to the receiver. It's advisable to measure the distance between the receiver and each speaker to determine the required length of speaker wire.
-
Subwoofer Cable (Optional): If your home theater system includes a subwoofer, you'll need a subwoofer cable to connect it to the receiver. This cable is specifically designed to carry low-frequency audio signals, enhancing the bass output of your system.
-
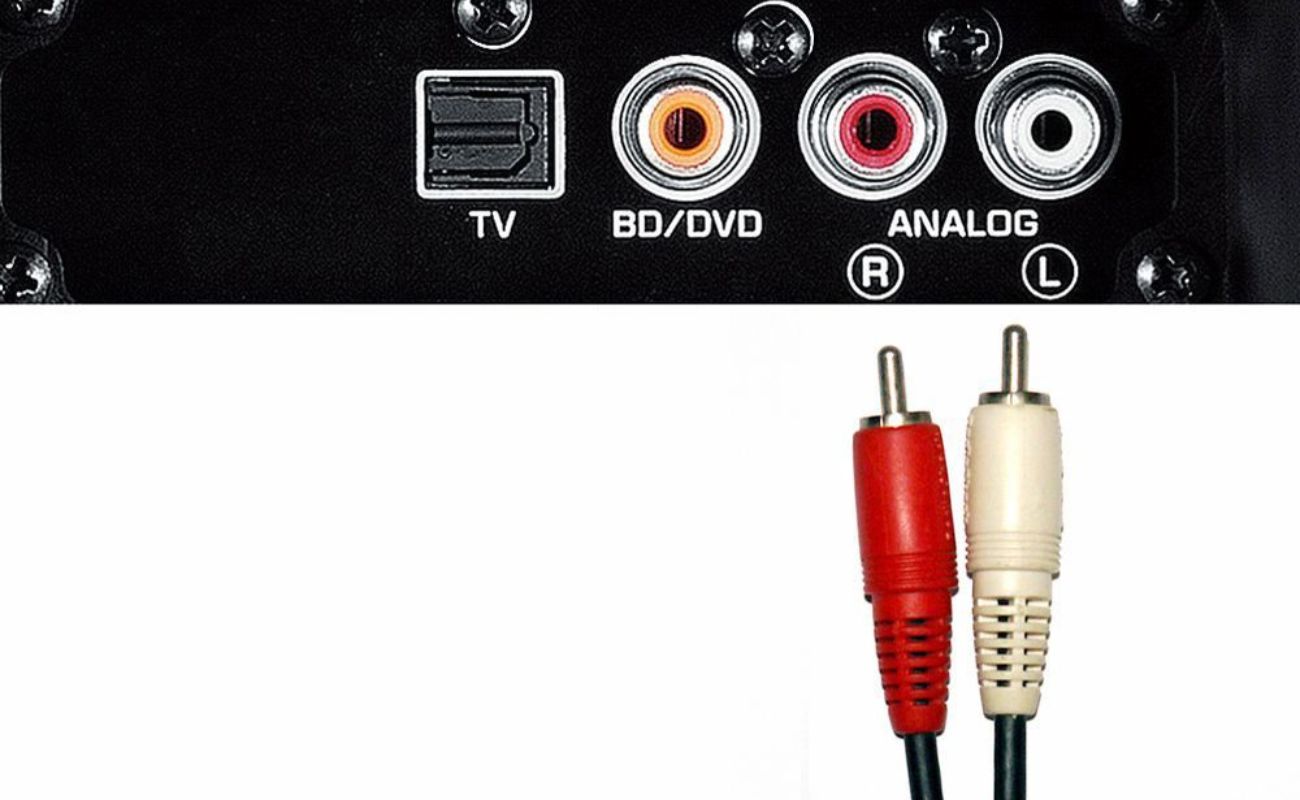
Optical Audio Cable (Toslink): Some audio systems may require an optical audio cable to transmit digital audio signals from the TV to the receiver. This cable is particularly useful for connecting devices that support optical audio output.
Equipment:
-
Home Theater Receiver: This serves as the central hub of your home theater system, receiving audio and video signals from various sources and distributing them to the speakers and TV. Ensure that the receiver supports the necessary input and output connections for your TV and other devices.
-
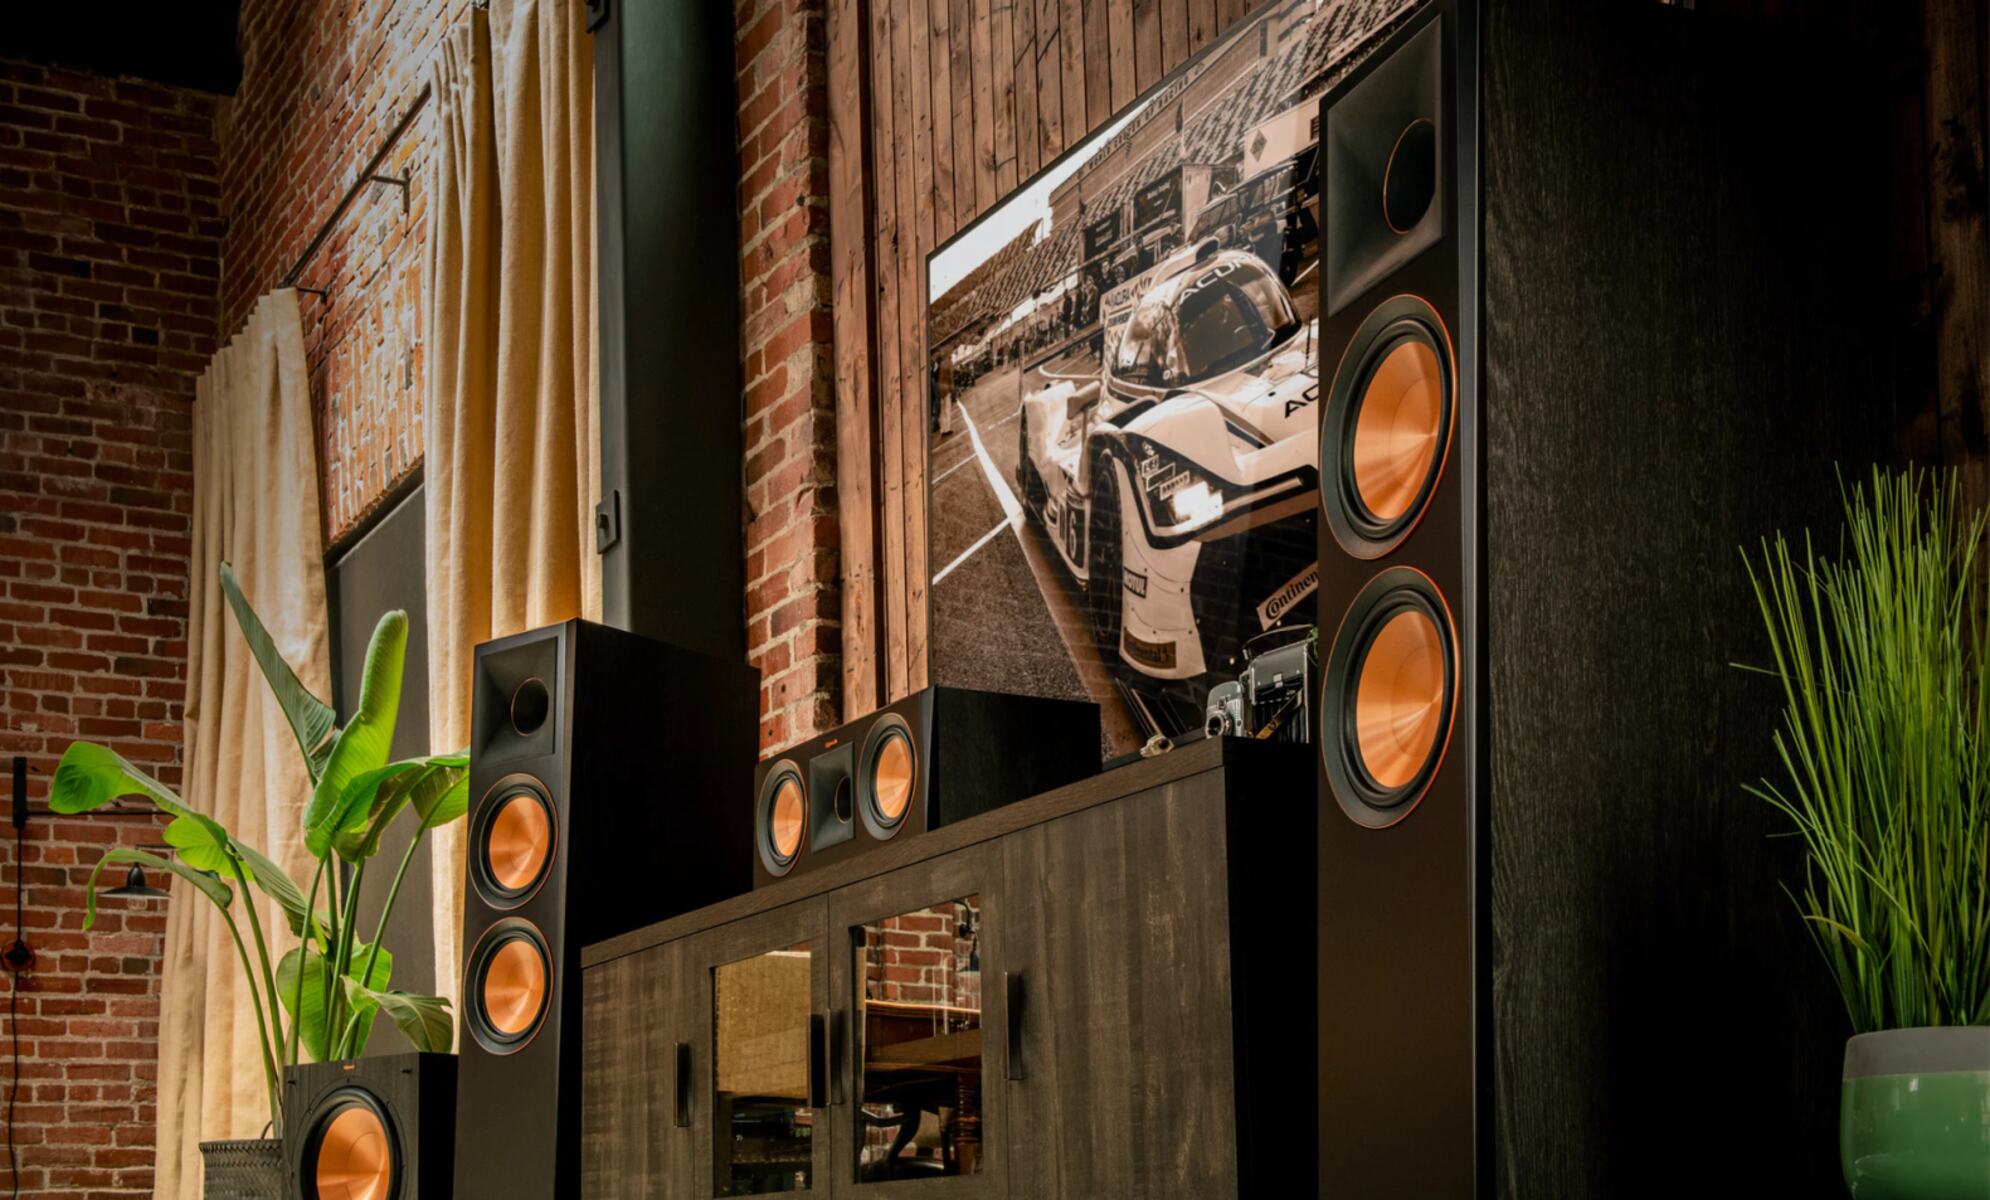
Speakers: Depending on your home theater setup, you may have a combination of front, center, surround, and subwoofer speakers. Ensure that all the speakers are in working condition and positioned according to the recommended layout for optimal audio performance.
-
TV: Of course, the TV is a fundamental component of your home theater system. Ensure that it has available HDMI ports and, if necessary, optical audio output to facilitate seamless connectivity with the home theater receiver.
-
Remote Control and Batteries: It's essential to have the remote control for your home theater receiver, as well as fresh batteries to power it. This will be necessary for configuring the receiver and adjusting audio settings during the setup process.
By ensuring that you have all the necessary cables and equipment at your disposal, you'll be well-prepared to proceed with the subsequent steps of connecting your home theater system to your TV. With these components in place, you're ready to embark on the exciting journey of creating a captivating home entertainment experience.
Step 2: Connect the home theater receiver to the TV
Once you have gathered all the necessary cables and equipment, the next crucial step is to connect the home theater receiver to the TV. This process forms the backbone of your home entertainment setup, enabling the seamless transmission of audio and video signals between the two devices. Follow these detailed steps to ensure a successful connection:
Read more: How To Connect An LG Home Theater To TV
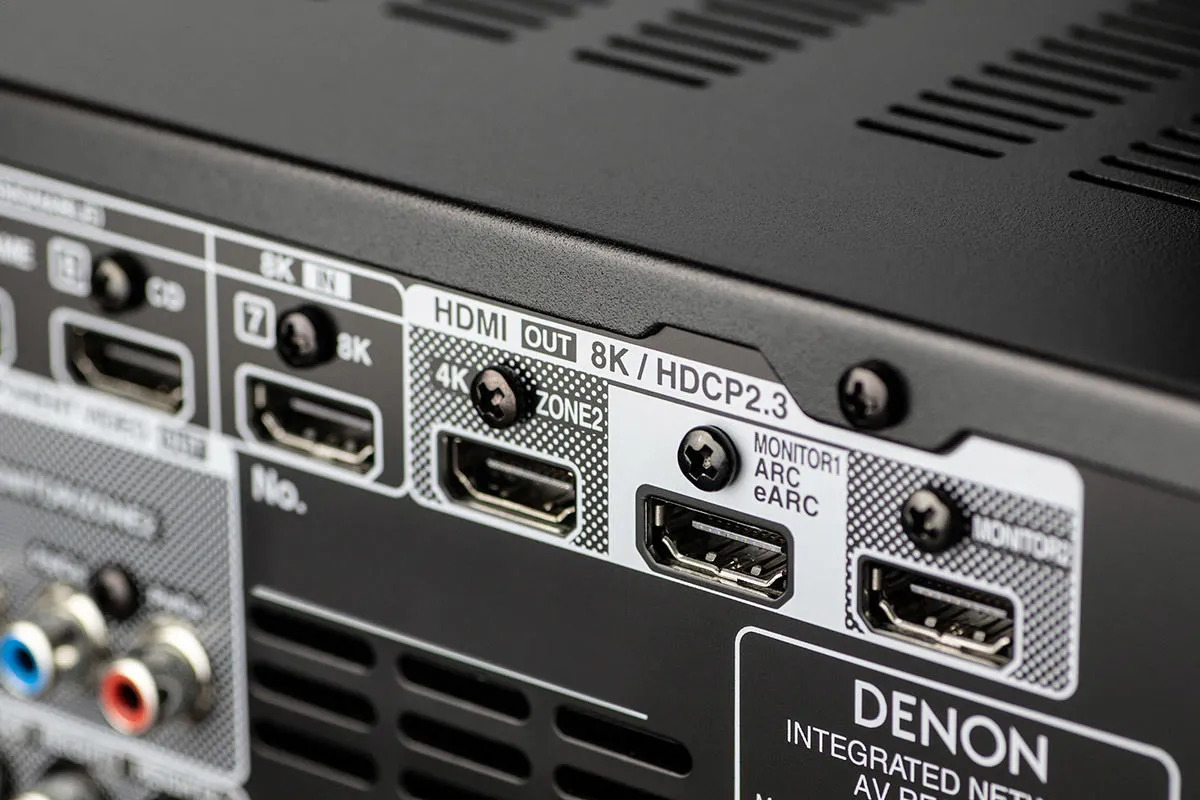
1. Locate the HDMI Ports:
Identify the HDMI ports on both the home theater receiver and the TV. Most modern TVs and home theater receivers are equipped with multiple HDMI ports to accommodate various devices. Ensure that you have clear access to these ports for easy connectivity.
2. Connect the HDMI Cable:
Take the HDMI cable and firmly insert one end into the HDMI output port on the home theater receiver. The HDMI output port is typically labeled as "HDMI OUT" or "ARC" (Audio Return Channel). Next, connect the other end of the HDMI cable to an available HDMI input port on your TV. It's advisable to use high-quality HDMI cables to ensure optimal signal transmission.
3. Power On the Devices:
Once the HDMI cable is securely connected, power on both the home theater receiver and the TV. Use the respective remote controls or power buttons to activate the devices. Ensure that the TV is set to the correct input source corresponding to the HDMI port to which the home theater receiver is connected.
4. Configure Audio and Video Settings:
Access the settings menu on your TV and navigate to the audio output settings. Select the option to output audio through the HDMI connection to ensure that the TV transmits audio signals to the home theater receiver. Additionally, you may need to configure the video settings on the TV to optimize the display output for the connected home theater system.
5. Test the Connection:
To verify the successful connection, play a piece of audio or video content on your TV. You should hear the audio playback through the speakers connected to the home theater receiver. Additionally, ensure that the video output on the TV is displayed correctly, indicating a successful audio-visual connection between the devices.
By following these steps, you can effectively connect your home theater receiver to the TV, laying the foundation for a captivating home entertainment experience. With the audio and video signals seamlessly transmitted between the devices, you're now ready to fine-tune the settings and immerse yourself in the immersive audio-visual journey that your home theater system offers.
Step 3: Set up the audio and video settings
Setting up the audio and video settings is a crucial aspect of optimizing your home theater system for an immersive entertainment experience. Once the home theater receiver is connected to the TV, configuring the audio and video settings ensures that the audio is delivered with precision and the video output is optimized for a captivating visual display.
Audio Settings:
-
Audio Output Configuration: Access the settings menu on your home theater receiver and navigate to the audio output configuration. Here, you can specify the speaker configuration, including the number of speakers (e.g., 2.1, 5.1, 7.1) and the presence of a subwoofer. Select the appropriate configuration based on your speaker setup to ensure accurate audio distribution.
-
Speaker Calibration: Many modern home theater receivers feature an automated speaker calibration system. This functionality allows the receiver to analyze the acoustic characteristics of your room and optimize the audio output accordingly. Follow the on-screen instructions to run the speaker calibration process, which typically involves using a microphone to measure audio levels and speaker distances.
-
Audio Modes and Equalization: Explore the various audio modes and equalization settings offered by your home theater receiver. These settings allow you to tailor the audio output to suit different types of content, such as movies, music, and gaming. Experiment with different audio modes to find the one that best complements your viewing or listening experience.
Video Settings:
-
Display Resolution: Navigate to the video settings on your TV to ensure that the display resolution is optimized for high-definition content. Select the highest available resolution that is supported by both the TV and the connected devices, such as streaming media players or Blu-ray players, to enjoy crystal-clear visuals.
-
Color and Contrast Adjustment: Many TVs offer advanced color and contrast adjustment settings to fine-tune the visual output. Depending on your preferences, you can adjust parameters such as brightness, contrast, color saturation, and sharpness to achieve a visually pleasing display that enhances the overall viewing experience.
-
HDMI Control and CEC: If your TV and home theater receiver support HDMI-CEC (Consumer Electronics Control), consider enabling this feature. HDMI-CEC allows for seamless communication between HDMI-connected devices, enabling functions such as automatic input switching and unified remote control operation, streamlining the overall user experience.
By meticulously configuring the audio and video settings, you can unleash the full potential of your home theater system, ensuring that both the audio and visual components harmonize to deliver a captivating and immersive entertainment experience. With the settings optimized to suit your preferences and the capabilities of your devices, you're poised to embark on a journey of cinematic audio and visual delight right in the heart of your home.
Step 4: Test the connection
Once the home theater receiver is connected to the TV and the audio and video settings have been configured, it's essential to thoroughly test the connection to ensure that both the audio and visual components are functioning seamlessly. This critical step allows you to verify the successful integration of your home theater system and address any potential issues that may arise during the testing process.
Audio Playback Verification
To initiate the testing process, select a piece of audio content, such as music or a movie soundtrack, and play it through your TV. As the audio signals are transmitted from the TV to the home theater receiver via the HDMI connection, listen attentively to ensure that the sound is being reproduced accurately through the connected speakers. Pay close attention to the spatial distribution of the audio, ensuring that each speaker, including the center, front, surround, and subwoofer (if applicable), is delivering the intended sound with clarity and precision.
Surround Sound Calibration
If your home theater system supports surround sound, consider playing content specifically designed to showcase the spatial audio capabilities, such as a movie with immersive sound effects or a video game with dynamic audio elements. As the audio content unfolds, assess the surround sound experience to confirm that the directional audio cues are accurately reproduced, creating an enveloping auditory environment that enhances the overall viewing or gaming experience.
Video Display Confirmation
Simultaneously, observe the visual output on your TV as the audio content is being played. Ensure that the video display is crisp, vibrant, and free from any visual artifacts or distortions. Pay attention to the color accuracy, contrast levels, and overall image quality to ascertain that the video signals are being transmitted flawlessly from the connected devices to the TV, resulting in a visually captivating display that complements the audio experience.
Read more: How To Connect A Security Camera To TV
Input Source Switching
As part of the testing process, consider switching between different input sources on your TV, such as a cable/satellite box, streaming media player, or gaming console, to verify the seamless transition between various audio and video sources. Confirm that the home theater receiver accurately detects and processes the audio and video signals from different input devices, allowing for effortless switching between entertainment sources without any disruption to the audio-visual continuity.
Troubleshooting and Fine-Tuning
In the event of any issues or discrepancies observed during the testing phase, take the opportunity to troubleshoot and fine-tune the settings. This may involve revisiting the audio and video configurations, checking the cable connections, and ensuring that all devices are powered on and functioning correctly. By addressing any potential issues proactively, you can optimize the performance of your home theater system and ensure a seamless audio-visual experience.
By meticulously testing the connection between your home theater receiver and the TV, you can confirm the successful integration of the audio and visual components, paving the way for an immersive and captivating home entertainment experience. With the connection verified and any potential issues addressed, you're now ready to indulge in the rich audio-visual journey that your meticulously connected home theater system offers.
Conclusion
In conclusion, the process of connecting a home theater system to a TV is a transformative endeavor that elevates the home entertainment experience to new heights. By following the comprehensive steps outlined in this guide, you have embarked on a journey that culminates in the seamless integration of audio and visual components, resulting in a captivating and immersive home theater setup.
Through meticulous cable and equipment preparation, you have ensured that all the essential components, including HDMI cables, speaker wires, and the home theater receiver, are in place to facilitate a seamless connection. The deliberate selection and setup of these elements lay the groundwork for a robust and high-fidelity audio-visual experience.
The pivotal step of connecting the home theater receiver to the TV solidifies the foundation of your home entertainment system. By leveraging HDMI connectivity and configuring the audio and video settings, you have established a conduit through which high-definition audio and visual signals flow effortlessly, creating a harmonious union between your TV and the home theater receiver.
Furthermore, the meticulous configuration of audio and video settings has allowed you to tailor the output to suit your preferences, optimizing the audio distribution and visual display for a truly immersive experience. By fine-tuning parameters such as speaker configuration, color and contrast levels, and HDMI control, you have unlocked the full potential of your home theater system, ensuring that both the audio and visual components synergize to deliver a captivating entertainment experience.
The thorough testing of the connection serves as the final validation of your efforts, allowing you to confirm the seamless integration of the audio and visual components. By meticulously verifying the audio playback, surround sound calibration, and video display, you have ensured that your home theater system operates at its peak performance, delivering a captivating audio-visual journey that rivals the experience of a commercial movie theater.
In essence, the successful connection of your home theater system to your TV marks the beginning of a captivating audio-visual journey that transcends traditional home entertainment. With the foundation laid and the components seamlessly integrated, you are now poised to immerse yourself in a world of cinematic audio and visual delight, right in the heart of your home. Whether you're indulging in a movie marathon, gaming with friends, or enjoying a concert from the comfort of your living room, your meticulously connected home theater system promises an unparalleled entertainment experience that will leave a lasting impression.
So, as you embark on this exciting journey of home theater connectivity, may your audio resonate with clarity, your visuals dazzle with vibrancy, and your overall entertainment experience be nothing short of extraordinary. Embrace the immersive world of home theater connectivity, and let the captivating audio-visual symphony unfold before you, enriching your home entertainment experience in ways you never thought possible.
Frequently Asked Questions about How To Connect A Home Theater To A TV
Was this page helpful?
At Storables.com, we guarantee accurate and reliable information. Our content, validated by Expert Board Contributors, is crafted following stringent Editorial Policies. We're committed to providing you with well-researched, expert-backed insights for all your informational needs.
0 thoughts on “How To Connect A Home Theater To A TV”