Home>Technology>Security & Surveillance>How To Remove August Lock From Door
Security & Surveillance
How To Remove August Lock From Door
Modified: August 24, 2024
Learn how to safely remove an August lock from your door with our step-by-step guide. Ensure the security and surveillance of your home with these expert tips.
(Many of the links in this article redirect to a specific reviewed product. Your purchase of these products through affiliate links helps to generate commission for Storables.com, at no extra cost. Learn more)
Introduction
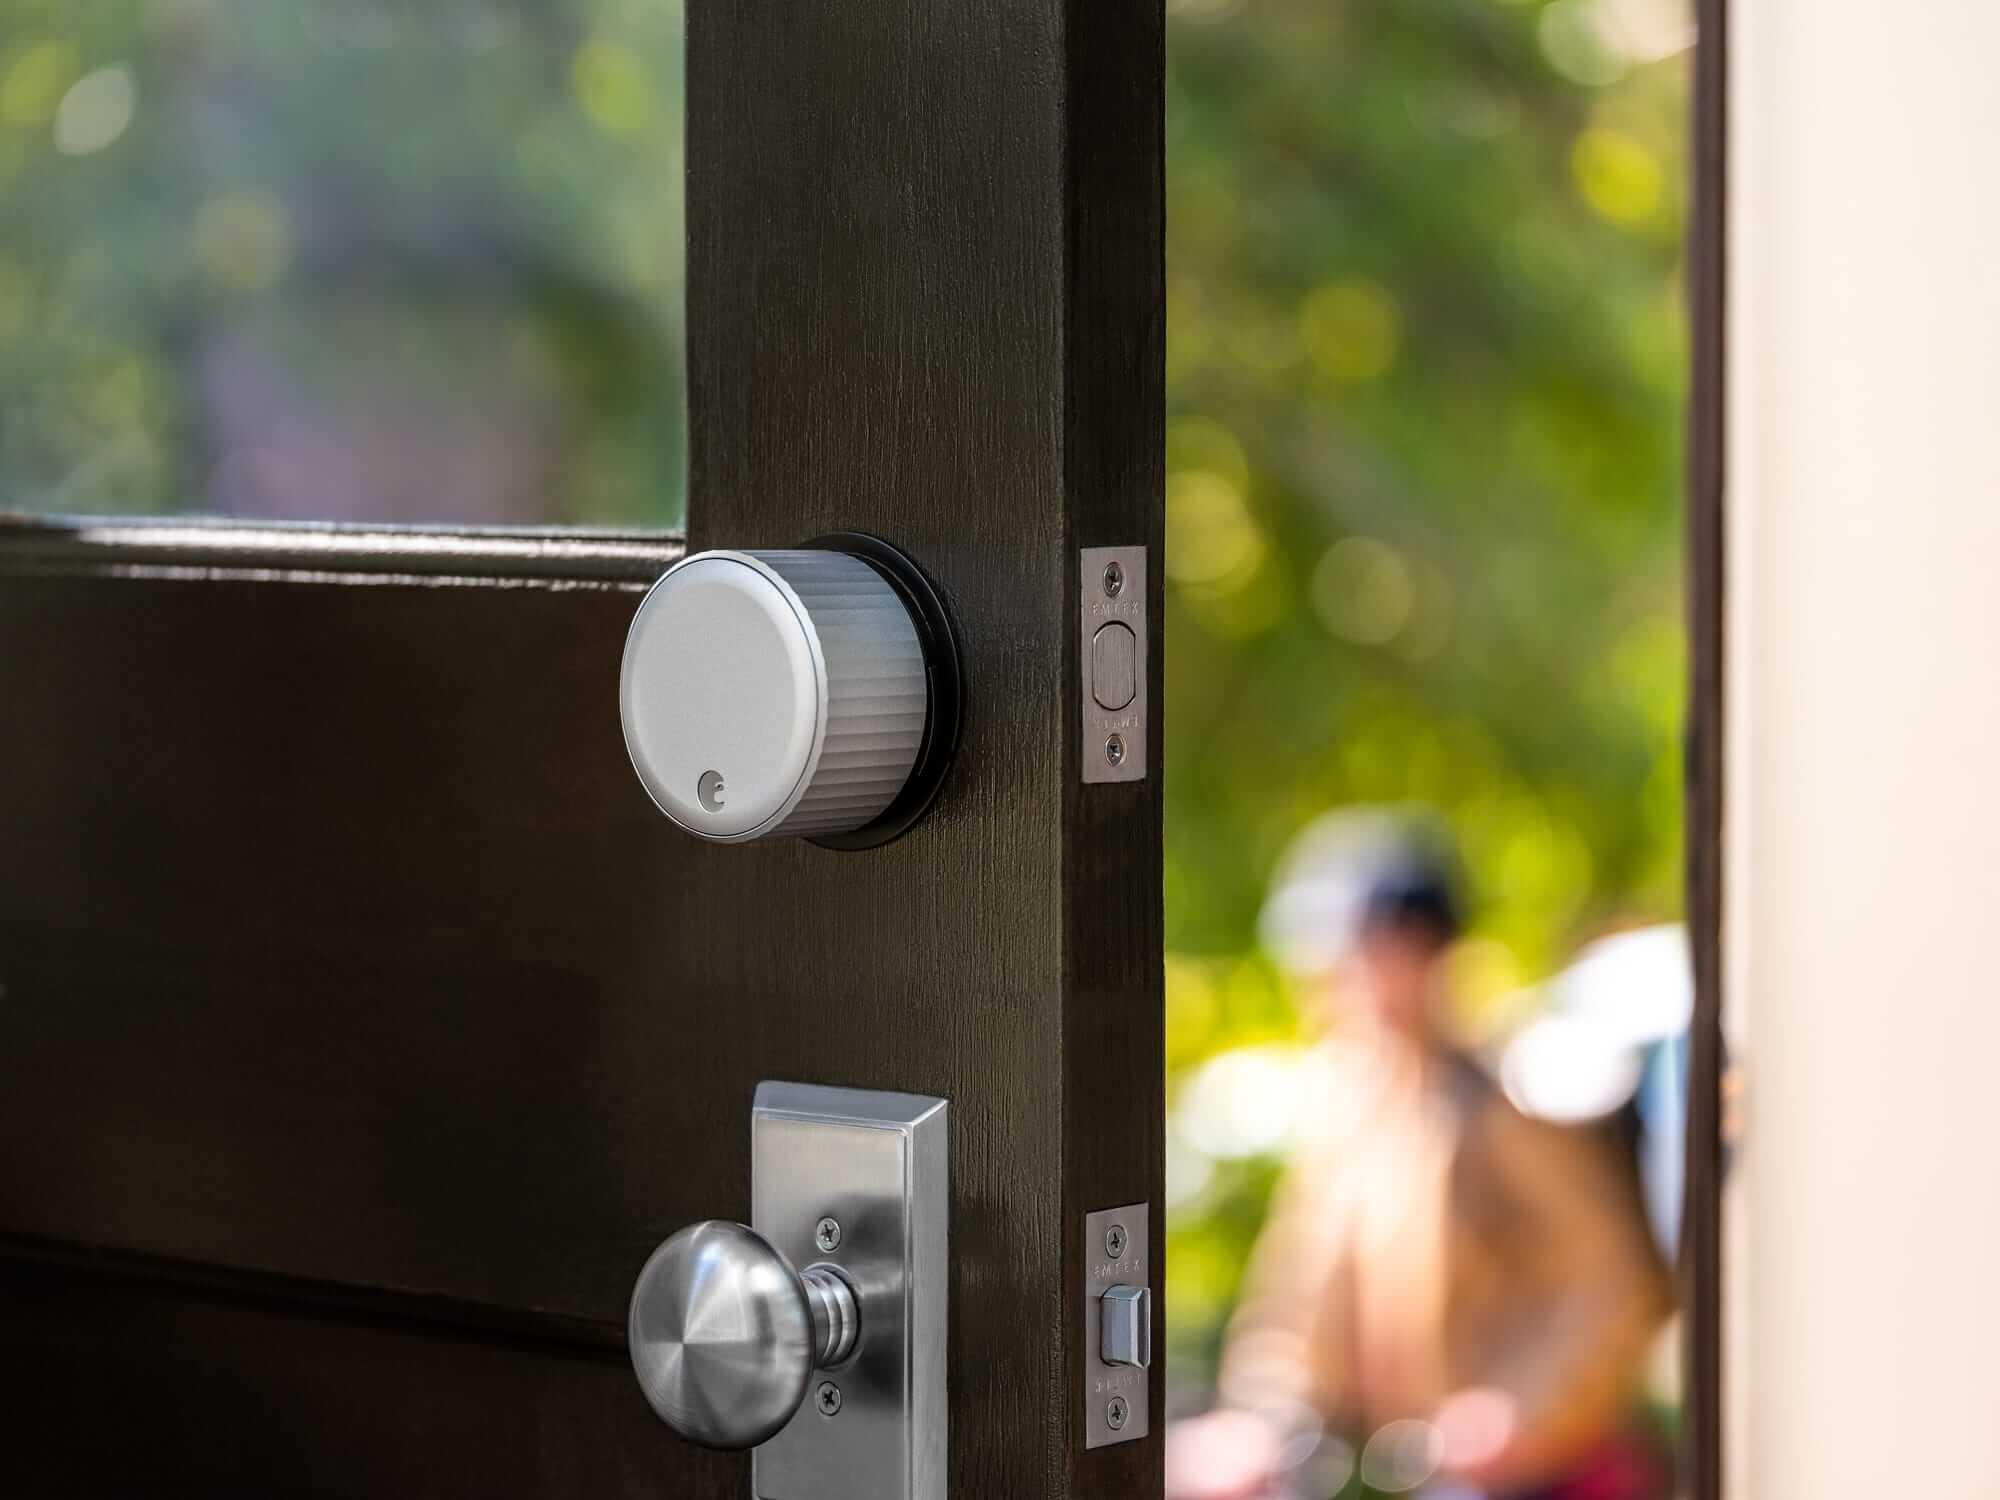
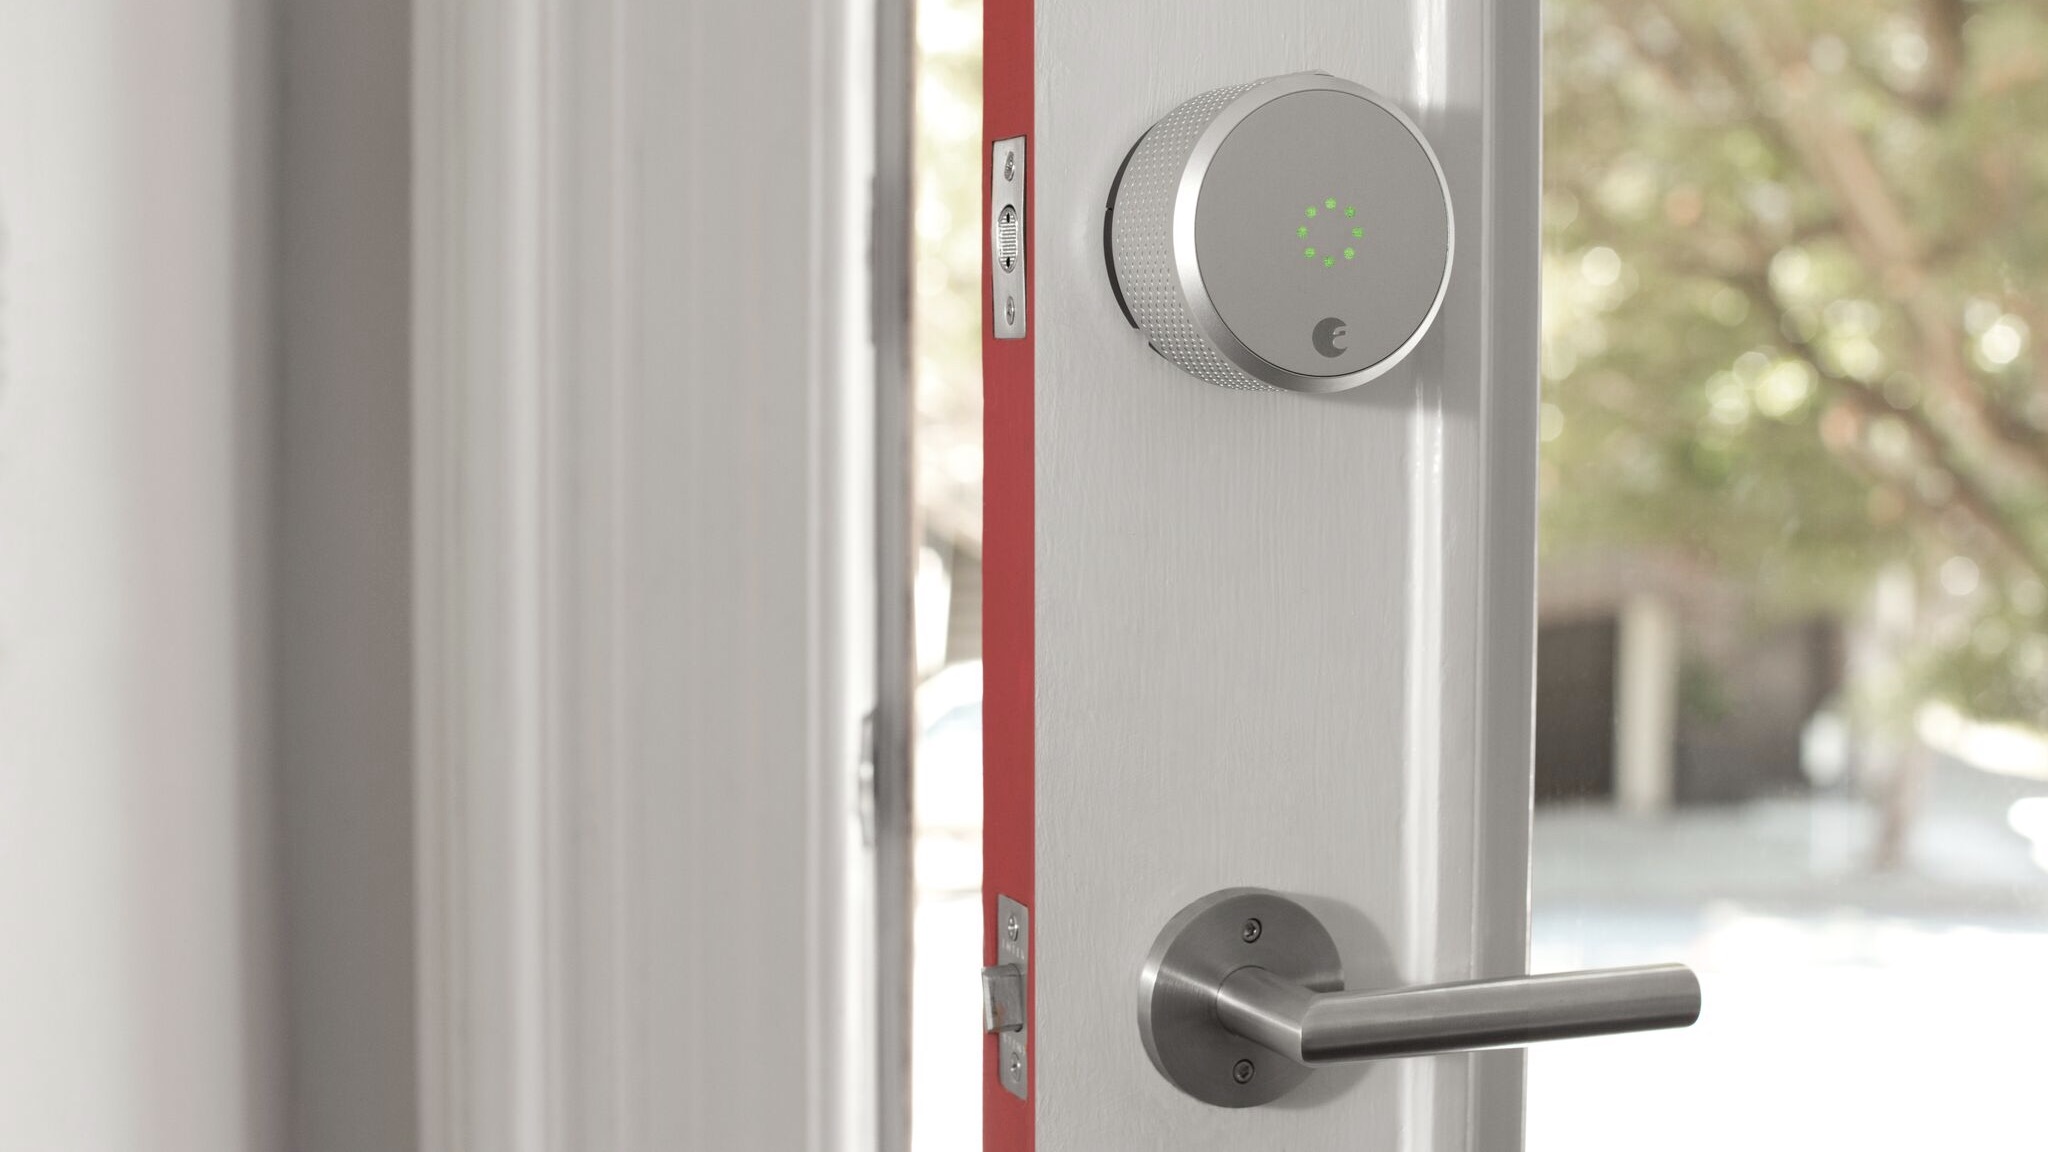
Welcome to the comprehensive guide on how to remove an August lock from a door. The August smart lock has revolutionized home security and convenience with its innovative technology, allowing homeowners to control access to their homes remotely. However, there are instances when you may need to remove the lock, whether for maintenance, replacement, or other reasons. This step-by-step tutorial will walk you through the process of safely removing an August lock from your door, ensuring that you can complete the task with confidence and ease.
Whether you are a homeowner seeking to replace your August lock with a newer model or a technician performing maintenance, understanding the proper removal procedure is essential. By following the instructions provided in this guide, you will be equipped to remove the August lock efficiently and without causing any damage to your door or the lock itself.
In the following sections, we will outline the tools required for the removal process, followed by a detailed walkthrough of each step. From removing the battery cover to detaching the mounting plate and adapter ring, you will gain a comprehensive understanding of the entire removal procedure.
By the end of this guide, you will have the knowledge and confidence to successfully remove an August lock from your door, allowing you to proceed with your specific maintenance or replacement needs. Let's dive into the tools required for the task at hand.
Key Takeaways:
- Safely remove an August lock by following step-by-step instructions, ensuring no damage to the door or lock. Gather necessary tools and disconnect power source before detaching the lock.
- Gain confidence and proficiency in removing an August lock, empowering you to handle maintenance, replacement, or reinstallation needs with ease. Safeguard components for future use.
Read more: How To Remove August Smart Lock
Tools Needed
Before embarking on the process of removing an August lock from your door, it’s essential to gather the necessary tools to ensure a smooth and efficient removal process. Here are the tools you will need:
- Phillips Head Screwdriver: This tool will be used to remove any screws securing the lock in place.
- Flathead Screwdriver: A flathead screwdriver may be required to assist in prying or releasing certain components of the lock.
- Replacement Batteries: Depending on the condition of the existing batteries, it’s advisable to have replacement batteries on hand to ensure uninterrupted functionality after reinstallation.
- Optional: Allen Wrench: Some August lock models may utilize an Allen wrench for certain components, so it’s recommended to have one available just in case.
By ensuring that you have these tools readily available, you can proceed with the removal process without any interruptions, allowing for a seamless transition as you work through each step. With the necessary tools in hand, you are now prepared to commence the removal of the August lock from your door.
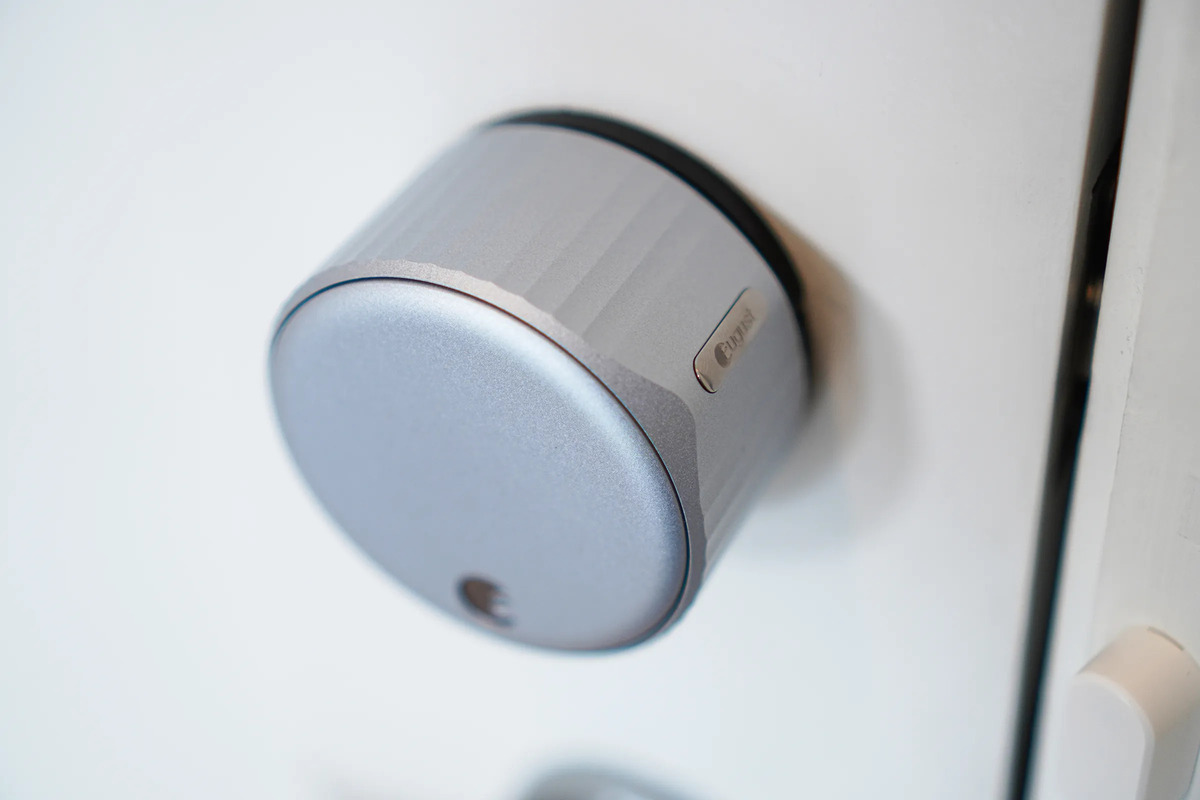
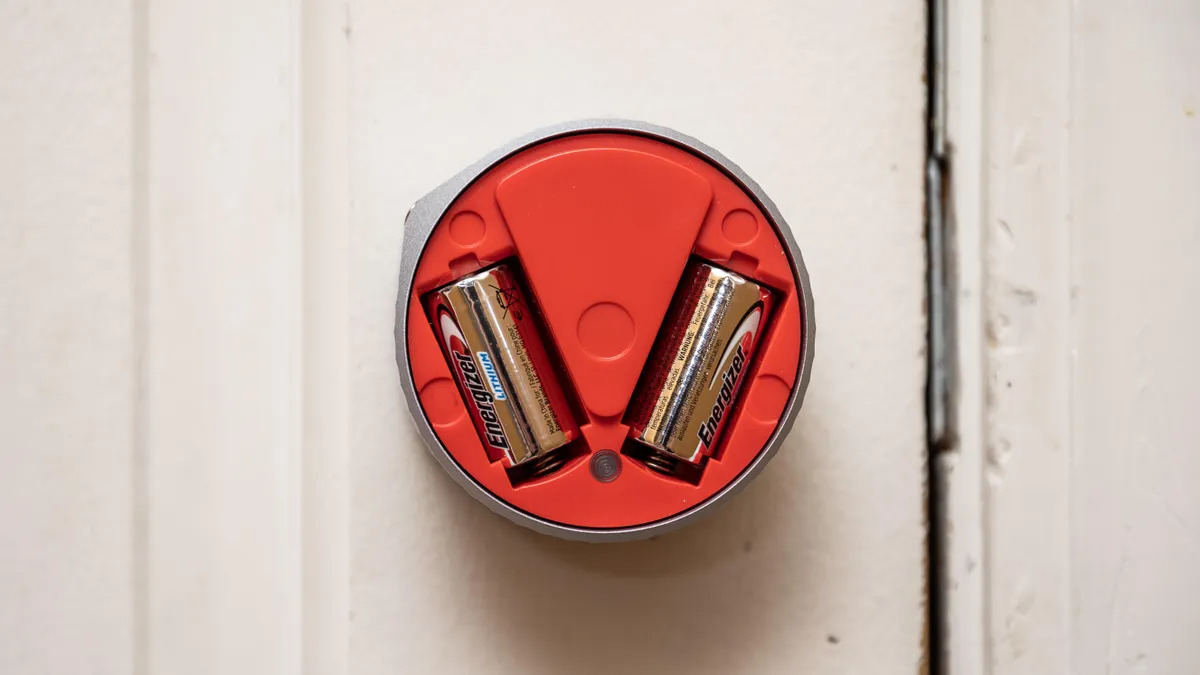
Step 1: Remove the Battery Cover
The first step in removing an August lock from your door is to access the battery compartment by removing the battery cover. This is a crucial initial step, as it provides access to the internal components of the lock and allows for the disconnection of power. Here’s how to proceed:
- Locate the Battery Cover: Depending on the model of your August lock, the battery cover may be situated on the exterior or interior portion of the lock. Carefully inspect the lock to identify the location of the battery cover.
- Use the Phillips Head Screwdriver: If the battery cover is secured with screws, utilize the Phillips head screwdriver to carefully remove the screws and set them aside in a secure location. Take care not to misplace the screws, as they will be needed for reassembly.
- Remove the Battery Cover: With the screws removed, gently detach the battery cover from the lock, exposing the battery compartment within. Take note of the orientation of the batteries and any additional components housed within the compartment.
- Disconnect the Batteries: If the batteries are still operational, carefully disconnect them from the lock to ensure that there is no power supply to the device during the removal process. If the batteries are due for replacement, this is an opportune time to install new ones to maintain uninterrupted functionality.
By successfully removing the battery cover and disconnecting the power source, you have initiated the first step in the removal process, setting the stage for the subsequent steps to follow. With the battery cover removed and the power source disconnected, you are now prepared to proceed to the next crucial phase of removing the August lock from your door.
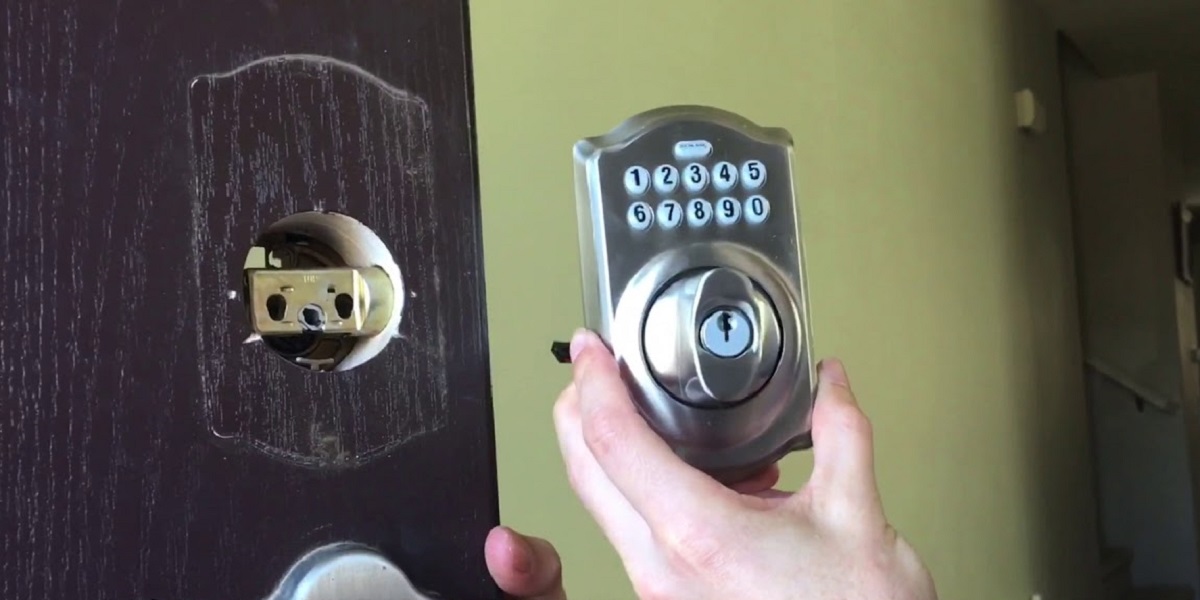
Step 2: Remove the August Lock
With the battery cover removed and the power source disconnected, the next step involves the physical removal of the August lock from the door. This step requires careful attention to detail to ensure that the lock is detached without causing any damage to the door or the lock itself. Here’s a detailed guide on how to proceed:
- Inspect the Lock: Before proceeding with the removal, take a moment to inspect the lock and its surrounding components. Identify any screws, latches, or mechanisms that may be securing the lock in place.
- Use the Phillips Head Screwdriver: If the lock is secured with screws, carefully unscrew and remove them, setting them aside for future reassembly. Take note of the number of screws and their respective locations to ensure accurate reinstallation.
- Gently Detach the Lock: Once any securing components have been addressed, gently detach the August lock from the door, taking care to support its weight and prevent any undue strain on the door or the lock itself.
- Set the Lock Aside: After successfully removing the lock, place it in a secure location, ensuring that it is positioned in a way that prevents accidental damage. This will also facilitate easy access to the door for the subsequent removal steps.
By following these steps, you can safely and effectively remove the August lock from your door, paving the way for the next stages of the removal process. With the lock successfully detached, you are now ready to proceed to the next critical phase: detaching the mounting plate.
To remove an August lock from a door, start by removing the batteries from the lock. Then, use a screwdriver to remove the screws on the interior mounting plate. Once the screws are removed, the lock can be lifted off the door.
Step 3: Detach the Mounting Plate
After removing the August lock from the door, the next pivotal step in the removal process involves detaching the mounting plate. The mounting plate is an integral component that facilitates the secure installation of the lock, and its removal is essential for comprehensive disassembly. Here’s a detailed guide on how to proceed with this crucial step:
- Locate the Mounting Plate: The mounting plate is typically situated on the interior side of the door, serving as the interface between the lock and the door itself. Identify the mounting plate and any screws or fasteners securing it in place.
- Use the Phillips Head Screwdriver: If the mounting plate is affixed with screws, carefully remove them using the Phillips head screwdriver. Ensure that the screws are set aside in a secure location for reassembly.
- Gently Detach the Mounting Plate: With the screws removed, gently detach the mounting plate from the door, taking care to avoid any unnecessary force that may cause damage to the door or the mounting plate itself.
- Inspect the Area: After removing the mounting plate, take a moment to inspect the area to ensure that all components have been successfully detached. Clear any debris or obstructions that may impede the subsequent steps of the removal process.
By meticulously following these steps, you can effectively detach the mounting plate, further advancing the disassembly process and preparing the door for the final removal step. With the mounting plate successfully removed, you are now ready to proceed to the subsequent phase: removing the adapter ring.
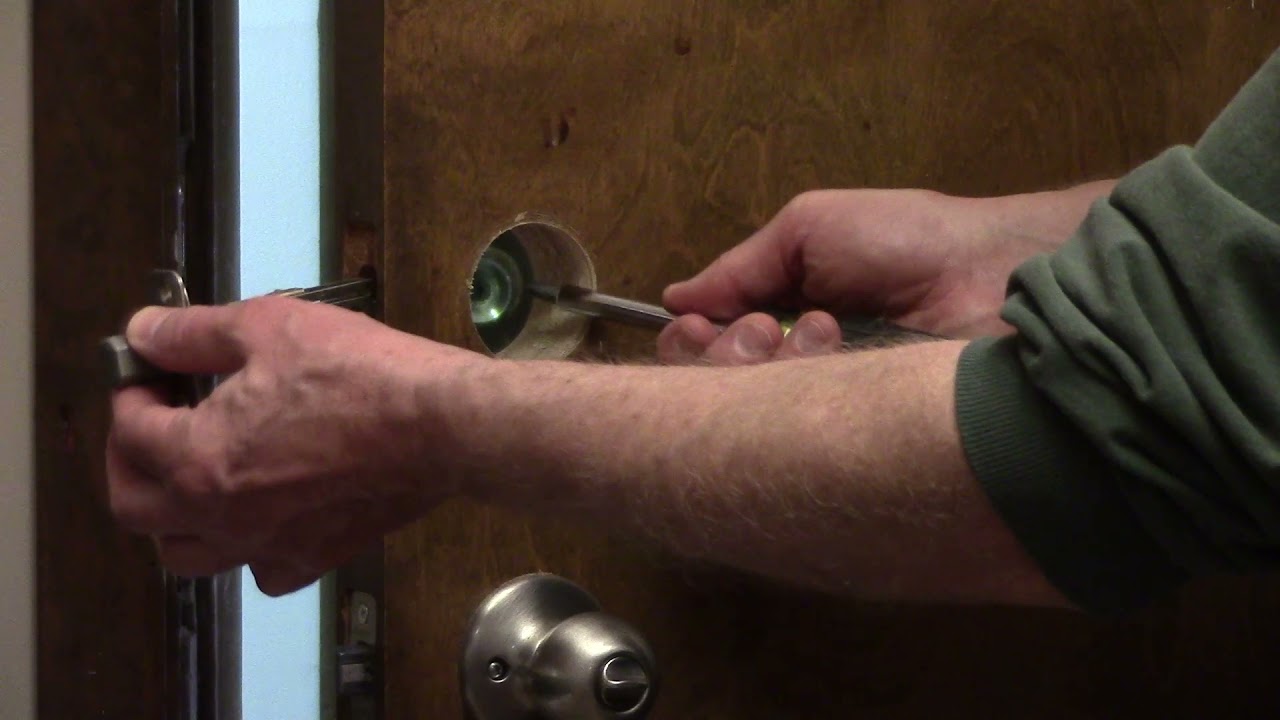
Step 4: Remove the Adapter Ring
As you progress through the process of removing an August lock from your door, the final step involves the removal of the adapter ring. The adapter ring serves as a crucial component that facilitates the seamless integration of the lock with the door, and its removal is essential for completing the disassembly process. Here’s a comprehensive guide on how to proceed with this vital step:
- Locate the Adapter Ring: The adapter ring is positioned around the perimeter of the lock, serving to adapt its size or shape to fit the specific requirements of the door. Identify the adapter ring and take note of its placement and orientation.
- Inspect for Fasteners: Examine the adapter ring for any fasteners, screws, or mechanisms that may be securing it in place. Depending on the model of the August lock, the method of attachment may vary.
- Utilize the Appropriate Tool: If the adapter ring is secured with fasteners, use the necessary tool, such as a screwdriver or wrench, to carefully remove them, ensuring that they are set aside for reassembly.
- Gently Remove the Adapter Ring: With any fasteners removed, carefully detach the adapter ring from the lock, taking care to maintain its structural integrity and prevent any damage during the removal process.
- Inspect the Area: After removing the adapter ring, take a moment to inspect the area and ensure that all components have been successfully detached, leaving the door in a state ready for any subsequent maintenance or reinstallation needs.
By meticulously following these steps, you can effectively remove the adapter ring, marking the completion of the disassembly process for the August lock. With the adapter ring successfully detached, you have concluded the comprehensive removal of the lock from your door, allowing for any necessary maintenance, replacement, or reinstallation to proceed seamlessly.
Conclusion
Congratulations on successfully completing the process of removing an August lock from your door. By following the step-by-step guidance outlined in this comprehensive tutorial, you have gained the knowledge and confidence to navigate each phase of the removal process with precision and ease. From removing the battery cover and disconnecting the power source to detaching the mounting plate and adapter ring, you have effectively disassembled the lock, paving the way for any subsequent maintenance, replacement, or reinstallation needs.
It is essential to approach the removal of the August lock with a meticulous and careful demeanor, ensuring that each component is handled with the necessary attention to detail and precision. By adhering to the instructions provided in this guide, you have successfully safeguarded your door and the lock from any potential damage during the removal process, setting the stage for a seamless transition to your specific maintenance or replacement requirements.
Whether you are a homeowner seeking to replace your August lock with a newer model or a technician performing maintenance, the knowledge acquired from this guide empowers you to navigate the removal process with confidence and proficiency. Additionally, the understanding gained from this tutorial provides valuable insights into the intricate components of the August lock, fostering a deeper appreciation for its functionality and design.
As you proceed with your maintenance, replacement, or reinstallation needs, it is advisable to retain the components removed from the door in a secure location, ensuring that they are readily accessible for any future requirements. Whether you are reinstalling the same lock or upgrading to a newer model, having the necessary components on hand will facilitate a smooth and efficient process.
With the completion of the removal process, you are now equipped with the expertise to handle the disassembly of an August lock with proficiency and ease. As you embark on the next phase of your home security and maintenance journey, may the knowledge gained from this guide serve you well in your endeavors. Thank you for entrusting us with your removal process, and we wish you success in all your future home security endeavors.
Frequently Asked Questions about How To Remove August Lock From Door
Was this page helpful?
At Storables.com, we guarantee accurate and reliable information. Our content, validated by Expert Board Contributors, is crafted following stringent Editorial Policies. We're committed to providing you with well-researched, expert-backed insights for all your informational needs.


0 thoughts on “How To Remove August Lock From Door”