Home>Technology>Security & Surveillance>How To Remove Storm Door Lock
Security & Surveillance
How To Remove Storm Door Lock
Modified: January 3, 2024
Learn how to remove a storm door lock for improved security and surveillance. Follow our step-by-step guide for quick and easy removal.
(Many of the links in this article redirect to a specific reviewed product. Your purchase of these products through affiliate links helps to generate commission for Storables.com, at no extra cost. Learn more)
Introduction
Welcome to our comprehensive guide on how to remove a storm door lock. Whether you're looking to replace a damaged lock, upgrade to a more secure option, or simply perform maintenance on your storm door, understanding the process of removing the lock is crucial. A storm door lock serves as a vital component of your home security, and knowing how to remove it properly can save you time and money in the long run.
Throughout this guide, we'll walk you through each step with clear instructions and helpful tips. By the end, you'll have the confidence and know-how to tackle this task with ease. So, gather your tools and let's get started on unlocking the secrets of storm door lock removal.
Key Takeaways:
- Removing a storm door lock requires inspecting, unscrewing, and detaching components. Proper maintenance and lubrication can ease the process and ensure a secure home.
- Installing a new storm door lock enhances security and functionality. Following manufacturer’s instructions is crucial for a successful installation.
Read more: How To Remove A Storm Door
Tools and Materials Needed
Before diving into the process of removing a storm door lock, it's essential to gather the necessary tools and materials. Having the right equipment at hand will streamline the task and ensure a smooth removal process. Here's a list of the items you'll need:
- Screwdriver (Phillips or flathead, depending on the screw type)
- Needle-nose pliers
- Replacement storm door lock (if you plan to install a new one)
- Lubricant (such as WD-40) for maintenance purposes
- Cloth or rag for cleaning
These tools and materials will play a pivotal role in successfully removing the storm door lock. Once you have everything ready, you're all set to proceed to the next steps.
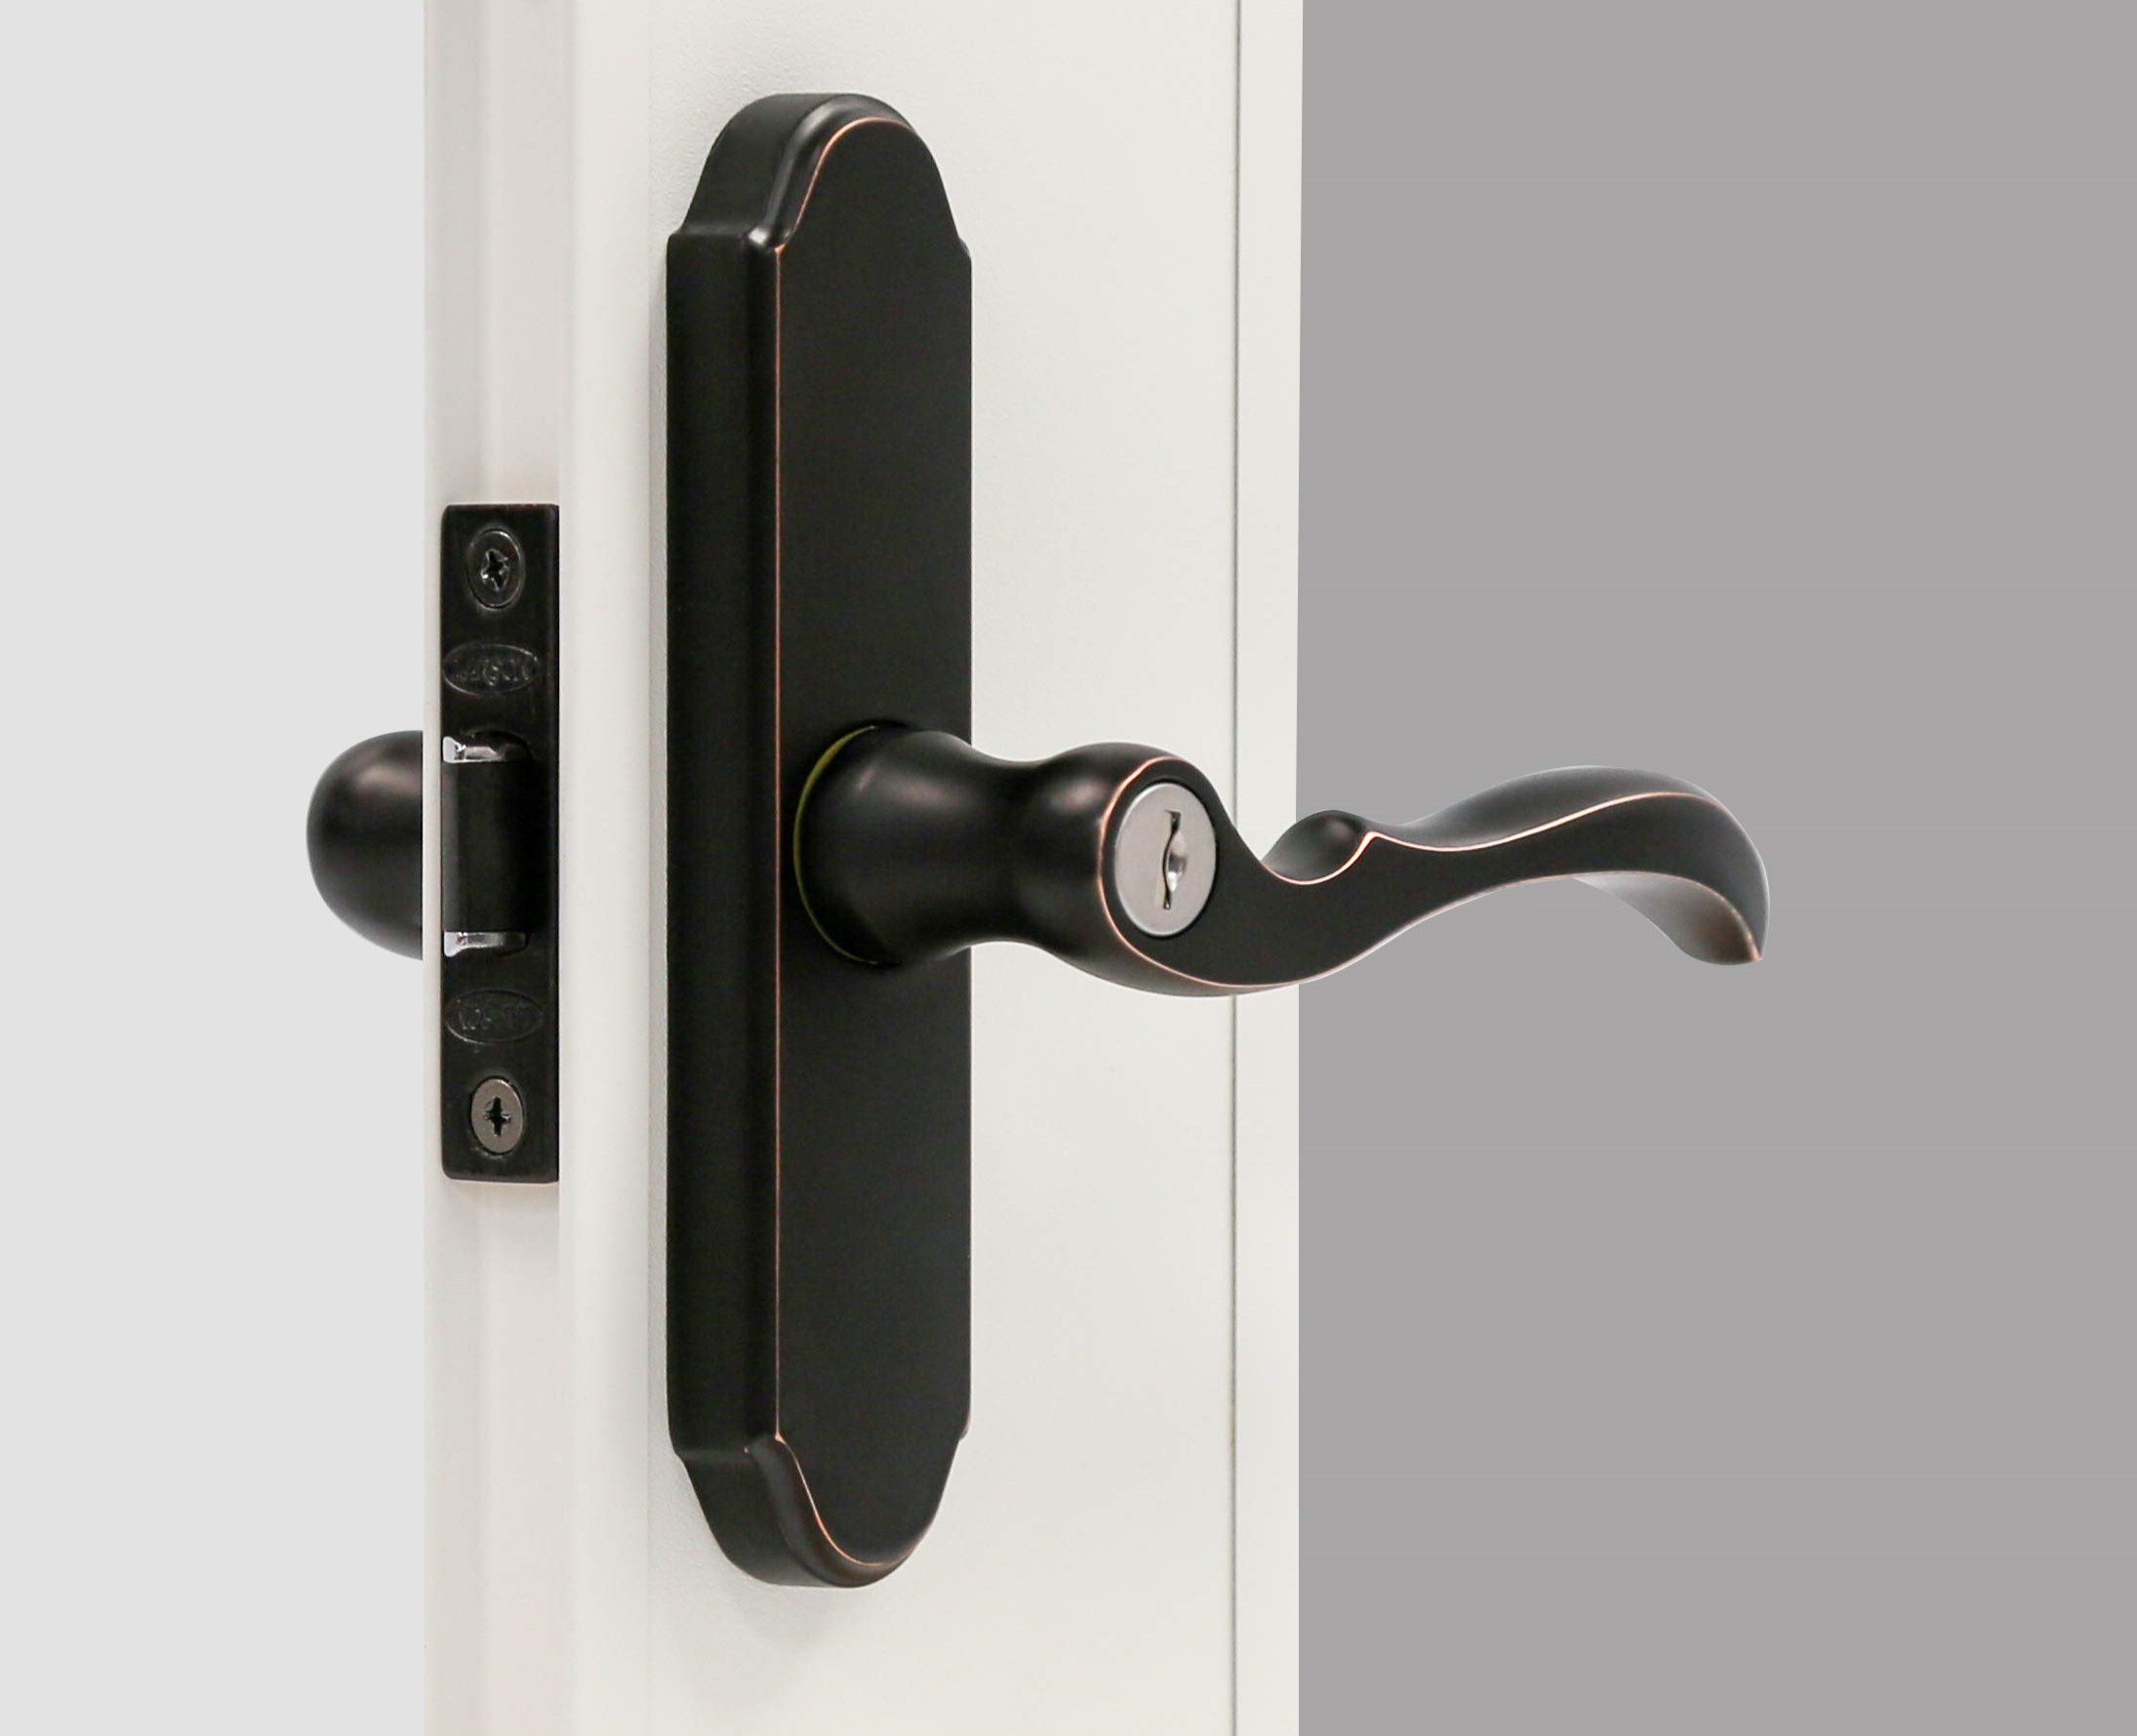
Step 1: Inspect the Lock
Before initiating the removal process, it’s crucial to inspect the lock and its surroundings. Start by examining the lock cylinder, the keyway, and the screws holding the lock in place. Take note of any visible damage, corrosion, or signs of wear and tear. This initial assessment will provide insight into the condition of the lock and help you anticipate any potential challenges during the removal.
Additionally, check for any accumulation of dirt, debris, or rust that may hinder the smooth operation of the lock. If the lock is stiff or difficult to turn, applying a lubricant can help loosen any stubborn components and facilitate the removal process. A well-lubricated lock is easier to work with and reduces the risk of causing damage during disassembly.
Furthermore, ensure that the storm door is securely closed and stable before proceeding with the removal. This will prevent any unexpected movement or instability while working on the lock. Taking the time to thoroughly inspect the lock and its immediate surroundings sets the stage for a systematic and efficient removal process.
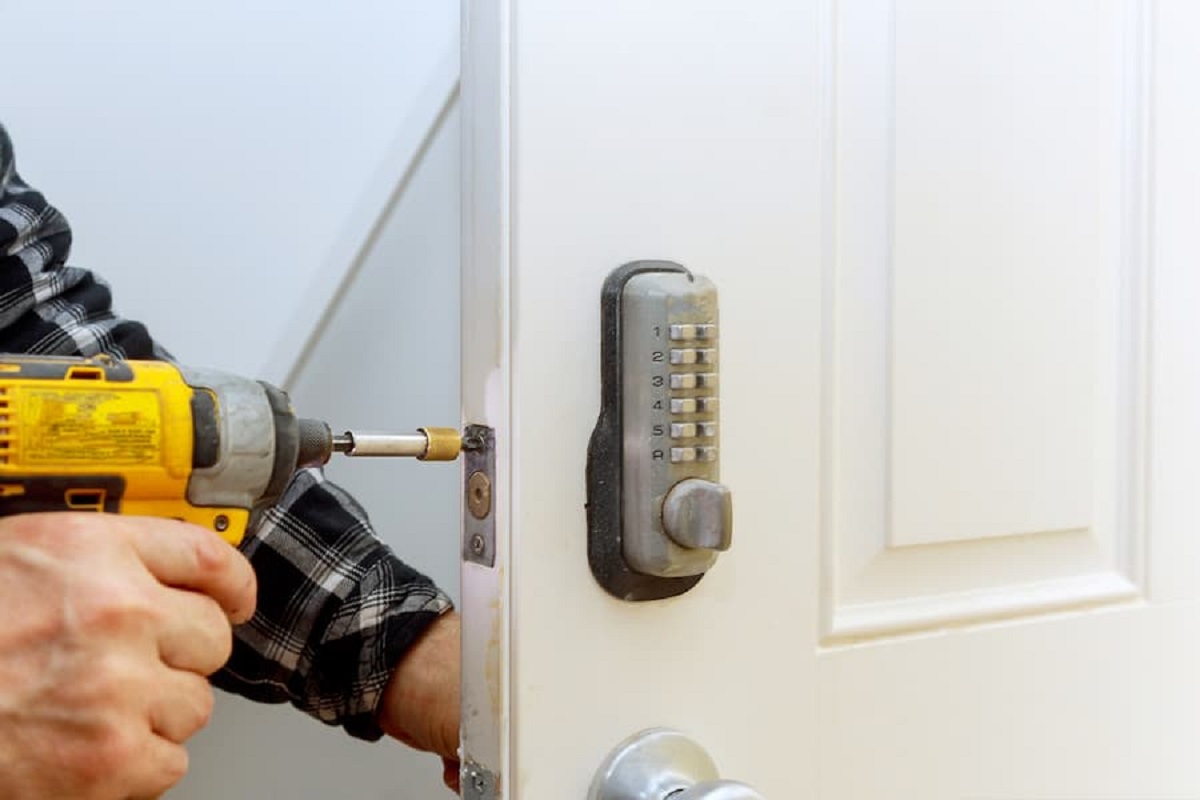
Step 2: Remove the Screws
With the lock inspected and any necessary lubrication applied, the next step is to remove the screws securing the lock in place. Using a suitable screwdriver—either Phillips or flathead, depending on the type of screws—carefully unscrew and remove all fasteners attaching the lock to the storm door. It’s important to keep the screws in a safe place, as they will be needed if you plan to re-install the same lock or for securing a new one.
As you loosen each screw, be mindful of any resistance or difficulty in turning them. If a screw appears stuck or overly tight, applying a small amount of lubricant to the screw threads can aid in smooth removal. Taking the time to loosen the screws gently and evenly can prevent stripping or damaging the screw heads, which could complicate the removal process.
Once all the screws are removed, carefully set them aside in a secure location. With the screws out of the way, the lock will be ready for the subsequent steps in the removal process. Removing the screws with precision and care sets the stage for the seamless extraction of the storm door lock.
To remove a storm door lock, start by unscrewing the screws on the inside handle. Then, remove the screws on the outside handle and pull the lock cylinder out. Finally, unscrew the mounting plate and remove the lock from the door.
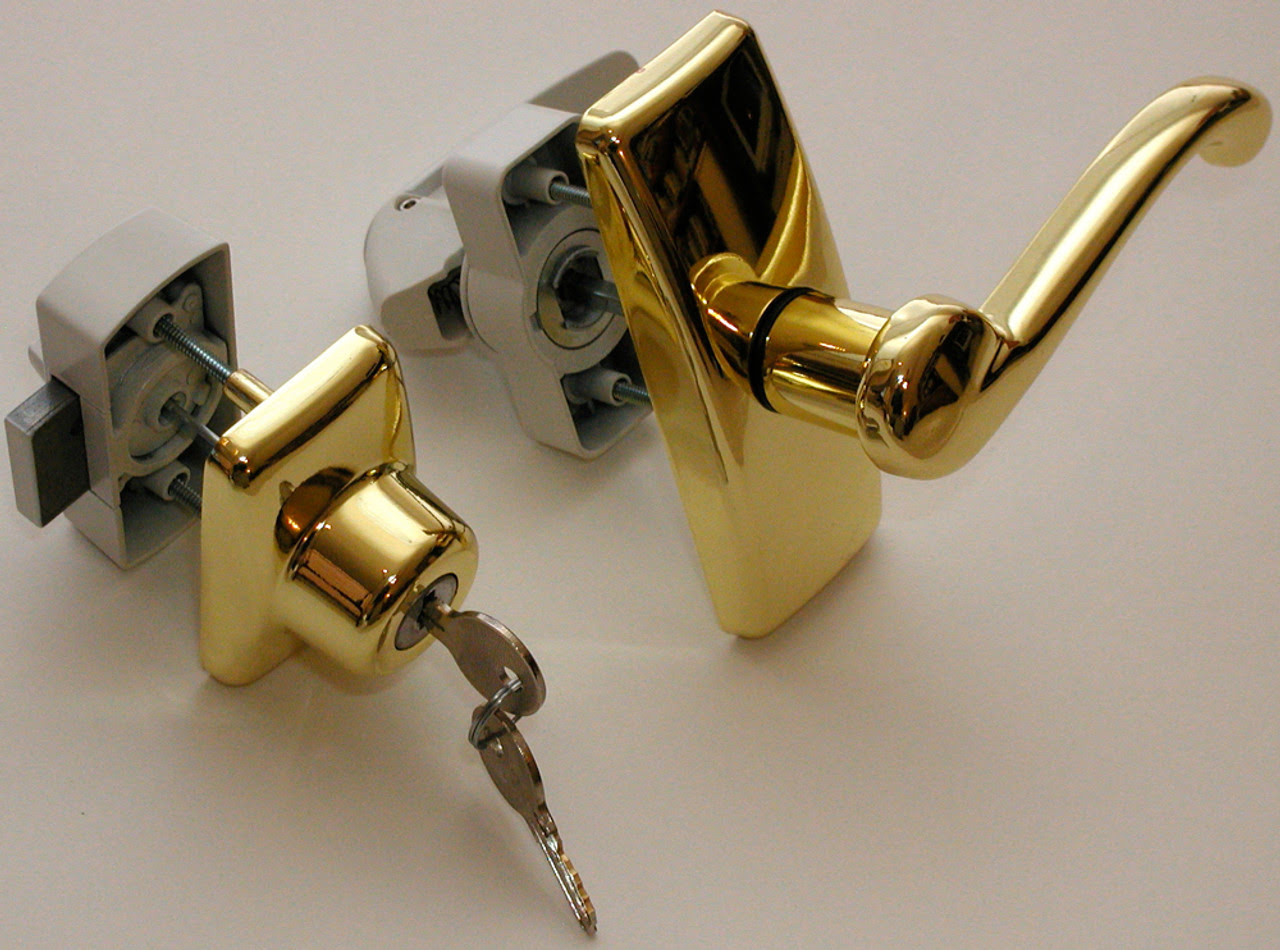
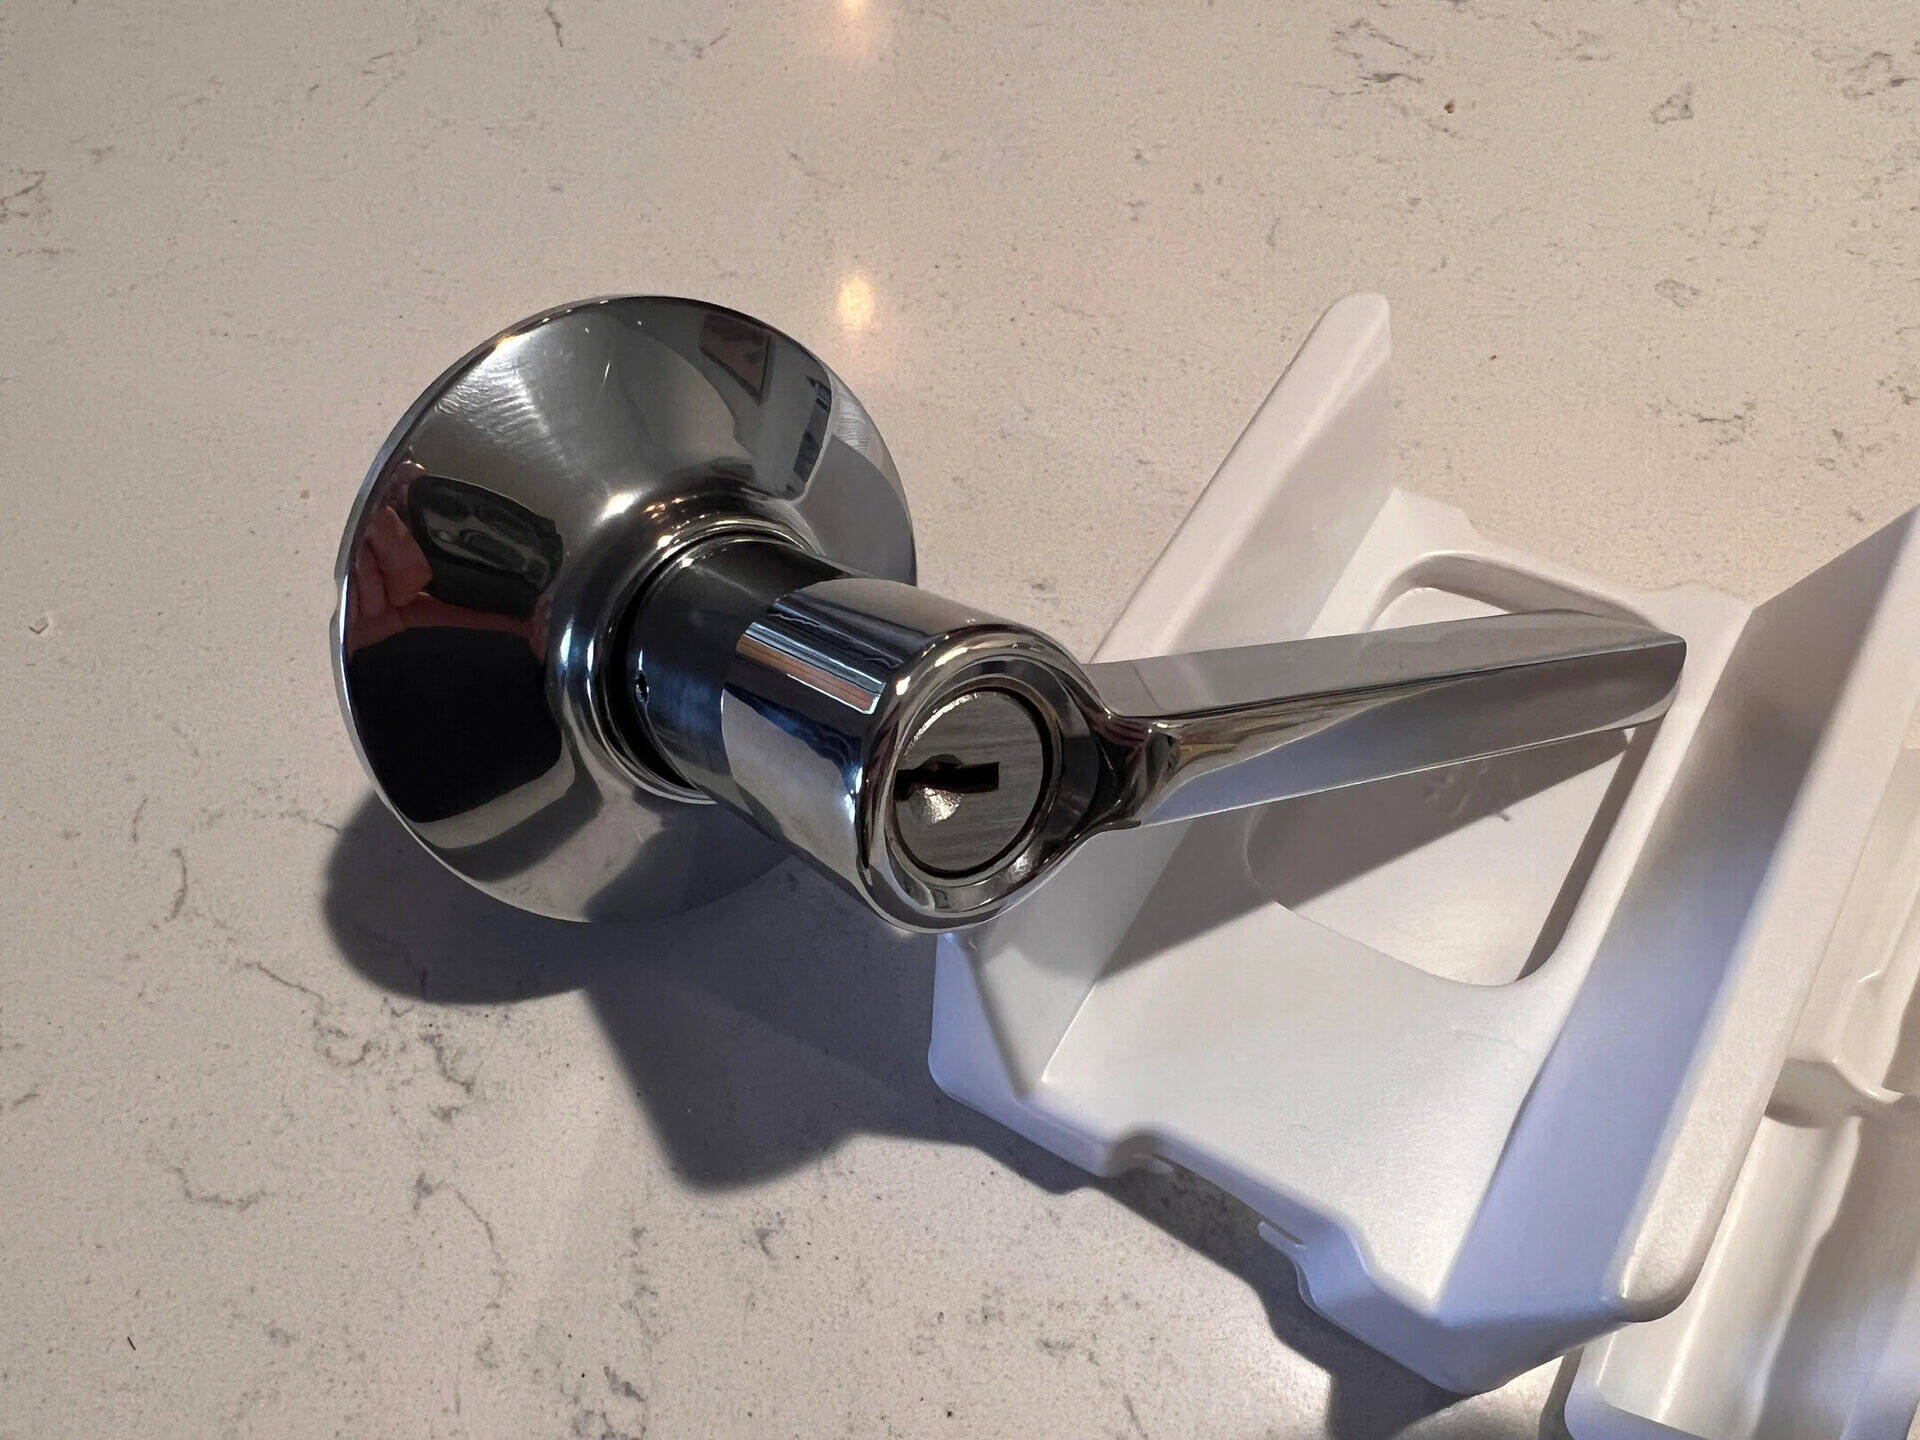
Step 3: Remove the Lock Cylinder
After successfully removing the screws, the next crucial step in the process of removing a storm door lock is to extract the lock cylinder. The lock cylinder is the component where the key is inserted, and it is typically housed within the lock body. To remove the cylinder, follow these steps:
- Access the Cylinder: Depending on the lock design, you may need to access the cylinder from the interior or exterior side of the door. Some models feature a removable cover or plate that allows direct access to the cylinder, while others may require disassembly of additional components.
- Release Retaining Clip or Set Screw: Once the cylinder is accessible, look for a retaining clip or set screw securing it in place. Use the appropriate tool, such as needle-nose pliers, to release the clip or screw. Carefully set aside the clip or screw for potential reinstallation or disposal, depending on the lock replacement plan.
- Withdraw the Cylinder: With the retaining mechanism disengaged, gently withdraw the lock cylinder from the lock body. Exercise caution to avoid forcing or damaging the cylinder during removal. If the cylinder encounters resistance, reassess the retaining clip or set screw to ensure complete disengagement.
Once the lock cylinder is successfully removed, take a moment to inspect it for any signs of damage, corrosion, or excessive wear. Cleaning the cylinder and applying lubricant to its components can help maintain its functionality and prepare it for potential reinstallation or replacement. With the lock cylinder extracted, you’re one step closer to completing the removal process and addressing any maintenance or replacement needs.
Read more: How To Remove Screen From A Storm Door
Step 4: Detach the Latch Mechanism
With the lock cylinder removed, the next pivotal stage in removing a storm door lock involves detaching the latch mechanism. The latch mechanism is responsible for securing the door and allowing it to open and close smoothly. To successfully detach the latch mechanism, follow these essential steps:
- Locate the Latch Assembly: Identify the location of the latch assembly within the door frame. The latch assembly is typically positioned within the edge of the door and may be partially visible upon removing the lock cylinder.
- Release the Latch Retaining Mechanism: Depending on the specific design of the latch mechanism, there may be retaining screws, clips, or fasteners holding it in place. Use the appropriate tools to release and remove these components, ensuring careful handling and organization to facilitate potential reassembly or replacement.
- Withdraw the Latch Mechanism: Once the retaining elements are disengaged, gently withdraw the latch mechanism from the door edge. Pay close attention to any resistance or obstructions, and address them methodically to prevent damage to the door or the latch components.
As you detach the latch mechanism, take the opportunity to inspect its condition and functionality. Clear any accumulated debris, dirt, or obstructions that may hinder its operation. Additionally, consider applying a small amount of lubricant to the moving parts to maintain smooth functionality and prepare the latch mechanism for potential reinstallation or replacement.
By effectively detaching the latch mechanism, you’re nearing the completion of the storm door lock removal process. This critical step sets the stage for addressing any maintenance or replacement requirements, ensuring the continued security and functionality of your storm door.
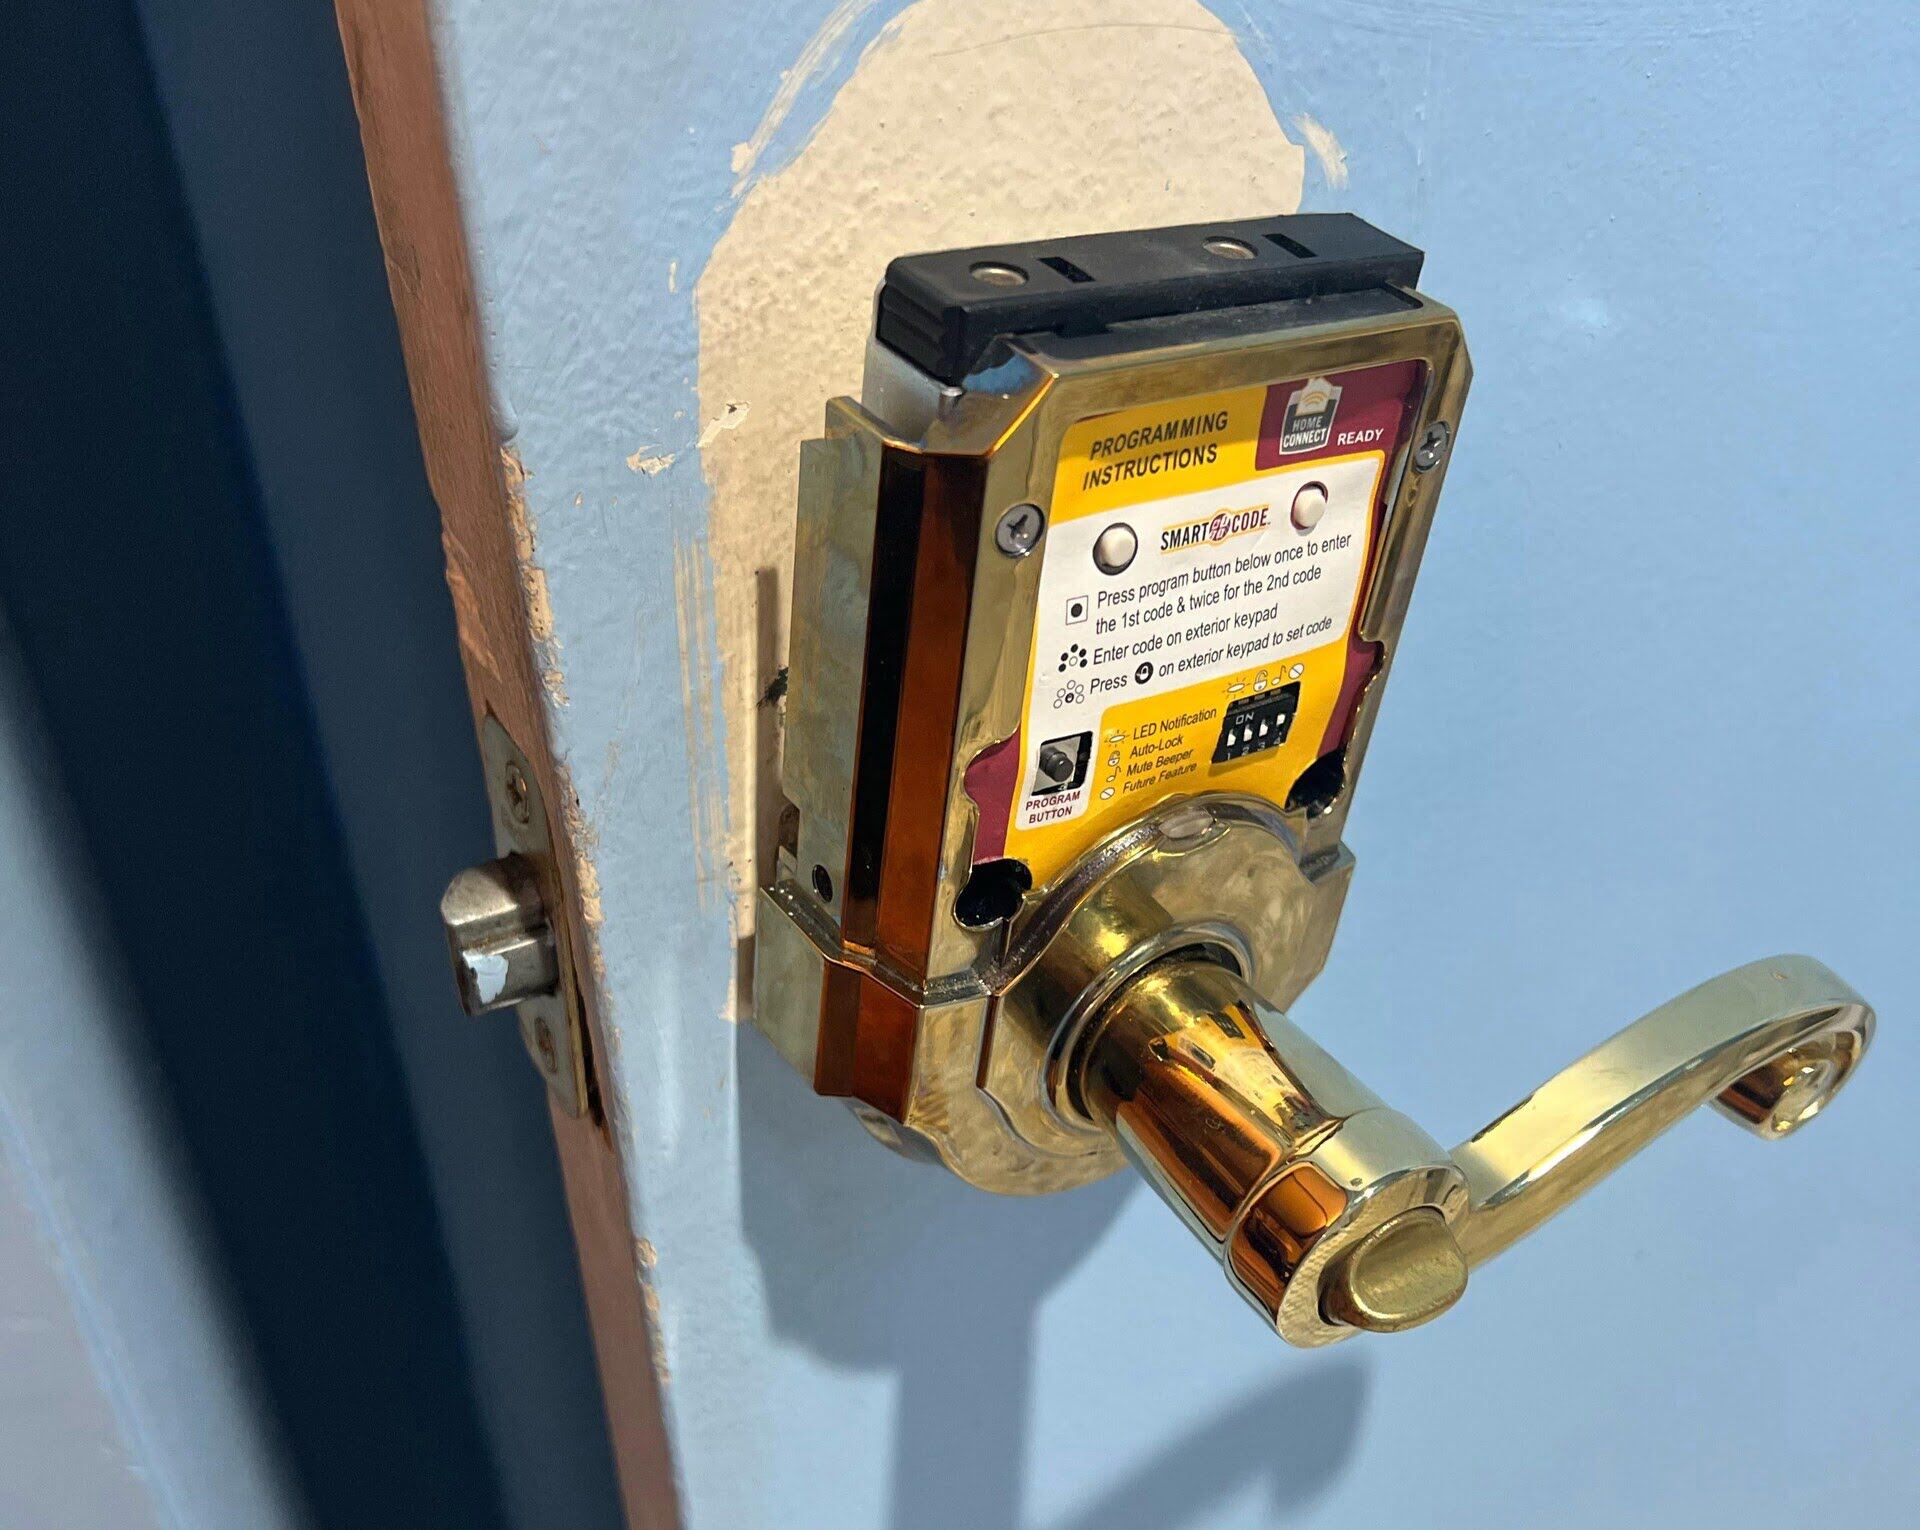
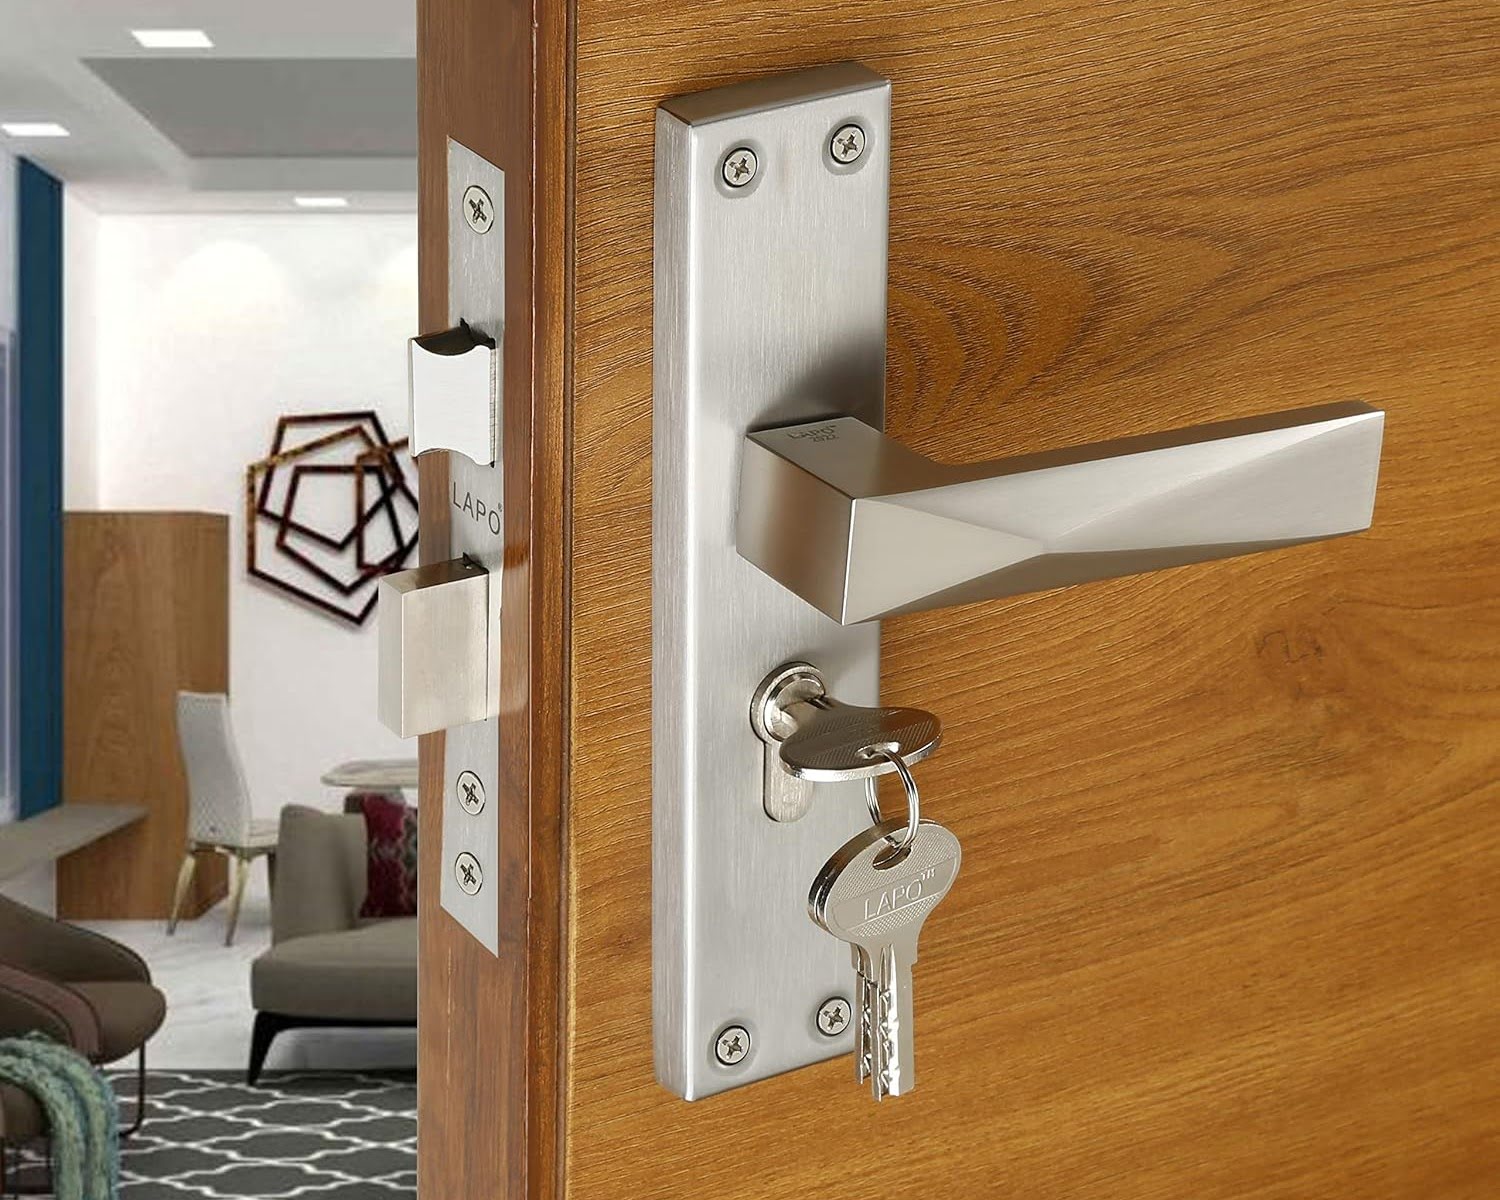
Step 5: Install the New Lock (Optional)
If your intention is to replace the existing storm door lock with a new one, this step provides guidance on the installation process. Installing a new lock can enhance security, update the aesthetic appeal, or address any functional deficiencies in the previous lock. Before proceeding with the installation, ensure that the new lock is compatible with your storm door and aligns with your security and aesthetic preferences.
Here are the essential steps to consider when installing a new storm door lock:
- Prepare the Door: Ensure that the door is clean and free of any debris or obstructions. Clear the lock recess and surrounding areas to provide a clean and stable foundation for the new lock installation.
- Position the New Lock: Align the new lock with the designated recess on the storm door, ensuring that it sits securely and uniformly. Take note of any alignment marks or indicators provided by the manufacturer to assist with proper positioning.
- Secure the Lock in Place: Using the supplied screws or fasteners, secure the new lock in position, ensuring a snug and stable fit. Exercise caution to avoid overtightening the screws, which could potentially damage the lock or the door surface.
- Test the Lock Operation: Once the new lock is installed, test its operation by engaging the key, handle, or any other applicable mechanisms. Verify that the lock functions smoothly and securely, and make any necessary adjustments to ensure optimal performance.
Upon successfully installing the new lock, take a moment to appreciate the enhanced security and functionality it brings to your storm door. Whether you’ve opted for a traditional key-operated lock or a modern electronic keypad system, the installation of a new lock can significantly contribute to the overall security and convenience of your home.
It’s important to follow the manufacturer’s specific instructions and recommendations for the installation of the new lock, as variations may exist based on the lock type and design. By carefully installing the new lock, you can enjoy peace of mind knowing that your storm door is equipped with a reliable and secure locking mechanism.
Conclusion
Congratulations on successfully navigating the process of removing a storm door lock. By following the systematic steps outlined in this guide, you’ve gained valuable insights into maintaining, replacing, or upgrading the lock on your storm door. Whether you’ve performed routine maintenance, addressed a malfunctioning lock, or installed a new locking mechanism, your efforts contribute to the overall security and functionality of your home.
Remember, the proper removal and installation of a storm door lock require attention to detail, patience, and the right tools. By inspecting the lock, removing the screws, extracting the lock cylinder, detaching the latch mechanism, and potentially installing a new lock, you’ve demonstrated a proactive approach to home security and maintenance.
As you reflect on your accomplishment, consider the impact of a reliable and secure storm door lock on your daily life. From providing peace of mind and protection to enhancing the visual appeal of your home, the significance of a well-maintained and functional lock cannot be overstated. Whether you’ve completed the removal process for maintenance purposes or to facilitate the installation of a new lock, your dedication to home security is commendable.
As you continue to prioritize the security and maintenance of your home, don’t hesitate to seek professional assistance or consult with experts if needed. Your commitment to maintaining a secure and welcoming home environment is a testament to your proactive mindset and dedication to the well-being of your household.
With the knowledge and experience gained from this endeavor, you’re well-equipped to handle future maintenance tasks, upgrades, or replacements related to your storm door lock. Your proactive approach and attention to detail are instrumental in safeguarding your home and enhancing its overall functionality.
Thank you for embarking on this journey to unlock the secrets of storm door lock removal. Your commitment to home security and maintenance is a valuable investment in the comfort and safety of your living space.
Frequently Asked Questions about How To Remove Storm Door Lock
Was this page helpful?
At Storables.com, we guarantee accurate and reliable information. Our content, validated by Expert Board Contributors, is crafted following stringent Editorial Policies. We're committed to providing you with well-researched, expert-backed insights for all your informational needs.


0 thoughts on “How To Remove Storm Door Lock”