Home>Technology>Smart Home Devices>Why Is My 3D Printer Filament Not Sticking
Smart Home Devices
Why Is My 3D Printer Filament Not Sticking
Modified: January 9, 2024
Discover the reasons why your 3D printer filament may not be sticking and learn how to troubleshoot the issue with smart home devices.
(Many of the links in this article redirect to a specific reviewed product. Your purchase of these products through affiliate links helps to generate commission for Storables.com, at no extra cost. Learn more)
Introduction
Welcome to the fascinating world of 3D printing! Whether you're a seasoned enthusiast or a curious beginner, encountering issues with filament adhesion is a common puzzle that can hinder the success of your 3D printing endeavors. When your 3D printer filament fails to stick to the printing surface, it can lead to frustrating print failures and wasted time and materials. However, fear not, as this article is here to guide you through the troubleshooting process and help you understand the various factors that contribute to filament adhesion issues.
In the realm of 3D printing, achieving proper filament adhesion is crucial for producing high-quality prints. The ability of the filament to adhere to the print bed during the printing process is essential for creating precise and accurate layers, ensuring that the final object maintains its structural integrity. Understanding the factors that influence filament adhesion and learning how to address these issues is key to unlocking the full potential of your 3D printer.
In this comprehensive guide, we will delve into the intricacies of 3D printer filament adhesion, exploring the significance of bed leveling, the impact of printing surfaces, the influence of temperature and speed settings, and the importance of employing effective adhesion techniques. Additionally, we will navigate through common troubleshooting scenarios and provide practical solutions to help you overcome filament adhesion challenges.
By the end of this journey, you will have gained valuable insights into the world of 3D printing and be equipped with the knowledge and techniques needed to ensure successful filament adhesion and elevate your 3D printing experience. So, let's embark on this enlightening exploration and unravel the mysteries of filament adhesion in 3D printing!
Key Takeaways:
- Proper bed leveling and choosing the right printing surface are crucial for ensuring your 3D printer filament sticks, leading to successful and high-quality prints. It’s like building on a level foundation for stability and strength!
- Adjusting printing temperature and speed, along with using effective adhesion techniques, can help overcome common adhesion issues like warping and poor first layer adhesion. It’s like finding the perfect recipe for sticking the landing in 3D printing!
Read more: How To Store 3D Printer Filament
Understanding the Importance of Bed Leveling
Bed leveling is a critical aspect of 3D printing that significantly impacts the adhesion of filament to the print surface. The term “bed leveling” refers to the process of ensuring that the print bed is perfectly aligned and parallel to the printer’s nozzle. When the print bed is leveled correctly, it allows for consistent and uniform contact between the nozzle and the printing surface, facilitating proper filament adhesion.
Why is bed leveling so crucial? Imagine trying to build a structure on an uneven or slanted foundation – the results would be far from satisfactory. Similarly, in 3D printing, an unlevel print bed can lead to uneven first layers, resulting in poor adhesion and compromised print quality. This can manifest as areas of the print not adhering properly, leading to warping, lifting, or even complete detachment of the print from the bed.
Proper bed leveling is essential for achieving an even and uniform first layer, which serves as the foundation for the rest of the print. When the first layer is deposited consistently across the entire print bed, it sets the stage for successful adhesion and the subsequent layers to adhere properly, resulting in a stable and well-formed print.
Bed leveling is not a one-time task but rather an ongoing maintenance procedure that should be performed regularly to ensure optimal print quality. Many 3D printers offer manual or automatic bed leveling features to assist users in achieving the desired levelness. Some advanced printers even employ technologies such as mesh bed leveling, which compensates for variations in the print bed’s surface, further enhancing adhesion and print accuracy.
By prioritizing bed leveling and ensuring that the print bed is perfectly calibrated, you can significantly improve filament adhesion, minimize print failures, and elevate the overall printing experience. In the next sections, we will explore additional factors that influence filament adhesion and delve into techniques for addressing adhesion challenges, empowering you to unleash the full potential of your 3D printer.
Choosing the Right Printing Surface
When it comes to achieving optimal filament adhesion in 3D printing, the choice of printing surface plays a pivotal role. The printing surface directly impacts the way the first layer of filament adheres during the printing process, ultimately influencing the overall print quality. Therefore, selecting the right printing surface is essential for promoting strong adhesion and minimizing the risk of print failures.
One of the most commonly used printing surfaces is a heated print bed with a build surface such as glass, PEI (Polyetherimide), BuildTak, or specialized adhesive sheets. These surfaces offer distinct advantages and are compatible with various filament materials, providing a reliable foundation for successful adhesion.
Glass print beds are favored for their flat and smooth surface, which promotes even adhesion and facilitates easy removal of prints once they have cooled. When using a glass bed, applying a thin layer of adhesive such as glue stick or hairspray can further enhance adhesion, especially for materials that tend to have poor adhesion properties, such as ABS (Acrylonitrile Butadiene Styrene).
PEI sheets are renowned for their excellent adhesion properties, particularly with materials like ABS and PETG (Polyethylene Terephthalate Glycol). The surface of a PEI sheet provides a strong grip on the filament during printing, resulting in sturdy adhesion and consistent first layers. However, it’s important to note that PEI surfaces should be maintained and cleaned regularly to preserve their adhesion properties.
BuildTak and similar adhesive sheets are designed to provide a reliable printing surface for a wide range of filaments. These sheets offer strong adhesion while allowing for easy print removal once the bed has cooled. They are particularly effective for materials that require a heated bed, such as ABS and Nylon, and can contribute to improved print adhesion and overall print quality.
Considering the specific requirements of your prints and the materials you frequently use, selecting the most suitable printing surface can greatly enhance filament adhesion and contribute to successful 3D prints. Additionally, experimenting with different surfaces and optimizing their preparation and maintenance can provide valuable insights into achieving consistent and reliable adhesion across various print projects.
As we continue our exploration of filament adhesion in 3D printing, we will delve into additional factors that influence adhesion and equip you with the knowledge and techniques needed to overcome adhesion challenges and elevate your printing endeavors.
Adjusting Printing Temperature and Speed
Temperature and printing speed are crucial variables that significantly impact filament adhesion and overall print quality in 3D printing. Properly adjusting these settings based on the filament material being used is essential for achieving optimal adhesion and ensuring successful print outcomes.
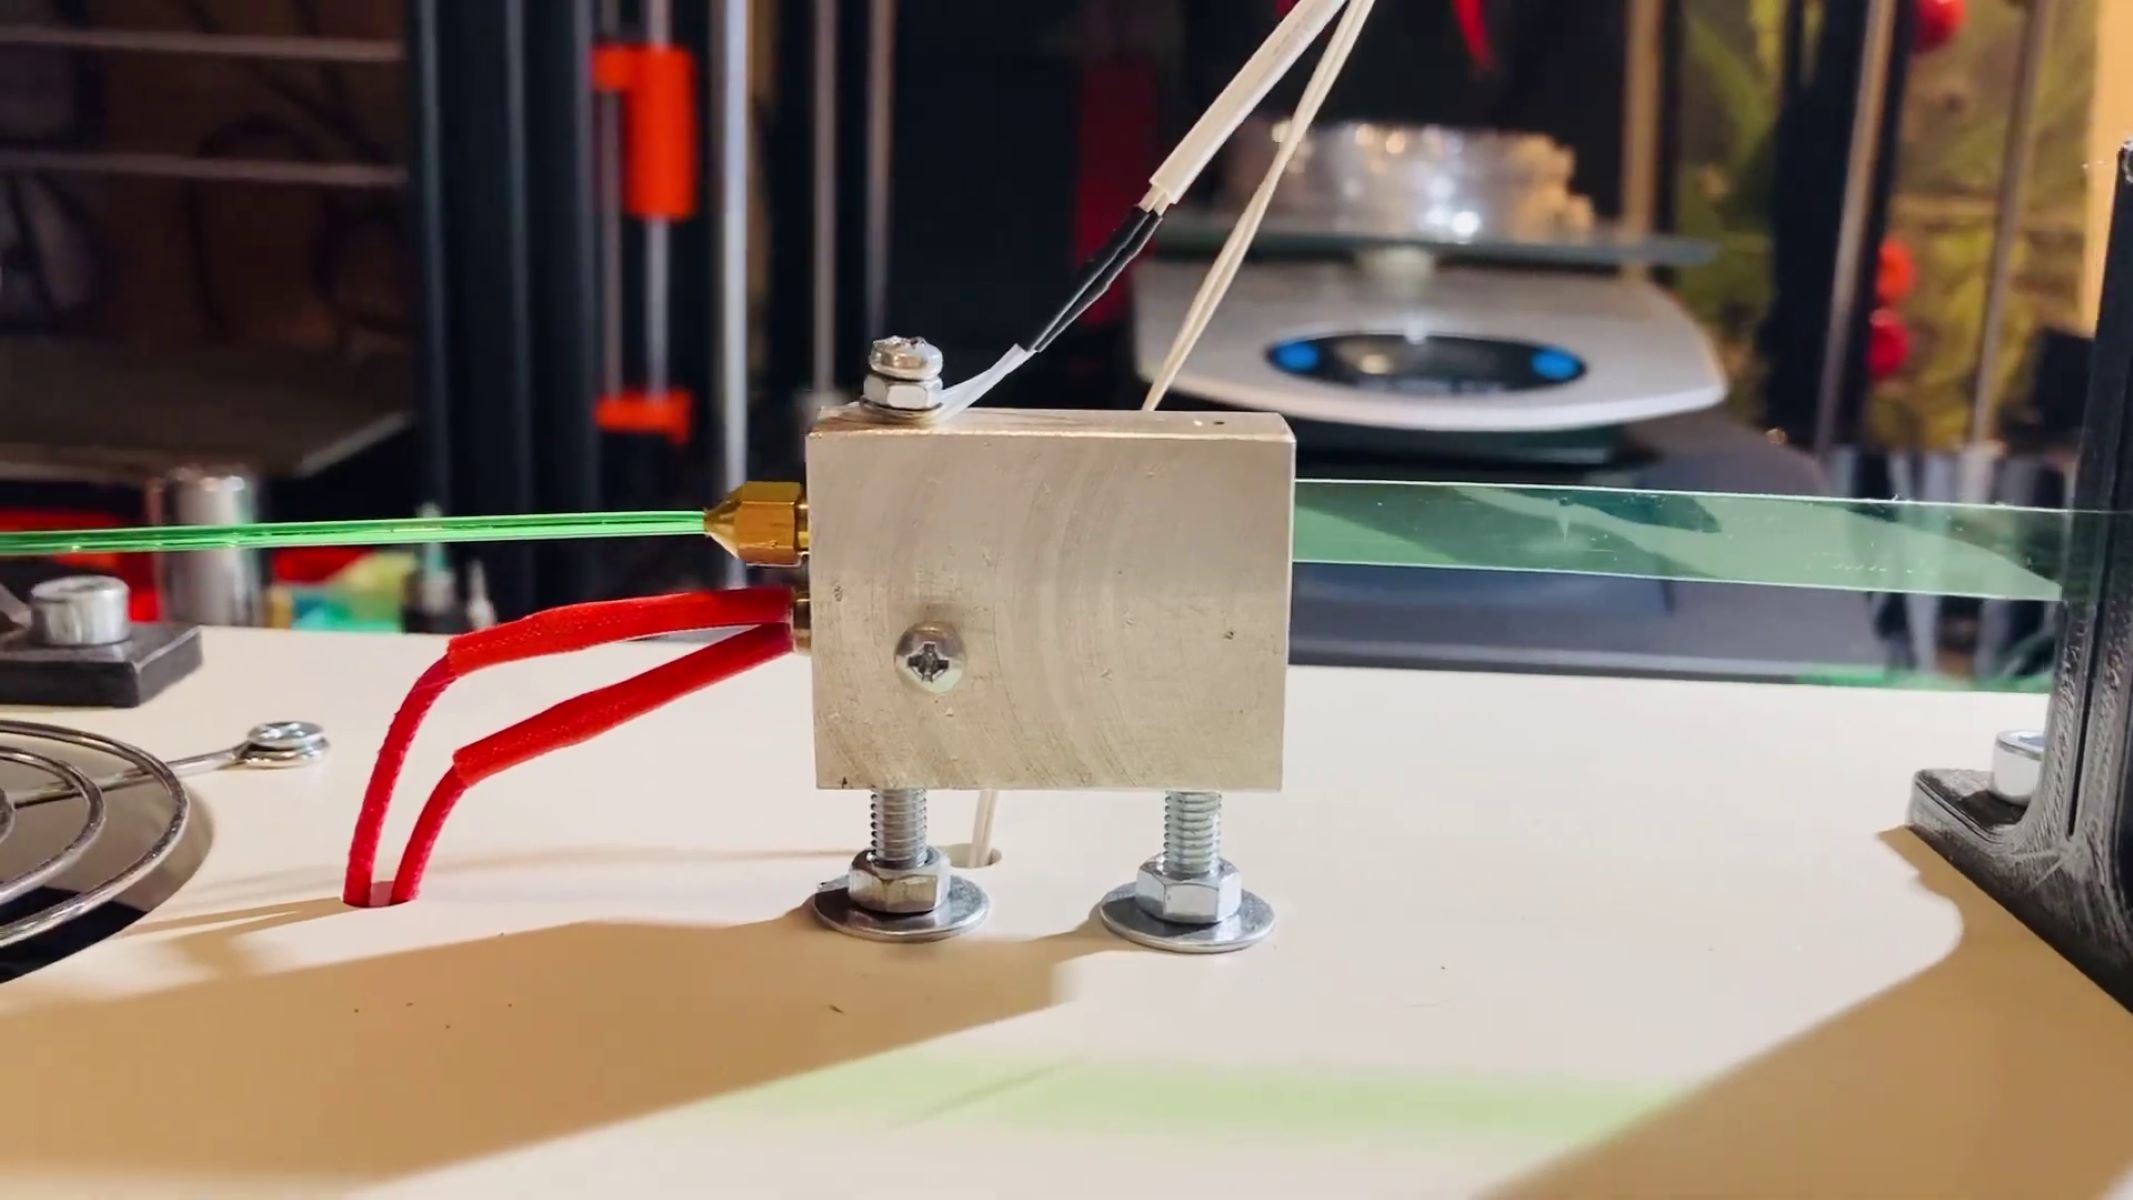
First and foremost, the printing temperature directly affects the adhesion of the filament to the print bed and influences the bonding between successive layers. Different filament materials have specific temperature requirements to achieve ideal adhesion and layer bonding. For example, PLA (Polylactic Acid) typically adheres well at temperatures ranging from 180°C to 220°C, while ABS usually requires higher temperatures, between 220°C and 250°C, to ensure proper adhesion.
When the printing temperature is too low, the filament may not melt and adhere effectively to the print bed, leading to poor adhesion and potential detachment during the printing process. Conversely, excessively high temperatures can cause the filament to become overly fluid, resulting in a lack of control and potentially compromising the adhesion of successive layers.
Furthermore, adjusting the printing speed can also influence filament adhesion and overall print quality. The speed at which the filament is extruded and the print head moves across the print bed impacts the deposition of each layer and the subsequent adhesion between layers. Slower printing speeds often contribute to better adhesion, especially for the initial layers, allowing for more precise filament placement and improved bonding with the print bed.
It is essential to strike a balance between printing temperature and speed to optimize filament adhesion while maintaining efficient printing processes. Experimenting with different temperature and speed settings, particularly during the initial layers of the print, can provide valuable insights into achieving strong adhesion and enhancing print quality.
Additionally, some 3D printers offer the capability to adjust temperature and speed settings during the printing process, allowing for real-time optimization based on the specific requirements of the print. This flexibility enables users to fine-tune these parameters to address any adhesion issues that may arise during the printing process, ultimately contributing to successful print completion.
By understanding the impact of temperature and speed on filament adhesion, you can effectively optimize these settings to promote strong adhesion and enhance the overall quality of your 3D prints. In the following sections, we will further explore techniques for ensuring proper adhesion and address common issues that may affect filament adhesion, empowering you to overcome challenges and achieve exceptional results in your 3D printing endeavors.
Ensure that your print bed is clean and level. Use a suitable adhesive like glue stick or hairspray to help the filament stick better. Adjust the printing temperature and speed to find the right settings for your filament.
Ensuring Proper Adhesion Techniques
Effective adhesion techniques are essential for promoting strong filament adhesion and enhancing the overall success of 3D printing projects. Employing appropriate adhesion strategies can significantly minimize the risk of print failures, warping, and lifting, ultimately contributing to the production of high-quality and structurally sound prints.
One widely utilized adhesion technique is the application of adhesive substances to the print bed surface. Common adhesives such as glue stick, hairspray, or specialized adhesion-promoting solutions can enhance the grip between the filament and the print bed, especially for materials that tend to have poor adhesion properties. These adhesives create a thin layer on the print bed, providing a conducive surface for the filament to adhere to during the printing process.
Another effective adhesion technique involves utilizing a brim or raft when slicing the 3D model for printing. A brim consists of an extended perimeter around the base of the print, increasing the surface area in contact with the print bed and promoting better adhesion. Similarly, a raft serves as a foundation for the print, offering additional support and improving adhesion, particularly for prints with intricate or delicate structures.
Ensuring proper bed adhesion is also crucial for promoting filament adhesion. This can be achieved by adjusting the initial layer height and extrusion width settings in the slicer software, allowing for a slightly squished first layer that firmly adheres to the print bed. Additionally, enabling features such as “elephant foot compensation” can help optimize the initial layer adhesion for improved print stability.
Moreover, maintaining a clean print bed surface is paramount for effective adhesion. Regularly cleaning the print bed to remove any dust, debris, or residual adhesive from previous prints can contribute to a smooth and uniform surface for the filament to adhere to. This is particularly important when using adhesive-based adhesion techniques, as a clean surface ensures optimal contact and adhesion between the filament and the print bed.
Implementing these adhesion techniques, either individually or in combination, can significantly enhance filament adhesion and mitigate common adhesion-related challenges in 3D printing. By integrating these strategies into your printing workflow and adapting them to the specific requirements of your prints and filament materials, you can establish a solid foundation for successful adhesion and elevate the overall quality of your 3D prints.
As we progress through our exploration of filament adhesion in 3D printing, we will delve into troubleshooting common adhesion issues and provide practical solutions to empower you in overcoming challenges and achieving exceptional results in your 3D printing endeavors.
Read more: How To Reuse 3D Printer Filament
Troubleshooting Common Issues
While striving for optimal filament adhesion in 3D printing, encountering common adhesion issues is not uncommon. Understanding these issues and implementing effective troubleshooting techniques is essential for overcoming challenges and ensuring successful print outcomes.
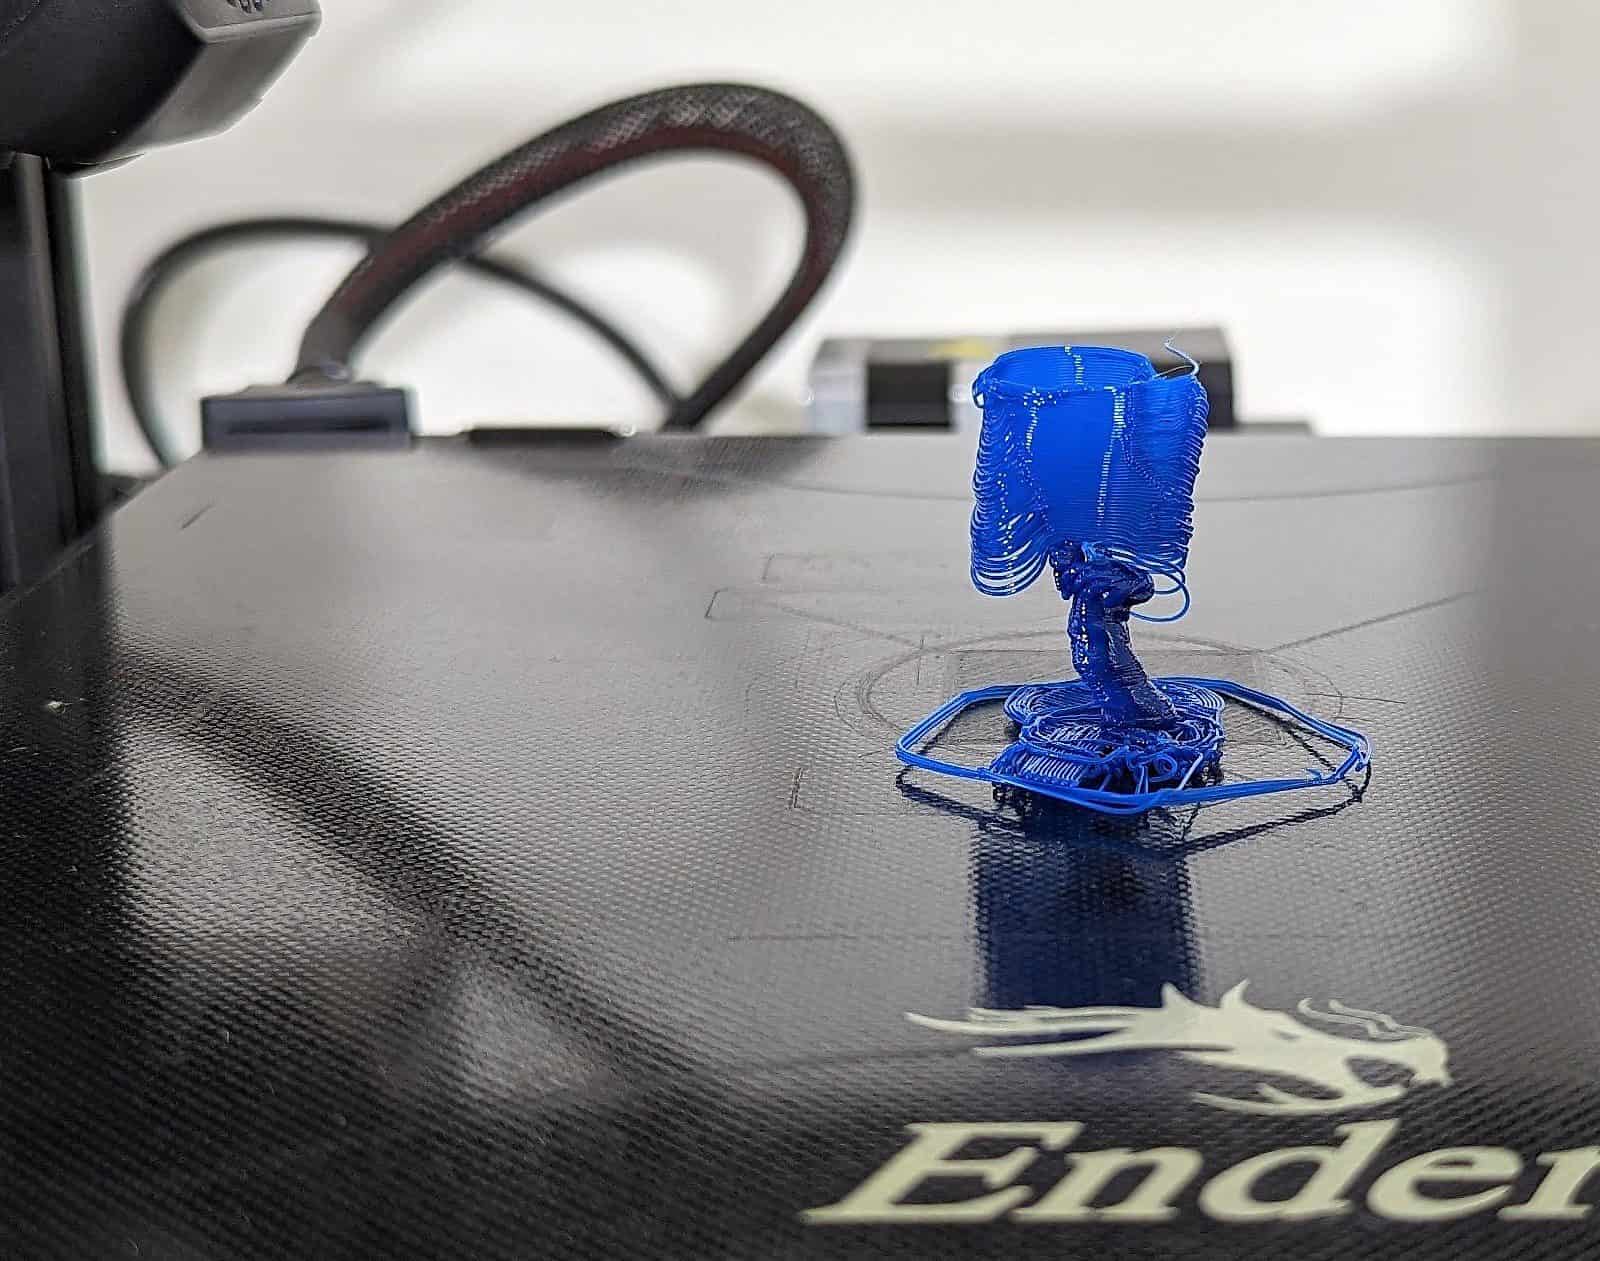
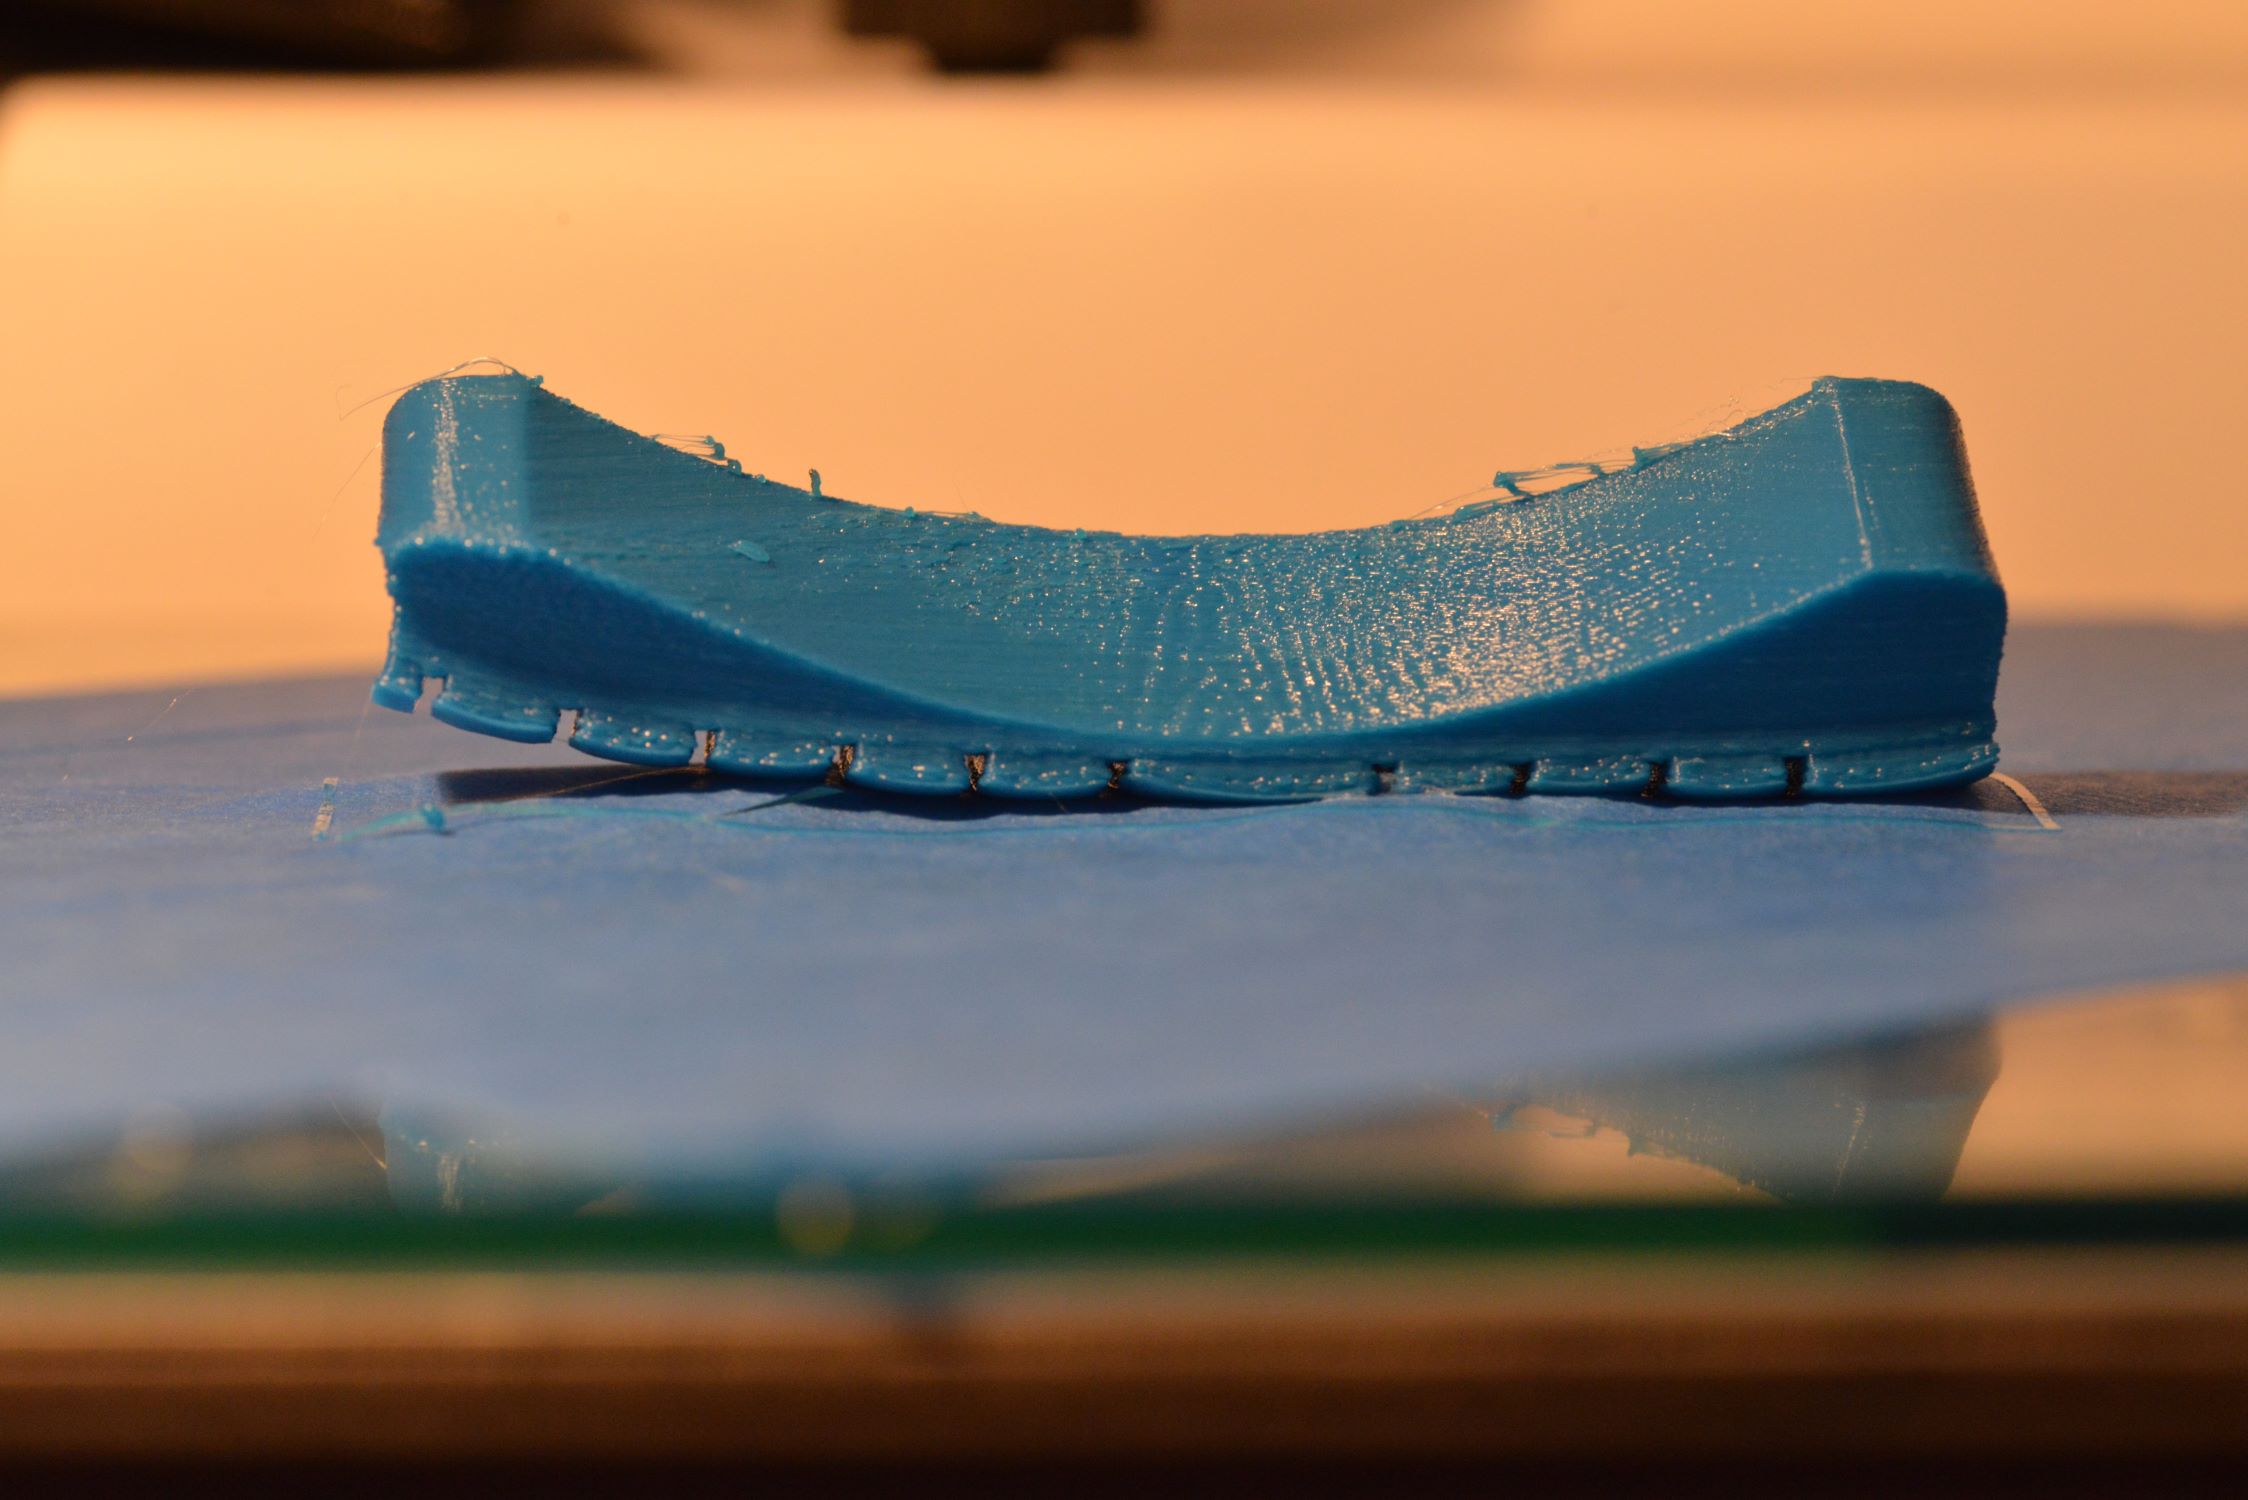
One prevalent adhesion-related issue is warping, which occurs when the edges or corners of the print lift or curl upward during the printing process. This phenomenon is often attributed to uneven cooling and poor adhesion of the initial layers. To address warping, adjusting the print bed temperature, using adhesive solutions, and incorporating a brim or raft can help mitigate this issue, promoting better adhesion and minimizing the risk of warping.
Lifting of the print from the bed during printing, also known as delamination, is another common adhesion challenge. Delamination can result from inadequate adhesion of the initial layers or insufficient bonding between successive layers. Employing effective adhesion techniques, optimizing temperature and speed settings, and ensuring proper bed leveling are key strategies for preventing delamination and promoting strong adhesion throughout the print.
Poor first layer adhesion, characterized by uneven or incomplete initial layers, can hinder the overall adhesion and stability of the print. Adjusting the initial layer height, extrusion width, and print bed leveling can help address this issue, ensuring that the first layer adheres uniformly and firmly to the print bed, laying the groundwork for successful adhesion throughout the print.
Furthermore, inconsistent adhesion across different areas of the print bed can lead to partial adhesion or detachment of specific regions of the print. This issue may stem from variations in the print bed surface or inadequate bed leveling. Implementing mesh bed leveling, utilizing adhesive solutions, and maintaining a clean print bed surface can aid in achieving consistent adhesion across the entire print bed, minimizing the risk of partial detachment and promoting uniform adhesion.
By identifying and addressing these common adhesion issues through targeted troubleshooting techniques, you can enhance filament adhesion and elevate the overall quality of your 3D prints. Experimenting with different adhesion strategies, fine-tuning print settings, and proactively addressing potential adhesion challenges can empower you to overcome obstacles and achieve exceptional results in your 3D printing endeavors.
As we conclude our exploration of filament adhesion in 3D printing, you are now equipped with valuable insights and practical solutions to navigate the intricacies of filament adhesion, troubleshoot common issues, and elevate your 3D printing experience. With this knowledge at your disposal, you can confidently embark on your 3D printing journey, empowered to achieve successful and visually stunning prints through optimized filament adhesion.
Conclusion
Congratulations on completing this enlightening exploration of filament adhesion in 3D printing! Throughout this journey, we’ve delved into the intricacies of achieving optimal adhesion, troubleshooting common issues, and empowering you with valuable insights to elevate your 3D printing experience.
Understanding the importance of bed leveling as a foundational element for successful adhesion has provided you with the knowledge to ensure a well-aligned print bed, setting the stage for consistent and uniform adhesion across your prints. Additionally, the significance of choosing the right printing surface has equipped you with the understanding of how different surfaces and adhesion techniques can influence filament adhesion and contribute to the overall quality of your prints.
Adjusting printing temperature and speed emerged as crucial factors in promoting strong adhesion, and you now possess the expertise to optimize these settings based on the specific requirements of your filament materials, enhancing adhesion and print quality. Moreover, by mastering effective adhesion techniques and troubleshooting common adhesion issues, you are well-prepared to address challenges and achieve exceptional results in your 3D printing endeavors.
As you continue your 3D printing journey, remember that achieving optimal filament adhesion is an ongoing process that requires experimentation, adaptation, and a deep understanding of the interplay between various factors. By integrating the knowledge and techniques acquired in this exploration, you can confidently navigate the complexities of filament adhesion and unleash the full potential of your 3D printer.
Embrace the creative possibilities that 3D printing offers, and let your newfound expertise in filament adhesion propel you toward producing remarkable prints with precision, stability, and visual appeal. Whether you’re crafting functional prototypes, artistic creations, or practical tools, the mastery of filament adhesion will be a cornerstone of your success in the world of 3D printing.
Armed with this comprehensive understanding of filament adhesion and its impact on 3D printing, you are now poised to embark on your future printing projects with confidence and expertise. Embrace the journey ahead, experiment with newfound knowledge, and revel in the satisfaction of producing exceptional prints through the art and science of filament adhesion in 3D printing.
Happy printing, and may your future endeavors be filled with successful adhesion and remarkable creations!
Frequently Asked Questions about Why Is My 3D Printer Filament Not Sticking
Was this page helpful?
At Storables.com, we guarantee accurate and reliable information. Our content, validated by Expert Board Contributors, is crafted following stringent Editorial Policies. We're committed to providing you with well-researched, expert-backed insights for all your informational needs.


0 thoughts on “Why Is My 3D Printer Filament Not Sticking”