Articles
How To Seal Garage Door
Modified: December 7, 2023
Discover effective ways to seal your garage door and keep out the elements with our informative articles. Learn how to prevent drafts and protect your belongings.
(Many of the links in this article redirect to a specific reviewed product. Your purchase of these products through affiliate links helps to generate commission for Storables.com, at no extra cost. Learn more)
Introduction
Sealing your garage door is an important step in ensuring the protection and energy efficiency of your home. A properly sealed garage door not only prevents drafts and keeps out unwanted pests and debris, but it also helps to maintain a comfortable temperature inside the garage. Additionally, a well-sealed garage door can contribute to reducing energy costs by preventing conditioned air from escaping and outside air from entering.
In this article, we will guide you through the process of sealing your garage door effectively. We will discuss the materials you will need, as well as step-by-step instructions on how to correctly seal the various parts of the garage door. By following these guidelines, you can ensure that your garage door is adequately sealed, providing you with a more comfortable and energy-efficient space.
Before we dive into the specifics, it’s important to note that sealing a garage door is a fairly simple and straightforward task that can be completed with basic tools and materials. However, it may require some physical effort and attention to detail. So, roll up your sleeves and let’s get started on sealing your garage door!
Key Takeaways:
- Sealing your garage door is a simple yet essential task that can enhance energy efficiency, comfort, and security. By following the step-by-step process and choosing the right sealant, you can create a well-insulated and protected garage space.
- Regularly testing and maintaining the seals of your garage door is crucial for ensuring their longevity and effectiveness. A properly sealed garage door not only provides insulation but also contributes to the overall aesthetic appeal of your home.
Read more: How To Seal Garage Door Sides
Materials Needed
Before you begin sealing your garage door, it’s important to gather all the necessary materials. Having everything ready before you start will ensure a smoother and more efficient process. Here are the materials you will need:
- Sealant: Choose a high-quality weather-stripping sealant that is specifically designed for garage doors. Look for a sealant that is durable, weather-resistant, and provides a strong seal to keep out drafts, moisture, and pests.
- Cleaner: You’ll need a mild detergent or garage door cleaner to thoroughly clean the door and remove any dirt, dust, or grime. Avoid using harsh chemicals as they may damage the door’s surface.
- Scrub brush: A soft-bristled scrub brush will help you effectively clean the garage door panels and remove any stubborn dirt or stains.
- Caulk gun: If you need to fill any gaps or cracks in the door, a caulking gun will be necessary to apply the sealant evenly.
- Putty knife: A putty knife will come in handy for spreading and smoothing the sealant along the garage door panels.
- Tape measure: To ensure precise measurements, have a tape measure on hand to measure the length and width of the garage door and any gaps that need to be sealed.
- Gloves: It’s always a good idea to protect your hands while working with sealants and cleaning agents. Wear a pair of gloves to keep your hands clean and safe.
- Ladder: Depending on the height of your garage door, you may need a ladder to reach the higher areas when applying the sealant.
By gathering these materials in advance, you’ll be fully prepared to seal your garage door effectively and efficiently. Now that you have everything you need, let’s move on to the step-by-step process of sealing your garage door.
Step 1: Clean and Prep the Garage Door
Before you can start sealing your garage door, it’s essential to clean and prepare the surface. This step ensures that the sealant adheres properly and provides a tight seal. Follow these steps to clean and prep your garage door:
- Clear the area: Begin by removing any objects or clutter from around the garage door, creating a clear and spacious working area.
- Open the garage door: Lift the garage door to its fully open position to access all the panels easily. Be cautious and ensure that the door is secured in place.
- Mix a cleaning solution: In a bucket, mix a mild detergent or garage door cleaner with water according to the manufacturer’s instructions.
- Clean the panels: Dip a soft-bristled scrub brush into the cleaning solution and gently scrub the garage door panels. Pay extra attention to any areas with dirt, stains, or debris. Rinse the brush frequently to avoid spreading dirt.
- Rinse with water: After scrubbing, use a hose or bucket of clean water to rinse off the cleaning solution from the panels thoroughly. Ensure that all suds and residue are removed.
- Dry the door: Use a clean towel or cloth to dry the garage door, removing any remaining moisture. This step is crucial for the proper adhesion of the sealant.
- Inspect for damage: Take a close look at the garage door panels, hinges, and other components. Repair or replace any damaged parts before moving forward.
- Remove existing sealant: If there is any old or deteriorating sealant on the garage door, use a putty knife or scraper to carefully remove it. Ensure that the surface is clean and smooth.
By thoroughly cleaning and preparing the garage door, you create an optimal surface for applying the sealant. This step ensures the best adhesion and longevity of the seal, resulting in a well-protected and energy-efficient garage space. Now that your garage door is clean and prepped, let’s move on to choosing the right sealant in step 2.
Step 2: Choose the Right Sealant
Choosing the right sealant is crucial to ensure a durable and effective seal for your garage door. There are various types of weather-stripping sealants available in the market, so it’s important to select one that suits your specific needs. Here are some factors to consider when choosing the right sealant:
- Material: Common garage door sealants are made of materials such as rubber, vinyl, or silicone. Each material has its own advantages, so consider factors like durability, flexibility, and resistance to weather conditions.
- Weather resistance: Look for a sealant that is specifically designed to withstand the climate in your area. If you experience extreme temperatures, heavy rainfall, or high winds, choose a sealant that offers superior weather resistance.
- Adhesion quality: The sealant should have strong adhesion properties to ensure it stays in place on the garage door panels. Look for a sealant that is designed for use on garage doors and offers excellent adhesion to both metal and wooden surfaces.
- Ease of application: Consider how easy the sealant is to apply. Some sealants come in tubes that can be applied using a caulking gun, while others may come with adhesive backing for simpler installation.
- Color options: If aesthetics are important to you, choose a sealant that comes in a color that matches or complements your garage door. This will give your garage door a seamless and polished look.
- Longevity: Look for a sealant that is known for its longevity, as you want it to last for an extended period of time without needing frequent replacements.
Do some research, read product reviews, and consult with professionals if needed to determine the best sealant for your garage door. Once you’ve selected the right sealant, you can proceed to the next step and apply it to the garage door panels. We will discuss this in detail in step 3.
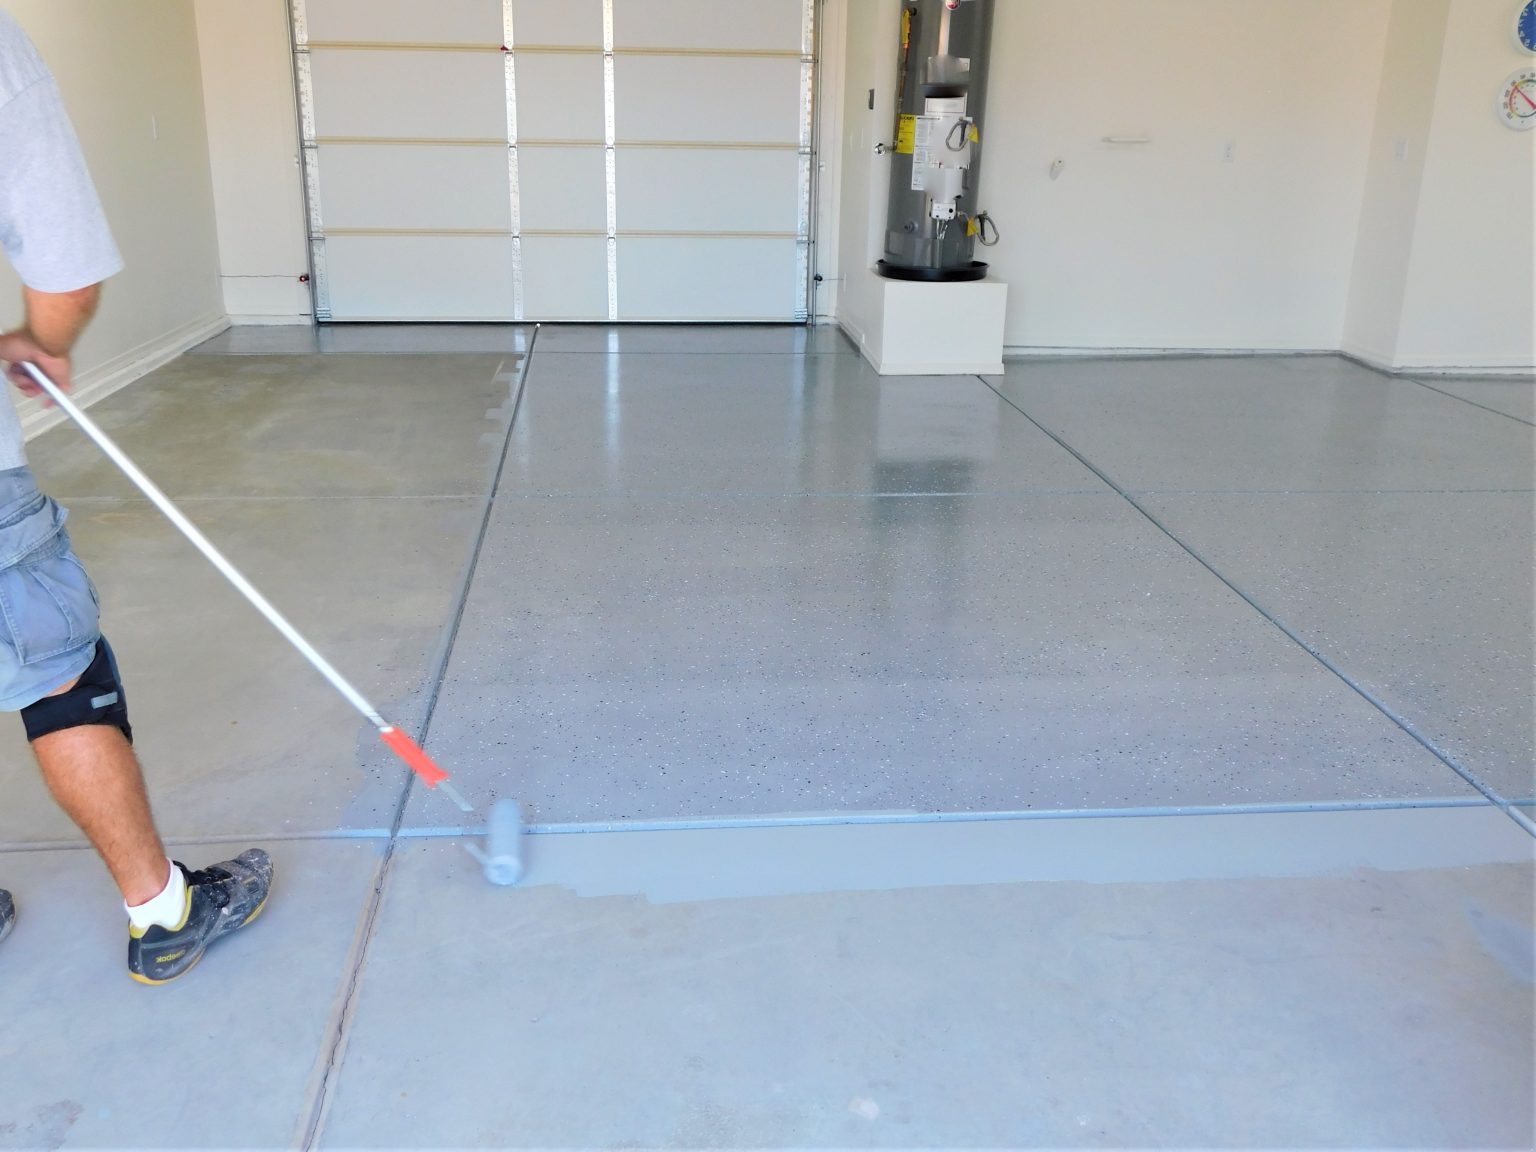
Step 3: Apply Sealant to the Garage Door Panels
Now that you have chosen the right sealant for your garage door, it’s time to apply it to the panels. This step ensures a tight seal and helps to prevent drafts, moisture, and pests from entering your garage. Follow these steps to apply the sealant to the garage door panels:
- Prepare the sealant: If your sealant comes in a tube, cut the tip at a 45-degree angle to create a small opening. Insert the tube into a caulking gun for easier and more controlled application.
- Start from the top: Begin applying the sealant to the top panel of the garage door. Squeeze a bead of sealant along the edge of the panel, making sure to cover any gaps or spaces between the panels.
- Spread the sealant: Use a putty knife or your finger to spread the sealant evenly along the edge of the panel. Press firmly to ensure proper adhesion and smooth out any excess sealant.
- Move to the next panel: Continue applying the sealant and spreading it along the edges of each panel, working your way down from top to bottom. Take your time and ensure thorough coverage.
- Fill any gaps: If there are any noticeable gaps or cracks between the panels, use the sealant to fill them. Apply a generous amount of sealant and use a putty knife to level and smooth it out.
- Check for uniformity: After applying the sealant to all the panels, step back and inspect the door from a distance to ensure the sealant is uniform and evenly applied. Make necessary adjustments if needed.
Take your time during this step to ensure that the sealant is applied properly and covers all the necessary areas. Proper coverage and adhesion are vital for achieving an effective seal. Once you have finished applying the sealant to the panels, it’s time to move on to sealing the bottom of the garage door in step 4.
Apply a weather seal to the bottom of the garage door to prevent drafts and keep out moisture and pests. This will also help to improve energy efficiency.
Read more: How To Replace Garage Door Bottom Seal
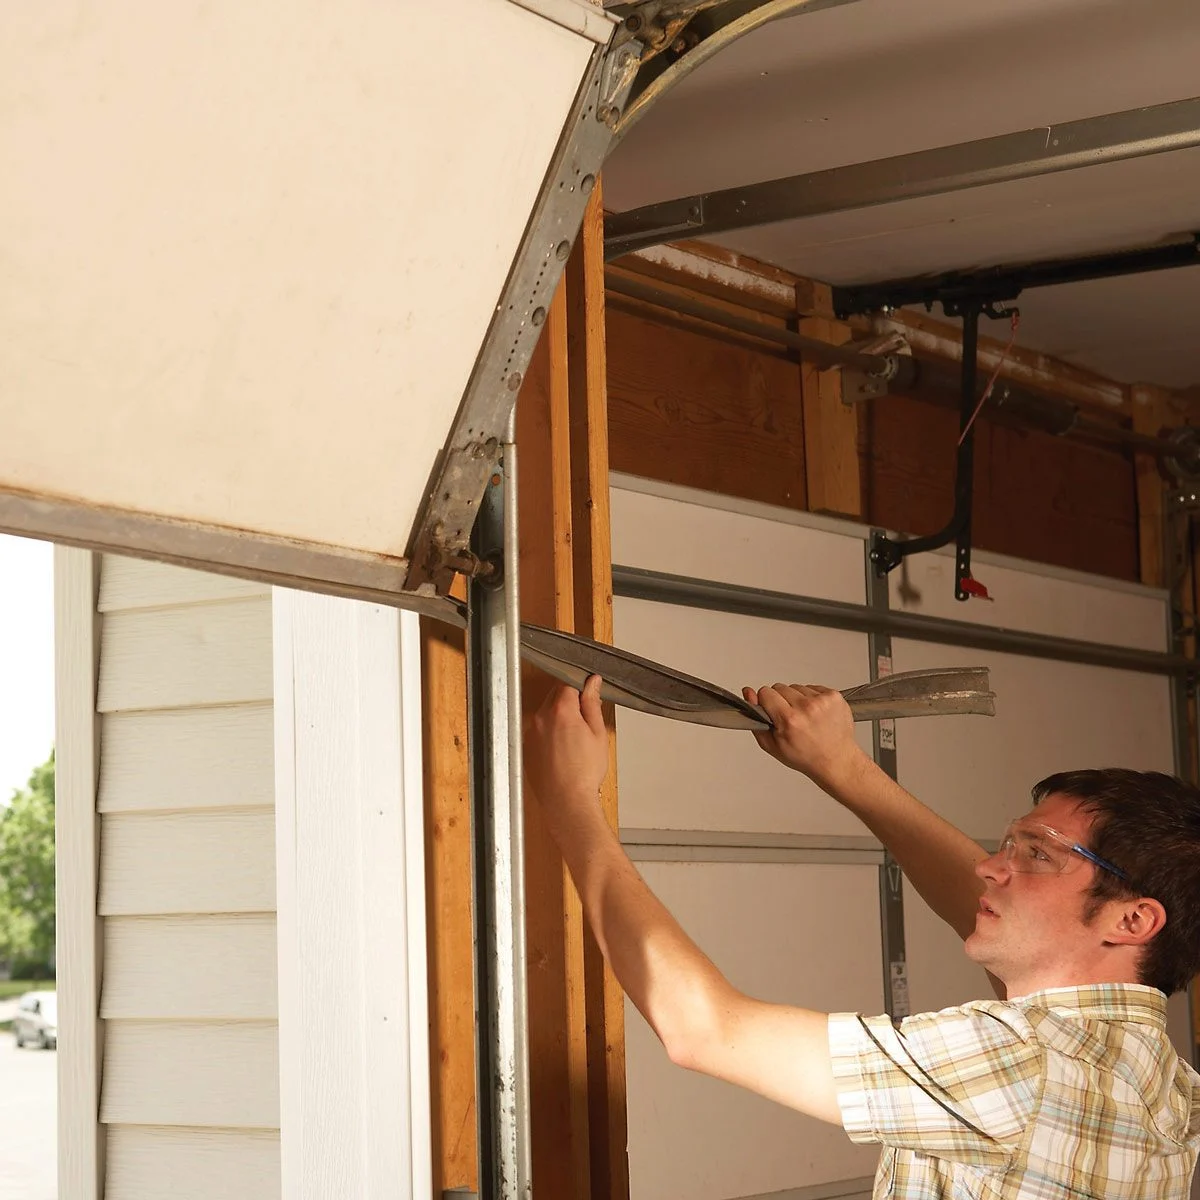
Step 4: Seal the Bottom of the Garage Door
Sealing the bottom of the garage door is essential to prevent drafts, pests, and debris from entering your garage. This step helps to maintain a comfortable and clean environment while also improving energy efficiency. Follow these steps to seal the bottom of your garage door:
- Measure the gap: Use a tape measure to measure the width of the bottom of the garage door. This will help you determine the length of the sealant needed.
- Select a bottom seal: Choose a bottom seal that is suitable for your specific garage door type and size. There are different types available, such as bulb seals, T-shaped seals, and astragal seals. Consider factors like durability, weather resistance, and ease of installation.
- Clean the bottom of the door: Before installing the bottom seal, make sure the area is clean and free of any dirt or debris. Wipe down the bottom of the garage door with a clean cloth or sponge.
- Attach the seal: Depending on the type of seal you’ve chosen, follow the manufacturer’s instructions to attach it to the bottom of the garage door. This usually involves using screws, nails, or adhesive.
- Check for proper alignment: Ensure that the seal is aligned properly and covers the entire width of the garage door. It should create a tight seal when the door is closed.
- Test the seal: Close the garage door and check for any gaps or spaces where air or light can pass through. Make any necessary adjustments to ensure a proper seal.
Sealing the bottom of the garage door provides an extra layer of protection against drafts, pests, and dirt. It also helps to improve the insulation and energy efficiency of your garage. With the bottom seal in place, you can now move on to sealing the sides of the garage door in step 5.
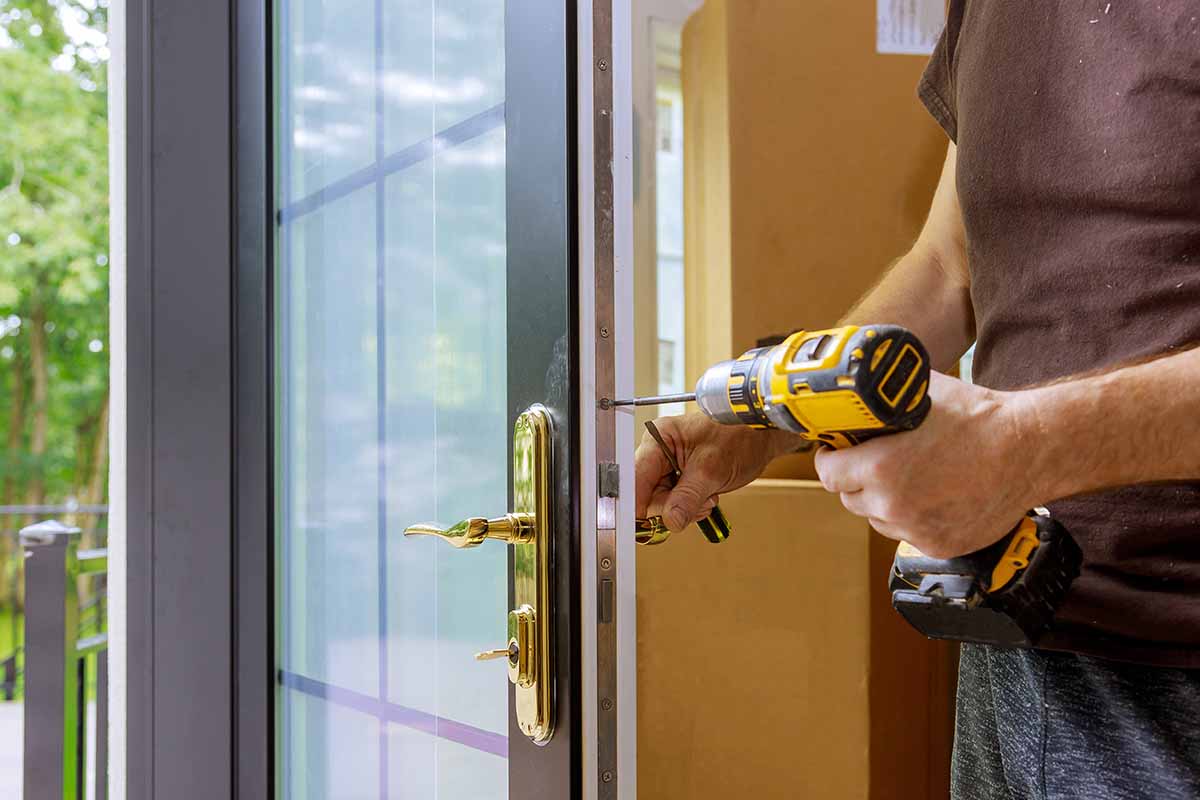
Step 5: Seal the Sides of the Garage Door
Sealing the sides of the garage door is an important step in completing the sealing process. This will help prevent drafts, water, and pests from entering your garage through the gaps between the door and the frame. Follow these steps to seal the sides of your garage door:
- Inspect the sides: Carefully examine the sides of your garage door to identify any gaps or spaces where air can pass through. Take note of the areas that need sealing.
- Choose the appropriate seal: Depending on the size and type of gaps, choose the right sealing material. There are various types of weather-stripping seals available, such as adhesive-backed strips or V-shaped weatherstrips.
- Cut the seal to size: Measure the length of the gaps on the sides of the garage door and cut the sealant to the appropriate length. Ensure that it fits snugly without stretching or overlapping.
- Clean the surfaces: Before installing the seal, clean the sides of the garage door and the frame using a mild detergent and water. Remove any dirt, debris, or old sealant to ensure proper adhesion.
- Apply the seal: Peel off the backing of the adhesive strip (if applicable) and carefully apply it along the sides of the garage door. Press firmly to ensure it sticks securely to both the door and the frame. If using a V-shaped weatherstrip, insert it into the gap tightly.
- Check the seal: Close the garage door and check for any gaps or spaces. The seal should create a tight barrier, preventing air or light from passing through the sides of the door.
- Trim any excess seal: If necessary, trim any excess sealant that protrudes beyond the edges of the door or frame. Use a utility knife or scissors for a clean and neat finish.
Sealing the sides of the garage door helps to create a more efficient and secure barrier against the elements. It ensures that your garage remains well-insulated and protected from external factors. With the sides properly sealed, it’s time to move on to the next step and test the effectiveness of the sealed garage door.
Step 6: Test the Sealed Garage Door
After completing the sealing process, it’s important to test the effectiveness of the sealed garage door. Testing will ensure that the seals are properly installed and that your garage is well-protected from drafts, moisture, pests, and other unwanted elements. Follow these steps to test the sealed garage door:
- Close the garage door: Shut the garage door completely and engage the locks or secure it in place.
- Inspect for gaps: Carefully inspect the entire door, including the panels, bottom seal, and sides. Look for any visible gaps or spaces that may allow air, light, or water to enter.
- Feel for drafts: Run your hand along the edges of the door, both vertically and horizontally, to check for any drafts or cool air coming through. Pay attention to the bottom seal and sides.
- Check for light: Turn off the lights in the garage and observe if any light passes through the edges of the door. A properly sealed door should not allow any light to enter.
- Listen for noise: Open and close the garage door a few times to listen for any unusual sounds or noises. A well-sealed door should operate smoothly without any creaking or rattling.
- Monitor for moisture or pests: Keep an eye out for any signs of moisture intrusion or pest activity. Inspect the interior of the garage for water droplets or pest droppings.
If you notice any areas that are not properly sealed or any issues during the testing process, make the necessary adjustments or repairs. This may involve reapplying sealant, adjusting the positioning of the seals, or seeking professional assistance, if needed. Properly testing your sealed garage door ensures that it is functioning optimally and providing the desired protection and insulation.
Congratulations! You have successfully sealed your garage door and created a more energy-efficient and secure space. Regularly inspect and maintain the seals to ensure their longevity and effectiveness. With a well-sealed garage door, you can enjoy a comfortable and protected environment while minimizing energy waste.
Remember, each garage door may have its own unique sealing requirements, so it’s essential to follow the manufacturer’s instructions and guidelines. If you are unsure about any steps or encounter any difficulties, consult with a professional or seek assistance from a garage door specialist.
By properly sealing your garage door, you can enhance the overall performance of your garage, protect your belongings, and reduce energy costs. Enjoy the benefits of a well-insulated and sealed garage door for years to come!
Conclusion
Sealing your garage door is a simple yet essential step in maintaining the energy efficiency and security of your home. By effectively sealing the garage door, you can prevent drafts, moisture, pests, and debris from entering the garage, while also improving insulation and reducing energy costs. Throughout this article, we have discussed the step-by-step process of sealing your garage door and provided tips to ensure a successful outcome.
We began by emphasizing the importance of sealing your garage door and the benefits it brings, such as improved comfort, reduced energy waste, and enhanced protection of your belongings. We then outlined the materials needed for the sealing process, including sealant, cleaner, scrub brush, caulking gun, putty knife, tape measure, gloves, and a ladder.
Following that, we explored each step in detail, starting with cleaning and prepping the garage door to create a clean surface for the sealant to adhere to. We then discussed the importance of choosing the right sealant, considering factors such as material, weather resistance, adhesion quality, ease of application, color options, and longevity.
Next, we delved into the process of applying the sealant to the garage door panels, emphasizing the importance of starting from the top and ensuring thorough coverage. We then moved on to sealing the bottom of the garage door, discussing the measurement, selection of the bottom seal, cleaning the surface, and attaching the seal for a proper seal.
Subsequently, we covered the step of sealing the sides of the garage door, focusing on inspecting for gaps, choosing the appropriate seal, cleaning the surfaces, applying the seal, and checking for proper alignment.
Finally, we emphasized the importance of testing the sealed garage door to ensure its effectiveness, including inspecting for gaps, feeling for drafts, checking for light penetration, listening for noise, and monitoring for moisture or pests.
In conclusion, sealing your garage door is a worthwhile investment that improves energy efficiency, comfort, and security. By following the step-by-step guidelines discussed in this article, you can effectively seal your garage door and enjoy the benefits for years to come. Remember to regularly inspect and maintain the seals to ensure their continued effectiveness.
Sealed garage doors not only provide a well-insulated space but also contribute to the overall aesthetic appeal of your home. So, take the time to seal your garage door properly and enjoy a well-protected and energy-efficient garage for your everyday needs.
Frequently Asked Questions about How To Seal Garage Door
Was this page helpful?
At Storables.com, we guarantee accurate and reliable information. Our content, validated by Expert Board Contributors, is crafted following stringent Editorial Policies. We're committed to providing you with well-researched, expert-backed insights for all your informational needs.


0 thoughts on “How To Seal Garage Door”