Articles
How To Winterize A Garage Door
Modified: October 20, 2024
Learn how to winterize your garage door with these helpful articles. Keep your garage insulated and protected from the cold weather.
(Many of the links in this article redirect to a specific reviewed product. Your purchase of these products through affiliate links helps to generate commission for Storables.com, at no extra cost. Learn more)
Introduction
As the winter season approaches, it’s important to take the necessary steps to winterize your home, including your garage. The garage door is often overlooked when it comes to winter preparations, but it’s an essential part of your home that requires attention to ensure it functions properly and remains protected from the harsh weather conditions.
Winterizing your garage door not only helps to maintain its longevity but also improves energy efficiency and prevents any potential damage. By taking a few simple steps to prepare your garage door for winter, you can save on energy costs, increase comfort levels, and extend the lifespan of your garage door.
In this article, we will guide you through the process of winterizing your garage door with easy-to-follow steps. Whether you have a manual or automatic garage door, these tips will help you protect your garage and keep it safe from the cold, snow, and icy conditions.
Before we dive into the steps, it’s essential to understand why winterizing your garage door is important. The garage is typically an extension of the main living space, and if it is not properly insulated or maintained, cold air can seep in, making it uncomfortable and potentially causing difficulties in heating the adjoining rooms. Additionally, exposure to extreme cold temperatures can affect the mechanical components of your garage door, leading to a decrease in functionality and potential damage.
By taking the time to winterize your garage door, you will not only protect your belongings stored in the garage but also ensure that your garage remains a comfortable and functional space throughout the winter months.
Key Takeaways:
- Winterizing your garage door is crucial for maintaining energy efficiency, preventing damage, and ensuring a comfortable living space during the cold winter months. From inspecting the door to replacing old seals, these steps are essential for a well-prepared garage.
- Regular maintenance, such as cleaning, lubricating moving parts, and checking the garage door opener, is vital for extending the lifespan of your garage door and preventing costly repairs. By following these steps, you can ensure a well-protected and functional garage throughout the winter.
Read more: How To Store Winter Clothes In Garage
Step 1: Inspect the Garage Door
Before you begin winterizing your garage door, it’s crucial to start with a thorough inspection to identify any existing issues or potential problems. This step will help you assess the overall condition of your garage door and determine the specific areas that need attention.
During the inspection, pay attention to the following aspects:
- Physical damage: Look for any signs of physical damage, such as dents, cracks, or warping. These issues not only affect the appearance of your garage door but can also impact its functionality and insulation properties.
- Hardware and components: Check the hinges, rollers, and other hardware for any signs of wear and tear. Make sure they are tight and functioning properly. Replace any broken or damaged components to ensure the smooth operation of your garage door.
- Weather seals: Examine the weather seals along the bottom of the garage door and between door panels. Check for any cracks, gaps, or wear and tear in the seals. Damaged weather seals can allow cold air, moisture, and pests to enter your garage, compromising its thermal efficiency and security.
- Balance and alignment: Open and close your garage door to check if it operates smoothly and evenly. A misaligned or unbalanced garage door can strain the opener mechanism and may cause premature wear and tear on the door itself.
If you notice any significant issues during the inspection, it may be wise to consult a professional garage door technician for repairs or replacements. Addressing these issues before winter sets in will ensure that your garage door is in optimal condition to withstand the cold weather and function properly throughout the season.
Step 2: Seal any Gaps or Cracks
One of the critical steps in winterizing your garage door is to seal any gaps or cracks that may exist. These openings not only allow cold air and moisture to enter the garage but also compromise its insulation and energy efficiency. By sealing these gaps, you can prevent drafts, improve insulation, and keep your garage warmer during the winter months.
Here’s how to seal any gaps or cracks in your garage door:
- Inspect for gaps: Carefully examine the edges of your garage door, including the top, sides, and bottom. Look for any visible gaps or cracks where cold air can enter.
- Apply weatherstripping: Weatherstripping is an effective solution for sealing gaps along the sides and top of your garage door. Measure the length needed for each side, and cut the weatherstripping accordingly. Attach the weatherstripping to the door frame, ensuring a snug fit when the door is closed. Repeat the process for the top of the door.
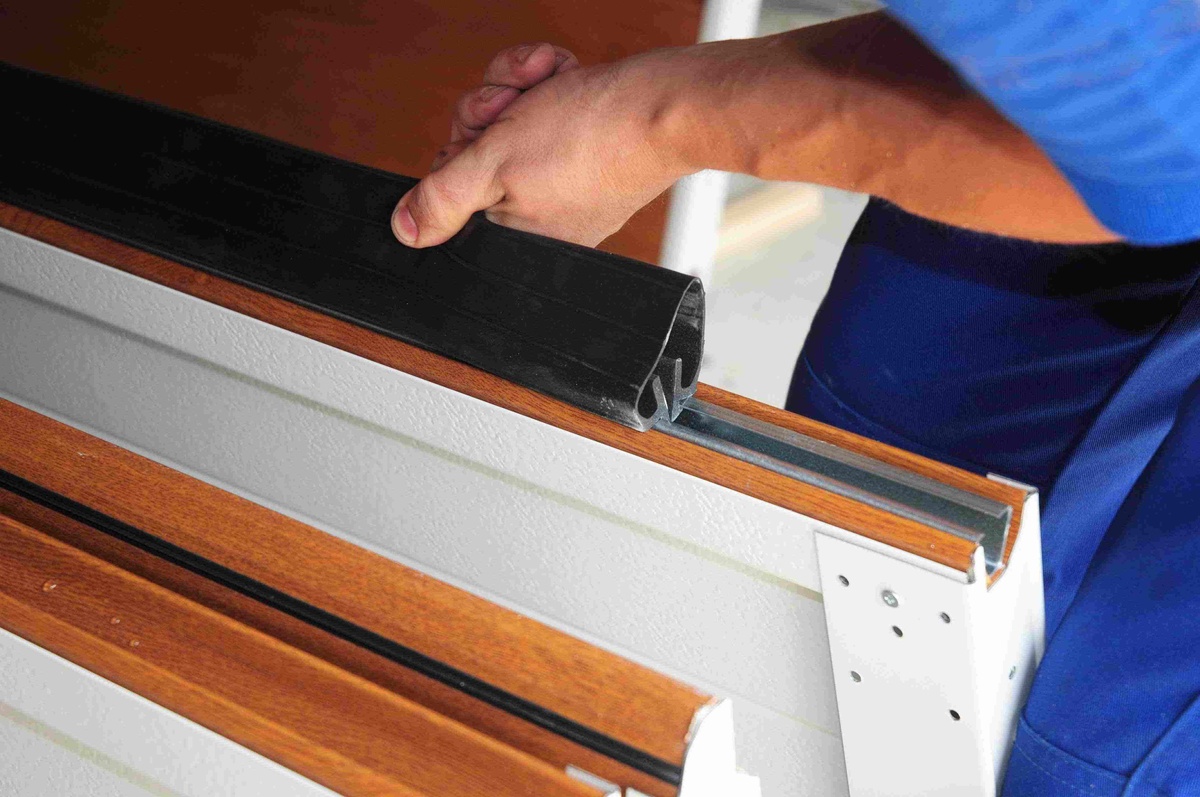
- Install a bottom seal: The bottom of your garage door is a common area for gaps and drafts to occur. Install a bottom seal to close this gap and prevent cold air, debris, and pests from entering. Measure the width of your door and cut the bottom seal accordingly. Align the seal with the bottom of the garage door and attach it using screws or adhesive.
- Use caulk or sealant: If you notice any cracks or gaps in the garage door panels, apply a bead of caulk or sealant along the affected areas. This will help seal the gaps and prevent cold air infiltration. Ensure that the caulk or sealant is appropriate for outdoor use and can withstand temperature fluctuations.
- Consider a threshold seal: If you have a large gap under your garage door, a threshold seal can be an effective solution. It creates a barrier against drafts, insects, and moisture. Measure the width of your garage door opening and choose a threshold seal that fits properly. Install it at the base of the door, following the manufacturer’s instructions.
By sealing these gaps and cracks, you will significantly reduce the amount of cold air and moisture entering your garage, making it more comfortable and energy efficient during the winter months. It will also help to keep out pests and debris, ensuring a cleaner and well-protected space.
Step 3: Install Weatherstripping
Installing weatherstripping is an essential step in winterizing your garage door. It helps seal gaps and create a barrier against drafts, moisture, and pests. Properly installed weatherstripping can significantly improve the insulation and energy efficiency of your garage, keeping it warmer during the cold winter months.
Here’s how to install weatherstripping on your garage door:
- Clean the surface: Before installing weatherstripping, ensure that the surface of your garage door is clean and free from dust and debris. Use a mild detergent and water to clean the areas where the weatherstripping will be installed. Allow it to dry completely before proceeding.
- Measure and cut the weatherstripping: Measure the lengths needed for each side and the top of your garage door. Leave a slight excess to ensure a tight fit when the door is closed. Use scissors or a utility knife to cut the weatherstripping to the appropriate lengths.
- Attach the weatherstripping: Starting with the side edges, peel off the backing of the weatherstripping and align it with the edge of the garage door. Press firmly to secure it in place. Repeat this process for the other side edge. For the top, align the weatherstripping with the door frame and press it firmly into place.
- Check the alignment: Close the garage door and check for any areas where the weatherstripping may be obstructing the door’s operation. Make adjustments as necessary to ensure a smooth and proper alignment.
- Test the seal: Once the weatherstripping is installed, open and close the garage door to ensure a tight and secure seal. Check for any gaps or areas where the weatherstripping may not be properly sealed. Make any necessary adjustments or additions to ensure an effective seal.
- Maintain the weatherstripping: Regularly inspect the weatherstripping for signs of wear or damage. Replace any worn-out or damaged sections promptly to maintain the insulation and energy efficiency of your garage door.
By installing weatherstripping, you will create a tight seal around your garage door, preventing cold air, drafts, and moisture from entering. This will not only improve the comfort of your garage but also help in reducing energy consumption and associated costs.
Step 4: Lubricate Moving Parts
Lubricating the moving parts of your garage door is an essential step in maintaining its functionality and preventing damage, especially during the winter months when cold temperatures can cause components to stiffen and operate inefficiently. Proper lubrication will help reduce friction, ensure smooth operation, and extend the lifespan of your garage door.
Follow these steps to lubricate the moving parts of your garage door:
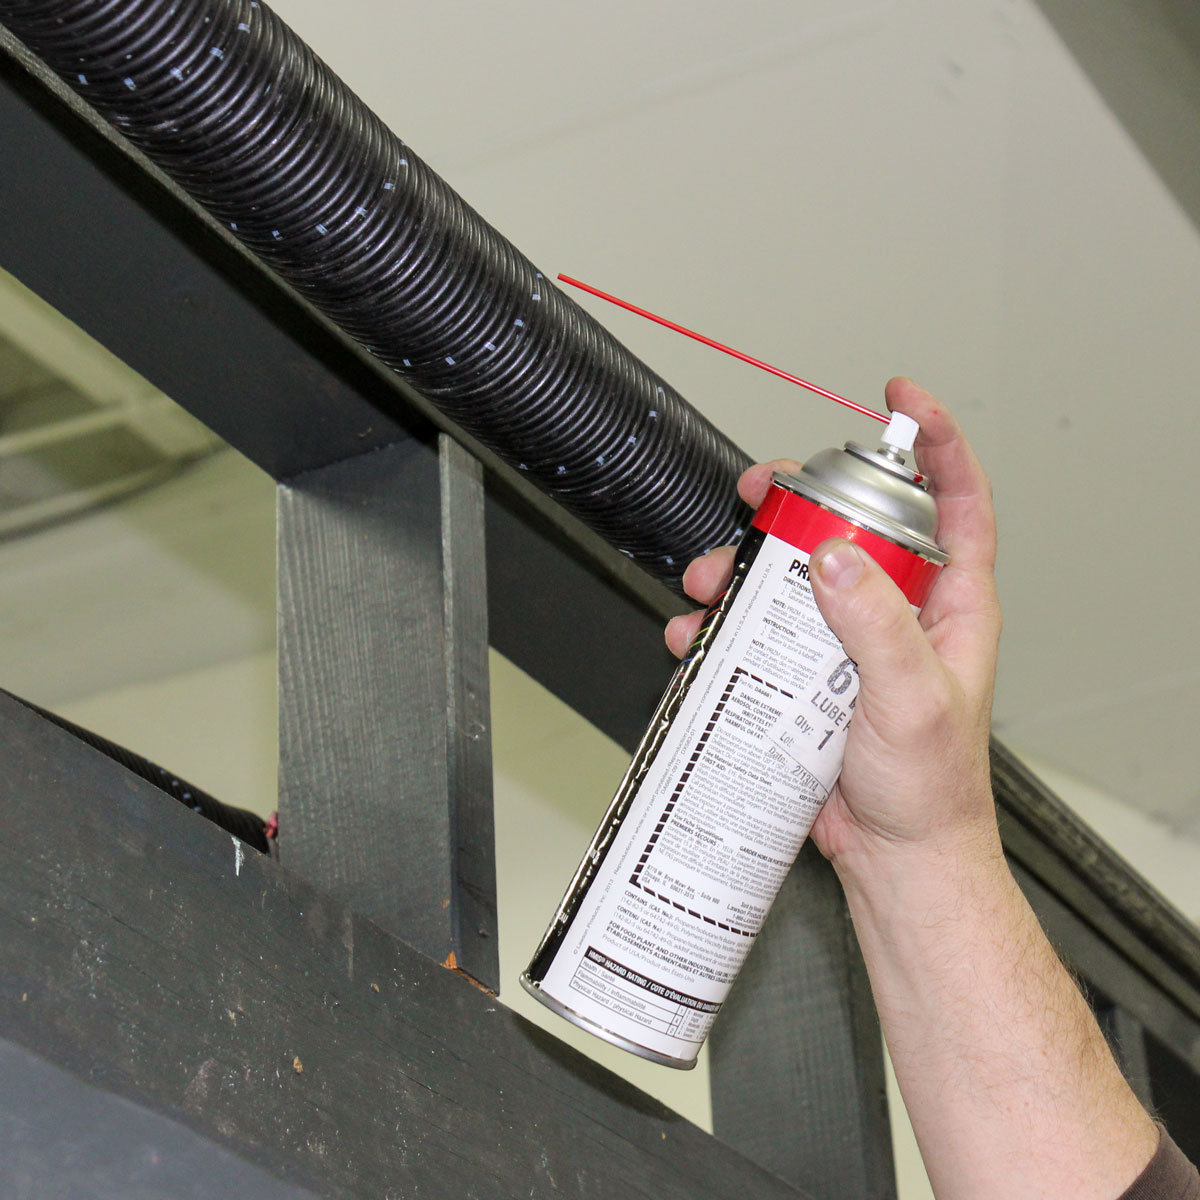
- Gather the necessary supplies: Before you begin, make sure you have the appropriate lubricant for your garage door. Silicone-based lubricants or garage door lubricants are recommended for most garage door systems. Avoid using WD-40 or grease, as they can attract dirt and grime.
- Clean the parts: Start by cleaning the tracks, rollers, hinges, and springs of your garage door. Remove any dirt, debris, or old lubricant using a soft cloth or brush. It’s important to have clean surfaces before applying the lubricant.
- Apply lubricant to the tracks and rollers: Use a small amount of the lubricant and apply it to the inside of the tracks. Be sure to cover the entire length of the track. Next, apply lubricant to the rollers, focusing on the ball bearings and the area where the roller attaches to the track. Move the door up and down a few times to ensure that the lubricant is evenly distributed.
- Lubricate the hinges: Apply lubricant to each hinge, focusing on the pivot points. This will help the hinges move smoothly as the door opens and closes.
- Address the springs: Consult your garage door manufacturer or a professional technician for specific instructions on lubricating the springs. In some cases, it may be recommended to leave the springs unlubricated or use a specific type of lubricant. Springs are under high tension and can be dangerous to work with if not handled properly.
- Wipe off excess lubricant: Using a clean cloth, wipe off any excess lubricant from the tracks, rollers, hinges, and other parts. This will help prevent accumulation of dirt and debris.
Regularly lubricating the moving parts of your garage door, especially before the winter season, will help maintain its smooth operation, prevent unnecessary wear, and minimize the risk of malfunctions. Additionally, it can reduce noise and ensure that the garage door operates quietly and efficiently.
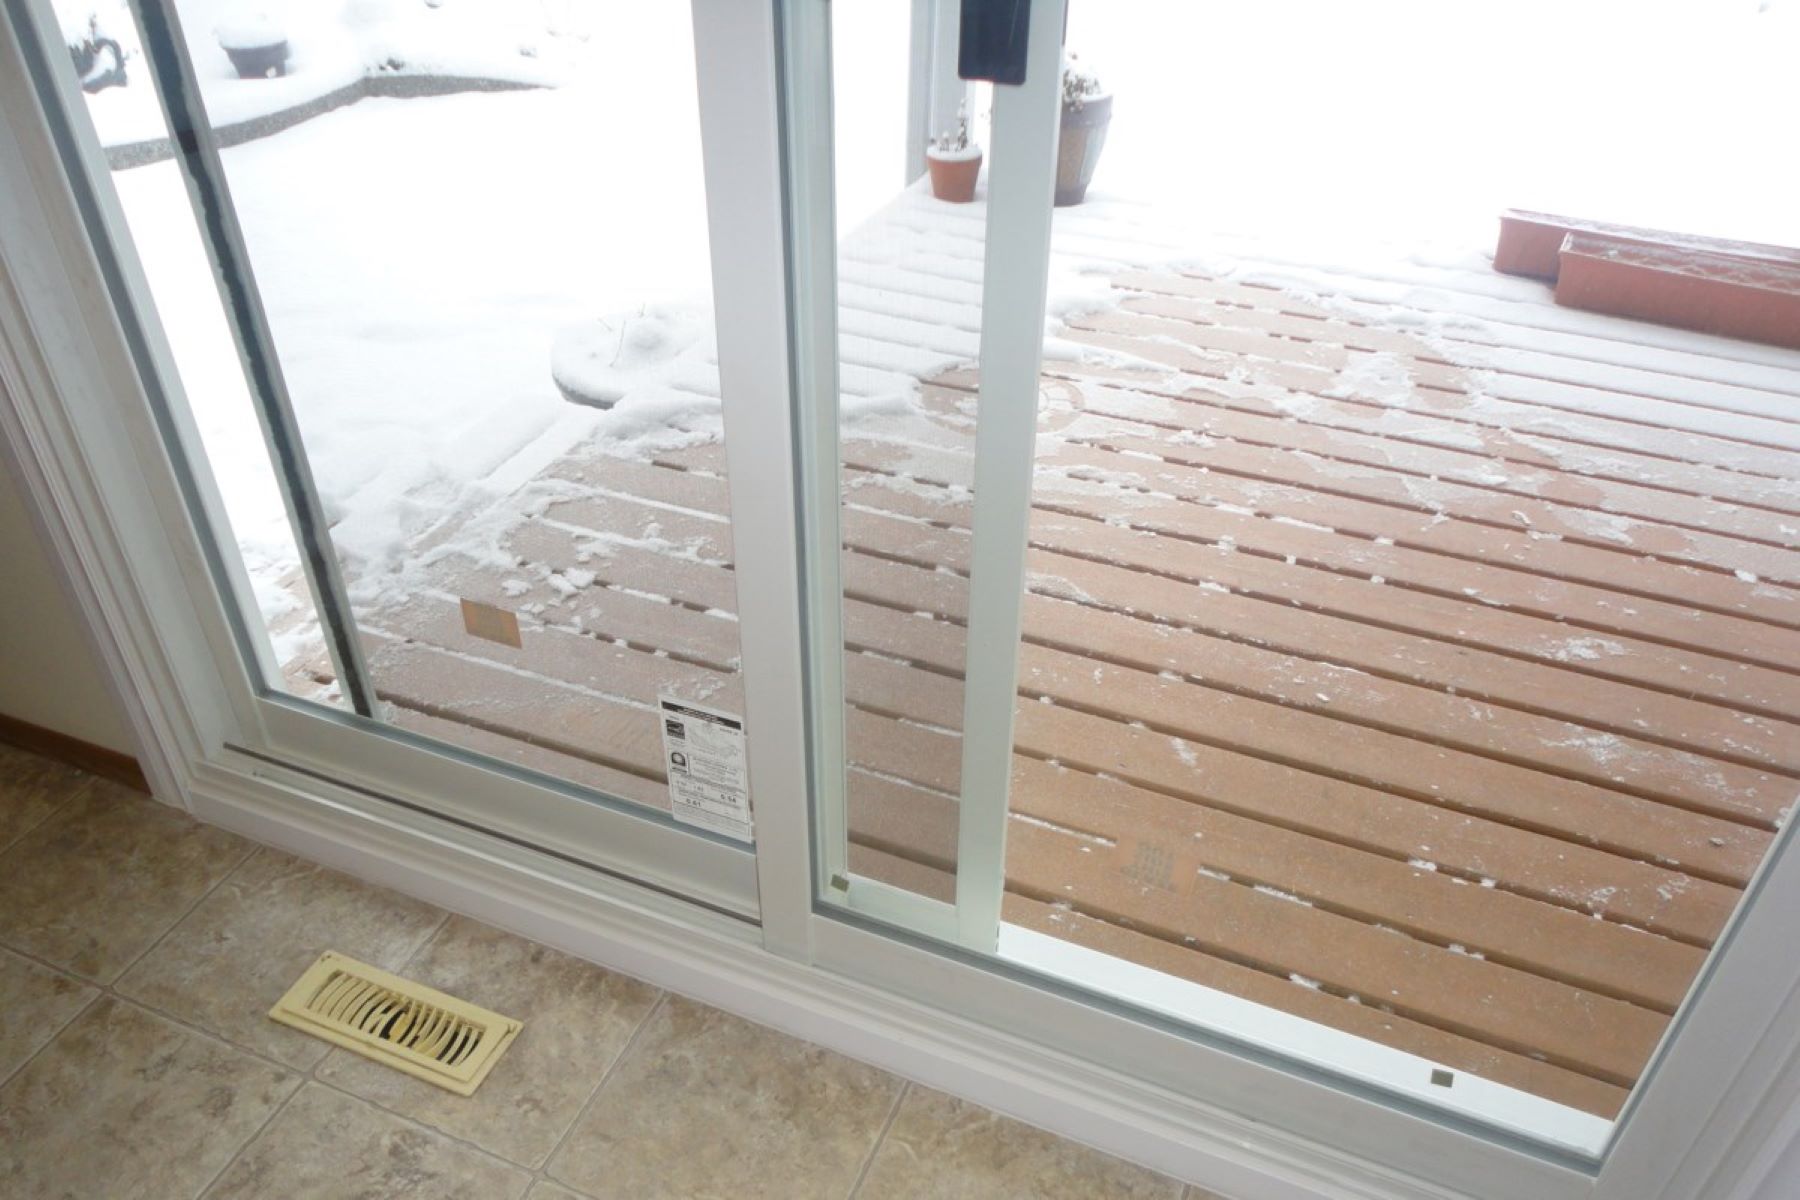
Apply a weather seal to the bottom of the garage door to prevent cold air and moisture from entering. This will help to keep the garage and any belongings inside warmer during the winter months.
Read more: How To Maintain Garage Door
Step 5: Insulate the Garage Door
Insulating your garage door is a vital step in winterizing your garage and improving its overall energy efficiency. Proper insulation helps to retain heat, prevent drafts, and create a more comfortable environment inside the garage, especially in cold weather.
Here’s how you can insulate your garage door:
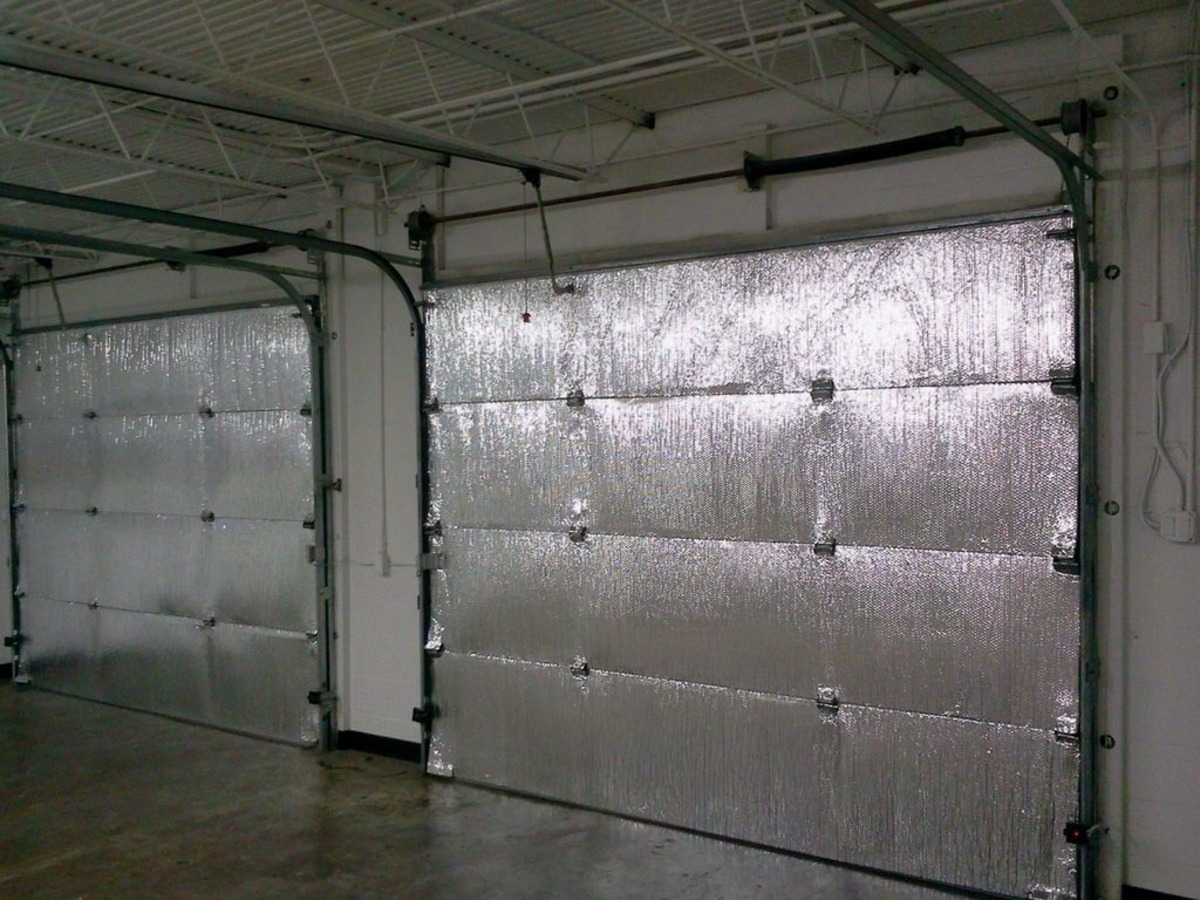
- Select the insulation material: There are several insulation options available for garage doors, including reflective foil insulation, foam board insulation, and garage door insulation kits. Consider factors such as insulation value, ease of installation, and budget when choosing the appropriate insulation material for your garage door.
- Measure and cut the insulation: Before installing the insulation, measure the panels of your garage door. Cut the insulation material to fit the size of each panel using a utility knife or scissors. Ensure a precise fit to maximize insulation effectiveness.
- Attach the insulation: Using adhesive or double-sided tape, attach the insulation material to the garage door panels. Start at the top panel and work your way down, ensuring a secure attachment. If using foam board insulation, you may also use small nails or staples to further secure the insulation.
- Seal the edges: To minimize air leakage, seal the edges of the insulation material with weatherstripping or special garage door insulation seals. This will ensure a tight seal and prevent drafts from entering the garage.
- Install a radiant barrier: If using reflective foil insulation, consider installing a radiant barrier to enhance energy efficiency. The reflective surface helps to reflect heat back into the garage, keeping it warmer during the winter months.
- Test the insulation: Once the insulation is in place, open and close the garage door to ensure proper operation. Confirm that the insulation does not impede the movement of the door.
Adding insulation to your garage door helps to create a more controlled and comfortable environment inside your garage throughout the winter season. It not only keeps the cold air out but also minimizes heat loss, reducing the strain on heating systems and potentially lowering energy costs. Insulating the garage door also helps to dampen noise, if your garage is adjacent to living spaces.
Remember to regularly inspect the insulation for any signs of damage or wear and replace it as needed to maintain its effectiveness. Insulating your garage door is a worthwhile investment that will pay off in terms of improved comfort, energy efficiency, and protection of your belongings stored in the garage.
Step 6: Replace Old or Damaged Seals
Replacing old or damaged seals is an important step in winterizing your garage door. Seals play a crucial role in keeping out drafts, moisture, pests, and debris, ensuring that your garage remains well-insulated and protected from the elements.
Here’s how to replace old or damaged seals on your garage door:
- Inspect the seals: Carefully examine the bottom weather seal and the seals between the door panels for any signs of wear, tears, or gaps. Look for cracks, brittle spots, or missing sections. These can significantly affect the insulation and efficiency of your garage door.
- Measure and purchase replacements: Take accurate measurements of the seals that need replacement. This includes the length and width of the bottom seal and the length of the seals between the door panels. Purchase replacement seals that match the measurements and are compatible with your garage door.
- Remove the old seal: Starting with the bottom seal, carefully peel away the old seal from the bottom of the garage door. Use pliers or a screwdriver to remove any fasteners or retainers that were holding the seal in place. Proceed to remove the seals between the door panels, gently pulling them out.
- Install the new seals: Begin by installing the new bottom seal. Align the new seal along the bottom of the garage door, ensuring that it covers the entire width. Secure it in place using the provided fasteners or retainers. Next, install the new seals between the door panels, pressing them firmly into the designated grooves.
- Check the seal: Close the garage door and observe the seals to ensure they create a tight seal against the floor and between the door panels. Test the door’s movement to make sure the seals do not interfere with its operation. Make any necessary adjustments to ensure a proper fit.
- Maintain the seals: Regularly inspect the seals for signs of wear and tear. Replace any damaged or worn-out sections promptly to maintain the integrity of the seals and the insulation of your garage door.
Replacing old or damaged seals is an essential part of winterizing your garage door. By ensuring that your seals are in good condition, you can prevent cold air, drafts, and pests from entering your garage, while also improving energy efficiency and maintaining a comfortable environment.
Step 7: Check the Garage Door Opener
Checking your garage door opener is an important step in winterizing your garage door. The opener plays a crucial role in the smooth and efficient operation of your garage door. Before the winter season arrives, it’s essential to ensure that your garage door opener is in proper working condition to withstand the cold weather and prevent any potential malfunctions.
Here’s how to check your garage door opener:
- Inspect the opener: Visually inspect the garage door opener for any signs of damage or wear. Look for loose or frayed cables, damaged chains or belts, and any unusual sounds when the opener is in operation. Address any visible issues promptly.
- Test the safety features: Most garage door openers are equipped with safety sensors that detect obstructions and prevent the door from closing. Test these sensors by placing an object in the path of the door as it closes. The door should reverse immediately upon contact with the object. If the sensors are not functioning correctly, clean them and adjust their alignment. If the issue persists, consult a professional technician.
- Lubricate the opener: Apply a small amount of lubricant to the moving parts of the opener, such as the chains, belts, or screw drive. This will help the opener operate smoothly and reduce wear on the components, especially in cold temperatures.
- Check the battery: If your garage door opener is battery-operated, check the battery’s condition and replace it if necessary. Cold weather can cause batteries to drain faster, so it’s important to ensure that the opener has a reliable power source.
- Test the opener’s remote control: Check the batteries of your garage door opener’s remote control and replace them if needed. Test the remote control to ensure it opens and closes the garage door smoothly. If there are any issues, troubleshoot the remote or consider reprogramming it to the opener.
- Consult a professional if needed: If you encounter any significant issues or if your garage door opener is old and showing signs of wear, it’s advisable to consult a professional garage door technician. They can provide a thorough inspection, perform necessary repairs, or recommend a replacement if required.
Ensuring that your garage door opener is in good working condition is crucial for a properly functioning and secure garage door throughout the winter season. By addressing any issues and taking proactive maintenance measures, you can avoid potential problems and ensure the longevity and reliability of your garage door opener.
Step 8: Clean and Maintain the Garage Door
Cleaning and maintaining your garage door is the final step in winterizing your garage door. Regular maintenance not only keeps your garage door looking its best but also helps to prevent damage, maintain functionality, and extend its lifespan.
Follow these steps to clean and maintain your garage door:
- Clean the surface: Start by cleaning the exterior surface of your garage door. Use a mild detergent mixed with water and a soft brush or cloth to remove dirt, debris, and stains. Rinse thoroughly with clean water and allow it to dry completely.
- Inspect for damage: While cleaning, take the opportunity to inspect the garage door for any signs of damage. Look for cracks, dents, or warping in the panels, and check for loose or damaged hardware. Address any issues promptly to prevent further damage or malfunctions.
- Check the paint or finish: If your garage door has a painted or finished surface, inspect it for any signs of peeling, flaking, or fading. If needed, consider repainting or refinishing the door to protect it from the elements and improve its appearance.
- Lubricate the moving parts: Apply lubricant to the moving parts of your garage door, including hinges, rollers, and tracks. Lubrication helps prevent friction and ensures smooth operation. Use a silicone-based lubricant specifically designed for garage door use.
- Test the balance and alignment: To maintain optimal performance, test the balance and alignment of your garage door. Close the door and disconnect the opener. With the door in the closed position, attempt to manually lift the door. It should lift smoothly and stay in place without support. If it fails to do so, consult a professional technician to adjust the balance and alignment.
- Check the weather seals: Inspect the weather seals for any signs of wear, damage, or gaps. Replace any worn-out or damaged seals to ensure proper insulation and protection against drafts, moisture, and pests.
- Remove debris and obstructions: Regularly remove any debris, leaves, or obstructions from the garage door tracks, rollers, and hinges. Use a soft brush or cloth to remove dirt and wipe away any built-up grime. Keeping these components clean helps to prevent damage and maintain smooth operation.
- Repeat maintenance tasks regularly: Make it a habit to regularly clean and maintain your garage door throughout the year, not just during winter. Perform these maintenance tasks at least twice a year or more frequently if needed.
By cleaning and maintaining your garage door, you not only improve its appearance but also ensure its proper function, longevity, and protection. Regular maintenance can help identify and address issues before they become major problems, saving you time and money in the long run.
Read more: How To Remove A Garage Door
Conclusion
Winterizing your garage door is an important step in protecting your home and ensuring a comfortable living space during the cold winter months. By following the steps outlined in this guide, you can effectively prepare your garage door for winter, enhance its functionality, and improve energy efficiency.
Inspecting the garage door, sealing any gaps or cracks, and installing weatherstripping are key measures to prevent cold air, drafts, and moisture from entering your garage. Additionally, lubricating the moving parts of your garage door helps to maintain smooth operation and prevent unnecessary wear and tear.
Insulating the garage door not only keeps the cold air out but also minimizes heat loss, making your garage more energy-efficient and reducing heating costs. Replacing damaged seals ensures optimal insulation and protection against the elements, and checking the garage door opener helps to prevent potential malfunctions during the winter season.
Lastly, don’t forget to clean and maintain your garage door regularly. By doing so, you can enhance its appearance, prolong its lifespan, and prevent costly repairs in the future.
Remember, safety should always be a priority when working on your garage door. If you encounter any significant issues or if you’re unsure about any of the steps mentioned in this guide, it’s best to consult a professional garage door technician for assistance.
By taking the time to properly winterize your garage door, you not only protect your belongings and maintain a comfortable environment but also ensure the longevity and functionality of your garage door for years to come.
Frequently Asked Questions about How To Winterize A Garage Door
Was this page helpful?
At Storables.com, we guarantee accurate and reliable information. Our content, validated by Expert Board Contributors, is crafted following stringent Editorial Policies. We're committed to providing you with well-researched, expert-backed insights for all your informational needs.


0 thoughts on “How To Winterize A Garage Door”