
Articles
How To Bore Under A Driveway
Modified: January 6, 2024
Learn the step-by-step process of how to bore under a driveway with our informative articles. Get expert tips and tricks for a successful driveway boring project.
(Many of the links in this article redirect to a specific reviewed product. Your purchase of these products through affiliate links helps to generate commission for Storables.com, at no extra cost. Learn more)
Introduction
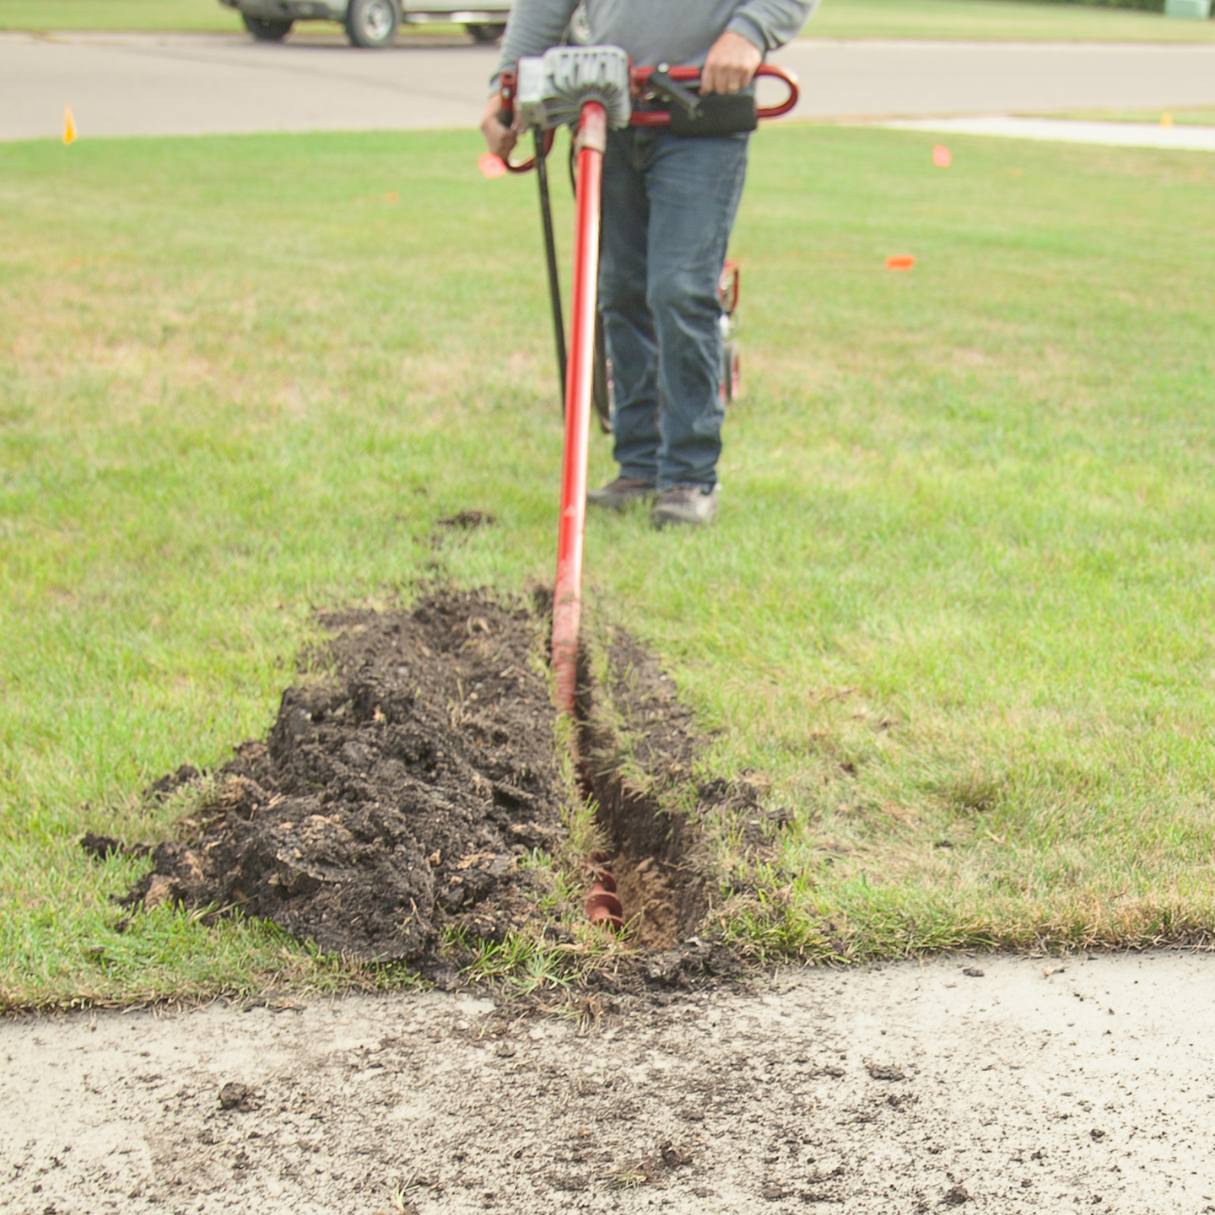
Are you looking to install a new utility line or irrigation system but have encountered a roadblock in the form of a driveway? Boring under a driveway is the perfect solution to this problem. By creating a tunnel beneath the surface, you can safely and efficiently route pipes, cables, or conduit without having to disrupt or damage the existing driveway.
In this article, we will guide you through the step-by-step process of how to bore under a driveway. From gathering the necessary tools and materials to completing the project successfully, you’ll have all the information you need to tackle this task with confidence.
But before we dive into the details, let’s take a moment to understand the importance of proper planning and preparation when it comes to boring under a driveway.
Planning and preparation are crucial in ensuring a smooth and hassle-free experience. By taking the time to gather the right tools and materials, assessing the location, and understanding the drilling equipment, you’ll be well-equipped to complete the project successfully. Additionally, following the proper steps and techniques will help you avoid costly mistakes and potential damage to your driveway.
So, whether you’re a seasoned DIY enthusiast or a homeowner looking to tackle a project, let’s get started on learning how to bore under a driveway!
Key Takeaways:
- Boring under a driveway requires careful planning, proper equipment, and precision. By following the step-by-step guide, you can efficiently route utilities without disrupting or damaging your driveway.
- Prioritize safety, monitor drilling progress, and confirm the success of the bore to ensure a smooth and successful project. With patience and attention to detail, you can achieve a seamless bore under your driveway.
Read more: How To Run Drainage Pipe Under A Driveway
Step 1: Gather necessary tools and materials
Before you begin the process of boring under a driveway, you’ll need to gather the necessary tools and materials. Having everything ready beforehand will save you time and ensure a smoother workflow. Here’s a list of the essential items you’ll need:
- Drill machine: You’ll need a drill machine specifically designed for horizontal drilling. Look for a model that offers enough power and torque to handle the job efficiently.
- Drill bits: Select drill bits that are suitable for drilling through the material of your driveway, such as concrete or asphalt. It’s a good idea to have a variety of sizes to accommodate different pipe diameters.
- Marking tools: You’ll need some marking tools, such as spray paint or chalk, to mark the exact path where you want to bore under the driveway. This will help guide your drilling.
- Pipe or conduit: Determine the type and size of pipe or conduit you’ll be installing and have it on hand. Make sure it’s the appropriate length to reach from one side of the driveway to the other.
- Trenching shovel: A trenching shovel will come in handy for digging a small access hole on each side of the driveway to insert the drill machine.
- Safety gear: It’s essential to prioritize safety when working with power tools. Wear safety goggles to protect your eyes from debris, and consider wearing gloves and knee pads for added protection.
Once you have gathered all the necessary tools and materials, you’ll be ready to move on to the next step: determining the location for boring under the driveway.
Step 2: Determine the location for boring under the driveway
Identifying the right location for your boring operation is crucial to ensure that the utility line or conduit reaches its intended destination. Here are the steps to determine the location:
- Study the landscape: Take a close look at the driveway and surrounding area. Look for potential obstructions, such as tree roots, underground utilities, or any other structures that may hinder the path of your utility line.
- Choose the shortest and most direct route: Try to find the shortest and most direct path from the point of entry to the destination point. This will minimize the length of the bore and reduce the chances of encountering any obstacles.
- Consider clearance: Take into account the clearance needed for the pipe or conduit to pass under the driveway. Ensure that there is enough space between the bottom of the driveway and the ground to avoid any interference.
- Mark the entry and exit points: Once you have determined the desired location for the bore, mark the entry and exit points using the marking tools. This will serve as a visual guide during the drilling process.
It’s worth noting that proper planning and the selection of the right location are essential to avoid any complications during the boring process. By taking the time to assess the landscape and choose the optimal route, you’ll increase the chances of a successful bore under the driveway.
With the location determined, you’re now ready to move on to the next step: preparing the drilling equipment.
Step 3: Prepare the drilling equipment
Before you start drilling under the driveway, it’s important to properly prepare your drilling equipment to ensure smooth and efficient operation. Here are the steps to prepare the drilling equipment:
- Set up the drilling machine: Position the drilling machine near the entry point of the driveway and secure it in place. Make sure it is stable and won’t move during the drilling process.
- Attach the appropriate drill bit: Select the drill bit that matches the size and type of material you will be drilling through. Attach it securely to the drilling machine according to the manufacturer’s instructions.
- Connect the drill machine to a water source: Depending on the type of drill machine you have, you may need a water source to prevent overheating and to lubricate the drill bit. Connect the machine to a water source and ensure a constant flow of water during the drilling.
- Check the drill machine settings: Before starting the drilling operation, double-check the settings on the drill machine. Make sure it is set to the appropriate speed and torque for the type of material you’re drilling through.
- Inspect and lubricate moving parts: Take a moment to inspect all moving parts of the drilling machine. Ensure that they are properly lubricated to minimize friction and maximize efficiency.
- Put on safety gear: Prioritize safety by wearing the appropriate safety gear, including safety goggles, gloves, and ear protection. This will protect you from any potential hazards during the drilling process.
By following these steps and ensuring that your drilling equipment is properly set up and prepared, you’ll be ready to move on to the next step: creating a pilot hole.
Step 4: Create a pilot hole
Creating a pilot hole serves as a starting point for the drilling process and helps guide the drill bit under the driveway. Follow these steps to create a pilot hole:
- Position the drill machine: Position the drill machine at the entry point of the driveway, aligning it with the marked spot.
- Start the drilling: Turn on the drill machine and slowly begin drilling, applying gentle and steady pressure. The goal is to create a small pilot hole that will serve as the starting point for the larger bore.
- Monitor the drilling: Pay close attention to the drilling process while maintaining a steady and controlled movement. Ensure that the drill bit is penetrating the surface evenly and smoothly.
- Use water for lubrication and cooling: If your drill machine requires water for lubrication and cooling, ensure a constant flow of water onto the drill bit. This will prevent overheating and prolong the life of the drill bit.
- Check the progress: Periodically check the depth and progress of the pilot hole. Use a measuring tape or depth gauge to determine how far the drill bit has penetrated.
- Adjust the drilling angle if necessary: Depending on the slope or angle of the driveway, you may need to adjust the drilling angle to ensure that the pilot hole remains straight and aligned with the desired path.
Creating a pilot hole is a crucial step in the boring process, as it provides a starting point for the larger bore. Take your time during this step to ensure accuracy and precision. Once the pilot hole has been established, you’re ready to set up the boring machine for the next step.
Before boring under a driveway, make sure to locate any underground utilities and obtain necessary permits. Use a high-quality boring machine and follow proper safety precautions.
Step 5: Set up the boring machine
Setting up the boring machine is an essential step in the process of boring under a driveway. Proper setup ensures a controlled and efficient drilling operation. Follow these steps to set up the boring machine:
- Position the boring machine: Move the boring machine to the entry side of the driveway, aligning it with the pilot hole. Ensure that the machine is stable and securely positioned.
- Connect the drill rod: Attach the drill rod to the drilling machine according to the manufacturer’s instructions. Make sure the connection is secure to prevent any dislodging during the drilling process.
- Extend the drill rod: Extend the drill rod from the machine towards the pilot hole, gradually feeding it into the hole. Maintain control over the speed and movement to prevent any kinks or bends in the drill rod.
- Align the drill rod: Ensure that the drill rod is properly aligned with the pilot hole. This will ensure that the bore remains on the desired path as it progresses under the driveway.
- Monitor the drilling process: Once the drill rod is properly aligned, start the boring machine and monitor the drilling process. Keep an eye on the progress and make adjustments as needed to maintain the desired alignment and depth.
- Use water for lubrication: If necessary, continue providing water for lubrication and cooling throughout the drilling process. This will help prevent overheating and improve the longevity of the drill rod.
- Feed the drill rod: Gradually feed the drill rod into the hole, maintaining a consistent and controlled speed. Avoid forcing or rushing the process to prevent damage to the equipment or the driveway.
Proper setup of the boring machine is crucial for the success of the drilling process. It ensures that the drill rod remains aligned and on track, allowing for a smooth and efficient bore under the driveway. With the boring machine set up, you’re ready to move on to the next step: actually boring under the driveway.
Step 6: Bore under the driveway
With the setup complete, it’s time to begin the actual bore under the driveway. This step requires precision and careful monitoring to ensure a successful outcome. Follow these steps to bore under the driveway:
- Start the boring process: Gradually increase the speed and power of the boring machine to start the drilling process. Maintain a steady and controlled movement as the drill rod progresses under the driveway.
- Monitor the drilling progress: Keep a close eye on the drilling progress as the drill rod moves under the driveway. Check the alignment, depth, and direction regularly to ensure the bore remains on track.
- Handle any obstacles: If you encounter any obstacles or resistance during the drilling process, carefully adjust the drilling angle or take necessary measures to overcome the obstruction. Avoid applying excessive force, as it may damage the equipment or the driveway.
- Continue feeding the drill rod: Gradually feed the drill rod into the hole, maintaining a consistent speed and movement. Be cautious not to overload the equipment or push it beyond its capabilities.
- Keep the drilling area clear: Remove any debris or dirt that accumulates around the drilling area. This will help maintain a clear path for the drill rod and ensure a smoother drilling process.
- Follow the planned route: Continuously refer to the marked entry and exit points as a guide to stay on the desired path. Make adjustments if necessary to align the bore accurately under the driveway.
Remember, patience and careful monitoring are key during the boring process. Take your time and make adjustments as needed to ensure a successful bore. With these steps completed, you’re ready to move on to the next step: confirming the success of the boring process.
Step 7: Confirm successful boring
Confirming the successful bore under the driveway is an important step to ensure that the utility line, conduit, or pipe has been properly installed. Follow these steps to confirm the success of the boring process:
- Inspect the exit point: Once the drill rod has reached the exit point of the driveway, carefully inspect the area. Look for any signs of the drill rod emerging successfully.
- Measure the depth: Use a measuring tape or depth gauge to measure the depth of the bore at both the entry and exit points. Compare the measurements to ensure that the bore is consistent and reaches the desired depth.
- Check for obstructions: Inspect the bore path under the driveway to ensure there are no unexpected obstructions, such as rocks or debris. Clear any obstacles if necessary.
- Test the utility line or conduit: Connect the utility line or conduit to the entry and exit points of the bore. Turn on the water or electricity to confirm that the line is functioning properly without any leaks or disruptions.
- Inspect the driveway: Finally, examine the driveway for any signs of damage caused during the boring process. Repair any small holes or cracks, if necessary, to restore the driveway’s appearance and integrity.
Confirming the success of the boring process ensures that the utility line or conduit is installed correctly and ready for use. Take the time to carefully inspect and test the installation to avoid any issues in the future.
With Step 7 complete, you’re ready to move on to the final step: cleanup and restoration.
Step 8: Cleanup and restoration
After successfully boring under the driveway, it’s important to clean up the work area and restore the surroundings to their original condition. Follow these steps to complete the cleanup and restoration process:
- Clear away debris: Remove any debris, dirt, or sediment that may have accumulated during the drilling process. Use a shovel or broom to clean up the area around the entry and exit points of the bore.
- Fill in the access holes: Fill in the access holes that were dug on either side of the driveway. Use soil or gravel to level the surface and restore it to its original state. Tamp down the filled areas to ensure stability.
- Repair any driveway damage: If any damage to the driveway occurred during the drilling process, such as small holes or cracks, repair them promptly. Use driveway patching material or asphalt sealer to fix the damaged areas.
- Restore landscaping: If any landscaping or plants were disturbed during the drilling process, take the time to restore and replant them. Replace any displaced soil and mulch to rejuvenate the affected areas.
- Inspect the utility line or conduit: Double-check the utility line or conduit running under the driveway. Ensure there are no leaks or issues with the installation. Make any necessary adjustments or repairs as needed.
- Clean and store the equipment: Clean and properly store the drilling equipment, including the drill machine, drill rod, and any other tools used during the process. This will help maintain their longevity and be ready for future use.
By completing the cleanup and restoration process, you can leave behind a clean and well-maintained environment, with your driveway intact and the utility line or conduit installed successfully.
Congratulations! You have now completed the eight steps involved in boring under a driveway. Remember, the process requires careful planning, preparation, and attention to detail. By following these steps and taking your time throughout the process, you can achieve a successful and efficient bore under your driveway.
Thank you for using this guide, and we hope your project is a great success!
Conclusion
Boring under a driveway may seem like a daunting task, but with the right preparation and guidance, it can be accomplished successfully. As you have learned in this article, the key steps to bore under a driveway include gathering necessary tools and materials, determining the location, preparing the drilling equipment, creating a pilot hole, setting up the boring machine, actually boring under the driveway, confirming the success of the bore, and finally, completing the cleanup and restoration process.
Throughout the process, it is important to prioritize safety, follow proper techniques, and monitor the drilling progress closely. Careful planning and attention to detail can help you overcome potential obstacles and achieve a successful bore under the driveway.
Remember, each project may have its unique challenges and requirements, so adapt these steps to suit your specific situation. Consult with professionals if needed, especially if you are unsure about any aspect of the bore or if there are specific regulations and permits to be considered.
By following this step-by-step guide, you can efficiently route utilities or install irrigation systems under your driveway without causing significant disruption or damage. Not only will this save you time and effort, but it will also result in a more aesthetically pleasing and functional space.
We hope this article has provided you with the information and confidence you need to successfully complete your project. So go ahead, gather your tools, plan meticulously, and bore under that driveway with precision and ease!
Frequently Asked Questions about How To Bore Under A Driveway
Was this page helpful?
At Storables.com, we guarantee accurate and reliable information. Our content, validated by Expert Board Contributors, is crafted following stringent Editorial Policies. We're committed to providing you with well-researched, expert-backed insights for all your informational needs.






0 thoughts on “How To Bore Under A Driveway”