Articles
How To Build Dining Room Table
Modified: January 23, 2024
Discover expert articles on how to build a beautiful dining room table, including step-by-step instructions and helpful tips for DIY enthusiasts.
(Many of the links in this article redirect to a specific reviewed product. Your purchase of these products through affiliate links helps to generate commission for Storables.com, at no extra cost. Learn more)
Introduction
Building your own dining room table can be a rewarding and fulfilling project that allows you to showcase your craftsmanship and create a personalized piece for your home. A dining room table serves as the centerpiece for meals, gatherings, and conversations, so it’s important to have one that not only fits your style but also meets your functional needs.
In this article, we will guide you through the step-by-step process of building a dining room table from scratch. Whether you’re an experienced woodworker or a novice DIY enthusiast, this project can be completed with the right tools, materials, and a little patience.
By building your own dining table, you have the freedom to choose the size, shape, and type of wood that matches your style and fits your dining space perfectly. Additionally, building your own table allows you to create a piece that is unique and will become a cherished item in your home for years to come.
The process may seem daunting at first, but with careful planning and attention to detail, building a dining room table can be a rewarding experience. So, let’s gather our materials and get started on creating a beautiful and functional dining table that will impress your family and friends!
Key Takeaways:
- Building your own dining room table allows you to customize the design, size, and features to perfectly fit your style and dining space, creating a unique and cherished piece for your home.
- By following the step-by-step process, you not only gain valuable woodworking skills but also experience the satisfaction of creating a beautiful and functional piece of furniture that will be enjoyed for years to come.
Read more: What Is In A Dining Room?
Step 1: Gather Materials
The first step in building your own dining room table is to gather all the necessary materials. Here’s a list of essential items you’ll need:
- Wood: Choose a high-quality hardwood such as oak, maple, or walnut for durability and a beautiful aesthetic. You’ll need enough wood for the tabletop, legs, and any additional components.
- Tools: Make sure you have the right tools for the job, including a table saw, miter saw, drill, chisels, clamps, and sandpaper. These tools will help you cut, shape, and assemble the various components of your dining table.
- Fasteners: Depending on your design, you’ll need screws, nails, or dowels to secure the different parts of the table together.
- Finish: Choose a finish that suits your style and provides protection for the wood. Options include varnish, polyurethane, or wax.
- Safety equipment: Don’t forget to prioritize safety by wearing protective goggles, gloves, and a dust mask.
It’s important to plan ahead and ensure you have all the necessary materials before you begin. This will save you time and prevent unnecessary interruptions during the construction process.
If you’re not sure where to source your materials, consider visiting a local lumberyard or woodworking supply store. They can help you select the right type of wood and guide you in choosing the appropriate tools and finish for your project.
Remember, the quality of your materials will greatly impact the final outcome of your dining table. Invest in high-quality wood and durable tools to ensure a long-lasting and visually appealing piece of furniture.
Once you have gathered all the materials, you’re ready to move on to the next step: designing and taking measurements for your dining table.
Step 2: Design and Measurements
Designing your dining room table and taking accurate measurements is a crucial step to ensure a well-proportioned and functional piece of furniture. Here’s how you can approach this step:
- Decide on the design: Consider the overall style and aesthetics you want for your dining table. Do you prefer a traditional farmhouse look or a sleek modern design? Look for inspiration online, in home decor magazines, or visit furniture showrooms to get ideas. Sketch out your design or use design software to visualize your table before proceeding.
- Measure your space: Take precise measurements of the area where you plan to place the dining table. Consider the dimensions of the room, the surrounding furniture, and the number of people you want to accommodate. This will help you determine the appropriate size and shape of your table.
- Determine the table dimensions: Based on your measurements, decide on the dimensions for your tabletop. Consider the width, length, and thickness of the table. Keep in mind that the standard height of a dining table is around 30 inches, but you can adjust this based on your personal preference.
- Select leg design: Choose a leg design that complements the overall style of your table. From traditional turned legs to sleek metal options, there are numerous styles to choose from. Consider the stability and balance of the legs to ensure the table can support the weight without wobbling.
- Add any additional features: Decide if you want to incorporate any additional features into your table, such as extensions for expanding the table during larger gatherings or a built-in storage compartment. These features should be incorporated into your design and measurements.
Once you have finalized your design and measurements, it’s a good idea to create a detailed plan or blueprint. This will serve as your guide during the construction process, ensuring that you stay on track and achieve the desired outcome.
Remember, taking the time to carefully plan and measure will save you from costly mistakes and ensure that your dining table fits perfectly in your space.
Now that you have your design and measurements in place, it’s time to move on to the next step: cutting and shaping the tabletop.
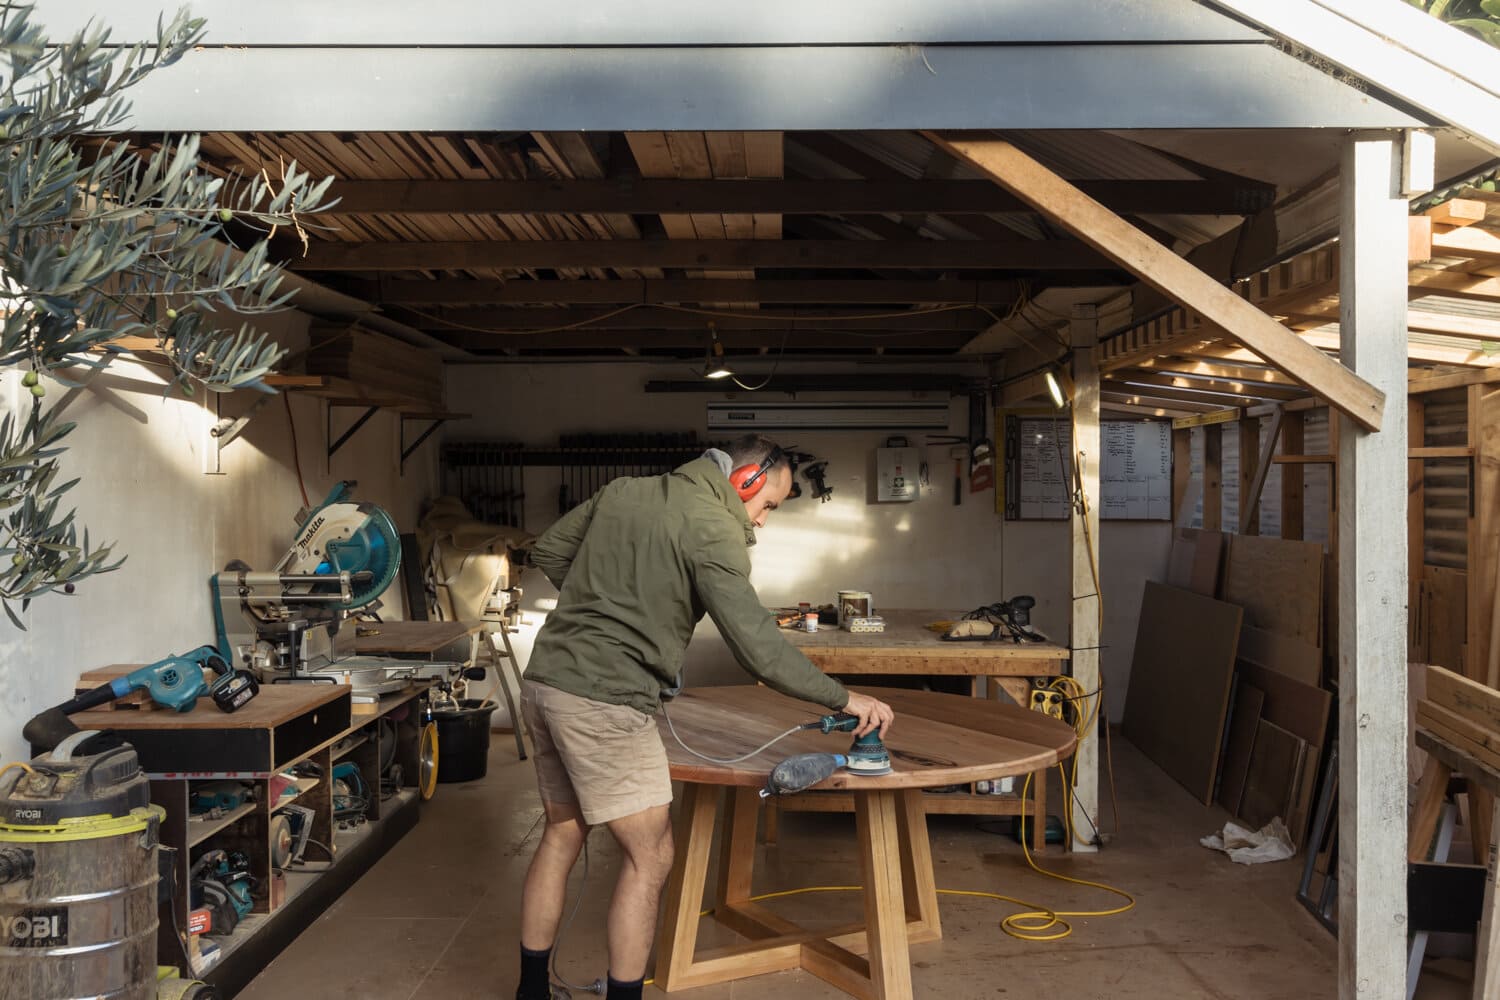
Step 3: Cut and Shape Tabletop
Now that you have your design and measurements finalized, it’s time to start working on the tabletop of your dining room table. Follow these steps to cut and shape the tabletop:
- Cut the wood: Using a table saw or a circular saw, carefully cut the wooden boards according to the dimensions you determined during the design phase. Take your time to ensure clean and straight cuts.
- Join the boards: Once the boards are cut, you’ll need to join them together to create a solid tabletop. There are several methods you can use, such as tongue and groove joints, biscuit joinery, or dowel joinery. Apply glue to the edges of the boards and clamp them tightly together. Follow the instructions for your chosen joining method to achieve a secure and seamless joint.
- Allow the glue to dry: After joining the boards, allow the glue to dry completely according to the manufacturer’s instructions. This step is crucial to ensure a strong bond between the boards.
- Shape the tabletop: Once the glue is dry, use a belt sander, hand plane, or orbital sander to shape and smooth the tabletop. Pay attention to the edges and corners to create a clean and visually appealing finish.
- Add any desired features: If you plan to include extensions or other features, now is the time to cut and shape them as well. Ensure they are aligned with the tabletop and match the design you envisioned.
Remember to wear safety goggles and a dust mask while cutting and shaping the wood to protect yourself from any flying debris. It’s also a good idea to periodically check the flatness of the tabletop using a straight edge to ensure an even surface.
Once you’re satisfied with the shape and smoothness of the tabletop, it’s time to move on to the next step: constructing the table legs.
Step 4: Construct Table Legs
With the tabletop completed, it’s time to move on to constructing the table legs. The legs provide stability and support for your dining room table. Follow these steps to construct sturdy and visually appealing legs:
- Select the leg material: Choose a wood species that matches or complements the tabletop. Consider the style of your table and the overall aesthetic you’re aiming for.
- Measure and cut the leg parts: Measure and mark the desired length for each table leg. Use a miter saw or a hand saw to make clean and accurate cuts.
- Shape the legs: Use a lathe, a hand plane, or other shaping tools to shape the legs according to your design. Pay attention to details such as curves, chamfers, or decorative elements that enhance the overall look of the legs.
- Drill for joinery: Depending on your chosen leg design, you may need to drill holes for joinery. Common joinery methods include mortise and tenon joints or dowel joints. Ensure the holes are straight and accurately aligned.
- Assemble the legs: Apply glue to the joinery holes and carefully assemble the leg parts. Use clamps to hold everything together while the glue dries. Follow the manufacturer’s instructions for the recommended drying time.
- Sand and finish the legs: Once the glue is dry, use sandpaper to smooth out any rough surfaces or edges. Apply the desired finish, such as stain or paint, to enhance the look of the legs and protect the wood.
Remember to take your time during the leg construction process and make precise measurements and cuts. The legs should be sturdy, level, and proportionate to the size of the tabletop. You can also add decorative elements or details to the legs to personalize your dining table.
Now that you have constructed the table legs, it’s time to move on to the next step: attaching the legs to the tabletop.
When building a dining room table, make sure to use sturdy and durable materials such as hardwood or high-quality plywood to ensure the table’s longevity and stability.
Read more: How To Build A Dining Table Bench
Step 5: Attach Legs to Tabletop
Now that you have both the tabletop and the table legs ready, it’s time to attach the legs securely to the tabletop. Follow these steps to ensure a stable and well-supported dining room table:
- Position the legs: Place the tabletop upside down on a flat surface and position the legs at each corner. Ensure they are evenly spaced and aligned with the edges of the tabletop.
- Mark the leg placement: Use a pencil or a marker to mark the exact placement of the legs on the underside of the tabletop. This will serve as a guide for attaching the legs later.
- Pre-drill pilot holes: To prevent the wood from splitting, pre-drill pilot holes on the tabletop where the legs will be attached. Use a drill bit slightly smaller than the screws or bolts you will be using.
- Attach the legs: Securely attach the legs to the tabletop using screws or bolts. Make sure the legs are flush with the surface and firmly attached to ensure stability. Use a screwdriver or a wrench to tighten the screws or bolts.
- Check for stability: Once the legs are attached, carefully turn the table upright and check for stability. Ensure that the table doesn’t wobble and that all legs are securely fastened.
It’s important to take your time during this step to ensure that the legs are properly aligned and securely attached. This will guarantee a strong and stable dining table that can withstand regular use.
Once the legs are securely attached to the tabletop, it’s time to move on to the next step: sanding and finishing the table for a smooth and polished look.
Step 6: Sand and Finish the Table
After attaching the legs to the tabletop, it’s important to sand and finish the table to achieve a smooth and polished surface. Follow these steps to bring out the natural beauty of the wood and protect it:
- Sand the tabletop: Use sandpaper or a sanding block to carefully sand the entire surface of the tabletop. Start with coarse-grit sandpaper to remove any roughness or imperfections, then gradually move to finer-grit sandpaper for a smoother finish. Sand along the grain of the wood to avoid scratches.
- Sand the edges and corners: Pay attention to the edges and corners of the tabletop. Use sandpaper or a sanding block to round off any sharp edges or smooth out any uneven areas.
- Remove sanding dust: After sanding, use a brush or a tack cloth to remove any sanding dust from the surface of the table. This will ensure a clean surface for applying the finish.
- Apply the finish: Choose a finish that suits your style and the type of wood you’re working with. Options include varnish, polyurethane, or wax. Apply the finish according to the manufacturer’s instructions, using a brush or a rag. Apply multiple coats as needed, allowing each coat to dry before applying the next one.
- Sand between coats: If desired, lightly sand the surface between coats of finish with fine-grit sandpaper. This will help achieve a smoother and more professional-looking finish.
- Cure the finish: Allow the final coat of finish to cure according to the manufacturer’s instructions. This will ensure that the finish is fully hardened and durable.
Sanding and finishing the table not only makes it more visually appealing, but it also protects the wood from moisture, stains, and wear and tear. The type of finish you choose will depend on your personal preference and the level of protection you desire for your dining table.
Remember to work in a well-ventilated area and wear protective gear, such as gloves and a mask, when applying the finish. This will help protect yourself from any harmful fumes or irritants.
Once the finish has cured, your dining room table is almost complete. The final step is to assemble all the components for the finished product.
Step 7: Final Assembly
After sanding and finishing the table, it’s time for the final assembly of your dining room table. Follow these steps to bring all the components together:
- Clean the table: Give the tabletop and legs a final wipe-down to remove any dust or debris that may have accumulated during the sanding and finishing process.
- Inspect for any loose fasteners: Check all the screws or bolts that attach the legs to the tabletop. If any are loose, tighten them to ensure a stable and secure table.
- Position the table in its final location: Decide on the exact spot where you want your dining room table to be placed. Carefully move the table to that location, taking care to protect the floor from scratches.
- Level the table: Use a level to check if the table is sitting evenly on the floor. If it wobbles, adjust the legs slightly until the table is level and stable.
- Add protective pads or glides: To prevent scratching your floors, consider adding protective pads or glides to the bottom of the table legs. This will also make it easier to move the table if needed.
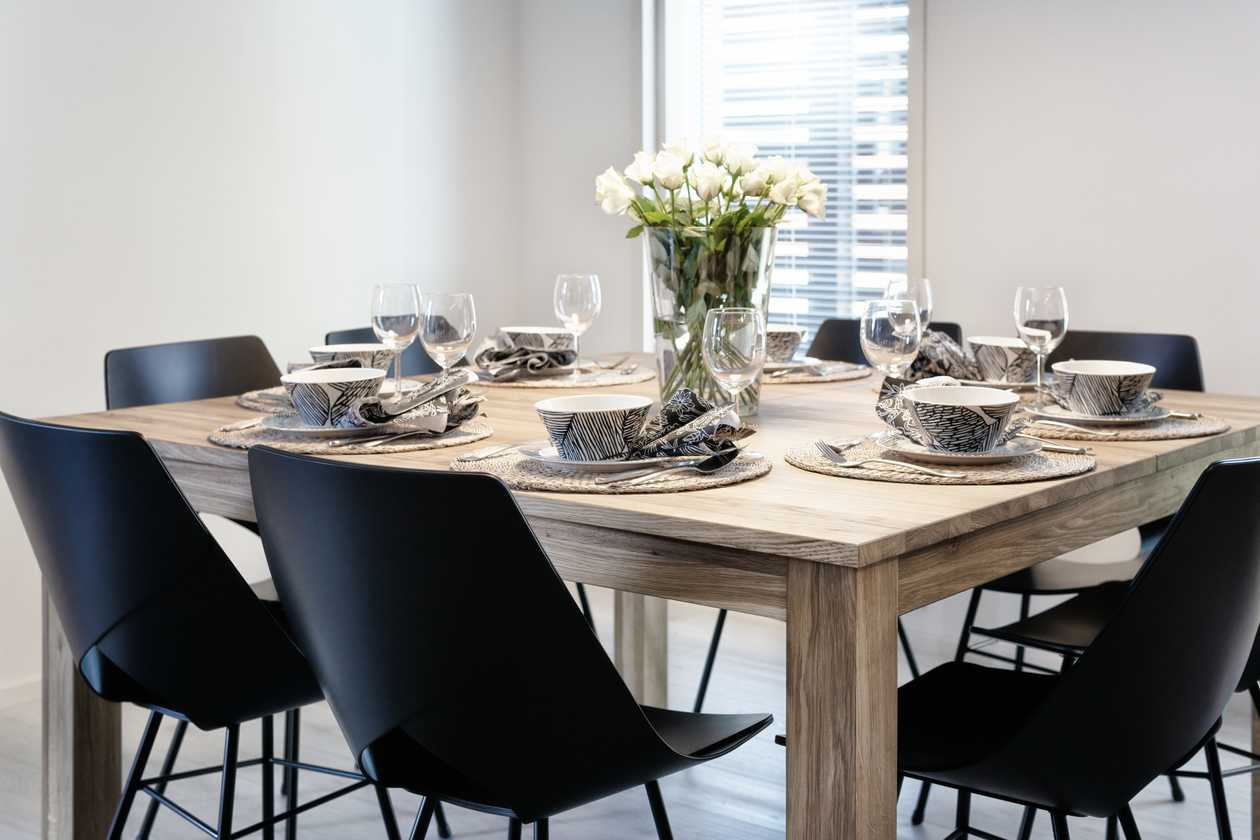
- Dress up the table: Dress up your dining room table with table linens, placemats, centerpieces, and other decorative items to make it inviting and ready for use.
Once you have completed the final assembly, step back and admire your handiwork. Your new dining room table is now ready to be enjoyed by family and friends during meals, gatherings, and special occasions.
Remember to regularly clean and maintain your table to keep it looking its best. Follow the care instructions for the specific type of finish you used to ensure its longevity.
Congratulations on successfully building your own dining room table! It’s a testament to your skills and creativity. Now you can proudly gather around your custom-made table and create lasting memories with your loved ones.
Thank you for following this step-by-step guide. We hope you found it helpful and inspiring. Enjoy your new dining room table!
Conclusion
Building your own dining room table is a gratifying project that allows you to showcase your creativity and craftsmanship. This guide has provided you with a comprehensive step-by-step process on how to build modern table, teaching you how to gather materials, design and measure, cut and shape the tabletop, construct the table legs, and attach them to the tabletop. Additionally, it has instructed you on how to sand and finish the table, culminating in the final assembly. Through your dedication and attention to detail, you have created a beautiful and functional modern table that will be cherished for years to come.
Throughout this journey, you have gained valuable woodworking skills and acquired knowledge on selecting the right materials, using the proper tools, and implementing various techniques to bring your vision to life. Remember to always prioritize safety by wearing protective gear and following best practices when working with tools and machinery.
Building your own dining room table also allows you to customize the design and size to perfectly fit your style and dining space. Whether you prefer a rustic farmhouse look or a sleek modern aesthetic, the possibilities are endless. You have the freedom to choose the type of wood, finish, and special features that reflect your personal taste and preferences.
As you admire your finished dining table, remember to take pride in your accomplishment. Building furniture from scratch requires patience, perseverance, and attention to detail. Enjoy the satisfaction that comes from creating a piece that is unique and tailored to your specific needs.
Now that you have successfully built your own dining room table, feel free to explore other woodworking projects and continue honing your skills. With each new project, you will continue to grow as a craftsman and create pieces that bring joy and functionality to your home.
Thank you for embarking on this journey with us. We hope this comprehensive guide has inspired you to unleash your creativity and tackle future woodworking projects. Happy crafting!
Frequently Asked Questions about How To Build Dining Room Table
Was this page helpful?
At Storables.com, we guarantee accurate and reliable information. Our content, validated by Expert Board Contributors, is crafted following stringent Editorial Policies. We're committed to providing you with well-researched, expert-backed insights for all your informational needs.


0 thoughts on “How To Build Dining Room Table”