Articles
How To Build A Knee Wall For Stairs
Modified: May 6, 2024
Learn how to build a knee wall for stairs with our comprehensive articles. Gain the knowledge and skills needed for a successful DIY project.
(Many of the links in this article redirect to a specific reviewed product. Your purchase of these products through affiliate links helps to generate commission for Storables.com, at no extra cost. Learn more)
Introduction
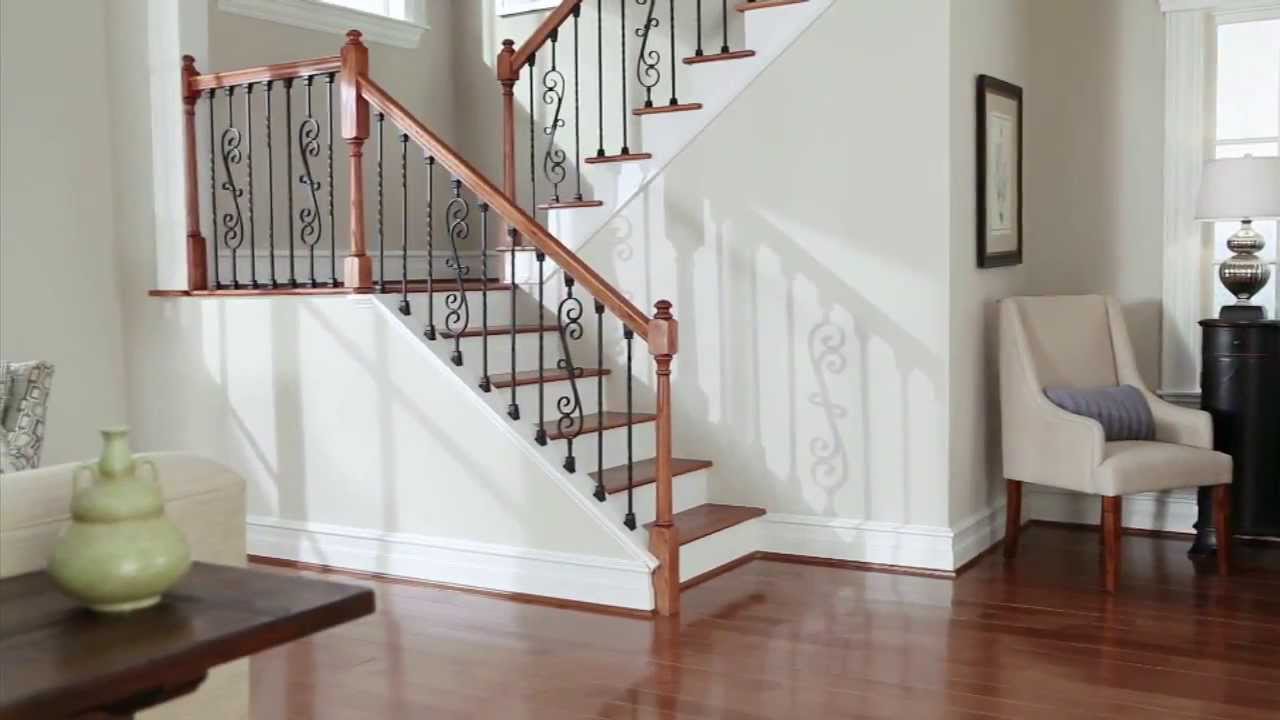
Welcome to our comprehensive guide on how to build a knee wall for stairs. If you’re considering adding a knee wall to your staircase, you’ve come to the right place. A knee wall is a low wall constructed along the side of a staircase, typically located under the handrail. This type of wall serves several purposes, including providing structural support, enhancing safety, and adding visual appeal to your staircase.
In this article, we will walk you through the step-by-step process of building a knee wall for stairs. Whether you’re a seasoned DIY enthusiast or a beginner looking to tackle a new project, this guide will provide you with all the information you need to successfully complete the task. From understanding the purpose of a knee wall to measuring, cutting, and installing the wall frame, we will cover it all. So let’s get started!
Key Takeaways:
- Building a knee wall for stairs provides structural support, safety enhancements, noise reduction, and aesthetic appeal. It’s a DIY project that adds both functionality and personalized style to your home.
- To build a knee wall, gather materials, prepare the area, measure and mark, cut and assemble the frame, install the wall, secure it, and add finishing touches. Attention to detail and safety are crucial for a successful project.
Read more: How To Build Stairs In A Retaining Wall
Understanding the Purpose of a Knee Wall for Stairs
A knee wall for stairs serves multiple purposes, making it a valuable addition to any staircase. Let’s take a closer look at some of its key functions:
- Structural Support: One of the primary purposes of a knee wall is to provide additional structural support to the staircase. By acting as a barrier between the stairs and the open space, the knee wall helps distribute the weight and prevents any shifting or movement of the stairs. This added stability is particularly important in homes with children or elderly individuals, ensuring that the stairs remain sturdy and safe.
- Safety Enhancements: Another significant benefit of a knee wall is the increased safety it provides. The knee wall acts as a protective barrier, preventing accidental falls from the stairs and reducing the risk of injury. This is especially crucial for households with young children or pets who may be more prone to accidents. Additionally, the knee wall can serve as a hand rest for those going up or down the stairs, offering extra support and stability.
- Noise Reduction: Staircases can often produce creaking or squeaking noises, especially if they are older or not properly maintained. The installation of a knee wall can help minimize these noises by providing a solid surface that absorbs some of the vibrations and prevents them from resonating throughout the house. This is particularly beneficial for those living in multi-story homes or apartments, where excessive noise can be a nuisance.
- Aesthetic Appeal: Beyond its functional purposes, a knee wall can also enhance the overall appearance of your staircase. This architectural feature adds a touch of elegance and visually divides the staircase from the surrounding space. With various design options available, such as different materials and finishes, you have the opportunity to customize your knee wall to complement your home’s decor and personal style.
Now that you understand the multiple benefits of a knee wall, let’s move on to the practical steps of building one for your staircase.
Step-by-Step Guide to Building a Knee Wall for Stairs
Building a knee wall for stairs may seem like a daunting task, but with the right tools, materials, and guidance, it can be a rewarding DIY project. Follow these step-by-step instructions to create a sturdy and visually appealing knee wall:
- Gather Materials and Tools: Before starting the construction process, gather all the necessary materials and tools. This typically includes lumber for the frame, plywood or drywall for the wall surface, nails or screws, a saw, a measuring tape, a level, a drill, and a hammer.
- Prepare the Area: Clear the area where the knee wall will be installed. Remove any existing baseboards, trim, or other obstacles that may interfere with the installation process. Make sure the area is clean and free of debris.
- Measure and Mark: Carefully measure the length and height of the knee wall, taking into account the slope of the stairs. Use a measuring tape to accurately mark the dimensions on the wall and floor.
- Cutting and Assembling the Wall Frame: Using the marks as a guide, cut the lumber pieces to the appropriate lengths for the wall frame. Make sure to adhere to the correct angles and dimensions to ensure a snug fit against the stairs. Assemble the frame using nails or screws, making sure it is level and plumb.
- Installing the Knee Wall: With the frame complete, it’s time to install the knee wall itself. Cut and attach the plywood or drywall panels to the frame, ensuring they are securely fastened. Use a level to check for straightness and make any necessary adjustments.
- Securing the Knee Wall: To ensure the stability and strength of the knee wall, secure it to the stairs and the adjacent walls. Use screws or nails to anchor the wall firmly in place, ensuring it cannot shift or move.
- Finishing Touches: Once the knee wall is securely installed, it’s time for the finishing touches. Fill any visible gaps or nail holes with wood putty or drywall compound, and sand the surface to create a smooth and seamless finish. Finally, apply paint or stain to match the desired aesthetic of your staircase.
By following these steps and exercising caution throughout the process, you can build a beautiful and functional knee wall for your stairs. Remember to measure accurately, use proper safety precautions, and take your time to ensure the best results. With the completion of the final touches, you can step back and admire your newly constructed knee wall, adding both style and stability to your staircase.
Materials and Tools Needed
Before starting the construction of your knee wall for stairs, it’s important to gather all the necessary materials and tools. Here is a list of the items you will need:
Materials:
- Lumber: Choose a sturdy and durable wood, such as pine or oak, for the frame construction. The exact amount of lumber will depend on the size and length of the knee wall.
- Plywood or Drywall: Use plywood or drywall panels to create the surface of the knee wall. The thickness of the panels will depend on personal preference and the desired level of sturdiness.
- Nails or Screws: Select appropriate nails or screws to secure the frame and panels together. Make sure they are long enough to provide a secure hold.
- Wood Putty or Drywall Compound: Use wood putty or drywall compound to fill any gaps or nail holes in the knee wall, ensuring a smooth and seamless finish.
- Paint or Stain: Choose a paint or stain that matches the overall aesthetic of your staircase and home’s interior design. Consider using a finish that is resistant to wear and tear.
- Primer: If you opt to paint the knee wall, applying a primer beforehand can improve paint adhesion and create a more professional-looking finish.
Read more: Knee Pain When Coming Down Stairs
Tools:
- Saw: Use a saw appropriate for cutting lumber and plywood or drywall panels. A circular saw or miter saw can be useful for making precise cuts.
- Measuring Tape: A measuring tape is essential for accurately measuring the dimensions of the knee wall and ensuring proper alignment during installation.
- Level: Use a level to achieve straight and even installation of the knee wall, both horizontally and vertically.
- Drill or Screwdriver: Depending on your choice of fasteners, have a drill or screwdriver on hand to secure the frame and panels.
- Hammer: A hammer can be used to drive in nails or make adjustments to the lumber, ensuring a secure and snug fit.
- Sandpaper: Sandpaper is necessary for smoothing out any rough edges or imperfections on the knee wall surface before applying paint or stain.
- Paintbrush or Roller: Choose a paintbrush or roller appropriate for the type of paint or stain you plan to use. Consider using a brush for detailed work and a roller for larger areas.
- Protective Gear: It’s important to prioritize safety while working on your knee wall. Remember to wear safety goggles, gloves, and a dust mask to protect against debris and fumes.
By ensuring you have all the necessary materials and tools before you begin, you can proceed with confidence and complete your knee wall construction efficiently.
Preparing the Area
Before you can start building your knee wall for stairs, it’s important to properly prepare the area where the wall will be installed. Here are the steps to ensure a clean and organized workspace:
- Clear the Space: Remove any obstacles or objects that may hinder the installation of the knee wall. This includes furniture, decorations, and any other items in close proximity to the staircase. Clearing the space will allow for easier access and maneuverability during construction.
- Protect Surrounding Surfaces: Cover the surrounding areas, such as the floor and adjacent walls, with drop cloths or plastic sheets. This will protect these surfaces from potential damage caused by dust, debris, or accidental spills during the construction process.
- Remove Baseboards and Trim: If there are baseboards or trim along the stairway, carefully remove them using a pry bar or a flathead screwdriver. This step is essential to ensure a seamless installation of the knee wall. Keep the removed baseboards and trim in a safe place for later reinstallation, if desired.
- Clean the Area: Thoroughly clean the area around the staircase. Sweep or vacuum the floor and remove any accumulated dust, dirt, or debris. Cleaning the area will provide a clean surface for installation and help maintain cleanliness throughout the construction process.
- Inspect the Stairs: Take the time to inspect the stairs for any signs of damage, loose parts, or structural issues. Address any necessary repairs or adjustments before proceeding with the knee wall installation. It’s crucial to ensure the stairs are in good condition to provide a solid foundation for the knee wall.
By following these preparation steps, you will create an optimal environment for building your knee wall for stairs. Having a clean and organized workspace will make the construction process smoother and more efficient. It will also help protect the surrounding surfaces and ensure the best possible results for your knee wall installation.
Measuring and Marking
Accurate measurement and careful marking are crucial steps in building a knee wall for stairs. This ensures that the wall fits snugly and aligns properly with the staircase. Follow these steps to measure and mark the dimensions for your knee wall:
- Measure the Length: Starting at the bottom of the staircase, use a measuring tape to determine the length of the knee wall. Measure from the edge of the first step to the desired endpoint on the top landing or the start of the handrail. Make a note of this measurement.
- Measure the Height: Measure the desired height of the knee wall, typically from the base of the staircase to just under the handrail. Ensure that the height measurement is consistent throughout the entire length of the wall.
- Consider the Slope: Take into account the slope of the stairs when determining the measurements for your knee wall. This is especially important if the stairs have different heights at each step. Adjust the height and length measurements accordingly to accommodate the slope and maintain a consistent look for the knee wall.
- Mark the Measurements: Use a pencil or chalk to mark the measurements directly on the wall and floor. Start by marking the height at several points along the staircase to ensure accuracy and consistency. Then, draw a horizontal line to mark the length measurement at the appropriate height on the wall, aligning it with the slope of the stairs.
- Double-Check the Measurements: Once you have marked the measurements, double-check the accuracy of your marks. Use a level to ensure that the horizontal line is straight and accurately aligned with the slope of the stairs. Make any necessary adjustments to the marks before proceeding to the next step.
Remember, taking precise measurements and making accurate marks is crucial to achieving a professional and well-fitted knee wall for your stairs. Take your time during this step to ensure that your measurements are correct, and don’t hesitate to double-check them before moving on to the construction phase.
When building a knee wall for stairs, make sure to measure and cut the framing lumber accurately to ensure a snug and secure fit. Use a level to ensure the wall is plumb before securing it in place.
Cutting and Assembling the Wall Frame
Now that you have accurately measured and marked the dimensions for your knee wall, it’s time to cut and assemble the wall frame. Follow these steps to create a sturdy and well-fitted frame:
- Gather the Materials: Collect the lumber pieces you will need for the frame construction. These will include vertical studs, horizontal top and bottom plates, and any additional framing pieces required for support.
- Measure and Cut the Lumber: Using your marked measurements as a guide, carefully measure and mark the appropriate lengths on the lumber pieces. Double-check your measurements before making any cuts. Use a saw, such as a circular saw or a miter saw, to make precise and accurate cuts according to your markings.
- Assemble the Vertical Studs: Lay out the cut studs on the floor or workbench, ensuring they are aligned in a straight line. Measure and mark the precise spacing between each stud, accounting for the required stability and structural support. Use a measuring tape and level to ensure accuracy. Attach the studs to the top and bottom plates using nails or screws. Make sure the studs are plumb and securely fastened.
- Add Additional Framing: Depending on the size and design of your knee wall, you may need to add additional framing pieces for support and stability. These may include additional horizontal or diagonal braces. Measure and cut these pieces to fit the desired locations, considering any angles or slopes of the stairs. Attach them securely to the existing frame with nails or screws.
- Check for Level and Plumb: Once the frame is assembled, check for levelness and plumbness. Use a level to ensure that the vertical studs are straight and perpendicular to the floor. Make any necessary adjustments before proceeding.
- Secure the Frame: With the frame properly aligned, secure it to the floor and adjacent walls. Use nails or screws to firmly attach the bottom plate to the floor or subfloor. Secure the top plate to the adjacent walls, ensuring a tight and stable connection.
By carefully measuring and cutting the lumber and assembling the frame with precision, you will create a solid foundation for your knee wall. Remember to double-check your measurements and use a level to ensure the frame is straight and plumb. With the wall frame in place, you’re ready to move on to the next step: installing the knee wall itself.
Read more: Knees Crack When Walking Up Stairs
Installing the Knee Wall
Now that you have successfully built and secured the wall frame, it’s time to move on to installing the knee wall itself. Follow these steps to ensure a proper and secure installation:
- Gather the Wall Material: Depending on your preference and design choice, gather the plywood or drywall panels that will serve as the surface of your knee wall. Ensure that the thickness of the panels matches your desired level of sturdiness and appearance.
- Measure and Cut the Wall Material: Measure and mark the dimensions for the wall material based on the height and length of the knee wall. Use a saw to carefully cut the panels to fit the frame. Double-check your measurements before making any cuts.
- Attach the Wall Material: Place the cut panels onto the frame, ensuring they fit snugly. Use nails or screws to secure the panels to the frame at regular intervals, ensuring a secure and even attachment. Consider starting from one end and working your way to the other, making sure the panels are aligned and straight as you go along.
- Check for Levelness and Plumbness: As you attach the wall material, use a level to check that the knee wall is level and plumb. Make any necessary adjustments to the panels or frame to ensure a straight and aligned finish.
- Trim any Excess Material: If the wall material extends beyond the frame, use a saw or utility knife to trim off any excess. This will create a clean and polished look for your knee wall.
Remember to take your time during the installation process to ensure a precise and secure fit. Use a level periodically to check that the knee wall is level and plumb, making any necessary adjustments along the way. By following these steps, you will have successfully installed the knee wall, bringing it one step closer to completion.
Securing the Knee Wall
After installing the knee wall, the next crucial step is to ensure that it is securely anchored in place. This will provide stability and prevent any movement or shifting. Follow these steps to properly secure your knee wall:
- Locate Wall Studs: Use a stud finder or tapping method to locate the supporting wall studs behind the knee wall. Mark their locations on the knee wall surface.
- Drill Pilot Holes: Using a drill fitted with an appropriate size drill bit, drill pilot holes through the knee wall material and into the wall studs at the marked locations. Ensure the drill bit is slightly smaller in diameter than the screws you will be using.
- Insert Screws: Insert screws through the pilot holes and into the wall studs, using a screwdriver or drill to securely fasten them. Make sure the screws are long enough to penetrate into the studs but not too long that they protrude through the knee wall surface.
- Repeat the Process: Repeat the drilling and screwing process at regular intervals along the length of the knee wall, ensuring that each screw is securely fastened into a wall stud. This will provide even and consistent support.
- Check for Stability: Once all screws are in place, test the stability of the knee wall by applying gentle pressure or pushing against it from different angles. Ensure the wall does not wobble or move significantly. If any movement is detected, reinforce the area with additional screws or consult a professional for assistance.
Securing the knee wall properly is essential to ensure its stability and durability over time. By firmly anchoring it to the wall studs, you will create a strong and reliable support system. Always follow safety guidelines and use caution when working with tools and fasteners.
With the knee wall securely in place, you’re ready to move on to the final steps: adding the finishing touches and giving your knee wall a polished look.
Finishing Touches and Final Thoughts
As you near the completion of your knee wall for stairs, it’s time to add the finishing touches that will enhance its appearance and ensure a polished final result. Here are the final steps to take:
- Fill Gaps and Nail Holes: Inspect the knee wall for any visible gaps or nail holes. Use wood putty for wooden knee walls or drywall compound for drywall knee walls to fill in these imperfections. Smooth the surface with a putty knife or a drywall knife and let it dry according to the product instructions.
- Sand the Surface: Once the putty or compound is fully dry, use sandpaper to smooth out the patched areas and create a seamless surface. Sand any rough edges or imperfections on the knee wall, ensuring a smooth and uniform finish.
- Apply Paint or Stain: If desired, apply a coat of paint or stain to the knee wall. Choose a color that matches your staircase or complements your home’s overall decor. Use a paintbrush or roller to apply an even coat, following the manufacturer’s instructions for drying times and additional coats if needed. Allow the paint or stain to dry completely.
- Reinstall Baseboards and Trim: If you removed any baseboards or trim during the preparation stage, now is the time to reinstall them. Carefully attach them back to the walls, ensuring they fit snugly against the knee wall and provide a clean transition between the wall and the floor.
- Clean the Area: Give the area around the knee wall a final clean-up. Remove any dust or debris that may have accumulated during the construction process. Wipe down the knee wall surface to remove any residue from the sanding or painting process.
With the finishing touches complete, step back and admire your newly constructed knee wall. It not only adds structural support and safety but also enhances the visual appeal of your staircase. Take satisfaction in the fact that you have successfully completed this DIY project and added a unique touch to your home.
Remember, safety should always be a priority during any construction project. Use appropriate safety gear, such as goggles and gloves, and follow proper procedures to minimize risks.
As a final thought, building a knee wall for stairs can be a rewarding and fulfilling project. It not only adds functionality but also allows for personalization and customization of your space. With proper planning, attention to detail, and following the steps outlined in this guide, you can confidently build a knee wall that meets your needs and enhances the overall aesthetic of your home.
Now that you've mastered building a knee wall for stairs, why not dive deeper into DIY projects or refine your woodworking skills? Whether you enjoy crafting practical solutions for your home or love working with wood, our upcoming articles will surely spike your interest. Check out our insights on the benefits of DIY projects and get ready for a roundup of the best woodworking tips for the coming year, ideal for both beginners and seasoned craftsmen alike.
Frequently Asked Questions about How To Build A Knee Wall For Stairs
Was this page helpful?
At Storables.com, we guarantee accurate and reliable information. Our content, validated by Expert Board Contributors, is crafted following stringent Editorial Policies. We're committed to providing you with well-researched, expert-backed insights for all your informational needs.


0 thoughts on “How To Build A Knee Wall For Stairs”