
Articles
How To Build Stone Stairs
Modified: January 9, 2024
Learn the step-by-step process of building durable stone stairs with our informative articles. Gain valuable insights and expert tips for a successful project.
(Many of the links in this article redirect to a specific reviewed product. Your purchase of these products through affiliate links helps to generate commission for Storables.com, at no extra cost. Learn more)
Introduction
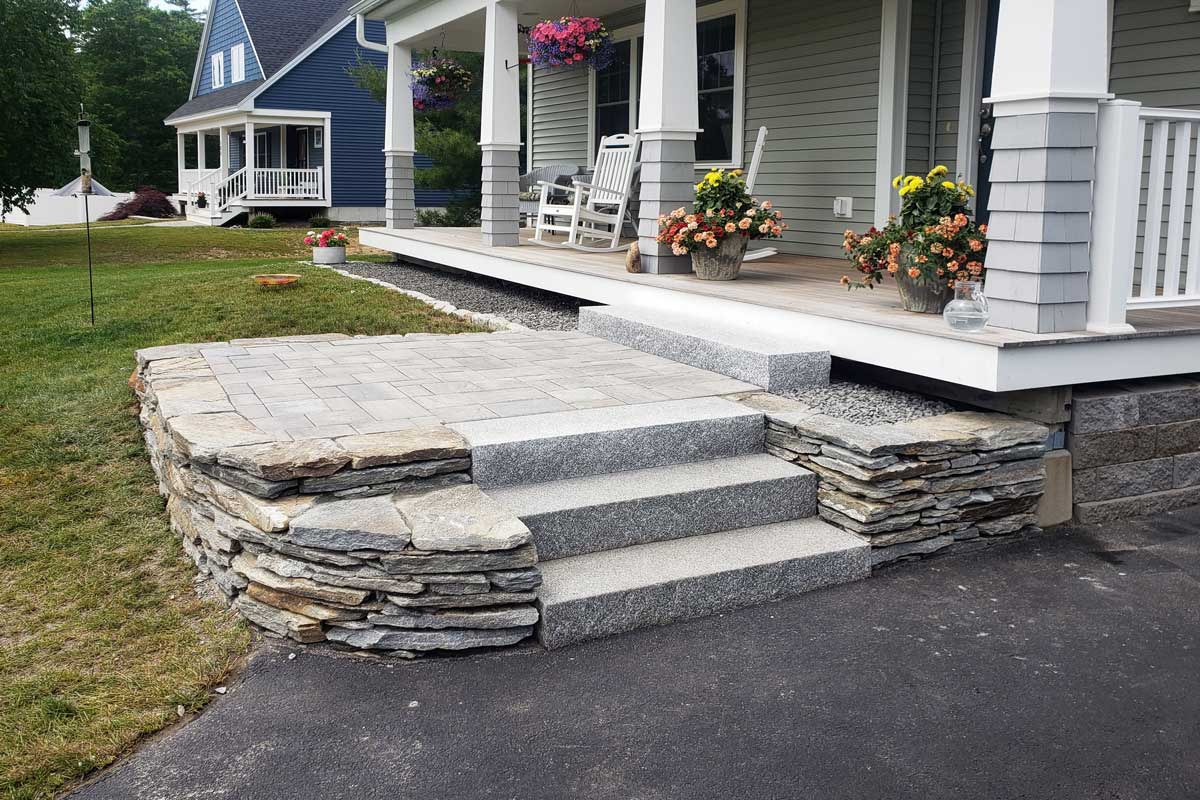
Stone stairs are not only functional but also add beauty and character to any outdoor space. Whether you want to create a grand entrance to your home or add a charming pathway through your garden, building stone stairs can be a rewarding and satisfying project.
In this article, we will guide you through the step-by-step process of building stone stairs. From planning and preparation to choosing the right stone and installing each step, we will cover everything you need to know to create a stunning and durable set of stairs.
Building stone stairs may seem like a daunting task, but with proper planning, the right tools, and a bit of patience, anyone can accomplish this project successfully. By following the steps outlined in this guide, you will be able to create a functional and visually appealing set of stone stairs that will stand the test of time.
Before we dive into the detailed steps, it’s important to note that safety should always be a top priority when undertaking any construction project, including building stone stairs. Make sure to wear appropriate safety gear, such as gloves and goggles, and use caution when handling heavy materials.
Now, let’s get started on your journey to building beautiful stone stairs that will elevate the aesthetic appeal of your outdoor space.
Key Takeaways:
- Building stone stairs requires careful planning, precise execution, and attention to detail. From choosing the right stone to installing each step, this guide ensures a stunning and durable staircase that enhances outdoor aesthetics.
- Safety, adherence to local regulations, and regular maintenance are crucial for successful stone stair construction. With proper care, your stairs will stand the test of time, providing an elegant entrance to your home.
Read more: How To Build A Stone Fireplace
Step 1: Planning and Preparation
Before you begin building your stone stairs, it’s crucial to invest time in careful planning and preparation. This will ensure that your project goes smoothly and the end result meets your expectations. Here’s what you need to do:
- 1.1 Assess the Site: Start by examining the area where you plan to build the stone stairs. Consider factors such as the slope, the available space, and any existing structures or obstacles that may affect the design and layout of the stairs.
- 1.2 Determine the Number of Steps: Decide how many steps you want your staircase to have. This will depend on the height difference between the starting and ending points of the stairs. Keep in mind that each step should offer a comfortable and safe rise and run ratio.
- 1.3 Create a Design: Sketch a rough design of your stone stairs, taking into account the dimensions, shape, and style you want to achieve. Consider the overall aesthetic of your outdoor space and choose a design that complements it.
- 1.4 Check Local Building Codes: Consult your local building codes and regulations to ensure that your intended project complies with any requirements or restrictions. This step is essential to avoid any legal issues and ensure the safety and stability of your stone stairs.
- 1.5 Gather the Necessary Tools and Materials: Make a list of the tools and materials you will need for the construction of your stone stairs. Common tools include a measuring tape, shovel, level, masonry saw, and safety equipment. As for materials, you will need stone slabs or blocks, gravel, sand, and mortar.
By thoroughly planning and preparing for your stone stair project, you can avoid costly mistakes and ensure that the construction process goes smoothly. Once you have completed this step, you will be ready to move on to the next phase: choosing the right stone for your stairs.
Step 2: Choosing the Right Stone
The choice of stone for your stairs is crucial as it not only contributes to the overall aesthetics but also determines the durability and longevity of your staircase. Here’s how you can select the right stone:
- 2.1 Consider the Purpose: Think about the primary purpose of your stone stairs. Will they be mainly decorative or heavily used for daily traffic? This will help you determine the level of durability required in the stone you choose.
- 2.2 Assess the Style: Consider the style and aesthetic of your outdoor space. Look for stones that complement the existing architecture and landscaping. Options can range from natural stones like slate, limestone, and granite to concrete pavers that mimic the look of natural stone.
- 2.3 Evaluate Slip Resistance: Safety is a critical factor when choosing the right stone for stairs. Look for stones that offer good slip resistance, especially in wet conditions. Rougher textures and stones with natural grip properties, such as sandstone, can provide enhanced traction.
- 2.4 Consider Maintenance: Different stones have varying degrees of maintenance requirements. Consider the effort and time you are willing to invest in maintaining your stone stairs. Natural stones may require periodic sealing and cleaning, whereas concrete pavers are generally low maintenance.
- 2.5 Explore Color and Texture: Select stones that align with your color palette and desired texture. Stones come in a variety of hues and finishes, including smooth, rough, or even patterned designs. Choose a stone that complements your outdoor space and creates visual interest.
Take your time to visit local stone suppliers or browse online to explore the different options available. Consider obtaining samples to see how the stones look in your actual outdoor space. Remember, the right choice of stone will enhance the beauty of your stairs and create a lasting impression.
Once you have selected the stone for your stairs, you can proceed to the next step: marking the steps on the site.
Step 3: Marking the Steps
Before you start digging and laying the foundation for your stone stairs, it’s essential to mark the exact location and dimensions of each step. Properly marking the steps will ensure accuracy and consistency throughout the construction process. Follow these steps to mark your stone stairs:
- 3.1 Measurements: Start by measuring the total height difference between the starting and ending points of your stairs. Divide this height by the desired rise of each step to determine the number of steps required.
- 3.2 Set the Starting Point: Identify the starting point of your stairs. This can be an existing pathway, a porch, or any other appropriate location. Ensure that the starting point is level and stable.
- 3.3 Determine the Tread and Riser Dimensions: Decide on the dimensions of each step’s tread (horizontal surface) and riser (vertical height). The general rule of thumb is to have a tread depth of 10-12 inches and a riser height of 6-8 inches to ensure comfortable and safe climbing conditions.
- 3.4 Use String Lines and Stakes: Begin by setting up string lines to establish the outer edges of the staircase. Drive stakes into the ground at the starting point and at each end of the proposed stairs. Attach the string lines between the stakes, ensuring they are taut and level.
- 3.5 Mark the Tread and Riser: Using a measuring tape, mark the dimensions of each step along the string lines. Make sure each mark represents the desired tread depth and riser height.
- 3.6 Double-Check the Alignment: Take a step back and visually inspect the marked steps. Ensure they are evenly spaced, level, and aligned with the overall design of your stone stairs. Adjust the markings if necessary.
Once you have successfully marked the steps, you will have a clear visual guide for the construction of your stone stairs. This step ensures that you maintain accuracy and consistency as you move forward with the excavation and construction process.
Now that the steps have been marked, let’s move on to the next step: excavating the area to prepare for the installation of the stone stairs.
Step 4: Excavating the Area
Excavating the area is an essential step in building stone stairs as it creates a stable foundation for the staircase. Proper excavation ensures that the stairs are level, secure, and able to withstand the test of time. Follow these steps to excavate the area:
- 4.1 Start Digging: Begin by digging out the area between the marked steps using a shovel or excavator. Remove any grass, vegetation, or debris to create a clear and even surface.
- 4.2 Dig to the Proper Depth: Dig out the area to a depth that accommodates the desired height of each step, including the thickness of the stone material and the base layers.
- 4.3 Create a Level Base: Use a level and a straight board to ensure that the bottom of the excavation is even and level. This will serve as the foundation for your stone stairs.
- 4.4 Compact the Soil: Use a vibrating plate compactor or hand tamper to compact the soil at the bottom of the excavation. This will provide a solid and stable base for the stairs.
- 4.5 Add a Gravel Base: In areas with poor drainage, it is advisable to add a layer of compacted gravel to improve stability and prevent water accumulation. Spread a layer of gravel and compact it with the plate compactor.
- 4.6 Check for Level and Slope: Use a level and a string line to check the level and slope of the excavated area. Make any necessary adjustments to ensure that the area is perfectly level and the slope matches the intended design.
By carefully excavating the area and creating a solid base, you will lay the foundation for strong and durable stone stairs. Remember to take your time during this step to ensure accuracy and precision.
With the excavation complete, it’s time to move on to the next step: creating a stable base for the installation of the first step of your stone stairs.
When building stone stairs, make sure to use a sturdy base and level each step carefully to ensure stability and safety.
Read more: How To Build Basement Stairs
Step 5: Creating a Stable Base
Creating a stable base is crucial for the structural integrity and longevity of your stone stairs. A solid and well-prepared base will ensure that your stairs remain level and secure over time. Follow these steps to create a stable base:
- 5.1 Lay a Layer of Paver Base: Start by spreading a layer of paver base material, such as crushed stone or gravel, over the compacted soil. This base layer will provide stability and help with drainage.
- 5.2 Compact the Base Material: Use a plate compactor to compact the paver base material. This will create a firm and level surface that supports the weight of the stone steps.
- 5.3 Check for Level and Slope: Use a level and a straight edge to confirm that the compacted base is level and properly sloped. Make any necessary adjustments to ensure stability and proper water drainage.
- 5.4 Add a Layer of Sand: Once the paver base is compacted and level, add a layer of sand on top. This layer will serve as a cushioning agent and provide a smooth surface for the stone steps to rest upon.
- 5.5 Level and Smooth the Sand: Use a straight board or a screed to level and smooth the layer of sand. This will ensure that the surface is even and ready for the installation of the stone steps.
- 5.6 Compact the Sand: Finally, use a plate compactor or a hand tamper to compact the sand layer. This will further stabilize the base and prepare it for the installation of the stone steps.
Creating a stable base is crucial to ensure the longevity and structural integrity of your stone stairs. Take the time to properly prepare the base, ensuring it is level, compacted, and well-drained. By following these steps, you will lay the foundation for a strong and durable staircase.
With the stable base in place, it’s time to move on to the next step: installing the first step of your stone stairs.
Step 6: Installing the First Step
Installing the first step of your stone stairs is a critical step as it sets the foundation for the rest of the staircase. Proper installation ensures stability and alignment, ensuring a secure and visually pleasing set of stairs. Follow these steps to install the first step:
- 6.1 Prepare the Mortar: Mix the mortar according to the manufacturer’s instructions. The mortar will act as the bonding agent between the stone steps and the base.
- 6.2 Apply the Mortar: Use a trowel to apply a layer of mortar onto the prepared and leveled base. Make sure the mortar is evenly spread, covering the area where the first step will be placed.
- 6.3 Position the Stone Step: Carefully place the first stone step onto the layer of mortar. Press it down gently to ensure proper adhesion and to level it with the surrounding area. Use a level to ensure the step is perfectly horizontal and adjust as necessary.
- 6.4 Check for Alignment: Use a level and a straight edge to check the alignment of the first step. Make adjustments to ensure it is straight and properly aligned with the marked guidelines.
- 6.5 Tap and Adjust: Use a rubber mallet or a wooden block to gently tap the stone step into place. This will help it settle into the mortar and create a secure bond. Make any necessary adjustments to ensure a proper fit.
- 6.6 Remove Excess Mortar: Use a damp cloth or sponge to clean off any excess mortar that may have squeezed out during the installation process. Allow the mortar to dry according to the manufacturer’s instructions.
By following these steps and taking the time to properly install the first step, you will establish a solid foundation for the rest of the stone stairs. Take care to ensure that the step is level, aligned, and securely bonded to the base for a sturdy and attractive staircase.
Now that the first step is in place, let’s move on to the next step: building the rest of the steps to complete your stone staircase.
Step 7: Building the Rest of the Steps
Building the rest of the steps is the next crucial step in completing your stone staircase. This involves repeating the process of installing each step, ensuring proper alignment, and creating a cohesive and visually appealing staircase. Follow these steps to build the rest of the steps:
- 7.1 Prepare the Mortar: Mix another batch of mortar following the manufacturer’s instructions. It’s important to mix the right amount of mortar for each step to ensure consistent quality.
- 7.2 Apply Mortar and Position the Step: Use a trowel to apply a layer of mortar onto the previously installed step and the area where the next step will be placed. Position the next stone step carefully, aligning it with the marked guidelines and ensuring a level surface.
- 7.3 Check for Alignment: Use a level and a straight edge to check the alignment of each step. Ensure that each step is level, both within itself and in relation to the previous steps. Make any necessary adjustments to achieve proper alignment.
- 7.4 Tap and Adjust: Use a rubber mallet or a wooden block to gently tap the stone step into place, allowing it to settle into the mortar and create a secure bond. Continue this process for each subsequent step, making sure they are securely and evenly placed.
- 7.5 Remove Excess Mortar: As you go, remove any excess mortar that may have squeezed out during the installation process using a damp cloth or sponge. This will help maintain a clean and polished appearance.
- 7.6 Check for Consistency and Aesthetics: Step back from your work periodically to assess the overall consistency and aesthetics of the staircase. Ensure that the steps are evenly spaced, aligned, and visually cohesive.
By following these steps and maintaining careful attention to detail, you will be able to build the rest of the steps for your stone staircase. Remember to consistently check for alignment and leveling, making any necessary adjustments, to ensure a durable and visually appealing end result.
With the rest of the steps in place, your stone staircase is almost complete. Let’s move on to the final step: adding finishing touches and discussing maintenance.
Step 8: Finishing Touches and Maintenance
Now that the construction of your stone stairs is nearing completion, it’s time to add the finishing touches and discuss maintenance to ensure the longevity and beauty of your staircase. Follow these steps for the final touches and ongoing maintenance:
- 8.1 Fill the Gaps: Use a mortar mix or polymeric sand to fill the gaps between the stone steps. This will provide stability, prevent weed growth, and enhance the overall appearance of your staircase.
- 8.2 Smooth the Joints: Use a pointing trowel or jointing tool to smooth and shape the joints between the stone steps. This will give the stairs a polished and finished look.
- 8.3 Seal the Stones (optional): Consider applying a stone sealer to protect the surface of the stones from weathering, staining, and fading. This step is especially important if you are using natural stones. Follow the manufacturer’s instructions for proper application.
- 8.4 Regular Cleaning: Keep your stone stairs clean by regularly sweeping away debris and dirt. This will help prevent moss, algae, or any other organic growth. If necessary, use a mild detergent or stone cleaner and a soft brush to remove stubborn stains.
- 8.5 Periodic Maintenance: Every few years, inspect your stone stairs for any signs of wear or damage. Address any loose stones, cracks, or erosion promptly to prevent further deterioration. Repoint or replace any damaged mortar as needed.
- 8.6 Winter Protection: In colder climates, protect your stone stairs from harsh winter conditions by using non-corrosive de-icing materials and avoiding the use of metal shovels that could damage the stones. Proper winter maintenance will help prolong the life of your stairs.
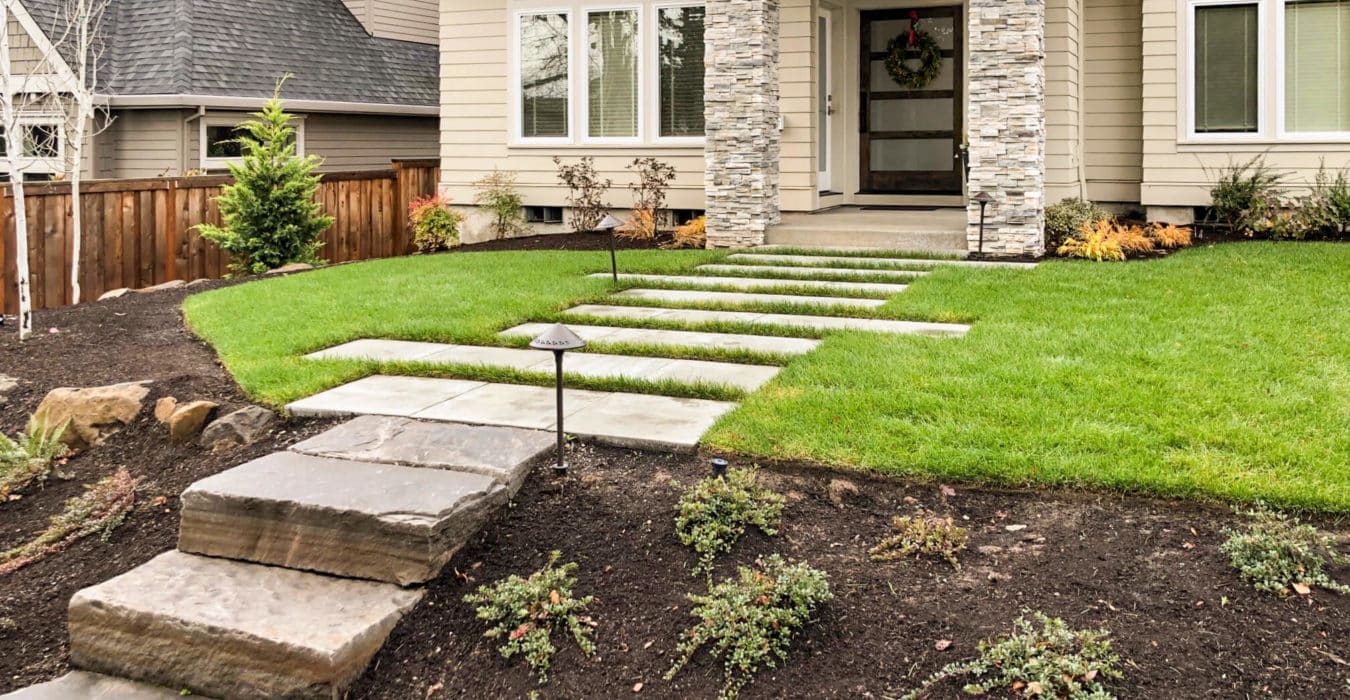
- 8.7 Enhance with Lighting and Landscaping: Consider adding outdoor lighting to highlight your stone stairs and enhance visibility during the evening. Additionally, landscape around the stairs by planting foliage or placing decorative elements to further enhance the aesthetic appeal.
By following these final steps and implementing regular maintenance practices, you can ensure that your stone stairs remain functional, safe, and beautiful for years to come. Don’t forget to enjoy the result of your hard work and the beauty it adds to your outdoor space!
Congratulations! You have successfully completed the process of building stone stairs. Your diligent planning, careful execution, and attention to detail have led to the creation of a stunning and functional addition to your outdoor environment.
Read more: How To Build Cement Stairs
Conclusion
Building stone stairs is a rewarding project that adds both functionality and beauty to your outdoor space. Through careful planning, proper preparation, and precise execution, you can create a stunning and durable set of stairs that will enhance the overall aesthetic appeal of your home.
We started by emphasizing the importance of safety and the need to adhere to local building codes. Following this, we discussed the crucial steps involved in building stone stairs:
We began with planning and preparation, where we assessed the site, determined the number of steps, created a design, and checked local regulations. Then, we moved on to choosing the right stone, considering factors such as purpose, style, slip resistance, maintenance, and color.
Next, we covered the process of marking the steps, ensuring accuracy and consistency in the construction. This was followed by excavating the area and creating a stable base using paver base and sand layers.
With the base prepared, we delved into the step-by-step process of installing the first step and building the subsequent steps, paying attention to proper alignment and leveling. Finally, we discussed the importance of finishing touches and maintenance.
It’s important to note that while this article provides a comprehensive guide, the specific details and requirements of your project may vary. Always consult with professionals or local experts when needed and be sure to follow safety guidelines.
Now that you have the knowledge and understanding to build stone stairs, it’s time to take action and bring your vision to life. Enjoy the process, embrace the challenges, and revel in the satisfaction of creating a beautiful and functional addition to your outdoor space.
Remember, with proper care and periodic maintenance, your stone stairs will withstand the test of time, providing an inviting and elegant entrance to your home for years to come.
Frequently Asked Questions about How To Build Stone Stairs
Was this page helpful?
At Storables.com, we guarantee accurate and reliable information. Our content, validated by Expert Board Contributors, is crafted following stringent Editorial Policies. We're committed to providing you with well-researched, expert-backed insights for all your informational needs.


0 thoughts on “How To Build Stone Stairs”