Home>Furniture & Design>Outdoor Furniture>How To Build Outdoor Railing For Stairs
Outdoor Furniture
How To Build Outdoor Railing For Stairs
Modified: August 25, 2024
Learn how to build a sturdy and stylish outdoor railing for stairs with our expert tips and design ideas. Create a safe and attractive outdoor space with our outdoor furniture and design solutions.
(Many of the links in this article redirect to a specific reviewed product. Your purchase of these products through affiliate links helps to generate commission for Storables.com, at no extra cost. Learn more)
Introduction
Welcome to the world of outdoor design and construction! Building outdoor railings for stairs is not only a practical necessity but also an opportunity to enhance the aesthetic appeal of your outdoor space. Whether you are a seasoned DIY enthusiast or a newcomer to the world of outdoor furniture and design, this guide will walk you through the process of creating a sturdy and visually appealing railing for your outdoor stairs.
When it comes to outdoor furniture and design, safety and style go hand in hand. A well-constructed railing not only provides support and stability for those using the stairs but also adds a touch of elegance to the overall outdoor ambiance. By following the steps outlined in this guide, you will have the opportunity to showcase your creativity and craftsmanship while ensuring the safety and comfort of those who will use the stairs.
Throughout this article, we will explore the materials and tools you will need, the importance of careful planning and design, the precise measurements and cuts required for a perfect fit, the step-by-step process of assembling and installing the railing, and the finishing touches that will elevate the final look of the project. Whether you are envisioning a sleek and modern railing or a more traditional and ornate design, the principles and techniques shared here will serve as a solid foundation for bringing your vision to life.
So, roll up your sleeves, gather your tools, and let's embark on this rewarding journey of creating a custom outdoor railing that not only meets safety standards but also adds a touch of charm and sophistication to your outdoor space. Let's dive into the world of outdoor furniture and design, where functionality meets creativity, and where every project is an opportunity to transform ordinary spaces into extraordinary outdoor sanctuaries.
Key Takeaways:
- Building outdoor railings for stairs is a creative and practical way to enhance your outdoor space, ensuring safety and adding elegance to your surroundings.
- From meticulous planning to precise cutting and thoughtful finishing, creating a custom outdoor railing is a rewarding journey that blends craftsmanship, creativity, and functionality.
Read more: How To Build A Railing For Stairs Outdoors
Materials and Tools
Before diving into the construction process, it’s essential to gather all the necessary materials and tools to ensure a smooth and efficient building experience. Here’s a comprehensive list to guide you through this phase:
Materials:
- Pressure-treated or weather-resistant wood: The primary material for the railing, chosen for its durability and ability to withstand outdoor elements.
- Railing balusters: These vertical support pieces come in various designs and materials, such as wood, metal, or composite, adding both structural support and aesthetic appeal to the railing.
- Railing posts: These vertical components provide the main support for the railing and are typically anchored securely to the stairs or the ground.
- Railing top and bottom rails: These horizontal components serve as the top and bottom boundaries of the railing, providing a secure grip and a finished look.
- Wood screws or fasteners: Essential for securing the various components of the railing together.
- Wood glue: Provides additional reinforcement when securing joints and connections.
- Finishing materials: Whether you opt for paint, stain, or sealant, these will protect the wood from moisture and UV damage while adding a polished look to the railing.
Tools:
- Tape measure: Essential for accurately measuring the dimensions of the railing components and ensuring a precise fit.
- Circular saw or miter saw: Used for cutting the wood components to the required lengths and angles.
- Drill and bits: Necessary for creating pilot holes and driving screws into the wood.
- Screwdriver: For manual screwdriving, especially for final adjustments and tightening.
- Level: Ensures that the railing components are installed perfectly straight and aligned.
- Pencil or marker: Used for marking cut lines and installation points on the wood.
- Safety gear: Including gloves, safety goggles, and a dust mask to protect yourself during cutting and construction.
By gathering these materials and tools, you will be well-prepared to commence the construction process, ensuring that you have everything you need at your fingertips. With these essentials in hand, you’re ready to move on to the next phase: planning and design.
Planning and Design
Before picking up a single tool, it’s crucial to invest time in meticulous planning and thoughtful design. This phase sets the stage for a successful railing construction project and allows you to tailor the railing to your specific aesthetic and functional requirements. Here are the key steps to consider during the planning and design process:
Read more: How To Build A Porch Stair Railing
Regulatory Compliance:
Start by familiarizing yourself with local building codes and regulations pertaining to outdoor railings. These codes often dictate the height, spacing, and structural requirements for outdoor stair railings, ensuring the safety of those using the stairs. Adhering to these regulations is essential, so be sure to research and understand the specific requirements in your area.
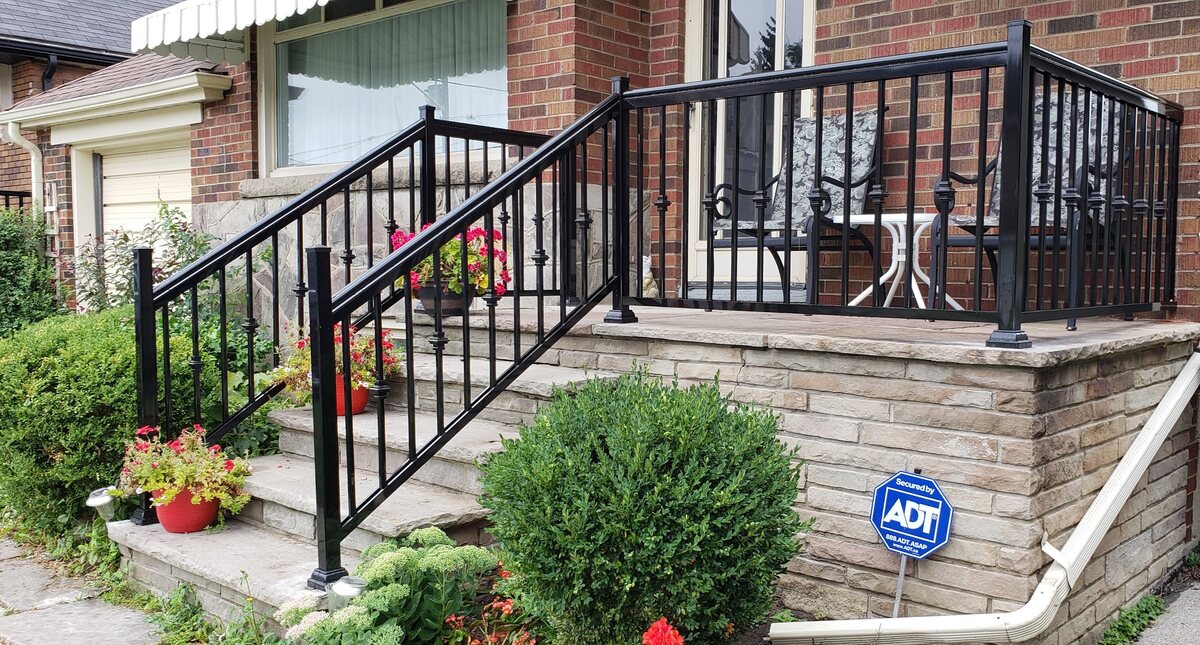
Style and Aesthetics:
Consider the overall style and aesthetic of your outdoor space. Are you aiming for a modern, minimalist look, or do you prefer a more traditional and ornate design? The railing should harmonize with the existing architectural elements and decor, adding a cohesive and visually appealing touch to the outdoor environment.
Material Selection:
Choose the type of wood and railing components that align with your design vision and practical needs. Consider the durability, maintenance requirements, and visual appeal of different materials to make an informed decision that suits your preferences and the outdoor setting.
Layout and Dimensions:
Take precise measurements of the stairs and the surrounding space to determine the required length and height of the railing. Visualize the layout of the railing, considering the number of balusters, the spacing between them, and the placement of the posts to ensure a balanced and visually pleasing design.
Read more: How To Paint Railings On Stairs
Sketch or Blueprint:
Create a rough sketch or blueprint of the railing design, incorporating the dimensions and layout details. This visual representation will serve as a guide during the construction phase, helping you stay on track with the intended design and measurements.
By investing time in careful planning and design, you lay a solid foundation for the construction phase, minimizing potential setbacks and ensuring that the end result aligns with your vision. With the design finalized, you are ready to move on to the next phase: measuring and cutting the railing components.
Measuring and Cutting
Accurate measurements and precise cuts are the cornerstones of a well-constructed outdoor railing for stairs. This phase requires attention to detail and the use of proper tools to ensure that the railing components fit seamlessly and securely. Here’s a step-by-step guide to the measuring and cutting process:
Measure Twice, Cut Once:
Begin by measuring the length of the railing, the height from the stairs to the top of the railing, and the spacing for the balusters and posts. Double-check all measurements to avoid errors that could lead to ill-fitting components.
Marking the Wood:
Use a pencil or marker to clearly mark the points where the wood components need to be cut. This includes the railing, balusters, posts, and top and bottom rails. Accurate markings ensure that the cuts are made at the right locations.
Read more: How To Build Outdoor Stairs On A Hill
Cutting the Wood:
Utilize a circular saw or miter saw to make clean and precise cuts according to the marked measurements. If angled cuts are required for the railing or balusters, adjust the saw accordingly to achieve the desired angles.
Test Fitting:
After cutting the components, perform a test fit to ensure that they align accurately and securely. This step allows you to make any necessary adjustments before proceeding to the assembly phase.
Attention to Detail:
Pay close attention to the quality of the cuts, ensuring that they are straight, smooth, and free from splinters or rough edges. This attention to detail contributes to the overall professional look and feel of the railing.
Safety First:
Always prioritize safety when using cutting tools. Wear appropriate safety gear, such as goggles and gloves, and operate the saws in a controlled and cautious manner to prevent accidents.
By meticulously measuring and cutting the railing components, you set the stage for a seamless assembly process, ensuring that each piece fits together with precision and stability. With the components prepared, you are ready to move on to the next phase: assembling the railing.
Read more: Where To Buy Railings For Stairs
Assembling the Railing
With the individual components cut to size, it’s time to bring the railing to life through the assembly process. This phase involves joining the various elements together to create a sturdy and visually appealing structure. Here’s a detailed guide to assembling the railing for your outdoor stairs:
Pre-Drilling and Fastening:
Begin by pre-drilling pilot holes in the railing and balusters to prevent the wood from splitting when screws are driven in. This step ensures a secure and durable connection between the components.
Attach the Balusters:
Position the balusters at the designated intervals along the bottom rail, ensuring equal spacing between each one. Secure them in place by driving screws through the pre-drilled holes, firmly anchoring them to the rail.
Install the Top Rail:
Once the balusters are in place, position the top rail over them, aligning it carefully to create a uniform and visually pleasing look. Secure the top rail to the balusters using screws, ensuring a strong and stable connection.
Read more: What Grit Sandpaper For Stair Railing
Secure the Railing Posts:
If the railing design includes posts, position them at the appropriate intervals along the bottom rail and secure them firmly using screws and wood glue. The posts provide essential support and stability to the railing structure.
Check for Stability:
After assembling the main components, perform a thorough inspection to ensure that the railing is stable and secure. Test its sturdiness by applying gentle pressure to different sections, making any necessary adjustments to enhance its stability.
Finishing Touches:
Apply wood glue to any joints or connections for added reinforcement, ensuring that the railing components are securely bonded. Wipe away any excess glue to maintain a clean and polished appearance.
Quality Assurance:
Prioritize the quality of the assembly, ensuring that all connections are tight, secure, and visually appealing. This attention to detail contributes to the overall durability and aesthetic value of the railing.
By following these steps, you will transform the individual railing components into a cohesive and robust structure, ready to be installed on your outdoor stairs. With the railing assembled, you are now prepared to move on to the next phase: installing the railing to complete the project.
Read more: How To Build Porch Rails
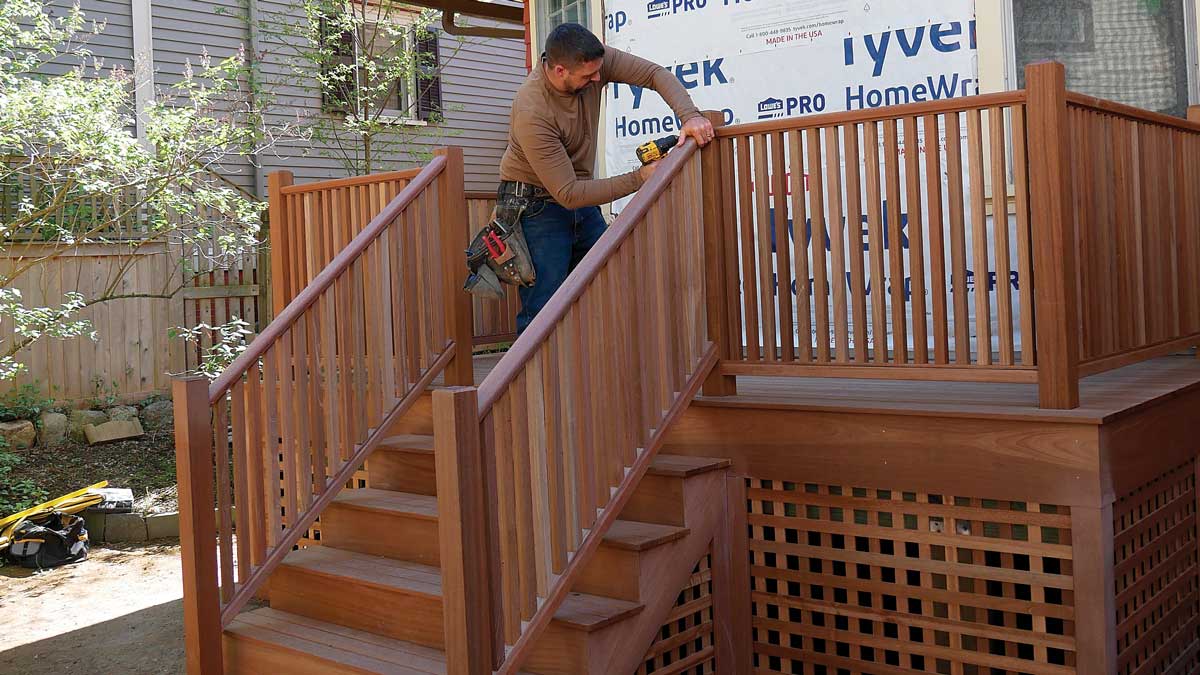
Installing the Railing
As the railing takes shape, the next crucial step is to install it securely onto the outdoor stairs. Proper installation ensures that the railing not only enhances the aesthetics of the space but also provides essential safety and support. Here’s a detailed guide to installing the railing for your outdoor stairs:
Positioning the Railing:
Begin by carefully placing the assembled railing in its intended position along the outdoor stairs. Ensure that it is aligned correctly and sits flush against the stair treads, providing a seamless and visually pleasing fit.
Marking the Installation Points:
Use a pencil or marker to mark the locations where the railing will be anchored to the stairs. These marks serve as guides for the installation process, ensuring that the railing is positioned accurately.
Secure Attachment:
Utilize appropriate fasteners, such as screws or bolts, to secure the railing to the stairs and any adjacent structural elements. Ensure that the fasteners are driven securely into place, providing a stable and reliable connection.
Read more: How To Build A Post And Rail Fence
Leveling and Alignment:
Use a level to ensure that the railing is installed perfectly straight and aligned with the stairs. This step is crucial for both the visual appeal and the functionality of the railing, guaranteeing a professional and secure installation.
Stability Check:
Once the railing is installed, perform a thorough stability check by applying gentle pressure at various points. Confirm that the railing is firmly anchored and does not wobble or shift, ensuring its reliability and safety.
Compliance with Regulations:
Verify that the installed railing meets the local building codes and regulations regarding height, spacing, and structural integrity. Adhering to these standards is vital to ensure the safety and compliance of the railing.
Final Inspections:
Conduct a comprehensive inspection of the installed railing, checking for any loose connections, uneven alignment, or other issues that may compromise its stability and visual appeal. Make any necessary adjustments to achieve a flawless installation.
By following these steps, you will complete the installation process with confidence, knowing that the railing is securely in place and ready to fulfill its essential role in providing safety and style to your outdoor space. With the railing installed, you are now ready to add the finishing touches to enhance its overall appearance and durability.
Read more: Home Repair: How To Repair Stair Railing
Finishing Touches
As the outdoor railing for your stairs nears completion, the finishing touches play a pivotal role in elevating its overall appearance and ensuring long-lasting durability. This phase involves adding protective treatments and fine details that enhance the visual appeal and resilience of the railing. Here’s a comprehensive guide to the essential finishing touches:
Protective Coating:
Apply a protective coating, such as weather-resistant paint, stain, or sealant, to the entire railing structure. This coating serves as a shield against outdoor elements, protecting the wood from moisture, UV exposure, and potential decay. Choose a finish that complements the outdoor aesthetic and provides long-term protection.
Smooth and Sand:
Prior to applying the protective coating, ensure that the wood surfaces are smooth and free from any rough patches or splinters. Sand the railing components gently to achieve a polished and touchable finish, enhancing both the appearance and safety of the railing.
Attention to Detail:
Pay close attention to the finer details, such as ensuring that all fasteners are countersunk and that any exposed hardware is neatly concealed. These small touches contribute to a professional and refined look, showcasing the craftsmanship of the railing.
Read more: How To Build Split Rail Fence
Maintenance Guidelines:
Provide maintenance guidelines to the railing’s users, highlighting the recommended care and periodic maintenance required to preserve the railing’s appearance and structural integrity. This empowers users to uphold the railing’s longevity and visual appeal over time.
Visual Harmony:
Ensure that the finished railing harmonizes with the surrounding outdoor environment, complementing the architectural style and existing design elements. The railing should seamlessly integrate into the space while standing out as a striking and functional feature.
Final Inspection:
Conduct a thorough inspection of the finished railing, verifying that the protective coating is evenly applied, the surfaces are smooth, and the overall appearance aligns with your vision. Address any imperfections or inconsistencies to achieve a flawless and professional finish.
Celebrate Your Craftsmanship:
Take a moment to appreciate the craftsmanship and effort invested in creating a custom outdoor railing that not only meets safety standards but also adds a touch of charm and sophistication to your outdoor space. Your attention to detail and dedication have transformed ordinary materials into a functional work of art.
By incorporating these finishing touches, you will ensure that the outdoor railing for your stairs not only meets practical requirements but also stands as a testament to your commitment to quality and aesthetics. With the finishing touches complete, you can step back and admire the transformation of your outdoor space, where functionality meets creativity and craftsmanship.
Read more: How To Paint Outdoor Wood Railings
Conclusion
Congratulations on successfully completing the construction of a custom outdoor railing for your stairs! This journey through the world of outdoor furniture and design has allowed you to blend practicality and creativity, resulting in a visually stunning and functional addition to your outdoor space. As you reflect on the process and the final outcome, it’s essential to acknowledge the valuable lessons and accomplishments that have emerged from this project.
Throughout this endeavor, you have honed your skills in planning, precision cutting, meticulous assembly, and thoughtful finishing, all of which are fundamental aspects of outdoor furniture and design. The attention to detail and adherence to safety standards have not only produced a beautiful railing but have also contributed to the overall safety and enjoyment of your outdoor environment.
By embracing the principles of regulatory compliance, style and aesthetics, material selection, and meticulous installation, you have not only created a functional structure but have also added a touch of elegance and personality to your outdoor space. The railing now stands as a testament to your craftsmanship and dedication to enhancing your surroundings.
As you admire the completed railing, take pride in the transformation that has taken place. Your outdoor space has evolved into a harmonious blend of safety, style, and durability, where every detail has been carefully considered and executed. This project has not only added value to your property but has also provided a source of personal satisfaction and pride in your abilities.
Furthermore, this experience serves as a stepping stone for future endeavors in the realm of outdoor furniture and design. The skills and knowledge gained from this project will undoubtedly inform and inspire your future creative pursuits, whether they involve additional outdoor enhancements or entirely new ventures within the world of design and construction.
As you enjoy the fruits of your labor, may this outdoor railing serve as a constant reminder of the transformative power of craftsmanship and design. Let it inspire you to continue exploring the boundless opportunities for creating functional and captivating outdoor spaces, where each project becomes an opportunity to infuse creativity and personality into the world outside your door.
Embrace the journey, celebrate your achievements, and continue to craft spaces that reflect your unique vision and passion for outdoor living. Your dedication to outdoor furniture and design has the power to turn ordinary spaces into extraordinary sanctuaries, where every detail tells a story of creativity, craftsmanship, and the joy of outdoor living.
Frequently Asked Questions about How To Build Outdoor Railing For Stairs
Was this page helpful?
At Storables.com, we guarantee accurate and reliable information. Our content, validated by Expert Board Contributors, is crafted following stringent Editorial Policies. We're committed to providing you with well-researched, expert-backed insights for all your informational needs.


0 thoughts on “How To Build Outdoor Railing For Stairs”