Articles
How To Build Loft Bed Stairs
Modified: March 1, 2024
Learn how to build loft bed stairs with our informative articles. Get step-by-step instructions and tips for creating safe and sturdy stairs for your loft bed.
(Many of the links in this article redirect to a specific reviewed product. Your purchase of these products through affiliate links helps to generate commission for Storables.com, at no extra cost. Learn more)
Introduction
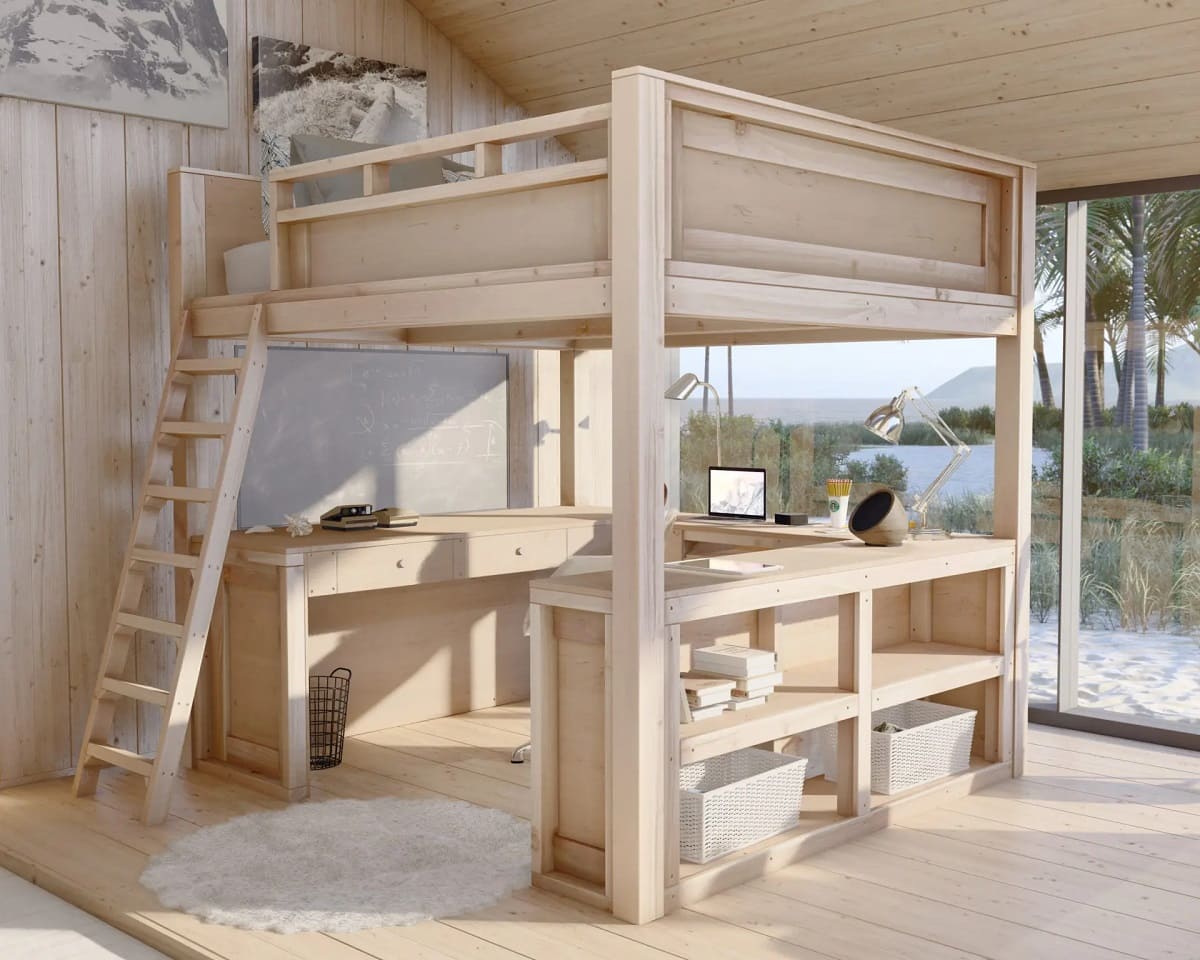
Building loft bed stairs is a practical and space-saving solution for those who have loft beds but struggle with climbing up and down ladders. Loft bed stairs provide added stability and safety, making it easier to access the loft bed without the fear of accidents.
In this article, we will guide you through the process of building loft bed stairs. Whether you are a seasoned DIYer or a beginner, this step-by-step guide will help you create sturdy and functional stairs that perfectly complement your loft bed.
Before we dive into the construction process, let’s discuss the materials and tools you will need for this project.
Key Takeaways:
- Building loft bed stairs requires precise measurements, sturdy construction, and careful installation. By following this step-by-step guide, you can create safe, stylish, and functional stairs for easy access to your loft bed.
- Sanding and finishing the stairs not only enhances their appearance but also ensures safety and durability. Regular maintenance and inspections will help keep your loft bed stairs in top condition for years to come.
Read more: How To Build A Loft In A Shed
Materials Needed
Before you start building loft bed stairs, gather the following materials:
- 2×4 lumber for the stair supports
- 1×6 or 1×8 lumber for the stair treads
- Screws
- Wood glue
- Measuring tape
- Saw (circular saw or miter saw)
- Drill
- Sandpaper
- Paint or stain for finishing (optional)
Make sure you have all these materials readily available before starting the construction process.
Step 1: Measure and Plan
The first step in building loft bed stairs is to measure the space where the stairs will be placed and create a detailed plan.
Start by measuring the height from the floor to the loft bed platform. This will determine the overall height of the stairs. Next, measure the width and depth of the available space to determine the dimensions of the stair treads.
Consider the angle at which the stairs will be placed. The ideal angle is around 30 to 45 degrees for comfortable and safe climbing. Take into account the available space in your room to determine the best angle for your stairs.
Once you have gathered all the necessary measurements, create a plan or a sketch of the stairs. This will serve as a guide throughout the construction process, helping you stay organized and ensuring that all the components fit together properly.
Now that you have your measurements and plan ready, it’s time to move on to the next step: cutting out the stair slats.
Step 2: Cut Out the Stair Slats
In this step, you will cut out the stair slats that will serve as the treads for your loft bed stairs.
Using your measurements from step 1, mark the dimensions for each stair tread on the 1×6 or 1×8 lumber. Use a measuring tape and a pencil to ensure accurate markings.
Next, carefully cut along the marked lines using a circular saw or a miter saw. Take your time and make precise cuts to ensure that all the stair treads are the same size and shape.
Once you have cut out all the stair slats, double-check their dimensions to ensure they match your original measurements. Sand the edges of the stair slats to smooth out any roughness or splinters.
You now have the stair slats ready for installation. It’s time to move on to the next step: building the stair supports.
Step 3: Build the Stair Supports
In this step, you will construct the stair supports that will provide stability and support for your loft bed stairs.
Start by cutting the 2×4 lumber into pieces according to your measurements. You will need two vertical pieces for the outer edges of the stairs and several horizontal pieces to serve as the supports for each stair tread.
Measure and mark the placement of the horizontal supports on the vertical pieces. Make sure to evenly space them to provide adequate support for each stair tread.
Next, use a drill to create pilot holes at the marked points. This will prevent the wood from splitting when you attach the screws.
Apply wood glue to the ends of the horizontal supports and then attach them to the vertical pieces. Align the edges and use screws to secure them in place. Repeat this process for all the stair supports.
Once you have built the stair supports, double-check their stability and ensure that they are level. Make any necessary adjustments before moving on to the next step.
Now that the stair supports are complete, it’s time to attach them to the loft bed in the next step.
Consider using a sturdy and stable material like hardwood for building loft bed stairs. Ensure the steps are evenly spaced and have a comfortable depth for safe and easy climbing.
Read more: How To Childproof Loft Bed Ladder
Step 4: Attach the Stair Supports to the Loft Bed
In this step, you will attach the previously built stair supports to the loft bed, securing them in place.
Begin by positioning the stair supports against the loft bed frame. Ensure that they are aligned properly and level with the floor. Use a measuring tape to ensure accuracy.
Once the stair supports are in the desired position, mark the locations where they will be attached to the loft bed. Use a pencil to create guide marks on both the stair supports and the loft bed frame.
Next, use a drill to create pilot holes at the marked points. This will prevent the wood from splitting and make it easier to insert the screws.
Apply wood glue to the areas where the stair supports will come into contact with the loft bed frame. This will provide additional stability and support.
Align the guide marks and secure the stair supports to the loft bed frame using screws. Make sure to tighten the screws firmly, but be careful not to overtighten and strip the wood.
Repeat this process for each stair support until all of them are securely attached to the loft bed frame.
Once all the stair supports are securely in place, it’s time to move on to the next step: installing the stair slats.
Step 5: Install the Stair Slats
In this step, you will install the previously cut stair slats onto the installed stair supports to create the actual steps of your loft bed stairs.
Start by placing the first stair slat on top of the bottom stair support, aligning it with the edge. Use a measuring tape to ensure that it is positioned evenly.
Apply wood glue to the top of the stair support where the stair slat will be placed. This will help secure the stair slat in place.
Once the glue is applied, carefully press the stair slat onto the stair support, ensuring it is flat and level. Use a level to double-check the alignment.
Secure the stair slat to the stair support by using screws. Place the screws along the edges of the stair slat to minimize their visibility.
Continue this process for each stair slat, ensuring that they are evenly spaced and aligned. Use wood glue and screws to secure each stair slat to their respective stair supports.
Once all the stair slats are installed, test the sturdiness and stability of the stairs by applying gentle pressure. Make any necessary adjustments to ensure that the stairs are secure.
Now that the stair slats are installed, it’s time to move on to the next step: sanding and finishing the stairs.
Step 6: Sand and Finish
In this final step, you will sand and finish the loft bed stairs to give them a smooth and polished look.
Start by using sandpaper to lightly sand the surface of the stair treads and stair supports. This will help remove any rough spots, splinters, or imperfections.
Focus on smoothing out the edges and corners of the stairs to ensure they are safe and comfortable to use.
After sanding, wipe down the stairs with a damp cloth to remove any dust or debris.
If you prefer a natural look, you can choose to leave the stairs as they are. However, if you want to add a touch of color or protection, you can apply paint or stain to the stairs.
Before applying the paint or stain, make sure to apply a coat of primer to the stairs to ensure better adhesion and a smoother finish.
Once the primer is dry, apply your chosen paint or stain according to the manufacturer’s instructions. Use a brush or roller to evenly distribute the product on the stairs.
Allow the paint or stain to dry completely between coats. Apply multiple coats if necessary to achieve the desired look.
After the final coat, allow the stairs to dry fully before using them. This will ensure that the paint or stain has properly cured and is durable.
Congratulations! You have successfully built and finished your loft bed stairs. Now you can enjoy the convenience and safety of easy access to your loft bed.
Remember to regularly inspect the stairs for any signs of wear or damage and make any necessary repairs to maintain their longevity.
Thank you for following this step-by-step guide. Happy climbing!
Conclusion
Building loft bed stairs is a rewarding DIY project that provides both functionality and style to your loft bed setup. By following the steps outlined in this guide, you can create sturdy and secure stairs that make accessing your loft bed a breeze.
Throughout the process, measuring accurately, carefully cutting the stair slats, building sturdy stair supports, and attaching them to the loft bed are crucial steps to ensure the stability and safety of the stairs.
Don’t forget the importance of sanding and finishing the stairs to achieve a polished and appealing look. Whether you choose to paint or stain them, adding a protective finish will also increase their durability.
Remember to prioritize safety by regularly inspecting the stairs for any signs of wear or damage. Make any necessary repairs promptly to ensure the continued sturdiness and stability of the stairs.
Building loft bed stairs not only improves the accessibility of your loft bed but also adds a unique and personalized touch to your bedroom. It is a practical and space-saving solution that enhances both functionality and aesthetics.
We hope this step-by-step guide has provided you with the knowledge and confidence to embark on this DIY project. Enjoy the convenience and comfort of your newly built loft bed stairs!
Frequently Asked Questions about How To Build Loft Bed Stairs
Was this page helpful?
At Storables.com, we guarantee accurate and reliable information. Our content, validated by Expert Board Contributors, is crafted following stringent Editorial Policies. We're committed to providing you with well-researched, expert-backed insights for all your informational needs.


0 thoughts on “How To Build Loft Bed Stairs”