Articles
How Build A Wooden Tool Chest
Modified: August 16, 2024
Discover step-by-step articles on how to build a wooden tool chest for your workshop. Get expert tips and guidance for crafting the perfect storage solution.
(Many of the links in this article redirect to a specific reviewed product. Your purchase of these products through affiliate links helps to generate commission for Storables.com, at no extra cost. Learn more)
Introduction
Every handyman needs a reliable tool chest to keep their tools organized and easily accessible. While there are various options available in the market, building your own wooden tool chest can be a rewarding and cost-effective project. Not only does it allow you to customize the design and size to fit your specific needs, but it also gives you the satisfaction of creating something with your own hands.
In this article, we will guide you through the process of building a wooden tool chest from scratch. We will cover everything from selecting the right wood to adding the finishing touches. Whether you are a seasoned woodworker or a beginner looking to sharpen your skills, this step-by-step guide will help you create a functional and aesthetically pleasing tool chest.
Before we dive into the nitty-gritty details, let’s take a moment to go over the tools you will need for this project. Make sure you have the following items on hand:
- Measuring tape
- Saw (circular saw or miter saw)
- Drill
- Screwdriver
- Wood glue
- Sandpaper (various grits)
- Wood stain or paint
- Brushes or rollers
- Hardware (hinges, handles, lock)
Now that you have all the necessary tools, let’s dive into the first step of building a wooden tool chest – selecting the right wood!
Key Takeaways:
- Build a personalized wooden tool chest using durable wood, precise measurements, and careful assembly. Customize the design, add functional hardware, and enjoy the satisfaction of creating a practical storage solution for your tools.
- Embrace the woodworking journey by infusing creativity and personal touch into your wooden tool chest. Prioritize safety, select high-quality materials, and embark on a fulfilling endeavor to showcase your skills and craftsmanship.
Read more: How To Clean Vintage Wooden Tool Chest
Selecting the Wood
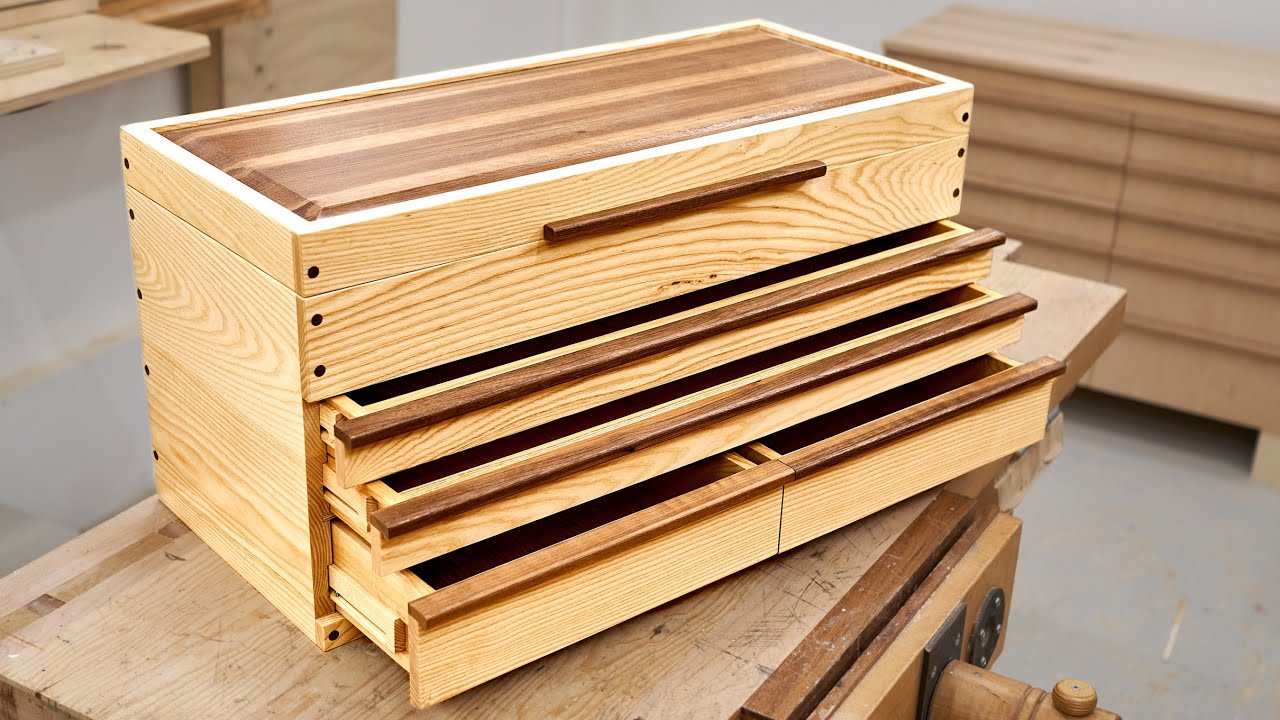
When it comes to selecting the wood for your tool chest, there are a few factors to consider. First and foremost, you want a sturdy and durable wood that can withstand the weight of your tools and the wear and tear of daily use. Hardwoods like oak, maple, and birch are excellent choices for this purpose, as they are known for their strength and longevity.
In addition to durability, you also want to consider the aesthetic appeal of the wood. The tool chest will likely be a prominent feature in your workshop, so choosing a wood with an attractive grain pattern and color can enhance its overall look. If you prefer a more rustic or vintage feel, you might opt for reclaimed wood or a species like cedar or pine.
Another factor to consider is the availability of the wood. Some woods can be harder to find or more expensive, so it’s important to do some research and find a source that meets your requirements. Local lumber yards or online suppliers are good places to start your search.
Lastly, it’s important to consider the dimensions and thickness of the wood. For the main panels of the tool chest, you’ll want a thickness of at least 3/4 inch to ensure stability. Thinner pieces can be used for internal dividers or smaller compartments. Be sure to factor in the overall dimensions of your tool collection when determining the size of the chest and the amount of wood you’ll need.
Once you’ve considered all these factors, it’s time to head to the lumberyard and select the perfect wood for your tool chest. Take your time and inspect each piece for any defects like cracks, knots, or warping. You want to choose boards that are straight, free of imperfections, and have a consistent grain pattern.
Remember, the quality of the wood you select will greatly impact the durability and overall appearance of your tool chest. So, choose wisely and invest in high-quality materials that will stand the test of time.
Measuring and Cutting the Wood
Now that you have selected the perfect wood for your tool chest, it’s time to start measuring and cutting the pieces to the desired dimensions. Accuracy is key in this step, as any discrepancies can affect the overall fit and functionality of the chest.
Start by creating a detailed plan or blueprint of the tool chest, outlining the dimensions and the arrangement of the panels. This will serve as your guide throughout the construction process. Take into account the size of your tools and how you want to organize them within the chest.
Using a measuring tape, measure and mark the dimensions on the selected wood boards. Double-check your measurements to ensure accuracy. If you have a miter saw or circular saw, set it to the appropriate angle and carefully cut the wood along the marked lines. Take your time and use a steady hand to ensure clean and precise cuts.
If you don’t have access to power tools, you can still achieve accurate cuts with a handsaw or a coping saw. Clamp the wood securely to a workbench or use a cutting guide to help you maintain a straight line. Take your time and let the saw do the work, using smooth and even strokes.
Once you have cut all the necessary pieces, double-check that they fit together properly. The edges should align and any joinery should fit snugly. If adjustments are needed, use sandpaper or a plane to fine-tune the dimensions until you achieve a perfect fit.
Remember to label each piece as you go, especially if there are multiple panels that look similar. This will prevent any confusion during the assembly process later on.
With the wood pieces accurately cut, you are now ready to move on to the next step – assembling the chest!
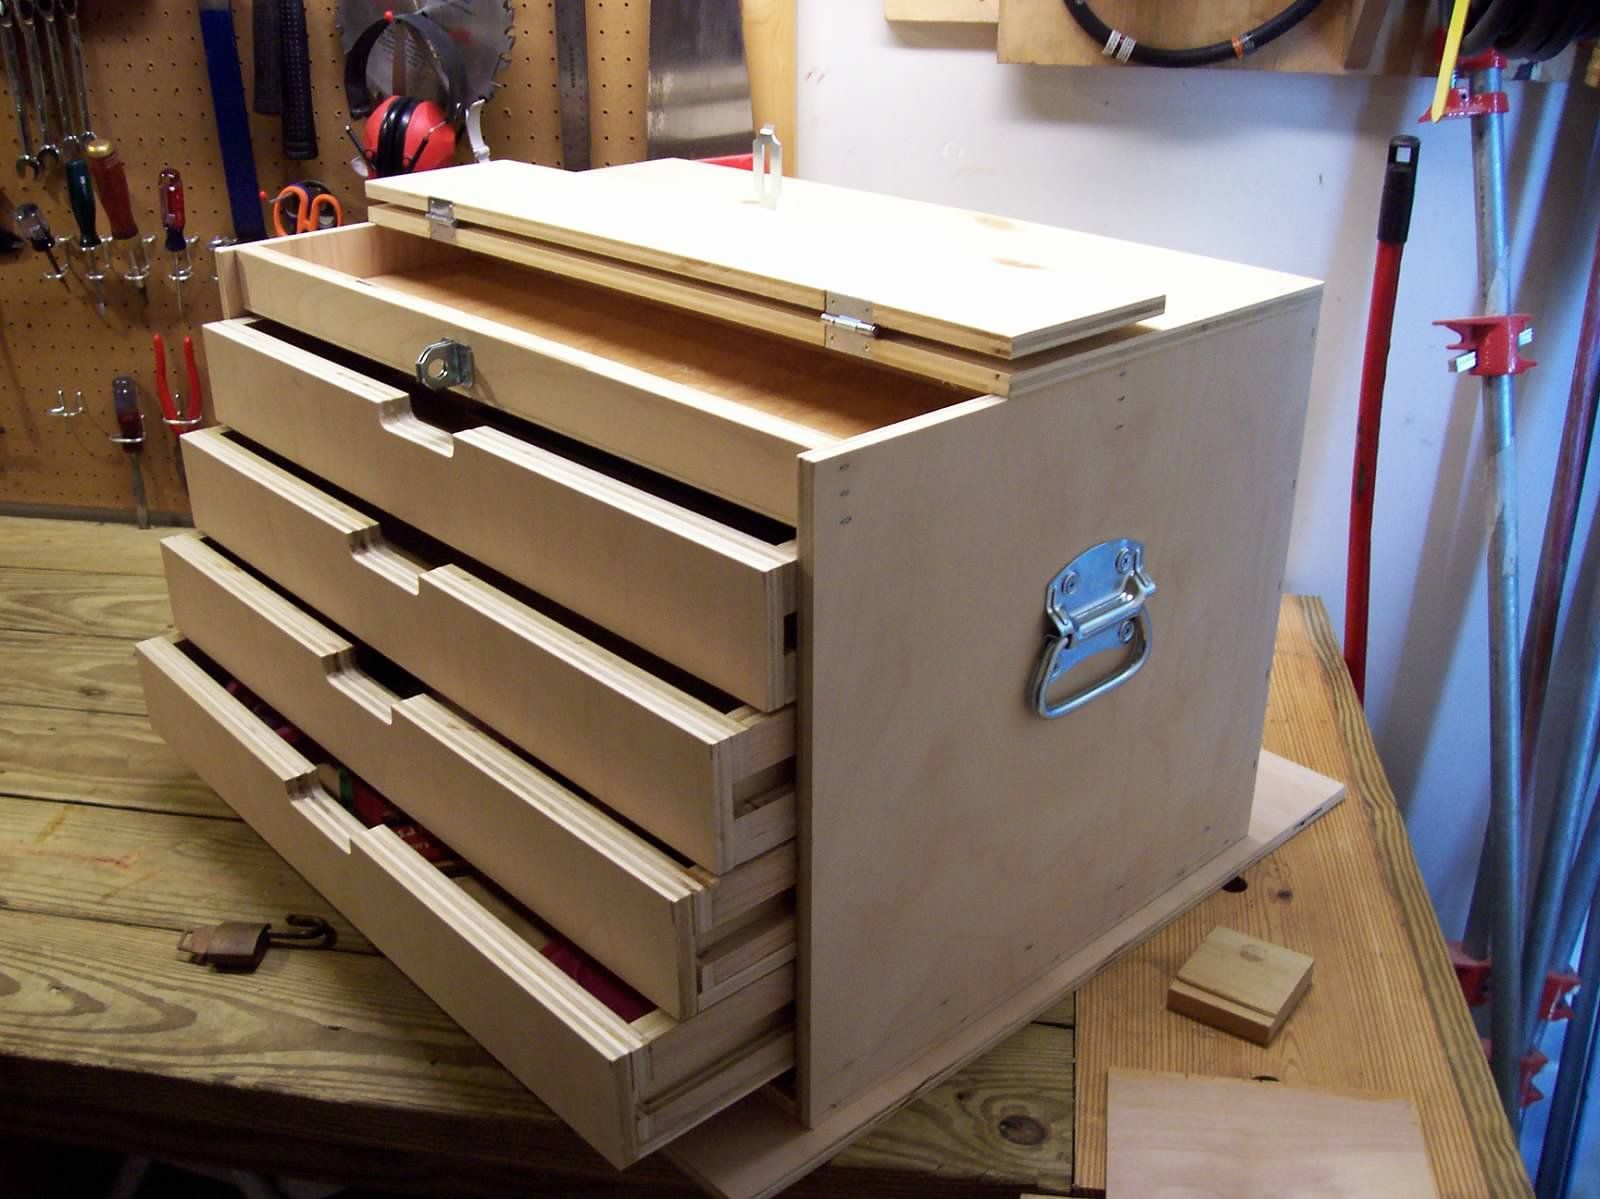
Assembling the Chest
With all the wood pieces cut to the appropriate dimensions, it’s time to assemble the tool chest. This step involves joining the panels together to create the main structure of the chest. There are several methods of assembly, and the choice depends on your preference and the tools available to you.
One common method is using wood glue and screws or nails to secure the panels. Apply a thin layer of wood glue to the edges of the panels that will be joined together. Then, using clamps, hold the panels in place and allow the glue to dry according to the manufacturer’s instructions. Once the glue has dried, reinforce the joints by driving screws or nails through the panels. Be sure to pre-drill holes to prevent splitting of the wood.
Another option is using joinery techniques such as dovetails or finger joints. These methods create strong and visually appealing connections between the panels. If you are not familiar with these techniques, it’s advisable to practice on scrap wood before attempting them on your tool chest.
Regardless of the assembly method you choose, make sure to double-check that the panels are aligned properly and square. Use clamps or braces to hold the pieces together while you work. Take your time during this step to ensure the structural integrity of the tool chest.
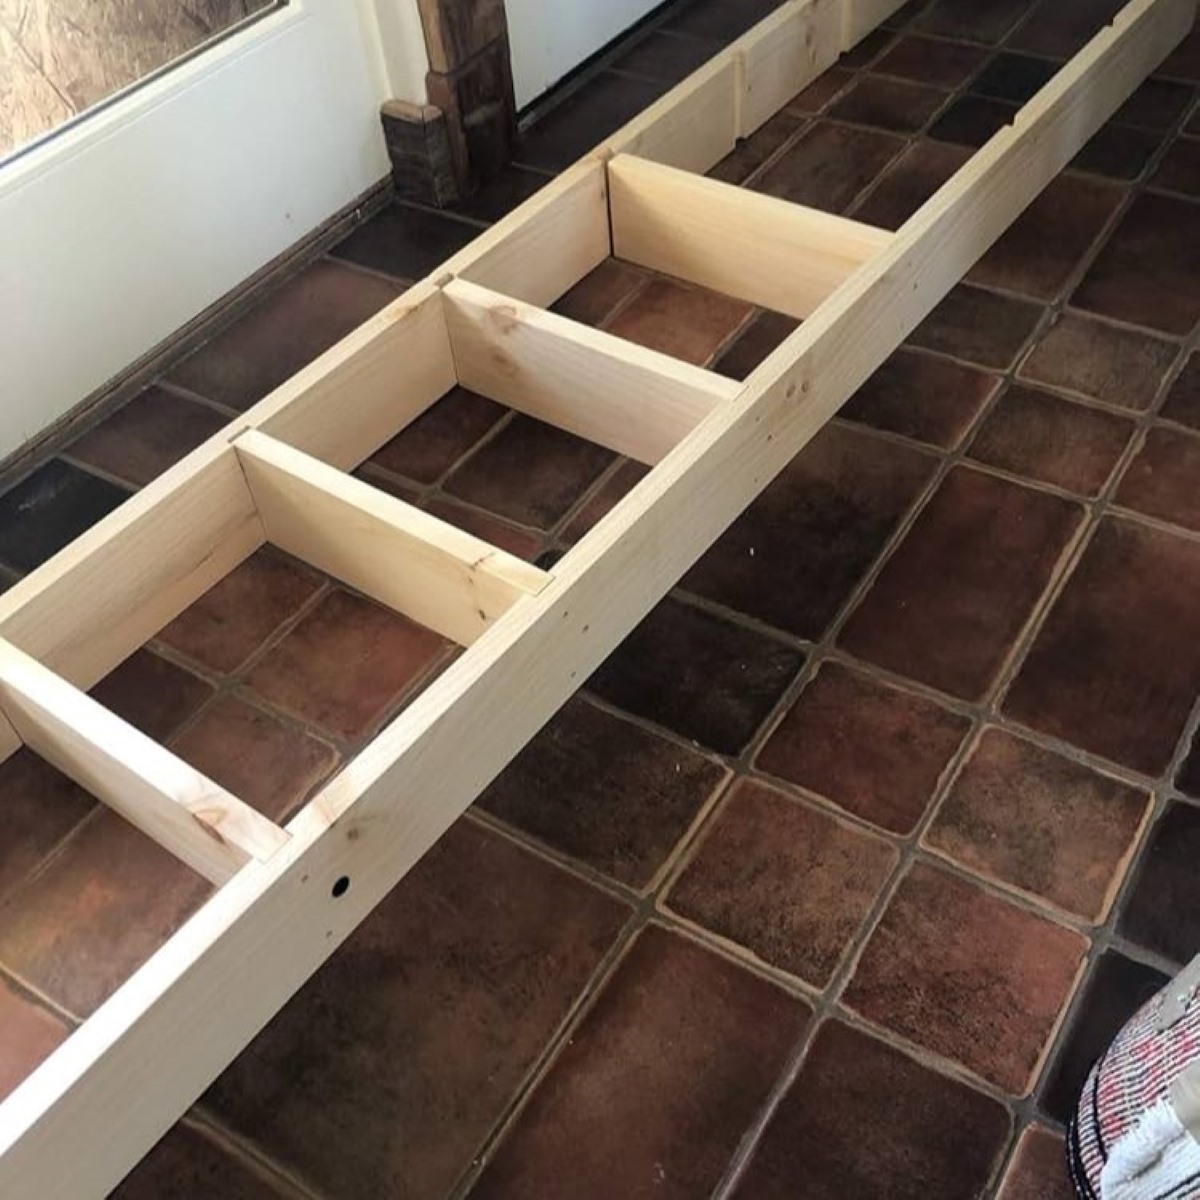
In addition to the main structure, you may also need to install internal dividers or compartments to better organize your tools. This can be done by cutting additional pieces of wood to fit snugly within the chest. Secure them in place using the same assembly techniques as before. Consider the size and shape of your tools when determining the layout of these dividers.
While assembling the chest, it’s a good idea to periodically check for squareness and make any necessary adjustments. This will ensure that the final result is a sturdy and well-built tool chest.
Once the chest is fully assembled, allow the glue to dry and move on to the next step – attaching hinges and handles!
When building a wooden tool chest, make sure to use high-quality, durable wood such as oak or maple to ensure the chest can withstand the weight of the tools and last for a long time.
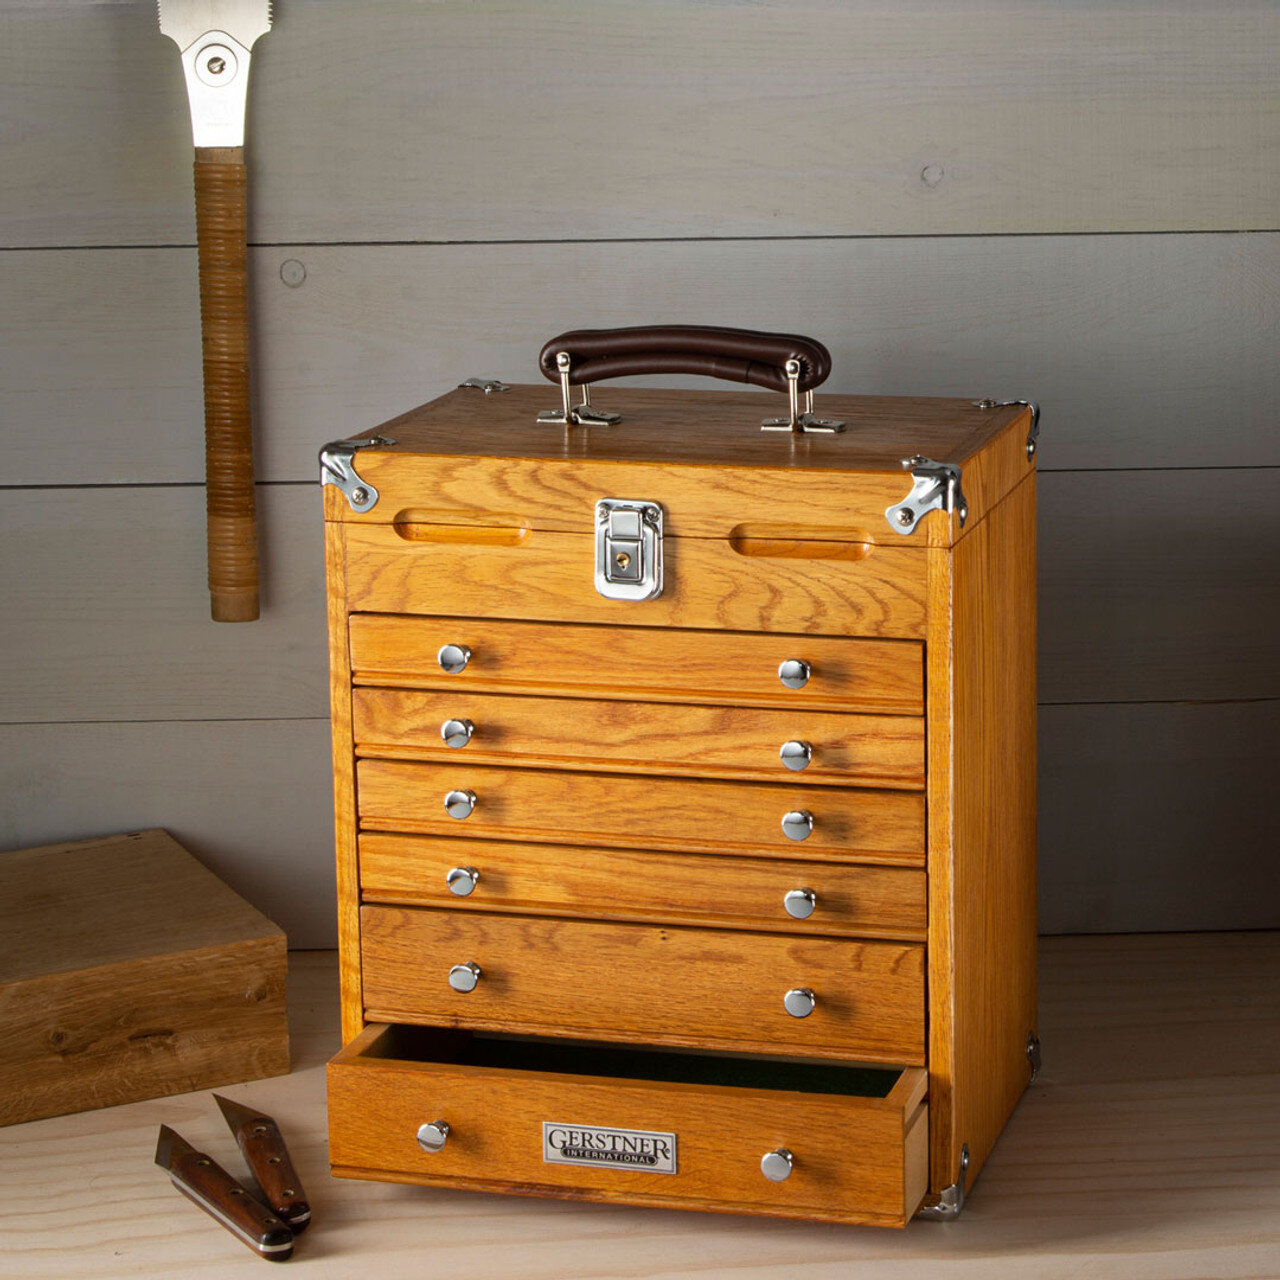
Attaching Hinges and Handles
Now that the main structure of your tool chest is complete, it’s time to add the finishing touches by attaching hinges and handles. These components not only provide functionality but also add visual appeal to the chest.
Start by determining the placement of the hinges. Take into consideration the size and weight of the lid and the overall design of the chest. Position the hinges evenly on the back panel and mark the screw holes with a pencil or marker. Pre-drill the holes to make it easier to secure the hinges.
Once the holes are ready, align the hinges with the markings and screw them in place using the appropriate screws. Make sure the hinges are securely fastened and allow the lid to open and close smoothly. Test the lid to ensure it stays open at the desired angle without swinging open too far or closing abruptly.
Next, it’s time to attach the handles. Handles not only make it easier to lift and carry the tool chest but also add a decorative element to the overall design. You can choose from various handle styles, such as recessed handles, leather straps, or metal handles.
Decide on the placement of the handles and mark the screw holes accordingly. Pre-drill the holes to avoid splitting the wood. Position the handles on the sides of the chest and secure them in place using screws or bolts, depending on the handle design.
Take a moment to check that the handles are firmly attached and can withstand the weight of the chest when lifted. Give them a test tug to ensure they are secure and won’t come loose.
With the hinges and handles securely in place, you now have a functional and visually appealing tool chest. The next step is to add a lid and lock to further enhance its functionality and security.
Remember to choose hinges and handles that complement the overall aesthetic of your tool chest. Whether you opt for a vintage-inspired look or a sleek and modern design, these hardware elements will add the perfect finishing touches to your wooden tool chest.
Read also: 8 Best Wooden Tool Box for 2025
Adding a Lid and Lock
Adding a lid to your wooden tool chest not only provides protection for your tools but also adds a professional and finished look to the overall design. Additionally, installing a lock ensures that your tools are secure and prevents unauthorized access.
To add a lid, start by measuring the dimensions of the opening on the top of the tool chest. Cut a piece of wood that matches these dimensions, making sure it fits snugly within the chest when closed. Sand the edges of the lid to achieve a smooth and seamless fit.
Once the lid is cut, you’ll need to attach hinges to allow it to open and close smoothly. Position the hinges along the back edge of the lid, ensuring they align with the hinges already attached to the chest. Mark the screw hole locations, and pre-drill the holes to prevent the wood from splitting.
Attach the hinges to the lid using screws, making sure they are securely fastened. Test the lid to ensure it opens and closes smoothly without any obstructions or misalignment.
Next, consider adding a lock to your tool chest for added security. Choose a lock that is suitable for your needs, such as a padlock or a cam lock. Determine the placement of the lock on the front panel of the chest and mark the screw hole locations.
Pre-drill the holes for the lock to ensure a clean installation. Attach the lock to the front panel using screws, following the manufacturer’s instructions. Test the lock to ensure it functions properly and securely locks the tool chest.
Adding a lid and lock to your wooden tool chest not only enhances its functionality but also provides peace of mind knowing that your tools are protected and secure. It’s important to choose high-quality hinges and locks that can withstand frequent use and provide long-lasting durability.
With the lid and lock in place, your tool chest is now complete and ready to be used. However, before you start filling it with tools, there’s one final step to take – sanding and finishing.
Sanding and Finishing
After assembling the wooden tool chest and adding the necessary components, it’s time to give it a smooth and polished finish. Sanding and finishing the wood not only enhances its appearance but also provides protection against moisture and wear.
Start by using sandpaper with a medium grit to remove any rough edges, splinters, or imperfections on the surface of the chest. Sand in the direction of the wood grain to achieve the best results. Be thorough and take your time, paying attention to all the sides of the chest.
Once you have sanded the chest with the medium-grit sandpaper, switch to a finer-grit sandpaper to achieve a smoother finish. This will help to remove any remaining small imperfections and leave the wood surface silky and ready for the final touches.
After sanding, it’s time to choose how you want to finish your tool chest. There are a few options to consider:
- Stain: If you want to enhance the natural beauty of the wood, you can choose to apply a wood stain. Stains come in different shades to match your preference and can deepen the color and highlight the grain pattern of the wood. Apply the stain evenly using a brush or a cloth, following the manufacturer’s instructions for drying and curing times.
- Paint: If you prefer a solid color or want to match the tool chest to your workshop’s aesthetic, you can choose to paint it. Select a high-quality wood paint that is suitable for your woodworking project and apply it evenly using a brush or a roller. Allow each coat to dry before applying subsequent coats, ensuring a smooth and even finish.
- Varnish or Clear Coat: If you prefer a natural and glossy look, you can choose to apply a clear coat or varnish. These finishes provide a protective layer and bring out the natural beauty of the wood. Apply multiple coats, allowing each coat to dry and sanding lightly between coats for a smooth and professional finish.
Whichever finish you choose, take your time and apply it carefully, following the instructions for drying times and recommended number of coats. Ensure proper ventilation in your workspace during the application process to allow the finish to dry and cure properly.
Once the finish has dried and cured, give the tool chest a final inspection. Check for any imperfections or spots that may need touch-ups. Clean the hinges, handles, and lock if necessary to remove any excess finish or debris.
With the sanding and finishing complete, your wooden tool chest is now ready for use. It’s time to fill it with your beloved tools and enjoy the satisfaction of a job well done.
Conclusion
Building a wooden tool chest from scratch is a rewarding and worthwhile project for any handyman or woodworking enthusiast. By selecting the right wood, measuring and cutting accurately, and assembling the chest with care, you can create a functional and aesthetically pleasing storage solution for your tools.
Throughout this article, we have covered the key steps involved in building a wooden tool chest, including selecting the wood, measuring and cutting, assembling, attaching hinges and handles, adding a lid and lock, and sanding and finishing. Each step plays a crucial role in ensuring the durability, functionality, and overall appeal of the tool chest.
While the process may require some time and effort, the end result is a personalized tool chest that reflects your craftsmanship and meets your specific needs. Whether you are a seasoned woodworker or a beginner looking to improve your skills, this project allows you to develop your woodworking abilities while creating a practical storage solution for your tools.
Remember, as you build your wooden tool chest, be sure to infuse your own creativity and personal touch. Customize the design, choose the hardware components that resonate with your style, and think about how the chest will fit into your workshop or workspace.
Lastly, don’t forget to prioritize safety throughout the construction process. Use appropriate safety equipment, follow the instructions for each tool and material, and take necessary precautions to protect yourself and others.
In conclusion, building a wooden tool chest is a fulfilling and enjoyable endeavor that allows you to showcase your skills while creating a practical storage solution for your tools. With patience, precision, and attention to detail, you can create a tool chest that will serve you well for years to come. So, grab your tools, select the perfect wood, and embark on this exciting woodworking journey!
Now that you’ve mastered building a wooden tool chest, why not expand your skills with our latest picks on woodworking? Or, if you're itching to get your hands dirty on more projects, our guide on the benefits of DIY projects could provide just the inspiration you need. For enthusiasts eager to organize their new and existing tools effectively, our review on tool storage options will surely come in handy. Dive into these articles for more engaging content and practical tips that will refine your crafting and organizational skills.
Frequently Asked Questions about How Build A Wooden Tool Chest
Was this page helpful?
At Storables.com, we guarantee accurate and reliable information. Our content, validated by Expert Board Contributors, is crafted following stringent Editorial Policies. We're committed to providing you with well-researched, expert-backed insights for all your informational needs.


0 thoughts on “How Build A Wooden Tool Chest”