Articles
How To Install A Decked Tool Box
Modified: February 23, 2024
Learn how to install a Decked tool box on your truck bed and keep your articles organized and secure.
(Many of the links in this article redirect to a specific reviewed product. Your purchase of these products through affiliate links helps to generate commission for Storables.com, at no extra cost. Learn more)
Introduction
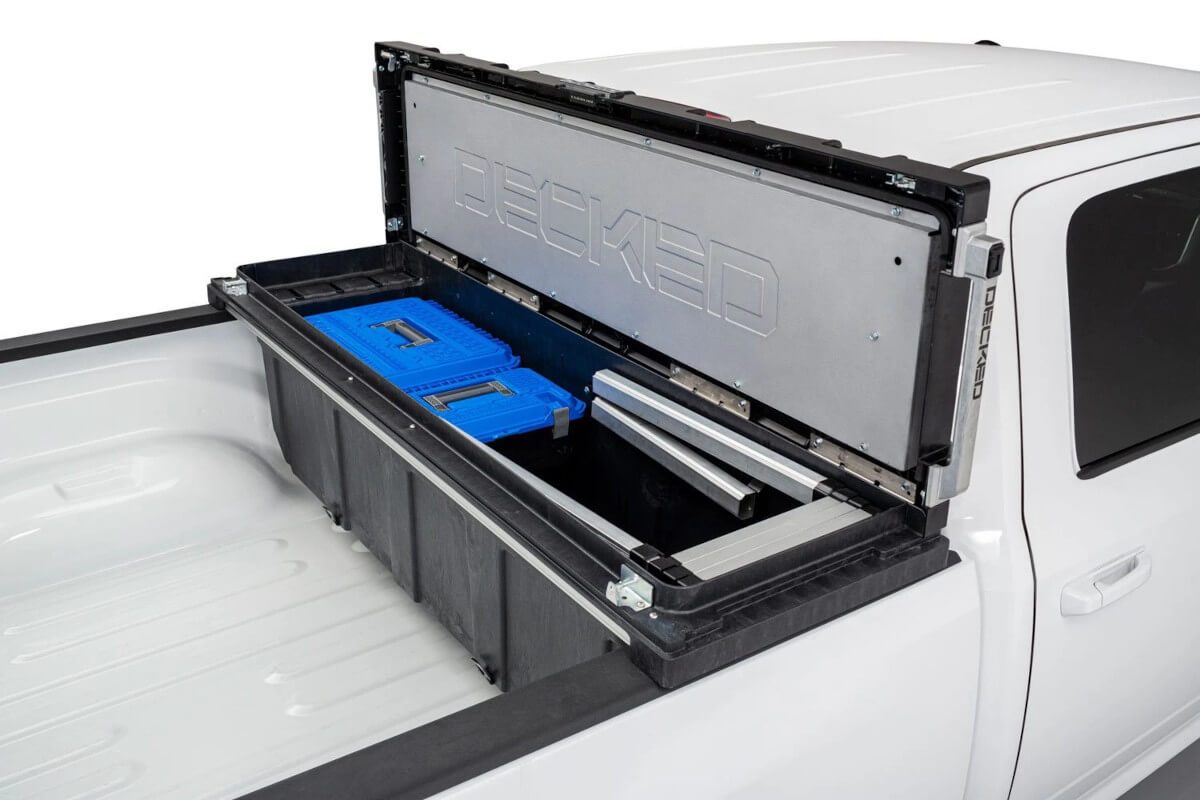
Installing a Decked tool box in your truck can greatly improve your storage options and make it easier to keep your tools and equipment organized. Whether you’re a contractor, an outdoor enthusiast, or someone who just needs extra space for hauling gear, a Decked tool box is a convenient solution. In this article, we will guide you through the step-by-step process of installing a Decked tool box in your truck bed.
Decked tool boxes are renowned for their durability, functionality, and innovative design. They are made from high-quality materials, such as high-density polyethylene and stainless steel, which ensure long-lasting performance even in the harshest conditions. Additionally, Decked tool boxes are engineered to fit most truck makes and models, providing a secure and customized storage solution.
Before you start the installation process, it’s important to gather all the necessary tools and materials. This will enable you to complete the installation smoothly and efficiently. In the next section, we will discuss the tools and materials you’ll need.
Key Takeaways:
- Enhance Your Truck’s Storage: Installing a Decked tool box offers durable, customized storage for tools and gear, ensuring easy access and organization for various tasks and adventures.
- Secure and Reliable Solution: With proper installation and maintenance, a Decked tool box provides stability, functionality, and longevity, offering peace of mind and convenience for your truck bed storage needs.
Read more: How To Install Weather Guard Tool Box
Step 1: Gather the necessary tools and materials
Before you begin installing your Decked tool box, it’s important to gather all the tools and materials you’ll need. This will ensure that you have everything on hand and save you time and frustration during the installation process. Here’s a list of the tools and materials you’ll need:
- Decked tool box (make sure you have the correct size for your truck bed)
- Measuring tape
- Socket set
- Screwdriver
- Drill with appropriate drill bits
- Wrench
- Level
- Masking tape
- Marker
- Clean cloth or rag
- Optional: Silicone sealant
Once you have all the necessary tools and materials ready, you can move on to the next step of preparing your truck bed for the installation of the Decked tool box.
Step 2: Prepare the truck bed
Preparing the truck bed is an important step in the installation process of your Decked tool box. This ensures that the tool box will fit securely and function properly. Follow these steps to prepare your truck bed:
- Clear out any items or debris from the truck bed. Remove any loose tools, equipment, or personal items.
- Use a clean cloth or rag to wipe down the truck bed surface. This will remove any dirt, dust, or grease that may interfere with the installation.
- Measure the dimensions of your truck bed to ensure a proper fit for your Decked tool box. Measure the length, width, and depth of the bed. Take note of any irregularities or obstructions such as wheel wells or bed liners.
- If your truck bed has a bed liner, inspect it for any damage or wear. Ensure that it is securely fastened and in good condition for the installation.
- Some truck beds may require the use of a reinforcement kit for added stability. If your truck bed has thin or weak sections, consider using a reinforcement kit to strengthen those areas.
- Use masking tape to mark the areas where the Decked tool box will be installed. This will serve as a visual guide during the installation process.
By taking the time to properly prepare your truck bed, you’ll ensure a smooth and secure installation of your Decked tool box. With the truck bed ready, you can now move on to the next step of assembling the tool box itself.
Step 3: Assemble the Decked tool box
Before you can install the Decked tool box in your truck bed, you’ll need to assemble it according to the manufacturer’s instructions. Follow these steps to assemble your Decked tool box:
- Unpack all the components of the Decked tool box and lay them out in an organized manner.
- Refer to the instruction manual provided by the manufacturer for the specific assembly steps. Follow the manual carefully to ensure proper assembly.
- Start by attaching the side panels and front panel of the tool box. Use the provided screws and a screwdriver or drill to securely fasten the panels together.
- Next, attach the bottom panel to the assembled side and front panels. Again, use the provided screws and a screwdriver or drill to fasten them together.
- If your Decked tool box includes dividers or organizers, install them according to the manufacturer’s instructions. These dividers are designed to help you further customize the storage space within the tool box.
- Once all the components are properly assembled, double-check that all screws are tightened and secure. This will ensure the stability and durability of the tool box.
By following the manufacturer’s instructions and properly assembling your Decked tool box, you’ll have a sturdy and functional storage solution ready for installation in your truck bed. With the tool box assembled, let’s move on to the next step of installing it in the truck bed.
When installing a Decked tool box, make sure to carefully follow the manufacturer’s instructions for proper assembly and installation. This will ensure the tool box is securely and safely installed on your truck bed.
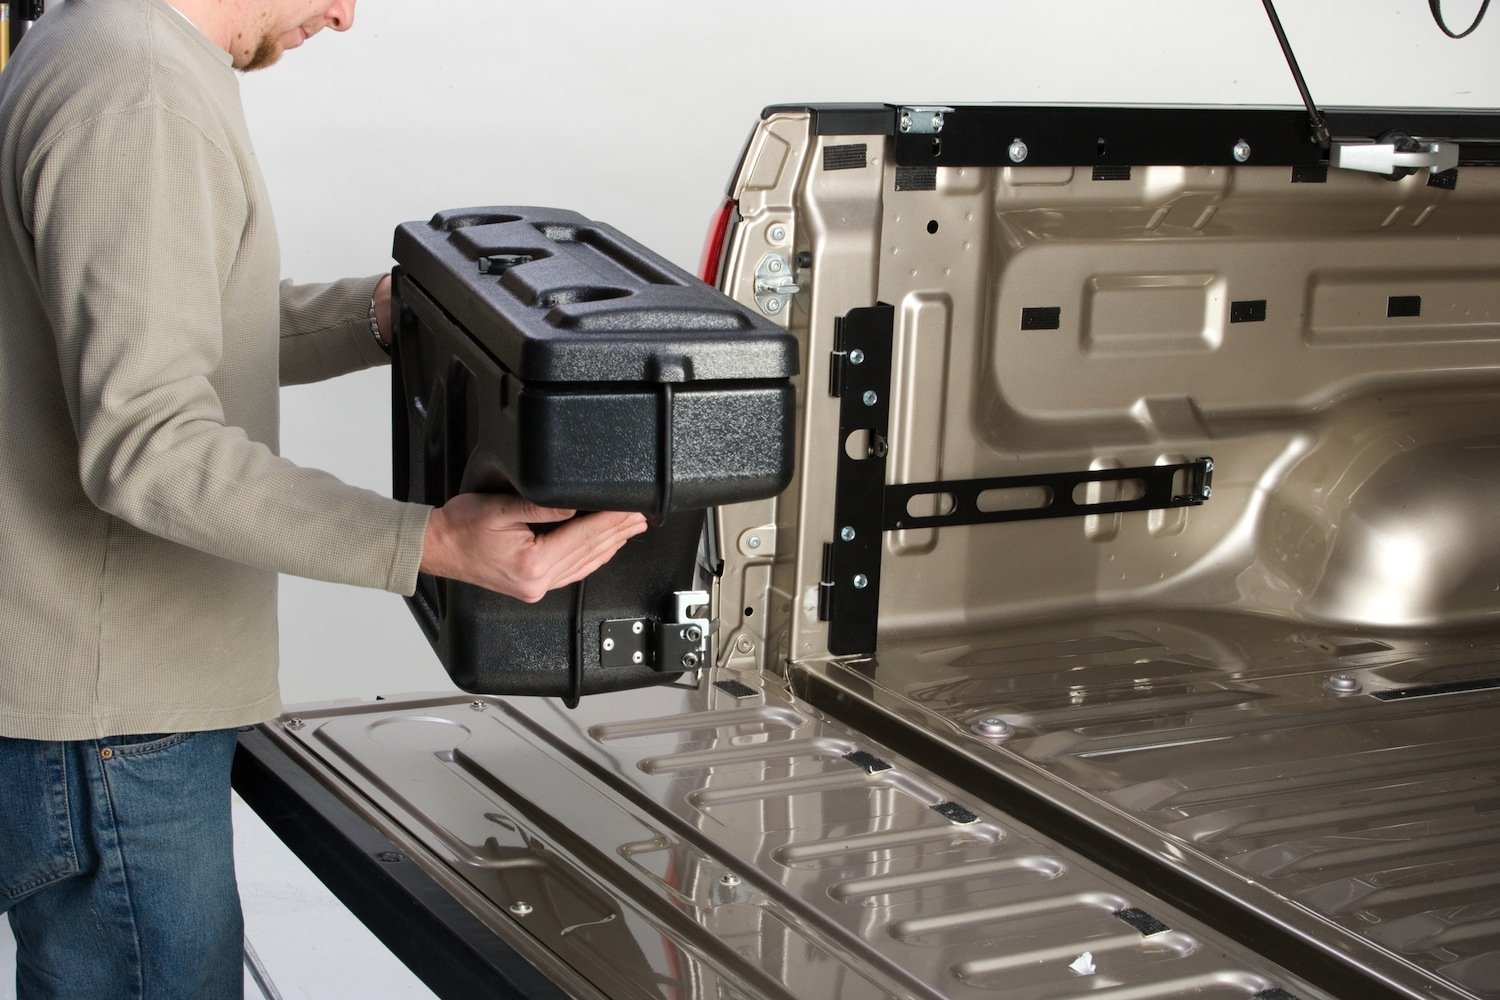
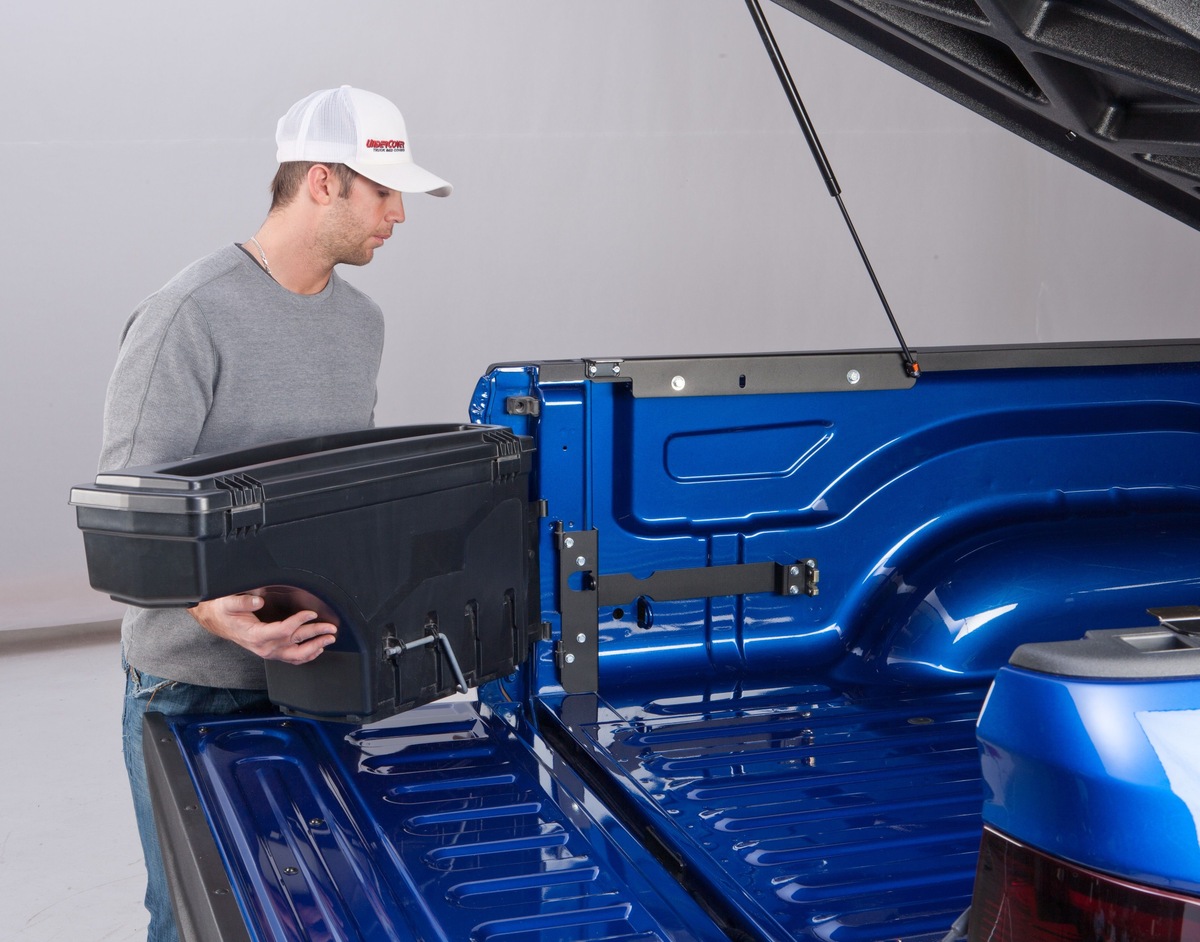
Step 4: Install the Decked tool box in the truck bed
Now that you have assembled your Decked tool box, it’s time to install it in your truck bed. Follow these steps to properly install the tool box:
- Position the Decked tool box in the designated area of your truck bed. Make sure it is centered and aligned with the markings you made in Step 2.
- Check that the tool box fits securely in the truck bed and sits flush against the sides and front of the bed.
- If your truck bed has a bed liner, ensure that it does not interfere with the installation. Adjust the tool box position if needed.
- Refer to the instruction manual for any specific installation steps provided by the manufacturer.
- Depending on the model of your Decked tool box, it may require additional installation steps such as attaching brackets or securing clamps. Follow the manufacturer’s instructions for these additional steps.
- Ensure that the tool box is level and properly aligned with the truck bed. Use a level tool to check the alignment before proceeding.
By following these installation steps, you’ll securely position your Decked tool box in the truck bed, ensuring stability and functionality. With the tool box installed, let’s move on to the next step of securing it in place.
Step 5: Secure the tool box in place
Once you have installed the Decked tool box in your truck bed, it’s important to secure it in place to ensure that it stays in position during transportation. Follow these steps to secure your tool box:
- Refer to the instruction manual provided by the manufacturer for any specific guidance on securing the tool box.
- Most Decked tool boxes come with integrated tie-down points or anchor points. Utilize these points to secure the tool box using ratchet straps or bungee cords. Make sure to follow the recommended weight capacity for these tie-down points.
- If your tool box does not have integrated tie-down points, you can use aftermarket anchor points or create your own by drilling holes and installing eye bolts or D-rings.
- Place the straps or cords over the top of the tool box and tighten them to firmly secure the tool box in place.
- Double-check the tightness of the straps or cords to ensure the tool box remains stable and does not shift during transportation.
- Test the stability of the tool box by gently shaking it. If there is any movement, adjust the straps or cords accordingly to secure the tool box further.
By properly securing the tool box in place, you’ll prevent it from shifting or sliding during transit, providing a safe and secure storage solution for your tools and equipment. Now that your tool box is securely installed and fastened, let’s move on to the final step of testing its stability and functionality.
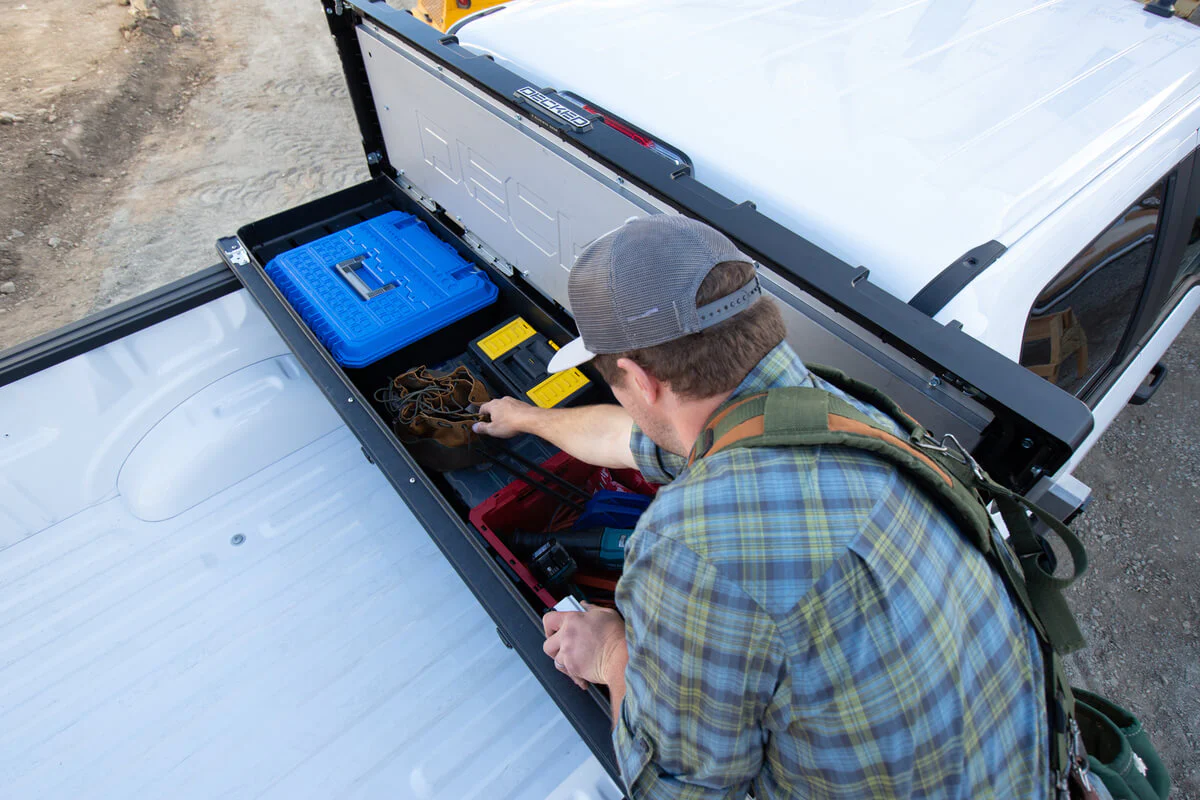
Step 6: Test the tool box for stability and functionality
After installing and securing your Decked tool box in the truck bed, it’s important to test its stability and functionality before you start using it regularly. Follow these steps to ensure that everything is in order:
- Give the tool box a thorough visual inspection. Check for any signs of damage, loose components, or misaligned parts. If you notice any issues, refer to the manufacturer’s instructions for troubleshooting or contact their customer support for assistance.
- Open and close the drawers of the tool box to ensure they operate smoothly and securely. If there are any difficulties in opening or closing the drawers, double-check for any obstructions or misalignments.
- Load the tool box with a reasonable amount of weight. This can include tools, equipment, or any other items you plan to store in the box. Make sure to distribute the weight evenly to maintain balance.
- While the truck is stationary, gently shake the tool box to test its stability. It should feel solid and not wobble excessively. If there is any noticeable instability, recheck the installation and secure any loose components or straps.
- If you live in an area with extreme weather conditions, such as heavy rain or snow, simulate those conditions by using a hose or pouring water on the tool box. Check if there are any leaks or water infiltration inside the box. If there are, consider applying silicone sealant to the affected areas.
- Take your truck for a short test drive to further evaluate the stability and functionality of the tool box. Pay attention to any unusual noises, movement or vibrations. If anything seems out of place, address it promptly to ensure the tool box is properly installed.
By testing your tool box for stability and functionality, you can have peace of mind knowing that your tools and equipment will be securely stored and easily accessible when you need them. With the installation process now complete, you can enjoy the convenience and efficiency of your Decked tool box in your truck bed.
Finalize the installation by cleaning up any tools or debris from the truck bed and organizing your tools within the tool box. Remember to maintain your tool box regularly by keeping it clean and lubricating the drawer hardware as needed. This will help prolong its lifespan and ensure optimal performance for years to come.
Now that you have successfully installed and tested your Decked tool box, you’re ready to take on any task with confidence and have all your tools conveniently stored in one secure location.
Conclusion
Installing a Decked tool box in your truck bed can significantly enhance your storage capabilities and improve organization for your tools and equipment. By following the step-by-step guide in this article, you have successfully completed the installation process and ensured the stability and functionality of your tool box.
Through gathering the necessary tools and materials, preparing the truck bed, assembling the tool box, installing it securely, and testing it for stability and functionality, you have created a reliable storage solution that will serve you well in various tasks and adventures.
With the high-quality construction and innovative design of Decked tool boxes, you can enjoy the benefits of durable storage that withstands tough conditions and provides easy access to your tools. Whether you’re a contractor, outdoor enthusiast, or someone who values organization, a Decked tool box is a valuable addition to your truck bed.
Remember to regularly maintain your tool box by cleaning it and lubricating the drawers as needed. This will help ensure its longevity and optimal performance over time.
Now that your Decked tool box is securely installed and ready for use, you can confidently tackle your projects, knowing that your tools are conveniently stored and easily accessible. Say goodbye to searching through a cluttered truck bed and hello to efficiency and organization with your Decked tool box.
So go ahead, load up your tools, hit the road, and experience the convenience and functionality of a properly installed and well-maintained Decked tool box in your truck bed!
Frequently Asked Questions about How To Install A Decked Tool Box
Was this page helpful?
At Storables.com, we guarantee accurate and reliable information. Our content, validated by Expert Board Contributors, is crafted following stringent Editorial Policies. We're committed to providing you with well-researched, expert-backed insights for all your informational needs.


0 thoughts on “How To Install A Decked Tool Box”