Articles
How To Build Bee Boxes
Modified: September 1, 2024
Learn how to build bee boxes in your garden and attract beneficial pollinators with our step-by-step guide. Create a thriving ecosystem for your plants and enjoy an abundance of fresh produce.
(Many of the links in this article redirect to a specific reviewed product. Your purchase of these products through affiliate links helps to generate commission for Storables.com, at no extra cost. Learn more)
Introduction
Building bee boxes, also known as beehives or honey bee colonies, is a rewarding endeavor that not only allows you to provide a safe and comfortable home for these essential pollinators but also enables you to enjoy the benefits of having your own honey supply. Whether you are an experienced beekeeper or a beginner looking to start your beekeeping journey, learning how to build bee boxes is an important skill to acquire.
In this step-by-step guide, we will walk you through the process of constructing bee boxes using basic materials and tools. By following these instructions, you will be able to create sturdy and functional bee boxes that will support the thriving of your honey bee colonies.
Before we dive into the construction process, it’s essential to understand the importance of choosing the right materials. Bee boxes are typically made from durable and weather-resistant wood, such as pine or cedar. These woods not only provide excellent insulation for the bees but also have natural properties that can discourage pests and fungal growth.
Additionally, it’s crucial to use non-toxic paints or stains when finishing the bee boxes, as bees are sensitive to chemicals. Choosing eco-friendly and bee-safe materials will ensure the overall health and well-being of your honey bee colonies.
Now that we have covered the basics, let’s gather our materials and get started on building bee boxes that will become the abode for your buzzing friends.
Key Takeaways:
- Building bee boxes involves careful wood cutting, precise assembly, and thoughtful additions like ventilation and entrance holes. It’s a labor of love that creates a safe haven for honey bees to thrive.
- Attention to detail, from choosing the right materials to adding finishing touches, ensures the longevity and functionality of bee boxes. Beekeeping is not just a hobby; it’s a commitment to environmental stewardship.
Read more: How To Build Cabinet Box
Materials Needed
Before embarking on the construction of your bee boxes, gather the necessary materials and tools to ensure a smooth building process. Here is a list of items you will need:
- 1-inch thick boards of pine or cedar for the sides, floor, and lid of the bee box
- 1/2-inch thick boards of pine or cedar for the frames
- Wood screws or nails
- Saw (preferably a table saw or a circular saw)
- Drill with screwdriver bits or a hammer if using nails
- Measuring tape
- Paint or stain (if desired)
- Paintbrush or roller
- Sandpaper or a sanding block for smoothing rough edges
- Protective gloves and eyewear
Ensure that all the wood you are using is of good quality and free from knots or other defects that could weaken the structure of the bee boxes. The dimensions of the boards will depend on the size of bee boxes you intend to build, so measure and cut accordingly.
Take your time to gather all the materials and tools mentioned above. Having everything readily available before you begin will make the construction process more efficient, allowing you to focus on building sturdy and functional bee boxes for your honey bee colonies.
Step 1: Cutting the Wood
The first step in building bee boxes is cutting the wood to the appropriate dimensions. Using a saw, carefully cut the boards according to the measurements required for the sides, floor, and lid of the bee box.
Ensure that the boards are cut precisely and have clean, straight edges. This will help in achieving a snug fit when assembling the bee box later on. Use a measuring tape to accurately mark the desired dimensions on the wood before cutting.
If you don’t have access to a woodworking shop or specialized equipment, you can opt to have the wood cut at your local home improvement store. Most stores offer this service for a small fee, which can save you time and ensure accurate cuts.
Once the wood is cut to size, carefully inspect each piece for any rough or uneven edges. Use sandpaper or a sanding block to smooth out any imperfections, ensuring a clean and professional finish.
Remember to wear protective gloves and eyewear while handling the wood and using the saw to prevent any accidents or injuries. Safety should be a top priority throughout the entire construction process.
With the wood cut to the proper dimensions and smooth to touch, you are now ready to move on to the next step: assembling the bee box.
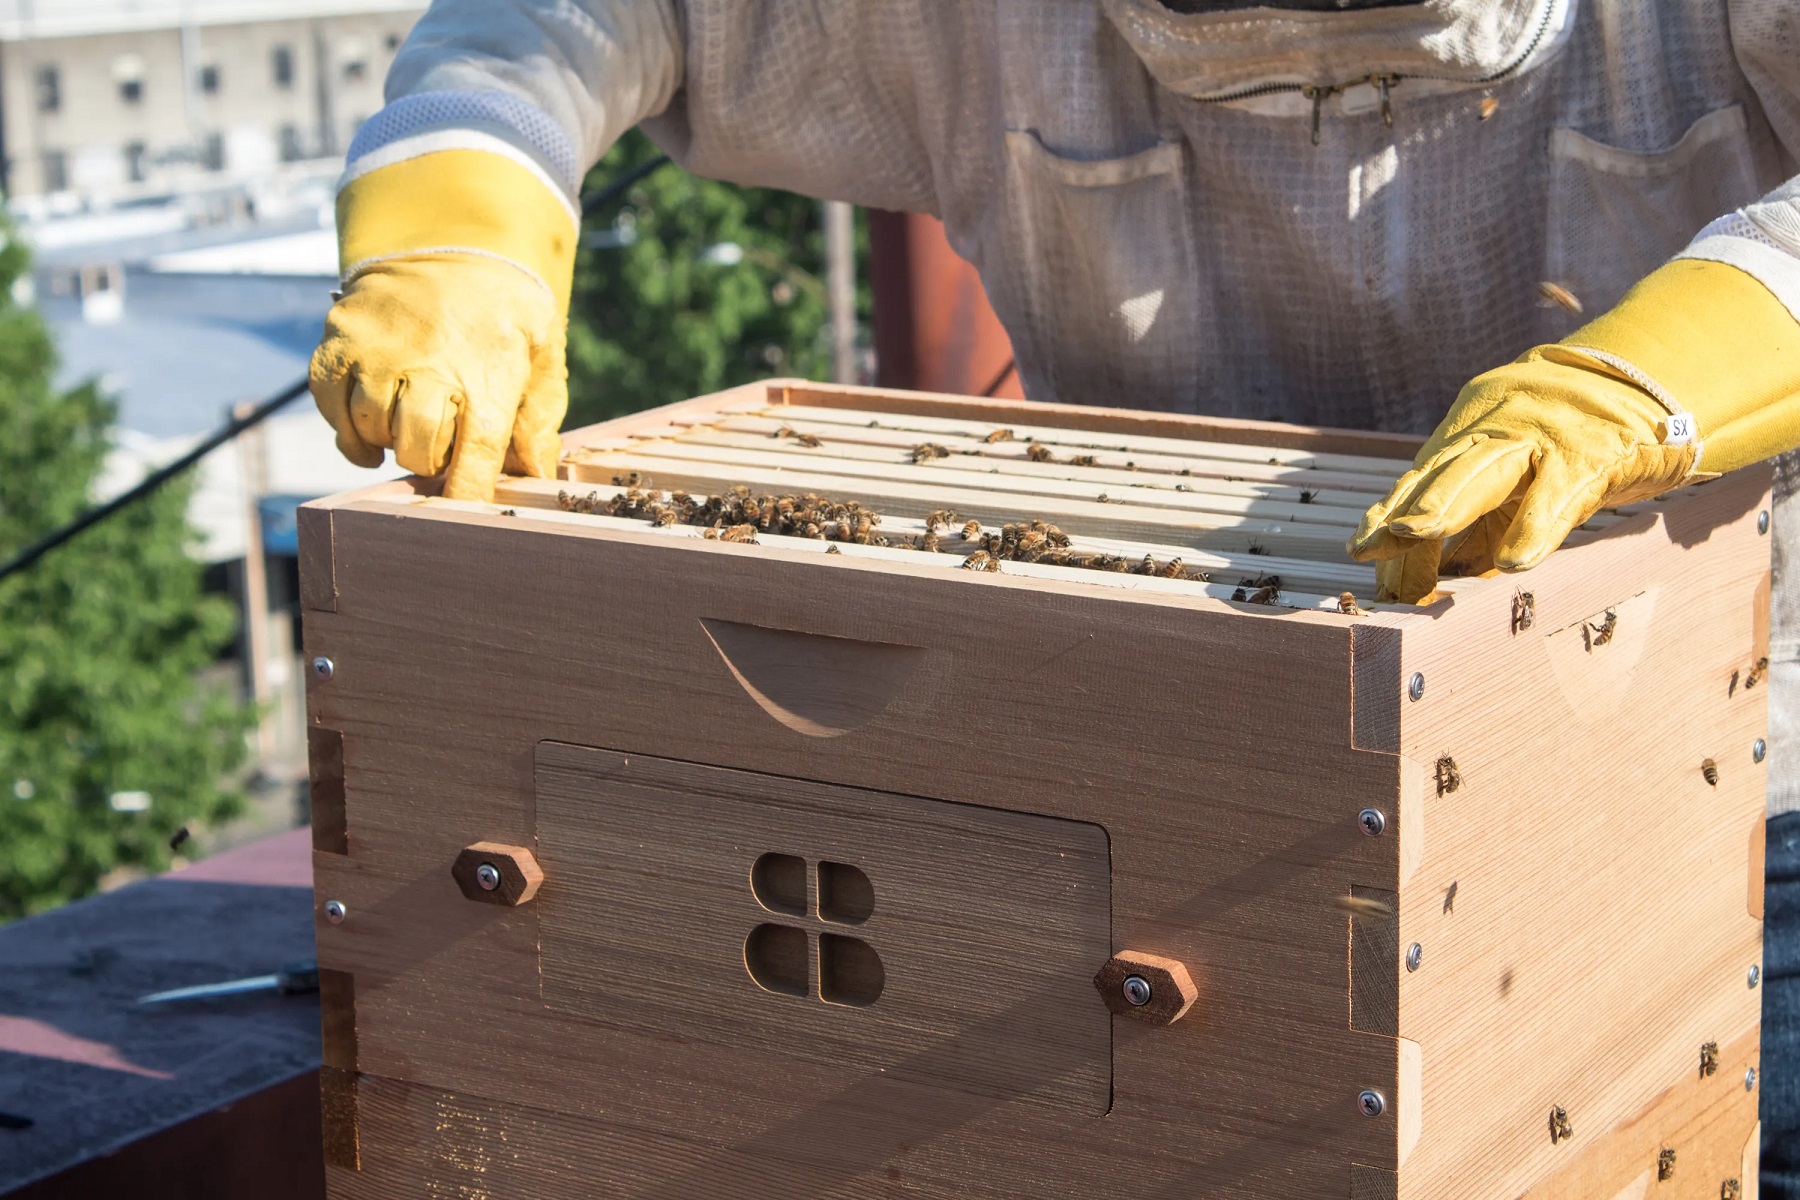
Step 2: Assembling the Box
Now that you have all the pieces of wood cut to size, it’s time to assemble the bee box. This step involves joining the sides, floor, and lid together to create a sturdy structure that will house your honey bee colony.
Start by laying out the bottom board (the floor) on a flat and level surface. Position the side boards against the edges of the floor, ensuring that they are aligned properly. Use wood screws or nails to attach the sides securely to the floor.
Next, attach the end boards to the side boards, completing the rectangular shape of the box. Again, make sure that all the boards are aligned correctly before fastening them together. Repeat this process for the opposite end of the bee box.
Once the sides and ends are securely attached to the floor, it’s time to add the lid. Place the lid on top of the assembled box, ensuring that it fits snugly. Attach the lid to the sides using hinges or screws, allowing for easy access to the inside of the bee box.
During the assembly process, make sure to check the corners and joints to verify that they are tight and secure. An adequately assembled bee box will provide the necessary stability for the honey bee colony and protect them from the elements.
If desired, you can also choose to paint or stain the bee box at this stage. Make sure to use non-toxic and bee-safe paint or stain, focusing on the exterior of the box and avoiding any application on the interior where the bees will reside.
With the bee box fully assembled and optionally painted or stained, you are ready to move on to the next step: creating the frames.
Step 3: Creating the Frames
Creating frames is an integral part of building bee boxes, as they provide the structure for the honeycomb and support the growth and development of the honey bee colony. In this step, we will guide you on how to create the frames for your bee box.
Using the 1/2-inch thick boards of pine or cedar, measure and cut pieces to the appropriate dimensions for the frames. The size of the frames may vary depending on the size of the bee box and the type of honey bee colony you are housing.
Typically, the frames consist of two vertical sidebars with horizontal top and bottom bars. These bars should be cut accurately to allow for a proper fit within the bee box and to support the honeycomb.
Once you have cut all the pieces for the frames, assemble them by attaching the top and bottom bars to the sidebars using wood screws or nails. Make sure the joints are strong and secure, as the frames need to withstand the weight of the honeycomb and the activities of the honey bees.
It is important to create enough frames to fill the bee box adequately. The number of frames required may depend on the size of your bee box and the preferences of your honey bee colony.
After the frames are assembled, check for any rough edges or splinters and use sandpaper or a sanding block to smoothen them out. This will help prevent any injuries to the bees or beekeepers during hive inspection and maintenance.
Once the frames are completed and inspected, you are now ready to move on to the next step: adding the foundations to the frames.
Building bee boxes requires attention to detail and precision, ensuring that the frames are well-constructed and provide a solid foundation for the development of the honey bee colony. Take the time to create sturdy frames that will support the bees’ growth and productivity in their new home.
When building bee boxes, make sure to use untreated wood to avoid harming the bees. Also, ensure that the boxes have proper ventilation and are placed in a sunny location.
Read more: How To Build Speaker Boxes
Step 4: Adding the Foundations
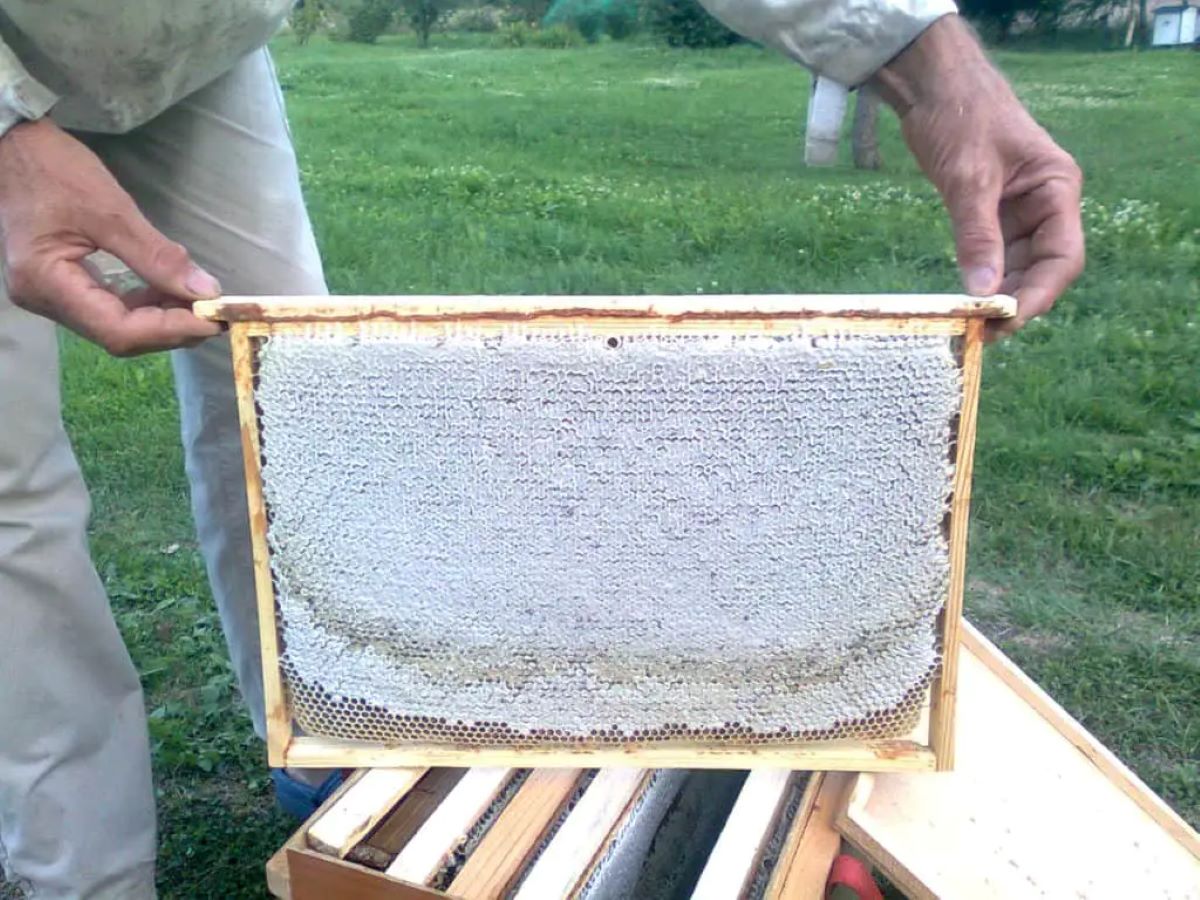
Foundations play a crucial role in providing the honey bees with a solid base upon which to build their honeycomb. In this step, we will guide you on how to add foundations to the frames in your bee box.
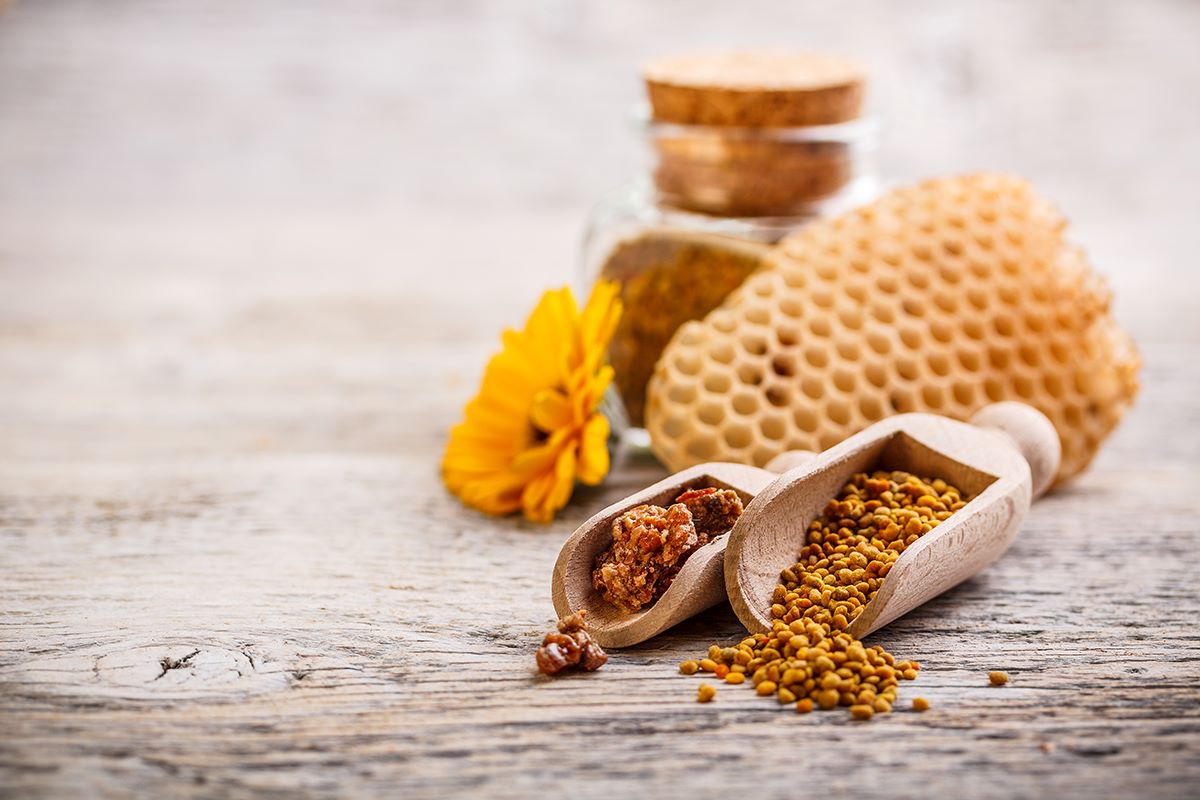
The foundations can be made of either beeswax or plastic. Beeswax foundations are commonly used in traditional beekeeping, while plastic foundations offer durability. The choice of material is up to your preference and beekeeping practices.
If using beeswax foundations, carefully insert them into the frame’s slots, making sure they fit snugly. Beeswax sheets can be purchased or made using molds for a uniform size and thickness. It’s crucial to handle beeswax with clean hands or gloves to prevent contamination that can be detrimental to the bees.
If using plastic foundations, follow the manufacturer’s instructions for attaching them to the frames. Plastic foundations often have tabs or hooks that insert into the frame’s slots for easy attachment. Ensure that the plastic foundations are securely inserted to prevent any movement or instability.
By adding foundations to the frames, you are providing the honey bees with a guide to build their honeycomb. These foundations serve as a template for the bees to start constructing their cells, storing honey, pollen, and brood.
Once the foundations are in place, carefully insert each frame into the bee box, ensuring a snug fit. The frames should be evenly spaced to allow for proper airflow and easy access for hive inspections.
With the foundations added and the frames securely placed within the bee box, you are now ready to move on to the next step: creating ventilation holes.
The addition of foundations gives the honey bees a head start in building their honeycomb and provides them with a structured environment for their activities. It is an essential step to support their natural processes and overall well-being in the bee box.
Step 5: Ventilation Holes
Creating proper ventilation in your bee box is crucial for the health and well-being of your honey bee colony. In this step, we will guide you on how to add ventilation holes to ensure adequate airflow within the hive.
Start by marking the locations for the ventilation holes on the sides of the bee box. It’s recommended to have multiple ventilation holes on each side to allow for optimal air circulation. The size and number of holes may vary depending on the size of your bee box and the local climate.
Using a drill with an appropriate drill bit, carefully create the ventilation holes on the marked locations. The size of the drill bit should be sufficient to allow for proper airflow without risking the entry of unwanted pests or excessive exposure to the elements.
It’s important to strategically place the ventilation holes to avoid direct exposure of the honey bee colony to extreme weather conditions or prevailing winds. Ideally, the ventilation holes should be positioned near the top of the bee box to allow warm air to escape while drawing in fresh air from the lower entrances.
After drilling the ventilation holes, inspect them to ensure that they are clean and free from any debris or wood shavings. Use sandpaper or a file to smooth any rough edges around the holes to prevent injury to the bees.
Proper ventilation is essential for regulating the temperature and humidity levels within the bee box. It helps to prevent excessive heat buildup in the summer months and condensation in the colder seasons. Adequate airflow also assists in keeping the hive clean and reducing the risk of diseases and pests.
With the ventilation holes added to the bee box, you are now ready to move on to the next step: adding entrance holes.
Creating ventilation holes ensures a healthy and comfortable environment for your honey bee colony, promoting their overall well-being and productivity. Paying attention to ventilation is key to successful beekeeping and maintaining thriving colonies.
Step 6: Adding Entrance Holes
Entrance holes provide honey bees with access in and out of the bee box, allowing them to forage for food and explore their surroundings. In this step, we will guide you on how to add entrance holes to your bee box.
Start by deciding on the number and size of entrance holes you want to incorporate. The number of entrance holes may vary depending on the size of your bee box and the number of honey bee colonies you plan to house. It’s generally recommended to have multiple entrance holes to facilitate traffic flow and prevent congestion.
Using a drill with an appropriate drill bit, carefully create the entrance holes on the front of the bee box. The size of the drill bit should be suitable for the bees to easily enter and exit without allowing larger pests or predators to gain access.
Position the entrance holes near the bottom of the bee box to allow for natural ventilation and prevent rainwater from entering. Ensure that the holes are evenly spaced, providing sufficient space for the bees to maneuver without overcrowding.
After drilling the entrance holes, inspect them to ensure that they are free from any obstructions or rough edges. Smooth any rough edges with sandpaper or a file to prevent injuries to the bees as they come and go.
Consider incorporating entrance reducers or entrance guards during periods when the colony is vulnerable, such as during winter or when establishing a new colony. These accessories can help in controlling the size of the entrance and protect the colony from potential threats.
Entrance holes are vital for the honey bees to navigate and establish efficient foraging routes. They also play a role in managing the population dynamics within the bee box and allowing bees to defend their hive against intruders.
With the entrance holes added to the bee box, you have nearly completed the construction process. The final step involves adding some finishing touches to ensure the bee box is ready for your honey bee colony.
By responsibly adding entrance holes, you provide honey bees with easy access to their hive and offer them the freedom to explore and gather resources, ultimately contributing to their overall success and productivity.
Step 7: Finishing Touches
In the final step of building bee boxes, it’s time to add some finishing touches to ensure that your bee box is in optimal condition for your honey bee colonies. These small details can make a significant difference in the functionality and longevity of your bee box.
Start by inspecting the bee box for any protruding or sharp edges that could potentially harm the bees or beekeepers. Use sandpaper or a sanding block to smooth out any rough areas, ensuring a safer environment for all.
Next, check the joints and connections within the bee box to ensure they are secure. Tighten screws or add additional nails if needed to reinforce the structure. A solidly constructed bee box will provide stability and support for the honey bee colony.
If desired, you can apply a protective finish to the exterior of the bee box to further enhance its durability. Choose a non-toxic and bee-safe paint or stain and carefully apply it, following the manufacturer’s instructions. Keep in mind that only the exterior of the bee box should be painted, as the interior is where the bees will reside.
Additionally, consider attaching a protective cover or roof to shield the bee box from the elements. A well-fitted cover can provide insulation, protect against excessive rain or direct sunlight, and further aid in maintaining a stable hive environment.
Finally, take a step back and admire your completed bee box. Ensure that all components are securely in place, the ventilation and entrance holes are clear, and the overall structure is stable. Congratulations! You have successfully built a bee box that will provide a safe and comfortable home for your honey bee colonies.
Remember to periodically inspect and maintain your bee boxes to ensure they remain in good condition. Regular hive checks, cleaning, and maintenance are essential for the health and productivity of your honey bee colonies.
With the finishing touches complete, you are now ready to introduce your honey bee colony to their new home. Monitor their progress, provide necessary care, and enjoy the rewards of beekeeping as you observe these fascinating pollinators thrive and contribute to our ecosystem.
Read more: How To Build Vegetable Planter Boxes
Conclusion
Building bee boxes is not just about constructing a physical structure; it is about creating a safe and comfortable home for honey bees, essential pollinators that play a crucial role in our ecosystem. By following the step-by-step process outlined in this guide, you have acquired the knowledge and skills to construct functional and durable bee boxes.
Throughout the building process, you learned the importance of choosing the right materials and ensuring proper ventilation. You carefully cut the wood, assembled the box, created frames, added foundations, ventilation holes, and entrance holes. These steps are all essential in providing a suitable environment for honey bee colonies to thrive.
By incorporating finishing touches and paying attention to detail, such as smoothing rough edges and adding protective covers, you have taken the necessary precautions to ensure the longevity of your bee boxes. These steps not only contribute to the well-being of the honey bees but also make the beekeeping experience safer and more rewarding for you.
Remember, beekeeping is not just a hobby – it is a way to connect with nature, support pollinators, and contribute to the preservation of biodiversity. As you embark on your beekeeping journey, be sure to continue learning and adapting your practices to the needs of your honey bee colonies.
Furthermore, always prioritize the health and safety of the honey bees. Regular hive inspections, proper maintenance, and attention to their well-being should be part of your ongoing beekeeping routine.
Building bee boxes is a labor of love and a commitment to environmental stewardship. By providing honey bees with a suitable home, you are not only contributing to the conservation of these remarkable creatures but also playing a role in safeguarding our food supply and ecosystem sustainability.
Now, armed with the knowledge gained from this guide, go forth, build your bee boxes, and welcome these industrious pollinators into their new abode. Enjoy the wonders of beekeeping, the joy of harvesting your own honey, and the satisfaction of making a positive impact on the world around you.
Frequently Asked Questions about How To Build Bee Boxes
Was this page helpful?
At Storables.com, we guarantee accurate and reliable information. Our content, validated by Expert Board Contributors, is crafted following stringent Editorial Policies. We're committed to providing you with well-researched, expert-backed insights for all your informational needs.


0 thoughts on “How To Build Bee Boxes”