Articles
How To Build Ladder Shelf
Modified: January 8, 2024
Learn how to build ladder shelf with our detailed articles. Find step-by-step instructions and tips for creating this versatile storage solution.
(Many of the links in this article redirect to a specific reviewed product. Your purchase of these products through affiliate links helps to generate commission for Storables.com, at no extra cost. Learn more)
Introduction
Welcome to our comprehensive guide on how to build a ladder shelf! Ladder shelves have become increasingly popular in recent years due to their versatile design and practicality. They offer a unique way to display and organize items while adding a touch of modern sophistication to any space. Whether you’re a seasoned DIY enthusiast or new to woodworking, this step-by-step tutorial will walk you through the process of creating your very own ladder shelf.
In this guide, we will cover everything you need to know, from planning the design to adding the finishing touches. We will provide you with a list of tools and materials you’ll need, along with detailed instructions for each step. So, roll up your sleeves, gather your supplies, and let’s get started on this rewarding DIY project!
Before we dive into the specifics, let’s talk about the benefits of building a ladder shelf. One of the key advantages is its space-saving design. Ladder shelves are known for their vertical orientation, which means they take up minimal floor space while offering ample storage and display areas. This makes them an excellent choice for small apartments or rooms with limited square footage.
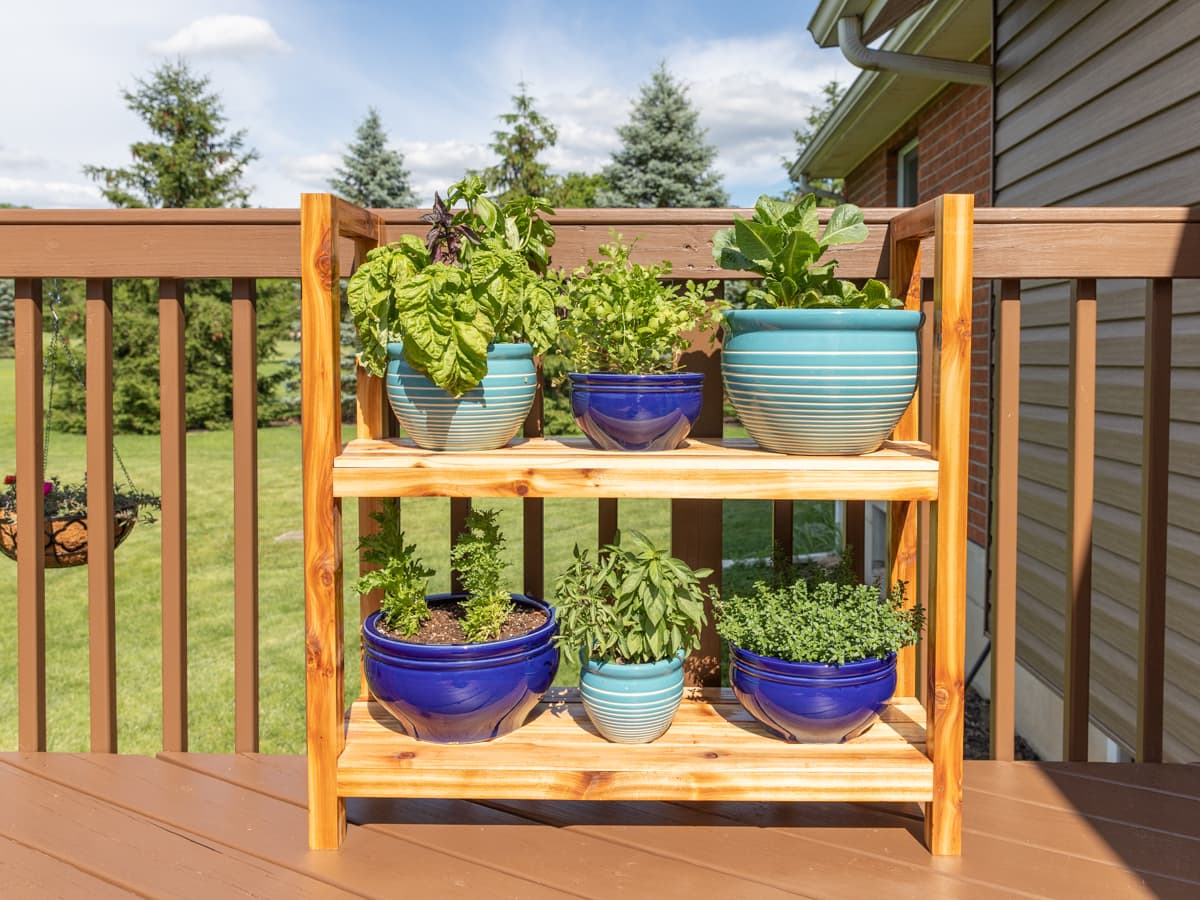
Besides their functionality, ladder shelves also add a stylish touch to any room. With their sleek and minimalist look, they effortlessly complement a variety of decor styles, from modern and industrial to farmhouse and bohemian. Plus, they provide the perfect opportunity to showcase your favorite books, plants, decor items, and even artwork.
Now that we’ve discussed the benefits and versatility of ladder shelves, it’s time to gather the necessary tools and materials. Let’s move on to the next section where we’ll list everything you’ll need for this project.
Key Takeaways:
- Building a ladder shelf offers a space-saving and stylish solution for displaying items. From planning the design to adding reinforcements, this DIY project provides a rewarding way to enhance your home decor.
- With the right tools and materials, constructing a ladder shelf involves precise cutting, thorough sanding, and thoughtful assembly. The finishing touches, such as staining or painting, allow for personalization and integration into any space.
Read also: 11 Best Ladder Shelf for 2025
Tools and Materials Needed
Before you begin building your ladder shelf, make sure you have the following tools and materials ready:
Tools:
- Measuring tape
- Pencil
- Circular saw or miter saw
- Drill
- Screwdriver
- Sanding block or sandpaper
- Clamps
- Level
- Paintbrush or roller
Materials:
- 1×2 inch wooden boards (quantity will depend on the size of your desired shelf)
- 1×6 inch wooden boards (quantity will depend on the size of your desired shelf)
- Wood glue
- 1 ¼ inch screws
- Wood stain or paint
- Paint primer (if painting the shelf)
- Wood filler
- Sandpaper (various grits)
It’s important to gather all the necessary tools and materials before you begin, as it will save you time and make the building process smoother. Additionally, having everything prepared in advance allows you to work efficiently without any interruptions.
Keep in mind that the quantity of wooden boards will depend on the size and design of the ladder shelf you want to build. Make sure to measure the space where you plan to place the shelf to determine the appropriate dimensions. You can also customize the width and height according to your personal preference.
Now that you have your tools and materials ready, let’s move on to the next step: planning the design of your ladder shelf.
Step 1: Planning the Design
The first step in building a ladder shelf is to plan the design. This involves determining the dimensions, style, and placement of your shelf. Take some time to visualize how you want your ladder shelf to look and consider how it will fit into the overall aesthetic of your space.
Start by measuring the area where you intend to place the ladder shelf. Take into account the height, width, and depth of the space to ensure that your shelf will fit comfortably and be proportionate to the surroundings. Consider any height restrictions, such as low ceilings or furniture that may obstruct the shelf.
Next, decide on the overall style and appearance of your ladder shelf. Do you want a sleek, modern look or a rustic, farmhouse-inspired design? This will help determine the type of wood you choose, as well as the finish or paint color.
Once you have an idea of the dimensions and style, it’s time to sketch out your design. Use a pencil and paper or a design software to create a rough sketch of your ladder shelf. Include the vertical supports, horizontal shelves, and any additional features or embellishments you desire.
Consider the number of shelves you want and their spacing. Keep in mind that the bottom shelf should be lower to the ground to serve as a stable base, while the top shelf should be within easy reach. Aim for a balanced design with equal spaces between the shelves.
As you plan the design, think about the functionality of the shelf. Are you primarily using it for displaying books, plants, or decor items? If you plan to store heavier items, you may need to add additional reinforcement or choose sturdier materials.
Once you have a finalized design, double-check the measurements and make any necessary adjustments. It’s important to have a clear plan before moving on to the next step to avoid any unnecessary errors or rework.
With your design in hand, you’re ready to move on to the next step: cutting the wood pieces for your ladder shelf.
Read more: How To Build A Shelf In A Cabinet
Step 2: Cutting the Wood Pieces
Now that you have a finalized design for your ladder shelf, it’s time to start cutting the wood pieces. This step is crucial in ensuring that all the components of your shelf fit together properly.
Begin by gathering the necessary 1×2 inch and 1×6 inch wooden boards. Measure and mark the dimensions of each component according to your design. Use a measuring tape and pencil to ensure accuracy. Take your time with this step as precise measurements will make a significant difference in the final result.
Next, using a circular saw or miter saw, carefully cut the wooden boards according to the measurements. Remember to wear safety goggles and follow all safety precautions when operating power tools. Take your time and make smooth, accurate cuts to ensure that the pieces fit together seamlessly.
When cutting the boards for the vertical supports, make sure they are all the same length to ensure a level shelf. If desired, you can cut an angle at the bottom of each support piece to give your ladder shelf a more distinctive look.
For the horizontal shelves, cut them according to the width you have chosen for each shelf. Take into account the desired spacing between the shelves and cut the boards accordingly.
As you cut the wood pieces, it’s a good idea to label them or make note of their intended position in the assembly process. This will make it easier to identify and organize the pieces when it comes time to assemble the ladder shelf.
Once you have cut all the necessary wood pieces, double-check their measurements to ensure accuracy. Use a sanding block or sandpaper to smooth out any rough edges or surfaces.
With the wood pieces cut and sanded, you are now ready to move on to the next step: sanding the wood surfaces.
Step 3: Sanding the Wood Surfaces
Now that you have cut all the wood pieces for your ladder shelf, it’s time to sand the surfaces. Sanding is an essential step that helps create a smooth finish and ensures the wood is free from any rough spots or imperfections.
Begin by gathering your sandpaper. It’s recommended to use sandpaper in different grits, such as 80-grit, 120-grit, and 220-grit, to achieve the desired smoothness. Start with a coarser grit and gradually move to finer grits for a flawless finish.
Take one of the wood pieces and secure it in place with clamps or by placing it on a sturdy surface. Holding the sandpaper firmly, move it back and forth along the surface of the wood, following the grain. Apply even pressure and cover the entire surface area.
Be thorough when sanding, paying attention to any rough edges or corners. It’s important to remove any splinters or sharp edges to ensure the safety of the finished ladder shelf.
As you sand, periodically check the smoothness of the wood surface by running your hand over it. If you still feel rough areas, continue sanding until the surface feels uniformly smooth.
Once you have completed sanding one side of the wood piece, flip it over and repeat the process on the other side. Be sure to also sand the edges to maintain a consistent look and feel.
Continue this process for all the wood pieces, ensuring that each one is sanded to the same level of smoothness. Take your time and pay attention to detail, as a well-sanded surface will result in a professional-looking ladder shelf.
Once you have finished sanding all the wood pieces, use a cloth or brush to remove any sanding dust. This will prepare the surfaces for the next step, which is assembling the sides of the ladder shelf.
With the wood surfaces beautifully sanded, you’re now ready to move on to step 4: assembling the sides of the ladder shelf.
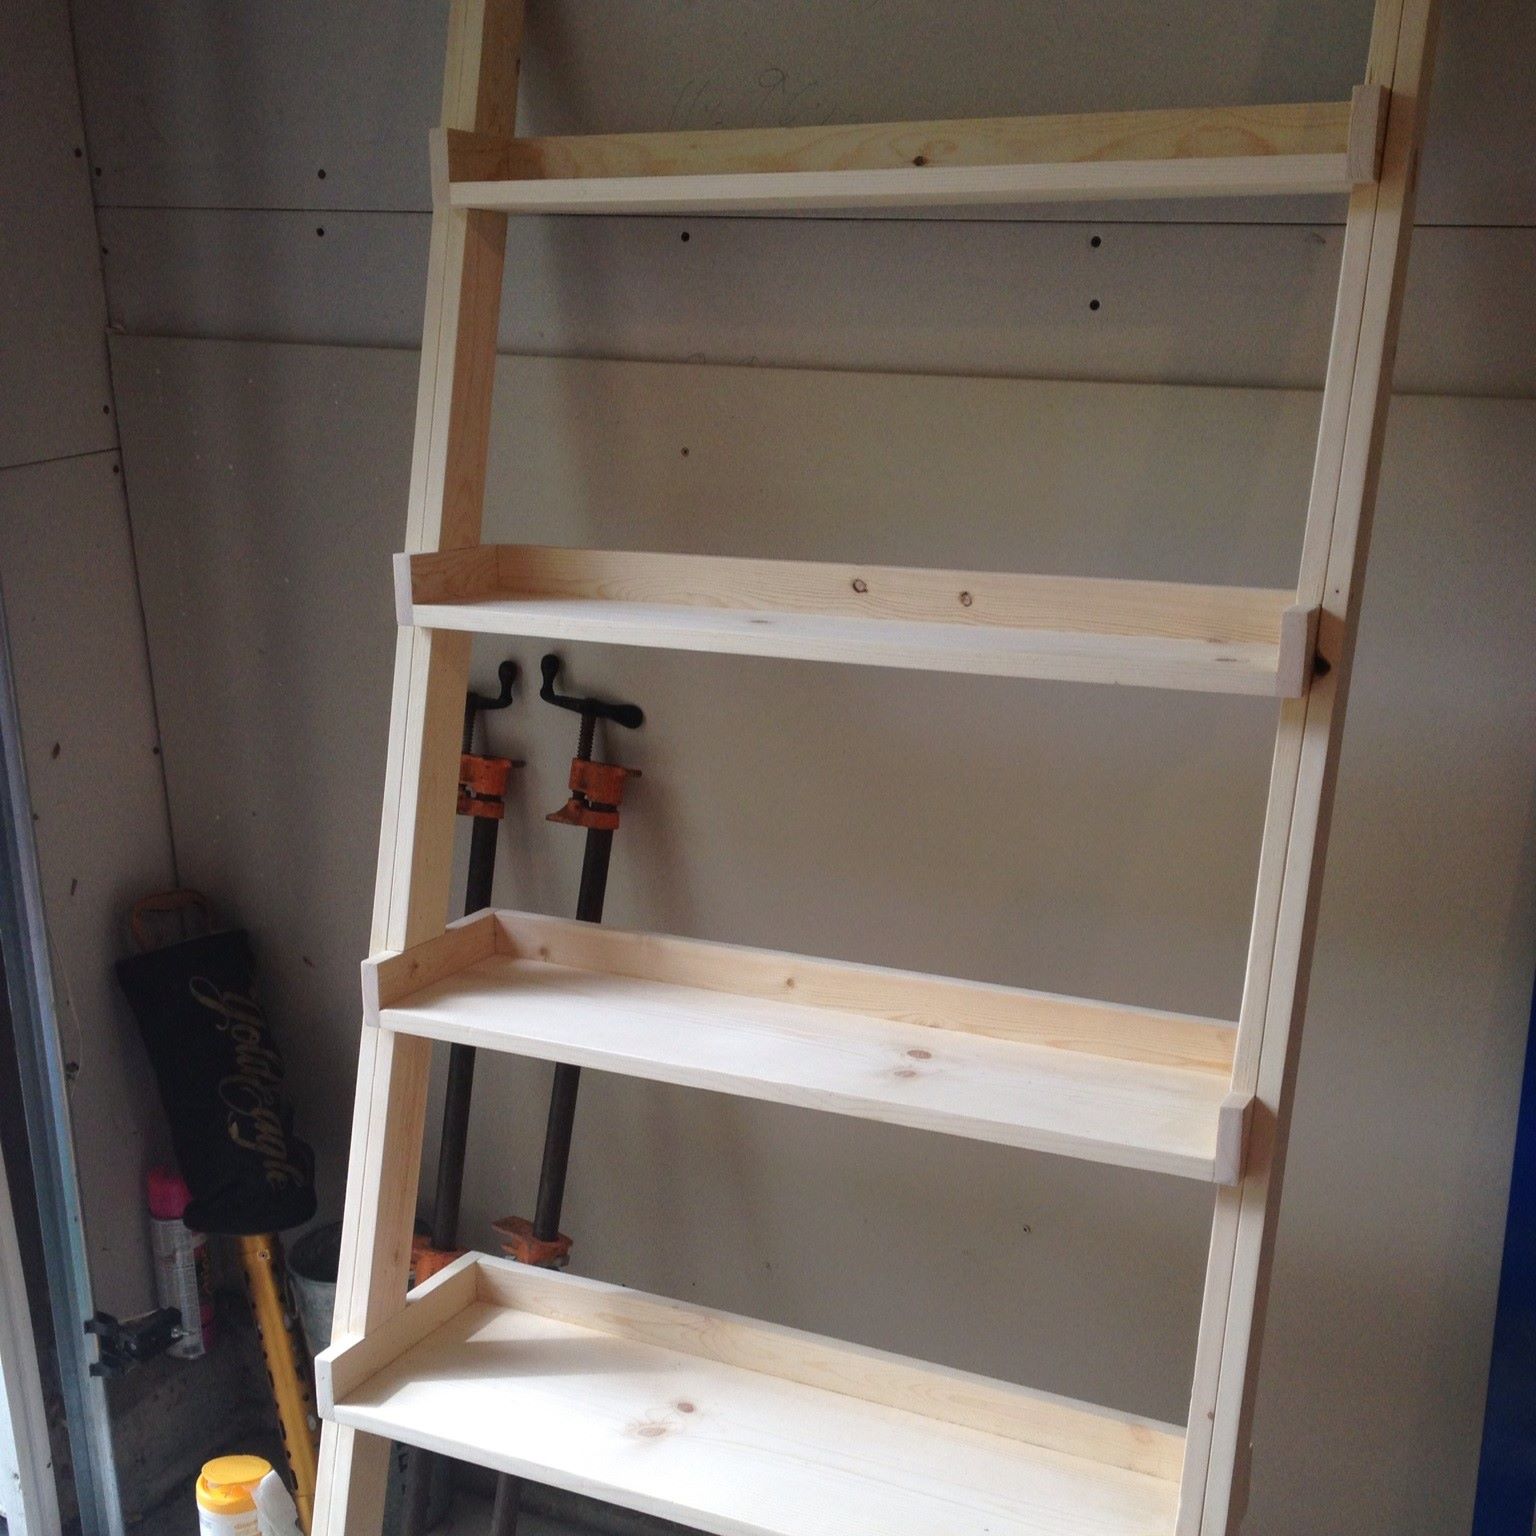
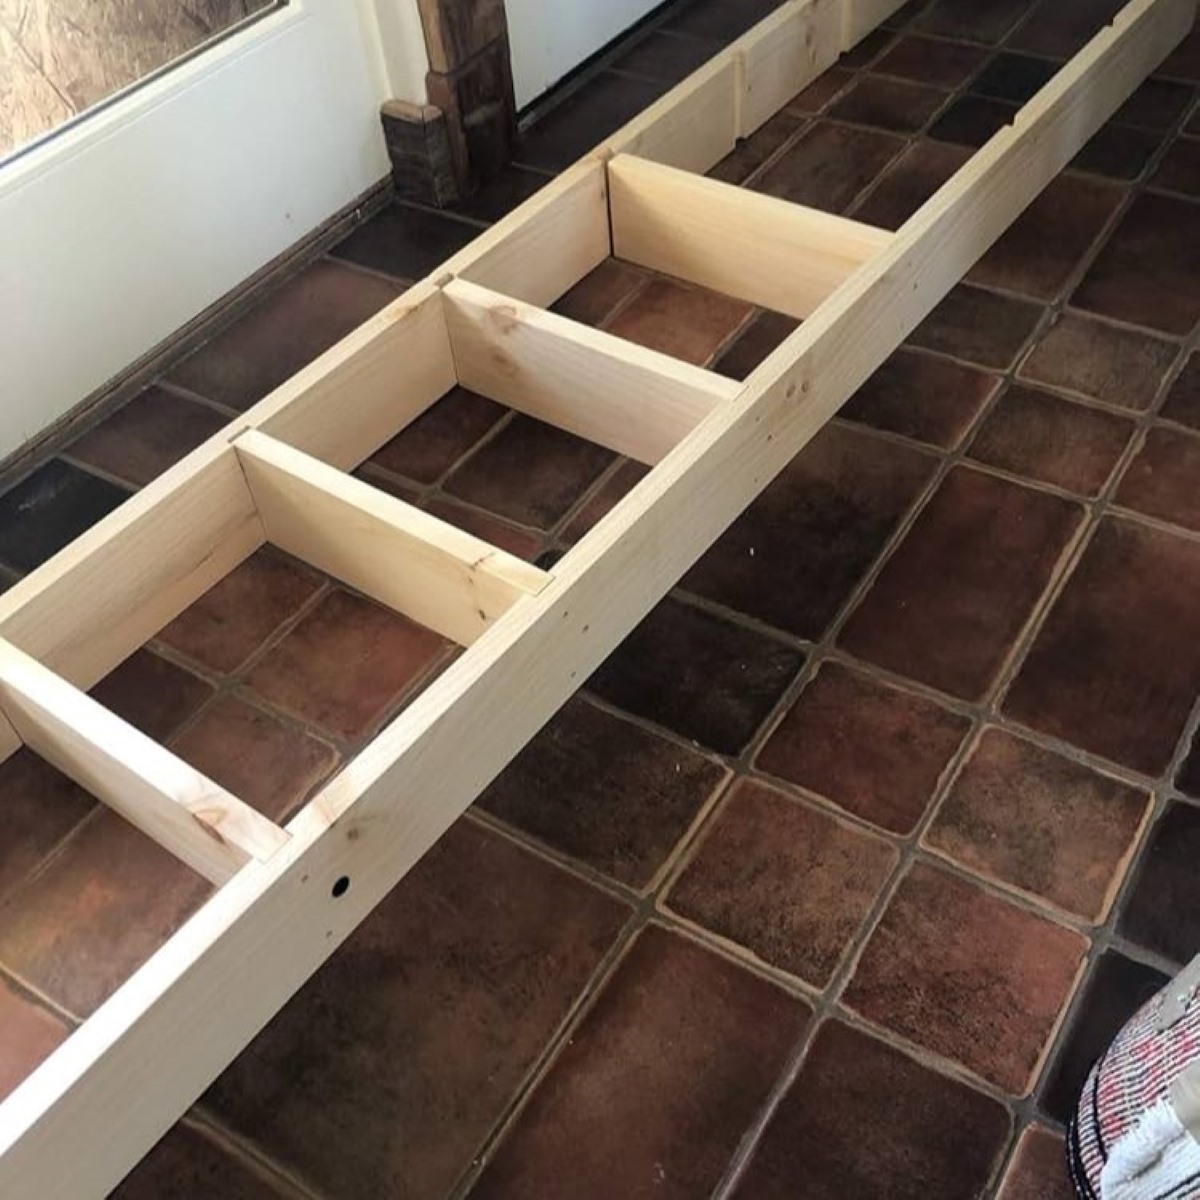
Step 4: Assembling the Sides of the Ladder Shelf
Now that you have cut and sanded all the wood pieces, it’s time to start assembling the sides of the ladder shelf. The sides of the ladder will provide the structure and stability for the shelves, so it’s essential to ensure that they are securely fastened together.
Begin by laying out the 1×2 inch vertical support pieces on a flat surface. Make sure to position them parallel to each other and leave enough space between each piece to accommodate the shelves.
Apply a thin layer of wood glue along the edges of the 1×2 inch supports where they will come in contact with the shelves. This will help create a stronger bond when the pieces are screwed together.
Take one of the 1×6 inch horizontal shelf pieces and align it with the bottom of the vertical supports. The shelf should sit flush with the edges of the supports. Use a level to ensure that the shelf is perfectly horizontal.
Once the shelf is in position, use a drill to pre-drill pilot holes through the shelf and into the vertical supports. This will prevent the wood from splitting when you insert the screws. Then, use a screwdriver or drill to insert 1 ¼ inch screws through the pilot holes and secure the shelf to the supports. Repeat this process for each shelf, making sure to check the levelness of each one.
Continue adding the remaining shelves, ensuring equal spacing between each one. Take your time to double-check the alignment and tightening of the screws to ensure a sturdy and stable structure.
Once all the shelves are attached to the vertical supports, allow the wood glue to dry according to the manufacturer’s instructions. This will further strengthen the bond between the wood pieces.
Finally, use a damp cloth to remove any excess wood glue that may have squeezed out during the assembly process. This will create a cleaner and more polished look for your ladder shelf.
Congratulations! You have successfully assembled the sides of your ladder shelf. Now it’s time to move on to the next step: attaching the shelves.
When building a ladder shelf, make sure to use sturdy and durable materials such as solid wood or metal for the frame to ensure stability and safety.
Step 5: Attaching the Shelves
With the sides of the ladder shelf securely assembled, it’s time to move on to attaching the shelves. This step will bring the structure together and provide functional storage and display areas for your ladder shelf.
Begin by positioning the ladder shelf sides upright, ensuring that they are stable and level. If needed, use clamps or have someone assist you in holding them in place.
Take one of the remaining 1×6 inch horizontal shelf pieces and place it on top of the 1×2 inch supports. Ensure that it is properly aligned and centered with the sides of the ladder shelf.
Using a drill, pre-drill pilot holes through the shelf and into the vertical supports. This will prevent the wood from splitting when you insert the screws. Then, use a screwdriver or drill to insert 1 ¼ inch screws through the pilot holes and secure the shelf to the ladder sides. Repeat this process for each shelf.
As you attach each shelf, make sure to check for levelness and adjust if needed. A level shelf will not only look more aesthetically pleasing but will also provide stable and secure storage surfaces for your items.
Continue attaching the remaining shelves, ensuring that they are evenly spaced and aligned with the sides of the ladder shelf. Take your time to tighten the screws firmly but be careful not to over-tighten and risk damaging the wood.
Once all the shelves are securely attached, step back and evaluate the stability and overall appearance of your ladder shelf. Give it a gentle shake or two to ensure it is sturdy and well-constructed. Make any necessary adjustments or tighten any loose screws if needed.
With the shelves successfully attached, you have completed a major milestone in building your ladder shelf. Now, let’s move on to the next step: adding reinforcements for added durability and strength.
Step 6: Adding Reinforcements
With the shelves securely attached to the ladder sides, it’s time to add reinforcements to further enhance the durability and strength of your ladder shelf. These reinforcements will provide additional support and stability, ensuring that your shelves can withstand the weight of the items placed upon them.
Start by assessing the structure of your ladder shelf and identifying areas that may benefit from reinforcements. Typically, the connection points between the shelves and the ladder sides are prime areas to add extra support.
One effective way to reinforce these areas is by using L-brackets or corner braces. These metal brackets are designed to provide additional rigidity and prevent the shelves from sagging or wobbling. Measure the length and width of the brackets to ensure they fit correctly.
Position the brackets at each shelf connection point, aligning them with the intersection of the shelf and the ladder side. Use a pencil to mark the screw hole locations on both the shelf and the ladder side.
Next, remove the shelves one at a time and use a drill to create pilot holes at the marked screw hole locations. This will prevent the wood from splitting when you attach the brackets.
Securely attach the L-brackets to both the shelf and the ladder side using screws. Make sure the brackets are snug and tightly fastened, ensuring a strong connection between the components.
Repeat this process for each shelf and reinforce any additional areas that may benefit from extra support, such as the top of the ladder sides where they meet the wall.
Once all the reinforcements are in place, give your ladder shelf a gentle shake to test its stability. Ensure that the shelves are level, and there is no noticeable wobbling or movement. If needed, adjust or tighten the screws on the brackets to achieve a sturdy and secure structure.
By adding reinforcements, you have significantly strengthened your ladder shelf, making it capable of safely holding heavier items or bearing the weight of stacked books and decor pieces.
Now that your ladder shelf is reinforced, it’s time for the final step: the finishing touches!
Step 7: Finishing Touches
Congratulations! You’re in the final stretch of building your ladder shelf. This last step involves adding the finishing touches to enhance the appearance and overall aesthetic of your completed project.
Start by inspecting the entire ladder shelf for any imperfections, such as small gaps or nail holes. Fill these imperfections with wood filler, using a putty knife or a small spatula. Allow the wood filler to dry completely, and then sand the patched areas until they are smooth and seamless with the surrounding wood surfaces.
Next, decide on the desired finish for your ladder shelf. You can choose to stain or paint the wood, depending on your personal preference and the overall style of your space.
If you opt for staining, apply the wood stain using a paintbrush or a clean cloth, following the manufacturer’s instructions. Make sure to evenly coat all the surfaces of the ladder shelf, allowing the stain to penetrate the wood for the desired amount of time. Wipe off any excess stain with a clean cloth and allow it to dry completely.
If you prefer to paint your ladder shelf, start by applying a coat of primer if necessary. This will help the paint adhere better and provide a smooth and even finish. Once the primer is dry, use a paintbrush or roller to apply the paint color of your choice. Apply multiple coats as needed, allowing each coat to dry before applying the next one.
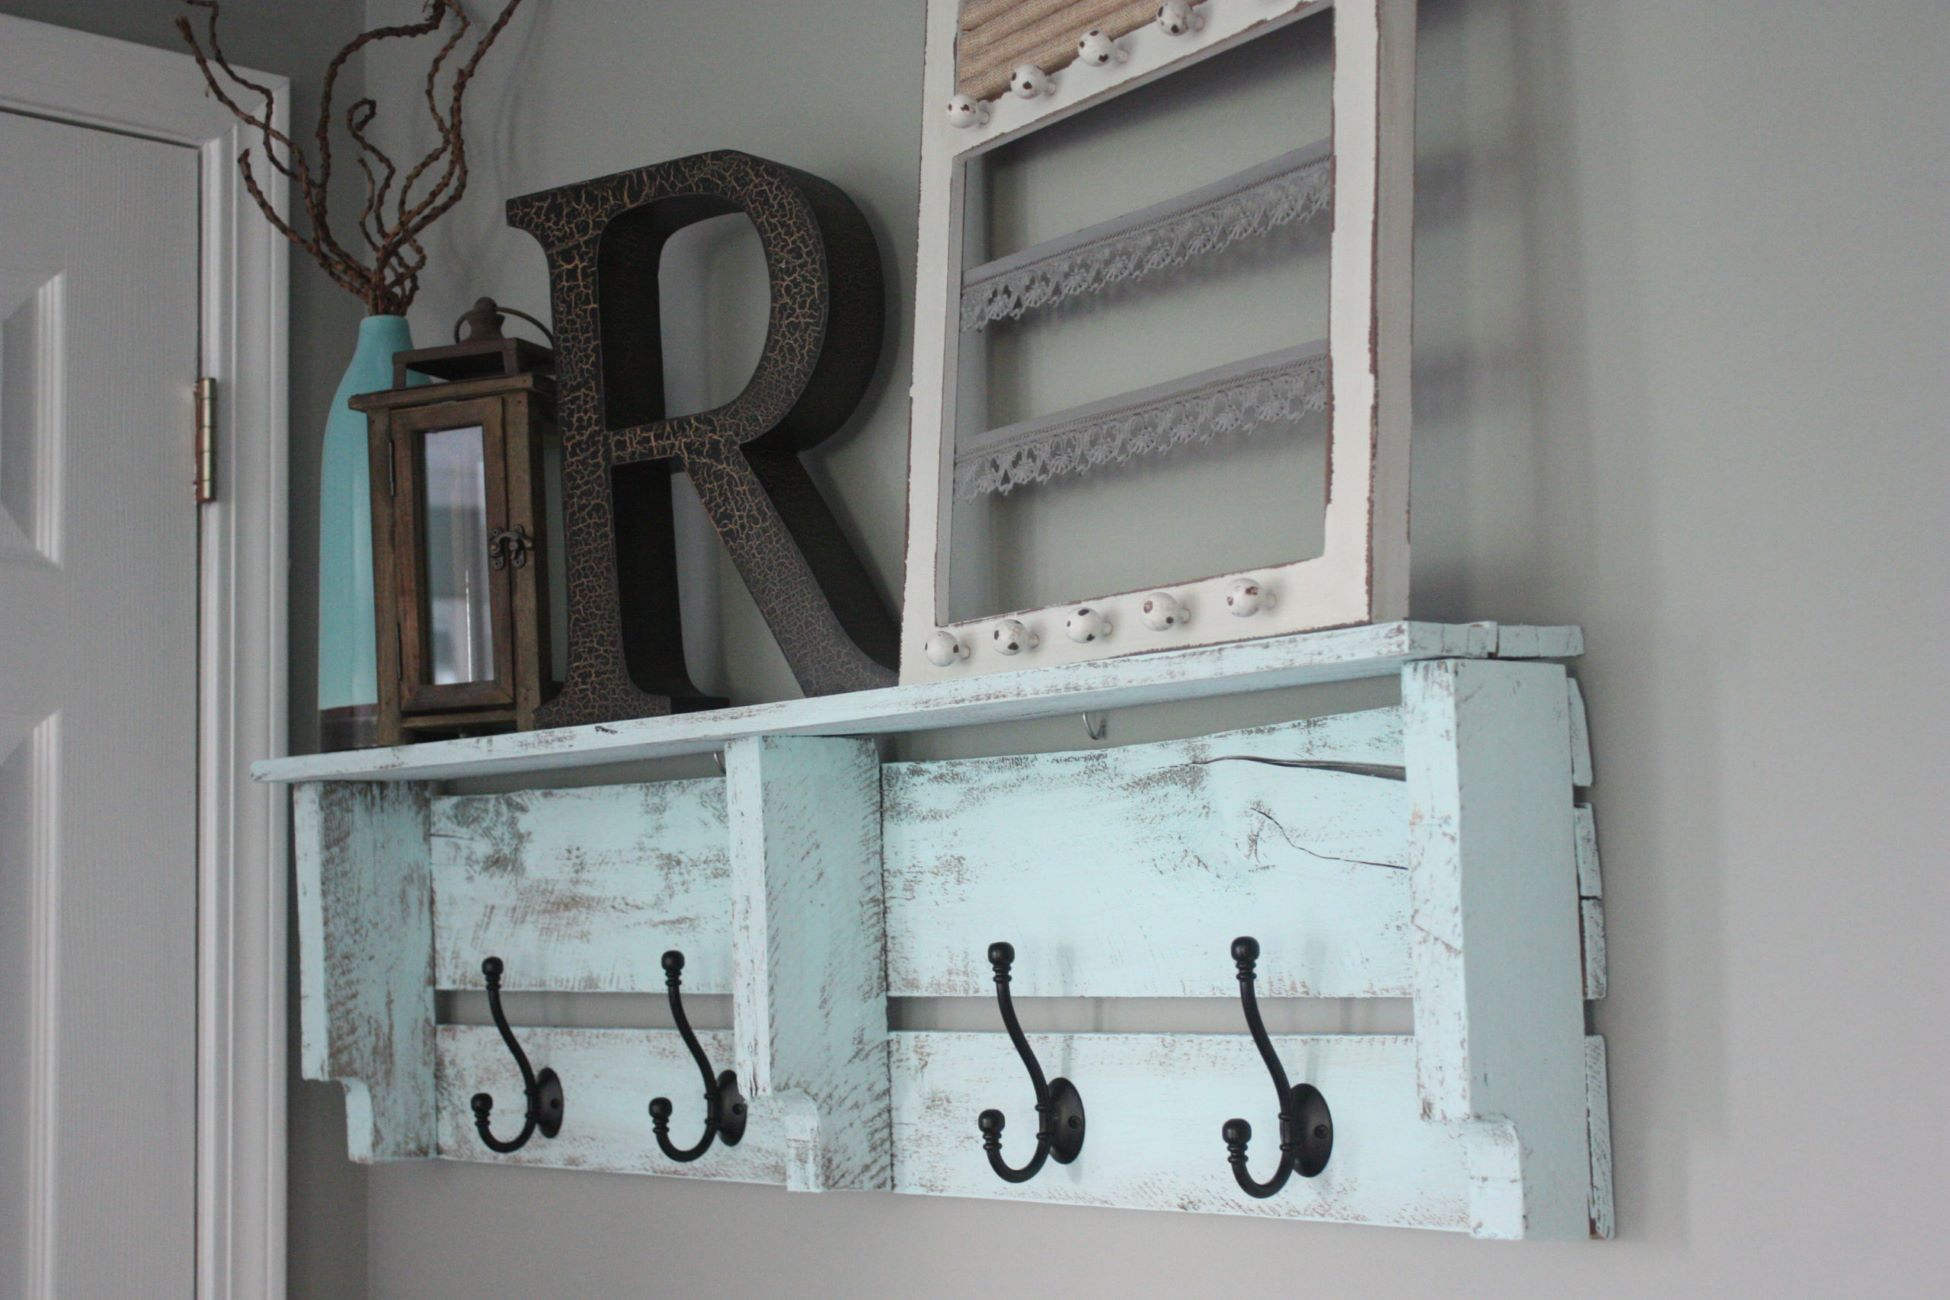
While the ladder shelf dries, consider additional decorative elements to personalize the shelf and make it uniquely yours. You can add decorative trim, such as crown molding or beadboard, to the edges or sides of the shelves. Additionally, you may choose to add hooks or knobs to the sides, creating hanging space for towels, scarves, or other items.
Once the paint or stain has dried completely and any additional decorative elements are in place, give the ladder shelf a final inspection. Make sure all screws are tightened, all surfaces are smooth, and there are no noticeable flaws.
Finally, carefully move the ladder shelf to its designated spot in your home. Make any necessary adjustments to ensure it is level and secure against the wall, especially if you have added a top reinforcement.
Step back, admire your work, and enjoy your newly-built ladder shelf. It’s now ready to hold and display your books, plants, decor items, and whatever else you choose.
Thank you for following this step-by-step guide on how to build a ladder shelf. We hope you found it helpful, and that your DIY project was a success. Happy decorating!
Conclusion
Building a ladder shelf is a rewarding and fulfilling DIY project that allows you to create a stylish and functional storage and display solution for your home. With the right tools, materials, and guidance, you can successfully construct a ladder shelf that complements your space and meets your storage needs.
Throughout this comprehensive guide, we have covered each step of the building process in detail. From planning the design to adding the finishing touches, we’ve provided you with the knowledge and instructions to confidently tackle this woodworking project.
By carefully measuring, cutting, and sanding the wood pieces, you have created a sturdy and smooth foundation for your ladder shelf. Assembling and reinforcing the structure ensures stability and durability, making it capable of securely holding your items.
The finishing touches, such as filling imperfections and applying the desired finish, allow you to personalize your ladder shelf and integrate it seamlessly into your home decor. Once completed, your ladder shelf will not only serve as a practical storage solution but also as an eye-catching display piece.
We hope you enjoyed this guide and that it inspired you to embark on your ladder shelf building journey. Remember to exercise caution when working with power tools and always follow safety guidelines.
Now, it’s time to put your newfound knowledge and skills to work. Gather your tools, select your materials, and start building your very own ladder shelf. Whether you place it in your living room, bedroom, study, or any other area of your home, your ladder shelf will add both functionality and style to your space.
Thank you for joining us on this DIY adventure, and we wish you the best of luck in creating your beautiful and functional ladder shelf!
Frequently Asked Questions about How To Build Ladder Shelf
Was this page helpful?
At Storables.com, we guarantee accurate and reliable information. Our content, validated by Expert Board Contributors, is crafted following stringent Editorial Policies. We're committed to providing you with well-researched, expert-backed insights for all your informational needs.


0 thoughts on “How To Build Ladder Shelf”