Articles
How To Build Blanket Ladder
Modified: February 24, 2024
Learn how to build a stunning blanket ladder with our step-by-step articles. Enhance your home decor and keep your blankets organized effortlessly.
(Many of the links in this article redirect to a specific reviewed product. Your purchase of these products through affiliate links helps to generate commission for Storables.com, at no extra cost. Learn more)
Introduction
Welcome to this comprehensive guide on how to build your very own blanket ladder. Blanket ladders are not only functional and practical, but they can also serve as stylish decorative pieces in your home. Whether you want to display your cozy blankets, quilts, or even towels, a blanket ladder is a versatile and trendy addition to any space.
Building a blanket ladder may seem like a daunting task, especially if you have little to no experience with woodworking. However, with the right tools, materials, and a step-by-step plan, you’ll be surprised at just how achievable and rewarding this project can be.
In this article, we will guide you through each stage of the process, from gathering materials to securely attaching the ladder to your wall. We’ll also offer some helpful tips along the way to make your blanket ladder construction a smooth and enjoyable experience.
So, whether you’re a beginner eager to dabble in some DIY or a seasoned woodworker looking for a new project, let’s dive in and learn how to build your very own blanket ladder.
Key Takeaways:
- Building a blanket ladder is a rewarding DIY project that adds both functionality and style to your home. With the right materials and step-by-step guidance, even beginners can create a beautiful and practical piece for displaying blankets and quilts.
- From gathering materials to securing the ladder to the wall, each step in building a blanket ladder requires attention to detail and creativity. Once completed, the ladder serves as a versatile and charming addition to any room, offering both organization and visual appeal.
Read more: How To Fold Blankets On A Ladder
Step 1: Gather Materials
Before you begin constructing your blanket ladder, you’ll need to gather all the necessary materials. Having everything on hand will allow you to work efficiently and ensure a smooth progression throughout the project. Here are the materials you’ll need:
- Wood: Choose a sturdy and durable wood for your ladder, such as pine or oak. The amount of wood you’ll need will depend on the size of the ladder you want to build. Measure the height and width you desire and purchase the appropriate lengths of wood.
- Saw: To cut the wood to the desired lengths, you’ll need a saw. A miter saw or a circular saw will work well for this task.
- Sandpaper: Sandpaper will be essential for smoothing the rough edges of the wood and preparing it for staining or painting.
- Stain or Paint: Depending on the look you want to achieve, you’ll need either stain or paint for the ladder. Stain will bring out the natural beauty of the wood, while paint allows for more creativity and customization.
- Brushes or Rags: If you choose to stain or paint the wood, you’ll need brushes or rags to apply the finish. Foam brushes and lint-free rags work well for this purpose.
- Rungs: To create the steps of the ladder, you’ll need wooden rungs. These can be purchased from a hardware store or made from the same wood used for the ladder itself.
- Screws or Nails: You’ll need screws or nails to attach the rungs to the ladder. Choose the appropriate size and type based on the thickness of the wood.
- Level: A level will be helpful for ensuring that your ladder is straight and properly aligned when securing it to the wall.
- Screwdriver or Drill: Depending on the fasteners you choose to use, you’ll need either a screwdriver or a drill to attach the ladder to the wall.
Take the time to gather all of these materials before you begin constructing your blanket ladder. This will make the entire process more efficient and allow you to focus on the construction without any interruptions.
Step 2: Measure and Cut the Wood
Once you have gathered all the necessary materials, it’s time to move on to the next step: measuring and cutting the wood for your blanket ladder. Here’s a detailed guide on how to get the measurements right and make accurate cuts:
- Decide on the dimensions: Determine the height and width you want for your blanket ladder. Consider factors such as the space available and the number of rungs you plan to include.
- Measure and mark: Measure and mark the desired length on your wooden boards. Use a measuring tape and a pencil to ensure accurate measurements.
- Cut the side rails: Using a saw, carefully cut the side rails to the desired length. Make sure to use proper safety precautions while using power tools.
- Cut the rungs: Determine the spacing between the rungs, keeping in mind the desired overall height of the ladder. Cut the rungs accordingly, ensuring they are all the same length.
As you measure and cut the wood, remember to double-check your measurements to avoid any mistakes. It’s always better to measure twice and cut once, ensuring precision and accuracy in your ladder construction.
Additionally, if you don’t have the necessary tools for cutting the wood, consider getting the wood cut at your local hardware store. Many stores offer free or affordable wood cutting services, saving you time and effort.
Once all the wood has been cut to the proper dimensions, you’re now ready to move on to the next step: sanding the wood to create a smooth surface.
Step 3: Sand the Wood
After measuring and cutting the wood for your blanket ladder, it’s essential to sand the surfaces to create a smooth finish. Sanding not only enhances the overall appearance of the ladder but also helps to remove any rough edges and splinters. Follow these steps to properly sand the wood:
- Prepare the sandpaper: Start by selecting the appropriate grit sandpaper for your project. For initial sanding, a medium-grit sandpaper (around 80-120) will work well. You can then transition to a finer grit sandpaper (around 220-400) for a smoother finish.
- Sand the surfaces: Begin by sanding the cut edges of the wood to remove any sharpness or roughness. Use long, even strokes and apply gentle pressure. Continue sanding the entire surface of the wood, including the sides and rungs, paying attention to any imperfections or rough spots.
- Smooth the corners: Use sandpaper or sanding blocks to round off the corners of the wood. This will not only improve the appearance but also make the ladder safer and more comfortable to handle.
- Clean the wood: After sanding, wipe down the wood surfaces with a clean, damp cloth to remove any dust or debris. Allow the wood to dry completely before proceeding to the next step.
While sanding, be mindful of the direction of the wood grain and follow it as much as possible. This will result in a more polished and professional look. Additionally, wearing safety goggles and a dust mask is advised to protect yourself from wood particles and dust.
Remember, thorough sanding is important for achieving a smooth and flawless finish on your blanket ladder. Taking the time to properly sand the wood will ensure a beautiful final result and make the subsequent steps, such as staining or painting, more effective.
Now that your wood is sanded, you’re ready to move on to the next step: assembling the ladder.
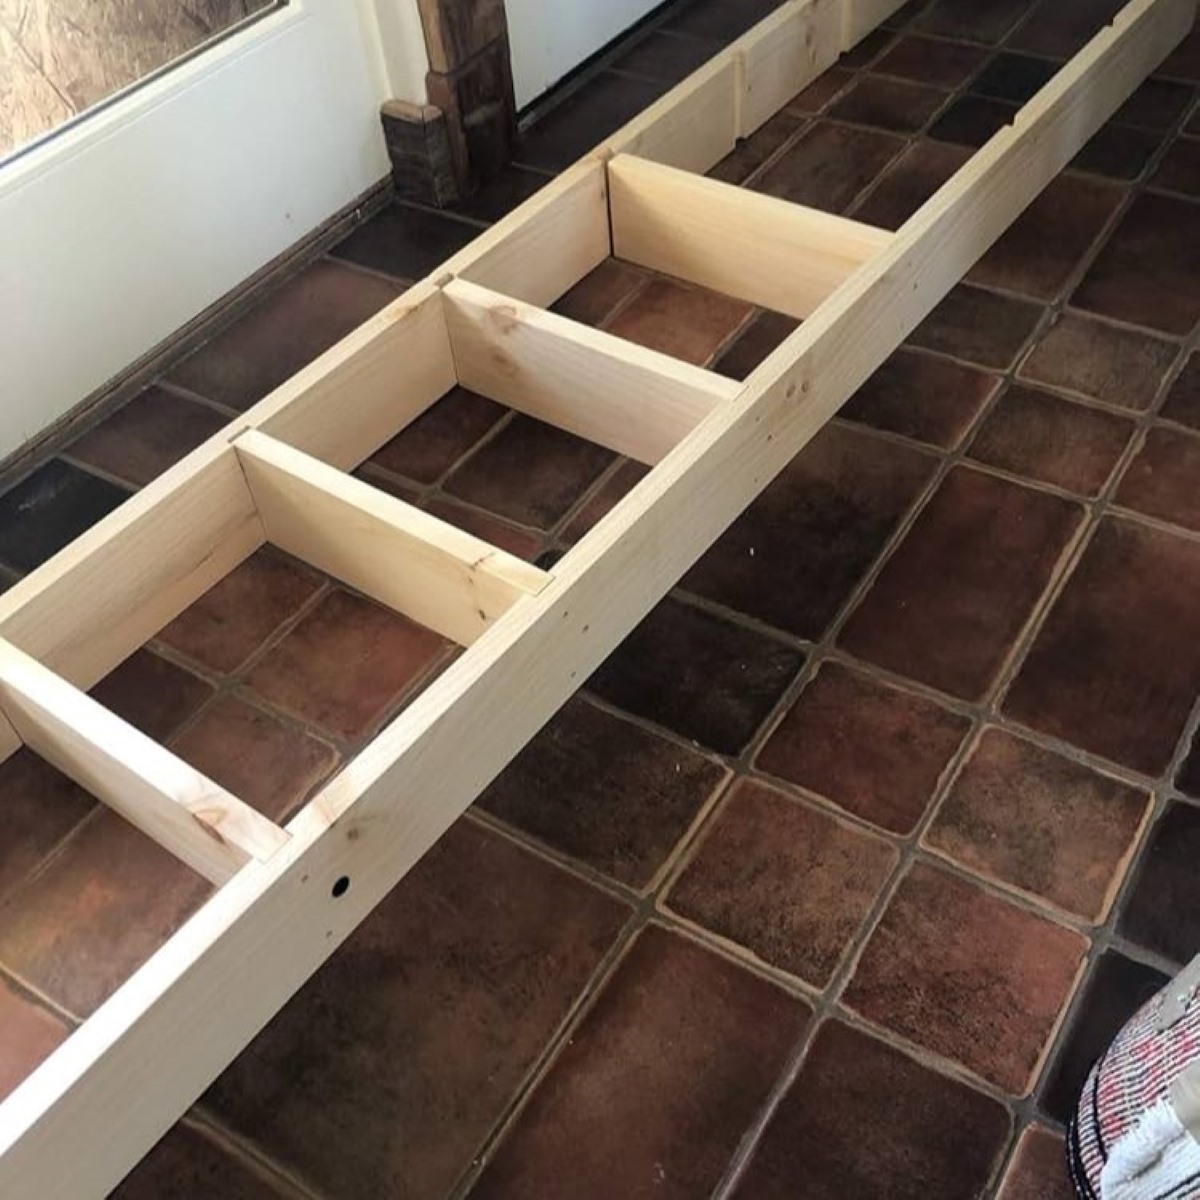
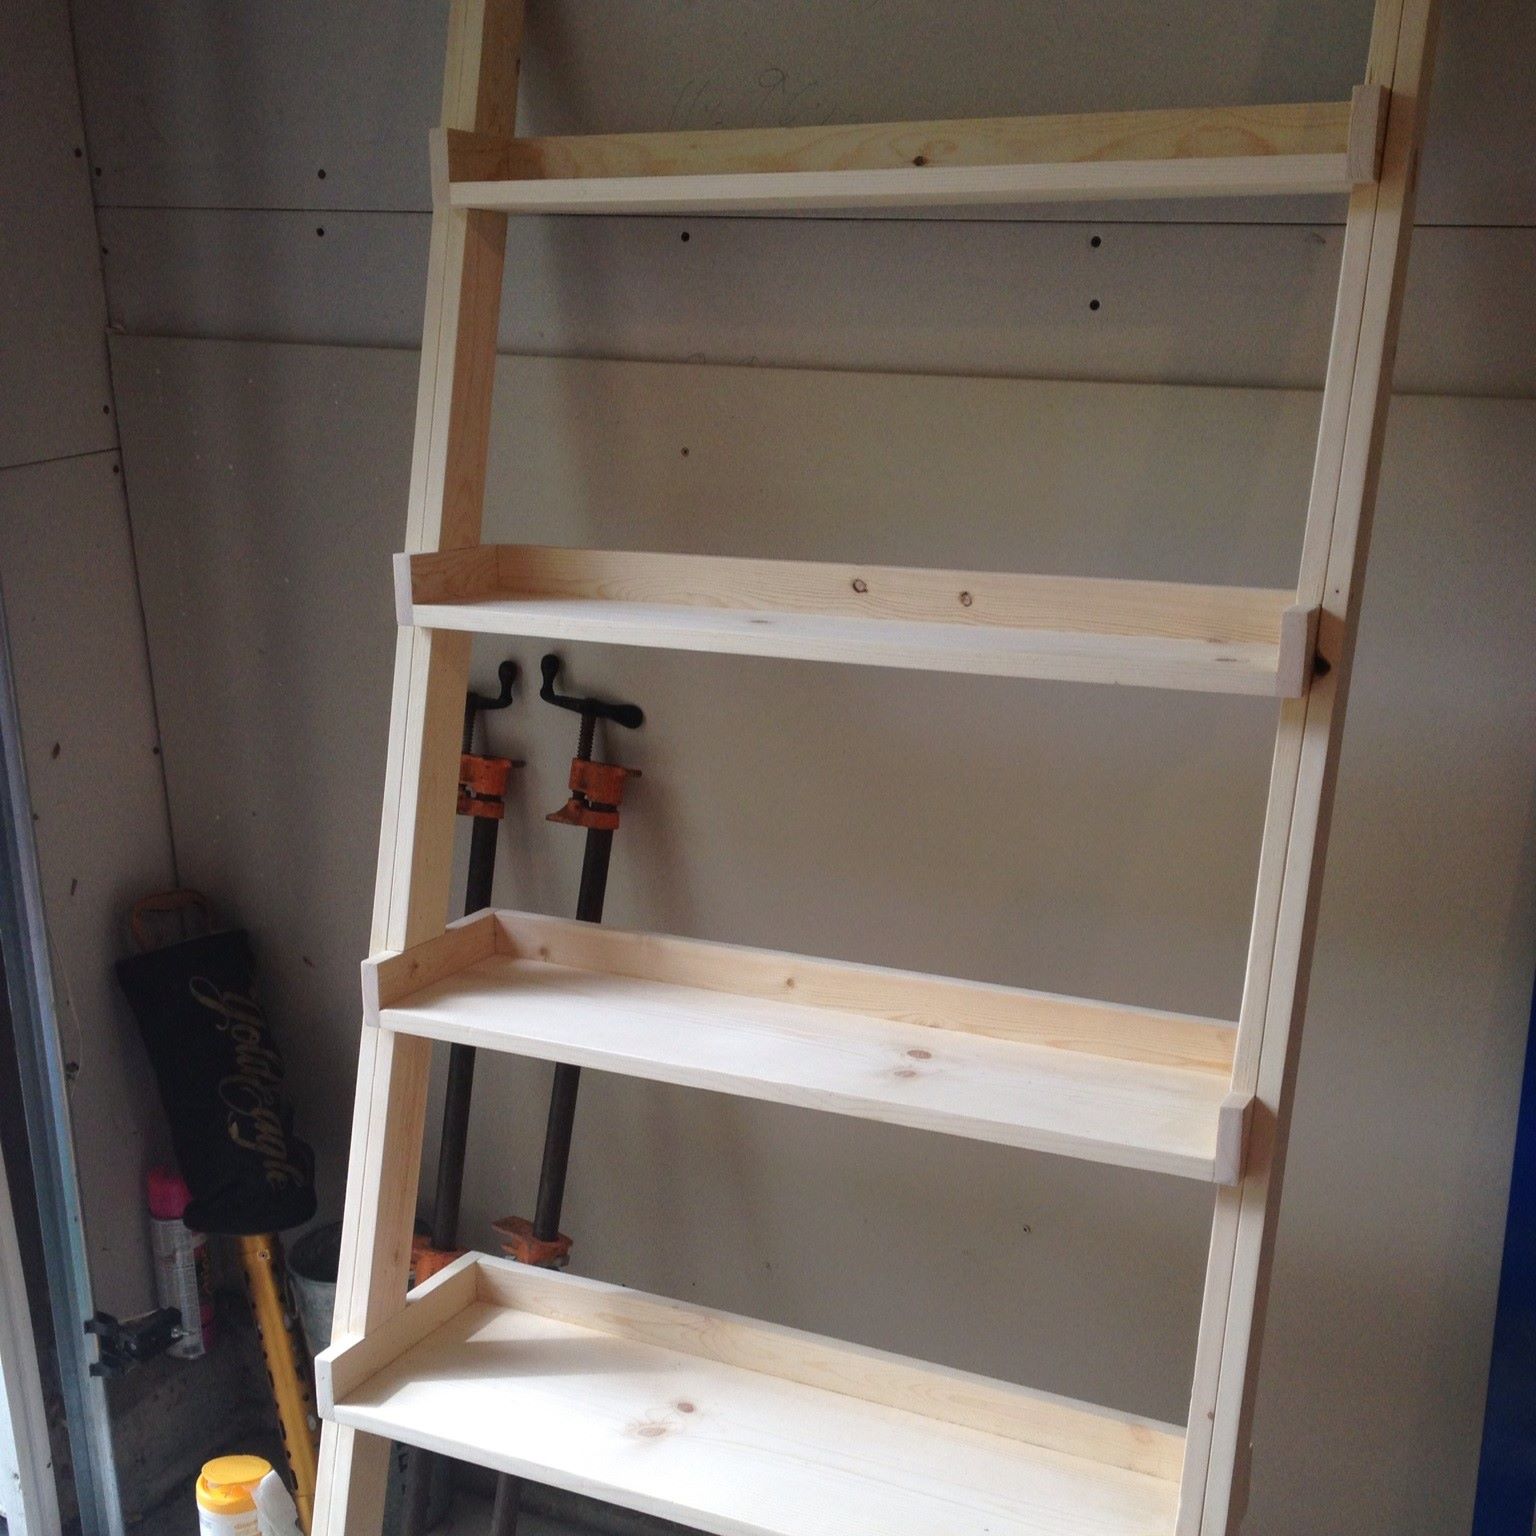
Step 4: Assemble the Ladder
With the wood cut and sanded, it’s time to assemble the pieces and bring your blanket ladder to life. Follow these steps to properly assemble the ladder:
- Lay out the side rails: Place the two longer pieces of wood, which will serve as the side rails of the ladder, parallel to each other on a flat surface. Make sure they are evenly aligned and facing the same direction.
- Position the rungs: Take the shorter pieces of wood that you cut for the rungs and position them horizontally between the side rails. Space them evenly, leaving enough room for your blankets to hang without touching the rungs above or below.
- Secure the rungs: Once you have positioned the rungs, use screws or nails to attach them to the side rails. Make sure to align and center each rung as you secure them, ensuring a sturdy and balanced ladder.
- Double-check alignment: Throughout the assembly process, periodically check that all the pieces are aligned properly and that the ladder is level. This will ensure a professional and visually pleasing end result.
It’s important to note that there are different assembly methods for ladder construction. Some methods involve using pocket holes, brackets, or dowels for added stability. Choose the method that suits your skill level and the tools available to you.
As you assemble the ladder, it’s worth pausing periodically to step back and review your progress. This allows you to make any necessary adjustments and ensure that the ladder is being constructed exactly as planned.
Once the ladder is fully assembled and you’re satisfied with the alignment and stability, it’s time to move on to the next step: staining or painting the ladder to achieve the desired look.
When building a blanket ladder, make sure to use sturdy and durable materials such as hardwood or metal to ensure it can support the weight of the blankets. Also, consider the height and spacing of the rungs to accommodate different sizes of blankets.
Read more: How To Use Blanket Ladder
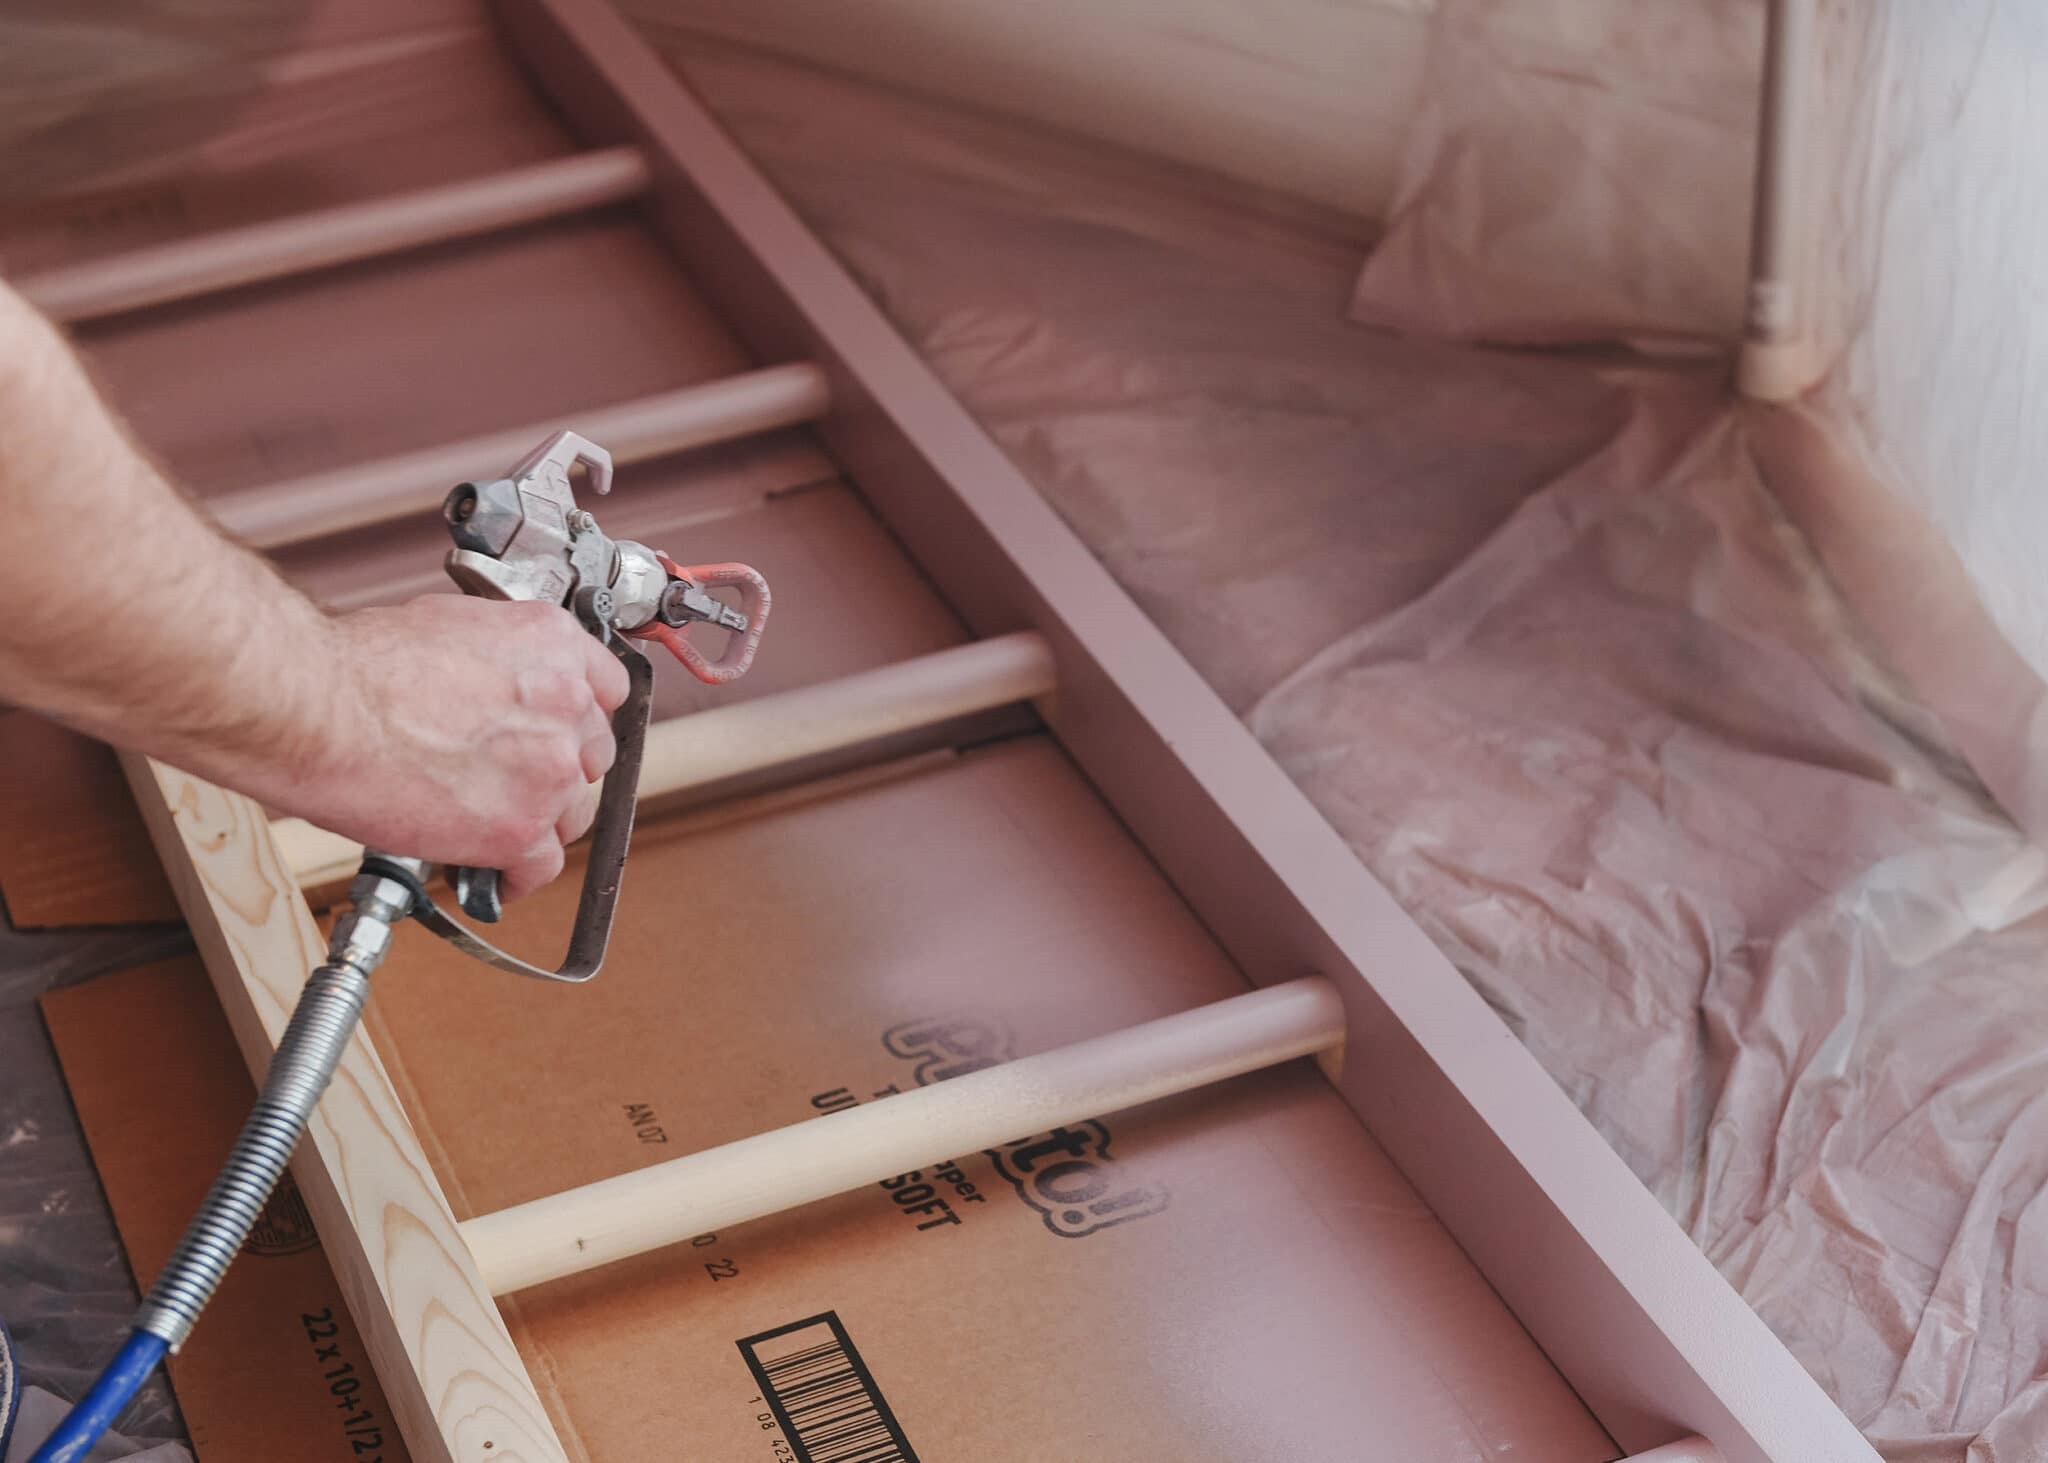
Step 5: Stain or Paint the Ladder
Now that you have assembled the ladder, it’s time to add the finishing touch by staining or painting the wood. This step not only enhances the overall appearance of the ladder but also protects the wood from wear and tear. Follow these steps to stain or paint your blanket ladder:
- Prepare the surface: Before applying any finish, ensure that the wood is clean and free of any dust or debris. Wipe down the ladder with a clean, damp cloth and allow it to dry completely.
- Staining: If you prefer a natural and rustic look, staining the wood will highlight its natural beauty. Choose a wood stain color that complements your decor. Apply the stain using a brush or lint-free rag, following the manufacturer’s instructions. Apply multiple coats if desired, allowing each coat to dry completely before applying the next.
- Painting: If you want to add a pop of color or match your ladder to your existing decor, painting is the way to go. Select a paint color that suits your style and the ambiance of the room. Use a brush or roller to apply the paint evenly, making sure to cover all surfaces. Apply multiple coats if needed, allowing each coat to dry before applying the next.
- Finishing touches: Once the stain or paint has dried, you can add a protective finish to the ladder for added durability. Depending on the type of finish you choose, apply it following the manufacturer’s instructions. This step will help seal the wood and protect it from daily use.
Remember to work in a well-ventilated area and protect your working surface from any potential drips or spills. Take your time during this step to ensure a smooth and even application, as the finish will greatly contribute to the final appearance of your blanket ladder.
Now that your ladder is stained or painted to perfection, it’s time to move on to the next step: attaching the rungs to the ladder frame.
Step 6: Attach the Rungs
With the ladder stained or painted, it’s time to move on to attaching the rungs. These rungs will serve as the steps of the ladder, providing support and functionality. Follow these steps to properly attach the rungs:
- Plan the spacing: Determine the desired spacing between each rung. This will depend on the size of your ladder and personal preference. Generally, spacing them about 10-12 inches apart works well.
- Mark the placement: Use a measuring tape and a pencil to mark the position of each rung on the side rails. Make sure to mark them at the same distance from the top and bottom of the ladder for consistency.
- Pre-drill pilot holes: To prevent the wood from splitting, pre-drill pilot holes through the side rails at the marked positions. The diameter of the pilot holes should be slightly smaller than the diameter of the screws or nails you plan to use.
- Attach the rungs: Align each rung with its corresponding pilot hole and secure it to the side rails using screws or nails. Make sure the rungs are centered and flush with the sides of the ladder for a clean and balanced look.
- Double-check alignment: Throughout the process, double-check that all the rungs are properly aligned and level. You can use a level tool to ensure that the rungs are straight and even.
It’s important to note that the method of attaching the rungs may vary depending on the type of ladder and personal preferences. Some builders may prefer using brackets or even wooden plugs for added aesthetic appeal. Choose the method that best suits your ladder design and construction skills.
Ensure that each rung is securely attached to the ladder frame to guarantee the ladder’s stability and safety. Take your time during this step to ensure a secure and sturdy ladder structure.
With the rungs securely attached, it’s now time for the final step: securing the ladder to the wall to ensure its stability and prevent any accidents.
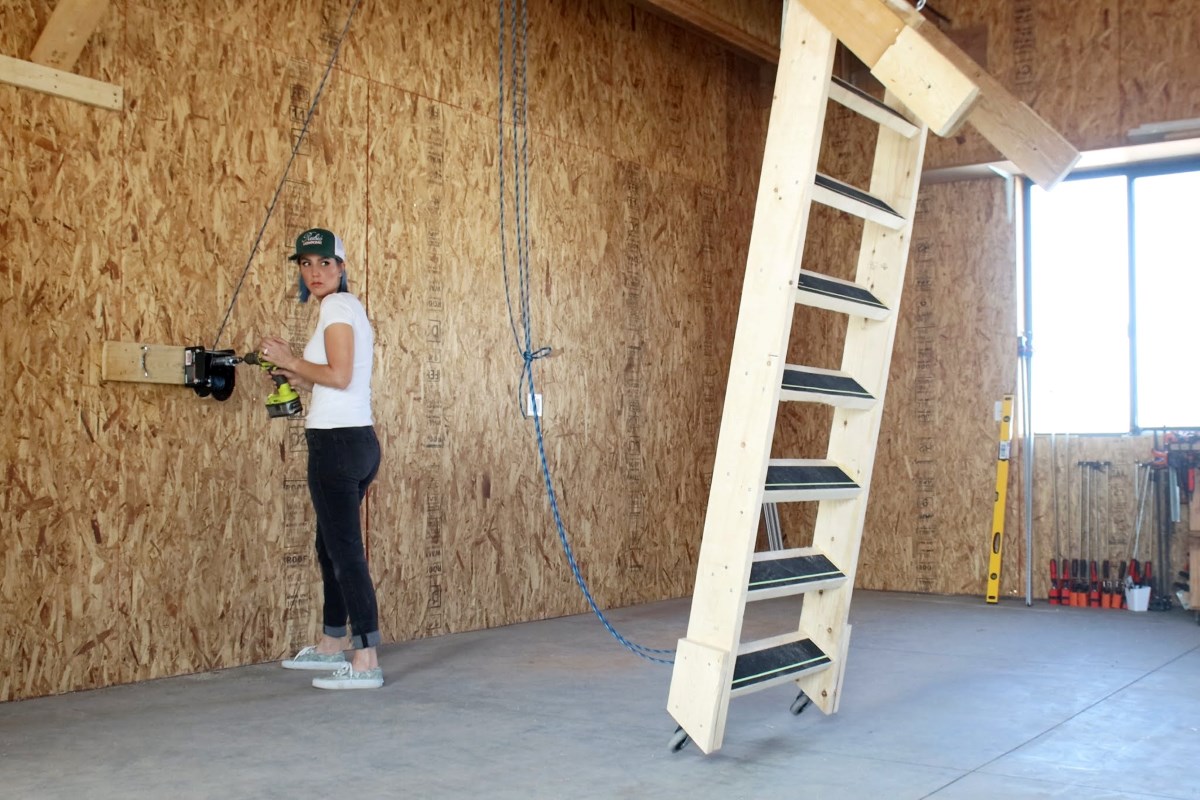
Step 7: Secure the Ladder to the Wall
Securing the ladder to the wall is a crucial step to ensure its stability and prevent any accidents. Follow these steps to properly secure your blanket ladder:
- Choose the location: Decide on the ideal location for your ladder. Ensure there is enough space for the ladder to stand upright without any obstructions.
- Mark the wall: Use a pencil to mark the intended placement of the ladder on the wall. Make sure the marks are level and aligned with the ladder to maintain a balanced appearance.
- Locate studs or use wall anchors: Determine if there are wall studs behind the marked locations. If there are no studs in the ideal placement area, use wall anchors appropriate for the weight of your ladder. Wall anchors provide additional support for securing the ladder.
- Pre-drill holes: If using studs, pre-drill holes slightly smaller than the screw diameter into the marked locations. If using wall anchors, follow the manufacturer’s instructions to pre-drill appropriate holes.
- Attach the ladder: With the pre-drilled holes, align the ladder with the marks on the wall. Use a screwdriver or drill to secure the ladder to the wall by driving screws through the holes and into the studs or wall anchors.
- Check for stability: After attaching the ladder to the wall, gently test its stability by applying a small amount of pressure. Ensure it is firmly secured and doesn’t wobble. If needed, adjust the screws or wall anchors for increased stability.
It’s important to consider both the weight of the ladder and the weight it will support when securing it to the wall. If you plan to hang heavy blankets or quilts, ensure that the ladder is properly anchored and can support the load.
Additionally, if you are uncertain about locating studs or using wall anchors, it’s always a good idea to consult a professional or seek advice from a hardware store expert for proper installation techniques.
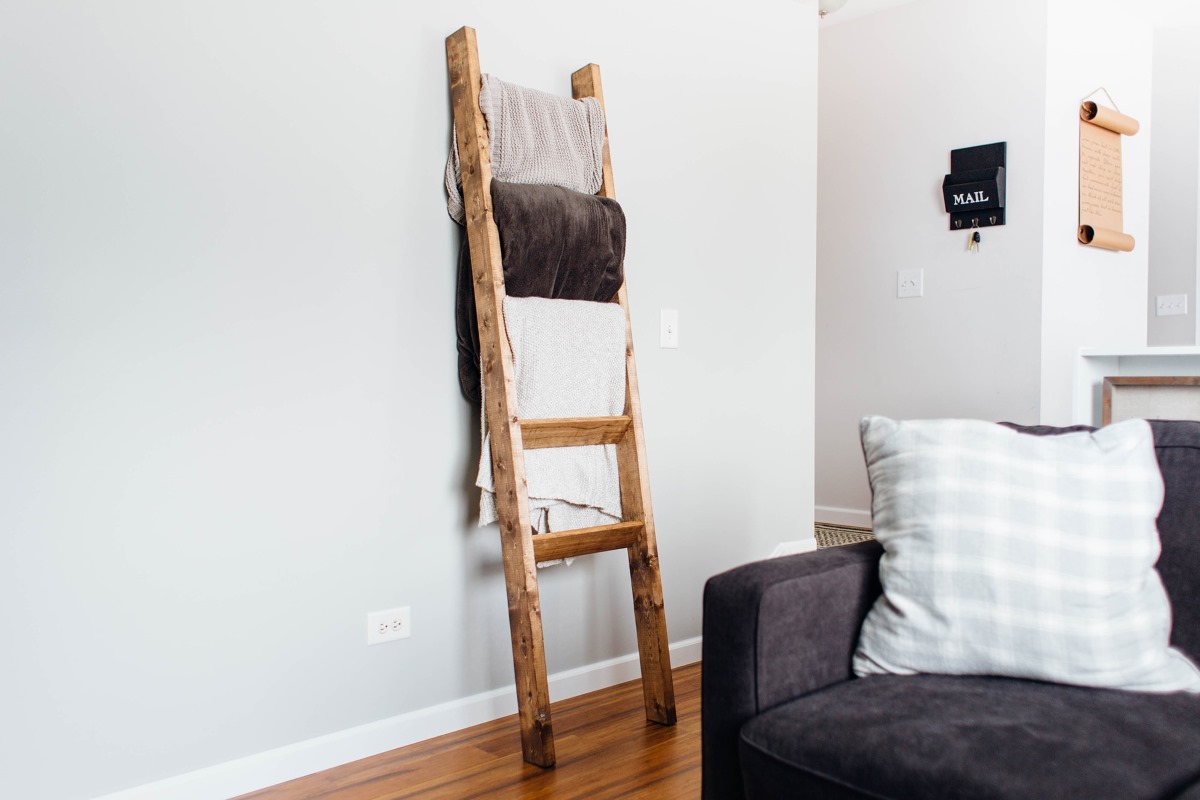
Congratulations! With the ladder securely fastened to the wall, you have successfully completed the construction of your blanket ladder. It’s now ready to be admired and used to display your cozy blankets and create a stylish focal point in your home.
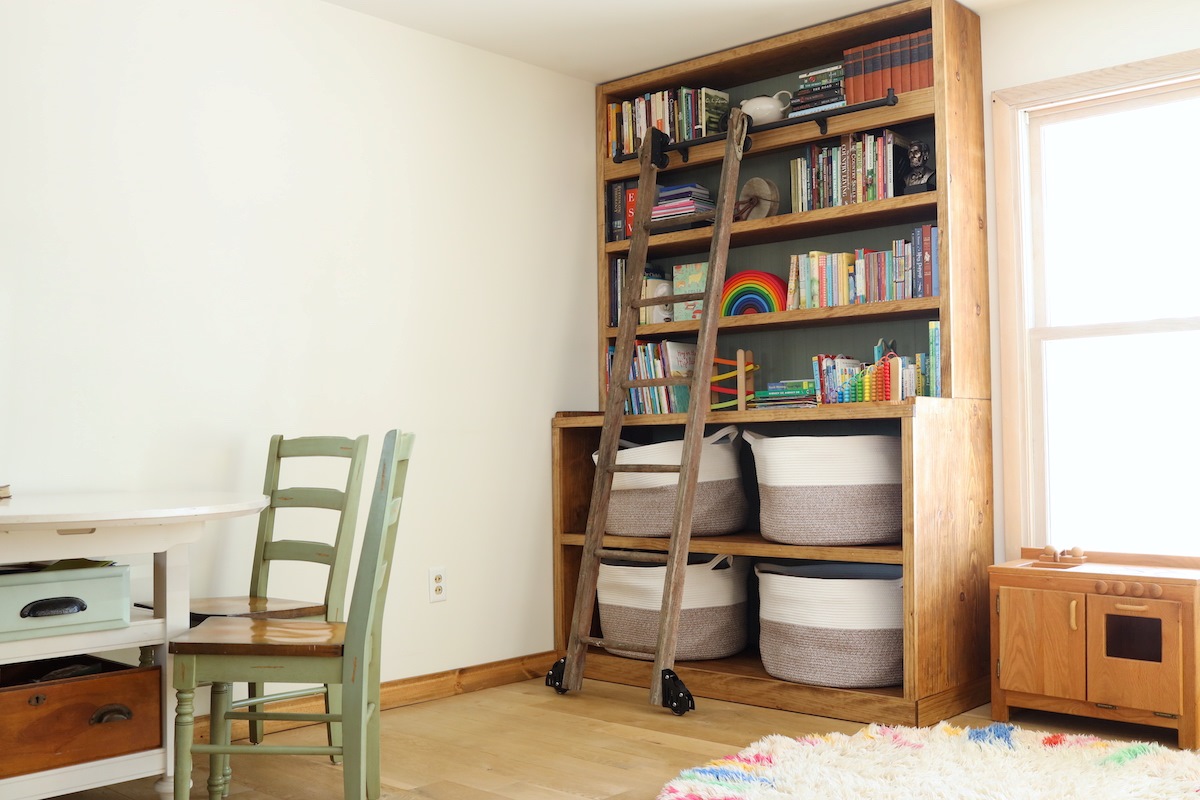
Now that you have learned how to build a blanket ladder, you can customize it further by adding decorative touches such as hooks, baskets, or shelf inserts to enhance functionality and aesthetics. Let your creativity shine as you style and enjoy your newly constructed blanket ladder!
Conclusion
Congratulations on completing the construction of your very own blanket ladder! By following the steps outlined in this guide, you have not only created a functional and practical piece for displaying your blankets but also added a stylish and decorative element to your home.
Building a blanket ladder may have seemed like a daunting task at first, but with the right materials, tools, and a step-by-step plan, you were able to achieve a beautiful end result. Remember to take your time throughout the process, ensuring precision and attention to detail, and don’t be afraid to exercise your creativity to make the ladder truly your own.
A well-constructed and properly secured blanket ladder can bring both organization and visual appeal to any room. It provides a convenient and attractive way to keep your blankets, quilts, and towels within reach, while also adding a touch of warmth and charm to your space.
Now that you have your blanket ladder, feel free to experiment with different ways to display your blankets. Create a cozy corner in your living room, add a touch of luxury to your bedroom, or even grace your bathroom with this versatile piece. The possibilities are endless!
Remember to maintain your ladder by periodically cleaning it and inspecting the fasteners to ensure its continued stability and functionality. With proper care, your blanket ladder will serve you well for years to come.
We hope you enjoyed this guide on how to build a blanket ladder. Embrace your newfound woodworking skills, and feel free to share your ladder creation with friends and family. Happy decorating!
Frequently Asked Questions about How To Build Blanket Ladder
Was this page helpful?
At Storables.com, we guarantee accurate and reliable information. Our content, validated by Expert Board Contributors, is crafted following stringent Editorial Policies. We're committed to providing you with well-researched, expert-backed insights for all your informational needs.


0 thoughts on “How To Build Blanket Ladder”