Articles
How To Build A Ladder Rack For A Pickup
Modified: August 31, 2024
Learn how to build a sturdy ladder rack for your pickup truck with our step-by-step articles. Increase your storage capacity and transport equipment easily.
(Many of the links in this article redirect to a specific reviewed product. Your purchase of these products through affiliate links helps to generate commission for Storables.com, at no extra cost. Learn more)
Introduction
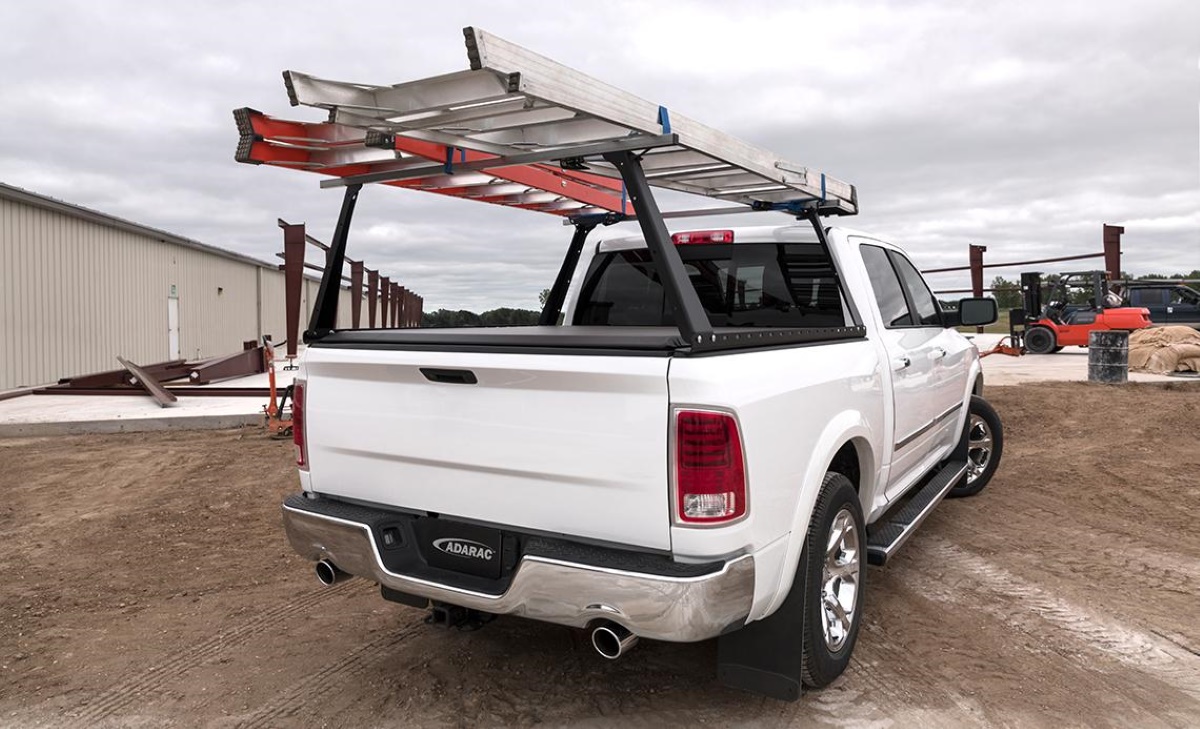
Having a pickup truck provides a lot of versatility when it comes to hauling items, but sometimes you need a little extra help to secure and organize your cargo. That’s where a ladder rack comes in handy. A ladder rack is a great addition to your pickup truck as it provides a sturdy and secure way to transport ladders, lumber, or any other long items.
While there are pre-made ladder racks available in the market, building your own ladder rack not only allows you to customize it to fit your specific needs but also saves you money. In this article, we will walk you through the steps of building a ladder rack for your pickup truck.
To ensure your ladder rack is sturdy and functional, it’s important to gather all the necessary materials and tools before you begin. Let’s take a look at what you’ll need:
Key Takeaways:
- Building your own ladder rack for a pickup truck allows for customization, cost savings, and a sense of accomplishment. From measuring and planning to adding finishing touches, each step contributes to a functional and reliable hauling solution.
- Prioritize safety throughout the construction process, ensuring accurate measurements, secure connections, and regular inspections for wear or damage. With a sturdy ladder rack in place, confidently transport long items with added convenience and peace of mind.
Read more: How To Transport Extension Ladder In Pickup
Materials Needed
Before you start building your ladder rack, gather the following materials:
- 2×4 lumber: You’ll need enough to create the base and uprights of the ladder rack, based on the dimensions of your truck bed.
- 2×6 or 2×8 lumber: This will be used to reinforce the base and add stability.
- Metal brackets or corner braces: These will help secure the joints and add extra strength to the structure.
- Bolts, nuts, and washers: Ensure you have the appropriate size and length to secure the ladder rack to your truck bed.
- Wood screws: These will be used to fasten the lumber together.
- Drill with drill bits and screwdriver bits: You’ll need these for drilling pilot holes and driving screws.
- Measuring tape: To accurately measure and mark the dimensions of your ladder rack.
- Saw: A circular saw or miter saw will be useful for cutting the lumber to the desired lengths.
- Sandpaper or a sander: This will help smooth out any rough edges.
- Paint or stain (optional): If you want to protect the lumber from the elements, consider applying some paint or stain.
Once you have gathered all the necessary materials, it’s time to move on to the next step: measuring and planning the dimensions of your ladder rack.
Step 1: Measure and Plan
The first step in building a ladder rack for your pickup truck is to measure and plan the dimensions. Take accurate measurements of your truck bed to determine the width and length of the ladder rack. Keep in mind that the ladder rack should fit snugly within the dimensions of your truck bed.
Next, consider the height of your ladder or the longest item you plan to transport with the rack. This will help you determine the height of the uprights to ensure that your cargo remains secure and doesn’t protrude above the cab of your truck.
Once you have the measurements, create a rough sketch or a blueprint of your ladder rack design. Consider how many uprights you’ll need to evenly distribute the weight and support your cargo.
It’s important to plan for any additional features you might want to incorporate into your ladder rack design, such as crossbars or tie-down points. These can enhance the functionality of your rack and provide added security for your cargo.
Take the time to review your sketch and measurements to ensure everything fits together properly and meets your needs. This planning stage is crucial for a successful ladder rack build.
With your measurements and design in hand, you’re ready to move on to the next step: cutting and assembling the base of the ladder rack.
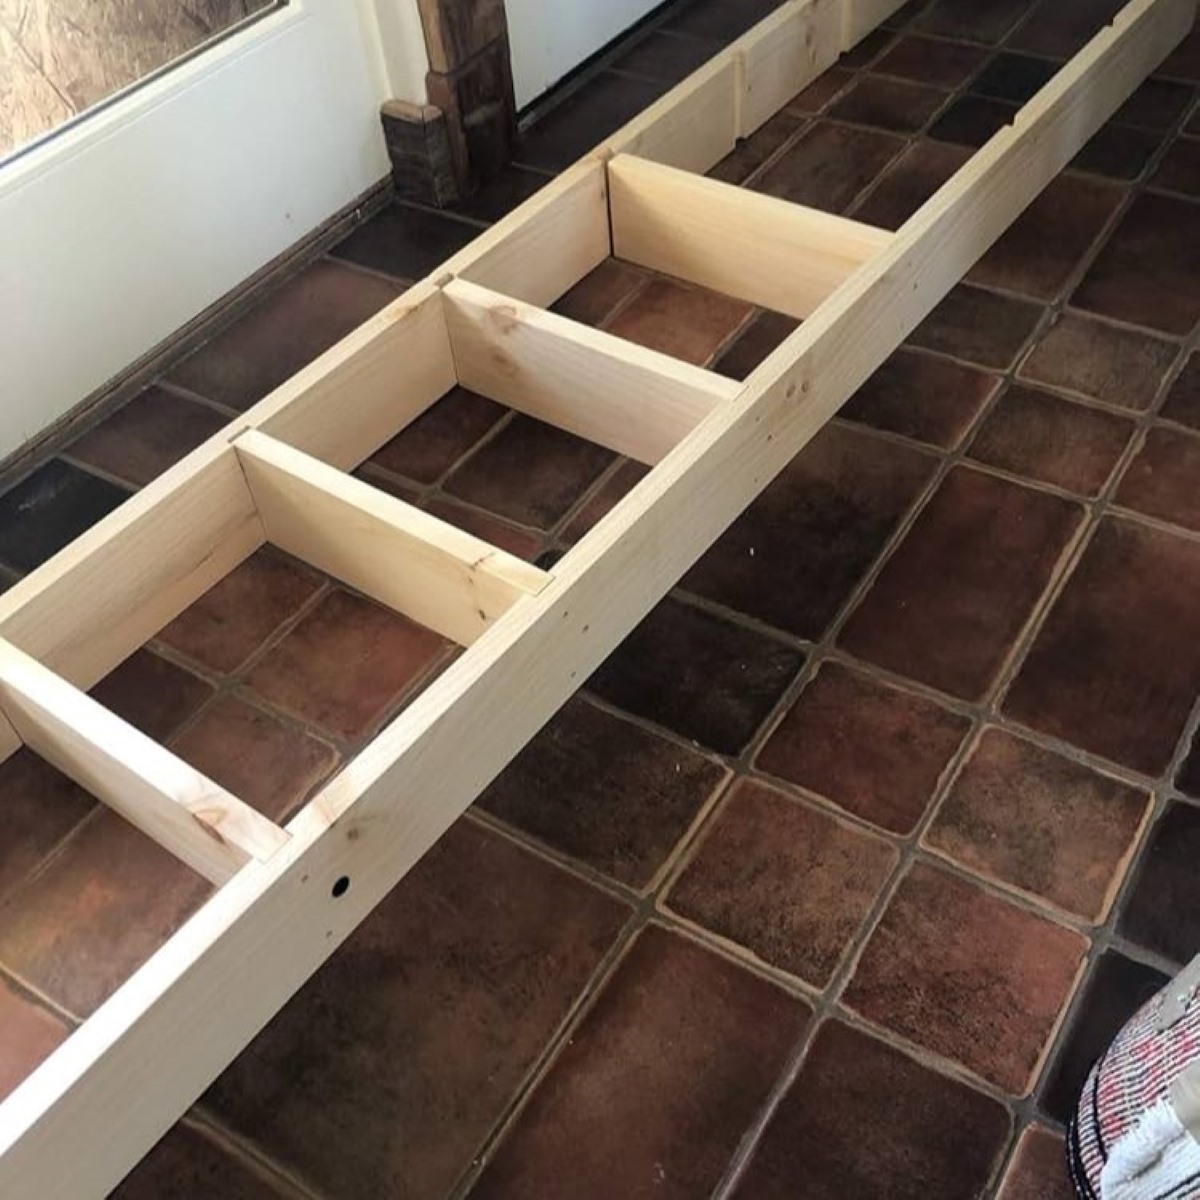
Step 2: Cut and Assemble the Base
Now that you have your measurements and design, it’s time to cut and assemble the base of your ladder rack. The base serves as the foundation and support for the entire structure.
Start by cutting the 2×4 lumber to the desired lengths for the base. Measure and mark the appropriate dimensions on the lumber, then use a saw to make clean and accurate cuts. Ensure that the lengths of the lumber match the width of your truck bed.
Once you have all the pieces cut, lay them out on a flat surface and arrange them according to your design. Use metal brackets or corner braces to secure the joints where the pieces intersect. Pre-drill pilot holes and attach the brackets using wood screws or bolts, making sure to align the pieces properly.
To add stability and reinforcement to the base, cut the 2×6 or 2×8 lumber to fit between the base beams. Attach these pieces perpendicular to the base beams using wood screws, creating a sturdy platform for the ladder rack.
Once the base is assembled, double-check the measurements and make any necessary adjustments before moving on to the next step. It’s crucial to have a solid and properly aligned base to ensure the stability and longevity of your ladder rack.
With the base complete, you’re ready to move on to step 3: attaching the uprights.
Step 3: Attach the Uprights
Now that you have the base of your ladder rack assembled, it’s time to attach the uprights. The uprights are vertical supports that will hold and secure your cargo.
Measure and cut the 2×4 lumber to the desired height for the uprights. Ensure that they are tall enough to safely hold your cargo without protruding above the cab of your truck.
Position the uprights on the base, aligning them with the corners or edges of the base beams. Use clamps or have a helper hold them in place while you pre-drill pilot holes through the uprights and into the base beams.
Secure the uprights to the base using bolts, nuts, and washers. Make sure to tighten the bolts securely to ensure stability. If necessary, you can also reinforce the joint with metal brackets or corner braces for added strength.
Repeat this process for each upright, evenly spacing them along the base to distribute the weight of your cargo. Double-check the alignment and measurements before proceeding.
It’s important to note that if you plan to transport longer items on your ladder rack, you may need to add additional uprights for better support and stability. Consider your specific needs and adjust the number and placement of the uprights accordingly.
With the uprights securely attached, you’re ready to move on to step 4: securing the ladder rack to your pickup truck bed.
When building a ladder rack for a pickup, make sure to use sturdy materials such as steel or aluminum to ensure it can support the weight of the ladder and withstand the elements.
Read more: How To Install Ladder Rack
Step 4: Secure the Rack to the Pickup Bed
Now that your ladder rack is taking shape, it’s time to secure it to your pickup truck bed. This step is crucial to ensure that the rack remains stable and doesn’t shift during transportation.
Start by positioning the ladder rack on your truck bed, making sure it is centered and aligned properly. Use clamps or have a helper hold the rack in place while you mark the locations for drilling pilot holes.
Using a drill, create pilot holes through the base beams of the ladder rack and into the truck bed. These holes will serve as guides for the bolts that will secure the rack.
Next, insert bolts through the pilot holes and secure them with nuts and washers underneath the truck bed. Make sure to tighten the bolts securely, but avoid overtightening as it may cause damage to the truck bed or the ladder rack.
It may be helpful to use additional hardware such as angle brackets or L-brackets to reinforce the connection between the ladder rack and the truck bed. These brackets can be attached to the base beams of the ladder rack and then secured to the truck bed using bolts or screws.
After securing the ladder rack, give it a firm shake to ensure that it is stable and properly attached to the truck bed. If there is any movement or wobbling, check the bolts and connections again and make any necessary adjustments.
With the ladder rack securely in place, you can now move on to step 5, which involves adding crossbars for additional support and versatility.
Step 5: Optional: Add Crossbars
Adding crossbars to your ladder rack can provide additional support and versatility. Crossbars are horizontal bars that connect the uprights of the ladder rack, creating a grid-like structure.
If you want to install crossbars, start by measuring the distance between the uprights. Cut the 2×4 lumber to fit this length, considering how many crossbars you want to incorporate.
Position the first crossbar across the top of the uprights, aligning it with the front and back edges. Use clamps or have a helper hold the crossbar in place while you pre-drill pilot holes through the crossbar and into the uprights.
Secure the crossbar to the uprights using wood screws. Repeat this process for each additional crossbar, evenly spacing them along the uprights.
The number of crossbars you install will depend on your needs and the type of cargo you plan to transport. Consider how much support and stability you require for your specific load.
Adding crossbars can offer several benefits, such as providing additional areas to tie-down and secure your cargo. This is especially useful if you will be transporting items that may shift or move during transportation.
With the crossbars in place, your ladder rack is now more versatile and ready to safely transport a wider range of items. However, if you do not require crossbars, you can skip this step and proceed to the final step, which involves putting the finishing touches on your ladder rack.
Step 6: Finishing Touches
In the final step of building your ladder rack, you can add some finishing touches to enhance its appearance and functionality.
If desired, you can sand down any rough edges or surfaces of the lumber to create a smoother finish. This step is optional but can improve the overall aesthetics of your ladder rack.
Depending on your preference, you may choose to apply a coat of paint or stain to the ladder rack. This not only adds a touch of personalization but also helps protect the wood from the elements, increasing its durability.
If you decide to paint or stain the ladder rack, be sure to choose a product that is suitable for outdoor use and compatible with the type of wood you used. Apply the paint or stain according to the manufacturer’s instructions and allow it to dry completely before using the ladder rack.
Additionally, you can consider adding non-slip padding or grip tape to the top surface of the ladder rack. This provides extra security and helps prevent your cargo from sliding or shifting during transportation.
Before you start using your ladder rack, it’s a good idea to test its stability and load-bearing capacity. Place some weight on the rack, such as sandbags or dummy cargo, and ensure that it remains stable and secure.
Lastly, remember to periodically check and inspect your ladder rack for any signs of wear or damage. Regular maintenance and timely repairs will prolong its lifespan and ensure safe and reliable use.
Congratulations! You have successfully built a ladder rack for your pickup truck. With your new ladder rack in place, you can now safely and securely transport ladders, lumber, or other long items with ease.
Remember to always drive cautiously and obey all traffic laws when using your ladder rack. Safe travels!
Conclusion
Building a ladder rack for your pickup truck is a gratifying project that provides you with a customized and cost-effective solution for transporting long items. By following the step-by-step guide in this article, you can create a sturdy and secure ladder rack that meets your specific needs.
From measuring and planning to cutting and assembling the base, attaching the uprights, securing the rack to the pickup bed, adding optional crossbars, and applying finishing touches, each step plays a vital role in creating a functional and reliable ladder rack.
Remember to prioritize safety throughout the construction process. Take accurate measurements, use appropriate materials, and ensure that all connections are secure. Regularly inspect your ladder rack for any signs of wear or damage and make any necessary repairs or adjustments.
With your ladder rack in place, you’ll be able to confidently transport ladders, lumber, or other long items without worrying about shifting or damage. The added convenience and peace of mind that a ladder rack provides make it a valuable addition to any pickup truck.
Now that you have the knowledge and guidance to build your own ladder rack, get started on your project and enjoy the benefits of a personalized and practical hauling solution. Happy building and safe travels!
Frequently Asked Questions about How To Build A Ladder Rack For A Pickup
Was this page helpful?
At Storables.com, we guarantee accurate and reliable information. Our content, validated by Expert Board Contributors, is crafted following stringent Editorial Policies. We're committed to providing you with well-researched, expert-backed insights for all your informational needs.


0 thoughts on “How To Build A Ladder Rack For A Pickup”