Articles
How To Change Water Pump On Toyota Camry
Modified: August 27, 2024
Learn how to change the water pump on your Toyota Camry with this step-by-step guide. Get expert articles and tips for a successful DIY project.
(Many of the links in this article redirect to a specific reviewed product. Your purchase of these products through affiliate links helps to generate commission for Storables.com, at no extra cost. Learn more)
Introduction
Welcome to our guide on how to change the water pump on a Toyota Camry. The water pump is a crucial component in the engine cooling system, responsible for circulating coolant to prevent the engine from overheating. Over time, the water pump can wear out and may need to be replaced. Performing this task on your own can save you time and money, and we’re here to provide you with step-by-step instructions to help you get the job done.
Before we dive into the details, it’s important to note that working on a vehicle’s cooling system can be dangerous, as it involves handling hot coolant and working near moving engine parts. If you’re not comfortable with these tasks or do not have the necessary tools, it’s best to consult a professional mechanic. Safety should always be a top priority.
In this guide, we’ll walk you through the process of changing the water pump on a Toyota Camry. We’ll cover each step in detail, from gathering the necessary tools and materials, to draining the coolant and removing the old water pump, all the way to installing the new water pump and refilling the coolant. By following these instructions carefully, you’ll be able to tackle this project with confidence.
Remember, each car model may have slight variations in the water pump replacement process, so it’s always a good idea to consult your vehicle’s specific service manual for additional guidance. Now, let’s get started on changing the water pump on your Toyota Camry!
Key Takeaways:
- Proper preparation is crucial for a successful water pump replacement on a Toyota Camry. From gathering the right tools to draining the coolant and reinstalling drive belts, attention to detail ensures a smooth process.
- Safety and thoroughness are paramount when tackling a water pump replacement. Following step-by-step instructions, checking for leaks, and monitoring coolant levels post-installation are essential for long-term engine performance.
Read more: How To Change A Water Pump Impeller
Step 1: Gather necessary tools and materials
Before you begin replacing the water pump on your Toyota Camry, it’s important to gather all the necessary tools and materials. Having everything ready beforehand will help streamline the process and prevent any unnecessary delays. Here’s a list of items you’ll need:
- Socket set and ratchet
- Wrench set
- Screwdrivers
- Drain pan
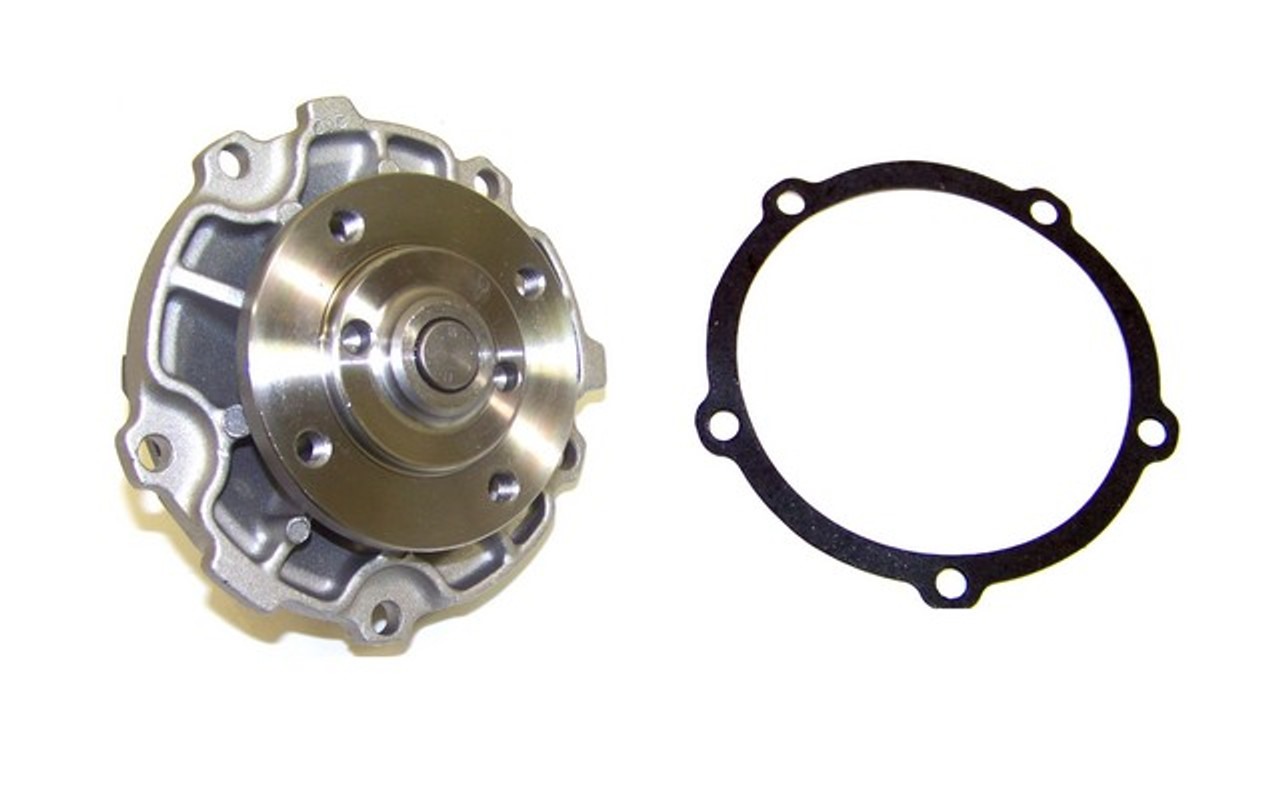
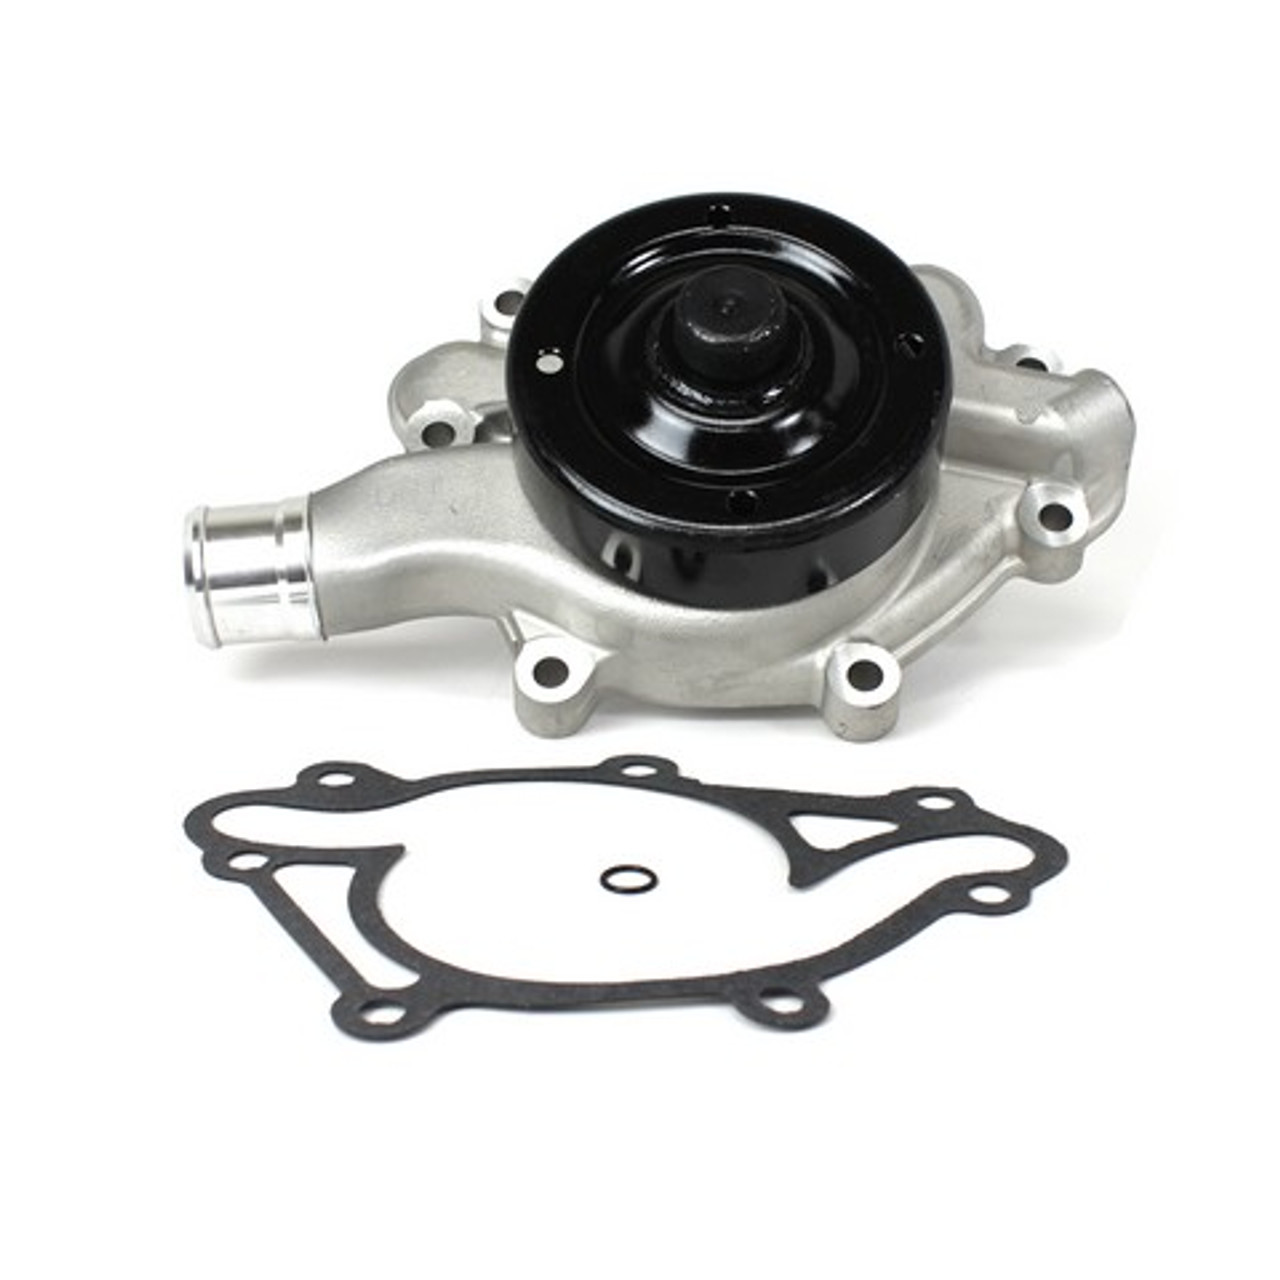
- New water pump
- New gasket
- New coolant
- Clean rags
- Threadlocker
- Plastic scraper or gasket remover
The socket set and ratchet will be used for removing bolts, while the wrench set will come in handy for loosening and tightening various components. Screwdrivers will be necessary for removing any clips or screws that may be holding parts in place.
A drain pan is essential for catching the coolant when you drain the system. Be sure to choose a pan that can contain the amount of coolant in your vehicle’s system.
When it comes to the water pump itself, it’s always recommended to use a new one for optimal performance and longevity. Make sure to get the correct water pump model for your specific Toyota Camry year and engine.
Additionally, you’ll need a new gasket to ensure a proper seal between the water pump and the engine. It’s important not to reuse the old gasket as it may lead to leaks. You’ll also need to purchase new coolant to replace the old coolant that will be drained.
Having clean rags on hand will help you wipe down any surfaces and keep things tidy throughout the process. Threadlocker is a useful item to have to secure bolts and prevent them from loosening over time.
Finally, a plastic scraper or gasket remover will be helpful for cleaning any old gasket material from the engine surface prior to installing the new water pump.
Once you have all these tools and materials ready, you can move on to the next step, which involves preparing the vehicle for the water pump replacement process.
Step 2: Prepare the vehicle
Before you can start the water pump replacement on your Toyota Camry, it’s important to properly prepare the vehicle. Follow these steps to ensure a smooth and efficient process:
- Turn off the engine: Allow your vehicle’s engine to cool down completely before starting any work. This will help prevent any burns or injuries during the process.
- Engage the parking brake: Park your car on a flat and level surface, then engage the parking brake. This will help ensure that the vehicle remains secure and stationary throughout the procedure.
- Open the hood: Raise the hood of your Toyota Camry and secure it with the hood prop rod. This will provide you with easy access to the engine compartment.
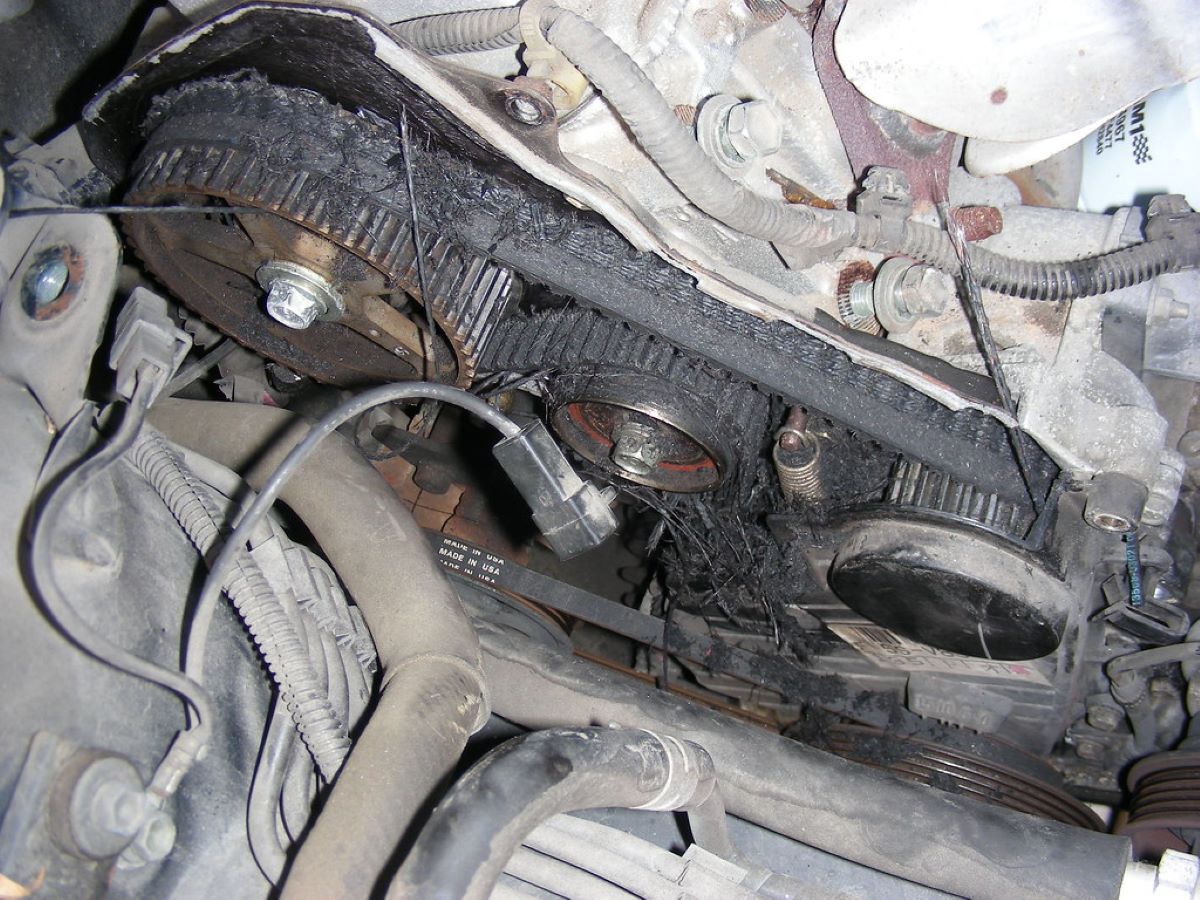
- Locate the water pump: Familiarize yourself with the location of the water pump on your specific Camry model. It is typically located on the front of the engine, driven by a belt connected to the crankshaft pulley. Refer to your vehicle’s service manual if you’re unsure where to find it.
- Disconnect the battery: To ensure safety during the procedure, disconnect the negative terminal of the vehicle’s battery. This will prevent any accidental electrical shorts while working on the water pump.
- Take pictures (optional): Before you start removing any components, it can be helpful to take pictures or make a diagram of the belt routing and component placement. This will serve as a reference for reassembling everything correctly.
By following these steps, you’ll ensure that your vehicle is in the proper state for the water pump replacement. It’s crucial to take these preparations seriously to ensure a safe and successful repair process.
Next, we’ll move on to step 3, which involves draining the coolant from the system.
Step 3: Drain the coolant
Draining the coolant is an important step in the water pump replacement process, as it helps empty the cooling system and prepare it for the installation of the new water pump. Follow these steps to drain the coolant from your Toyota Camry:
- Find the coolant drain valve: Locate the coolant drain valve, which is typically located at the bottom of the radiator. It is usually a small valve or petcock.
- Place a drain pan: Position a drain pan underneath the coolant drain valve to catch the coolant that will be released. Ensure that the drain pan is large enough to contain the volume of coolant in your vehicle’s system.
- Open the drain valve: Use a wrench or a pair of pliers to carefully open the coolant drain valve. Be cautious as the coolant may be hot. Allow the coolant to flow into the drain pan until it has completely emptied from the radiator.
- Drain the remainder: Once the coolant has stopped flowing from the drain valve, it’s important to ensure that all the coolant has been properly drained from the system. To do this, you can remove the radiator cap to allow any remaining coolant to drain out.
- Dispose of the coolant: Coolant contains hazardous chemicals, so it’s important to dispose of it responsibly. Check with your local recycling center or waste disposal facility for the proper methods of coolant disposal in your area.
Once the coolant has been drained completely, you can move on to the next steps in the water pump replacement process. It’s crucial to properly drain the coolant to ensure a clean working environment for the subsequent tasks.
Next, we’ll move on to step 4, which involves removing the drive belts.
Step 4: Remove the drive belts
Removing the drive belts is the next step in the water pump replacement process for your Toyota Camry. The drive belts are responsible for transferring power from the engine to various components, including the water pump. Follow these steps to remove the drive belts:
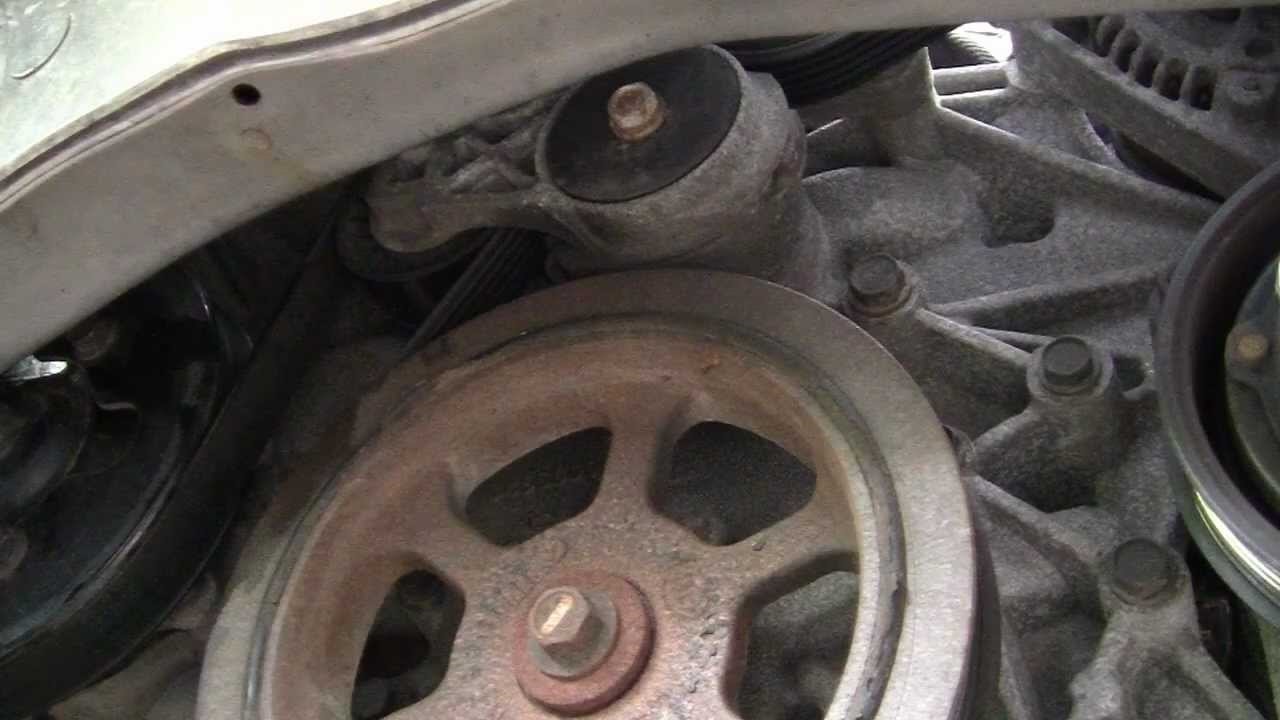
- Locate the belt tensioner: Find the belt tensioner pulley, which is responsible for keeping the drive belts at the proper tension. It is usually located near the front of the engine and is spring-loaded.
- Release the belt tension: Use a socket or wrench to rotate the belt tensioner and relieve tension on the drive belts. This will allow you to easily remove the belts from their respective pulleys. Take note of the belt routing for reinstallation later.
- Remove the drive belts: Once the tension has been released, slip the drive belts off the pulleys one by one. If there are multiple belts, repeat this process for each belt until all of them have been removed.
- Inspect the belts: While the belts are off, it’s a good opportunity to inspect them for any signs of wear, cracks, or damage. If necessary, this is the ideal time to replace any worn-out belts to ensure optimal performance.
With the drive belts removed, you have clearer access to the water pump and can proceed to the next steps of the water pump replacement. Remember to keep the belts organized and take note of their positioning to facilitate the reinstallation process later.
Next, we’ll move on to step 5, which involves removing the water pump pulley.
Read more: How To Change A Water Pump On A Chevy Truck
Step 5: Remove the water pump pulley
Removing the water pump pulley is a crucial step in accessing and removing the water pump itself. The pulley is typically mounted on the water pump and is responsible for transmitting power from the drive belt to the pump. Follow these steps to remove the water pump pulley on your Toyota Camry:
- Secure the pulley: Use a wrench or socket to hold the water pump pulley in place while you loosen the bolts. This will prevent the pulley from spinning as you try to remove the bolts.
- Remove the bolts: Using the appropriate size socket or wrench, loosen and remove the bolts that secure the water pump pulley to the water pump shaft. Take note of the number and location of the bolts for reinstallation later.
- Slide off the pulley: Once the bolts have been removed, carefully slide the water pump pulley off the shaft. Be mindful not to damage the pulley or any surrounding components in the process.
- Inspect the pulley: Take this opportunity to inspect the water pump pulley for any signs of damage or wear. If you notice any issues, it’s advisable to replace the pulley to ensure smooth operation of the water pump.
With the water pump pulley removed, you’ll have better access to the water pump itself for the next steps in the replacement process. Keep the pulley and bolts in a safe place for reinstallation later.
Next, we’ll move on to step 6, which involves removing the water pump from your Toyota Camry.
Step 6: Remove the water pump
Now that the water pump pulley has been removed, you can proceed to remove the water pump itself. The water pump is responsible for circulating coolant throughout the engine to keep it at a safe operating temperature. Here’s how you can remove the water pump from your Toyota Camry:
- Disconnect hoses: Locate the upper and lower coolant hoses connected to the water pump. Use pliers or a hose clamp tool to loosen the clamps and disconnect the hoses from the water pump. Be prepared for some coolant spillage, so have a drain pan or rags ready to catch any fluid.
- Remove mounting bolts: Using a socket or wrench, carefully remove the mounting bolts that secure the water pump to the engine block. Take note of their location and ensure they are kept in a safe place for reinstallation.
- Detach the water pump: Gently pry the water pump away from the engine block using a plastic scraper or a gasket remover tool. Be careful not to damage the mating surface of the engine block during this process.
- Clean the mating surface: Once the water pump is removed, clean the mating surface of the engine block with a plastic scraper or gasket remover. Ensure that the surface is free from any residue or gasket material for a proper seal with the new water pump.
- Inspect the water pump: Take a moment to carefully inspect the old water pump for any signs of leakage, corrosion, or damage. If you notice any issues, it’s recommended to replace the water pump with a new one to ensure proper functioning of the cooling system.
With the water pump successfully removed, you can proceed to the next steps to clean and prepare the new water pump for installation.
Next, we’ll move on to step 7, which involves cleaning and preparing the new water pump.
When changing the water pump on a Toyota Camry, make sure to drain the coolant first to avoid a mess. Also, consider replacing the timing belt at the same time if it’s due for maintenance.
Step 7: Clean and prepare the new water pump
Now that the old water pump has been removed, it’s time to prepare the new water pump for installation. Properly cleaning and preparing the new water pump will ensure optimal performance and a secure seal. Follow these steps to clean and prepare the new water pump for your Toyota Camry:
- Clean the mating surface: Use a plastic scraper or gasket remover to clean the mating surface on the engine block where the water pump will be installed. Remove any residue, old gasket material, or debris. This will help promote a proper seal between the water pump and the engine.
- Inspect the gasket: Check the gasket that came with the new water pump for any defects, such as tears or uneven edges. If the gasket is damaged, replace it with a new one to ensure a proper fit and seal.
- Apply sealant (if necessary): Depending on the instructions provided with the new water pump, you may need to apply a thin layer of sealant to the mating surface of the water pump. Ensure that you follow the instructions and apply the sealant evenly for a secure seal.
- Position the gasket: Carefully place the gasket onto the mating surface of the water pump. Ensure that it aligns properly with the bolt holes and is centered on the pump.
- Check for accessories: Inspect the new water pump for any additional accessories or components that need to be installed before mounting it to the engine block. Some water pumps may require the installation of an O-ring or other parts for proper functioning.
- Clean the impeller: The impeller is the rotating part of the water pump that circulates the coolant. Take a moment to clean it and remove any dirt, debris, or corrosion that may be present. This will help ensure proper coolant flow.
By following these steps, you’ll properly clean and prepare the new water pump for installation. Taking the time to perform these tasks will help ensure a secure and effective water pump replacement for your Toyota Camry.
Next, we’ll move on to step 8, which involves installing the new water pump on your vehicle.
Step 8: Install the new water pump
With the new water pump cleaned and prepared, it’s time to install it onto your Toyota Camry’s engine. Proper installation is crucial to ensure the efficient circulation of coolant and prevent any leaks. Follow these steps to install the new water pump:
- Position the new water pump: Carefully align the new water pump with the mounting holes on the engine block. Ensure that the gasket is properly aligned and centered.
- Insert the mounting bolts: Insert the mounting bolts through the water pump and into the engine block. Start threading them by hand to avoid cross-threading.
- Tighten the bolts: Use a socket or wrench to tighten the mounting bolts evenly and in a crisscross pattern. Refer to the torque specifications provided in the water pump’s instruction manual or service manual for the specific torque values.
- Connect the coolant hoses: Reattach the upper and lower coolant hoses to the water pump. Make sure the hoses are securely fastened and the clamps are tightened to prevent any leaks.
- Reinstall any accessories: If there were any additional accessories or components that were removed for the water pump replacement, make sure to reinstall them according to the manufacturer’s instructions.
- Double-check the installation: Take a moment to visually inspect the installed water pump and ensure that it is securely mounted, the hoses are properly connected, and all the bolts are tightened.
Properly and securely installing the new water pump is crucial for the efficient and reliable operation of the cooling system in your Toyota Camry. Once you’ve completed this step, you’re one step closer to completing the water pump replacement.
Next, we’ll move on to step 9, which involves reinstalling the water pump pulley.
Read more: How To Change E36 Water Pump
Step 9: Reinstall the water pump pulley
Now that the new water pump is securely installed, it’s time to reinstall the water pump pulley. The pulley is responsible for transferring power to the water pump from the drive belt. Follow these steps to reinstall the water pump pulley on your Toyota Camry:
- Position the pulley: Align the water pump pulley with the water pump shaft, ensuring that it is properly seated.
- Thread the bolts: Insert and thread the bolts through the pulley and into the water pump shaft. Start threading them by hand to avoid cross-threading.
- Tighten the bolts: Use a socket or wrench to tighten the bolts that secure the water pump pulley. Follow the recommended torque specifications provided in your vehicle’s service manual for the proper torque value.
- Spin the pulley: Once the bolts are tightened, give the water pump pulley a gentle spin to ensure smooth rotation without any obstructions or binding.
- Check belt alignment: Ensure that the drive belt is properly aligned with the water pump pulley and other related pulleys. Adjust the tensioner if necessary to achieve the correct belt tension.
- Inspect for secure installation: Double-check that the water pump pulley is securely installed and that all the bolts are tightened properly. This will help prevent any issues or potential damage during operation.
By following these steps, you’ll successfully reinstall the water pump pulley on your Toyota Camry. A secure and properly aligned water pump pulley is essential for the efficient operation of the cooling system.
Next, we’ll move on to step 10, which involves reinstalling the drive belts.
Step 10: Reinstall the drive belts
With the water pump pulley back in place, it’s time to reinstall the drive belts on your Toyota Camry. The drive belts are responsible for transferring power from the engine to various components, including the water pump. Follow these steps to reinstall the drive belts:
- Check belt condition: Inspect the drive belts for any signs of wear, cracks, or damage. If any of the belts appear worn, it’s advisable to replace them with new ones for optimal performance.
- Route the belts: Refer to your notes or pictures taken earlier to ensure proper routing of the drive belts. Make sure each belt is correctly positioned on the respective pulleys.
- Release the belt tension: Use a socket or wrench to rotate the belt tensioner and relieve tension on the drive belts. This will allow you to easily slip the belts onto the pulleys.
- Attach the belts: Starting with the first belt, position it on the pulleys according to the correct routing. Repeat this step for each drive belt, making sure they are properly seated on the pulleys.
- Apply tension: Use the belt tensioner to apply tension to the belts. Follow the manufacturer’s specifications or your vehicle’s service manual for the proper tensioning procedure and torque specifications.
- Check belt alignment: Ensure that each belt is aligned properly on its respective pulleys. Adjust the tensioner or pulleys if needed to achieve the correct belt alignment and tension.
- Verify proper tension: Give each belt a gentle tug to ensure they are properly tensioned. They should have a slight amount of play without feeling loose or excessively tight.
By following these steps, you’ll successfully reinstall the drive belts on your Toyota Camry. Properly tensioned and aligned drive belts are crucial for the efficient operation of the water pump and other engine components.
Next, we’ll move on to step 11, which involves refilling the coolant in the system.
Step 11: Refill the coolant
With the water pump and drive belts securely installed, it’s time to refill the coolant in your Toyota Camry’s cooling system. Properly filling the coolant is essential for maintaining optimal engine temperature and preventing overheating. Follow these steps to refill the coolant:
- Prepare the coolant: Ensure that you have the correct type and amount of coolant for your vehicle. Refer to your vehicle’s manual or consult a local dealership for the recommended coolant specifications.
- Locate the coolant reservoir: Find the coolant reservoir in your engine bay. It is typically a translucent plastic tank with level markings indicating the minimum and maximum levels.
- Open the coolant reservoir cap: Carefully remove the coolant reservoir cap, taking precautions as the engine may still be hot. This will allow air to escape and facilitate the filling process.
- Slowly pour the coolant: Using a funnel, slowly pour the coolant into the coolant reservoir. Pour it in slowly to prevent any spills and allow the system to properly absorb the coolant. Fill the reservoir up to the recommended level.
- Burp the cooling system: After filling the coolant reservoir, start the engine and let it run for a few minutes with the heater on. This will help burp any air pockets out of the cooling system.
- Monitor the coolant level: Keep an eye on the coolant reservoir level as the engine runs. If necessary, add more coolant to bring it to the proper level. Avoid overfilling, as it can cause coolant overflow and potential damage to the system.
- Check for leaks: After turning off the engine, inspect the area around the water pump and other cooling system components for any signs of leaks. Address any leaks immediately to prevent further issues.
- Replace the reservoir cap: Once you have confirmed that there are no leaks and the coolant level is at the appropriate level, securely replace the coolant reservoir cap.
By following these steps, you’ll successfully refill the coolant in your Toyota Camry. Adequate coolant levels and proper cooling system function are crucial for the longevity and performance of your vehicle.
With the coolant refilled, you have completed the water pump replacement process on your Toyota Camry. Congratulations on successfully replacing the water pump and ensuring the efficient cooling of your engine!
If you have any concerns or if you encountered any issues during the process, it’s always best to consult a professional mechanic for assistance.
I hope this guide has been helpful, and happy driving!
Validate the output HTML before submission
Conclusion
Replacing the water pump on your Toyota Camry is a task that can be accomplished with the right tools, knowledge, and attention to detail. By following the steps outlined in this guide, you can confidently tackle this project and ensure the efficient operation of your vehicle’s cooling system.
Remember, safety should always be a priority when working on your vehicle. Take necessary precautions, such as allowing the engine to cool down, engaging the parking brake, and disconnecting the battery before starting any work. If you’re unsure or uncomfortable with any aspect of the water pump replacement process, it’s always best to consult a professional mechanic.
Throughout the process, make sure to gather all the necessary tools and materials, properly prepare the vehicle, and take your time for each step. From draining the coolant to removing the drive belts, and from removing the water pump pulley to installing the new water pump, every task plays a critical role in the successful completion of the project.
Once the new water pump is installed and the coolant has been refilled, monitor the coolant level regularly and address any leaks or abnormalities promptly. This will help ensure the long-term performance and reliability of your vehicle’s cooling system.
We hope that this guide has provided you with valuable insights and step-by-step instructions for changing the water pump on your Toyota Camry. By following these instructions carefully, you’ll be able to complete the replacement process and maintain the optimal performance of your vehicle for miles to come.
Safe driving and happy adventures with your newly replaced water pump!
Now that you've mastered changing your Toyota Camry's water pump, you might wonder about the best time for this task. Timing is everything in maintenance to ensure your car runs smoothly. Don't miss our detailed guide on optimal timing for water pump replacement, full of expert advice and practical tips.
Frequently Asked Questions about How To Change Water Pump On Toyota Camry
Was this page helpful?
At Storables.com, we guarantee accurate and reliable information. Our content, validated by Expert Board Contributors, is crafted following stringent Editorial Policies. We're committed to providing you with well-researched, expert-backed insights for all your informational needs.


0 thoughts on “How To Change Water Pump On Toyota Camry”