
Articles
How To Change Water Pump On 2004 Trailblazer
Modified: October 19, 2024
Learn how to change the water pump on your 2004 Trailblazer with our informative articles. Step-by-step instructions and tips to complete the job efficiently.
(Many of the links in this article redirect to a specific reviewed product. Your purchase of these products through affiliate links helps to generate commission for Storables.com, at no extra cost. Learn more)
Introduction
Changing the water pump on a 2004 Trailblazer can seem like a daunting task, but with the right tools and a little bit of know-how, you can do it yourself and save money on costly repairs. The water pump plays a crucial role in the engine’s cooling system, circulating coolant throughout the engine to regulate its temperature. Over time, the water pump may wear out or develop leaks, leading to overheating issues and potential engine damage.
In this article, we will guide you through the step-by-step process of changing the water pump on a 2004 Trailblazer. We will cover the necessary tools and materials, as well as provide detailed instructions to ensure a successful replacement. Whether you’re a seasoned DIYer or a novice looking to learn some new skills, we’ve got you covered.
Before we dive into the process, please note that every vehicle is unique, and the instructions provided here are general guidelines. It’s always recommended to consult your vehicle’s manual for precise instructions and specifications tailored to your specific make and model. Additionally, if you’re not confident in your abilities or lack the necessary tools, it’s best to seek professional assistance.
Now, let’s gather our tools and get started on replacing the water pump on your 2004 Trailblazer!
Key Takeaways:
- DIY Water Pump Replacement
Save money and maintain your 2004 Trailblazer by following our detailed DIY guide to replace the water pump. With the right tools and patience, you can successfully complete this essential repair. - Attention to Detail
From draining the cooling system to reconnecting hoses, our step-by-step instructions emphasize the importance of thoroughness and precision. Following these guidelines ensures a successful water pump replacement.
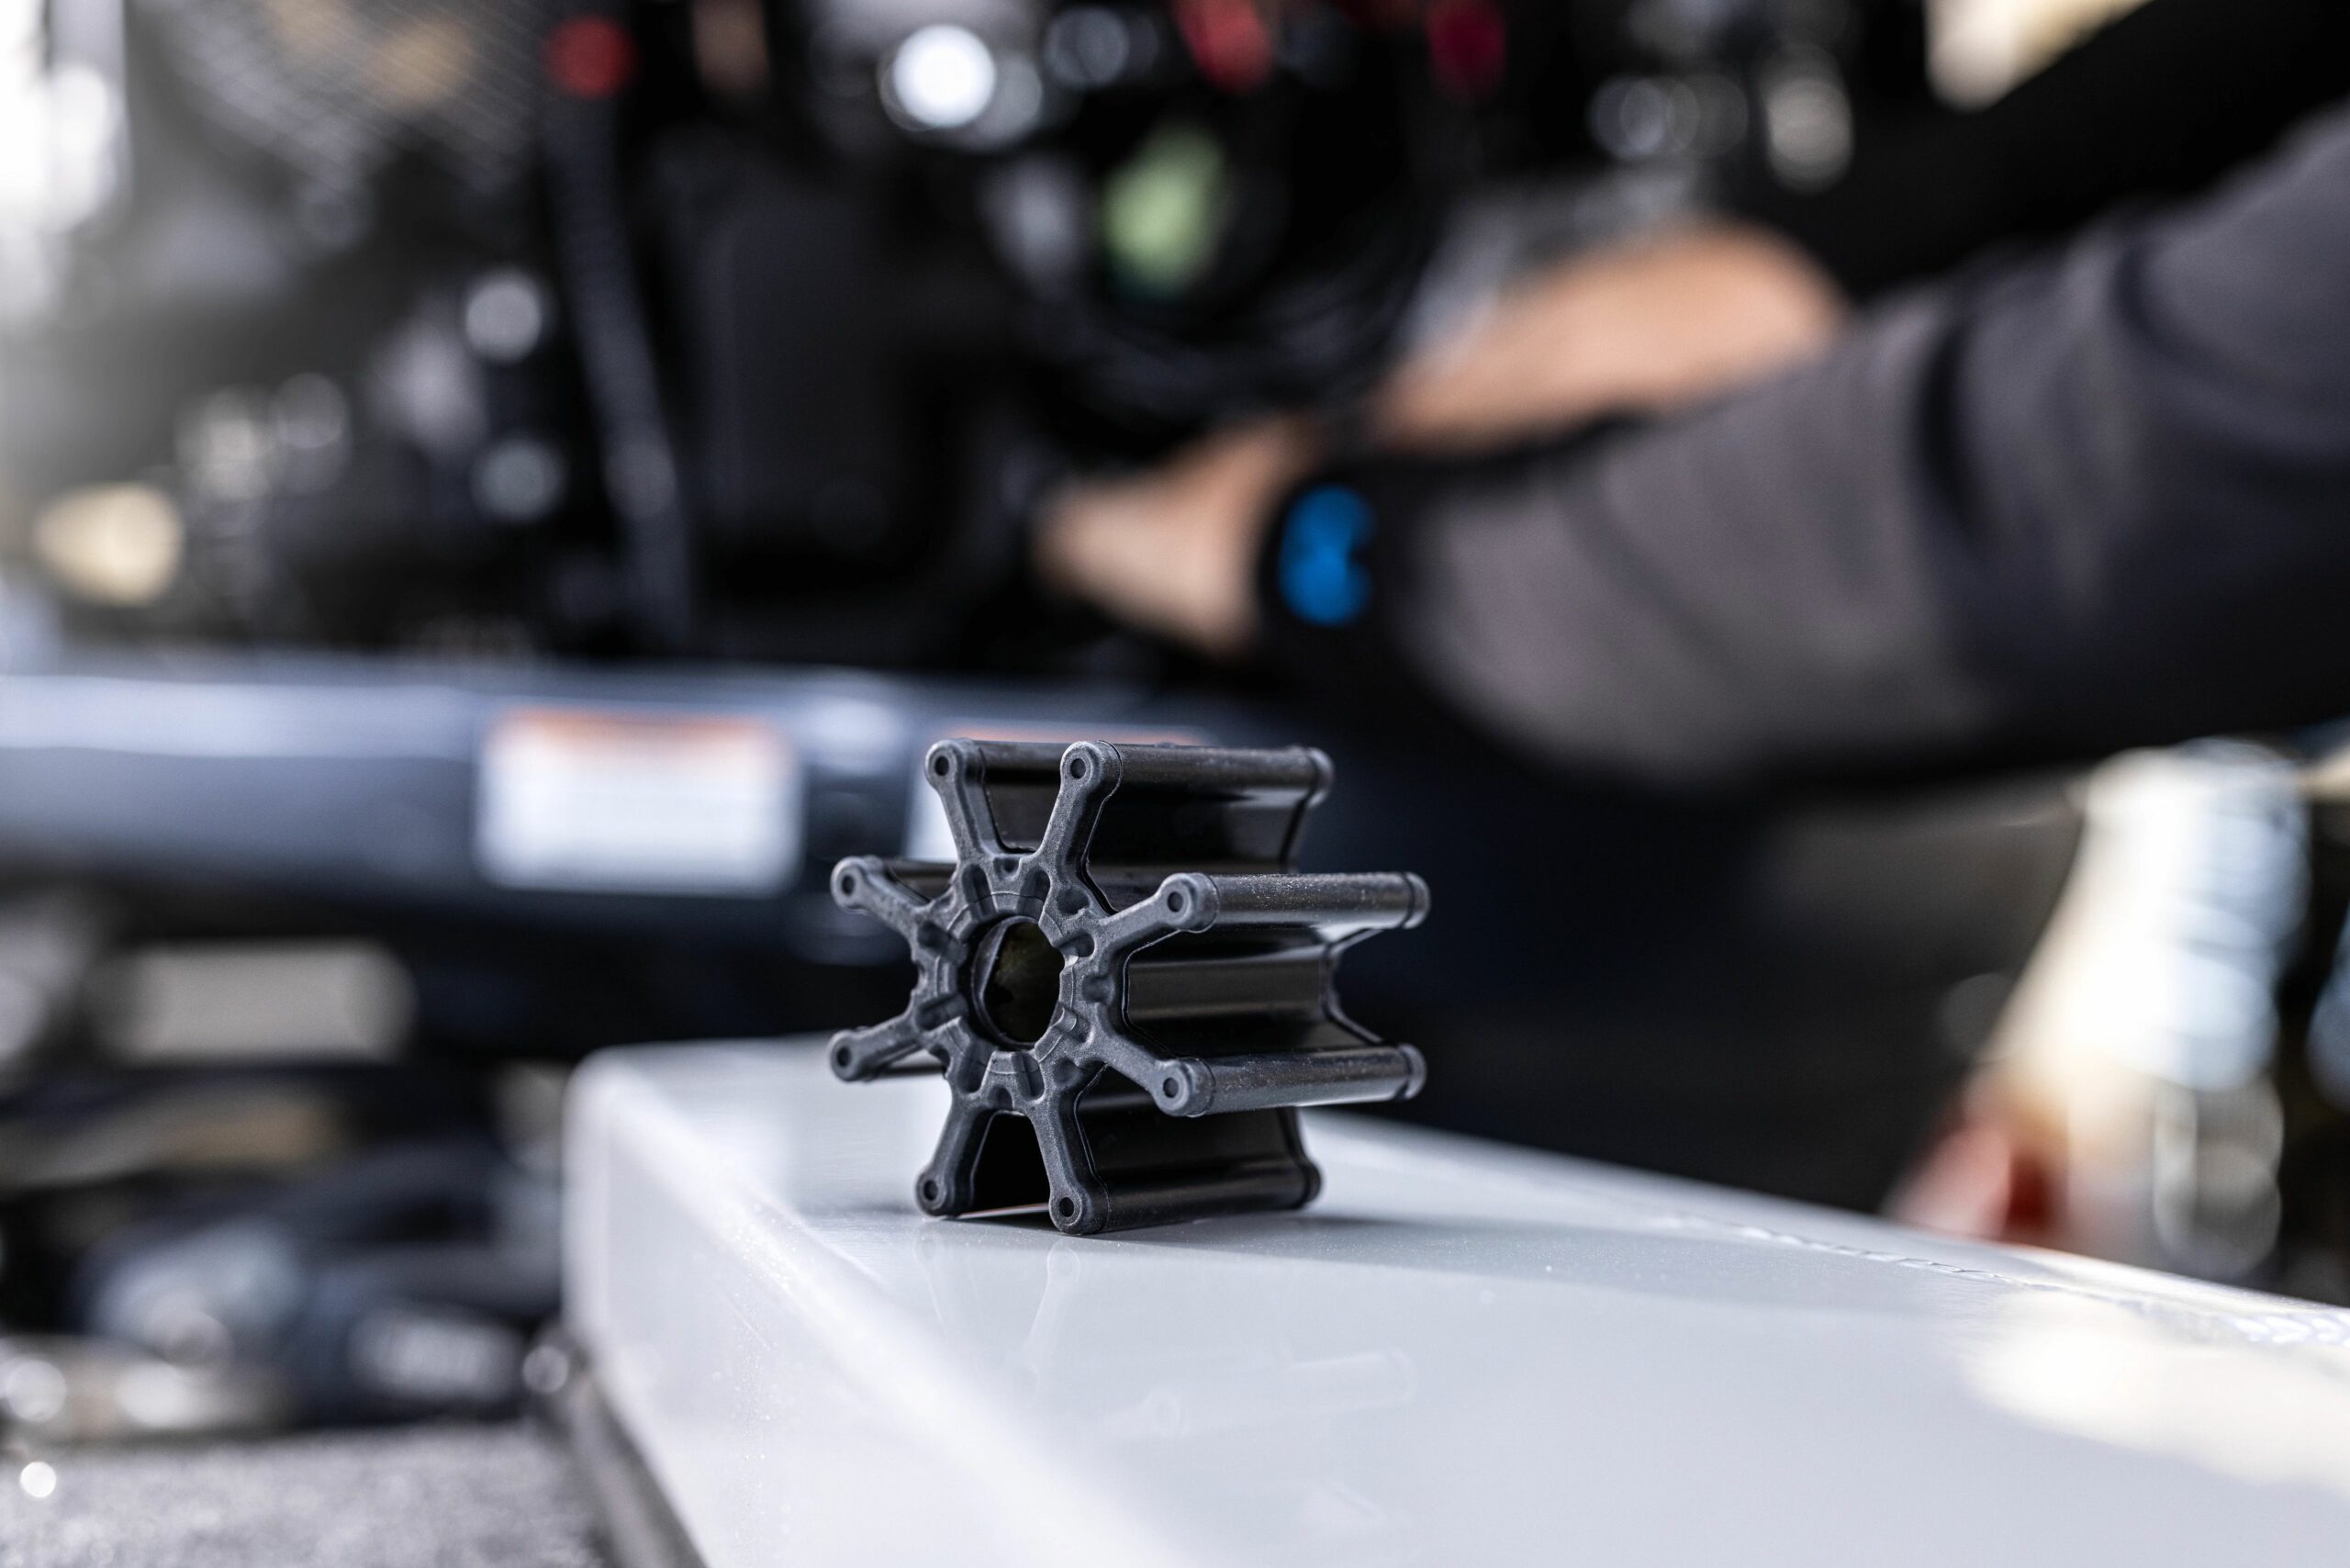
Read more: How To Change A Water Pump Impeller
Tools and Materials Required
Before we begin the water pump replacement process, let’s make sure we have all the necessary tools and materials on hand. Here’s a list of what you’ll need:
- Socket set
- Ratchet
- Screwdrivers (flathead and Phillips)
- Pliers
- Adjustable wrench
- Antifreeze/coolant
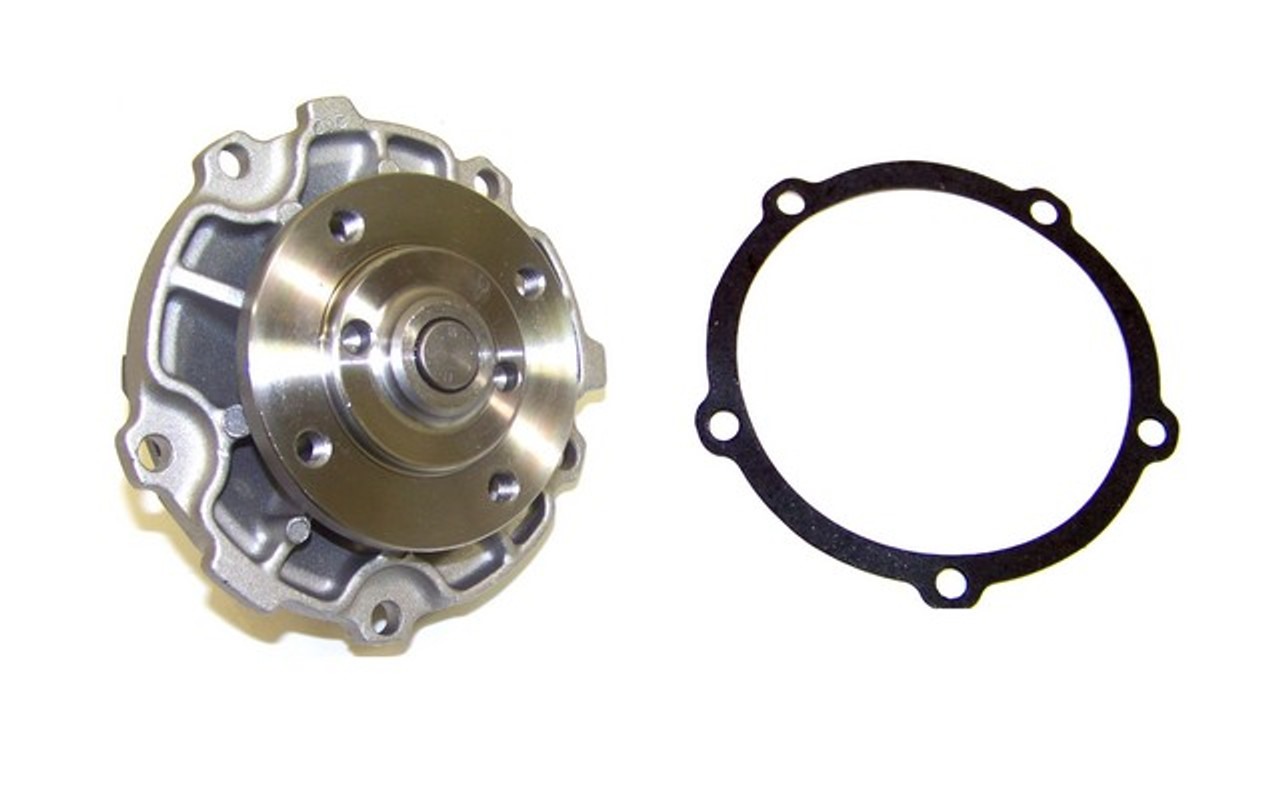
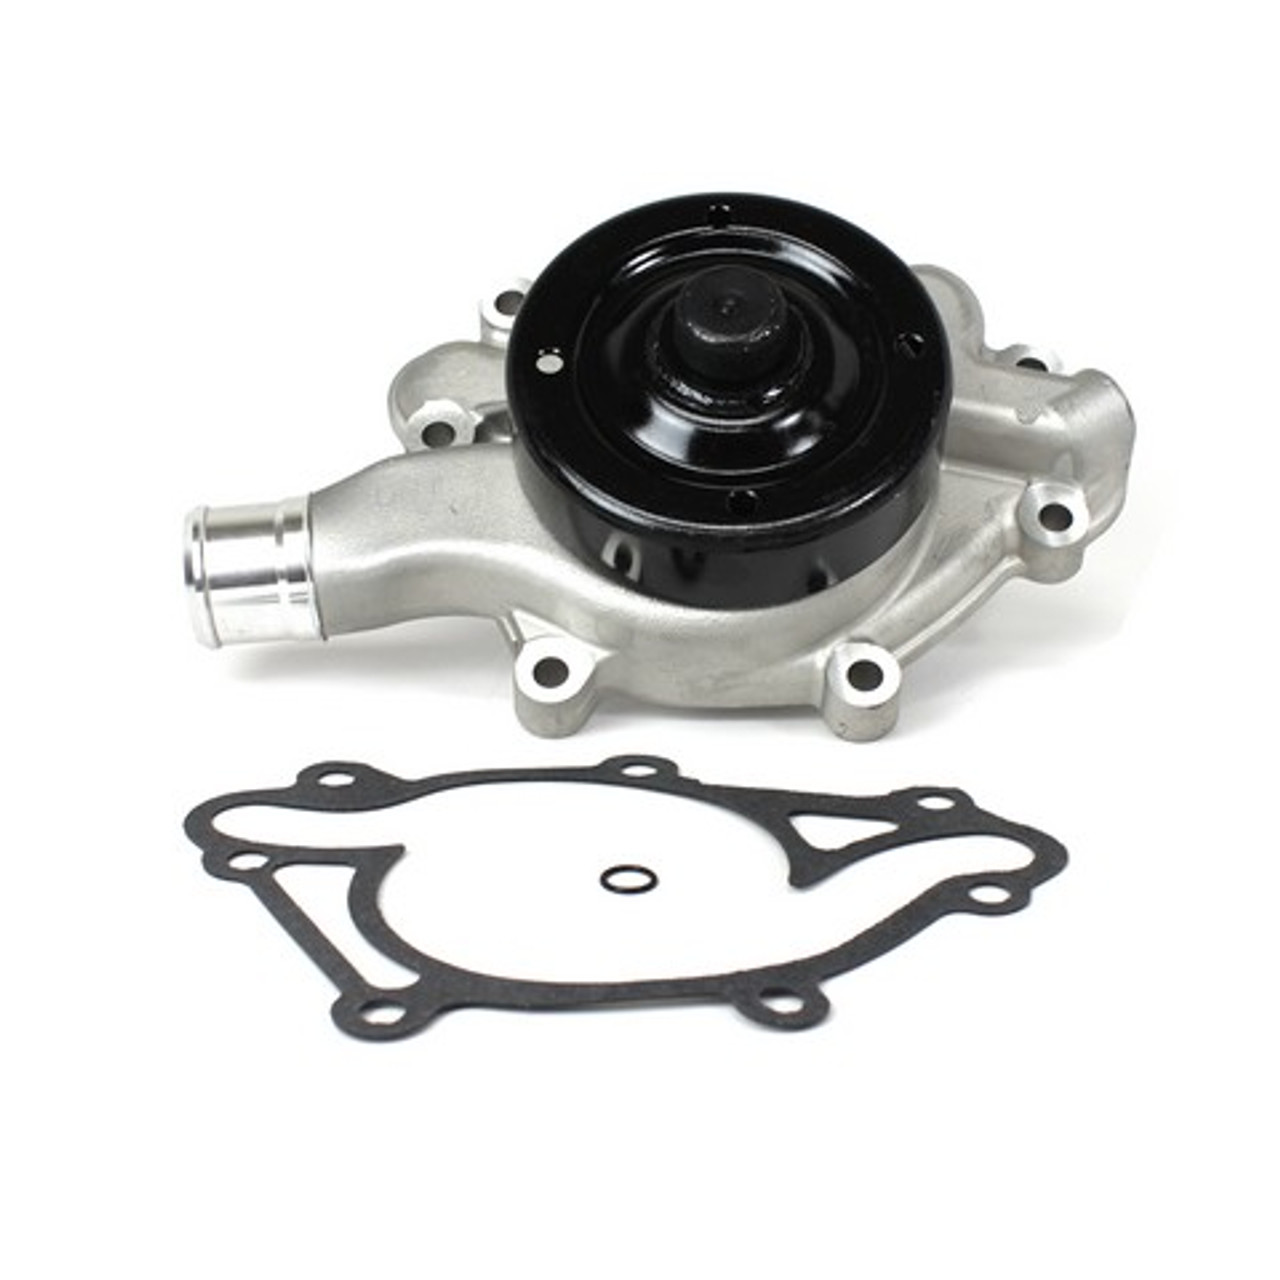
- New water pump
- New gaskets
- New belt (if needed)
- Drain pan
- Shop towels
It’s important to have the correct size sockets and wrenches for your particular vehicle. Check your vehicle’s manual or consult an automotive parts store to determine the right sizes for your 2004 Trailblazer.
Additionally, make sure you have the appropriate replacement parts. It’s recommended to use OEM (Original Equipment Manufacturer) or high-quality aftermarket parts to ensure proper fit and functionality.
Lastly, have a drain pan ready to catch the coolant that will be drained from the system. Coolant can be toxic and harmful to the environment, so be sure to dispose of it properly according to your local regulations.
Once you’ve gathered all the necessary tools and materials, you’re ready to move on to the next steps. Let’s get started on changing the water pump on your 2004 Trailblazer!
Step 1: Preparation
Before diving into the water pump replacement process, it’s crucial to take a few preparatory steps to ensure a smooth and successful repair. Here’s what you need to do:
- Disconnect the battery: To ensure safety and prevent any electrical mishaps, start by disconnecting the negative terminal of the battery. This will prevent any accidental short circuits while working under the hood.
- Allow the engine to cool down: It’s important to let the engine cool down completely before starting any work on the cooling system. This prevents any accidental burns from hot coolant or parts.
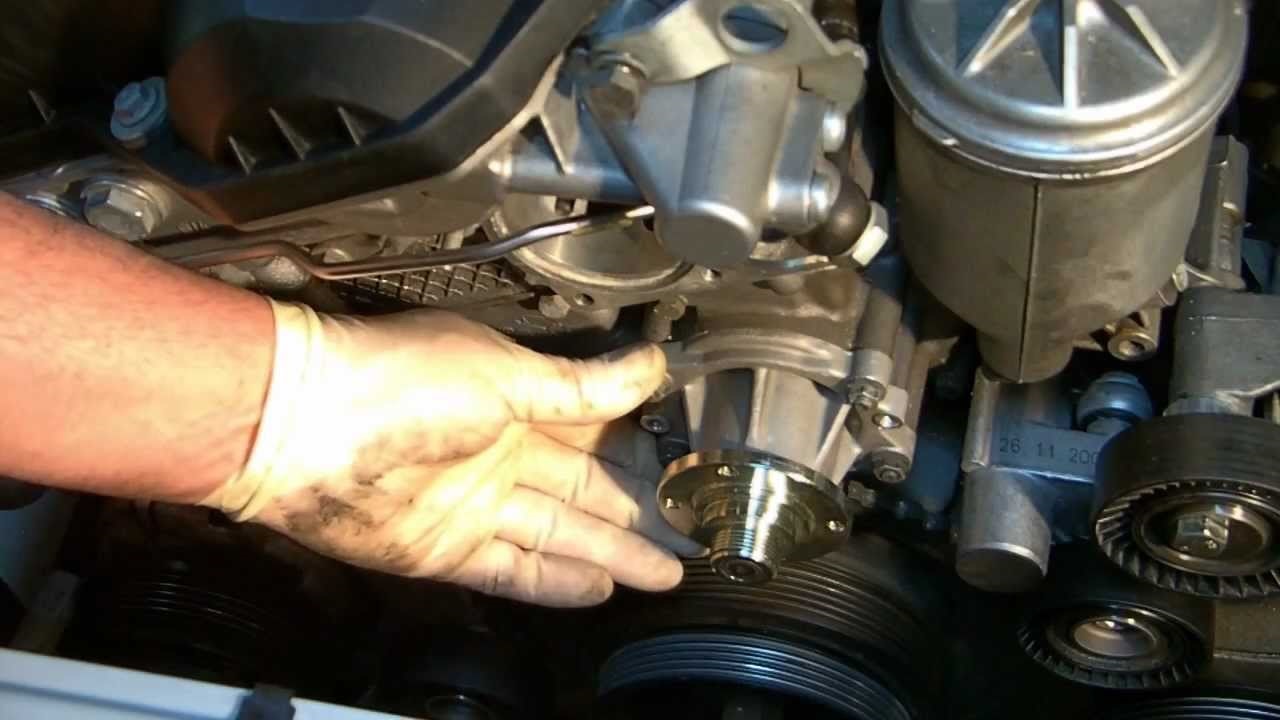
- Locate the water pump: Familiarize yourself with the location of the water pump on your 2004 Trailblazer. It is typically located on the front of the engine, connected to the engine block and driven by the serpentine belt.
- Inspect the surrounding components: Take a moment to inspect the condition of the belt, pulleys, and hoses in the vicinity of the water pump. If you notice any signs of wear, such as cracks or fraying, it’s a good idea to replace them during the water pump replacement process.
- Gather your tools and materials: Ensure that you have all the necessary tools and materials mentioned in the previous section ready and easily accessible. Having everything at arm’s reach will save you time and frustration during the repair.
By taking these preliminary steps, you will set yourself up for a successful water pump replacement. It’s important to be patient and thorough during this preparation stage to avoid unnecessary complications later on. Now that you’ve completed these steps, let’s move on to draining the cooling system in the next step.
Step 2: Drain the Cooling System
Now that you’ve completed the preparation stage, it’s time to drain the cooling system. Here’s how you can do it:
- Locate the radiator drain plug: Start by identifying the drain plug on the bottom of the radiator. It’s usually located on the driver’s side and can be accessed from underneath the vehicle.
- Place a drain pan underneath: Position a drain pan directly under the drain plug to catch the coolant that will be released. Ensure that the drain pan is large enough to hold the entire coolant capacity of your vehicle.
- Open the drain plug: Using a socket or wrench, carefully loosen and remove the drain plug. Be cautious as the coolant may be hot and under pressure. Allow the coolant to completely drain into the pan.
- Drain the engine block: In some cases, draining the radiator alone may not completely remove all the coolant. To ensure a thorough draining process, locate the engine block drain plug, which is typically located on the side of the engine block. Loosen and remove the engine block drain plug to drain any remaining coolant.
- Dispose of the coolant safely: Once all the coolant has been drained, ensure that you dispose of it properly according to your local regulations. Coolant is toxic and harmful to the environment, so take it to a designated recycling facility or disposal center.
By following these steps, you will effectively drain the cooling system and prepare it for the next stages of the water pump replacement process. Remember to take precautions when handling coolant and dispose of it responsibly. In the next step, we’ll guide you through the process of removing the belt and pulley.
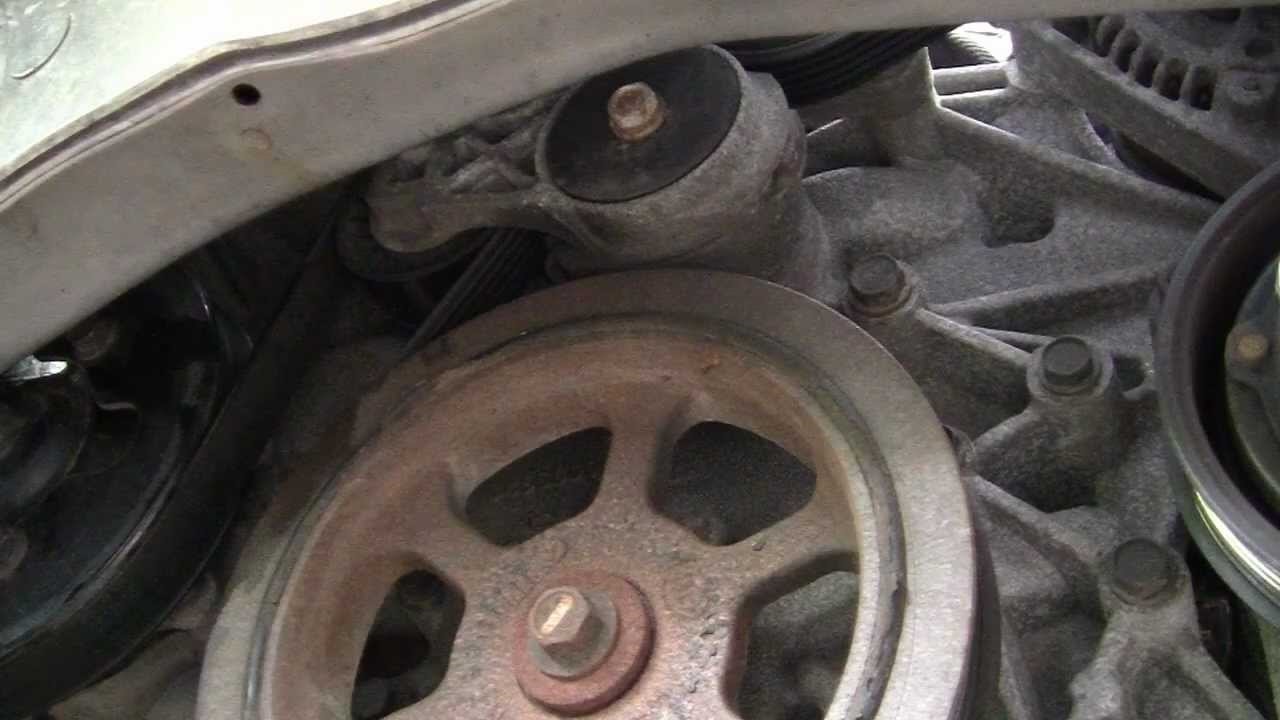
Step 3: Remove the Belt and Pulley
With the cooling system drained, you can now proceed to remove the belt and pulley to gain access to the water pump. Follow these steps:
- Locate the belt tensioner: Look for the belt tensioner, which is a spring-loaded pulley that keeps tension on the belt. It can usually be found near the top of the engine and has a square or hexagonal hole for a ratchet or breaker bar.
- Release tension on the belt: Use a ratchet or breaker bar to insert into the square or hexagonal hole on the tensioner. Rotate it counterclockwise to release tension on the belt. Hold the tensioner in this position to keep the belt loose.
- Remove the belt: With the tension released, carefully slide the belt off the pulleys. Take note of the belt’s routing before removing it to ensure proper reinstallation.
- Remove the pulley: Locate the pulley connected to the water pump. It may be held in place by bolts or a press-fit. Use the appropriate tools, such as a socket or puller, to remove the pulley from the water pump shaft.
Once you’ve completed these steps, the belt and pulley will be removed, providing you with clear access to the water pump. Take this opportunity to inspect the belt and pulley for any signs of wear or damage. If necessary, replace them before proceeding further. In the next step, we’ll guide you through the process of disconnecting hoses and electrical connections.
Read more: How To Change A Water Pump On A Chevy Truck
Step 4: Disconnect Hoses and Electrical Connections
Now that you have removed the belt and pulley, it’s time to disconnect the hoses and electrical connections connected to the water pump. Follow these steps:
- Identify the hoses: Take a moment to identify the coolant hoses connected to the water pump. There will typically be an inlet and an outlet hose.
- Loosen hose clamps: Using pliers or a screwdriver, loosen the hose clamps securing the hoses to the water pump. Slide the clamps away from the hose connections.
- Disconnect the hoses: With the clamps loosened, carefully twist and pull the hoses free from the water pump. Be prepared for some residual coolant to spill out.
- Label electrical connections: Take note of any electrical connections or sensors attached to the water pump. If necessary, label them to ensure proper reinstallation.
- Disconnect electrical connections: Depending on your vehicle, there may be electrical connections that need to be disconnected from the water pump. Gently unplug these connections and set them aside.
By following these steps, you will successfully disconnect the hoses and electrical connections from the water pump. Take care not to damage the hoses or electrical connections during this process. Now that everything is disconnected, you’re ready to move on to the next step: removing the water pump itself.
Step 5: Remove the Water Pump
Now that you have disconnected the hoses and electrical connections, it’s time to remove the water pump from your 2004 Trailblazer. Follow these steps:
- Remove mounting bolts: Locate the mounting bolts that secure the water pump to the engine block. There may be several bolts around the perimeter of the water pump. Use an appropriate socket or wrench to loosen and remove the bolts.
- Gently pry the water pump: With the mounting bolts removed, gently pry the water pump away from the engine block. If the pump feels stuck, use a rubber mallet or a piece of wood to tap it lightly. Avoid using excessive force to prevent damaging the engine block.
- Remove the old gasket: Once the water pump is freed, carefully remove the old gasket from the engine block. Take your time to ensure that no residue or pieces of the gasket remain on the block’s mating surface.
After following these steps, you should have successfully removed the water pump from your 2004 Trailblazer. Take a moment to inspect the pump for any signs of damage, such as leaks or excessive wear. If necessary, replace the water pump with a new one before proceeding to the next steps.
Now that the old water pump is out, we can move on to the next step: cleaning and preparing the area for the new water pump installation.
When changing the water pump on a 2004 Trailblazer, make sure to drain the coolant first to avoid a mess. Also, take note of the belt routing before removing it.
Step 6: Clean and Prep the Area
With the old water pump removed, it’s crucial to clean and prepare the area before installing the new water pump. Follow these steps:
- Clean the engine block surface: Use a clean shop towel or rag to thoroughly clean the mating surface of the engine block where the water pump will be installed. Remove any traces of old gasket material, debris, or dirt.
- Inspect the mounting surface: Take a moment to inspect the mounting surface of the engine block. Ensure there are no cracks, damage, or irregularities that could affect the proper sealing of the new water pump.
- Apply gasket sealant (if necessary): Check the instructions or recommendations provided with your new water pump. Some manufacturers may recommend applying a thin layer of gasket sealant to ensure a proper seal. If required, apply a small amount of sealant to the mounting surface.
- Install a new gasket: Place a new gasket onto the engine block’s mounting surface, aligning it properly with the bolt holes. Ensure that the gasket is positioned correctly and sits flat on the surface.
By performing these steps, you will ensure a clean and properly prepared surface for the new water pump installation. This will help guarantee a secure seal and prevent any leaks in the cooling system. Once you have completed cleaning and prepping the area, you are ready to move on to the next step: installing the new water pump.
Step 7: Install the New Water Pump
Now that the area is cleaned and prepped, it’s time to install the new water pump on your 2004 Trailblazer. Follow these steps:
- Position the new water pump: Carefully place the new water pump onto the engine block, aligning it with the bolt holes and the gasket. Make sure it sits flush against the mounting surface.
- Insert and tighten the mounting bolts: Begin by hand-threading the mounting bolts to ensure they are properly aligned. Once all the bolts are in place, use a socket or wrench to tighten them snugly. Be cautious not to overtighten and strip the threads.
- Reconnect electrical connections and hoses: Reattach any electrical connections and hoses that were disconnected earlier. Ensure they are properly aligned and securely attached. Slide the hose clamps back into place and tighten them to secure the hoses.
It’s important to refer to your vehicle’s manual or the manufacturer’s instructions for any specific torque specifications or guidelines for tightening the mounting bolts. Following the recommended torque settings will help ensure proper sealing and prevent any leaks.
Once you’ve installed the new water pump and reconnected the electrical connections and hoses, you’re one step closer to completing the water pump replacement process. In the next step, we’ll guide you through reconnecting the belt and pulley.
Read more: How To Change Water Pump On Toyota Camry
Step 8: Reconnect Hoses and Electrical Connections
Now that the new water pump is installed, it’s time to reconnect the hoses and electrical connections that were disconnected earlier. Follow these steps:
- Position the hoses: Carefully position the coolant hoses back onto the water pump. Ensure that they are aligned with the respective inlet and outlet ports.
- Tighten hose clamps: Slide the hose clamps back into place over the hoses and tighten them securely using pliers or a screwdriver. Check for proper alignment and ensure there are no kinks or leaks in the hoses.
- Connect electrical connections: Reattach any electrical connections that were removed earlier. Ensure they are properly aligned and securely plugged in. Be gentle when reconnecting the electrical connections to avoid any damage.
Double-check all the connections and ensure there are no loose hoses or poorly connected electrical components. This step is critical to prevent any coolant leaks or electrical malfunctions.
With the hoses and electrical connections successfully reconnected, you’re almost done with the water pump replacement process. The next step will guide you through reinstalling the belt and pulley.
Step 9: Install the Belt and Pulley
With the hoses and electrical connections securely in place, it’s time to reinstall the belt and pulley on your 2004 Trailblazer. Follow these steps:
- Position the pulley: Place the pulley back onto the water pump shaft. Ensure that it sits flush and aligned with the other pulleys in the system.
- Route the belt: Refer to your vehicle’s belt routing diagram, which is typically found on the engine compartment’s underside or your vehicle’s owner’s manual. Carefully route the belt around the pulleys according to the correct configuration.
- Tension the belt: Locate the belt tensioner and use a ratchet or breaker bar to rotate it counterclockwise. This will create enough slack in the belt to allow for easy installation. Slide the belt onto the tensioner pulley, then release the tensioner slowly, allowing it to take up the slack and apply proper tension to the belt.
It’s important to ensure that the belt is correctly seated on all pulleys and follows the designated routing. A misaligned or incorrectly routed belt can cause noise, slippage, or premature wear. Take your time and double-check the belt’s alignment before proceeding.
By following these steps, you will successfully install the belt and pulley, completing an essential component of the water pump replacement process. In the final step, we’ll guide you through refilling the cooling system.
Step 10: Refill the Cooling System
With the belt and pulley reinstalled, it’s time to refill the cooling system and ensure it’s properly topped up with coolant. Follow these steps:
- Prepare the coolant mixture: Consult your vehicle’s manual or the coolant manufacturer’s instructions to determine the proper coolant-to-water mixture ratio for your specific vehicle. Prepare the coolant mixture accordingly.
- Locate the coolant cap/reservoir: Find the coolant reservoir or radiator cap, depending on your vehicle’s configuration. Remove the cap to access the coolant system.
- Fill the coolant system: Slowly pour the prepared coolant mixture into the coolant reservoir or radiator opening, taking care to avoid any spills. Fill the system to the recommended level specified by your vehicle’s manual.
- Burp the system (if necessary): Some vehicles require a process called burping to remove air pockets from the cooling system. Refer to your vehicle’s manual to determine if this step is necessary and follow the recommended procedure.
- Monitor for leaks: Start the engine and monitor the coolant system for any leaks. Check for any signs of coolant leakage around the water pump, hoses, or connections. If you notice any leaks, address them immediately.
It’s important to use the recommended coolant type for your vehicle and follow the proper mixing ratios to ensure the optimum performance of your cooling system. Overfilling or underfilling the coolant level can lead to cooling issues or overheating.
Once you have successfully refilled the cooling system and ensured there are no leaks, you have completed the final step. Congratulations! You have successfully replaced the water pump on your 2004 Trailblazer. Double-check all connections and hoses, and take your vehicle for a test drive to confirm the proper functioning of the cooling system.
Please note that these instructions are general guidelines, and it’s important to consult your vehicle’s manual for any specific instructions or torque specifications. If you are unsure or uncomfortable with performing this repair yourself, it’s recommended to seek professional assistance.
Conclusion
Replacing the water pump on your 2004 Trailblazer may seem like a challenging task, but with the right tools, knowledge, and patience, you can successfully complete the job and save money on costly repairs. The water pump plays a vital role in the engine’s cooling system, and a worn-out or malfunctioning pump can lead to overheating and potential engine damage.
In this article, we have provided you with a step-by-step guide on how to change the water pump on a 2004 Trailblazer. We started with the preparation stage, gathering the necessary tools and materials. Then, we walked you through the process of draining the cooling system, removing the belt and pulley, disconnecting hoses and electrical connections, removing the old water pump, cleaning and prepping the area, installing the new water pump, reconnecting hoses and electrical connections, reinstalling the belt and pulley, and finally, refilling the cooling system.
Throughout each step, we highlighted the importance of paying attention to details, following proper procedures, and consulting your vehicle’s manual for specific instructions and torque specifications. We also reminded you to dispose of coolant and other waste materials responsibly and in accordance with local regulations.
By successfully completing the water pump replacement process, you have taken a significant step in maintaining the health and performance of your 2004 Trailblazer’s engine. Regular maintenance and addressing cooling system issues promptly can help prolong the life of your vehicle and prevent costly repairs down the line.
Remember, if you ever feel unsure or uncomfortable performing this repair yourself, it’s always best to seek the assistance of a professional mechanic who can ensure the job is done correctly and safely.
We hope this guide has been helpful in guiding you through the process of changing the water pump on your 2004 Trailblazer. By following these steps and exercising patience and caution, you can successfully complete the repair and get your vehicle back on the road with a properly functioning cooling system.
Frequently Asked Questions about How To Change Water Pump On 2004 Trailblazer
Was this page helpful?
At Storables.com, we guarantee accurate and reliable information. Our content, validated by Expert Board Contributors, is crafted following stringent Editorial Policies. We're committed to providing you with well-researched, expert-backed insights for all your informational needs.


0 thoughts on “How To Change Water Pump On 2004 Trailblazer”