
Articles
How To Fix Water Pump
Modified: December 7, 2023
Learn effective ways to fix your water pump with our informative articles. Get step-by-step guides and expert advice to troubleshoot and resolve common water pump issues.
(Many of the links in this article redirect to a specific reviewed product. Your purchase of these products through affiliate links helps to generate commission for Storables.com, at no extra cost. Learn more)
Introduction
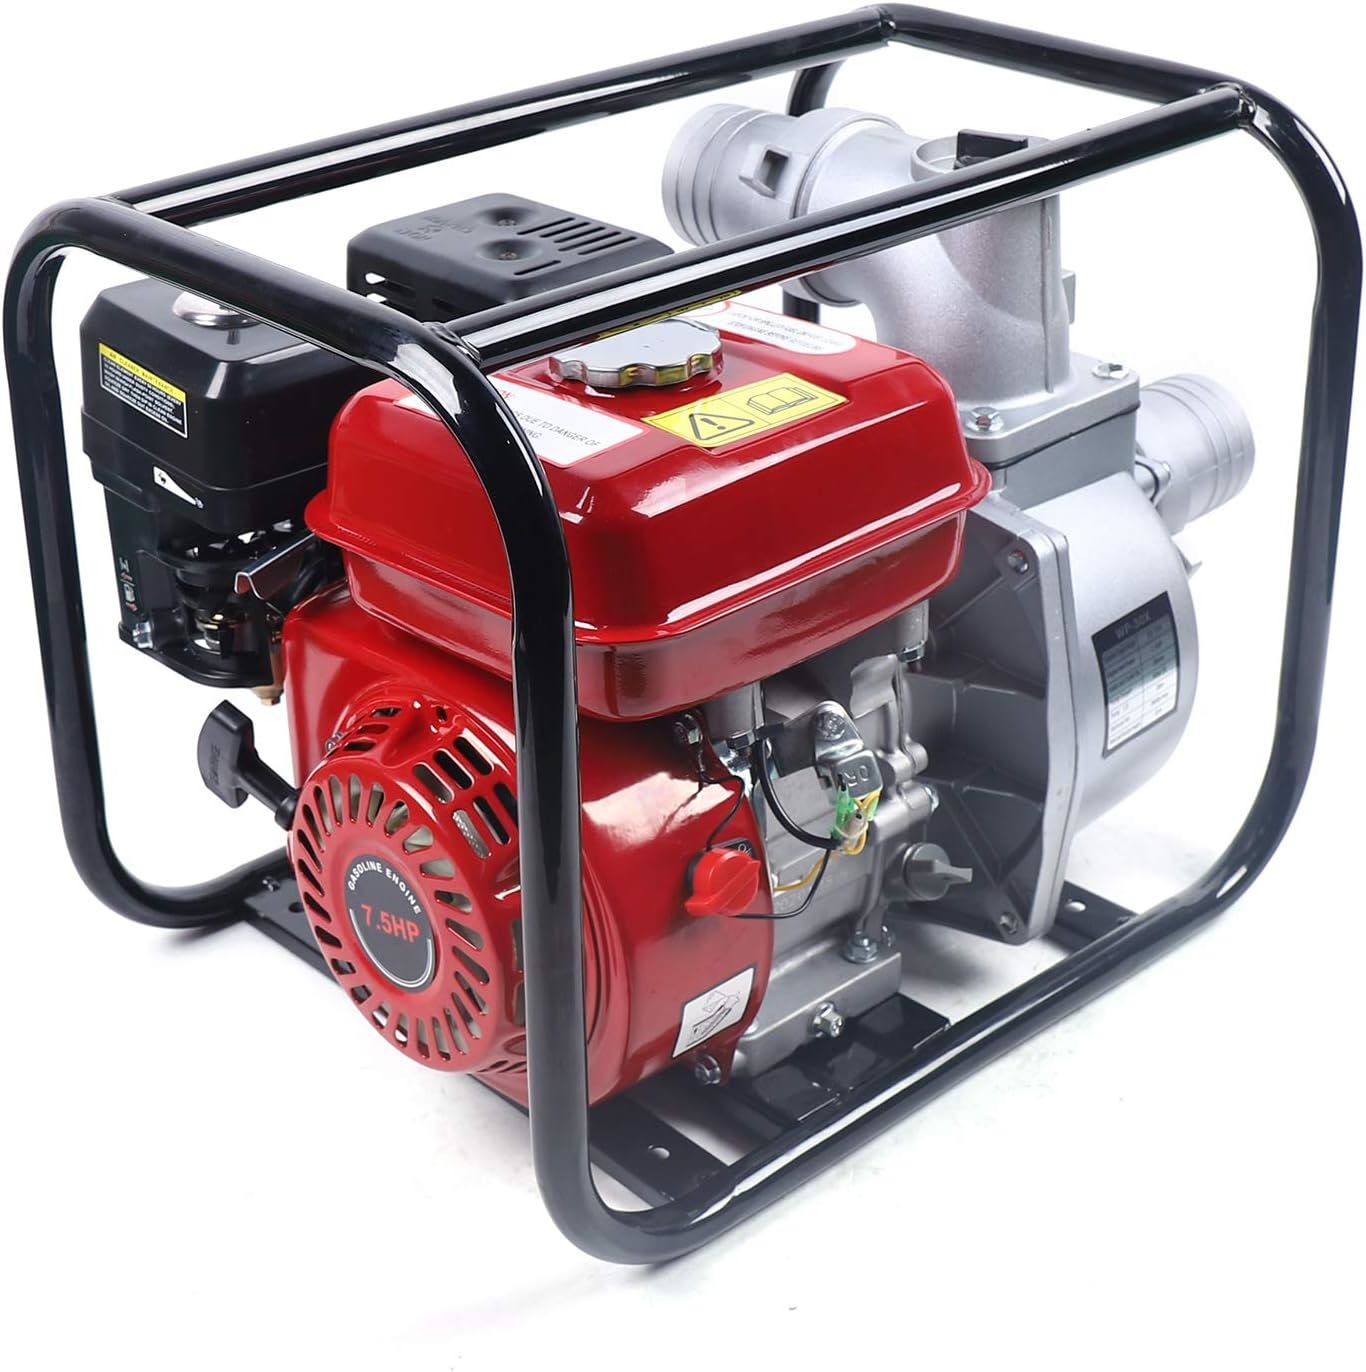
Welcome to this comprehensive guide on how to fix a water pump. Water pumps are essential components of many systems, ranging from home plumbing to automobile engines. These pumps are responsible for circulating and transferring water efficiently, ensuring the smooth operation of various appliances and machinery.
Over time, water pumps may develop issues such as leaks, decreased performance, or complete failure. The good news is that many common water pump problems can be resolved with some basic troubleshooting and repair techniques. In this article, we will walk you through a step-by-step process that will help you identify and fix issues with your water pump.
Before we begin, it’s important to note that water pump repair can involve working with electrical components and water systems. If you are uncomfortable working with these elements, it is recommended to consult a professional plumber or technician. Safety should always be the top priority when working with any type of machinery or electrical equipment.
This guide is designed to provide a general overview of the steps involved in fixing a water pump. While the specific instructions may vary depending on the type and model of your water pump, the underlying principles and techniques remain the same. Be sure to consult the manufacturer’s manual or seek professional advice if you are unsure about any aspect of the repair process.
Now that we have covered the necessary disclaimers, let’s dive into the exciting world of water pump repair. In the following sections, we will outline the step-by-step process to identify and fix common water pump problems, ensuring the efficient and reliable operation of your water pump.
Key Takeaways:
- Identifying water pump issues, gathering tools, and prioritizing safety are crucial steps in successfully repairing a water pump. Following the step-by-step process ensures efficient and reliable pump operation.
- Thorough inspection, cleaning, and replacement of faulty parts, followed by reassembly and testing, are essential for maintaining and troubleshooting water pumps. Prioritize safety and seek professional help when needed.
Read more: How To Fix A Well Water Pump
Step 1: Identify the Issue
The first step in fixing a water pump is to identify the issue. Before attempting any repairs, it’s important to understand what exactly is wrong with the pump. This will help you determine the appropriate course of action and ensure that you don’t waste time on unnecessary repairs.
Start by observing the water pump’s behavior. Is it making unusual noises? Is it leaking water? Is it failing to pump water at the desired pressure? These are common signs that there may be an issue with the pump. It’s also helpful to check the surrounding area for any visible signs of damage or malfunction.
Next, it’s essential to consider any recent changes or events that may have led to the problem. Have there been power outages or electrical surges? Has the pump been exposed to extreme temperatures or harsh weather conditions? Understanding the potential causes can provide valuable insights into the problem at hand.
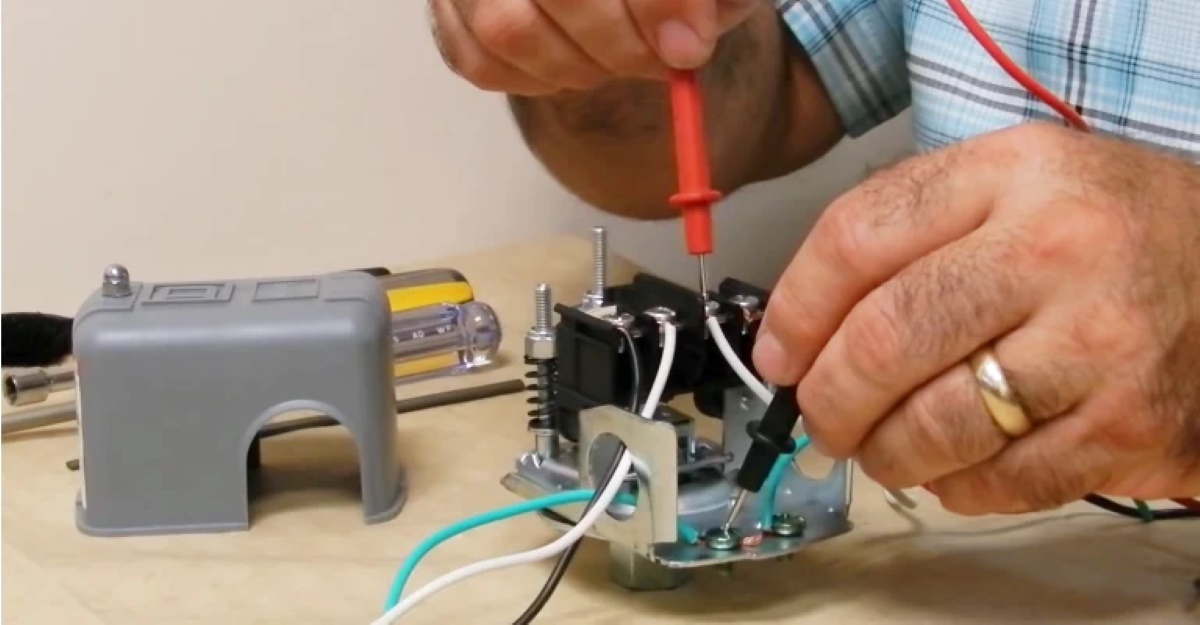
In addition to visual inspection and considering recent events, it may be necessary to conduct some diagnostic tests. For example, you can use a multimeter to check the electrical connections and ensure that power is reaching the pump. You may also need to measure the water pressure to determine if it falls within the recommended range.
It’s worth noting that some water pump issues are more straightforward to identify than others. For instance, a leaking pump is usually easy to spot, while a pump that fails to start or shuts off intermittently may require more in-depth troubleshooting.
If you are unsure about the nature of the problem or unable to identify the issue after conducting initial checks, it’s recommended to consult a professional. They have the expertise and knowledge to diagnose the problem accurately and recommend the most effective solution.
Once you have identified the issue with your water pump, it’s time to move on to the next step: gathering the necessary tools and materials for the repair process.
Step 2: Gather Necessary Tools and Materials
Now that you have identified the issue with your water pump, it’s time to gather the necessary tools and materials for the repair process. Having everything you need on hand will help ensure a smooth and efficient repair process without unnecessary delays.
The specific tools and materials you will need may vary depending on the type of water pump and the nature of the problem. However, here is a general list of items that are commonly required for water pump repairs:
- Screwdriver set: You may need both flathead and Phillips screwdrivers to remove screws and access different components of the water pump.
- Adjustable wrench: This tool will come in handy for tightening or loosening nuts or bolts.
- Pliers: A good pair of pliers can assist in gripping and manipulating small parts or connectors.
- Multimeter: This device is essential for testing electrical connections and troubleshooting any electrical issues with the water pump.
- Replacement parts: Depending on the nature of the problem, you may need to purchase specific replacement parts such as seals, gaskets, impellers, or motors. Consult the manufacturer’s manual or seek professional advice to determine the exact parts required.
- Teflon tape: This self-adhesive tape is useful for creating watertight seals when reassembling or replacing components of the water pump.
- Gloves and safety goggles: It’s always important to prioritize safety. Wearing gloves and safety goggles will protect your hands and eyes during the repair process.
Before starting the repair, ensure that you have all the necessary tools and materials readily available. This will save you time and frustration while working on the water pump.
It’s also a good idea to double-check the manufacturer’s manual or consult a professional to ensure that you have identified all the required tools and materials specific to your water pump. Different pump models may have unique requirements that are not included in this general list.
Once you have gathered all the necessary tools and materials, you are ready to proceed to the next step: turning off the power supply to the water pump.
Step 3: Turn Off Power Supply
Before you begin working on your water pump, it is crucial to turn off the power supply to ensure your safety and prevent any electrical accidents or damage. Water pumps are typically electrically powered, and working on them while they are still connected to a power source can be extremely dangerous.
To turn off the power supply, follow these steps:
- Locate the circuit breaker or the switch that controls the power to the water pump. This may be located in the main electrical panel of your home, utility room, or near the pump itself, depending on your setup.
- Identify the circuit or switch that corresponds to the water pump. It may be labeled or marked specifically, or you may need to consult your home’s electrical plan or ask a professional for assistance.
- Once you have located the correct circuit or switch, turn it off by flipping the switch to the “off” position or by pushing the circuit breaker switch to the “off” position.
After turning off the power supply, it is recommended to verify that the pump is no longer receiving electricity. You can do this by attempting to turn on the pump or using a non-contact voltage tester to check for any remaining electrical currents.
Turning off the power supply is a critical step in ensuring your safety during the repair process. It prevents any accidental shocks or electrical malfunctions while you work on the water pump.
Remember, electricity can be extremely hazardous, and it is always better to be safe than sorry. If you are unsure or uncomfortable with handling electrical components, it is advisable to seek professional help.
With the power supply successfully turned off, you are ready to move on to the next step: draining the water pump.
Step 4: Drain the Water Pump
Before you can proceed with repairing your water pump, it is essential to drain the water from the system. Draining the pump will prevent any water from causing damage or making a mess during the repair process.
Here’s how you can drain the water pump:
- Locate the drain valve or plug on the water pump. This is typically located on the bottom or side of the pump.
- Place a container or bucket beneath the drain valve or plug to catch the water as it drains out.
- Slowly open the drain valve or remove the plug, allowing the water to flow out. Be cautious of hot water or excessive pressure if the pump was recently in use.
- Let the water drain completely from the pump until no more water flows out. You may need to tilt or shake the pump gently to remove any remaining water.
It is important to note that the water drained from the pump may be hot or contain debris, so exercise caution and use appropriate protective equipment, such as gloves and safety goggles.
In some cases, the water pump may be connected to a water supply source, such as a pipe or hose. If this is the case, you may also need to turn off the water supply before draining the pump. Locate the shut-off valve connected to the water supply line and close it to prevent any additional water from entering the pump.
Once you have successfully drained the water pump and ensured that no more water is flowing out, you are ready to proceed to the next step: disconnecting the water pump.
Read more: How Much Is It To Fix A Water Pump In A Car
Step 5: Disconnect the Water Pump
Now that you have drained the water from the pump, the next step is to disconnect it from the plumbing or system it is connected to. This will allow you to have better access to the pump and perform the necessary repairs or maintenance.
Follow these steps to disconnect the water pump:
- Ensure that the power supply to the pump is still turned off.
- Identify the inlet and outlet connections of the water pump. These are the pipes or hoses that are connected to the pump.
- Using an adjustable wrench or pliers, carefully loosen the hose clamps or fittings that secure the pipes or hoses to the pump. If there are multiple connections, start by disconnecting the outlet side first.
- Gently pull the pipes or hoses away from the pump, detaching them completely. Be cautious of any residual water that may still be present in the pipes or hoses.
- Once the pipes or hoses are disconnected, place them aside in a safe location to avoid tripping or causing damage.
It’s good practice to label or take note of the pipes or hoses you have disconnected to ensure the correct reconnection later. You can use masking tape or small labels to mark which connection is the inlet and which is the outlet.
If the water pump is connected to an electrical source through a power cord, safely disconnect the power cord from the pump as well. This may involve unplugging it from an outlet or disconnecting it from a terminal box, depending on the setup.
Ensure that all connections have been completely disconnected before proceeding to the next step. This will allow you to work on the water pump with ease and without any obstructions.
Now that the water pump is disconnected, you are ready to move on to the next step: inspecting and cleaning the water pump.
Check for leaks and inspect the water pump for any signs of corrosion or damage. Replace the water pump if necessary and ensure all connections are secure.
Step 6: Inspect and Clean the Water Pump
With the water pump disconnected, it’s time to thoroughly inspect and clean the pump. This step is crucial as it allows you to identify any visible damage, clogs, or debris that may be affecting the pump’s performance.
Follow these steps to inspect and clean the water pump:
- Visually examine the exterior of the water pump for any signs of damage, such as cracks or corrosion. Pay close attention to the seals, gaskets, and fittings, as these are common areas for leakage.
- Inspect the impeller, which is a rotating part inside the pump responsible for moving the water. Look for any damage, buildup of debris, or signs of wear and tear. Clean the impeller if necessary, using a soft brush or cloth.
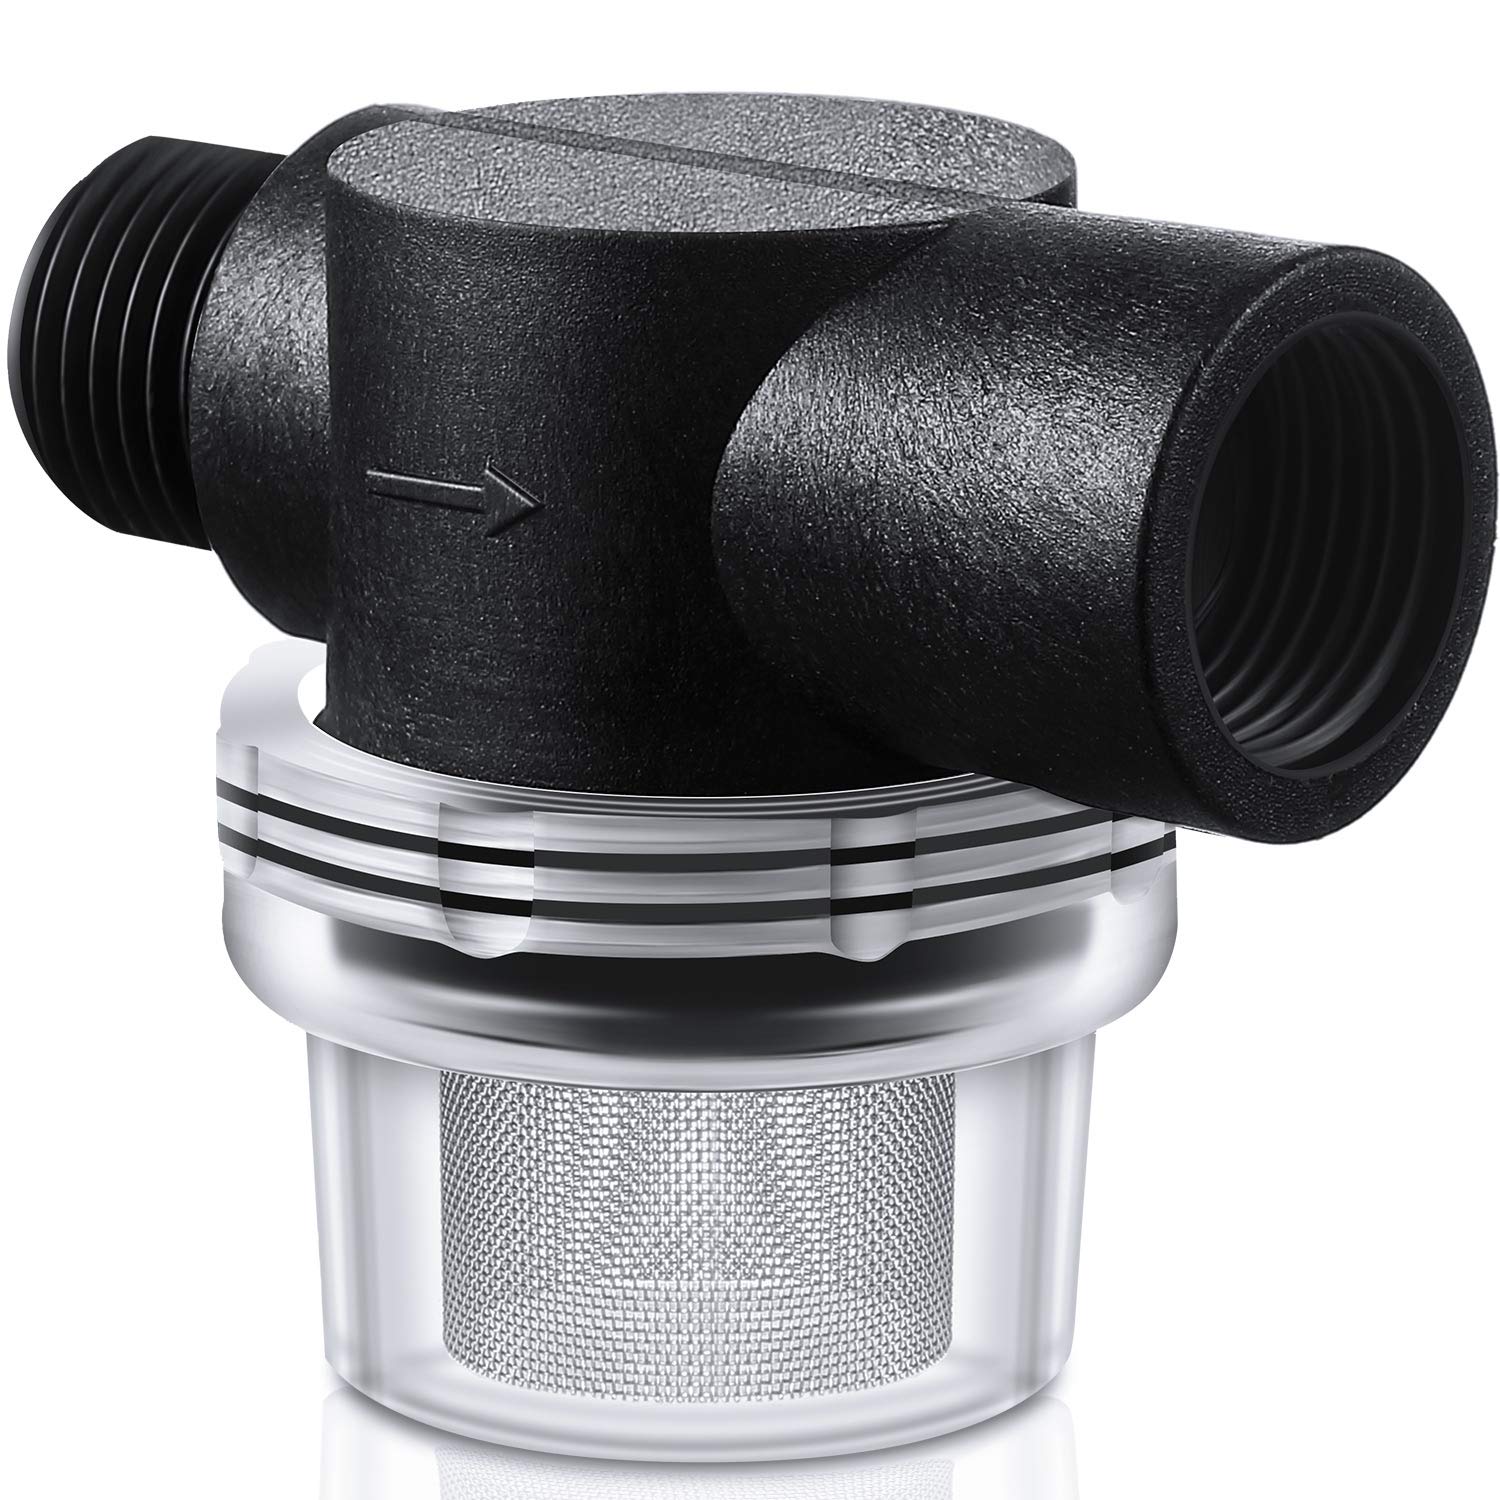
- If your water pump has a filter or strainer, remove it and clean it thoroughly. These components can get clogged with debris over time, affecting the pump’s efficiency. Rinse the filter or strainer with water to remove any accumulated dirt or particles.
- Inspect the pump’s housing or casing for any obstructions or blockages. Use a flashlight to check the interior for debris or sediment that may be affecting the pump’s performance.
- If you notice any significant damage or wear, such as a cracked housing or damaged impeller, you may need to replace the affected parts. Consult the manufacturer’s manual or seek professional advice to determine the appropriate replacement parts.
- Once you have inspected and cleaned all the necessary components, dry them thoroughly before reassembling the pump. This will prevent any moisture-related issues and ensure optimal performance.
During the inspection and cleaning process, it’s important to handle the pump and its components with care. Avoid using abrasive materials or sharp objects that could cause further damage.
By inspecting and cleaning the water pump, you not only prolong the life of the pump but also ensure that it functions efficiently once it is reassembled and connected back to the system.
With the inspection and cleaning complete, it’s time to move on to the next step: replacing any faulty parts.
Step 7: Replace Faulty Parts
After inspecting the water pump and identifying any damaged or malfunctioning parts, it’s time to proceed with replacing those faulty components. This step ensures that the pump operates at its optimal capacity and minimizes the risk of future issues.
Follow these steps to replace faulty parts in your water pump:
- Refer to the manufacturer’s manual or seek professional guidance to identify the specific replacement parts needed for your water pump. This may include seals, gaskets, impellers, motors, or other components.
- Obtain the necessary replacement parts from a reputable supplier or directly from the manufacturer. Ensure that the replacements match the specifications and requirements of your particular pump model.
- Carefully remove the damaged or faulty parts from the water pump. This may involve unscrewing screws, disconnecting wiring or connectors, or using appropriate tools as instructed by the manufacturer.
- As you remove each part, take note of its position and orientation for the proper installation of the new component. Labeling or taking pictures can help ensure accurate reassembly later.
- Install the new parts into the water pump following the manufacturer’s instructions. Pay attention to any specific guidelines regarding torque specifications, alignment, or sealing materials that need to be used.
- Tighten screws or fittings securely but be cautious not to over-tighten, as this can cause damage or leaks. Use the appropriate tools as recommended by the manufacturer.
- Reconnect any wiring or connectors that were disconnected during the replacement process. Double-check that all connections are secure and properly seated.
If you encounter any difficulties during the replacement process or are unsure about any steps, it is recommended to consult the manufacturer’s manual or seek professional assistance. Working with precision and care is essential to ensure the proper functioning of the water pump.
Once you have successfully replaced the faulty parts, it’s time to move on to the next step: reassembling and reconnecting the water pump.
Step 8: Reassemble and Reconnect the Water Pump
With the faulty parts replaced, it’s time to reassemble and reconnect the water pump. This step ensures that all the components are properly aligned and secured, allowing the pump to function effectively when it is reconnected to the system.
Follow these steps to reassemble and reconnect the water pump:
- Refer to any notes, labels, or pictures you took during the disassembly process to ensure proper orientation and positioning of the components.
- Begin by placing the newly replaced parts back into the pump housing or casing. Align them carefully, following the manufacturer’s instructions.
- Secure the parts by tightening the screws or fittings. Use the appropriate tools and torque specifications as recommended by the manufacturer. Be cautious not to over-tighten to avoid damaging the components.
- If applicable, reattach the filter or strainer to the pump, ensuring that it is properly fitted and secured in place.
- Reconnect any wiring or connectors that were disconnected during the repair process. Ensure that all connections are secure and properly seated.
- If the water pump is connected to a plumbing system with pipes or hoses, reattach them to the pump’s inlet and outlet. Use adjustable wrenches or pliers to tighten the hose clamps or fittings securely.
- Double-check all connections to ensure that they are tight and leak-free. Any loose fittings or connections can lead to water leakage or decreased pump performance.
During the reassembly process, be mindful of the order and sequence in which the components need to be installed. Following the manufacturer’s instructions and using any provided diagrams or illustrations can help ensure proper reassembly.
Once the pump is properly reassembled and all connections are secure, you are ready to move on to the next step: turning on the power supply and testing the water pump.
Read more: How To Lubricate A Water Pump
Step 9: Turn On Power Supply and Test the Water Pump
Now that you have reassembled and reconnected the water pump, it’s time to turn on the power supply and test the pump to ensure everything is functioning correctly. This step allows you to verify that the repairs and replacements were successful and that the pump is operating as intended.
Follow these steps to turn on the power supply and test the water pump:
- Ensure that all connections to the water pump are secure and properly tightened.
- Make sure that the water supply is turned on and flowing into the pump. Check that any shut-off valves or supply lines are fully open.
- Turn on the power supply to the water pump by flipping the switch or resetting the circuit breaker.
- Observe the water pump’s behavior. Listen for any unusual noises or vibrations. Pay attention to the water flow and pressure.
- If your water pump has a pressure gauge, monitor it to ensure that the pump is reaching and maintaining the desired pressure.
- Check for any signs of leakage around the pump or in the surrounding area. Look for drips, puddles, or water stains.
- If the pump appears to be functioning normally without any issues, then congratulations! Your repair and replacement efforts have been successful.
- If there are still issues or if you notice any abnormalities, it’s recommended to consult a professional or refer to the manufacturer’s troubleshooting guide for further assistance.
It is important to carefully observe the water pump during the testing phase to identify and address any potential issues as early as possible. Regular monitoring and maintenance can help prevent future problems and prolong the lifespan of the water pump.
Once you are satisfied that the water pump is working properly and there are no issues, you have successfully completed the repair process.
Congratulations on your successful repair of the water pump! By following the steps outlined in this guide, you have not only fixed the problem but also gained valuable knowledge and skills in troubleshooting and maintaining water pumps.
Remember to periodically check and maintain your water pump to ensure its long-term functionality. And as always, prioritize safety throughout the repair process.
Thank you for reading, and we hope this guide has been helpful in resolving the issue with your water pump!
Conclusion
Fixing a water pump can be a daunting task, but with the right knowledge and steps, it is entirely possible to resolve common issues that may arise. In this comprehensive guide, we walked you through a step-by-step process to identify problems, gather the necessary tools, disconnect and drain the pump, inspect and clean the components, replace faulty parts, reassemble and reconnect the pump, and finally, test its functionality. By following these steps, you can enhance the performance and longevity of your water pump.
It is important to note that while the steps provided in this guide encompass a general approach to water pump repair, the specific procedures may vary depending on the type and model of the pump. Always consult the manufacturer’s manual or seek professional advice if you are uncertain about any aspect of the repair process.
Additionally, we emphasized the importance of prioritizing safety throughout the repair process. Before embarking on any repairs, always turn off the power supply to the pump, drain the water from the system, and take the necessary precautions to protect yourself from any potential hazards.
Remember, if you are unsure or uncomfortable with repairing the water pump yourself, it’s always recommended to consult a professional plumber or technician. They have the expertise and experience to handle complex issues and ensure a safe and effective repair.
By successfully fixing your water pump, you have not only saved time and money but also gained valuable knowledge in maintaining and troubleshooting similar systems. Regular maintenance and proactive care will help prevent future problems and keep your water pump functioning optimally for years to come.
We hope this guide has provided you with the information you need to tackle water pump repairs with confidence. Remember to approach each step with care and patience, and never hesitate to seek professional assistance if needed.
Thank you for reading, and best of luck with your water pump repair endeavors!
Frequently Asked Questions about How To Fix Water Pump
Was this page helpful?
At Storables.com, we guarantee accurate and reliable information. Our content, validated by Expert Board Contributors, is crafted following stringent Editorial Policies. We're committed to providing you with well-researched, expert-backed insights for all your informational needs.


0 thoughts on “How To Fix Water Pump”