
Articles
How To Bleed A Water Pump
Modified: August 27, 2024
Learn how to properly bleed a water pump with this informative article. Step-by-step instructions and helpful tips to ensure efficient water pump operation.
(Many of the links in this article redirect to a specific reviewed product. Your purchase of these products through affiliate links helps to generate commission for Storables.com, at no extra cost. Learn more)
Introduction
Welcome to the world of water pumps! Whether you’re a seasoned DIY enthusiast or just embarking on your first DIY project, understanding how to properly bleed a water pump is an essential skill to have. A water pump plays a crucial role in ensuring the smooth flow of water in various systems, from household plumbing to irrigation systems and even car engines.
In this article, we will explore what a water pump is, the importance of bleeding it, and provide you with a step-by-step guide on how to bleed a water pump effectively. By following these instructions, you’ll be able to maintain the optimal performance of your water pump and prevent any potential issues that may arise from air pockets in the system.
So, let’s dive in and demystify the world of water pumps and the art of bleeding them.
Key Takeaways:
- Regularly bleeding your water pump is essential to maintain optimal performance, prevent air pockets, and ensure consistent water flow, pressure, and longevity of the system.
- By following a step-by-step process, including preparing, locating the bleed screw, releasing air, and testing the pump, you can effectively bleed your water pump and keep it operating smoothly.
Read more: How To Lubricate A Water Pump
What is a Water Pump?
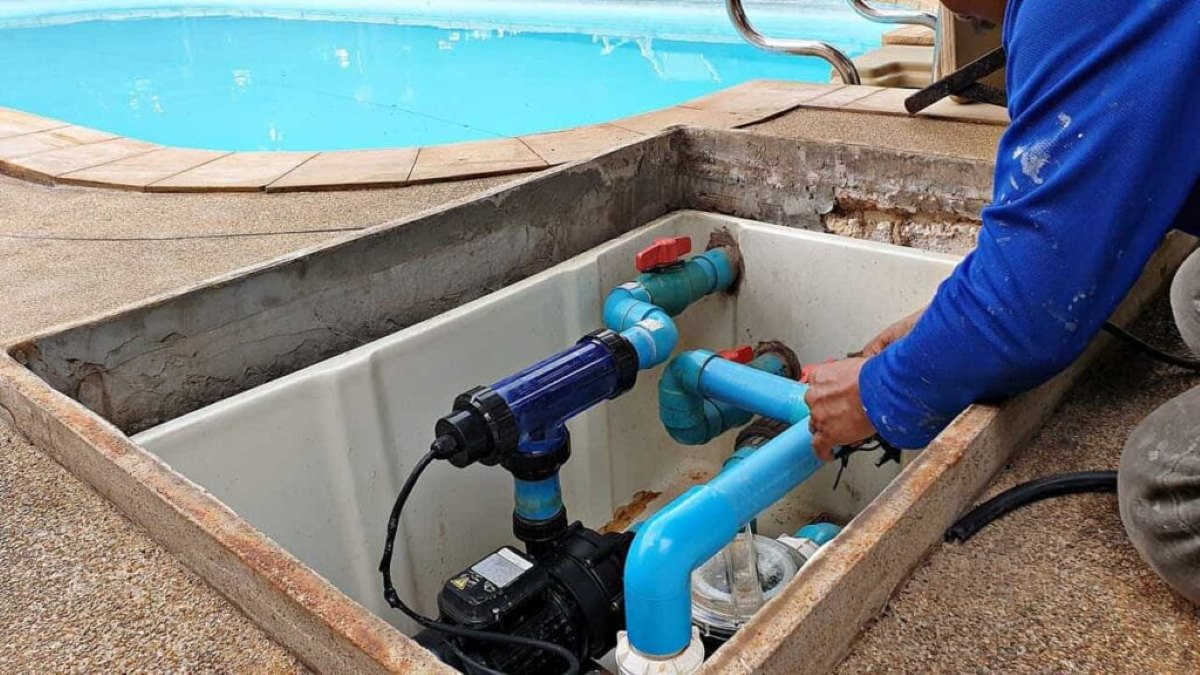
A water pump is a mechanical device designed to move water from one location to another. It is commonly used in plumbing systems, heating and cooling systems, and various industrial applications. The primary function of a water pump is to create pressure, which allows water to flow through pipes and hoses.
Water pumps come in different types and sizes, depending on the specific application. Some common types of water pumps include centrifugal pumps, submersible pumps, well pumps, and booster pumps. Each type has its own unique design and method of operation to efficiently move water.
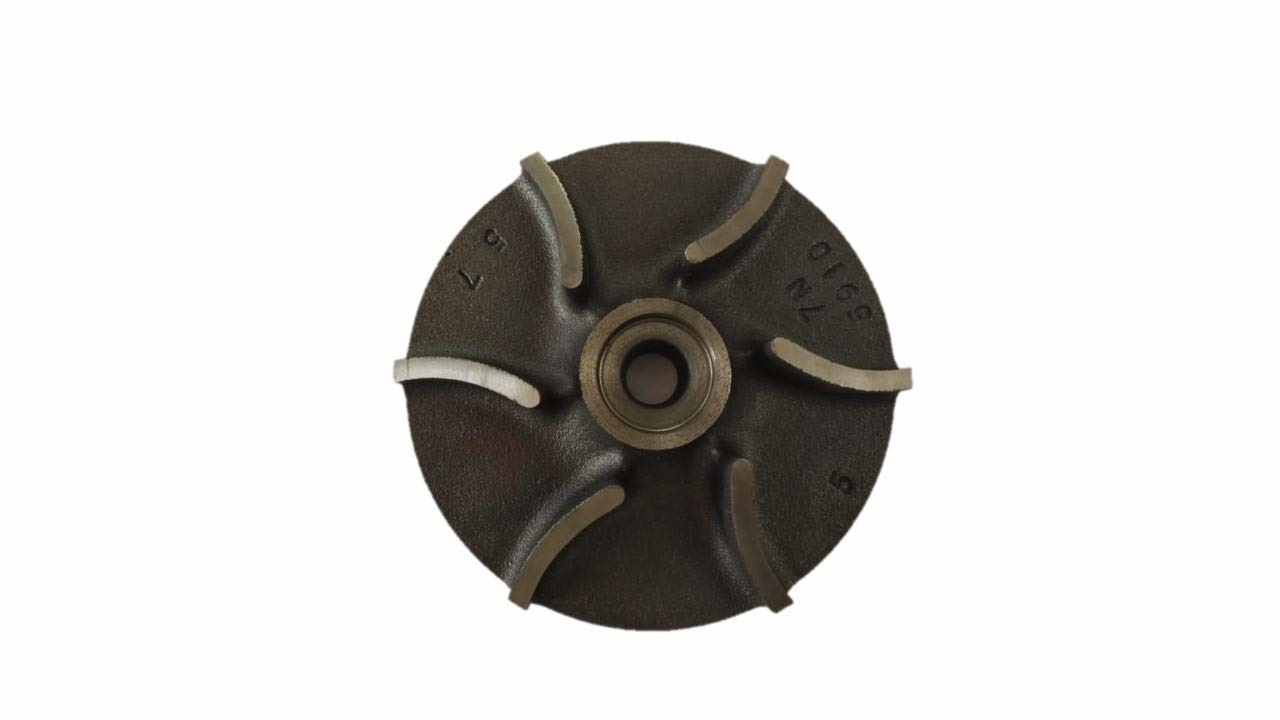
Centrifugal pumps are the most commonly used type of water pump. They utilize an impeller, which spins rapidly to create centrifugal force, pushing water outwards. The water enters the pump through an inlet, and as the impeller rotates, it forces the water towards the outlet, creating pressure and flow.
In a plumbing system, water pumps are crucial for maintaining steady water pressure in the pipes. Without a properly functioning water pump, water flow may be inadequate, leading to weak or inconsistent water pressure in faucets and showers.
In heating and cooling systems, water pumps help circulate water through the system to transfer heat or cool down the environment. They play a vital role in keeping buildings comfortable by ensuring efficient heat exchange and temperature control.
Additionally, water pumps are essential in various industrial applications, such as irrigation, firefighting, wastewater management, and construction projects. They help move large volumes of water quickly and efficiently, making them indispensable in these fields.
Overall, water pumps are critical components in many systems, enabling the efficient and reliable movement of water. By understanding how they work and how to properly maintain them, you can ensure optimal performance and longevity of your water pump.
Signs of a Bleeding Water Pump
Knowing when your water pump needs to be bled is essential for maintaining its performance and preventing potential issues. Here are some common signs that indicate a bleeding water pump:
- Noisy Operation: If you hear unusual noises coming from your water pump, such as rattling or screeching sounds, it may be a sign of air trapped in the system. The presence of air can disrupt the smooth flow of water, causing the pump to work harder and produce abnormal noises.
- Inconsistent Water Flow: If you notice fluctuations in water pressure or irregular water flow from your faucets, showerheads, or other water outlets, it could indicate air pockets in the water pump. Air can disrupt the proper flow of water, leading to inconsistent water pressure and flow rates.
- Poor Water Pressure: If you’re experiencing weak water pressure throughout your plumbing system, it may be a sign of a bleeding water pump. Air pockets can restrict the flow of water, resulting in reduced water pressure at your taps and showers.
- Water Pump Losing Prime: A water pump that frequently loses prime, meaning it fails to maintain a consistent water flow, could be a clear indication of air in the system. Air pockets can disrupt the pump’s ability to create the necessary pressure to move water efficiently.
- Visible Air Bubbles: If you see air bubbles coming from the water outlets or in the water itself, it’s a clear indicator of air trapped in the system. These air bubbles can disrupt the flow of water and affect the performance of your water pump.
If you notice any of these signs, it’s important to address them promptly by bleeding your water pump. By removing air from the system, you can restore proper water flow, improve water pressure, and prevent any further damage to the pump or associated equipment.
Next, we will discuss the tools you’ll need to effectively bleed a water pump.
Tools Needed
Before you begin the process of bleeding a water pump, it’s essential to gather the necessary tools to ensure a smooth and successful operation. Here are the tools you’ll need:
- Adjustable Wrench: An adjustable wrench is a versatile tool that will come in handy for loosening and tightening various components of the water pump, such as the bleed screw.
- Screwdriver: A screwdriver is necessary for opening and closing the bleed screw. Ensure that you have the appropriate type and size of screwdriver to fit the bleed screw on your specific water pump model.
- Rag or Towel: Having a rag or towel nearby will help you clean up any spills or excess water that may occur during the bleeding process.
- Bucket or Container: It’s a good idea to have a bucket or container available to collect any water that may escape from the bleed screw or overflow during the bleeding process.
- Pen and Paper: Keeping a pen and paper handy will allow you to jot down any important notes or observations during the bleeding process. This can be helpful for future reference or troubleshooting.
- Flashlight (optional): If your water pump is located in a dimly lit area, having a flashlight on hand can help you see the components and valves more clearly.
By gathering these tools before you begin, you’ll be prepared to efficiently bleed your water pump and address any potential issues that may arise.
Now that you have the necessary tools, let’s move on to the step-by-step process of bleeding a water pump.
Step 1: Prepare for the Process
Before you start bleeding your water pump, it’s important to take some preparatory steps to ensure a smooth and successful process. Follow these guidelines:
- Turn off the Power: Ensure that the power supply to the water pump is switched off to prevent any accidents or damage during the bleeding process.
- Gather the Tools: As mentioned earlier, gather all the necessary tools such as an adjustable wrench, screwdriver, rag or towel, bucket or container, pen and paper, and a flashlight if needed.
- Locate the Water Pump: Identify the location of your water pump. In most cases, it will be near your plumbing system’s main control panel or in the basement. Ensure you have easy access to the pump for the bleeding process.
- Shut Off the Water Supply: To avoid any water leakage or unexpected flow, shut off the water supply to the pump. This can usually be done by turning off the main water valve or valves leading to the pump.
- Read the Manufacturer’s Manual: Familiarize yourself with the manufacturer’s instructions or manual specific to your water pump model. This will give you a better understanding of the bleeding process and any unique requirements or precautions to follow.
- Inspect the Pump Connections: Take a moment to inspect the connections and fittings of the water pump. Ensure that there are no visible leaks, loose connections, or damaged components. If you notice any issues, address them before proceeding with the bleeding process.
By following these preparatory steps, you’ll set yourself up for a smooth and efficient water pump bleeding process. Once you’ve completed these preparations, you’re ready to move on to the next step: locating and opening the bleed screw.
Read more: How To Fix Water Pump
Step 2: Locate the Bleed Screw
After preparing for the bleeding process, the next step is to locate the bleed screw on your water pump. The bleed screw is a small valve or screw that allows air to be released from the system. Follow these guidelines to locate the bleed screw:
- Consult the Manual: Refer to the manufacturer’s manual or instructions specific to your water pump model. It should provide information on the location of the bleed screw.
- Inspect the Pump Housing: Carefully examine the exterior of the water pump. Look for any visible screws, valves, or fittings that may indicate the location of the bleed screw. It’s often located near the top or the highest point of the pump housing.
- Look for Markings: Some pumps may have markings or labels indicating the position of the bleed screw. These markings can be helpful in identifying the exact location without having to guess.
- Check Online Resources: If you’re unable to find the bleed screw or need additional assistance, you can search for online resources, forums, or videos specific to your water pump model. These resources may provide visual guidance or step-by-step instructions on locating the bleed screw.
- Consult a Professional: If you’re still unsure about the location of the bleed screw, or if you’re uncomfortable proceeding without expert guidance, it’s best to seek help from a professional plumber or someone experienced with water pump systems.
Once you have successfully located the bleed screw, you’re ready to move on to the next step: opening the bleed screw to release the air from the water pump system.
When bleeding a water pump, make sure to turn off the power supply and allow the pump to cool down before starting the process. This will prevent any potential accidents or injuries.
Step 3: Open the Bleed Screw
With the bleed screw located on your water pump, it’s time to move on to the next step: opening the bleed screw to release the trapped air from the system. Follow these guidelines to open the bleed screw:
- Prepare the Tools: Have your screwdriver or appropriate tool ready to open the bleed screw.
- Position a Container: Place a bucket or container beneath the bleed screw to catch any water that may be released during the bleeding process.
- Hold the Screwdriver Properly: Align the tip of the screwdriver with the notch or slot on the bleed screw. Apply steady pressure to prevent slipping or stripping of the screw.
- Turn the Screw Counterclockwise: Gently rotate the screwdriver counterclockwise to loosen the bleed screw. Be cautious not to apply excessive force, as this can damage the screw or the pump housing.
- Loosen the Bleed Screw: Continue turning the screw until it is loose enough to allow air and water to escape from the system. You may hear a hissing sound as the air is released.
- Keep the Bleed Screw Partially Open: Once the screw is loosened, leave it partially open to allow the air and water to flow out. This will enable the trapped air to escape from the system.
By carefully opening the bleed screw, you initiate the process of releasing the trapped air from the water pump system. The next step involves releasing the air and restoring the proper flow of water, which we will cover in the next section.
Step 4: Release the Air
Now that the bleed screw is open, it’s time to release the trapped air from the water pump system. Follow these guidelines to efficiently release the air:
- Monitor the Flow: As you open the bleed screw, keep an eye on the flow of water coming out of the system. Initially, there may be a mixture of air and water coming out. Gradually, the air bubbles should dissipate, and the flow should become steady.
- Allow Water to Flow: Let the water flow freely through the open bleed screw. This will help flush out any remaining air pockets present in the system. It’s important to release the air until only a continuous flow of water is observed.
- Observe the Water Pressure: Take note of any changes in water pressure as the air is released. If you notice an improvement in water pressure or a more consistent water flow, it indicates that the air pockets are being successfully eliminated.
- Collect the Discharged Water: Ensure that the discharged water is collected in the bucket or container placed beneath the bleed screw. This will prevent any water from spreading and causing a mess.
- Be Patient: Releasing air from the water pump system may take some time, especially if there is a significant amount of air trapped. It’s important to be patient and allow the process to complete naturally. Avoid rushing or forcefully trying to remove the air, as this can disrupt the process or cause damage.
- Monitor the Bleed Screw: Keep an eye on the bleed screw while the air is being released. If you notice any water leaks or if the bleed screw becomes loose, tighten it slightly to prevent further water loss. However, ensure it remains partially open to continue releasing air.
By following these steps, you will effectively release the trapped air from the water pump system. The next step involves closing the bleed screw and checking for any potential leaks, which we will cover in the next section.
Step 5: Close the Bleed Screw
After successfully releasing the trapped air from the water pump system, it’s important to close the bleed screw to prevent any further water leakage and restore the normal operation of the pump. Follow these guidelines to close the bleed screw:
- Ensure No More Air is Being Released: Before closing the bleed screw, verify that there are no more air bubbles coming out of the system. The water flow should be consistent and free of any air pockets.
- Position the Screwdriver: Use your screwdriver to gently rotate the bleed screw clockwise. Align the tip of the screwdriver with the notch or slot on the screw, while applying gentle pressure to tighten.
- Tighten the Bleed Screw: Gradually tighten the bleed screw until it is snug, but be careful not to overtighten, as it can damage the screw or the pump housing.
- Check for Water Leaks: After closing the bleed screw, visually inspect the area around it for any signs of water leakage. If you notice any leaks, use an adjustable wrench or screwdriver to slightly tighten the bleed screw further.
- Verify the Pump Operation: Once the bleed screw is securely closed, turn on the power and monitor the operation of the water pump. Check for any abnormal noises, vibrations, or irregularities in water flow. If everything appears to be functioning normally, you have successfully closed the bleed screw.
- Dispose of Discharged Water: Properly dispose of the discharged water collected in the bucket or container. You can use it for other purposes such as watering plants or flushing toilets, as long as it’s clean and uncontaminated.
By closing the bleed screw, you complete the bleeding process and ensure that the water pump is ready to operate efficiently. The next step involves checking for any potential leaks and testing the water pump, which we will cover in the next section.
Read more: How To Use A Water Pump
Step 6: Check for Leaks
After closing the bleed screw, it’s crucial to check for any potential leaks in the water pump system. This step is essential to ensure that everything is properly sealed and there are no water leaks that might cause damage or affect the performance of the pump. Follow these guidelines to check for leaks:
- Inspect the Pump Connections: Carefully examine all the connections, fittings, and valves in the water pump system. Look for any signs of water leakage, such as dripping or pooling water. Pay close attention to the area around the bleed screw, as well as the inlet and outlet connections.
- Use a Flashlight (if needed): If the pump is located in a dimly lit area, use a flashlight to help you see the components clearly and detect any potential leaks.
- Monitor the System: Turn on the power and observe the operation of the water pump for a few minutes. Keep an eye on the connections and any visible piping for any signs of water leakage during operation.
- Check for Drips or Moisture: Look for any drips, moisture, or water stains around the pump, pipes, or nearby components. Even a small amount of water can indicate a potential leak.
- Address any Leaks: If you notice any leaks, promptly address them to prevent further issues. Tighten any loose connections or valves, or replace any damaged components as necessary. It’s important to resolve any leaks before proceeding with the operation of the water pump.
By thoroughly checking for leaks, you can ensure the integrity of the water pump system. Resolving any leaks will help maintain the efficiency and prevent water wastage or damage to the surrounding area.
Once you have confirmed that there are no leaks, it’s time to move on to the final step: testing the water pump to ensure it is functioning correctly.
Step 7: Test the Water Pump
After completing the bleeding process and checking for leaks, it’s important to test the water pump to ensure that it is functioning correctly. Testing the water pump will help you verify that the air has been successfully removed, and the pump is operating at its optimal capacity. Follow these guidelines to test the water pump:
- Turn on the Power: If you had turned off the power during the bleeding process, switch it back on to allow the water pump to receive the necessary power supply.
- Open Water Fixtures: Open one or more water fixtures, such as faucets or showerheads, to allow water to flow through the system. This will help you check the water pump’s performance.
- Observe Water Flow: Pay attention to the water flow from the fixtures. The flow should be steady and consistent, with no air sputtering or interruptions. If you notice any air pockets or uneven flow, it may indicate that there is still air trapped in the system.
- Test Water Pressure: Check the water pressure from the fixtures. The pressure should be sufficient, providing a steady and strong flow of water. If you notice weak or inadequate water pressure, it could be a sign of an ongoing issue that requires further troubleshooting.
- Listen for Unusual Noises: While the water pump is in operation, listen for any unusual noises, such as rattling or clicking sounds. These noises may indicate that there are still air pockets or other problems that need attention.
- Monitor for Consistent Operation: Observe the water pump’s operation over a period of time. Ensure that it operates consistently, without any fluctuations or interruptions in water flow.
- Check for Any New Leaks: During the testing process, continue to inspect the water pump system for any new leaks that may have appeared. Address any leaks promptly to prevent further damage.
By testing the water pump, you can confirm that the bleeding process was successful and ensure the proper functioning of the pump. If you notice any issues or irregularities during the testing phase, it may be necessary to consult a professional for further assistance.
Congratulations! You have now completed the process of bleeding and testing your water pump. Regularly monitor the system for any signs of air buildup or leaks, as preventative maintenance can help prolong the life of your water pump and ensure its continued efficient operation.
Remember, always refer to the manufacturer’s instructions and guidelines specific to your water pump model for the most accurate and detailed information regarding bleeding and maintenance procedures.
Happy pumping!
Conclusion
Bleeding a water pump is a crucial maintenance task that ensures the optimal performance and longevity of the system. By taking the time to bleed your water pump, you can effectively remove trapped air and prevent issues such as reduced water flow, inconsistent water pressure, and potential damage to the pump.
Throughout this article, we explored the importance of understanding water pumps and the signs that indicate the need for bleeding. We provided a step-by-step guide on how to bleed a water pump effectively, starting from preparing for the process to testing the pump for proper operation.
Remember, always consult your water pump’s manufacturer instructions and guidelines for specific procedures and precautions tailored to your pump model.
By following these steps and regularly maintaining your water pump, you can ensure its optimal performance, extend its lifespan, and prevent unnecessary repairs or replacements.
So, don’t hesitate to take the necessary steps to bleed your water pump when needed. By doing so, you’ll keep the water flowing smoothly and maintain a well-functioning system for your plumbing, heating, irrigation, or industrial applications.
Thank you for reading, and happy pumping!
Frequently Asked Questions about How To Bleed A Water Pump
Was this page helpful?
At Storables.com, we guarantee accurate and reliable information. Our content, validated by Expert Board Contributors, is crafted following stringent Editorial Policies. We're committed to providing you with well-researched, expert-backed insights for all your informational needs.


0 thoughts on “How To Bleed A Water Pump”