Home>Articles>How To Check For Square, Level, And Plumb On Your Decking

Articles
How To Check For Square, Level, And Plumb On Your Decking
Modified: August 27, 2024
Learn how to check for square, level, and plumb on your decking in these informative articles. Essential tips for a sturdy and perfectly installed deck.
(Many of the links in this article redirect to a specific reviewed product. Your purchase of these products through affiliate links helps to generate commission for Storables.com, at no extra cost. Learn more)
Introduction
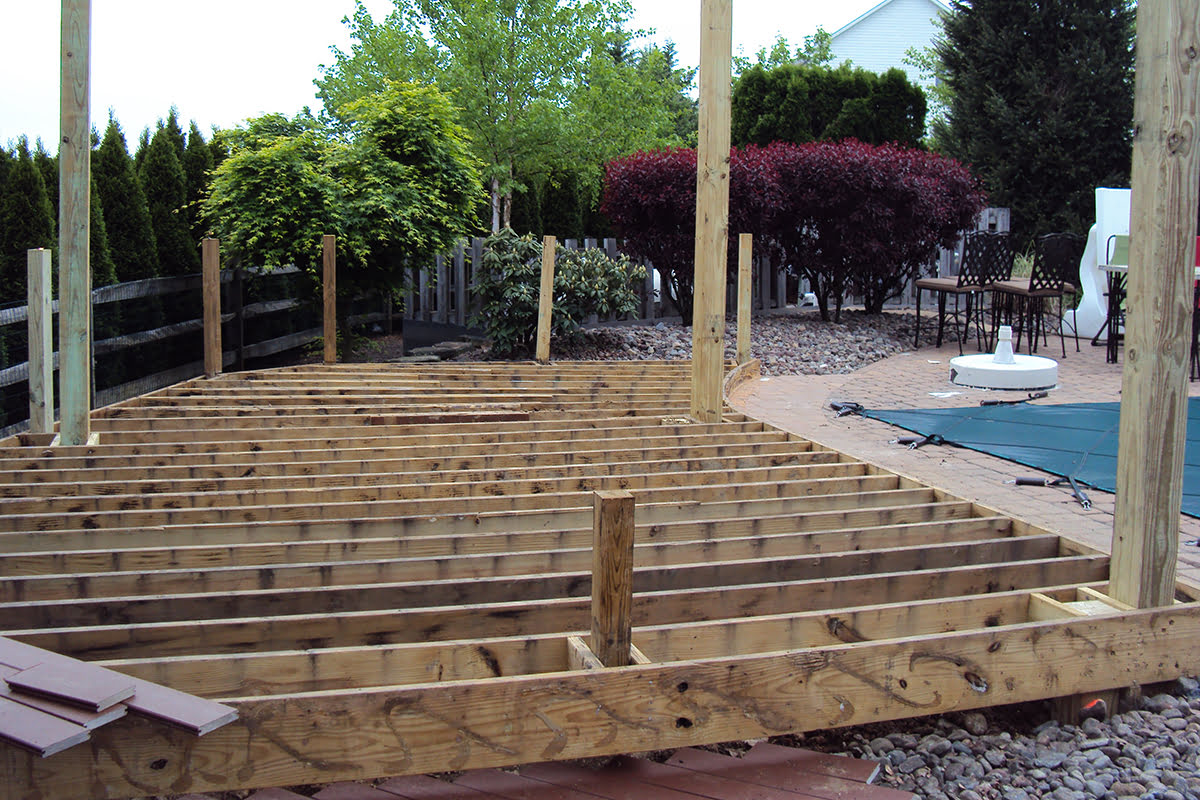
When it comes to building a sturdy and visually pleasing deck, ensuring that it is square, level, and plumb is of utmost importance. These three aspects are essential to the structural integrity and overall appearance of your decking project. Square refers to the corners and angles being perfectly 90 degrees, level ensures that the deck surface is flat and even, and plumb refers to the vertical alignment of posts and railings.
By checking for square, level, and plumb during the construction process, you can avoid potential problems such as uneven surfaces, crooked lines, and unstable structures. It will also help your deck to meet building codes and regulations, ensuring the safety of those who use it.
In this article, we will guide you through the step-by-step process of checking for square, level, and plumb on your decking project. We will also highlight the tools you will need and address common issues you may encounter along the way.
So, whether you’re a seasoned DIY enthusiast or a beginner embarking on your first decking project, follow these guidelines to ensure that your deck is square, level, and plumb.
Key Takeaways:
- Ensuring your deck is square, level, and plumb is crucial for structural integrity, safety, and visual appeal. Use the right tools and follow step-by-step checks to avoid common issues and create a well-built outdoor space.
- Regular inspections and maintenance are essential to keep your deck in top condition. Address common issues promptly and seek professional help if needed to ensure a safe, sturdy, and visually pleasing deck for years to come.
Read more: How To Check Plumbing In A House
Importance of Checking for Square, Level, and Plumb
Checking for square, level, and plumb is crucial for several reasons. Firstly, it ensures the structural strength and stability of your deck. A square deck with level and plumb components will distribute weight evenly, preventing sagging or collapsing over time. It also reduces the risk of accidents, ensuring that your deck remains safe for use.
Secondly, a properly squared deck with level and plumb components enhances the aesthetic appeal of your outdoor space. Crooked lines, uneven surfaces, and misaligned posts not only look unappealing but can also affect the overall functionality and usability of your deck. By investing time and effort into checking for square, level, and plumb, you can create a visually pleasing and inviting space for friends and family to enjoy.
In addition to structural integrity and visual appeal, checking for square, level, and plumb is necessary to meet building codes and regulations. Building authorities require decks to meet specific standards to ensure the safety of occupants. By following these guidelines, you can avoid fines, delays, or potential legal issues associated with non-compliance.
Furthermore, a properly squared deck will make the installation of additional features, such as railings and stairs, much easier. When the deck is square, level, and plumb, the installation process becomes straightforward, allowing for precise alignment and a seamless integration of these elements.
Lastly, checking for square, level, and plumb can save you time, money, and frustration in the long run. By identifying and rectifying any issues early in the construction phase, you can avoid costly repairs or even having to rebuild portions of your deck. It is always better to address any problems during the initial stages of construction to ensure the longevity and durability of your deck.
Overall, checking for square, level, and plumb is not just a technical requirement; it is essential for the safety, functionality, and visual appeal of your deck. By dedicating time to this process, you can enjoy a well-constructed, beautiful, and long-lasting outdoor space.
Tools Needed for Checking
Before you begin the process of checking for square, level, and plumb on your decking project, it’s important to gather the necessary tools. These tools will help you accurately measure and assess the alignment of various components. Here are the essential tools you will need:
- Measuring Tape: A measuring tape is crucial for taking accurate measurements of distances between points and ensuring symmetry.
- Carpenter’s Square: Also known as a framing square, a carpenter’s square is a helpful tool for checking the squareness of corners and angles. It consists of a long arm and a shorter arm that are at a 90-degree angle to each other.
- Level: A level is used to determine whether a surface or object is perfectly horizontal or vertical. A 2-foot or 4-foot level is recommended for most decking projects.
- Plumb Bob or Line Level: A plumb bob or line level is used to check vertical alignment. It helps you ensure that posts and railings are perfectly upright.
- String or Mason’s Line: String or mason’s line is useful for creating guide lines that you can use during the checking process.
- Pencil or Chalk Line: These tools will allow you to mark your measurements and guidelines on the decking material.
- Power Drill or Screwdriver: You may need these tools to adjust or secure components as you make adjustments to achieve square, level, and plumb.
- Safety Gear: Don’t forget to wear safety glasses, gloves, and any other necessary protective equipment while working on your deck.
By having these tools readily available, you will be well-prepared to accurately measure and assess the squareness, levelness, and plumbness of your decking project.
Step 1: Checking for Square
The first step in ensuring that your deck is square involves checking the corners and angles to ensure they are perfectly 90 degrees. Here’s how to do it:
- Start by marking a reference line along the outside edge of one of the deck boards. This line will serve as a guide for measuring and checking the squareness of the deck.
- Measure diagonally from one corner of the deck to the opposite corner. Use a measuring tape and take note of the measurement.
- Next, measure the other diagonal from the opposite corners of the deck and record the measurement.
- If the two diagonal measurements are equal, your deck is square. If they differ, your deck is not square, and adjustments need to be made.
- To square the deck, gently tap the corners that need adjustment with a hammer or rubber mallet to align them properly. A carpenter’s square can be used to verify the 90-degree angles.
- Continue checking for squareness by measuring and adjusting the other corners as necessary. Remember to use the reference line you marked earlier to guide your measurements.
- Once all corners are square, secure the deck boards and framing materials in place using screws or nails.
Checking for square is a crucial step to ensure the stability and aesthetic appeal of your deck. Taking the time to make adjustments and ensure that all corners are perfectly 90 degrees will result in a well-built and visually pleasing end product.
Use a carpenter’s square to check for square, a level to check for level, and a plumb bob to check for plumb on your decking. This will ensure a sturdy and well-built deck.
Step 2: Checking for Level
Checking for level is an important step in ensuring that your deck surface is flat and even. Here’s how to check for level:
- Start by selecting a reference point on your deck. This can be a post, a corner, or any fixed point that you can easily measure from.
- Place a level on top of the reference point and ensure that it is fully in contact with the surface.
- While keeping the level in place, observe the bubble in the level. If the bubble is centered between the two lines, it means that the surface is level. If the bubble is off-center, adjustments are needed.
- To adjust for levelness, use shims or adjust the supporting posts or beams until the bubble is centered.
- Continue checking the levelness of the rest of the deck surface by moving the level to different areas and repeating the process.
- Make any necessary adjustments to ensure that the entire deck surface is level. This may involve adding or removing shims, adjusting post heights, or sanding down high spots.
- Once the deck surface is level, secure the decking material in place, ensuring that it remains level during installation.
Checking for level is essential to prevent water pooling, uneven surfaces, and potential tripping hazards on your deck. A level deck will also give a polished and professional appearance to your outdoor space.
Note: If your deck has multiple levels or tiers, it is important to check for levelness on each individual level, as well as the overall deck structure.
Read more: How To Check For Leaks In Plumbing
Step 3: Checking for Plumb
Checking for plumb ensures that your posts and railings are perfectly vertical, providing stability and a polished look to your deck. Here’s how to check for plumb:
- Select a reference post or railing to begin the plumb checking process.
- Hold a plumb bob or line level against the reference post or railing, allowing it to hang freely.
- Observe the position of the bob or bubble. If it aligns perfectly with the center of the marking on the level, the post or railing is plumb. If not, adjustments are needed.
- To adjust for plumbness, gently tap or nudge the post or railing until the bob or bubble aligns with the center marking.
- Continue checking the plumbness of the remaining posts and railings using the same method.
- Make any necessary adjustments to ensure that all posts and railings are plumb, using a level or plumb bob as a guide.
- Once all posts and railings are plumb, secure them in place with appropriate brackets, screws, or connectors.
Checking for plumb ensures the overall stability and safety of your deck’s structural components. Properly aligned posts and railings not only enhance the visual appeal but also provide a secure and reliable framework for your deck.
Remember to periodically recheck the plumbness of your deck’s posts and railings, especially after any significant changes or movements.
Common Issues and Troubleshooting
During the process of checking for square, level, and plumb on your decking project, you may encounter some common issues. Here are a few of them, along with suggested troubleshooting solutions:
- Uneven or warped deck boards: If you notice that your deck boards are uneven or warped, it can impact the overall levelness of the surface. In this case, consider replacing the affected boards or using shims to create a level surface.
- Inaccurate measurements: It’s important to ensure accurate measurements when checking for squareness, levelness, and plumb. Double-check your measurements and use high-quality measuring tools to avoid any discrepancies or errors.
- Shifting or settling of the deck structure: Over time, the deck structure may shift or settle, causing misalignment. To resolve this issue, ensure proper footing and support for the posts and consider reinforcing the foundation if necessary.
- Insufficient post support: If your deck posts are not adequately supported, they may lean or shift over time. Make sure that the posts are properly secured with appropriate footing, brackets, or cement to ensure stability and alignment.
- Severe unevenness or instability: In some cases, severe unevenness or instability may require professional assistance. If you’re experiencing significant issues with your deck’s squareness, levelness, or plumbness, contacting an experienced contractor or deck builder can help resolve the problem effectively.
Remember, it’s crucial to address any issues promptly to ensure the safety and durability of your deck. Regular inspections and maintenance can help identify and resolve problems before they worsen.
Conclusion
Checking for square, level, and plumb is an essential part of building a structurally sound and aesthetically pleasing deck. By ensuring that your deck is square, level, and plumb, you will not only create a safe and sturdy outdoor space but also enhance its visual appeal.
Throughout this article, we have discussed the importance of checking for square, level, and plumb, the tools needed for the process, and the step-by-step instructions to carry out each check. By following these guidelines, you can avoid common issues such as uneven surfaces, misaligned components, and potential structural problems.
Taking the time to check for square, level, and plumb during the construction process will save you time, money, and frustration in the long run. It will result in a deck that meets building codes and regulations, provides a stable and level surface for activities, and looks visually pleasing.
Remember to conduct regular inspections and perform maintenance as needed to ensure that your deck remains square, level, and plumb over time. Additionally, consider seeking professional assistance if you encounter severe issues or are unsure about the proper course of action.
So, whether you’re a DIY enthusiast or working with a contractor, always prioritize checking for square, level, and plumb to create a deck that is not only functional and durable but also a beautiful addition to your outdoor living space.
Frequently Asked Questions about How To Check For Square, Level, And Plumb On Your Decking
Was this page helpful?
At Storables.com, we guarantee accurate and reliable information. Our content, validated by Expert Board Contributors, is crafted following stringent Editorial Policies. We're committed to providing you with well-researched, expert-backed insights for all your informational needs.






0 thoughts on “How To Check For Square, Level, And Plumb On Your Decking”