Home>Furniture>Outdoor Furniture>How To Put Up Your Decking
Outdoor Furniture
How To Put Up Your Decking
Modified: August 27, 2024
Discover the step-by-step process of putting up your decking with our comprehensive guide. Create the perfect outdoor oasis with our tips and techniques for designing and arranging your outdoor furniture.
(Many of the links in this article redirect to a specific reviewed product. Your purchase of these products through affiliate links helps to generate commission for Storables.com, at no extra cost. Learn more)
Introduction
Welcome to your complete guide on how to put up your decking! If you’re looking to enhance your outdoor living space with a functional and beautiful addition, building a deck is a fantastic option. Whether you’re envisioning a cozy spot for gathering with friends and family or a peaceful retreat to enjoy the outdoors, a well-crafted deck can transform your backyard into a sanctuary.
Before you dig into this DIY project, it’s essential to familiarize yourself with the necessary materials and tools you’ll need. Having a clear understanding of each step in the process will ensure a smooth construction process and a finished deck that you can be proud of. So grab your safety gear and let’s get started!
Key Takeaways:
- Building a deck requires careful planning, precise measurements, and the right materials and tools. Following the steps in this guide will help you create a sturdy and beautiful outdoor space for relaxation and enjoyment.
- After completing your deck, remember to maintain it regularly for longevity and safety. Add personal touches like furniture, lighting, and decorations to create a cozy and inviting outdoor oasis for gatherings and relaxation.
Read more: How To Put Decking On Grass
Materials and Tools Needed
Before beginning any construction project, it’s crucial to have all the necessary materials and tools on hand. Here’s a list of what you’ll need to put up your decking:
- Pressure-treated lumber or composite decking boards
- Support beams and joists
- Concrete footings or deck blocks
- Galvanized deck screws or hidden fasteners
- Hammer and drill
- Tape measure and level
- Saw or miter saw
- Clamps
- Safety goggles and gloves
- Deck sealer or stain
Now that you have all the necessary materials and tools, let’s move on to the first step of putting up your decking.
Key Takeaways:
- Building a deck requires careful planning, precise measurements, and the right materials and tools. Following the steps in this guide will help you create a sturdy and beautiful outdoor space for relaxation and enjoyment.
- After completing your deck, remember to maintain it regularly for longevity and safety. Add personal touches like furniture, lighting, and decorations to create a cozy and inviting outdoor oasis for gatherings and relaxation.
Read more: How To Put Decking On Grass
Materials and Tools Needed
Before beginning any construction project, it’s crucial to have all the necessary materials and tools on hand. Here’s a list of what you’ll need to put up your decking:
- Pressure-treated lumber or composite decking boards: Choose the type of decking material that suits your preferences and budget. Pressure-treated lumber is a popular choice for its durability, while composite decking offers a low-maintenance and eco-friendly option.
- Support beams and joists: These structural elements will provide the framework for your deck. Opt for pressure-treated lumber that can withstand the outdoor elements and support the weight of the decking boards.
- Concrete footings or deck blocks: These will serve as the foundation for your deck. The type of foundation you choose will depend on the soil conditions in your area and the size of your deck.
- Galvanized deck screws or hidden fasteners: These will be used to secure the decking boards to the support structure. Galvanized screws are resistant to rust and corrosion, ensuring the longevity of your deck.
- Hammer and drill: These tools will be indispensable during the construction process. A hammer will be used for nailing and a drill for making holes and driving screws.
- Tape measure and level: Accurate measurements and a level surface are essential for a properly constructed deck. These tools will help you ensure that everything is aligned and balanced.
- Saw or miter saw: You’ll need a saw to cut the decking boards, support beams, and joists to the desired dimensions. A miter saw will provide precise and angled cuts.
- Clamps: Clamps will come in handy when joining boards, ensuring a tight and secure fit.
- Safety goggles and gloves: Protecting your eyes and hands is essential when working with tools and materials. Safety goggles will shield your eyes from debris, while gloves will provide protection and a better grip.
- Deck sealer or stain: To protect your deck from weathering and enhance its appearance, consider applying a deck sealer or stain. This will help prolong the life of your deck and maintain its aesthetic appeal.
Now that you have all the necessary materials and tools, you’re ready to move on to the next step of putting up your decking.
Step 1: Preparing the Area
Before you start building your deck, it’s important to properly prepare the area where it will be located. Follow these steps to ensure a solid foundation and a level surface:
- Check local building codes: Before you begin any construction, familiarize yourself with your local building codes and obtain any necessary permits. Building codes may dictate requirements for setbacks, railing heights, and other specifications.
- Clear the area: Remove any existing vegetation, rocks, or debris from the area where your deck will be located. This will provide a clean and level surface for construction.
- Mark the layout: Use stakes and string to outline the shape and dimensions of your deck. This will help you visualize the space and make any adjustments before construction begins.
- Excavate the area: Dig holes for the concrete footings or prepare the ground for deck blocks, following the specifications provided in your local building codes. The depth and diameter of the holes will depend on the size and height of your deck.
- Compact the soil: After excavating, use a tamper or plate compactor to compact the soil in the excavation area. This will provide a firm and stable base for your deck.
- Install the footings or deck blocks: Place the concrete footings or deck blocks in the excavated holes. Follow the manufacturer’s instructions to ensure they are level and properly positioned.
- Attach ledger board (if applicable): If you plan on attaching your deck to the house, install a ledger board along the exterior wall. This board will provide additional support and a seamless connection between the deck and the house.
- Check the level: Use a level to ensure that the ground is level and that the footings or deck blocks are at the correct height. Make any adjustments as necessary.
By properly preparing the area, you’ll create a stable foundation for your deck and set the stage for the rest of the construction process. Once you’ve completed these steps, you’re ready to move on to building the support structure.
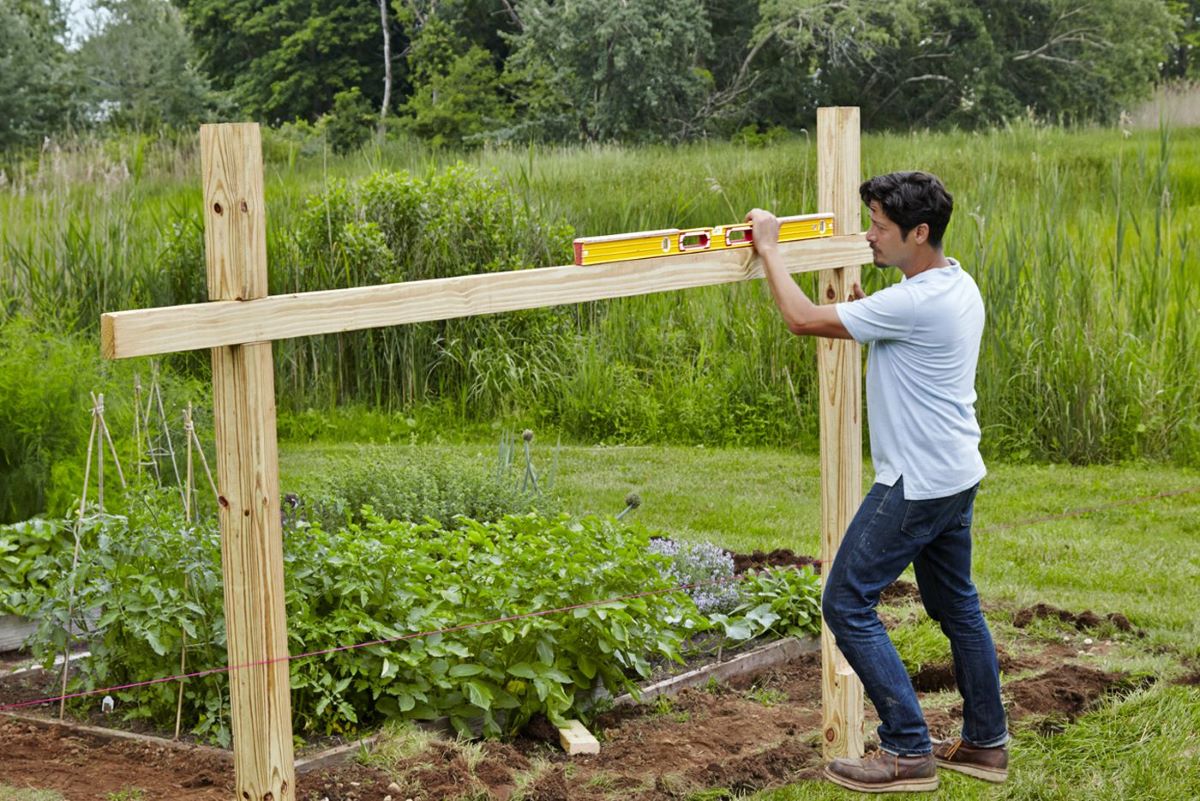
Step 2: Building the Support Structure
With the area prepared, it’s time to start building the support structure for your deck. This step involves constructing the framework that will provide stability and support for the decking boards. Follow these steps to build the support structure:
- Measure and cut the support beams: Measure and cut the pressure-treated lumber into the appropriate lengths for the support beams. These beams will run perpendicular to the ledger board (if applicable) and provide the primary structural support for your deck.
- Attach the support beams: Secure the support beams to the ledger board (if applicable) or directly to the posts or footings using galvanized deck screws. Use a level to ensure that the beams are level and properly aligned.
- Install the joists: Measure and cut pressure-treated lumber to the appropriate lengths for the joists. These joists will run parallel to the support beams and provide additional structural support for the decking boards. Space the joists according to local building codes, typically 16 inches on center.
- Secure the joists: Attach the joists to the support beams using joist hangers or galvanized deck screws. Ensure that the joists are level and evenly spaced.
- Install blocking (optional): Adding blocking between the joists can help prevent the deck from sagging over time. Cut pressure-treated lumber to the appropriate lengths and install the blocking between the joists at regular intervals.
- Double-check the level: Use a level to ensure that the support beams and joists are level and properly aligned. Make any necessary adjustments before moving on to the next step.
Building a solid support structure is essential for the stability and longevity of your deck. By following these steps, you’ll create a sturdy framework that will serve as the foundation for the deck boards. Once the support structure is complete, you’re ready to move on to the next step: installing the deck boards.
Before putting up your decking, make sure to properly prepare the area by clearing any debris and leveling the ground. This will ensure a stable and even surface for your decking to be installed on.
Read more: How To Put Up A Backsplash
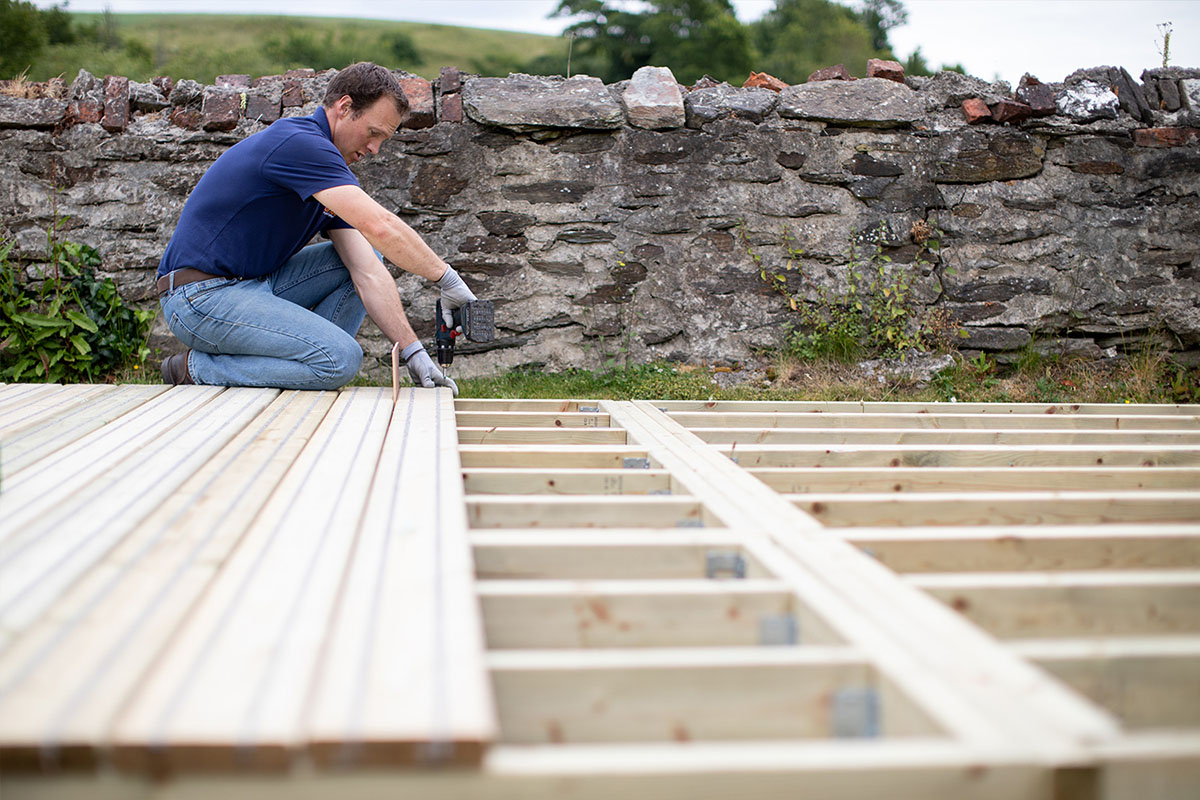
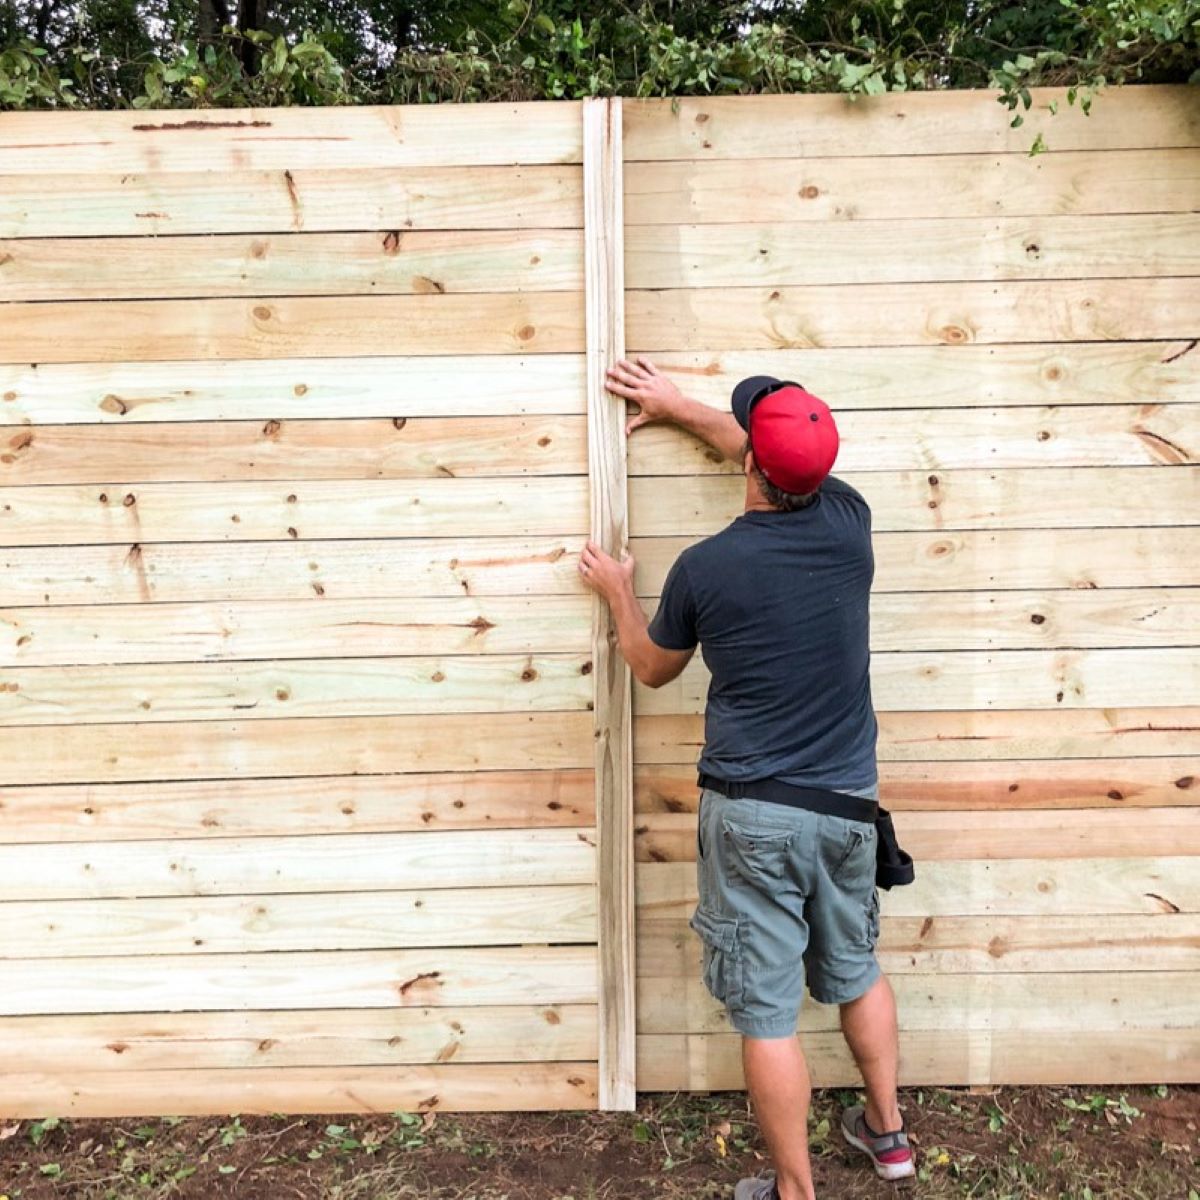
Step 3: Installing the Deck Boards
Now that you have built the support structure for your deck, it’s time to install the deck boards. This step will bring your project to life, as the deck boards will create the surface for you to walk on and enjoy. Follow these steps to install the deck boards:
- Prepare the deck boards: Measure and cut the decking boards to the desired length, leaving a small gap between each board for expansion and drainage. Be sure to use pressure-treated lumber or composite decking boards that are suitable for outdoor use.
- Start from one end: Begin installing the first deck board at one end of the deck, ensuring that it is flush with the outer edge of the support structure. Use galvanized deck screws or hidden fasteners to attach the board securely.
- Continue with the next boards: Install the subsequent deck boards, making sure they are aligned and evenly spaced. Use a spacer, such as a nail or small piece of wood, to maintain a consistent gap between each board.
- Trim the final board: Measure and cut the final deck board to fit the remaining space at the other end of the deck. Ensure that it is flush with the outer edge of the support structure.
- Check for level: Periodically check that the deck boards are level as you install them. Use a level or straight edge to ensure that the boards are even and not sloping.
- Secure the boards: Once all the deck boards are installed, go back and secure them more securely with additional screws or hidden fasteners, ensuring they are firmly attached to the support structure.
As you install the deck boards, take note of the pattern and orientation you desire. Align the boards in a way that suits your aesthetic preferences, whether it’s a traditional parallel pattern or a more creative herringbone or diagonal layout.
Remember to take your time during this step, ensuring that each deck board is securely installed and properly aligned. When done correctly, this will result in a visually appealing and functional deck surface.
With the deck boards installed, you’re one step closer to completing your deck project. The next step is to secure the decking and make any necessary adjustments. Read on to learn how!
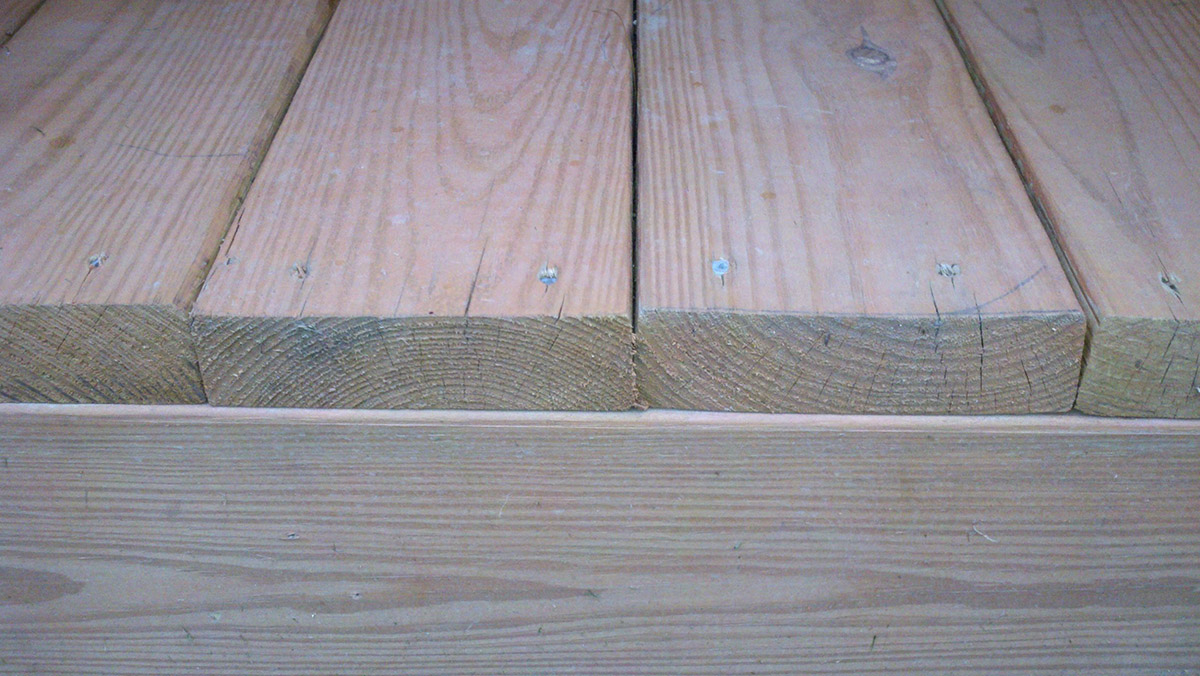
Step 4: Securing the Decking
After installing the deck boards, it’s crucial to secure them properly to ensure a safe and sturdy deck. This step involves fastening the decking boards securely to the support structure. Follow these steps to securely fasten the decking:
- Choose the appropriate fasteners: Depending on the type of decking material you’re using, you can choose between galvanized deck screws or hidden fasteners. Galvanized screws are a reliable option for pressure-treated lumber, while hidden fasteners provide a cleaner look for composite decking.
- Pre-drill the holes: If you’re using galvanized screws, pre-drill pilot holes to prevent the decking boards from splitting. The size of the pilot hole should be slightly smaller than the diameter of the screws.
- Secure the decking boards: Starting from one end of the deck, use a drill or screwdriver to drive the screws or insert the hidden fasteners into the pre-drilled holes. Place the fasteners at regular intervals, according to the manufacturer’s recommendations, ensuring that each board is securely fastened to the support structure.
- Check for any protruding fasteners: After securing the decking boards, inspect the surface of the deck to ensure there are no screws or fasteners sticking out. This will help prevent any tripping hazards or potential injuries.
As you secure the decking, pay attention to the alignment and spacing between the boards. Ensure that they are evenly spaced and that the gaps between them are consistent. This will not only improve the aesthetic appeal of your deck but also promote proper drainage and prevent water from pooling on the surface.
Don’t rush through this step, as it’s crucial to have each deck board securely fastened to the support structure. Taking the time to properly secure the decking will result in a durable and long-lasting deck that you can enjoy for years to come.
Once you have secured the decking, it’s time to add the finishing touches to complete your deck. Read on for the next step!
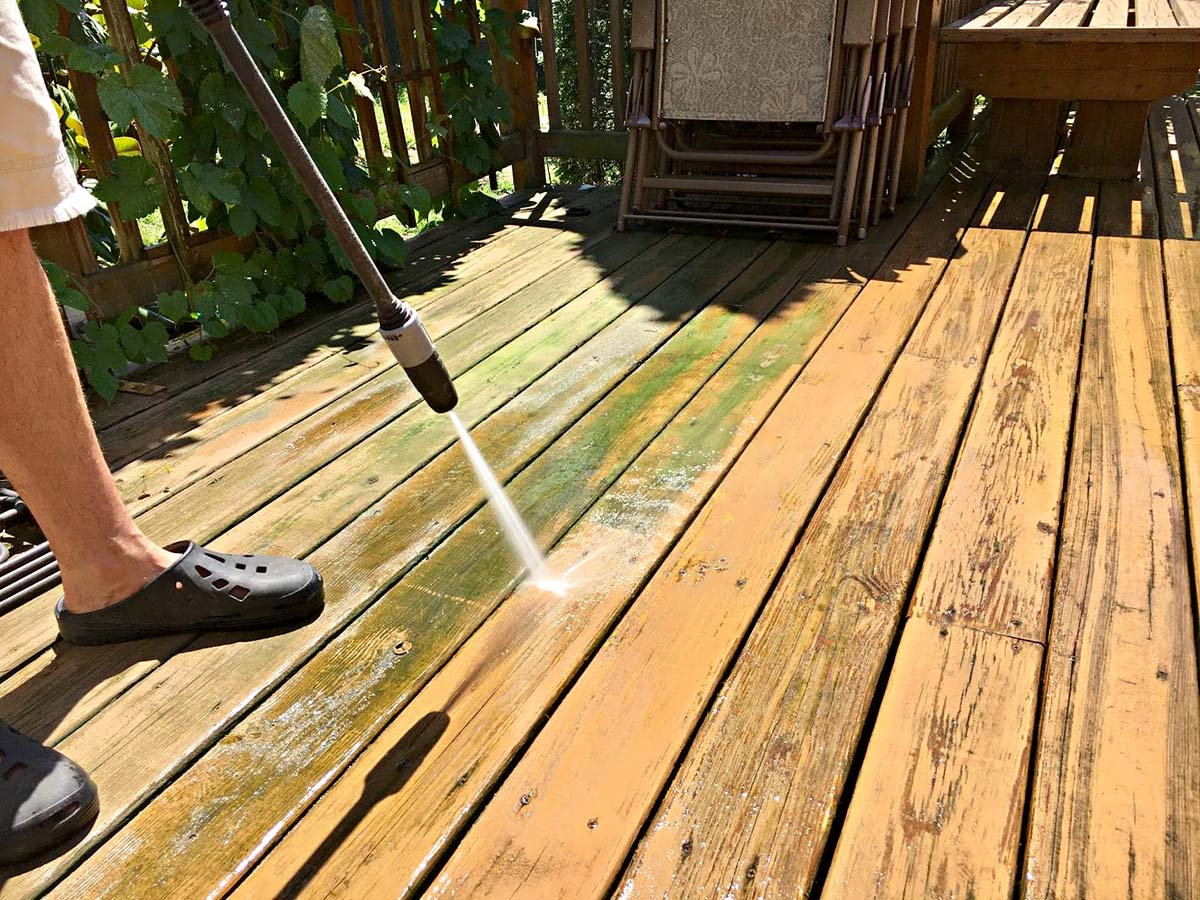
Step 5: Adding Finishing Touches
With the decking securely in place, it’s time to put the finishing touches on your deck to give it the final polish and enhance its overall appearance. Follow these steps to complete your deck:
- Clean the deck: Before applying any finishes, thoroughly clean the deck to remove any dirt, debris, or construction residues. Use a deck cleaner or a mixture of mild soap and water, along with a stiff brush or power washer.
- Apply a deck sealer or stain: Protect your deck from the elements and enhance its natural beauty by applying a deck sealer or stain. Choose a product that is specifically formulated for outdoor use and follow the manufacturer’s instructions for application.
- Consider adding railing: Depending on the height of your deck and local building codes, you may need to install railings for safety. Choose a railing style and material that complements your deck design and install it securely to the support structure.
- Add post caps and decorative elements: Add post caps to the tops of the railing posts for a decorative touch and extra protection. Consider incorporating other decorative elements, such as solar lights or planters, to further enhance the visual appeal of your deck.
- Furnish your deck: Complete your deck by adding furniture, such as outdoor seating, tables, and umbrellas, to create a comfortable and inviting space. Choose durable, weather-resistant materials that can withstand outdoor conditions.
- Create a cozy ambiance: Set the mood by adding outdoor lighting, such as string lights or lanterns, to create a warm and inviting atmosphere. Adding plants, potted flowers, and other decorative elements can also enhance the ambiance of your deck.
By adding these finishing touches, you’ll transform your deck into a functional and inviting outdoor living space. Take your time to select the right finishes and accessories that suit your personal style and make your deck a comfortable extension of your home.
Congratulations! You have successfully completed all the steps to put up your decking. Now, it’s time to sit back, relax, and enjoy your newly constructed deck.
Remember to regularly inspect and maintain your deck to ensure its longevity and safety. Regular cleaning, resealing, and repairs will help keep your deck in excellent condition for years to come.
We hope this guide has been helpful in guiding you through the process of putting up your decking. Enjoy your outdoor oasis!
Conclusion
Congratulations on completing your deck-building project! By following the steps outlined in this guide, you have successfully put up your decking and created a beautiful and functional outdoor space. Your deck will serve as a gathering spot for friends and family, a place to relax and unwind, and an extension of your home’s living area.
Throughout the process, you have learned how to properly prepare the area, build a solid support structure, install the deck boards, secure the decking, and add those finishing touches that personalize and enhance your deck’s appearance. By paying attention to detail and taking your time, you have created a deck that is not only visually appealing but also safe and sturdy.
Remember to regularly maintain and inspect your deck to ensure its longevity. Cleaning, resealing, and making any necessary repairs will help your deck withstand the elements and continue to provide enjoyment for years to come.
As you spend time on your deck, don’t forget to relax and appreciate the outdoors. Consider adding comfortable furniture, ambient lighting, and decorative elements to create a cozy and inviting atmosphere. Whether you’re hosting a barbecue, enjoying a morning coffee, or simply lounging with a good book, your deck will be a haven for relaxation and enjoyment.
We hope this comprehensive guide has equipped you with the knowledge and confidence to successfully put up your decking. Remember to always prioritize safety, follow local building codes and regulations, and consult professionals if needed.
Now, it’s time to sit back, embrace the warm sun or cool breeze, and fully enjoy the fruits of your labor on your newly constructed deck. Happy decking!
Frequently Asked Questions about How To Put Up Your Decking
Was this page helpful?
At Storables.com, we guarantee accurate and reliable information. Our content, validated by Expert Board Contributors, is crafted following stringent Editorial Policies. We're committed to providing you with well-researched, expert-backed insights for all your informational needs.


0 thoughts on “How To Put Up Your Decking”