Home>Articles>How To Check Water Heater Thermostat With Multimeter
Articles
How To Check Water Heater Thermostat With Multimeter
Modified: October 22, 2024
Learn how to check your water heater thermostat using a multimeter and troubleshoot any issues. Read our informative articles for step-by-step instructions and expert tips.
(Many of the links in this article redirect to a specific reviewed product. Your purchase of these products through affiliate links helps to generate commission for Storables.com, at no extra cost. Learn more)
Introduction
Water heaters are essential appliances in our homes, providing us with hot water for various purposes, such as bathing, washing dishes, and doing laundry. However, like any other electrical device, water heaters can experience issues over time, including problems with the thermostat. The thermostat is a crucial component of the water heater that controls the temperature of the water.
If you’re experiencing inconsistent water temperatures or suspect that the thermostat may be faulty, it’s important to know how to check it properly. In this article, we will guide you through the process of checking a water heater thermostat with a multimeter, a handy tool for measuring electrical current.
Before diving into the steps, it’s important to note that working with electrical components always carries some risks. If you’re not comfortable working with electricity or unsure about your capabilities, it’s best to seek the assistance of a professional. Safety should always be a top priority when dealing with electrical systems.
Key Takeaways:
- Safely and effectively troubleshoot water heater thermostat issues by following a step-by-step process using a multimeter. Prioritize safety, gather necessary tools, and evaluate readings to determine thermostat functionality.
- Replace a faulty water heater thermostat with confidence by following proper steps, including disconnecting power, removing and installing the new thermostat, and testing its functionality. Seek professional assistance if needed for a safe and effective replacement.
Read more: How To Check Water Heater Element
Understanding the Water Heater Thermostat
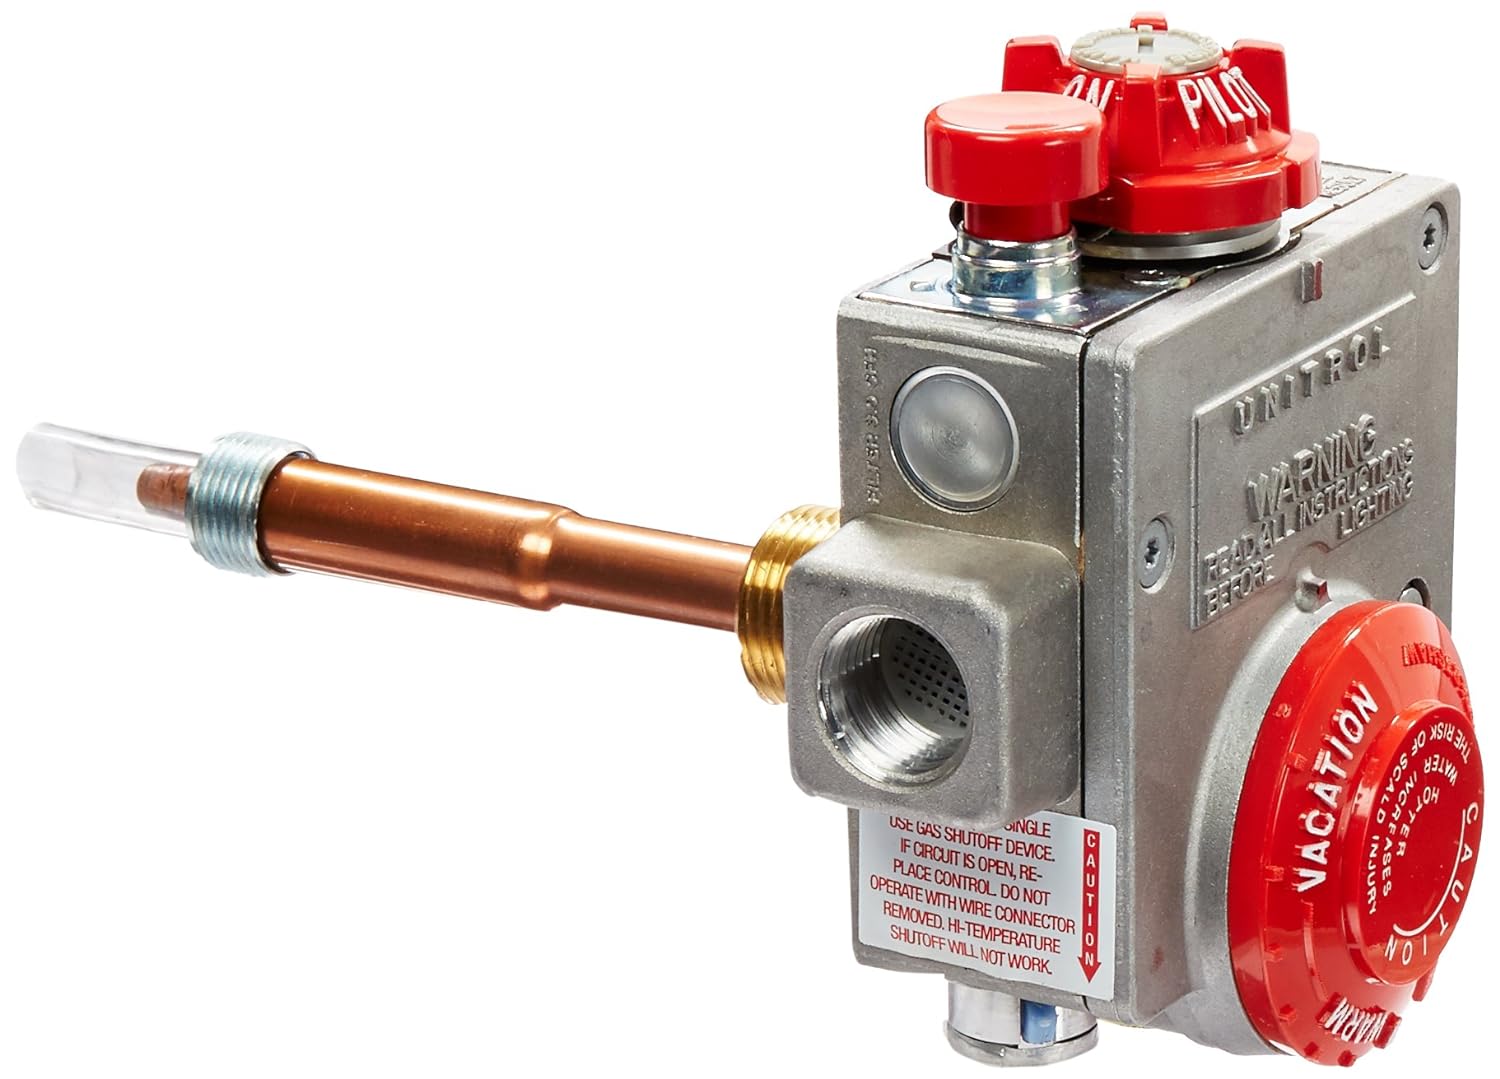
The thermostat in a water heater is responsible for regulating the temperature of the water inside the tank. It works by receiving signals from the temperature sensors and adjusting the heating elements accordingly. The thermostat typically has two settings: one for the upper heating element and one for the lower heating element.
Most water heaters have a temperature range of 120-180 degrees Fahrenheit (49-82 degrees Celsius), with the recommended setting usually around 120-140 degrees Fahrenheit (49-60 degrees Celsius). This range ensures that the water is hot enough for everyday tasks while minimizing the risk of scalding.
When the thermostat malfunctions, it can lead to a variety of issues. If the water is not reaching the desired temperature or fluctuating between hot and cold, it could be a sign of a faulty thermostat. Checking the thermostat with a multimeter will help you determine if it’s working properly or if it needs to be replaced.
Before proceeding with the thermostat check, it’s important to gather the necessary tools to ensure a smooth process.
Gathering the Required Tools
Before you start checking the water heater thermostat, it’s essential to gather the necessary tools. Here is a list of the items you will need:
- Multimeter: A multimeter is a versatile tool that can measure electrical current, voltage, and resistance. It is used to determine if the thermostat is functioning correctly.
- Screwdriver: A screwdriver is needed to remove the access panel from the water heater. Depending on your water heater model, you may need a flathead or Phillips-head screwdriver.
- Protective Gloves: It is always a good idea to wear protective gloves when working on electrical components. Gloves can protect your hands from any potential shocks or injuries.
- Safety Glasses: Safety glasses are essential to protect your eyes from any debris or sparks that may occur during the process.
- Flashlight: A flashlight will help you see inside the water heater more clearly, especially if the area is poorly lit.
Once you have gathered all the necessary tools, you can proceed with the next steps. However, it’s equally important to prioritize safety while working with electrical components.
Safety Precautions
Working with electrical systems can be hazardous if proper precautions are not taken. Before you begin checking the water heater thermostat, it’s important to follow these safety guidelines:
- Turn off the power: Before working on your water heater, make sure to turn off the power supply. Locate the circuit breaker or fuse box that controls the water heater, and switch off the corresponding breaker or remove the fuse.
- Allow time to cool down: Hot water inside the tank can cause burns. It’s crucial to allow the water heater to cool down for at least an hour before starting any work.
- Wear protective gear: Always wear protective gloves and safety glasses to protect yourself from potential injuries and electrical hazards.
- Avoid contact with water: Water and electricity do not mix. Ensure that you are working in a dry area and avoid direct contact with water while performing the check.
- Follow manufacturer’s instructions: Every water heater model may have specific guidelines and safety precautions provided by the manufacturer. Make sure to read and follow these instructions accordingly.
By adhering to these safety precautions, you can minimize the risk of accidents and ensure a safe working environment. Now that you’re prepared with the necessary tools and safety measures, let’s proceed to the steps of checking the water heater thermostat with a multimeter.
Step 1: Turn Off the Power
Before you begin checking the water heater thermostat, the first and most crucial step is to turn off the power supply to the water heater. This ensures your safety and prevents any electrical mishaps during the process.
Locate your home’s circuit breaker panel or fuse box and find the breaker or fuse that controls the water heater. Switch off the corresponding breaker or remove the fuse to disconnect the power supply. Double-check that the power is indeed off by testing the water heater’s controls to see if they are no longer functioning.
It’s important to note that some water heaters may have a dedicated electrical disconnect near the appliance. If your water heater has this feature, locate the disconnect switch and turn it off as well.
This step is critical as it prevents any potential electric shocks while working on the thermostat. Take a few minutes to ensure that the power is completely disconnected before proceeding to the next steps.
Now that you have turned off the power supply, you can safely move on to the next step of checking the water heater thermostat.
Read more: How To Check Electric Water Heater
Step 2: Remove the Access Panel
With the power supply turned off, you can now proceed to remove the access panel on the water heater. The access panel provides you with access to the internal components of the water heater, including the thermostat.
Identify the access panel on your water heater. It is usually located near the bottom of the appliance and secured in place with screws. Depending on your water heater model, you may need either a flathead or Phillips-head screwdriver to remove the screws.
Once you have the appropriate screwdriver, carefully remove the screws securing the access panel. Place the screws in a safe location to avoid misplacing them.
After removing the screws, gently pull or slide the access panel away from the water heater. Take note of any wires or connections attached to the panel and make sure not to damage them.
Set the access panel aside in a secure place where it won’t be accidentally dropped or misplaced. Keep it nearby as you may need to reattach it later once the thermostat check is complete.
With the access panel removed, you now have a clear view of the internal components of the water heater, including the thermostat. Proceed to the next step to locate and identify the thermostat.
Step 3: Locate the Thermostat
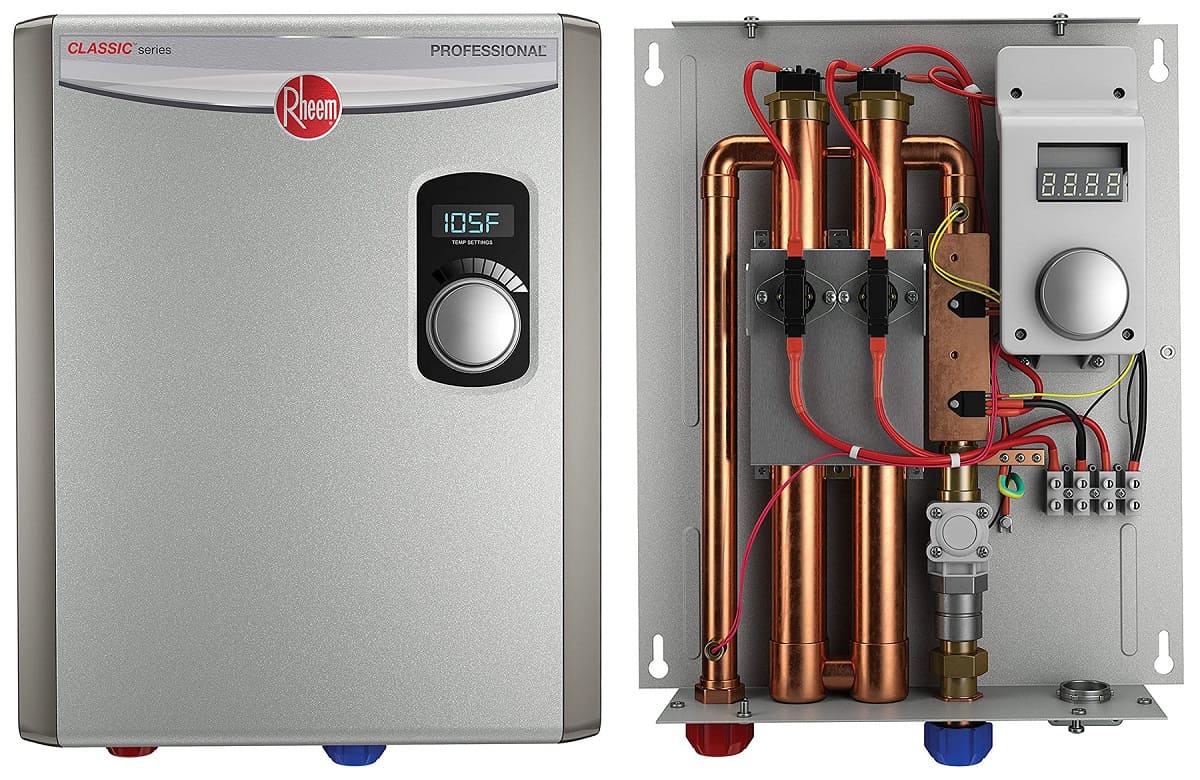
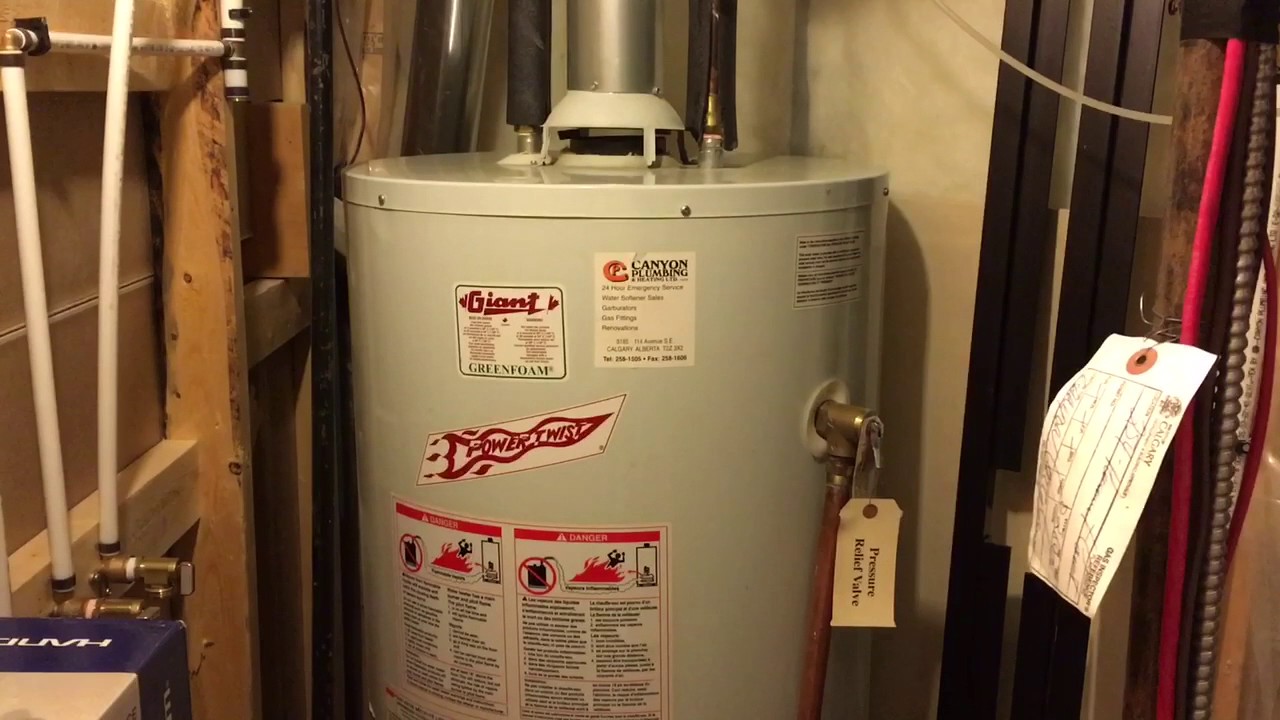
Now that you have removed the access panel, you can begin locating the thermostat on your water heater. The thermostat is responsible for regulating the temperature of the water inside the tank.
Typically, the thermostat is located near the bottom of the water heater, adjacent to the heating elements. It is often a rectangular or square-shaped device with temperature settings and wires connected to it.
Take a moment to visually inspect the internal components of the water heater. Look for a device that matches the description of a thermostat. It may be labeled as “Thermostat,” “Temperature Control,” or have a symbol indicating its function.
If you’re having trouble identifying the thermostat, refer to the owner’s manual or consult the manufacturer’s website for specific information regarding your water heater model. The manual typically provides detailed diagrams and instructions on locating and troubleshooting the thermostat.
Once you have successfully located the thermostat, you can proceed to the next step of setting up the multimeter for testing the thermostat’s functionality.
When checking a water heater thermostat with a multimeter, make sure to set the multimeter to the appropriate voltage setting and carefully follow the manufacturer’s instructions to ensure accurate readings.
Step 4: Set the Multimeter
Now that you have located the thermostat on your water heater, the next step is to set up the multimeter for testing. The multimeter will allow you to measure electrical current and check if the thermostat is functioning properly.
Start by turning on your multimeter and selecting the appropriate mode for measuring resistance or continuity. Look for the symbol on the multimeter that represents resistance or continuity, usually indicated by the Omega symbol (Ω).
Once you have selected the correct mode, set the range on the multimeter. The range is the maximum value that the multimeter can measure. If you are unsure of the range to set, start with the highest range available and work your way down if necessary.
It’s important to ensure that the multimeter leads are securely connected to the correct terminals on the multimeter. The black lead should be connected to the COM (common) terminal, and the red lead should be connected to the terminal labeled with the Omega symbol (Ω) or the one indicated for resistance/continuity testing.
With the multimeter set up and ready, you’re now prepared to proceed with the next steps of checking the water heater thermostat.
Note: It’s crucial to refer to the specific instructions provided with your multimeter as the setup process may vary slightly depending on the model you have.
Step 5: Checking the Thermostat Wires
With the multimeter set up, you are now ready to check the thermostat wires. These wires are connected to the thermostat and carry the electrical current needed to regulate the temperature of the water heater.
Start by carefully examining the thermostat and identifying the wires connected to it. Take note of the color-coded wires and their respective terminals on the thermostat. Common wire colors include red, black, white, and green, although variations may exist depending on your water heater model.
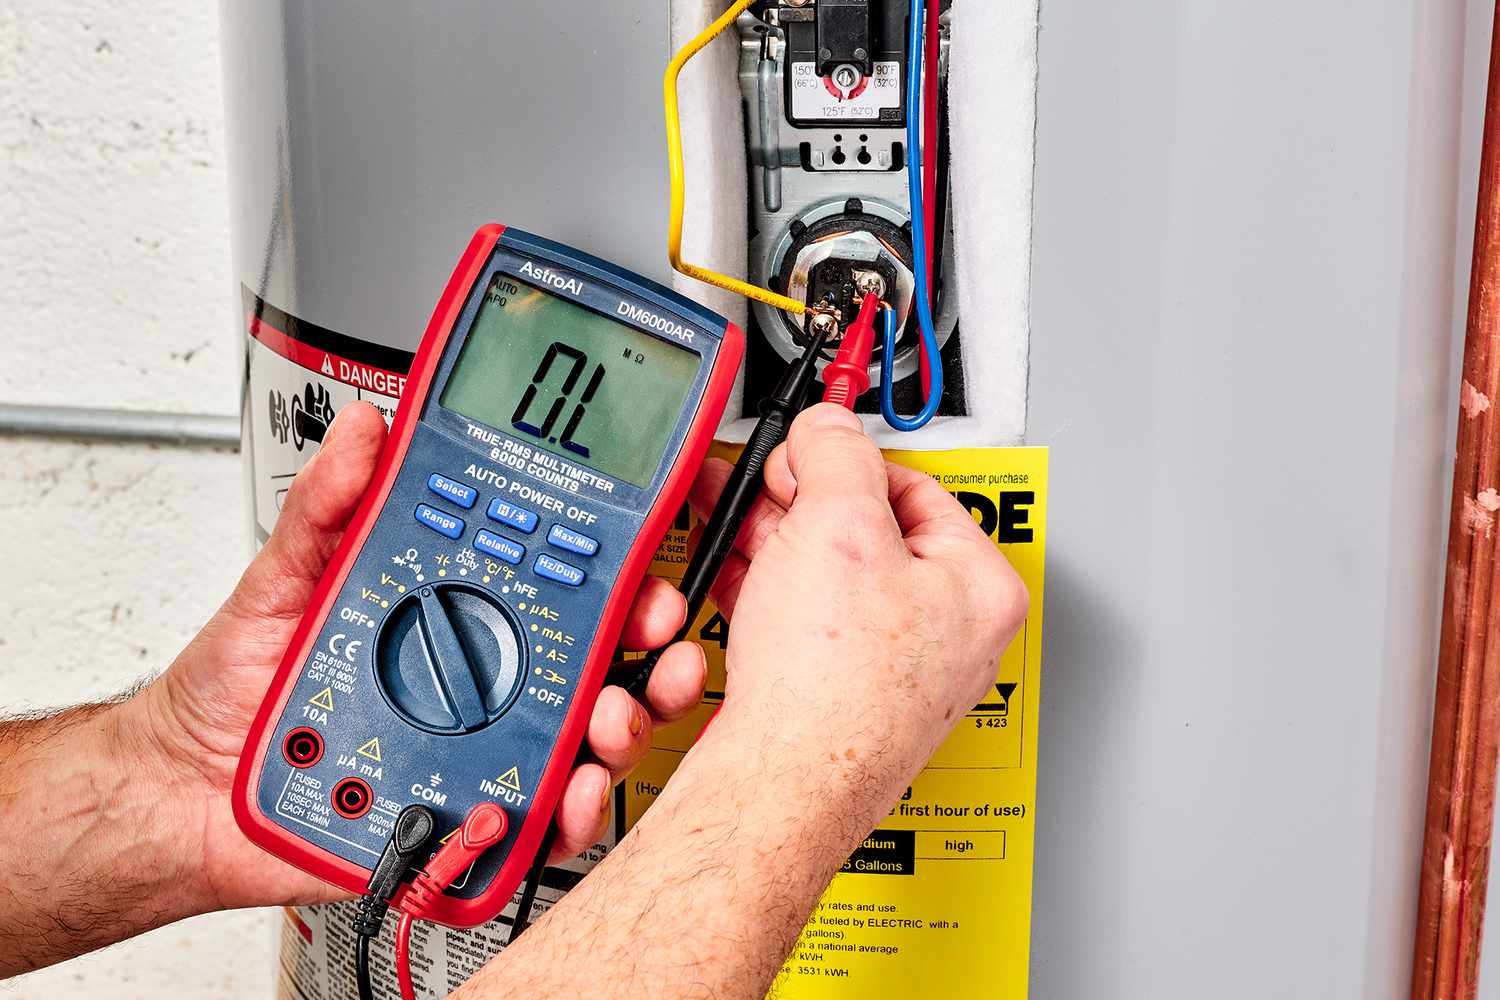
Next, take the black lead of the multimeter and touch it to one of the thermostat wires. It doesn’t matter which wire you choose to start with. Then, take the red lead of the multimeter and touch it to the other thermostat wire. Be sure to make a good contact with each wire.
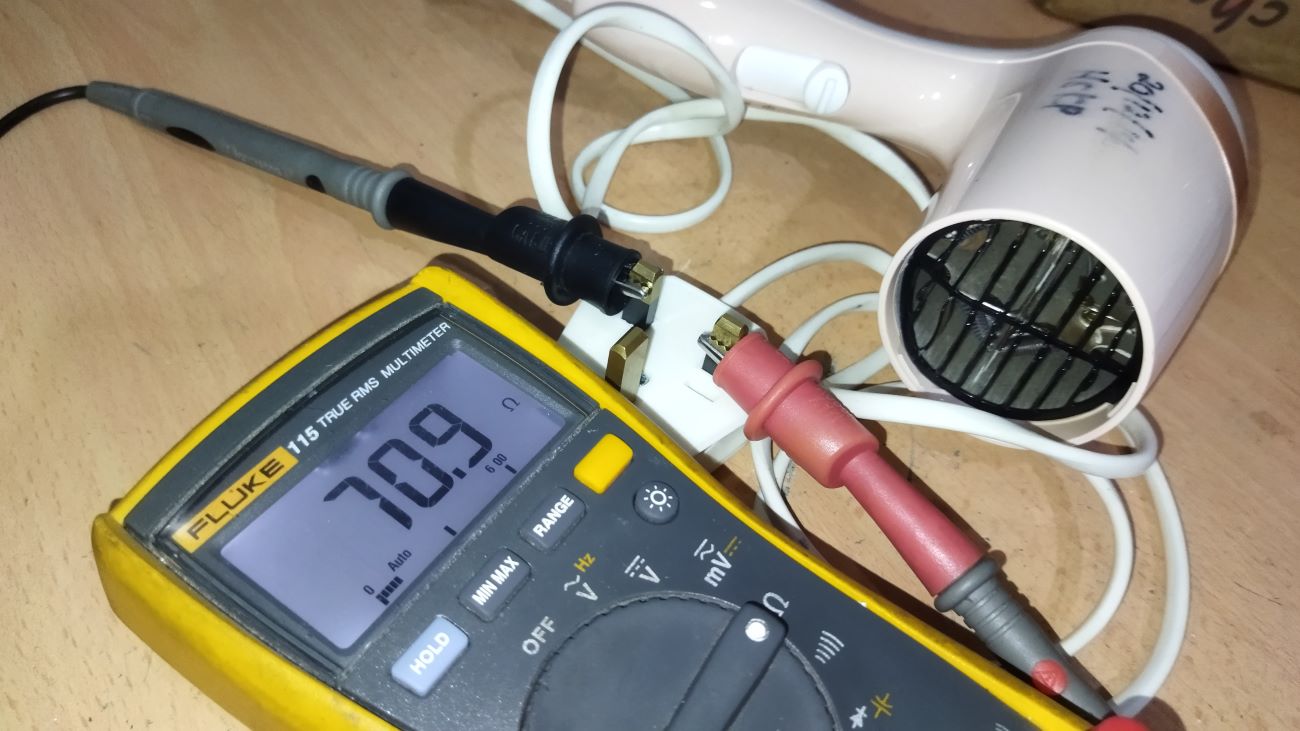
Once the leads are in place, observe the multimeter reading. Depending on the multimeter model and the specific resistance scale you have set, you should see a reading in ohms (Ω).
A reading of zero or very low resistance indicates that there is continuity in the circuit, meaning the thermostat wires are intact and not broken. This suggests that the thermostat may be functioning correctly.
However, if you get an infinite reading or a reading that is significantly higher than expected, it suggests there is a break in the circuit. This could indicate a problem with the thermostat or the thermostat wires.
Remember to document the readings for each wire and compare them with the expected values provided in the water heater’s manual or guidelines from the manufacturer. This will help you determine if the thermostat is functioning within the correct range.
Once you have completed this step, you can proceed to the next step of testing the thermostat’s continuity.
Step 6: Testing the Thermostat Continuity
Continuity testing is a crucial step in checking the functionality of the water heater thermostat. It helps determine if the thermostat is able to maintain a continuous circuit and regulate the temperature effectively.
To test the thermostat continuity, begin by touching one multimeter lead to one terminal of the thermostat and the other lead to the remaining terminal. Ensure that the leads make proper contact with the metal tabs or terminals on the thermostat.
Observe the multimeter reading. If the thermostat is functioning correctly, you should see a reading close to zero ohms (Ω) on your multimeter. This indicates that there is continuous electrical flow through the thermostat.
On the other hand, if the multimeter shows an infinite reading or a significantly high resistance reading, it suggests there is a break in continuity. This indicates that the thermostat is not able to maintain a complete circuit and may be faulty.
It’s important to note that specific water heater models may have different resistance values or ranges considered acceptable for continuity. Refer to the manufacturer’s guidelines or the water heater’s manual to compare your readings against the recommended values.
If the thermostat fails the continuity test, it is likely defective and will need to be replaced. However, if the continuity test produces positive results, you can move on to the next step to evaluate the reading and verify the thermostat’s functionality.
Remember to always exercise caution and follow safety precautions while working with electrical components.
Step 7: Evaluating the Reading
After performing the continuity test on the thermostat, it’s time to evaluate the readings you obtained on the multimeter. This step will help you determine if the thermostat is functioning properly or if it needs to be replaced.
If the multimeter reading shows continuity (a low resistance or zero ohms), it indicates that the thermostat is able to maintain a complete circuit and regulate the temperature effectively. This suggests that the thermostat is functioning correctly.
On the other hand, if the multimeter reading shows no continuity (an infinite reading or a significantly high resistance), it suggests that there is a break in continuity and the thermostat is likely faulty. This indicates that the thermostat is not able to regulate the temperature properly, and it may need to be replaced.
It’s essential to refer to the manufacturer’s guidelines or the water heater’s manual to compare the readings obtained with the recommended values. This will help you determine if the readings are within an acceptable range.
If the readings are within the acceptable range and the thermostat is functioning correctly, you can proceed to reassemble the water heater by reattaching the access panel using the screws you removed earlier.
However, if the readings indicate a faulty thermostat, it is recommended to replace it with a new one. Contacting a professional plumber or electrician may be advisable to ensure proper installation and minimize the risk of further issues.
By evaluating the readings obtained from the multimeter, you can make an informed decision about the functionality of the thermostat and take appropriate action accordingly.
Now that you have assessed the readings, move on to the final step to replace a faulty thermostat if necessary.
Step 8: Replacing a Faulty Thermostat
If your evaluation indicates that the thermostat is faulty and needs to be replaced, it’s important to follow the proper steps to ensure a successful replacement. Here’s a guide to help you through the process:
- Turn off the power: Before you begin replacing the faulty thermostat, make sure to turn off the power supply to the water heater. Locate the circuit breaker or fuse box that controls the water heater and switch off the corresponding breaker or remove the fuse.
- Disconnect the wires: Start by disconnecting the wires from the faulty thermostat. Take note of the wire connections and their corresponding terminal locations. Carefully loosen and remove the wires from their terminals using a screwdriver or pliers, depending on your water heater model.
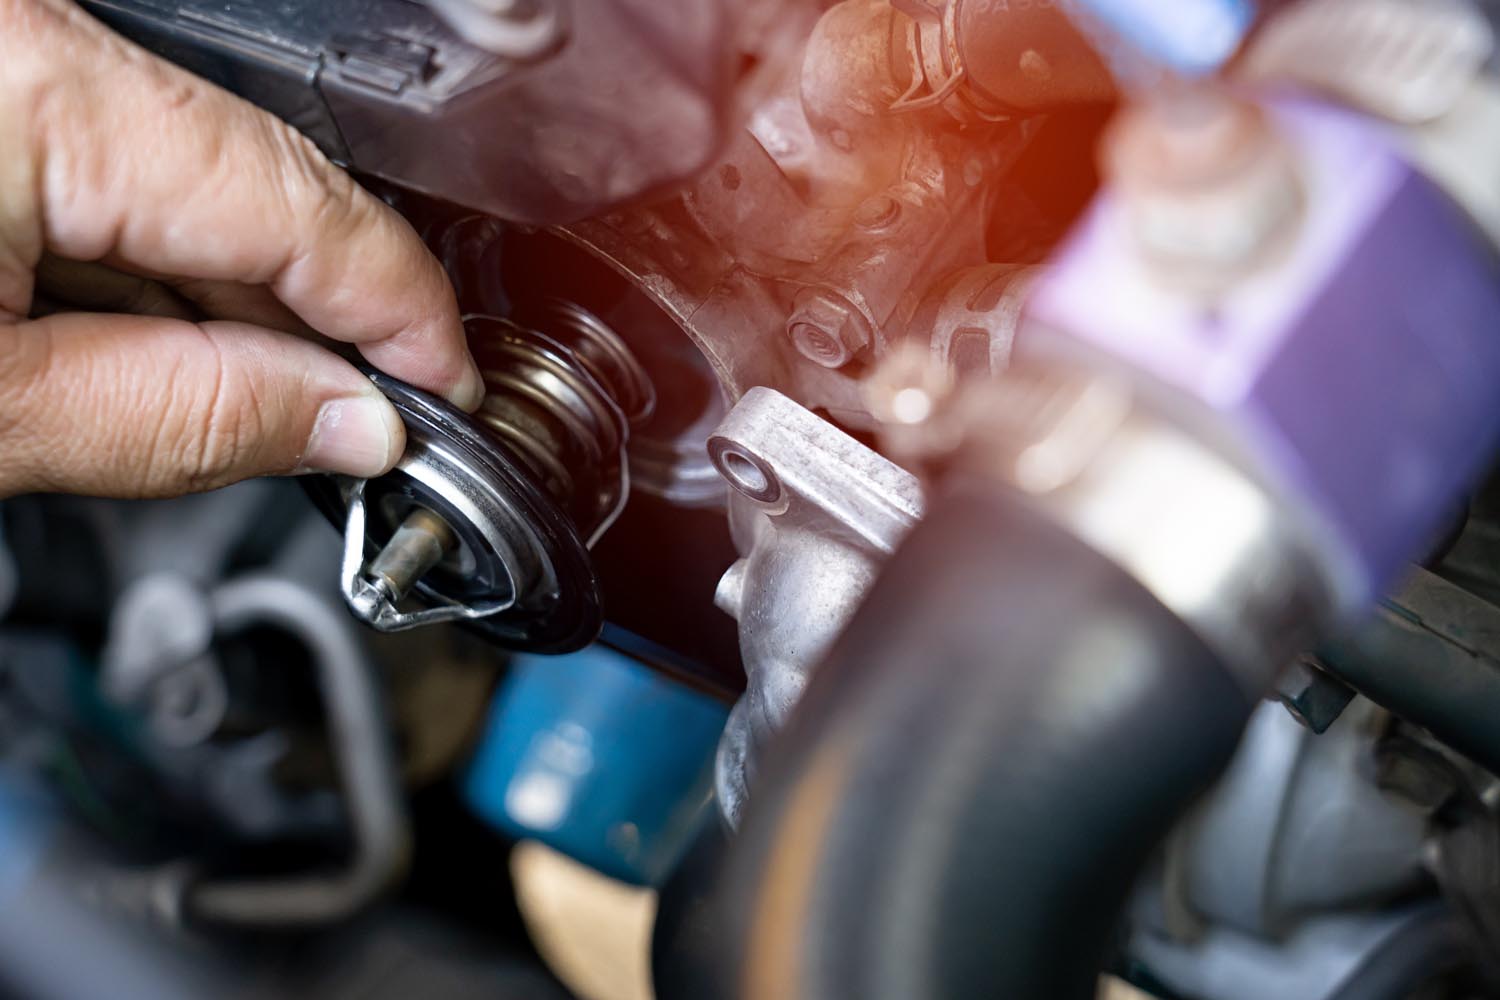
- Remove the old thermostat: Once the wires are disconnected, remove the faulty thermostat from its mounting bracket. This can typically be done by unscrewing it or releasing any clips that may be holding it in place.
- Install the new thermostat: Take the new thermostat and position it in the mounting bracket. Ensure that it aligns properly and securely fits into place. Use screws or clips to secure it in position.
- Reconnect the wires: Carefully reconnect the wires to their respective terminals on the new thermostat. Refer to your documentation or the markings on the thermostat for proper wire placement. Tighten the terminal screws to secure the wires in place.
- Turn on the power: Once the new thermostat is securely installed and the wires are connected, turn on the power supply to the water heater. Locate the circuit breaker or fuse box and switch on the corresponding breaker or insert the fuse.
- Test the new thermostat: With the power restored, test the new thermostat by setting the desired temperature and monitoring the water heater’s performance. Check that the water temperature reaches the desired level and remains consistent.
- Reassemble the water heater: If the new thermostat is functioning properly, reassemble the water heater by attaching the access panel using the screws you removed earlier. Ensure that all connections are tight and secure.
It’s important to note that if you’re not comfortable or confident in replacing the thermostat yourself, it’s best to seek the assistance of a professional plumber or electrician. They have the knowledge and expertise to handle the task safely and effectively.
By following these steps, you can replace a faulty thermostat and ensure that your water heater functions optimally for reliable hot water supply.
Conclusion
Checking the water heater thermostat with a multimeter is an essential skill that can help troubleshoot temperature-related issues with your water heater. By following the step-by-step process outlined in this guide, you can effectively evaluate the functionality of the thermostat and identify if it needs to be replaced.
Remember to prioritize safety by turning off the power supply and taking precautions such as wearing protective gear. It’s also important to gather the necessary tools, including a multimeter, screwdriver, and flashlight, to ensure a smooth and successful process.
Understanding the water heater thermostat and its role in regulating water temperature is key to diagnosing potential problems. By familiarizing yourself with the location and wiring of the thermostat, you can effectively perform checks and tests to evaluate its functionality.
Using a multimeter, you can check the thermostat wires for continuity and evaluate the readings obtained to determine the thermostat’s condition. If the readings indicate a faulty thermostat, it’s crucial to replace it to maintain optimal water heater performance.
When replacing a faulty thermostat, be sure to follow the proper steps, including disconnecting the power supply, disconnecting the wires, removing the old thermostat, installing the new thermostat, reconnecting the wires, and testing the new thermostat’s functionality.
However, if you’re not confident in performing the checks or replacing the thermostat yourself, it’s best to seek the assistance of a professional plumber or electrician. They have the expertise and experience to handle the task safely and effectively.
By following these steps, you can effectively check and replace a faulty water heater thermostat, ensuring that your water heater continues to provide reliable hot water for your everyday needs.
Remember, proper maintenance and regular checks of your water heater are essential for its longevity and optimal performance.
Frequently Asked Questions about How To Check Water Heater Thermostat With Multimeter
Was this page helpful?
At Storables.com, we guarantee accurate and reliable information. Our content, validated by Expert Board Contributors, is crafted following stringent Editorial Policies. We're committed to providing you with well-researched, expert-backed insights for all your informational needs.


0 thoughts on “How To Check Water Heater Thermostat With Multimeter”