Articles
How To Clean A Levoit Humidifier
Modified: August 23, 2024
Learn how to clean and maintain your Levoit humidifier with our helpful articles. Keep your humidifier in optimal condition for healthy air.
(Many of the links in this article redirect to a specific reviewed product. Your purchase of these products through affiliate links helps to generate commission for Storables.com, at no extra cost. Learn more)
Introduction
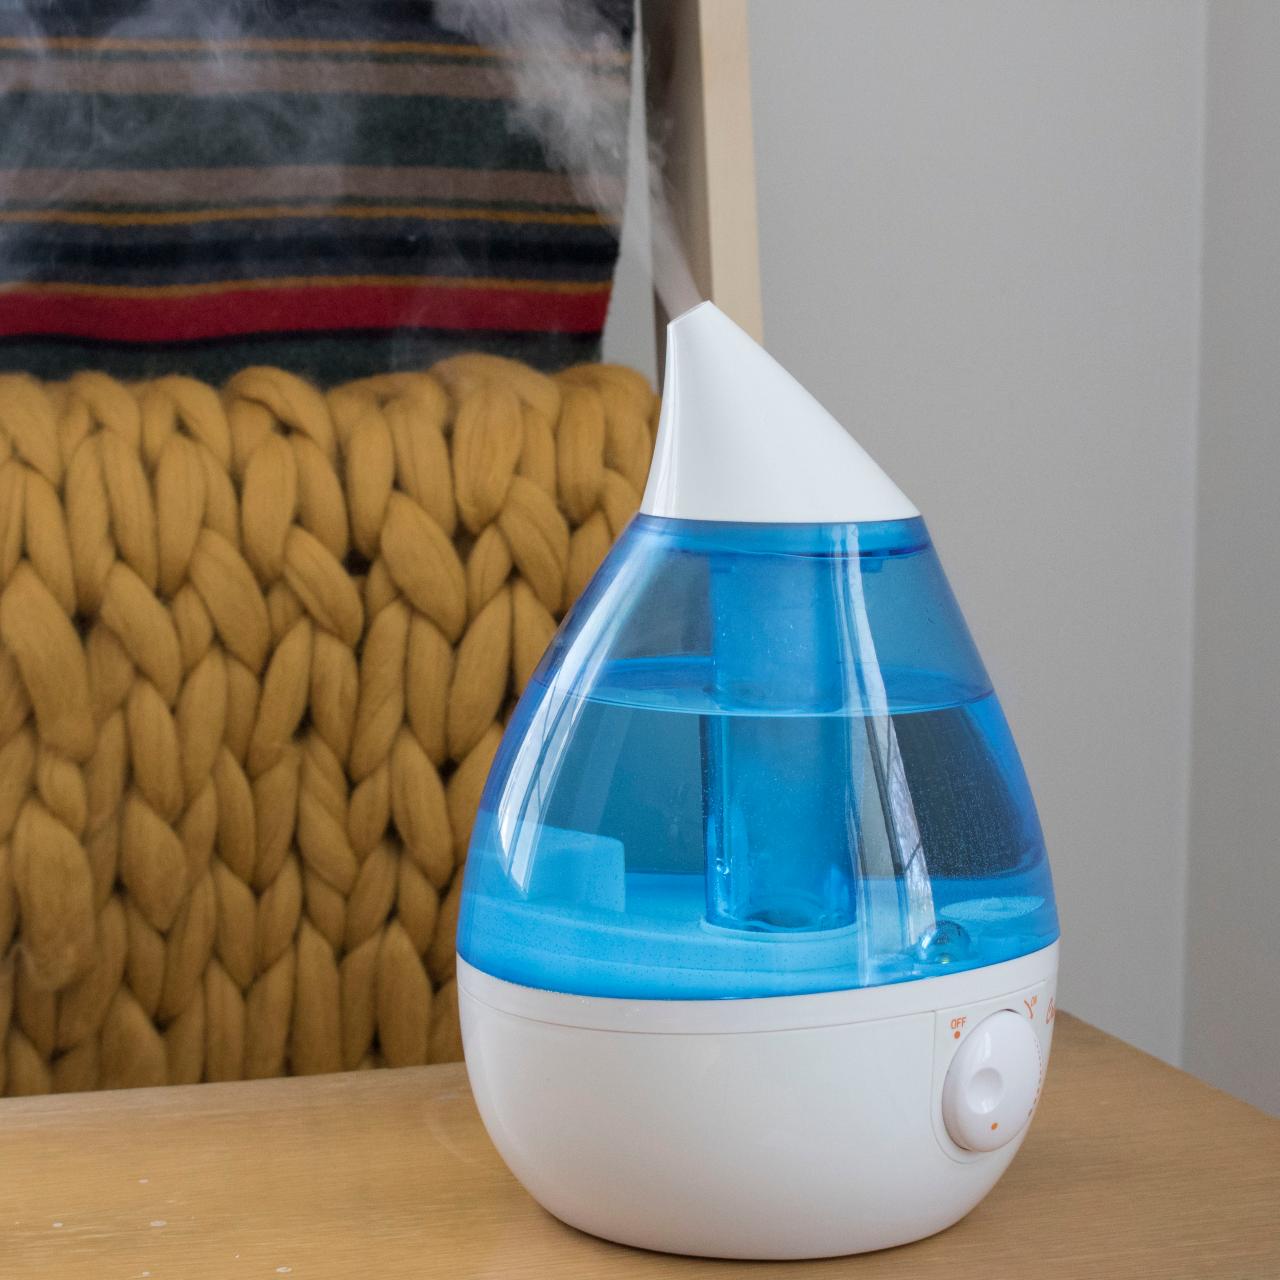
Welcome to this guide on how to clean a Levoit humidifier! A humidifier is a great addition to any home, helping to add moisture to the air and alleviate dryness in the environment. Over time, however, your humidifier can accumulate dirt, mineral deposits, and bacteria, which can affect its performance and the quality of the air it produces. Regular cleaning is crucial to ensure that your Levoit humidifier continues to work effectively and provide clean, healthy air.
In this article, we will take you through a step-by-step process to clean your Levoit humidifier thoroughly. Before we dive into the cleaning procedure, let’s discuss a few safety precautions to keep in mind.
Key Takeaways:
- Regularly clean and maintain your Levoit humidifier to prevent mineral deposits, mold, and bacteria buildup, ensuring clean and moisturized air for a healthier living environment.
- Follow safety precautions, thorough cleaning steps, and regular maintenance tips to ensure the longevity and optimal performance of your Levoit humidifier, providing a comfortable and healthy home atmosphere.
Read also: 8 Amazing Levoit Humidifier for 2025
Safety Precautions
Before you begin cleaning your Levoit humidifier, it is essential to take some safety precautions to ensure your well-being and prevent any potential damage. Here are some important safety guidelines to keep in mind:
- Turn off and unplug the humidifier: Always make sure to turn off and unplug your Levoit humidifier before starting the cleaning process. This will prevent any accidental electrical shocks or damage to the device.
- Handle with care: When handling the humidifier components, such as the water tank and base, be gentle to avoid any breakage or damage. Follow the manufacturer’s instructions for disassembling and cleaning each specific part.
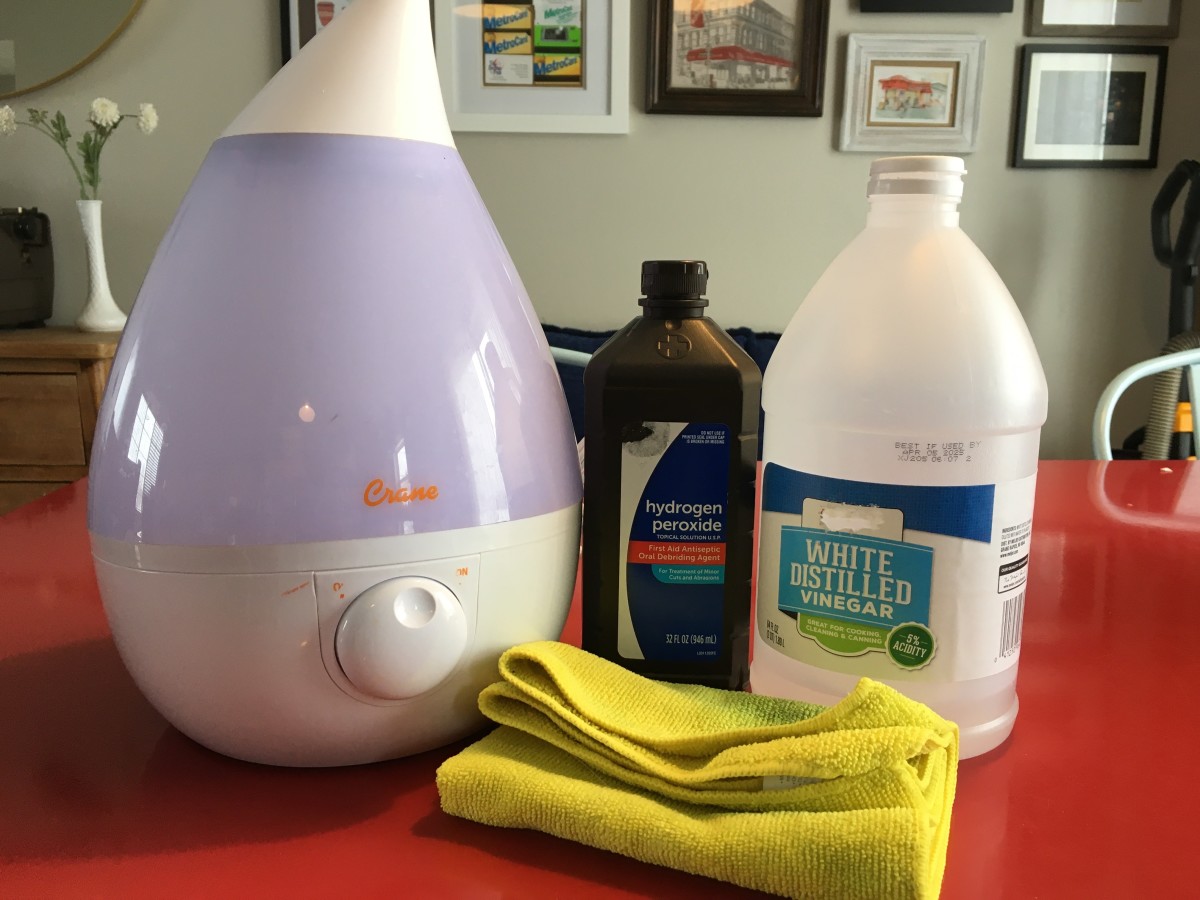
- Use mild cleaning solutions: Avoid using harsh chemicals or abrasive cleaners, as they can damage the humidifier’s components or leave behind harmful residues. Instead, opt for mild, non-toxic cleaning solutions, such as vinegar and water or hydrogen peroxide and water.
- Protect your hands: As you clean, it’s a good idea to wear protective gloves to prevent skin irritation or exposure to cleaning agents. Additionally, keep the cleaning area well-ventilated to avoid inhaling fumes from cleaning solutions.
- Follow manufacturer’s instructions: While this guide provides general cleaning instructions, always refer to the Levoit humidifier’s user manual for specific cleaning recommendations. This will ensure that you clean your humidifier according to the manufacturer’s guidelines.
By adhering to these safety precautions, you can clean your Levoit humidifier effectively while minimizing any risks or potential damage. Now let’s move on to the step-by-step cleaning process.
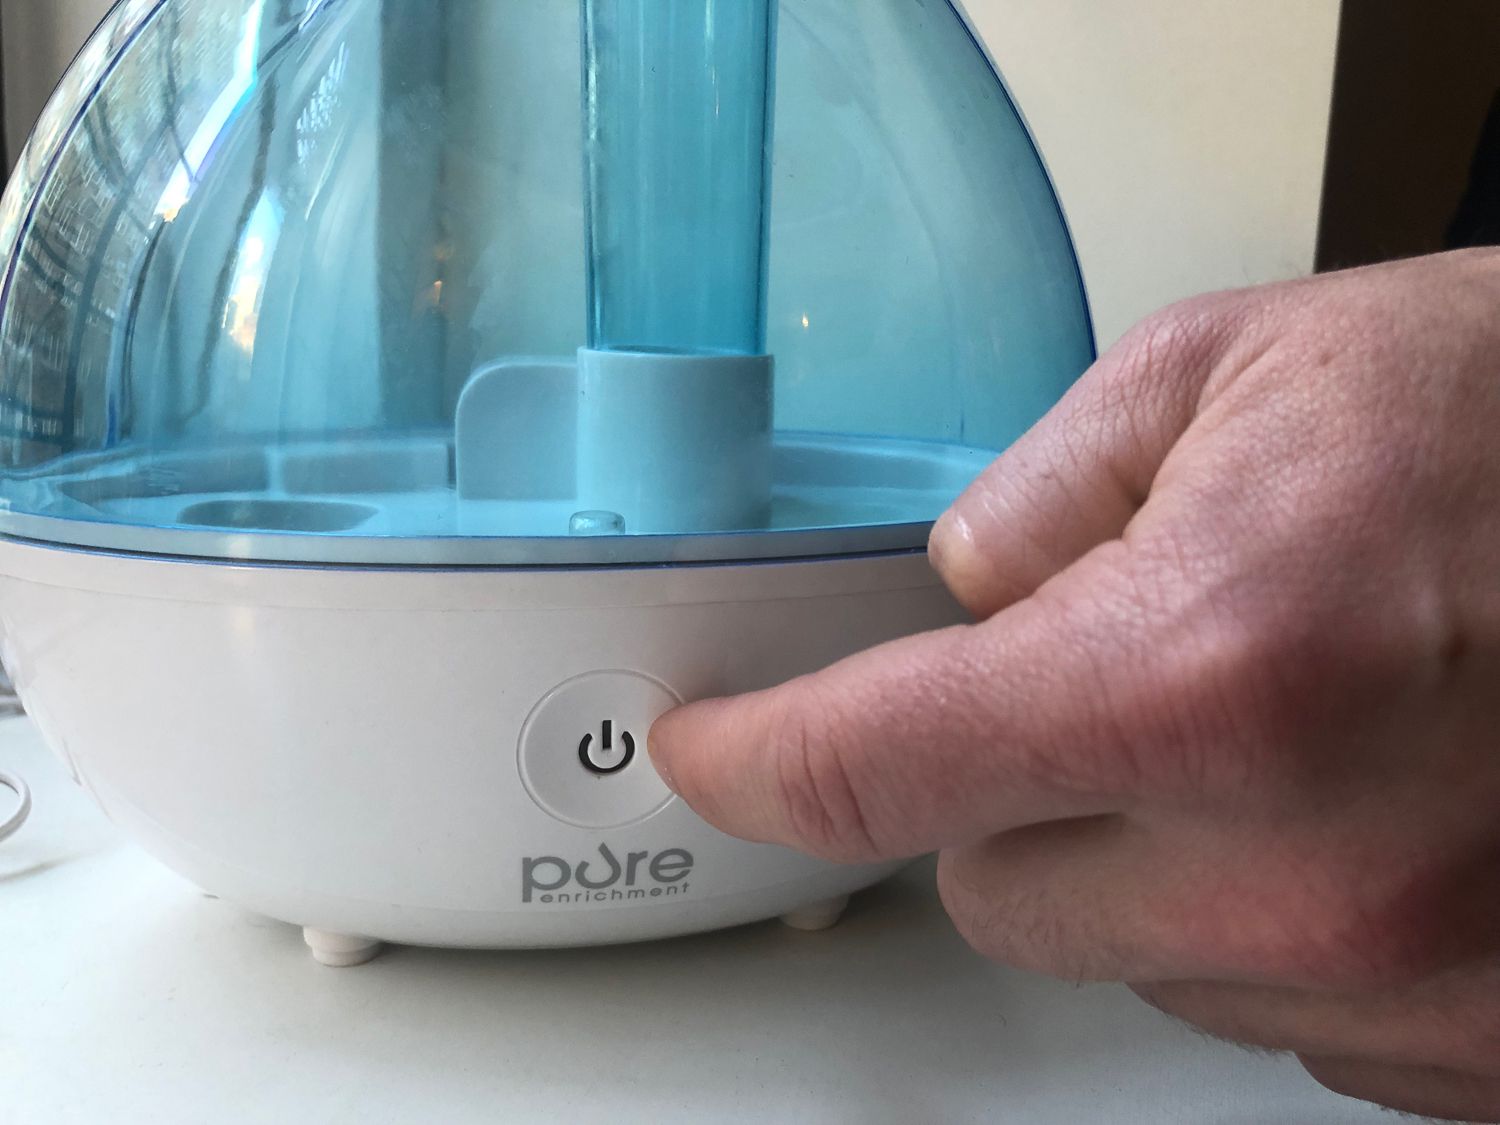
Step 1: Unplug the Humidifier
Before you start cleaning your Levoit humidifier, the first step is to unplug the device from the power source. This is important to ensure your safety and prevent any electrical accidents.
Make sure the humidifier is turned off and unplugged from the power outlet before proceeding with the cleaning process. This will eliminate the risk of electric shock and allow you to handle the components without any danger.
Double-check that the power cord is not connected to the humidifier, and if it is, disconnect it from the wall socket. Once you have unplugged the device, you can move on to the next step of the cleaning process.
Unplugging the humidifier is a simple yet crucial step that should not be overlooked. It ensures that you can clean the device safely without any electrical hazards. Now that the humidifier is unplugged, let’s move on to the next step: emptying and rinsing the water tank.
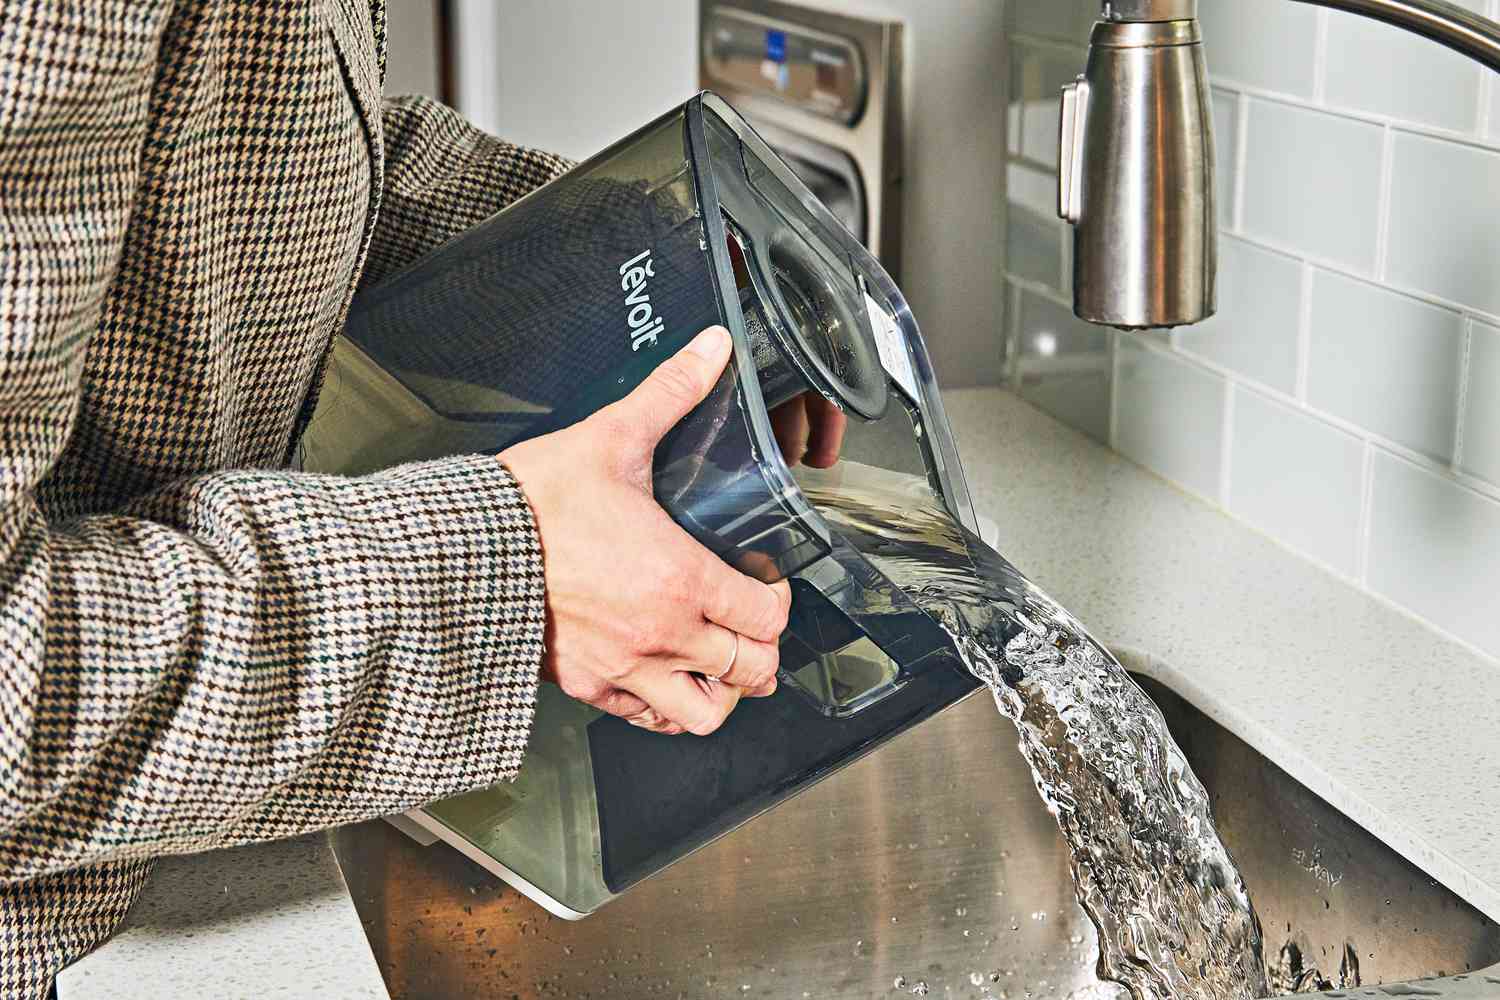
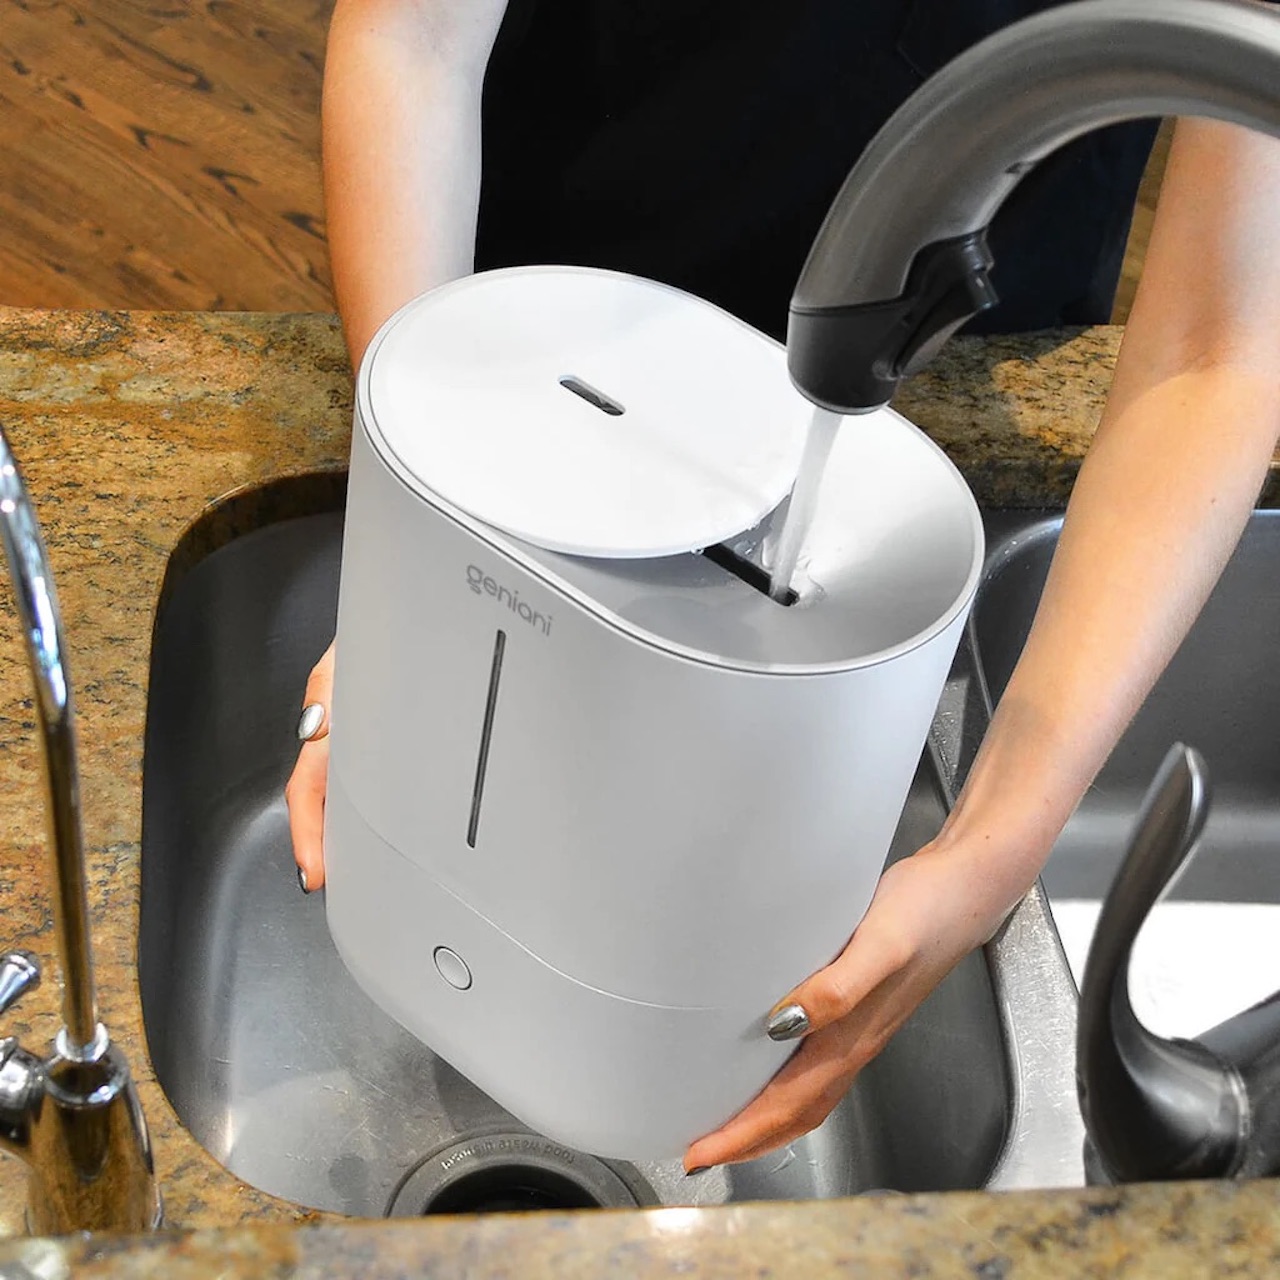
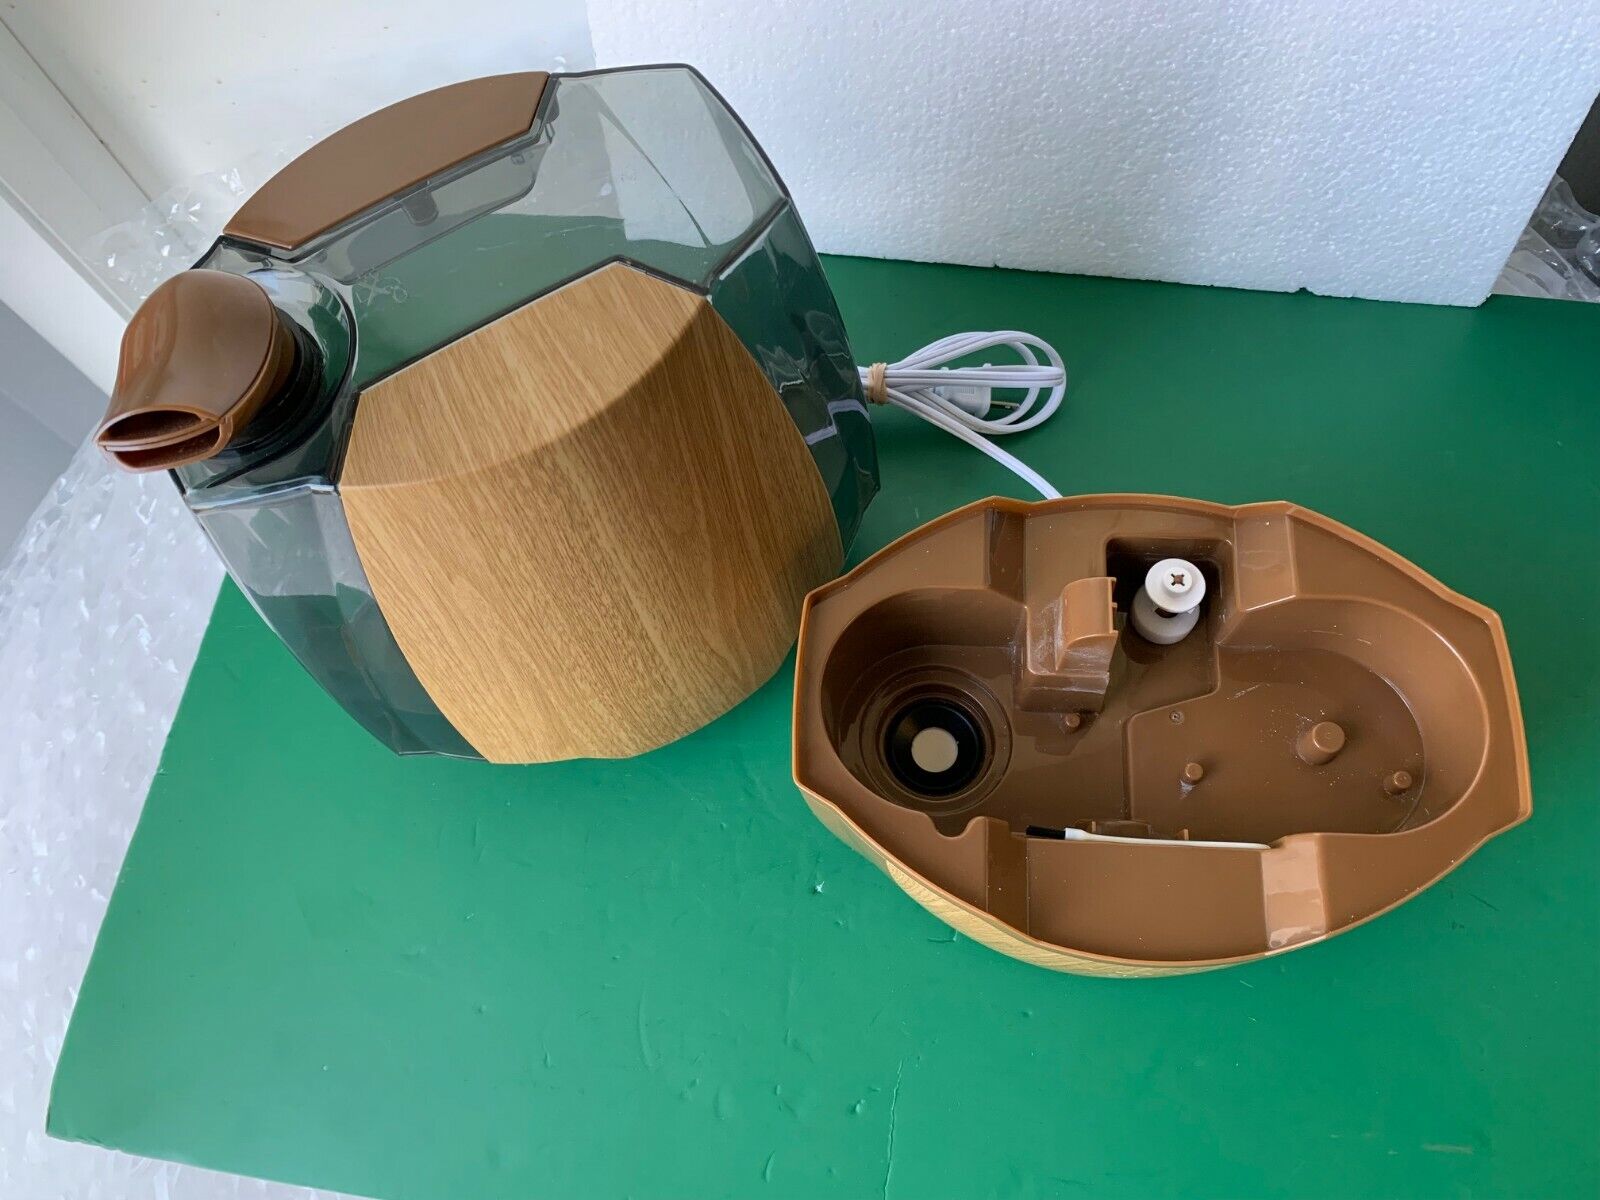
Step 2: Empty and Rinse the Water Tank
Once you have unplugged the Levoit humidifier, it’s time to empty and rinse the water tank. This step is essential to remove any remaining water, mineral deposits, or impurities that may have accumulated.
To begin, carefully remove the water tank from the humidifier base. In most Levoit humidifier models, the water tank can be easily detached by gently lifting it upwards. Place the tank on a stable surface, such as a countertop or sink.
Next, remove the cap or lid from the water tank. This allows you to access the inside of the tank for thorough cleaning. Pour out any remaining water from the tank and discard it.
After emptying the tank, rinse it with warm water. Use a soft brush or cloth to gently scrub the inside of the tank, ensuring you reach all corners and crevices. This will help remove any residue or build-up that may have accumulated.
It’s important to note that some Levoit humidifier models may have a removable filter inside the water tank. If your humidifier includes a filter, refer to the user manual for instructions on how to clean or replace it.
Once you have thoroughly rinsed the water tank, give it a final rinse with clean water to ensure all soap or cleaning solution has been removed. Shake out any excess water and place the tank on a clean towel or drying rack to air dry completely.
Emptying and rinsing the water tank is a crucial step in cleaning your Levoit humidifier. Properly cleaning the tank will ensure that no residue or impurities contaminate the air you breathe. Now that the water tank is clean, let’s move on to cleaning the base of the humidifier in step 3.
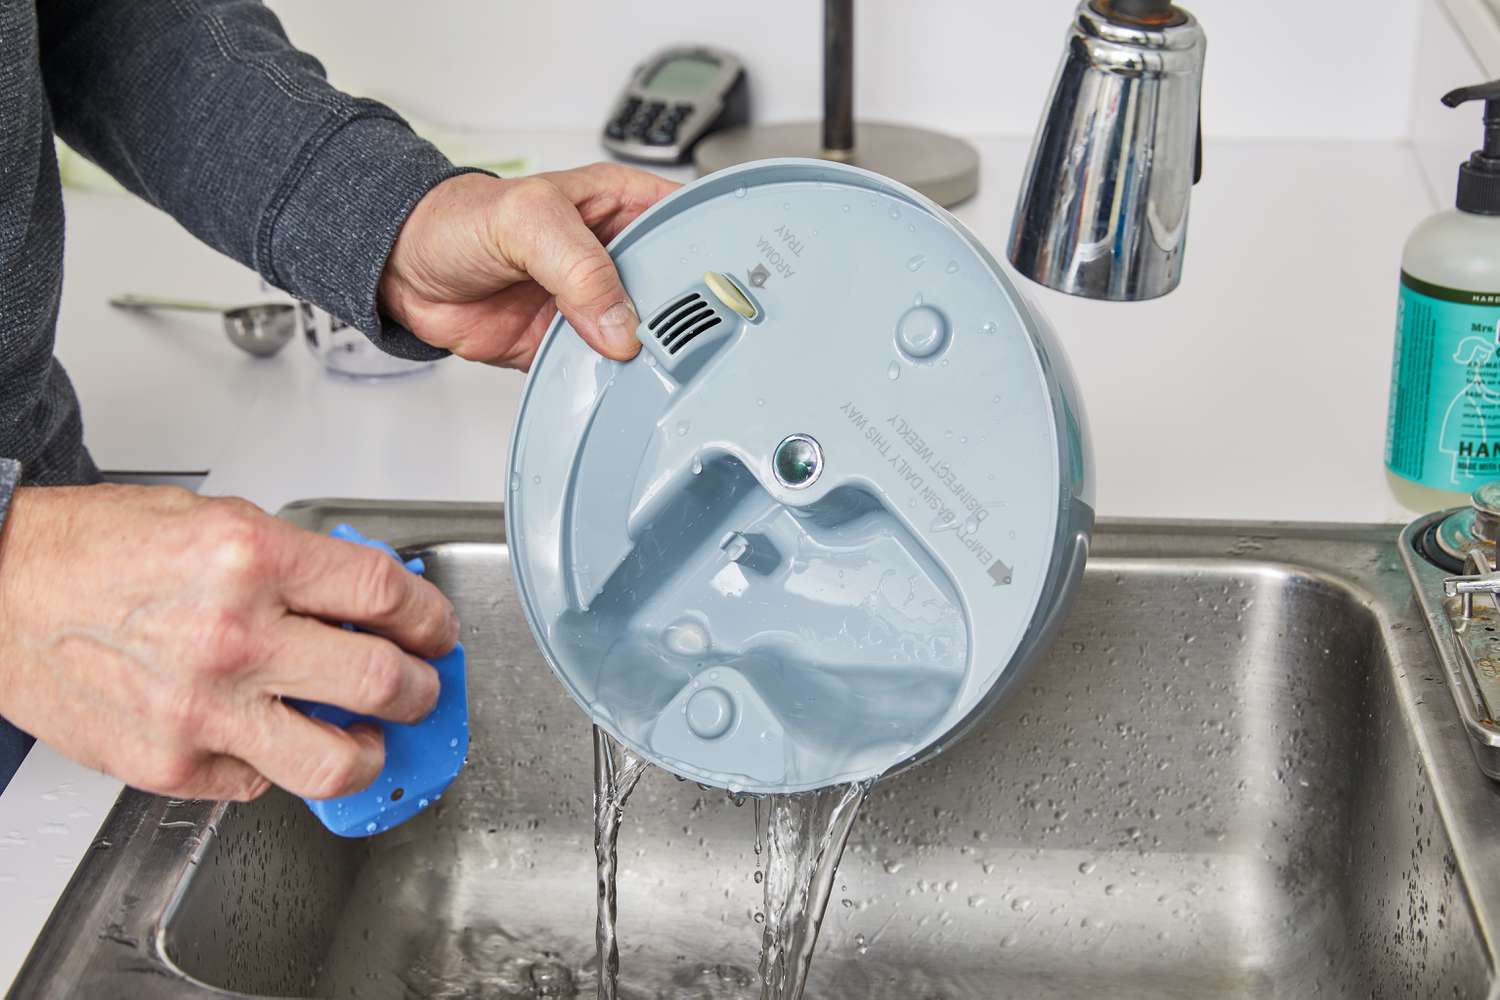
Step 3: Clean the Base of the Humidifier
After emptying and rinsing the water tank, the next step in cleaning your Levoit humidifier is to clean the base of the device. This is where the water is stored and the mist is generated, so it’s important to keep it clean to ensure optimal performance and prevent the build-up of bacteria or mold.
To clean the base, start by unplugging the humidifier if you haven’t done so already. Carefully detach the water tank and set it aside.
Using a soft, damp cloth or sponge, wipe down the interior and exterior surfaces of the base. Pay special attention to the areas where water comes into contact, such as the water inlet and the mist nozzle. These areas can accumulate mineral deposits and impurities over time, affecting the efficiency of the humidifier.
If there are stubborn stains or mineral deposits that are hard to remove, you can use a mixture of vinegar and water to help dissolve them. Simply dampen a cloth or sponge with the vinegar solution and gently scrub the affected areas. Be sure to rinse the base thoroughly with clean water afterward to remove any vinegar residue.
Once you have finished cleaning the base, wipe it dry with a clean towel or allow it to air dry completely. This will help prevent the growth of mold or bacteria.
Remember to consult the manufacturer’s instructions for specific cleaning recommendations, as some Levoit humidifier models may have removable components or require additional care.
With the base of the humidifier now properly cleaned, we can move on to the next step: removing and cleaning the mist nozzle.
Read more: How To Clean A Levoit Air Purifier
Step 4: Remove and Clean the Mist Nozzle
The mist nozzle of your Levoit humidifier is responsible for dispersing the moisturized air into the environment. Over time, mineral deposits and impurities can accumulate on the nozzle, affecting its efficiency and the quality of the mist produced. Cleaning the mist nozzle is an important step in maintaining the performance of your humidifier.
Start by unplugging the humidifier and removing the water tank from the base. Locate the mist nozzle, which is usually positioned on top of the base or attached to the water tank.
Depending on the model of your Levoit humidifier, the mist nozzle may be detachable. If it is, carefully remove the nozzle from the device. Be gentle to avoid any damage to the nozzle or other components.
Once the mist nozzle is detached, rinse it with warm water to remove any loose debris or mineral deposits. You can use a soft brush or cotton swab to gently scrub the nozzle, ensuring you reach all the small openings.
If there are stubborn mineral deposits that are hard to remove, you can soak the nozzle in a mixture of vinegar and water for about 15-30 minutes. The vinegar’s acidity will help dissolve the deposits. After soaking, rinse the nozzle thoroughly with clean water to remove any vinegar residue.
Once you have finished cleaning the mist nozzle, inspect it for any remaining debris or blockages. Use a toothpick or a small brush to clear any clogs and ensure that the nozzle is clean and free from obstructions.
After cleaning, allow the mist nozzle to air dry completely before reattaching it to the humidifier. Ensure that the nozzle is securely fixed to prevent leaks or misalignment.
By regularly cleaning the mist nozzle, you can ensure that your Levoit humidifier continues to disperse clean and moisturized mist, providing you with a comfortable environment. Now that the mist nozzle is clean, let’s move on to step 5: cleaning the water tray.
To clean a Levoit humidifier, regularly empty and rinse the water tank, and use a mixture of water and vinegar to remove mineral buildup. Be sure to follow the manufacturer’s instructions for proper cleaning and maintenance.
Step 5: Clean the Water Tray
The water tray of your Levoit humidifier is where water collects and circulates before it is dispersed into the air as mist. It is important to clean the water tray regularly to prevent the growth of mold, bacteria, and mineral deposits. Follow these steps to properly clean the water tray:
1. Begin by unplugging the humidifier and removing the water tank from the base. Set the water tank aside for now.
2. Locate the water tray, which is typically situated beneath the mist nozzle or in a compartment on the base of the humidifier. Carefully detach the water tray according to the instructions provided by the manufacturer. Be gentle to avoid any damage to the tray or other components.
3. Empty any water remaining in the water tray into a sink or drain. Dispose of the water properly. Alternatively, you can use the water from the tray to water plants, as long as it doesn’t contain any chemicals or cleaning solutions.
4. Rinse the water tray with warm water to remove any dirt, debris, or mineral deposits. Use a soft brush or sponge to gently scrub the tray, paying close attention to any corners or crevices where build-up may occur.
5. If there are stubborn stains or mineral deposits that are difficult to remove, you can create a cleaning solution using equal parts of vinegar and water. Apply this solution to the water tray and let it sit for a few minutes to help dissolve the deposits. Then, rinse the tray thoroughly with clean water to remove any vinegar residue.
6. After cleaning, dry the water tray with a clean towel or allow it to air dry completely. Ensure that the tray is completely dry before reattaching it to the humidifier.
7. Before reassembling the unit, it’s a good idea to wipe down the base of the humidifier to remove any dust or moisture that may have accumulated during the cleaning process. This will help ensure that the unit is clean and ready for use.
Cleaning the water tray regularly will help maintain the hygiene and efficiency of your Levoit humidifier. Now that the water tray is clean, let’s move on to step 6: descaling the humidifier if necessary.
Step 6: Descale the Humidifier (if necessary)
Over time, mineral deposits can accumulate in your Levoit humidifier, especially if the water in your area has a high mineral content. This build-up, known as scale, can affect the performance of your humidifier and reduce its efficiency. Descaling your humidifier is an important step to remove these mineral deposits and maintain its optimal functioning.
Before starting the descaling process, make sure that your humidifier’s user manual allows for descaling and follow any specific instructions provided by the manufacturer.
To descale your Levoit humidifier, you will need a descaling agent such as white vinegar or a commercial descaling solution. Follow these steps:
1. Unplug the humidifier from the power source and remove the water tank and other detachable parts.
2. Prepare a descaling solution by diluting white vinegar or a descaling solution with water. The ratio will depend on the specific product and the severity of the scale build-up, so refer to the instructions on the descaling product packaging.
3. Fill the water tank with the prepared descaling solution and place it back onto the base of the humidifier. Make sure the mist nozzle is also immersed in the solution.
4. Let the descaling solution sit in the humidifier for the recommended amount of time, often around 30 minutes to an hour. This allows the solution to break down and dissolve the mineral deposits.
5. After the specified time, empty the descaling solution from the water tank and rinse it thoroughly with clean water. Repeat the rinsing process until the vinegar or descaling solution odor is no longer present.
6. Using a soft brush or sponge, scrub the base of the humidifier and the mist nozzle to remove any loosened scale. Be gentle to avoid damaging any components.
7. Rinse the base and the mist nozzle with clean water to remove any remaining descaling solution or debris.
8. Once everything is clean and rinsed, dry the parts with a clean towel or allow them to air dry completely.
Remember, descaling may not be necessary every time you clean your humidifier. It depends on the mineral content of your water and how often you use the humidifier. If you notice signs of scale build-up, such as decreased mist output or a white residue on the base or mist nozzle, it’s a good indication that descaling is needed.
With Step 6 completed, we can move on to Step 7: drying and reassembling the humidifier.
Step 7: Dry and Reassemble the Humidifier
After cleaning and descaling your Levoit humidifier, it’s important to ensure that all the components are completely dry before reassembling the unit. Proper drying helps prevent the growth of mold or bacteria and ensures the longevity of your humidifier.
Follow these steps to dry and reassemble your Levoit humidifier:
1. Start by using a clean, dry cloth or towel to wipe down all the components you have cleaned, including the water tank, base, mist nozzle, and water tray. Make sure to thoroughly dry each part to prevent any moisture from remaining.
2. Set the components aside and allow them to air dry completely. This may take a few hours, depending on the humidity level in your home. Placing the parts in a well-ventilated area can help speed up the drying process.
3. Once all the components are completely dry, reassemble the Levoit humidifier according to the manufacturer’s instructions. Make sure that all the parts are properly fitted and securely connected.
4. Place the water tank back onto the base, ensuring that it is securely in place. Double-check that all the connections are tight and that there are no leaks.
5. Plug the humidifier back into the power source and turn it on to ensure that it is functioning properly. Listen for any unusual sounds or check for any signs of leaks or malfunctions.
By thoroughly drying and properly reassembling your Levoit humidifier, you can ensure that it operates efficiently and remains in excellent working condition. Regular maintenance and cleaning will help prolong the lifespan of your humidifier and ensure that you and your family can enjoy clean and moisturized air.
With Step 7 completed, let’s move on to Step 8: regular maintenance tips to keep your Levoit humidifier in optimal condition.
Read more: How To Clean Frida Humidifier
Step 8: Regular Maintenance Tips
To keep your Levoit humidifier in optimal condition and ensure its longevity, it’s important to follow regular maintenance practices. Here are some tips to help you maintain your humidifier:
- Regular cleaning: Clean your Levoit humidifier at least once a week to prevent the build-up of mineral deposits, mold, and bacteria. Refer to the earlier steps in this article for a thorough cleaning process.
- Change the water daily: Empty any water remaining in the water tank daily and refill it with fresh, clean water. This helps prevent stagnant water, foul odors, and the growth of bacteria.
- Replace filters (if applicable): If your Levoit humidifier has a replaceable filter, follow the manufacturer’s instructions for filter maintenance and replacement. Regularly replacing the filter ensures optimal performance and clean mist output.
- Use distilled or filtered water: Using distilled or filtered water instead of tap water can help reduce mineral build-up and prolong the lifespan of your humidifier. It also prevents the dispersal of any impurities into the air.
- Monitor humidity levels: Keep an eye on the humidity levels in your home and adjust your humidifier’s settings accordingly. Ideally, indoor humidity should range between 30% and 50% for optimal comfort and to prevent excess moisture that can lead to mold and mildew growth.
- Replace damaged parts: If you notice any cracks, leaks, or damaged components in your Levoit humidifier, replace them promptly to maintain its functionality and prevent further issues.
- Store properly when not in use: If you plan to store your humidifier for an extended period, make sure to clean and dry it thoroughly before storing it in a cool, dry place. This prevents the growth of mold and bacteria during storage.
By following these regular maintenance tips, you can ensure that your Levoit humidifier continues to provide clean, moisturized air and operates efficiently over time. Taking care of your humidifier will contribute to a healthier and more comfortable living environment for you and your family.
Congratulations on completing all eight steps! By following this comprehensive guide on how to clean a Levoit humidifier and implementing regular maintenance practices, you have taken an important step towards ensuring the longevity and optimal performance of your humidifier.
Remember to consult the user manual for your specific humidifier model to understand any unique features or maintenance requirements. Enjoy the clean and moisturized air provided by your Levoit humidifier!
If you have any further questions or concerns, don’t hesitate to reach out to the Levoit customer support team for assistance.
Happy humidifier maintenance!
Conclusion
Maintaining a clean and well-functioning Levoit humidifier is essential for ensuring a healthy and comfortable living environment. Regular cleaning of your humidifier helps prevent the build-up of mineral deposits, mold, and bacteria, keeping the air you breathe clean and moisturized.
In this comprehensive guide, we’ve walked you through the step-by-step process of cleaning your Levoit humidifier. From safety precautions to descaling, we’ve covered everything you need to know to keep your humidifier in optimal condition.
Remember to always follow the manufacturer’s instructions and consult the user manual specific to your Levoit humidifier model for any unique cleaning or maintenance requirements.
By following the eight steps outlined in this guide and implementing regular maintenance tips, you can ensure that your Levoit humidifier operates efficiently, provides clean and moisturized air, and lasts for years to come.
So, go ahead and give your Levoit humidifier the care it deserves. Enjoy the benefits of a well-maintained humidifier in your home, providing you with a healthier and more comfortable environment.
Thank you for reading, and happy cleaning!
Frequently Asked Questions about How To Clean A Levoit Humidifier
Was this page helpful?
At Storables.com, we guarantee accurate and reliable information. Our content, validated by Expert Board Contributors, is crafted following stringent Editorial Policies. We're committed to providing you with well-researched, expert-backed insights for all your informational needs.


0 thoughts on “How To Clean A Levoit Humidifier”