Home>Storage Ideas>Kitchen Storage>How To Clean A Humidifier In Five Simple Steps
Kitchen Storage
How To Clean A Humidifier In Five Simple Steps
Modified: October 18, 2024
Learn how to clean your humidifier in just five easy steps. Maintain a healthy and fresh environment in your home with these effective cleaning methods.
(Many of the links in this article redirect to a specific reviewed product. Your purchase of these products through affiliate links helps to generate commission for Storables.com, at no extra cost. Learn more)
Introduction
Welcome to the ultimate guide on how to clean a humidifier in five simple steps! Having a humidifier in your home is a great way to improve the air quality and create a more comfortable living environment. However, to ensure that your humidifier continues to function effectively and doesn’t become a breeding ground for bacteria and mold, regular cleaning is essential.
By properly maintaining your humidifier, you can prevent the buildup of mineral deposits and ensure that it operates at optimal efficiency. In this article, we will walk you through a step-by-step process to effectively clean your humidifier and keep it in pristine condition.
Before we dive into the cleaning process, it’s important to familiarize yourself with the different types of humidifiers available. There are two main categories: evaporative and ultrasonic.
- Evaporative humidifiers: These humidifiers work by evaporating water from a wick or filter. They tend to be more affordable, but they require regular maintenance to prevent the growth of bacteria.
- Ultrasonic humidifiers: These use a vibrating diaphragm to turn water into a fine mist. They are generally quieter and easier to clean, but they can create a white dust residue if not properly maintained.
No matter which type of humidifier you have, the cleaning process will be similar. So let’s get started on our journey to cleaner and healthier air in your home.
Key Takeaways:
- Regularly cleaning and maintaining your humidifier is essential to prevent mineral deposits, bacteria, and mold buildup, ensuring clean and healthy air for a more comfortable living environment.
- By following the step-by-step cleaning process and regularly maintaining your humidifier, you can enjoy the benefits of improved air quality, alleviated respiratory issues, and a longer lifespan for your appliance.
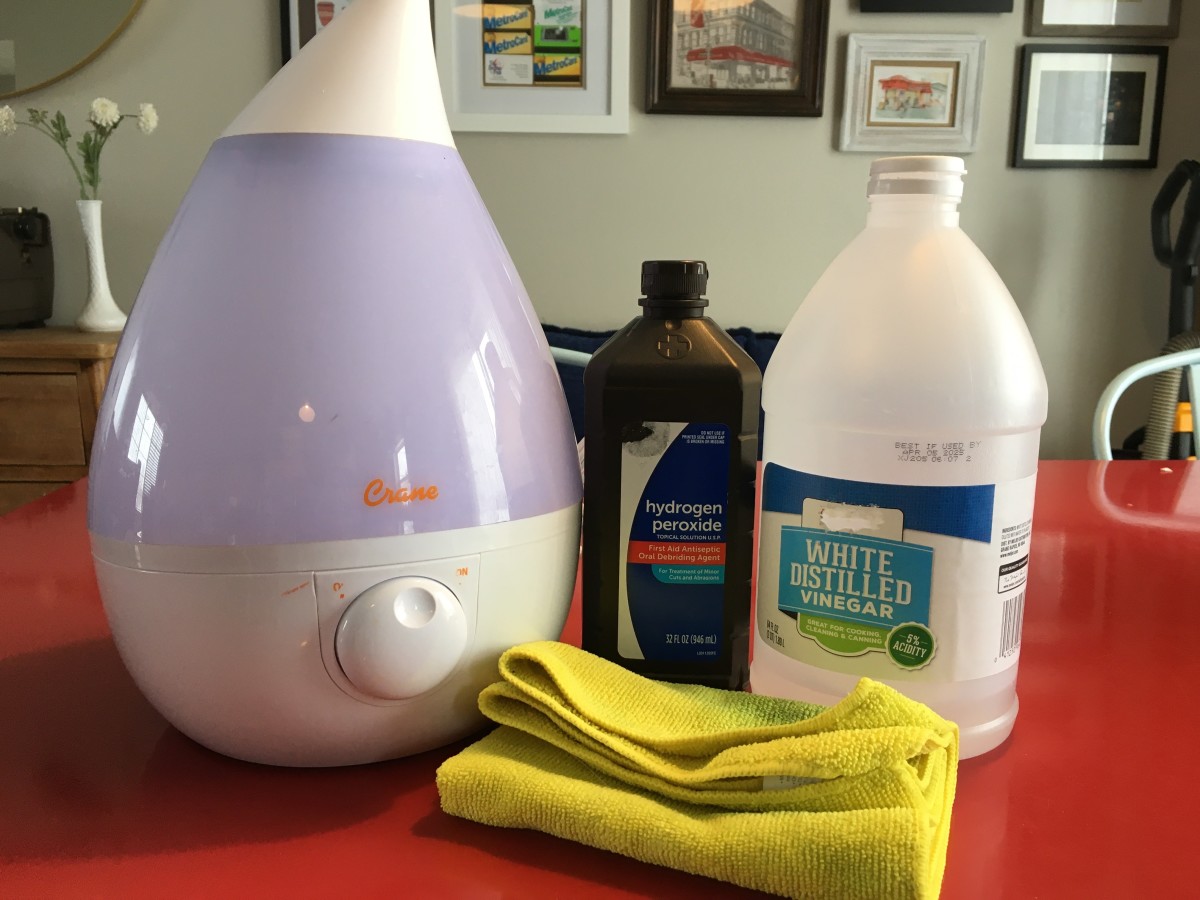
Step 1: Gather the necessary supplies
Before you begin the cleaning process, it’s important to gather all the necessary supplies. Having everything ready will save you time and ensure that you have everything you need to thoroughly clean your humidifier. Here’s a list of the supplies you’ll need:
- A soft-bristle brush or toothbrush
- White vinegar or hydrogen peroxide
- Water
- A clean cloth or sponge
- A small container or basin
- Optional: Distilled water
The soft-bristle brush or toothbrush will be used to scrub away any residue or build-up. You can also use it to clean the small crevices and hard-to-reach areas. White vinegar or hydrogen peroxide will serve as a natural cleaning solution to break down mineral deposits and kill any bacteria or mold that may be present.
Water is, of course, essential for the cleaning process. It’s best to use warm water to help facilitate the cleaning process. Additionally, having a clean cloth or sponge will allow you to wipe down the exterior of the humidifier and remove any dirt or dust.
A small container or basin will be used to hold the cleaning solution while you disassemble and clean the various parts of the humidifier. Finally, while not essential, using distilled water in your humidifier can help prevent the build-up of mineral deposits and extend the lifespan of your appliance.
Now that you have all your supplies ready, it’s time to move on to the next step: disassembling the humidifier.
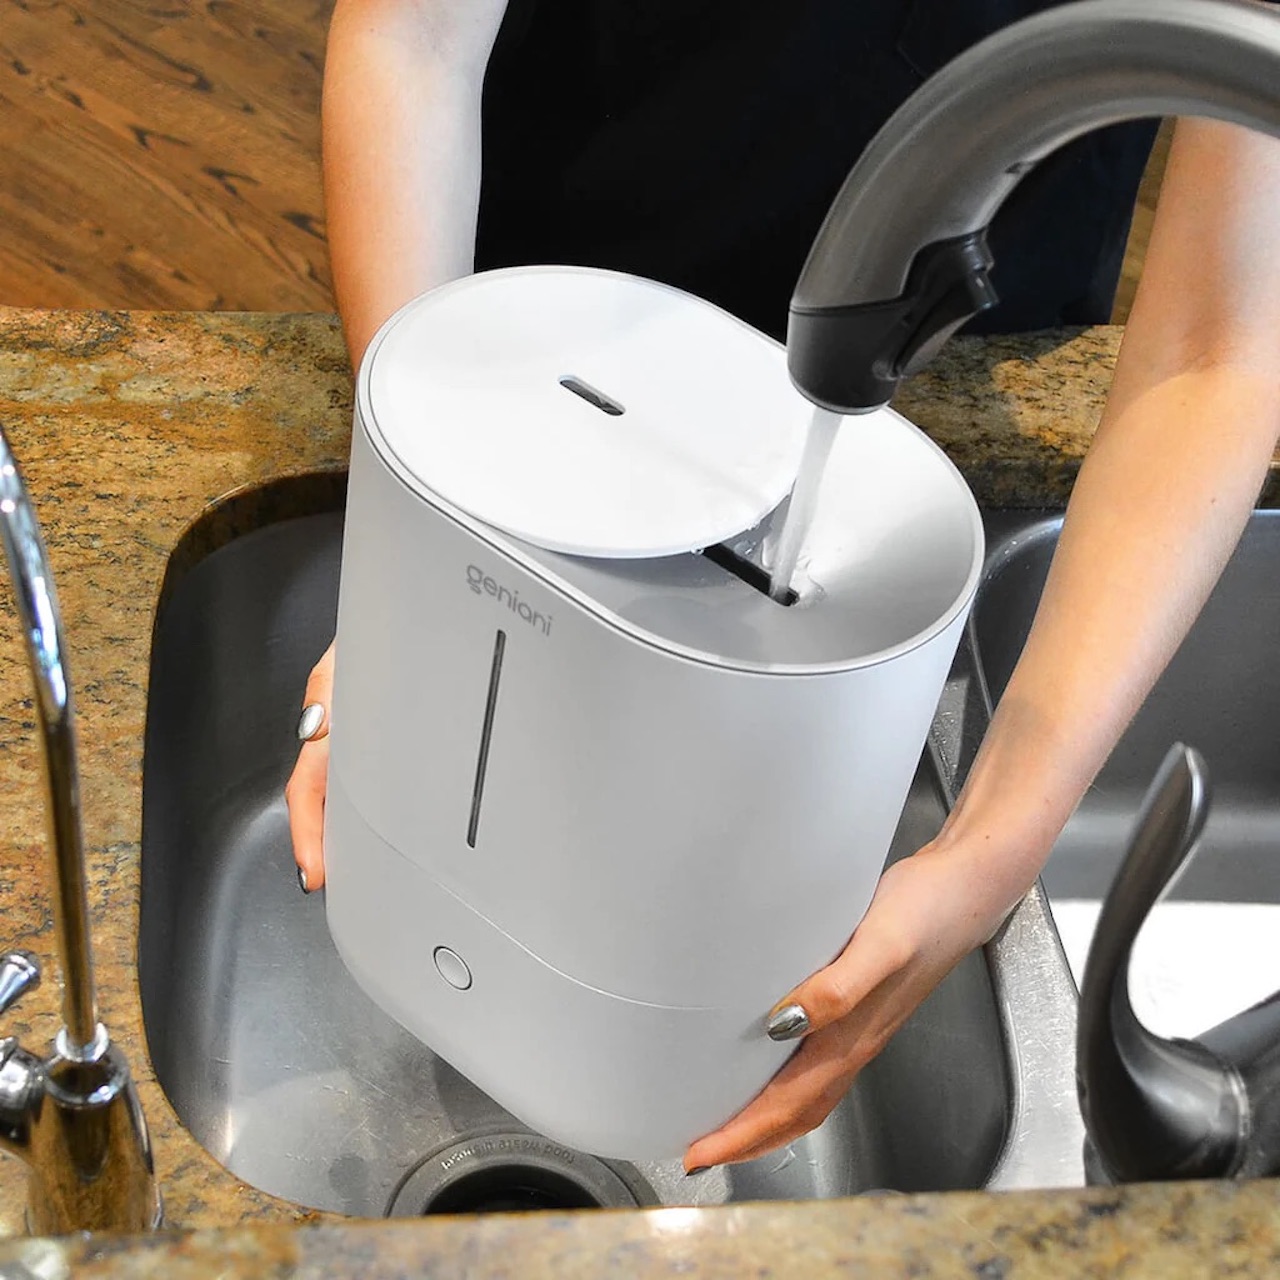
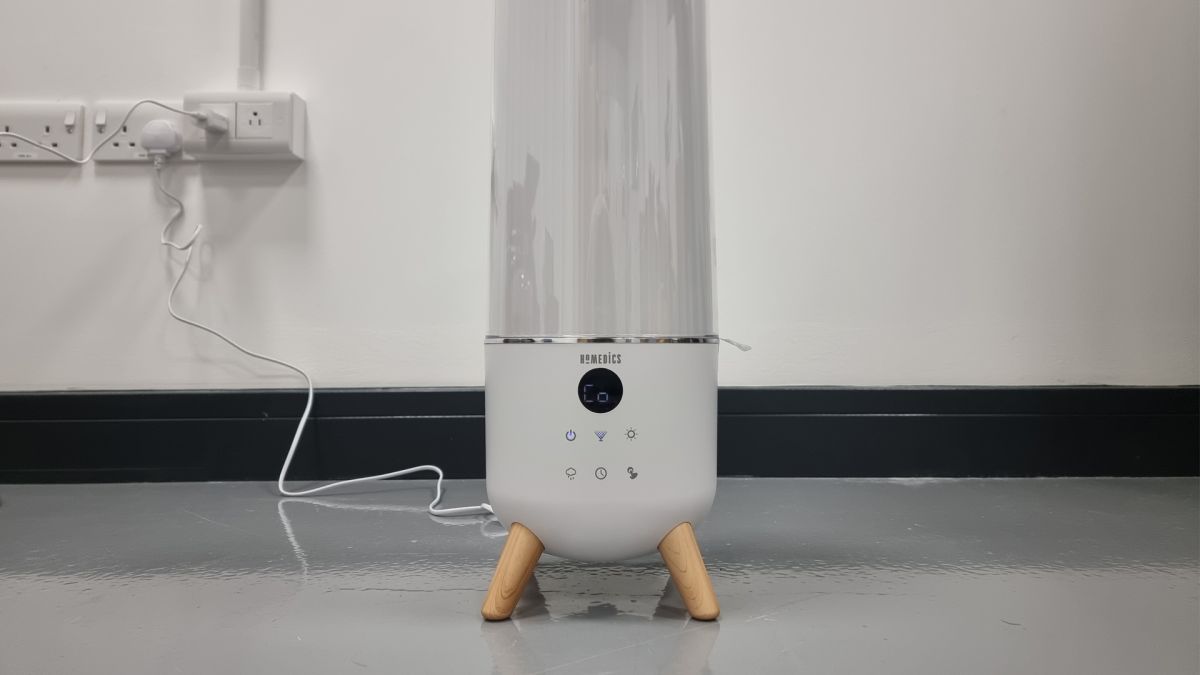
Step 2: Disassemble the humidifier
Now that you have gathered all the necessary supplies, it’s time to disassemble the humidifier. Before starting this step, make sure the humidifier is unplugged and turned off to ensure your safety.
Follow these steps to disassemble your humidifier:
- Remove the water tank: Most humidifiers have a removable water tank that holds the water. Take off the tank and set it aside.
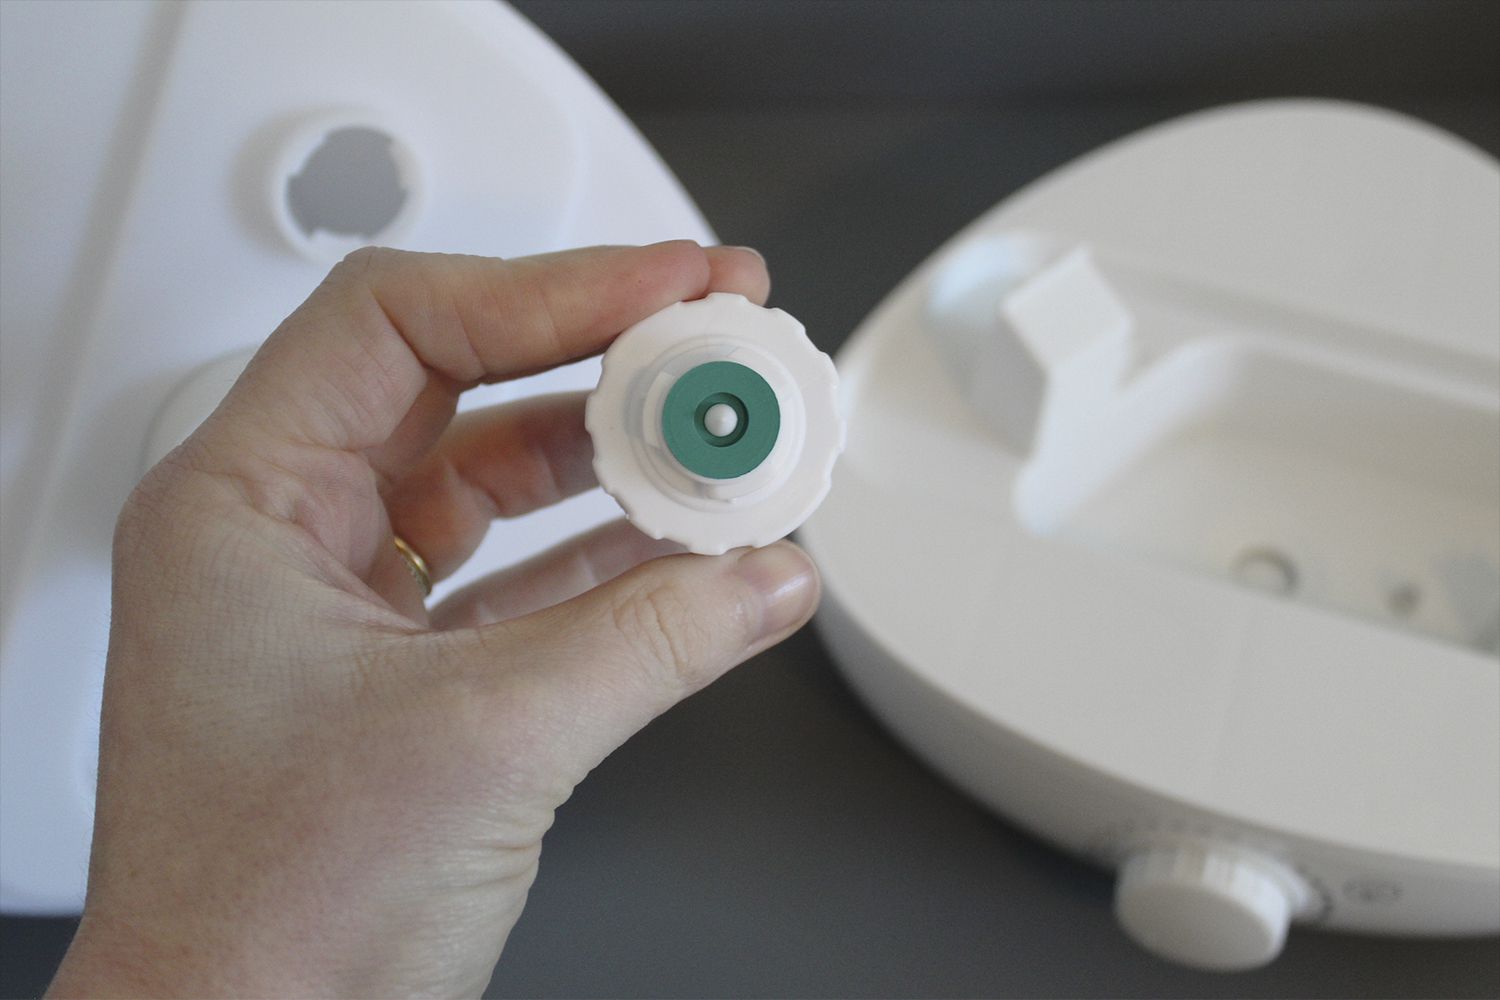
- Remove the filter or wick: If your humidifier has a filter or wick, carefully remove it. It’s important to check if it needs to be replaced or cleaned, as it can accumulate mineral deposits over time.
- Take apart any other removable parts: Depending on the design of your humidifier, there may be additional removable parts such as a cap, tray, or mist nozzle. Take note of all the components and remove them as necessary.
- Refer to the manufacturer’s instructions if needed: If you’re unsure of how to disassemble your specific humidifier model, refer to the manufacturer’s instructions for guidance. They will provide you with the specific steps to follow.
As you disassemble the humidifier, pay attention to how the parts fit together. This will make reassembling the humidifier much easier later on.
Once you have successfully disassembled the humidifier, you’re ready to move on to the next step: cleaning the various parts.
Step 3: Clean the various parts
Now that you have disassembled the humidifier, it’s time to clean the various parts to remove any residue, mineral deposits, or bacteria. Each part requires specific cleaning techniques, so let’s go through them one by one:
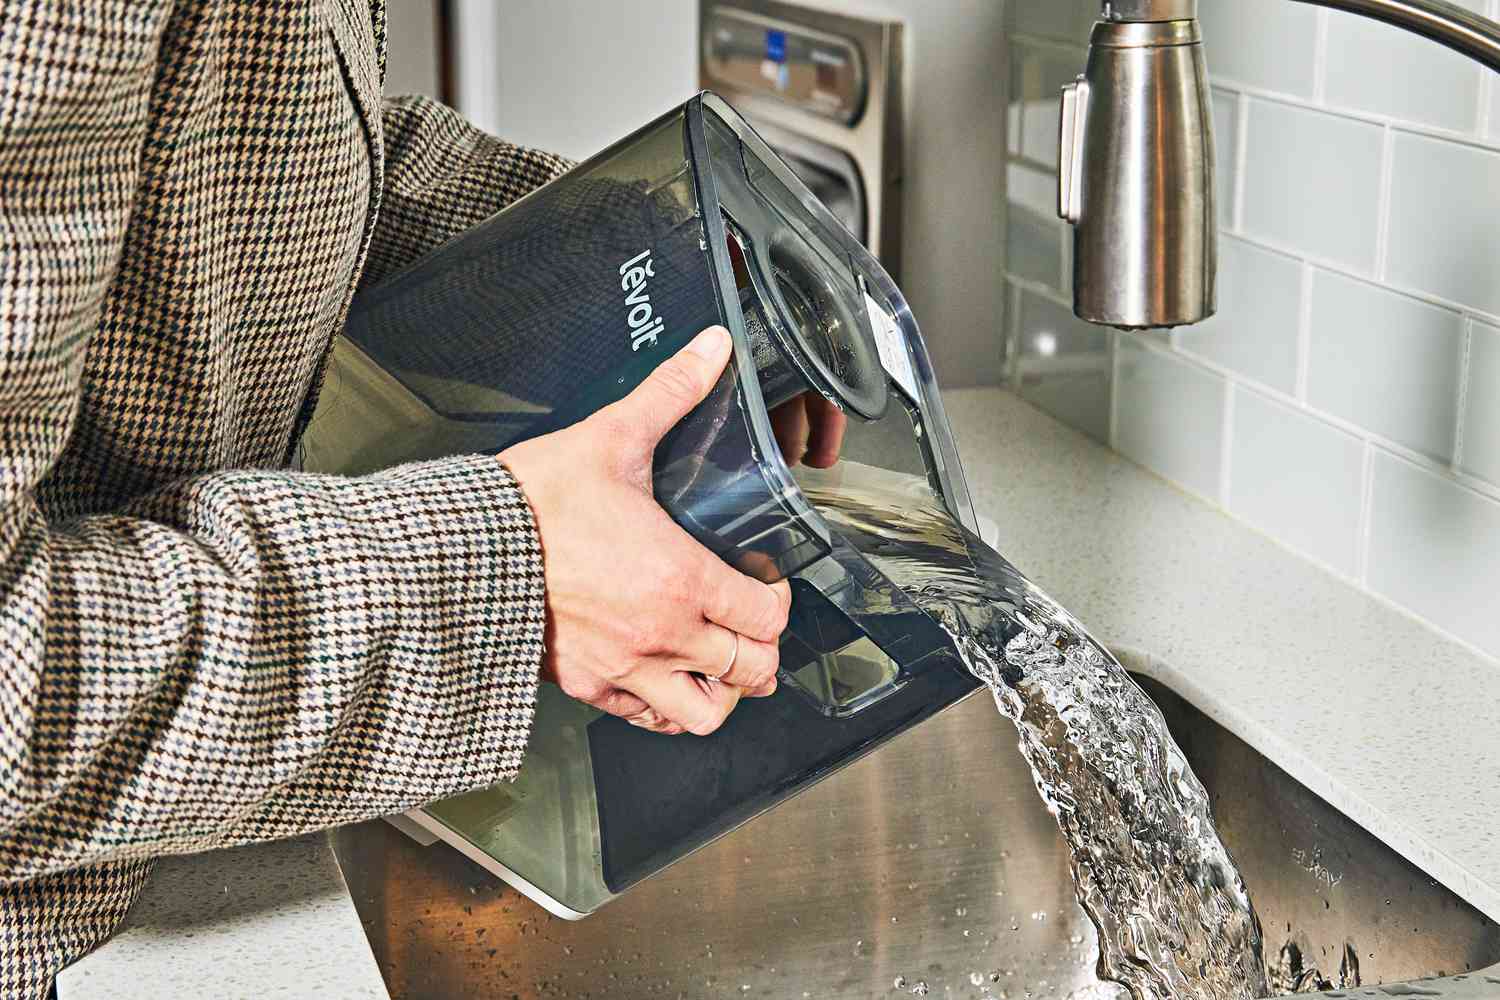
- Clean the water tank: Fill the water tank with a mixture of equal parts white vinegar and water. Let it sit for about 30 minutes to loosen any mineral deposits. Then, use the soft-bristle brush or toothbrush to scrub the inside of the tank, paying attention to any corners or crevices. Rinse the tank thoroughly with water to remove any vinegar residue.
- Clean the filter or wick: If your humidifier has a filter or wick, check the manufacturer’s instructions to determine if it needs to be replaced or cleaned. If it’s reusable, rinse it under running water to remove any sediment or debris. If it’s heavily soiled, you can soak it in a mixture of water and white vinegar for 15-20 minutes before rinsing it again.
- Clean other removable parts: Using the cleaning solution of water and vinegar, scrub any other removable parts such as the cap, tray, or mist nozzle. Pay attention to any nooks and crannies where mineral deposits or bacteria may accumulate. Rinse them thoroughly with water.
- Clean the base of the humidifier: The base is where the water tank sits and where the mist is released. Use the soft-bristle brush or toothbrush to scrub the base, ensuring that you remove any mineral deposits or residue. Rinse it thoroughly with water.
As you clean each part, inspect them for any signs of damage. If you notice any cracks, discoloration, or other issues, it may be time to replace that part.
After cleaning all the parts, you’re ready to move on to the next step: rinsing and disinfecting the humidifier.
Regularly clean your humidifier to prevent mold and bacteria growth. Use a mixture of water and vinegar to remove mineral deposits and disinfect the unit. Be sure to follow the manufacturer’s instructions for cleaning.
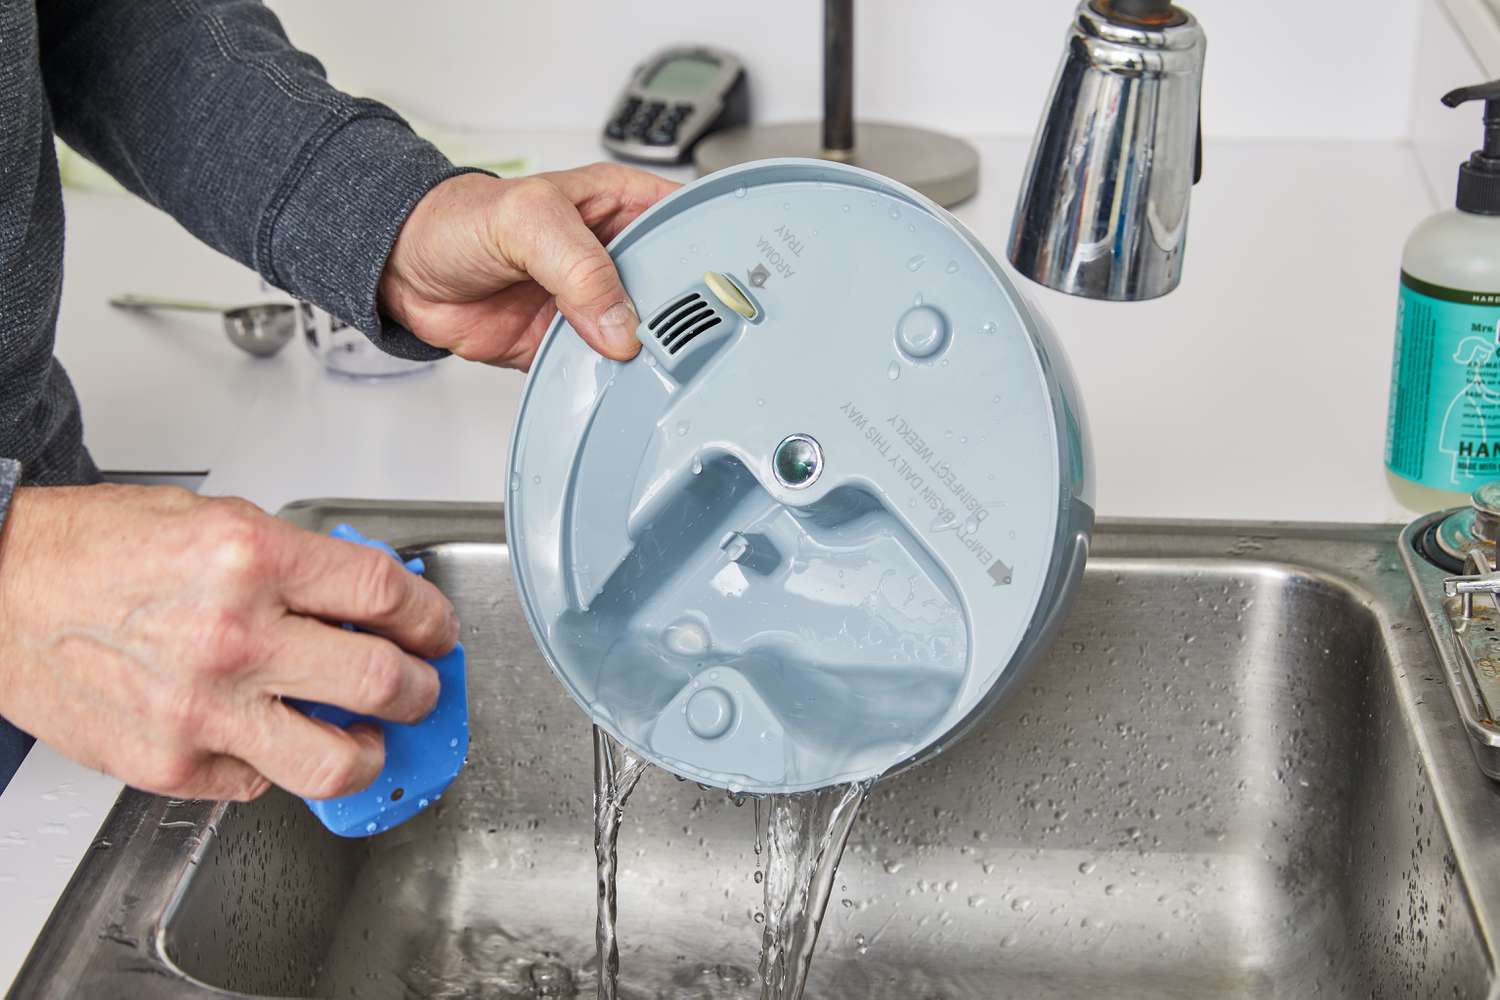
Step 4: Rinse and disinfect the humidifier
After cleaning the various parts of your humidifier, it’s important to thoroughly rinse them to remove any remaining cleaning solution or residue. This step ensures that your humidifier will function properly and that you won’t introduce any cleaning agents into the air you breathe. Here’s how to rinse and disinfect your humidifier:
- Fill a basin or sink with clean water: Fill a basin or sink with clean water. Make sure the water is lukewarm and at a comfortable temperature for handling.
- Rinse the parts: Submerge the cleaned parts, such as the water tank, filter or wick, and other removable components, into the water. Swish them around to ensure all surfaces are thoroughly rinsed.
- Rinse the base: Take the base of the humidifier and rinse it under running water, making sure to remove any traces of cleaning solution or residue.
- Disinfect with hydrogen peroxide (optional): If desired, you can take an extra step to disinfect your humidifier by using hydrogen peroxide. Mix equal parts of hydrogen peroxide and water in a basin or container. Submerge the cleaned parts and let them soak for about 30 minutes. Rinse them thoroughly with clean water afterwards.
Rinsing and disinfecting your humidifier is crucial to prevent any potentially harmful bacteria or mold from contaminating the air you breathe. It’s important to note that this step is especially important if you or someone in your household has respiratory issues or allergies.
Once you have thoroughly rinsed and, if desired, disinfected the humidifier’s parts, you’re ready for the final step: reassembling the humidifier.
Step 5: Reassemble the humidifier
You’re almost done! After cleaning, rinsing, and disinfecting the various parts of your humidifier, it’s time to reassemble everything so you can start enjoying clean and moist air in your home. Follow these steps to reassemble your humidifier:
- Ensure everything is completely dry: Before reassembling, make sure that all the parts are completely dry. You can use a clean cloth or towel to gently pat them dry.
- Place the filter or wick back into the humidifier: If you removed a filter or wick, insert it back into its designated spot in the humidifier. Make sure it fits securely.
- Reattach any other removable parts: Take the cap, tray, mist nozzle, or any other removable parts that you previously cleaned, and attach them back onto the humidifier. Follow the manufacturer’s instructions if you’re unsure of the correct placement.
- Fill the water tank: Fill the water tank with clean water. If you prefer to use distilled water, this is the time to do so. Place the tank back onto the base of the humidifier.
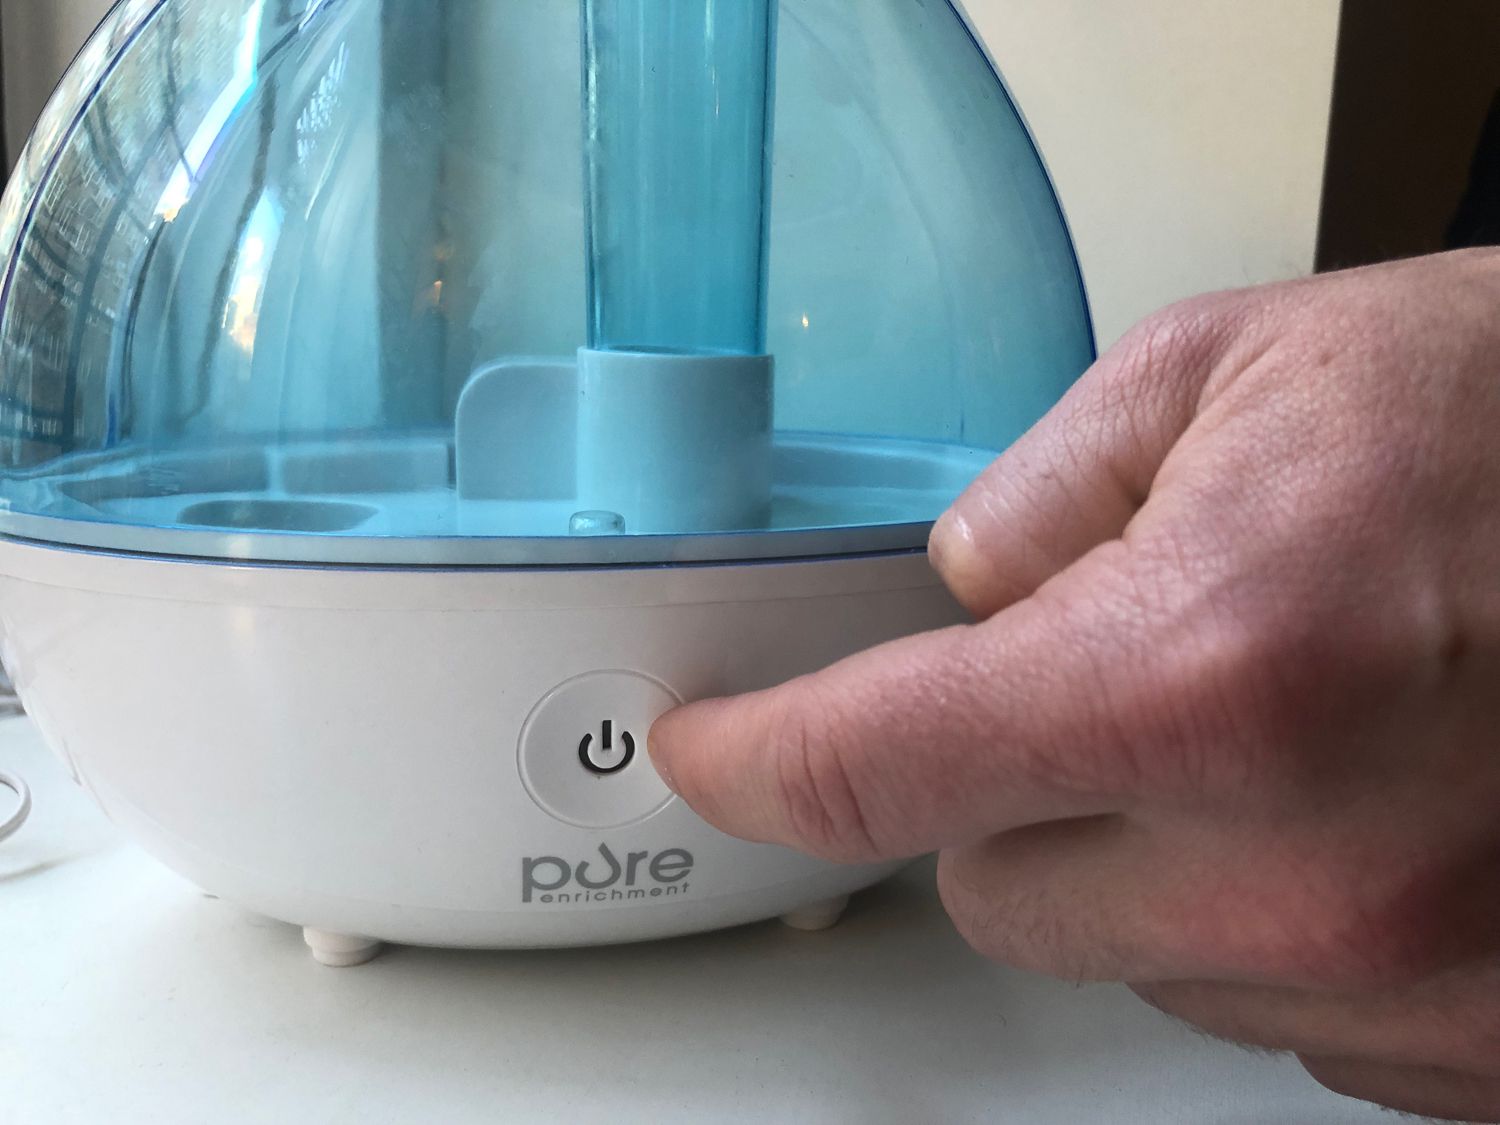
- Plug in the humidifier: Once everything is reassembled and the water tank is securely in place, plug in the humidifier. Set your desired humidity level and turn it on.
Now that you have successfully reassembled your humidifier, it’s important to maintain regular cleaning and maintenance to ensure its long-term performance. Regularly check the filter or wick and replace it as needed. Also, be sure to clean the humidifier at least once a week to prevent the buildup of minerals and bacteria.
By following these simple steps to clean and maintain your humidifier, you can create a healthier and more comfortable living environment. Breathing clean and moist air can benefit your respiratory system, help alleviate dry skin, and reduce symptoms of allergies or asthma.
Remember, a clean humidifier is a happy and efficient humidifier. So, enjoy the benefits of a properly maintained appliance and breathe easy in your home.
Conclusion
Congratulations! You have successfully learned how to clean a humidifier in five simple steps. Taking the time to clean and maintain your humidifier will not only extend its lifespan but also ensure that you are breathing in clean and healthy air.
Regular maintenance and cleaning of your humidifier are crucial to prevent the buildup of mineral deposits, bacteria, and mold. By following the step-by-step process outlined in this guide, you can effectively remove any residue and maintain optimal performance.
Remember to always refer to the manufacturer’s instructions for your specific model, as there may be slight variations in the cleaning process. It’s also essential to clean your humidifier at least once a week and check the filter or wick regularly for replacement or cleaning.
By keeping your humidifier clean, you can enjoy the benefits of improved air quality. Properly humidified air can help alleviate dry skin, prevent respiratory irritation, and create a more comfortable living environment, especially during dry seasons or in spaces with low humidity.
So, don’t neglect the maintenance of your humidifier. Make it a regular part of your cleaning routine, and your appliance will continue to provide you with clean and moist air for years to come.
Thank you for reading, and we hope this guide has been helpful to you. Breathe easy and enjoy the benefits of a well-maintained humidifier!
Frequently Asked Questions about How To Clean A Humidifier In Five Simple Steps
Was this page helpful?
At Storables.com, we guarantee accurate and reliable information. Our content, validated by Expert Board Contributors, is crafted following stringent Editorial Policies. We're committed to providing you with well-researched, expert-backed insights for all your informational needs.


0 thoughts on “How To Clean A Humidifier In Five Simple Steps”