Articles
How To Do Tile Countertops
Modified: September 2, 2024
Learn everything you need to know about tile countertops with our informative articles. Get expert tips, installation advice, and design inspiration for your kitchen or bathroom.
(Many of the links in this article redirect to a specific reviewed product. Your purchase of these products through affiliate links helps to generate commission for Storables.com, at no extra cost. Learn more)
Introduction
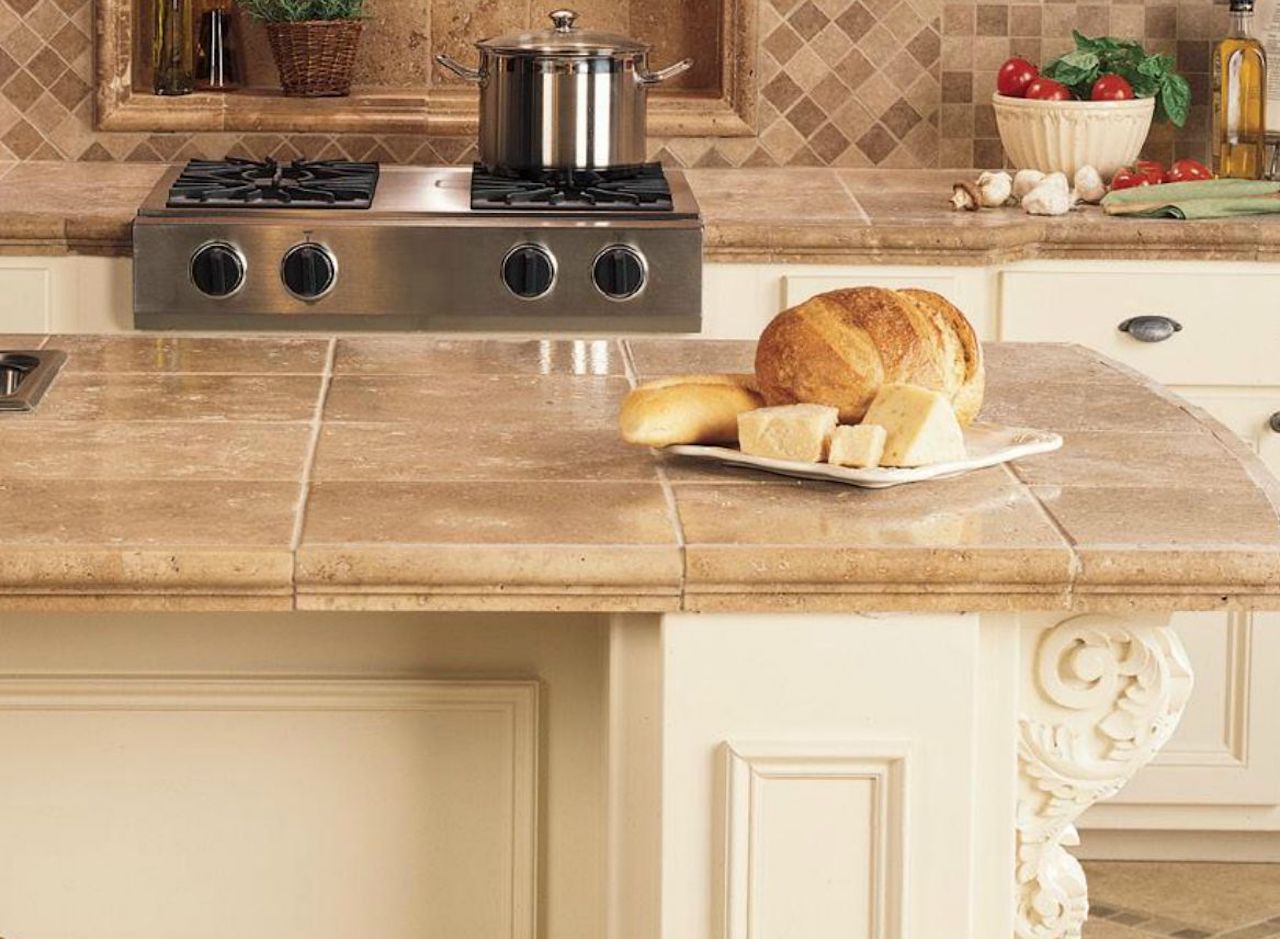
Tile countertops are a popular choice for kitchens and bathrooms due to their durability, versatility, and aesthetic appeal. Whether you are looking to upgrade your existing countertops or starting a new project from scratch, this article will guide you through the process of installing tile countertops. By following these steps, you can create a stunning and functional surface that adds value and beauty to your home.
Before diving into the details of the installation process, it is essential to understand the importance of selecting the right tile for your countertops, ensuring that it meets your functional and design needs. Additionally, proper preparation of the countertop surface and precise cutting and fitting of the tiles are crucial for a successful installation.
In this article, we will walk you through each step, providing tips and insights to help you achieve professional-looking results. So, let’s get started and transform your countertops into a charming focal point of your kitchen or bathroom.
Key Takeaways:
- Transform your kitchen or bathroom with stunning and durable tile countertops by carefully choosing the right tile, preparing the surface, and following the step-by-step installation process. Embrace creativity and enjoy the transformation journey.
- Achieve professional-looking results by meticulously cutting, fitting, and setting the tiles, applying adhesive and grout, and sealing the countertop. Balance functionality and aesthetics, and remember to practice proper maintenance for long-lasting beauty and functionality.
Choosing the Right Tile
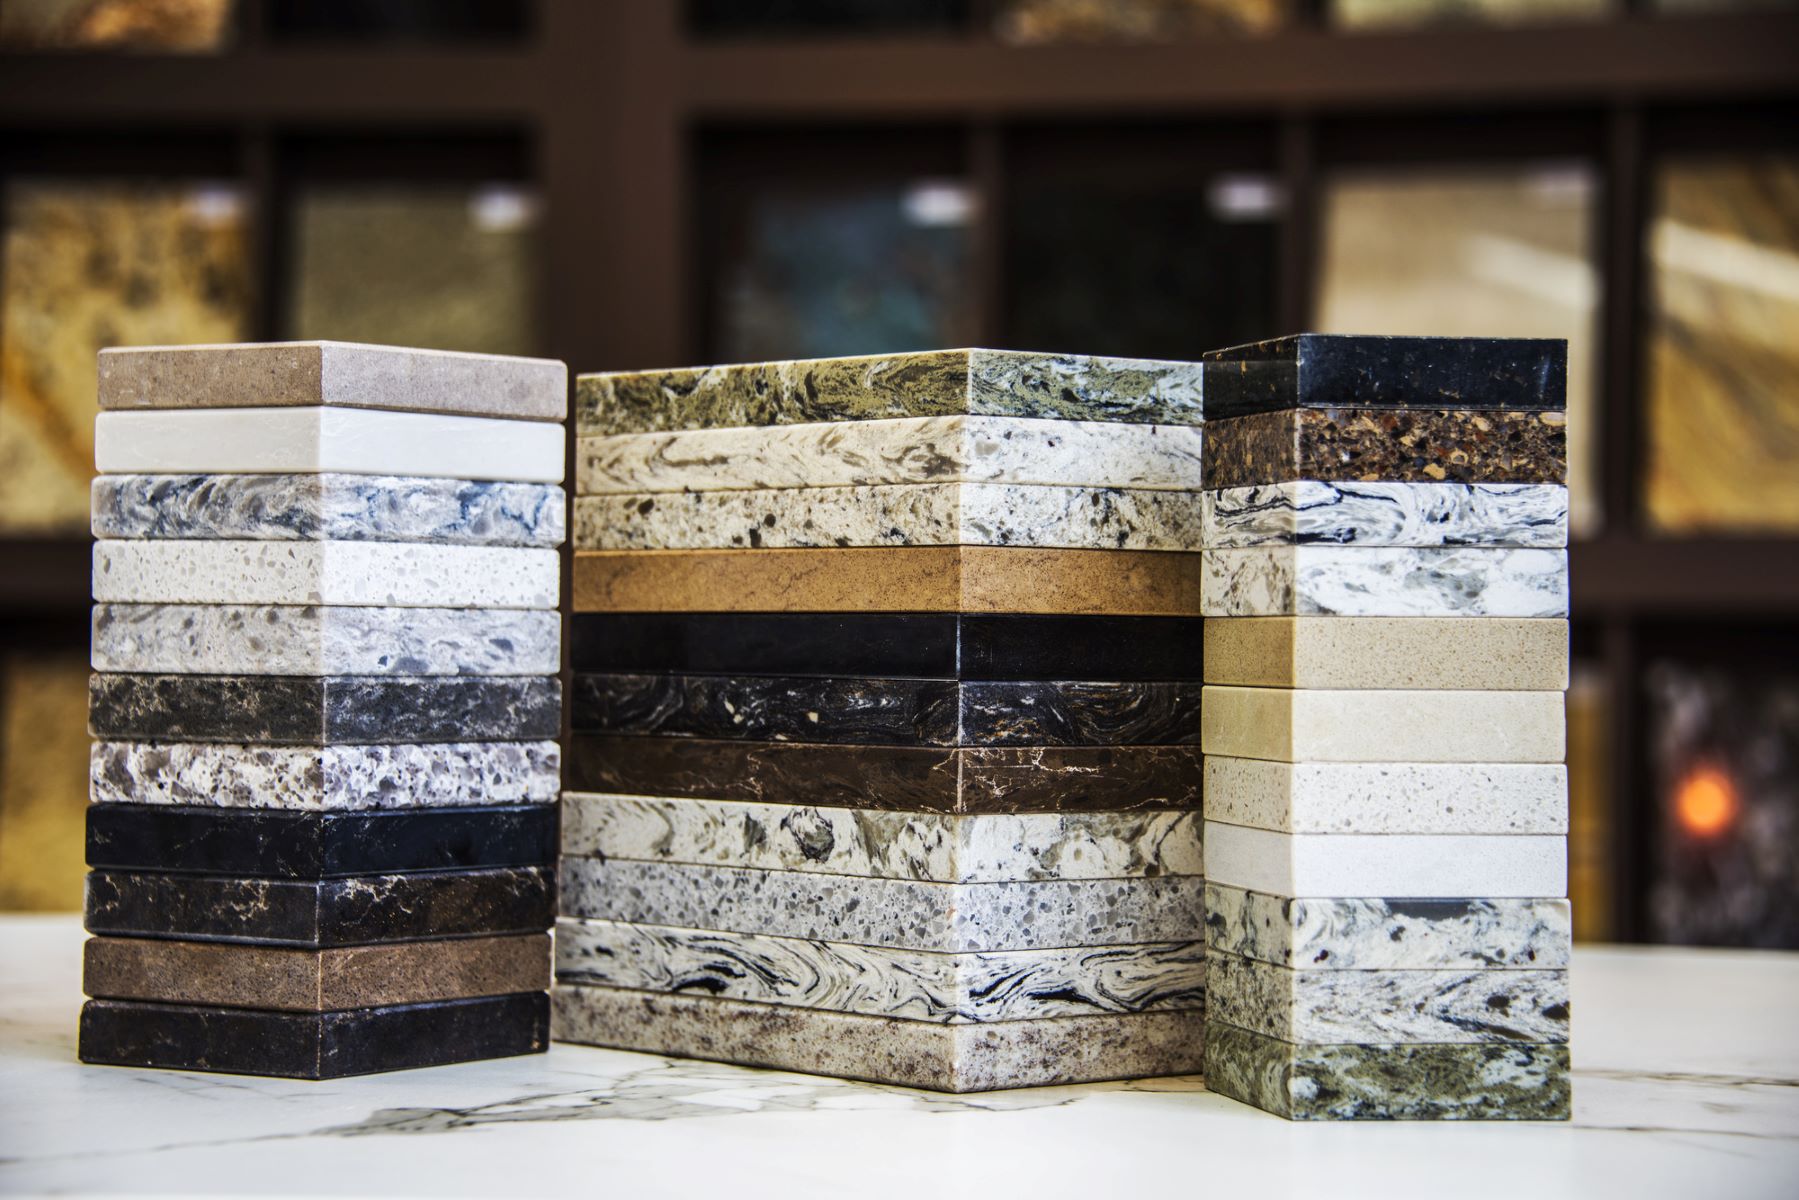
When it comes to choosing the right tile for your countertops, there are several factors to consider. The first consideration is the material of the tile. Popular options for countertop tiles include ceramic, porcelain, granite, marble, and quartz.
Ceramic and porcelain tiles are durable, affordable, and come in a wide range of colors and designs. These tiles are resistant to stains and moisture, making them suitable for high-traffic areas like kitchens. Granite and marble tiles, on the other hand, offer a luxurious and elegant look. They are heat-resistant and highly durable but require regular sealing to maintain their beauty.
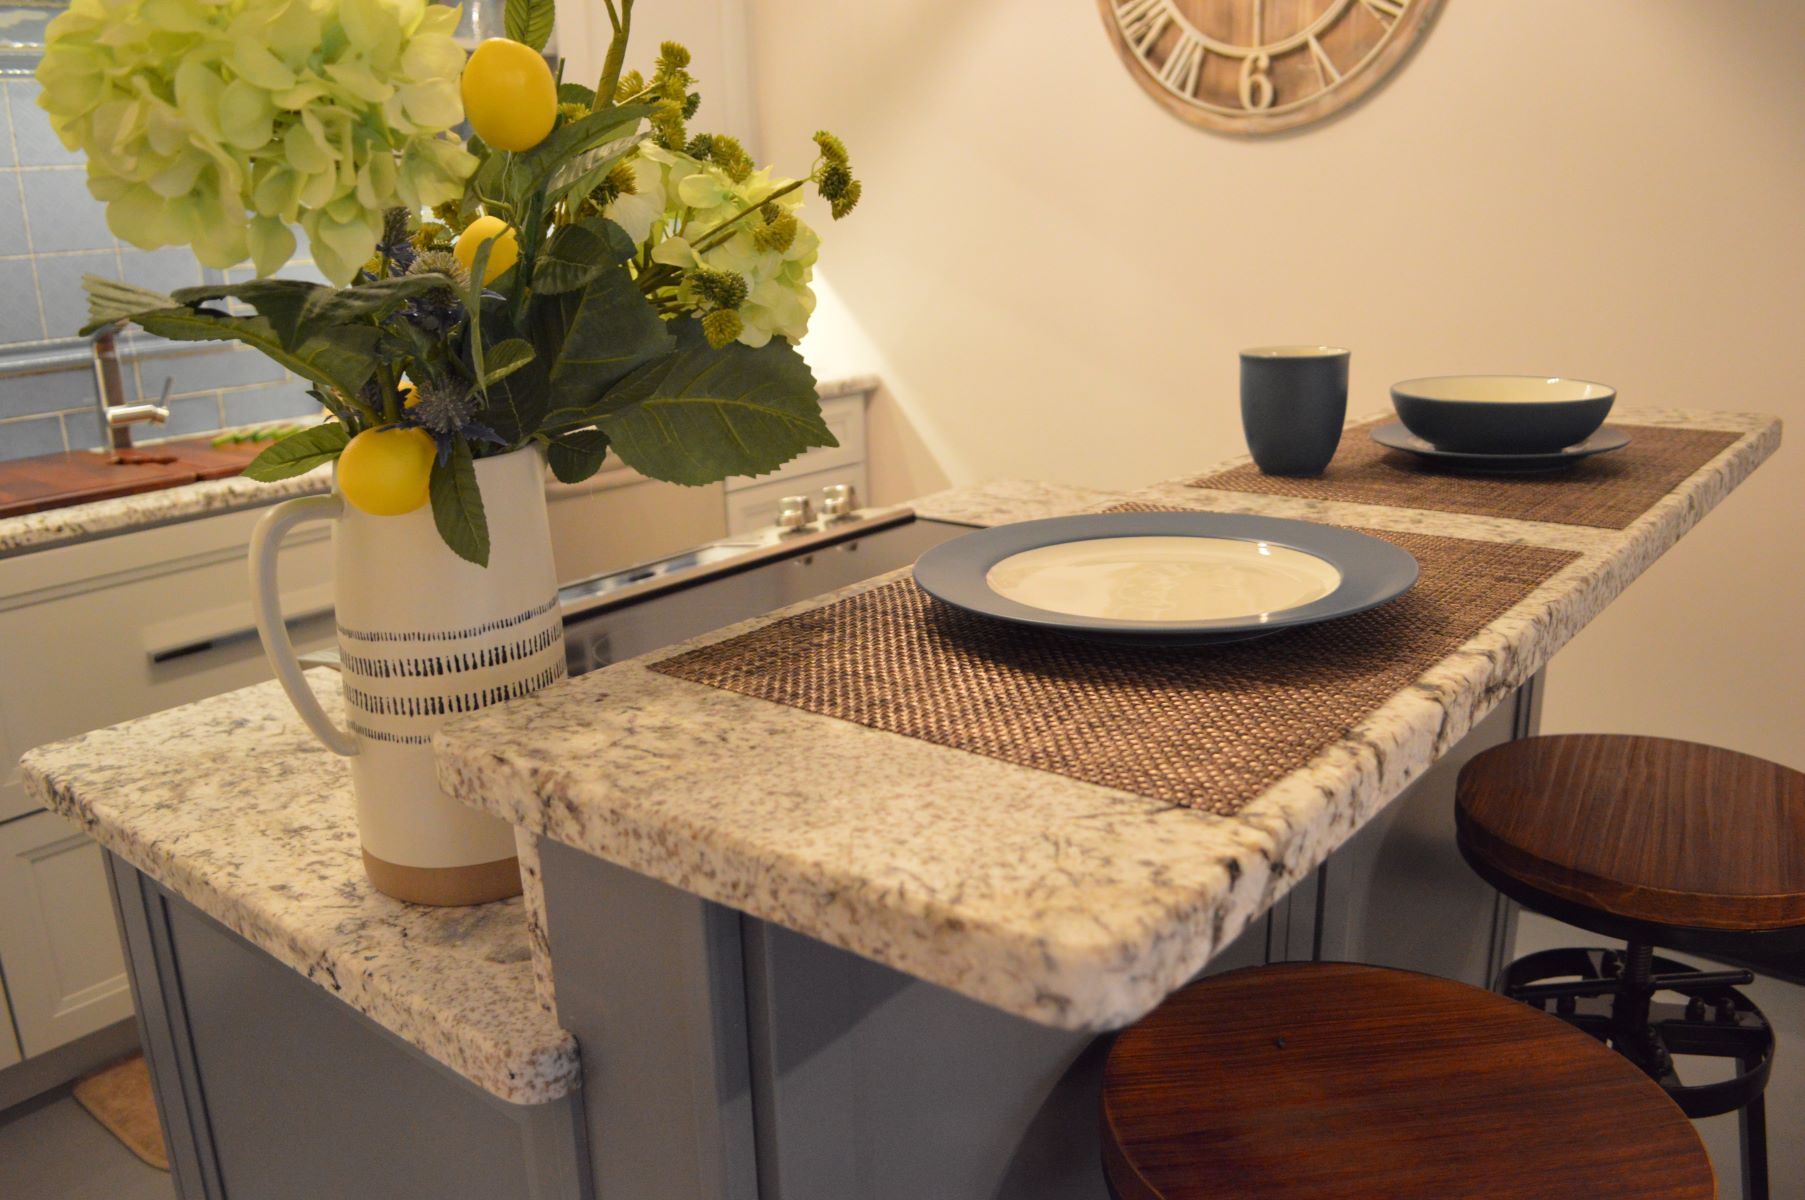
Quartz tiles are a popular choice for their durability and low-maintenance properties. These engineered stones come in various colors and patterns, mimicking the look of natural stone without the need for sealing. Consider your budget, aesthetic preference, and maintenance requirements when choosing the material for your tile countertops.
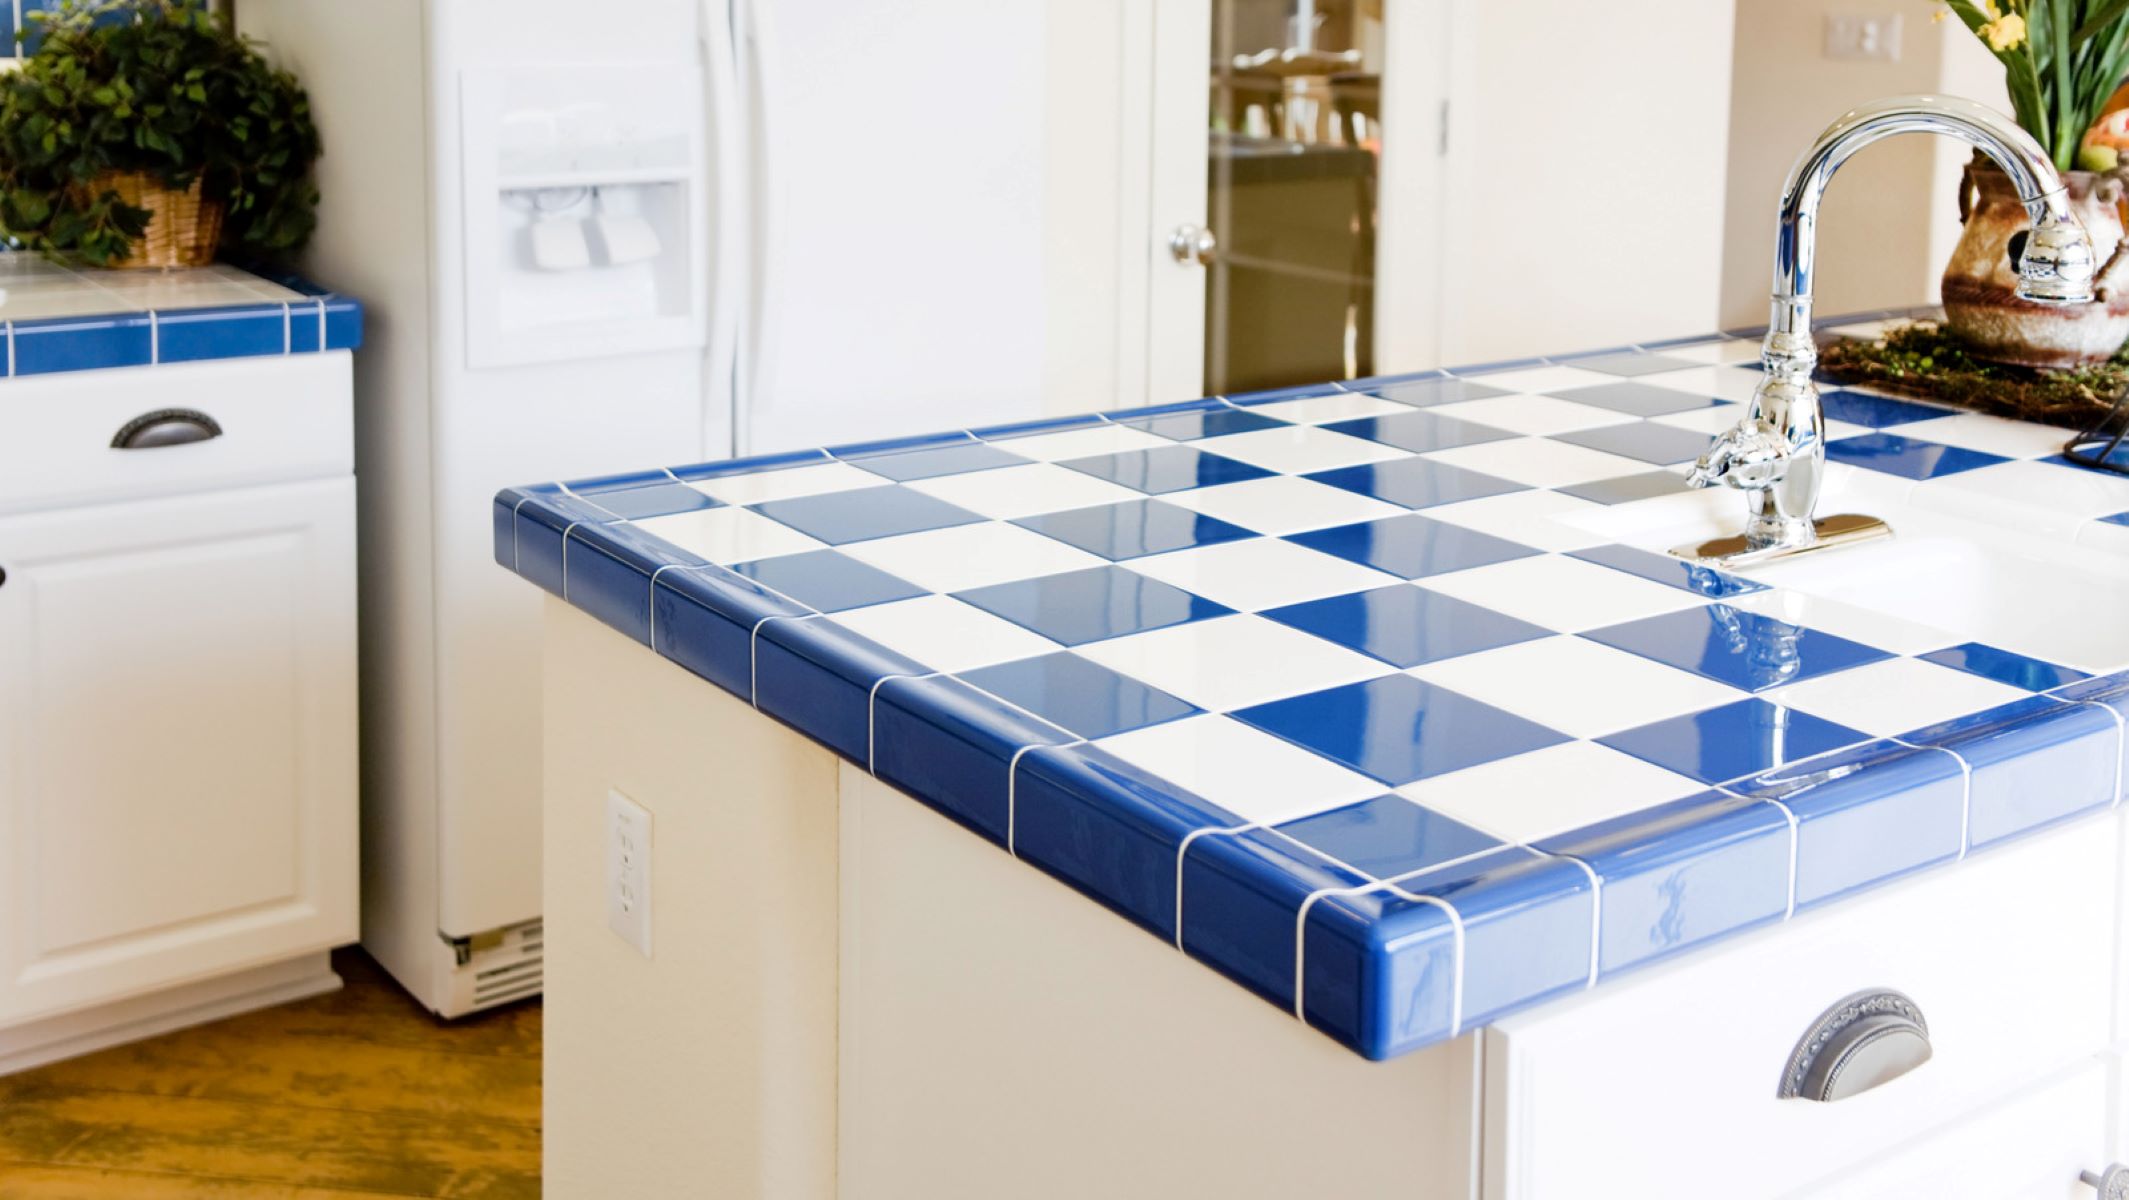
Another important aspect to consider is the size and shape of the tiles. Larger tiles can create a sleek and modern look, while smaller tiles can add visual interest and a mosaic-like effect. Consider the size of your countertop and the overall aesthetic you want to achieve when deciding on the tile size.
Additionally, think about the color and pattern of the tiles. Light-colored tiles can make a small space appear larger, while dark-colored tiles can add depth and richness to a larger area. Consider the existing color scheme and style of your kitchen or bathroom when choosing the color and pattern of the tiles.
Lastly, consider the durability and maintenance requirements of the tiles. Some tiles may be more prone to scratching or staining, requiring regular upkeep. It is essential to choose tiles that can withstand the demands of your daily use and are easy to maintain.
By taking the time to carefully consider these factors, you can choose the right tile for your countertops that not only complements your aesthetic preferences but also meets your functional needs. Now that you have selected the perfect tile, it’s time to prepare the countertop surface for installation.
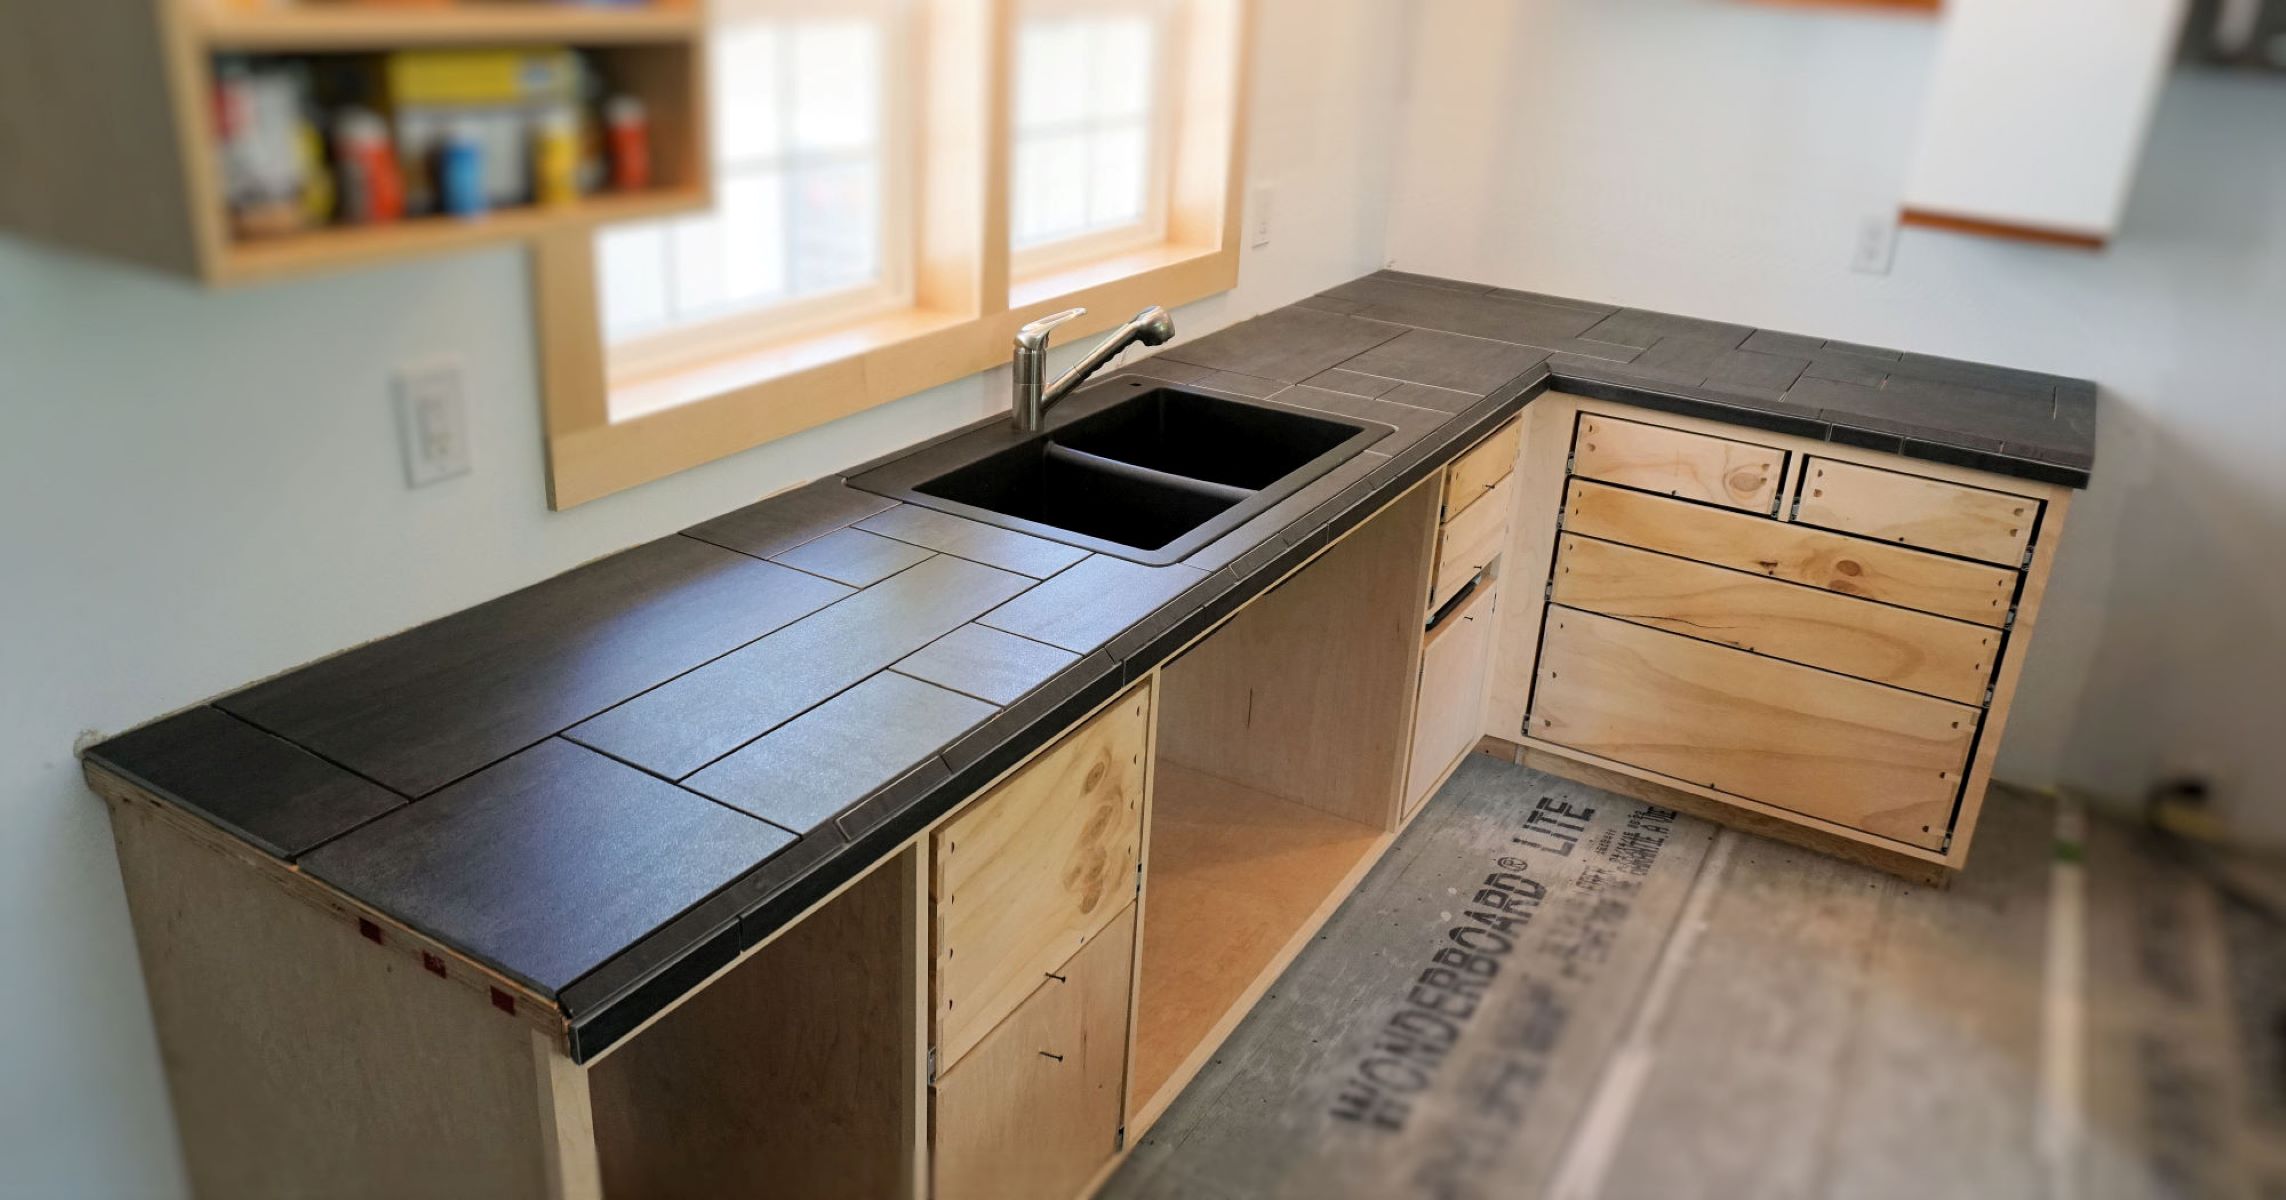
Preparing the Countertop Surface
Before you begin the installation process, it is crucial to properly prepare the countertop surface to ensure a successful and long-lasting tile countertop. Here are the steps to follow:
1. Clear the countertop: Remove any items, appliances, or debris from the countertop surface. This will allow you to work on a clean and clear area, making the preparation process easier.
2. Clean the countertop: Thoroughly clean the countertop surface using a mild detergent or a specialized stone cleaner. Remove any dirt, grease, or stains that might interfere with the adhesive bond of the tiles. Rinse the countertop and dry it completely before moving on to the next step.
3. Repair any damage: Inspect the countertop surface for any cracks, chips, or uneven areas. Use a filler or epoxy resin to repair any damage and ensure a smooth and level surface. Allow the repairs to dry and sand them down if necessary.
4. Sand the surface: If you are working with a laminate or glossy surface, lightly sand it to create a rough texture. This will help the adhesive bond properly with the countertop. Use a sanding block or sandpaper with a medium grit to achieve the desired texture.
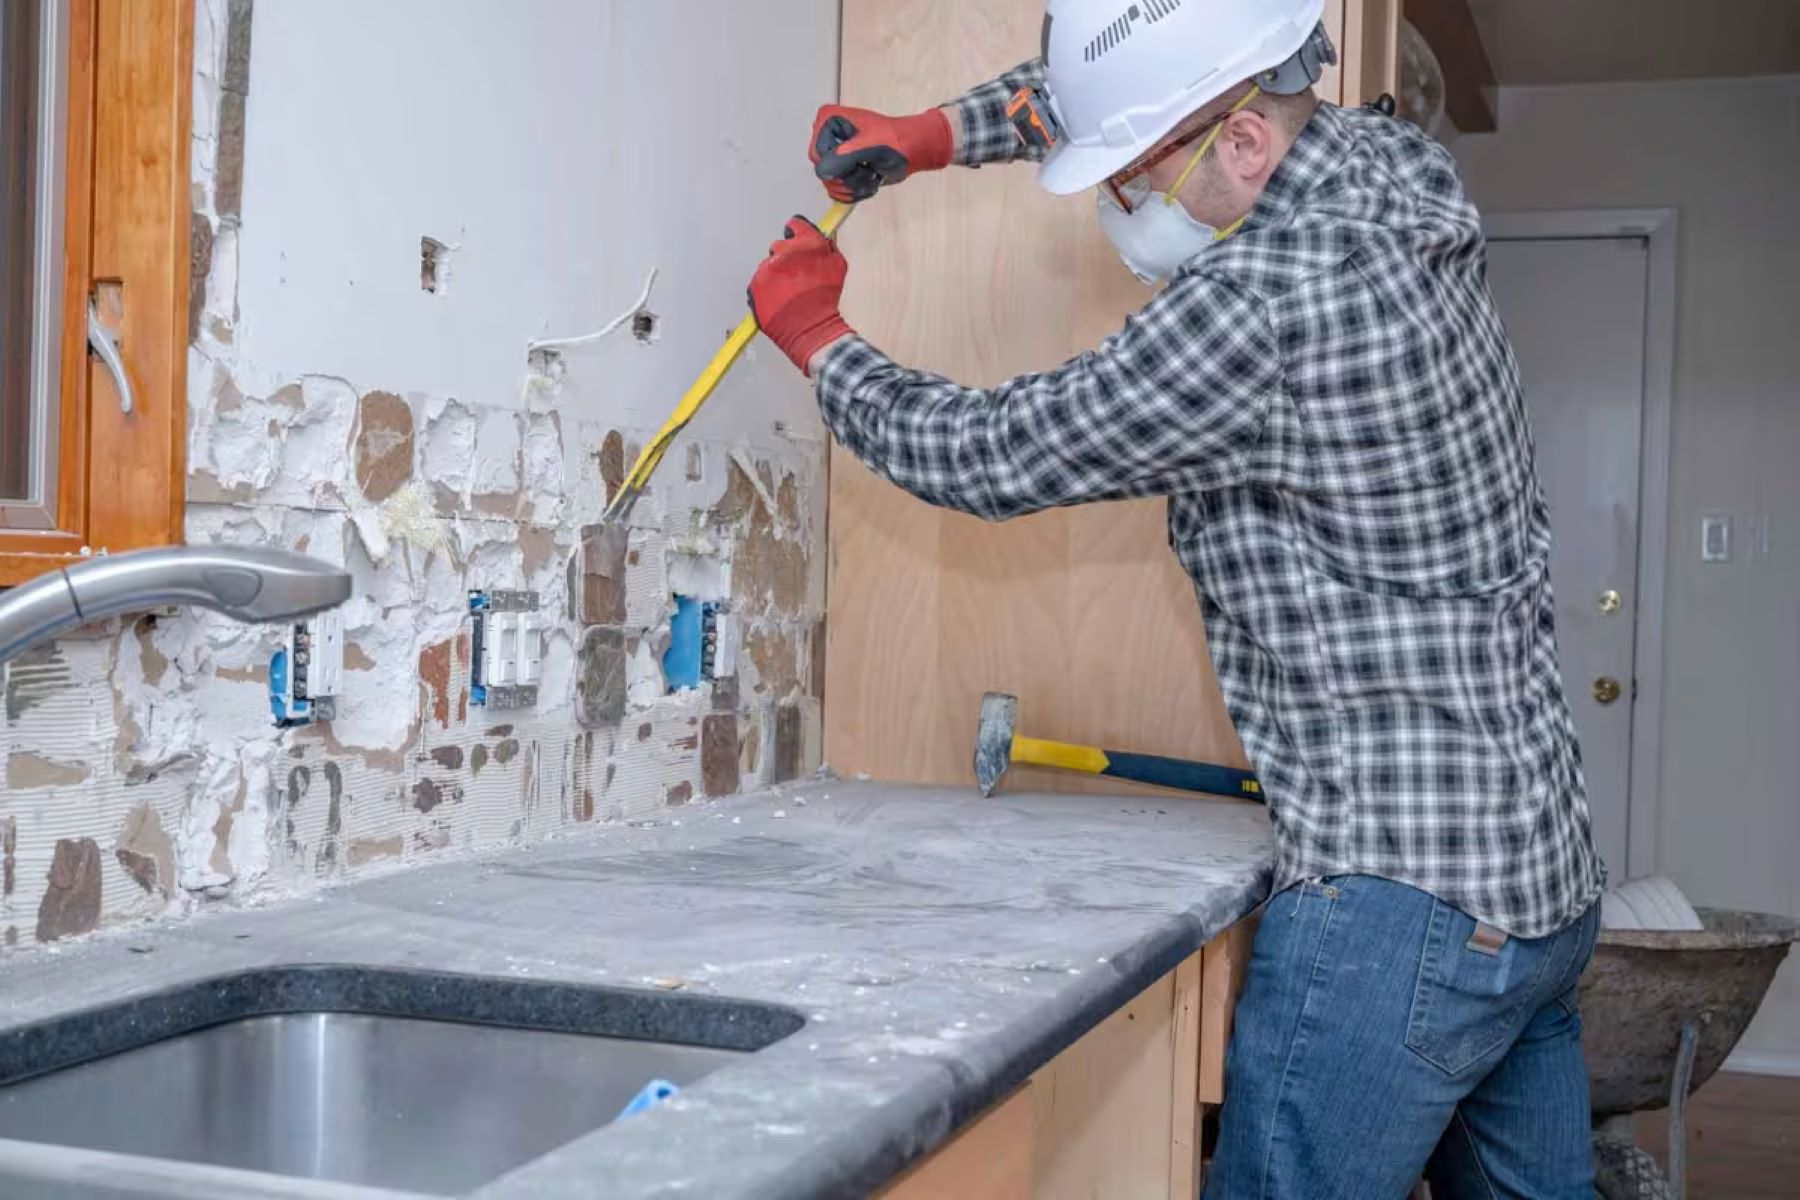
5. Remove the backsplash: If your countertop has a backsplash attached, consider removing it before installing the tiles. This will allow you to have a seamless and cohesive look once the tiles are in place. Use a pry bar or putty knife to gently lift and detach the backsplash from the countertop.
6. Protect surrounding areas: Use painter’s tape or masking tape to protect the surrounding areas, such as walls or cabinets, from the adhesive or grout. This will make the clean-up process easier and prevent any accidental damage.
By properly preparing the countertop surface, you are setting the foundation for a successful tile countertop installation. Take the time to complete each step carefully, ensuring a clean, level, and well-prepared surface. Now that the surface is ready, it’s time to move on to cutting and fitting the tiles for your countertops.
Cutting and Fitting the Tiles
Now that the countertop surface is prepared, it’s time to move on to cutting and fitting the tiles. This step requires precision and careful planning to ensure a seamless and professional-looking result. Here’s how to proceed:
1. Measure and mark: Start by measuring the dimensions of the countertop and sketching a layout plan. This will help you determine the placement of the tiles and the cuts required. Use a tape measure, straightedge, and pencil to mark the measurements directly on the countertop surface.
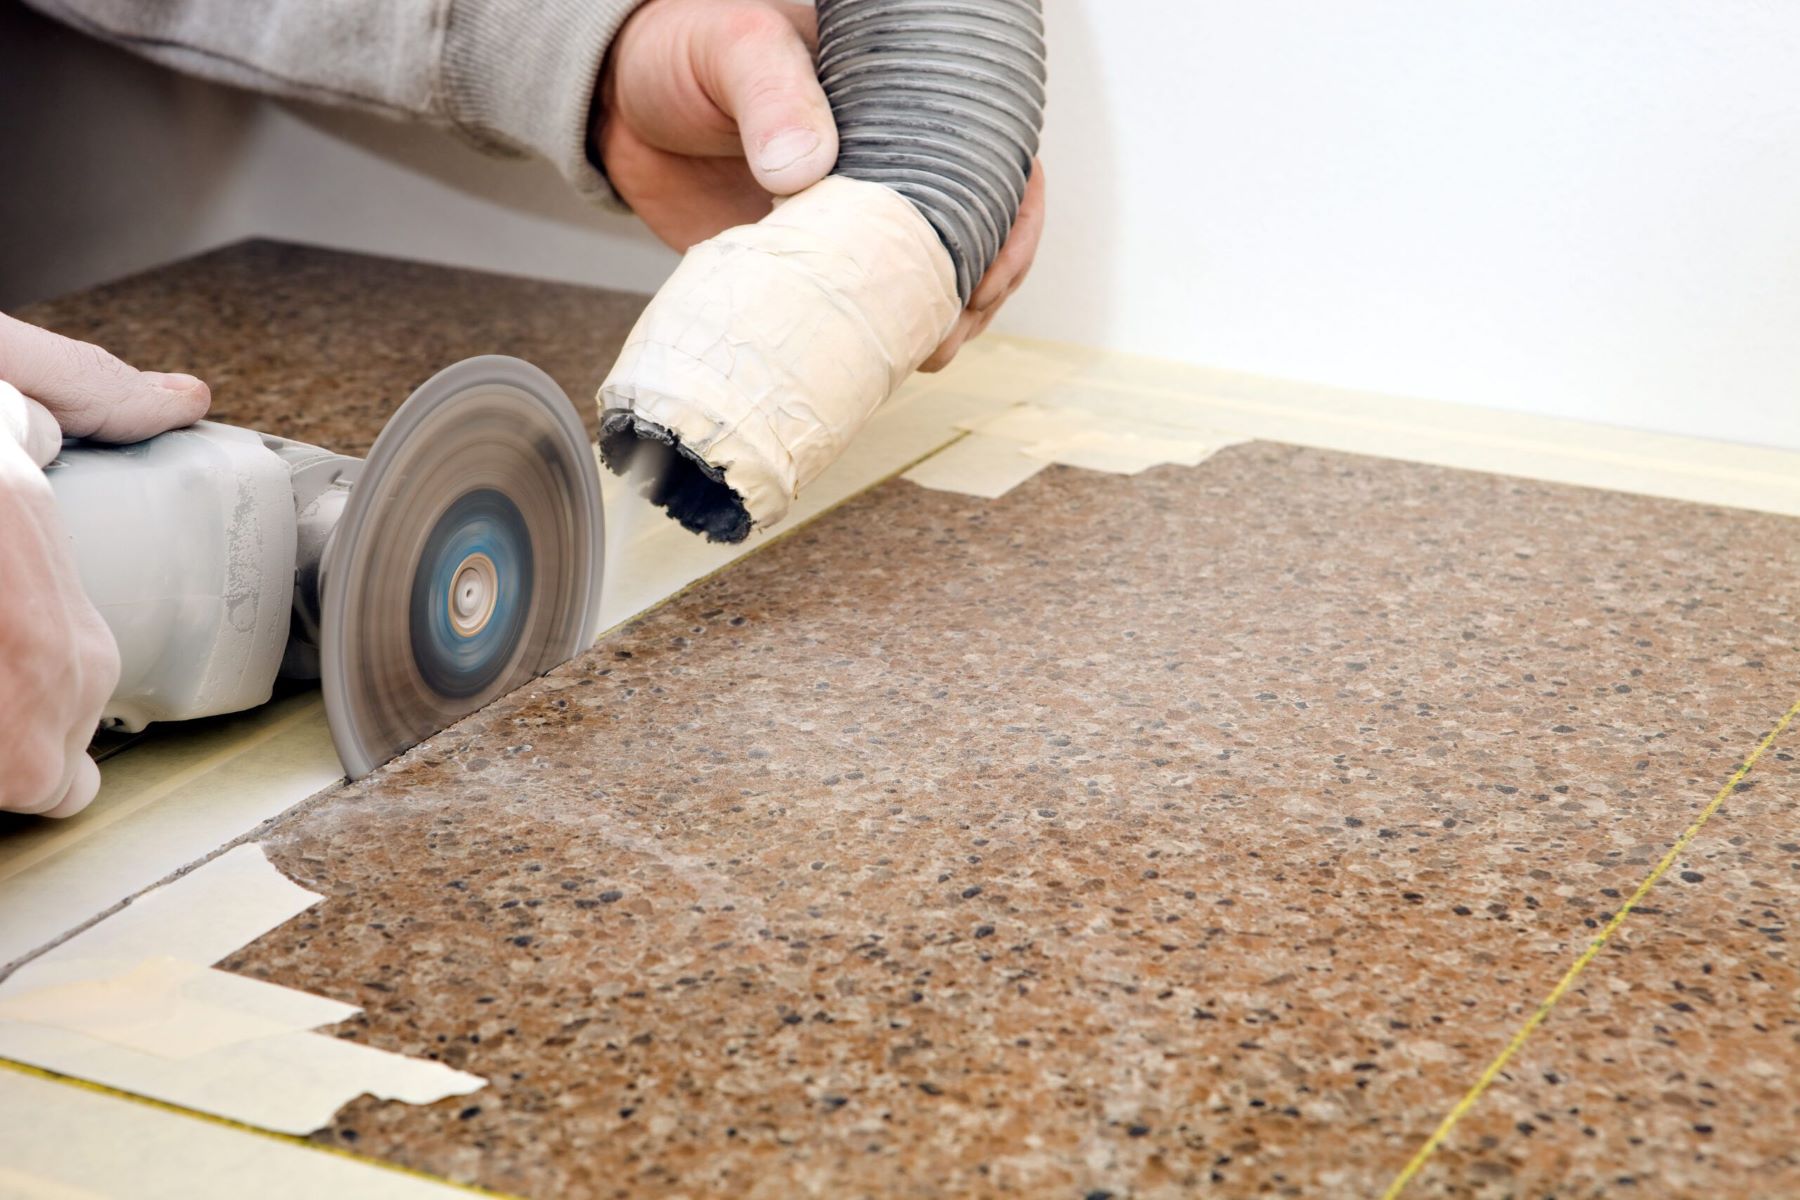
2. Start with edge tiles: Begin the installation by placing edge tiles along the perimeter of the countertop. These tiles will act as a frame and provide a neat and finished look. Use a tile cutter or wet saw to make the necessary cuts for the edge tiles, following the marked measurements.
3. Cut tiles for corners and edges: If your countertop has corners or curved edges, you will need to make special cuts to fit the tiles properly. Use a tile nipper or a tile file to carefully shape and trim the tiles as needed. Take your time and make precise cuts to ensure a perfect fit.
4. Dry fit the tiles: Before applying adhesive, dry fit the tiles on the countertop to ensure they fit properly and align with your layout plan. Make any necessary adjustments or additional cuts as needed to achieve the desired look. This step helps you visualize the final result and make any necessary modifications before permanently adhering the tiles.
5. Create a template for complex cuts: If your countertop requires intricate cuts, such as for sinks or faucets, create a template using cardboard or paper. Transfer the measurement and shape onto the tiles and carefully cut them using a wet saw or tile cutter. This method ensures accurate and precise cuts for a seamless fit.
6. Smooth the cut edges: After making all necessary cuts, use a tile file or sandpaper to smooth the edges of the cut tiles. This will create a clean and finished appearance and minimize the risk of injuries from sharp edges.
By following these steps, you can confidently cut and fit the tiles for your countertop. Take your time and pay attention to the details to achieve a professional-looking result. Once the tiles are cut and fitted, it’s time to move on to the next step: applying the adhesive.
Applying the Adhesive
Now that the tiles are cut and fitted, it’s time to move on to the next crucial step of the tile countertop installation process: applying the adhesive. The adhesive is what will securely bond the tiles to the countertop surface, ensuring a durable and long-lasting result. Follow these steps to properly apply the adhesive:
1. Choose the right adhesive: Select a high-quality adhesive that is specifically designed for tile countertop installations. Consult with a professional or the manufacturer’s instructions to determine the appropriate adhesive for your tile material and countertop surface.
2. Mix the adhesive: If you are using a pre-mixed adhesive, skip this step. However, if you are using a powdered adhesive, mix it with water according to the manufacturer’s instructions. Use a clean bucket and a mixing paddle to thoroughly mix the adhesive until it reaches a smooth and creamy consistency.
3. Apply the adhesive: Starting from the edges or the center of the countertop, apply a layer of adhesive using a notched trowel. Hold the trowel at a 45-degree angle and spread the adhesive evenly, ensuring full coverage. Work in small sections to prevent the adhesive from drying out before laying the tiles.
4. Comb the adhesive: After spreading the adhesive, use the notched side of the trowel to comb through the adhesive. This creates ridges and improves the bond between the tiles and the countertop. Make sure to maintain a consistent depth and angle as you comb the adhesive.
5. Place the tiles: Carefully place the tiles onto the adhesive, following your layout plan. Press the tiles firmly into the adhesive, applying even pressure to ensure proper adhesion. Use tile spacers to maintain consistent spacing between the tiles, ensuring a professional-looking result.
6. Check for level and alignment: Use a level and a straightedge to check that the tiles are level and aligned correctly. Make any necessary adjustments by gently tapping the tiles with a rubber mallet. This step is crucial to ensure a flat and even countertop surface.
7. Clean excess adhesive: As you work, periodically clean any excess adhesive that squeezes out from the edges of the tiles. Use a damp sponge or cloth to wipe away the excess adhesive before it dries. This will make the grouting process easier and result in a cleaner finish.
By following these steps, you can apply the adhesive correctly and ensure a strong bond between the tiles and the countertop surface. Once the adhesive has dried and the tiles are securely in place, it’s time to move on to the next step: grouting the tiles.
When installing tile countertops, make sure to use a waterproof, flexible adhesive to prevent water damage and cracking. Additionally, use a grout sealer to protect the grout from stains and moisture.
Read more: How To Clean Tile Countertops
Setting the Tiles in Place
After applying the adhesive and placing the tiles on the countertop, it’s time to proceed with setting the tiles in place. This step involves ensuring that the tiles are securely bonded to the countertop surface and creating a smooth and level installation. Here’s how to set the tiles:
1. Check for alignment: Take a moment to check the alignment and spacing of the tiles. Make any necessary adjustments by gently tapping on the tiles with a rubber mallet. This will help ensure that the tiles are evenly set and create a professional-looking finish.
2. Use tile spacers: If you haven’t already, insert tile spacers between the tiles to maintain consistent spacing. These spacers create uniform grout lines and help achieve a clean and polished look. Ensure that the spacers are properly aligned and adjust them as needed.
3. Check for levelness: Place a level across the tiles to check for any unevenness. If you notice any high spots or uneven tiles, gently tap them down with a rubber mallet to level them out. This step ensures that the countertop surface is flat and allows for easy grouting.
4. Remove excess adhesive: As you work, periodically clean off any excess adhesive that may have squeezed out from the edges of the tiles. Use a damp sponge or cloth to remove the excess adhesive before it dries. This will result in cleaner grout lines and a more professional finish.
5. Allow the adhesive to dry: Once all the tiles are set in place, allow the adhesive to dry completely. Follow the manufacturer’s instructions for the recommended drying time. Avoid placing any heavy objects or applying excessive pressure on the tiles during this drying period.
By following these steps, you can ensure that the tiles on your countertop are properly set and aligned. Taking the time to check for levelness and clean off excess adhesive will result in a beautiful and durable tile countertop. Once the adhesive has dried, it’s time to move on to the next step: grouting the tiles.
Grouting the Tiles
Grouting is a crucial step in the tile countertop installation process that not only provides a finished look but also helps to secure the tiles in place and seal any gaps between them. Here’s a step-by-step guide on how to properly grout your tiles:
1. Choose the right grout: Select a grout color that complements your tiles and desired aesthetic. There are different types of grout available, including sanded and unsanded. Choose the appropriate grout type based on the width of your grout lines.
2. Mix the grout: Follow the manufacturer’s instructions to mix the grout with water. Use a clean bucket and a grout float to mix the grout until it reaches a smooth and consistent texture. Let the grout mixture sit for a few minutes before proceeding.
3. Apply the grout: Scoop a generous amount of grout onto the countertop surface with the grout float. Holding the float at a 45-degree angle, spread the grout over the tiles, making sure to fill the grout lines completely. Work in small sections to prevent the grout from drying out before you can finish it.
4. Remove excess grout: After applying the grout, use a grout float or a grout sponge at a 45-degree angle to remove the excess grout from the surface of the tiles. Gently wipe diagonally across the tiles, taking care not to remove too much grout from the grout lines. Rinse the sponge or float regularly to keep it clean.
5. Shape and smooth the grout lines: Use a grout shaping tool or the corner of a damp sponge to shape the grout lines and make them smooth. This step helps to create an even and polished finish. Take your time and pay attention to detail for the best results.
6. Allow the grout to dry: Let the grout dry according to the manufacturer’s instructions. This usually takes several hours or even a full day. It’s important to avoid disturbing or placing any objects on the grout during the drying period to prevent it from cracking or becoming uneven.
7. Clean and seal the grout: Once the grout is completely dry, clean off any haze or residue using a damp cloth or sponge. Afterward, consider applying a grout sealer to protect the grout from stains and moisture. Follow the sealer manufacturer’s instructions for the proper application technique.
By following these steps, you can achieve well-grouted tiles that enhance the beauty and longevity of your tile countertop. Properly grouted tiles not only create a cohesive and finished look but also help protect the countertop from water damage and prolong its lifespan. Once the grout is dry and sealed, it’s time to move on to the final step: applying a sealer.
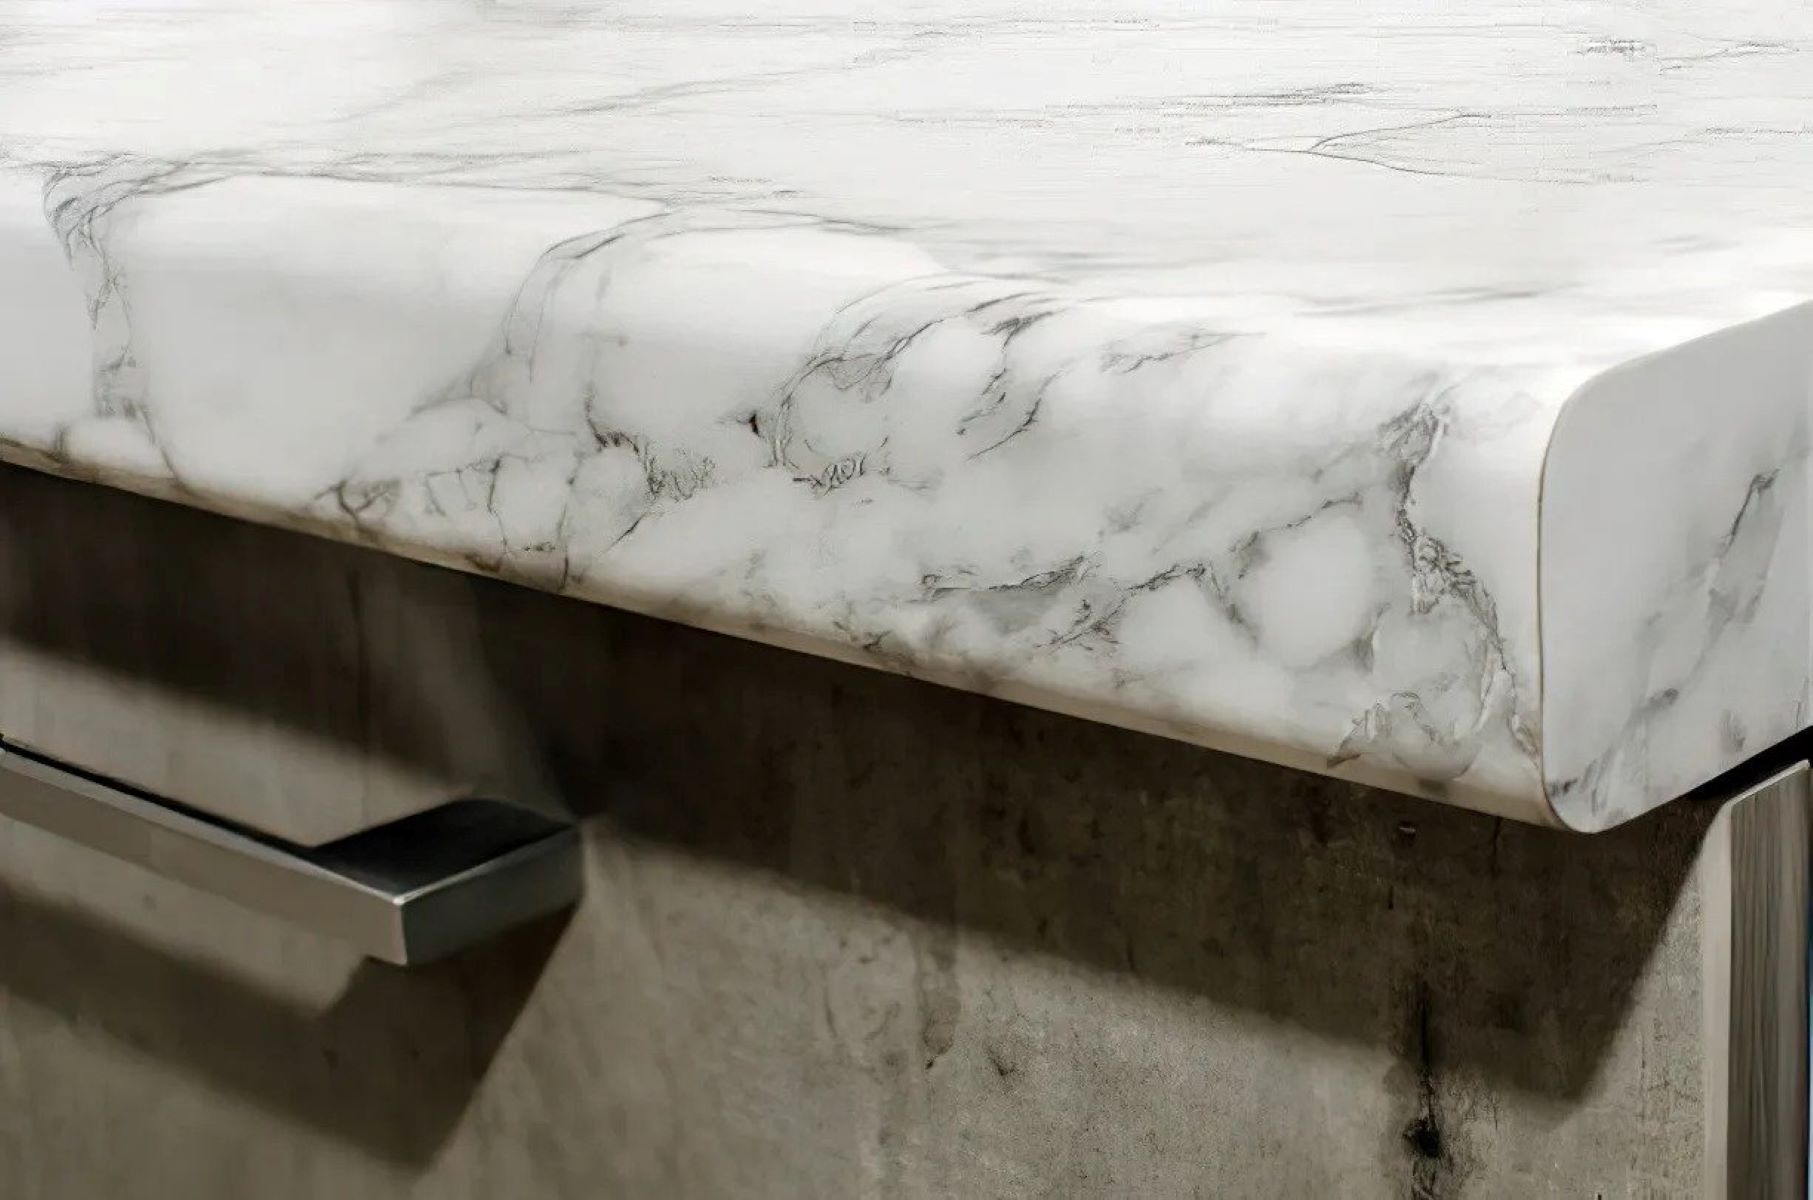
Applying a Sealer
Applying a sealer to your tile countertop is an essential step that helps protect the tiles and grout from stains, moisture, and daily wear and tear. The sealer creates a protective barrier that prevents liquids from penetrating the surface, ensuring the longevity and beauty of your countertop. Here’s a step-by-step guide on how to apply a sealer:
1. Choose the right sealer: There are various types of sealers available, including penetrating sealers, topical sealers, and enhancing sealers. Select a sealer that is suitable for your specific tile material and desired level of protection. Read the manufacturer’s instructions and product recommendations carefully.
2. Prepare the surface: Before applying the sealer, ensure that the countertop surface is clean and dry. Remove any dirt, dust, or debris using a mild detergent or specialized stone cleaner. Rinse the surface thoroughly and allow it to dry completely before proceeding.
3. Apply the sealer: Follow the manufacturer’s instructions for the application of the sealer. Most sealers can be applied with a brush, roller, or sprayer. Apply an even coat of sealer to the entire surface of the tiles and grout, making sure to cover all the areas. Take care to apply the sealer only to the tile surface and avoid getting it on surrounding surfaces or areas where it is not needed.
4. Allow the sealer to penetrate: Let the sealer sit on the surface for the recommended dwell time specified by the manufacturer. This allows the sealer to penetrate the tiles and grout, creating a protective barrier. Avoid using the countertop or exposing it to moisture during this curing period.
5. Remove excess sealer: After the dwell time has passed, check for any excess sealer that has not penetrated the surface. Use a clean cloth or sponge to gently wipe away any remaining sealer from the tiles and grout. This step helps ensure an even and smooth finish.
6. Allow the sealer to dry: Leave the sealer to dry completely according to the manufacturer’s instructions. This typically takes a few hours or overnight. Avoid placing any items, exposing the surface to moisture, or using the countertop until the sealer is fully dried and cured.
7. Apply additional coats (optional): Depending on the level of protection desired, you may choose to apply additional coats of sealer. Follow the manufacturer’s instructions for the recommended number of coats and drying time between applications. Be sure to allow sufficient drying time for each coat before applying the next one.
By following these steps and applying a sealer to your tile countertop, you can ensure long-lasting protection and maintain the beauty of your tiles and grout. Regularly check and reapply the sealer as recommended by the manufacturer to maintain its effectiveness. With the sealer applied, your tile countertop is now protected and ready for use and enjoyment.
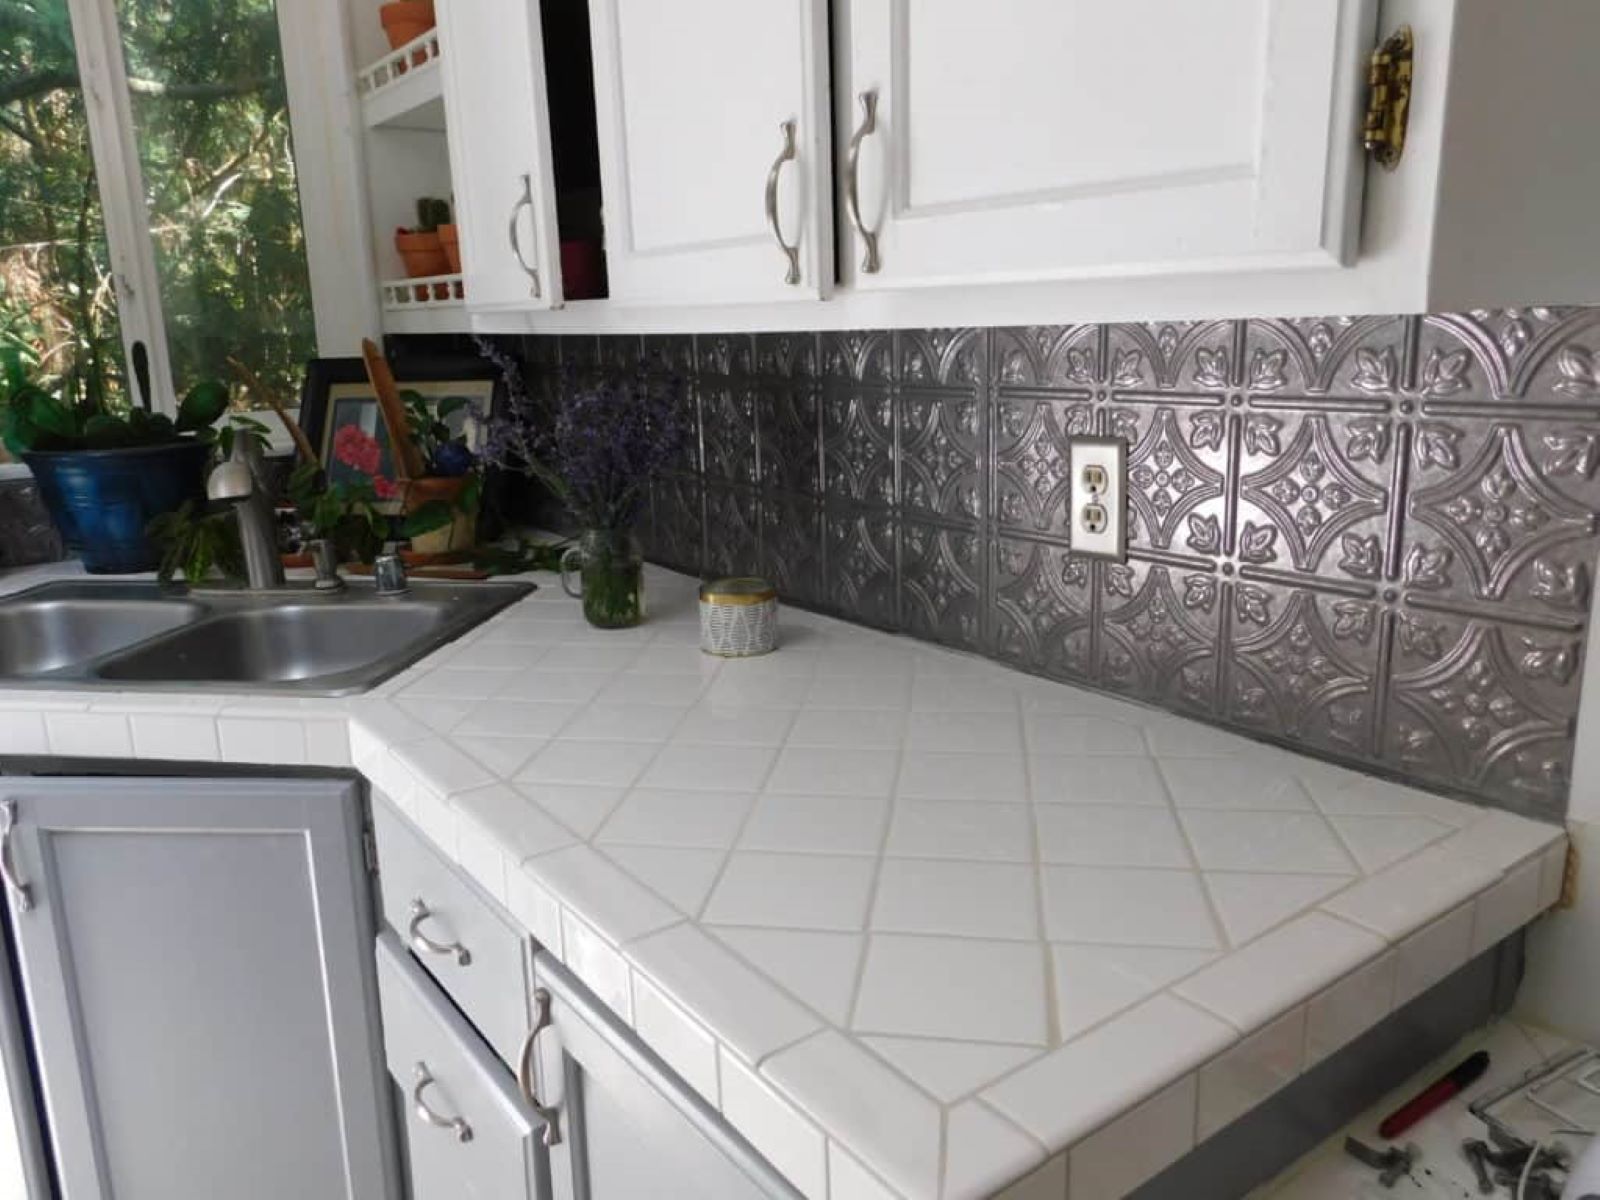
Finalizing the Countertop
Once you have completed the steps of installing tile countertops, there are a few final touches you can add to enhance the overall look and functionality. Here are some important steps to consider when finalizing your countertop:
1. Clean the countertop: After the sealer has dried, give your countertop a thorough cleaning. Use a mild cleaner or specialized stone cleaner to remove any residue or smudges. Wipe the surface with a clean cloth or sponge to restore its shine and luster.
2. Reinstall accessories: If you removed any accessories like faucets or sinks during the installation process, now is the time to reinstall them. Follow the manufacturer’s instructions carefully to ensure proper installation and functionality.
3. Apply caulk: Seal the edges between the tiles and the backsplash or walls with a waterproof caulk. This helps prevent water or dirt from seeping into the gaps and protects the integrity of the installation. Use a caulking gun to apply the caulk evenly, and smooth it out with a finger or a caulk finishing tool for a clean finish.
4. Organize and decorate: Arrange your countertop essentials in an organized and visually pleasing manner. Consider adding decorative items such as plants, utensil holders, or small appliances to personalize the space and make it feel more inviting.
5. Practice proper maintenance: To maintain the beauty and longevity of your tile countertop, follow proper maintenance practices. Wipe up spills promptly, use cutting boards and trivets to protect the tiles from scratches and heat, and clean the surface regularly with non-abrasive cleaners.
6. Inspect and make any necessary repairs: periodically inspect your tile countertop for any signs of damage, such as cracks, chips, or loose tiles. Make any necessary repairs promptly to prevent further issues and ensure the longevity of your countertop.
By following these steps and giving attention to the final touches, you can complete the installation of your tile countertop with confidence and enjoy a beautiful, functional, and durable surface in your kitchen or bathroom. Remember to take care of your countertop by practicing proper maintenance, and enjoy the benefits of your newly installed tile countertops for years to come.
Read more: How To Upgrade Tile Countertops
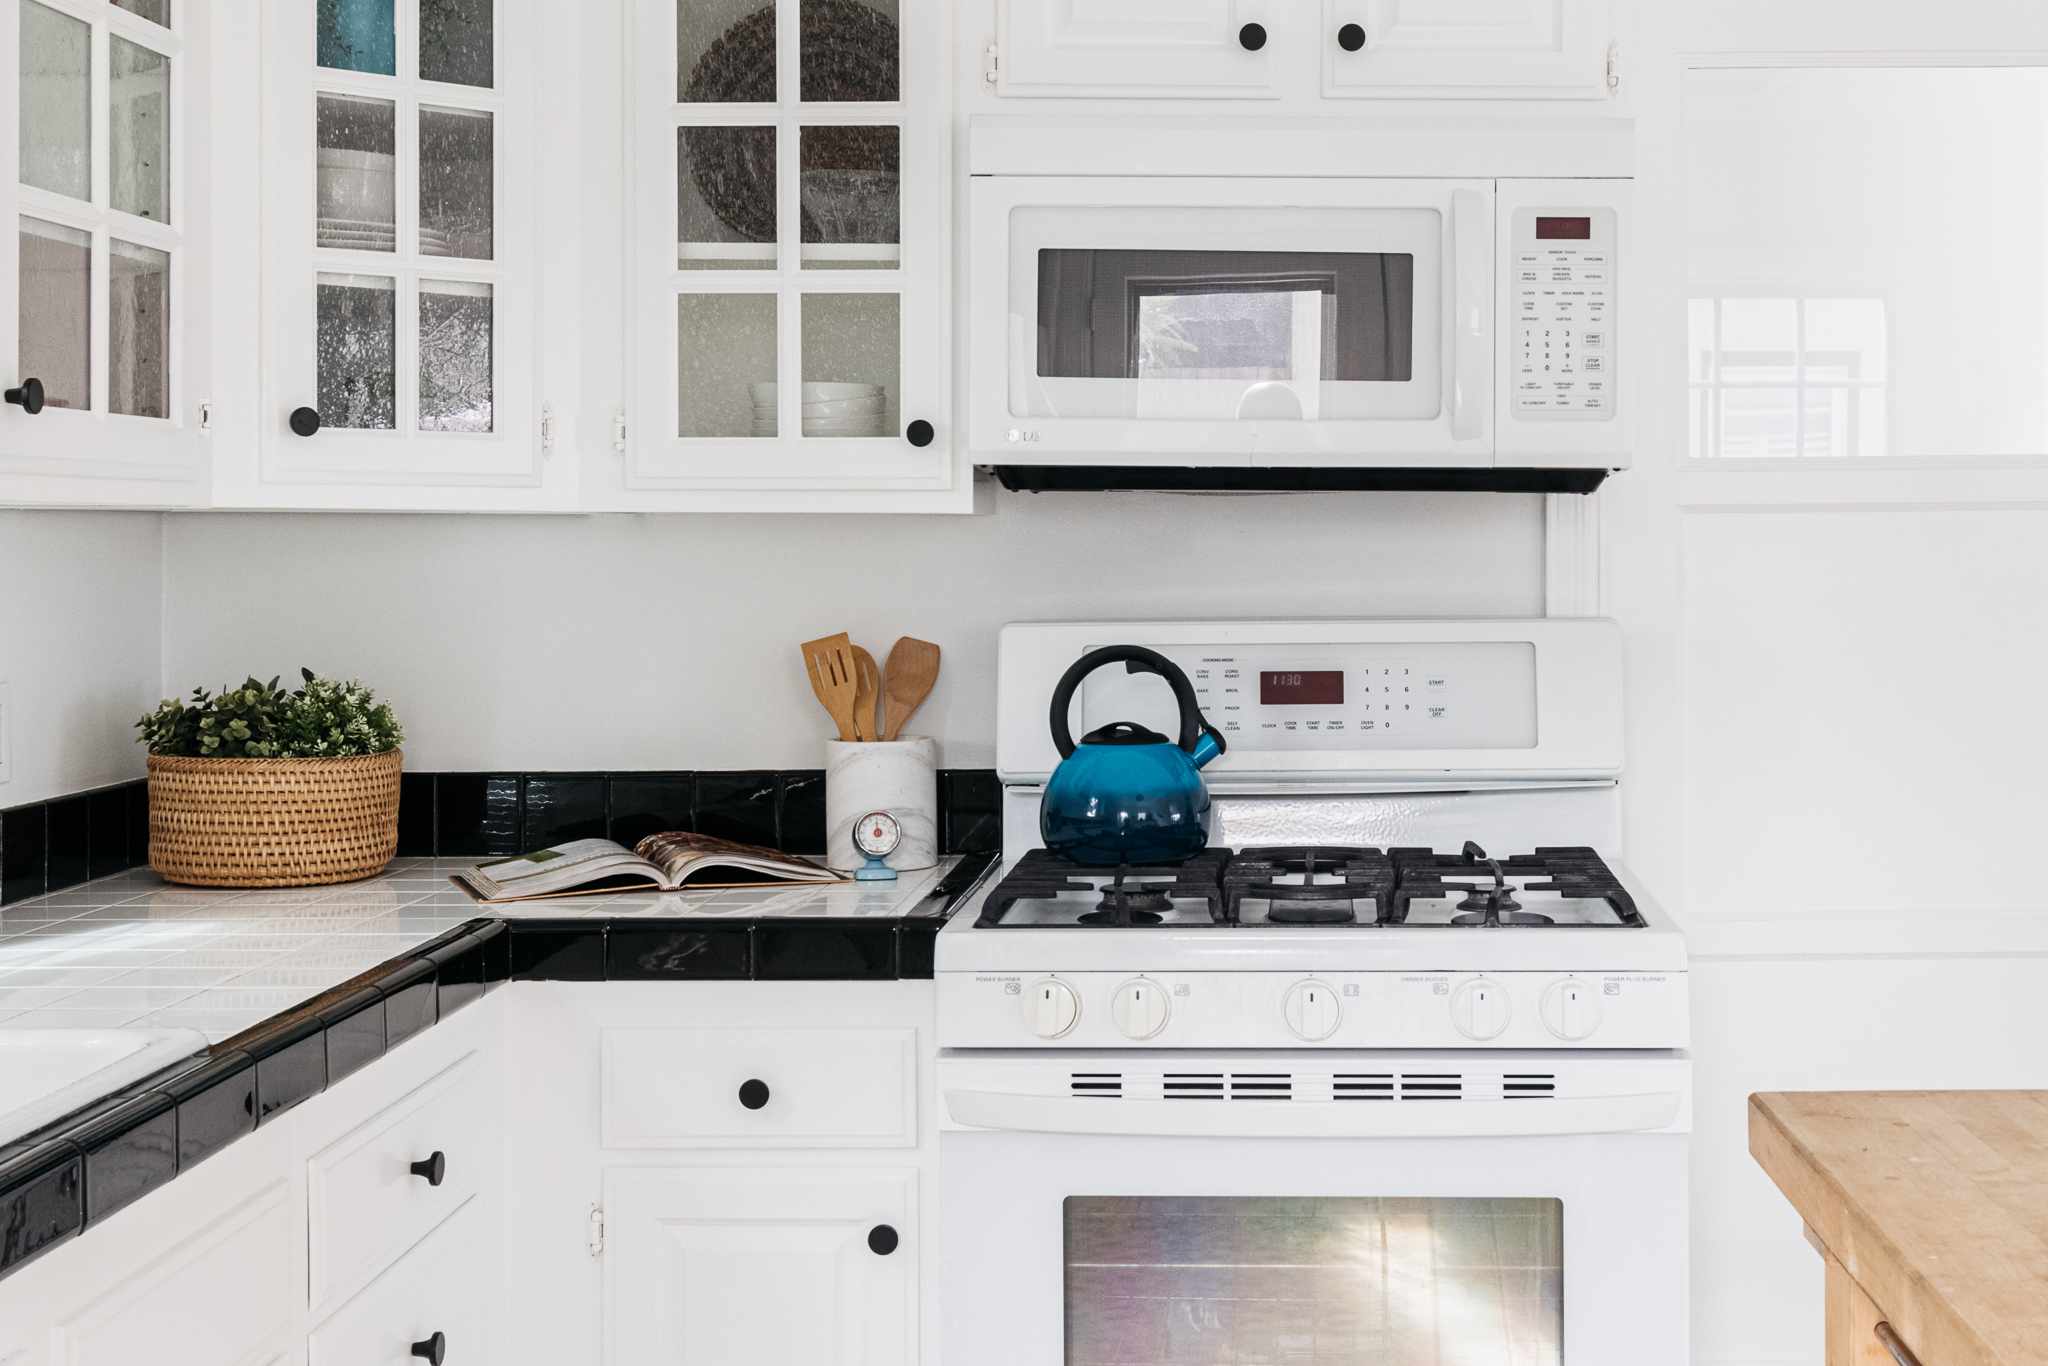
Conclusion
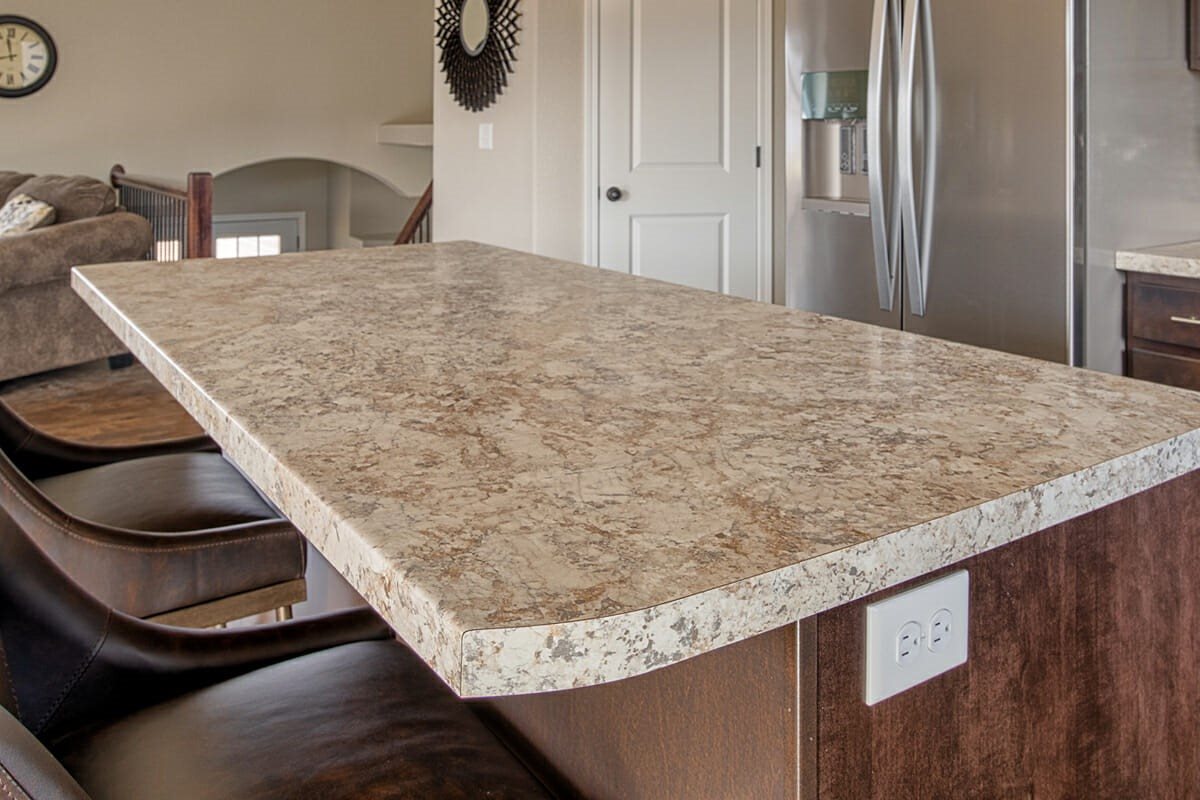
Installing tile countertops can transform the look and functionality of your kitchen or bathroom. By following the step-by-step process outlined in this article, you can successfully install tile countertops and achieve professional-looking results. From choosing the right tile to preparing the surface, cutting and fitting the tiles, applying the adhesive, setting the tiles in place, grouting, applying a sealer, and finalizing the countertop, each step is crucial for a successful installation.
Choosing the right tile material that suits your style and needs is essential. Properly preparing the countertop surface, cutting and fitting the tiles accurately, and applying the adhesive correctly ensure a secure and well-aligned installation. Grouting the tiles, sealing them with a protective sealer, and paying attention to the final touches like cleaning, caulking, and organizing complete the process. Practicing proper maintenance will help preserve the beauty and longevity of your tile countertop in the long run.
Throughout the installation process, remember to balance functionality and aesthetics. Consider your personal preferences, budget, and maintenance requirements when choosing the tile material, color, and pattern. By incorporating your unique style and following the guidelines provided, you can create a stunning and durable tile countertop that adds value and charm to your home.
Remember, patience and attention to detail are key when installing tile countertops. Take your time with each step and ensure precision to achieve the best results. If at any point you are unsure or uncomfortable with the installation process, it is recommended to consult with a professional to ensure a successful and safe installation.
Now, armed with the knowledge and guidance from this article, you are ready to embark on your tile countertop installation journey. Enjoy the process, embrace your creativity, and revel in the satisfaction of transforming your kitchen or bathroom with beautiful and functional tile countertops.
Frequently Asked Questions about How To Do Tile Countertops
Was this page helpful?
At Storables.com, we guarantee accurate and reliable information. Our content, validated by Expert Board Contributors, is crafted following stringent Editorial Policies. We're committed to providing you with well-researched, expert-backed insights for all your informational needs.


0 thoughts on “How To Do Tile Countertops”