Articles
How To Fill Raised Garden Beds Cheap
Modified: October 19, 2024
Learn how to fill your raised garden beds cheaply with our gardening tips and tricks. Create a beautiful garden on a budget!
(Many of the links in this article redirect to a specific reviewed product. Your purchase of these products through affiliate links helps to generate commission for Storables.com, at no extra cost. Learn more)
Introduction
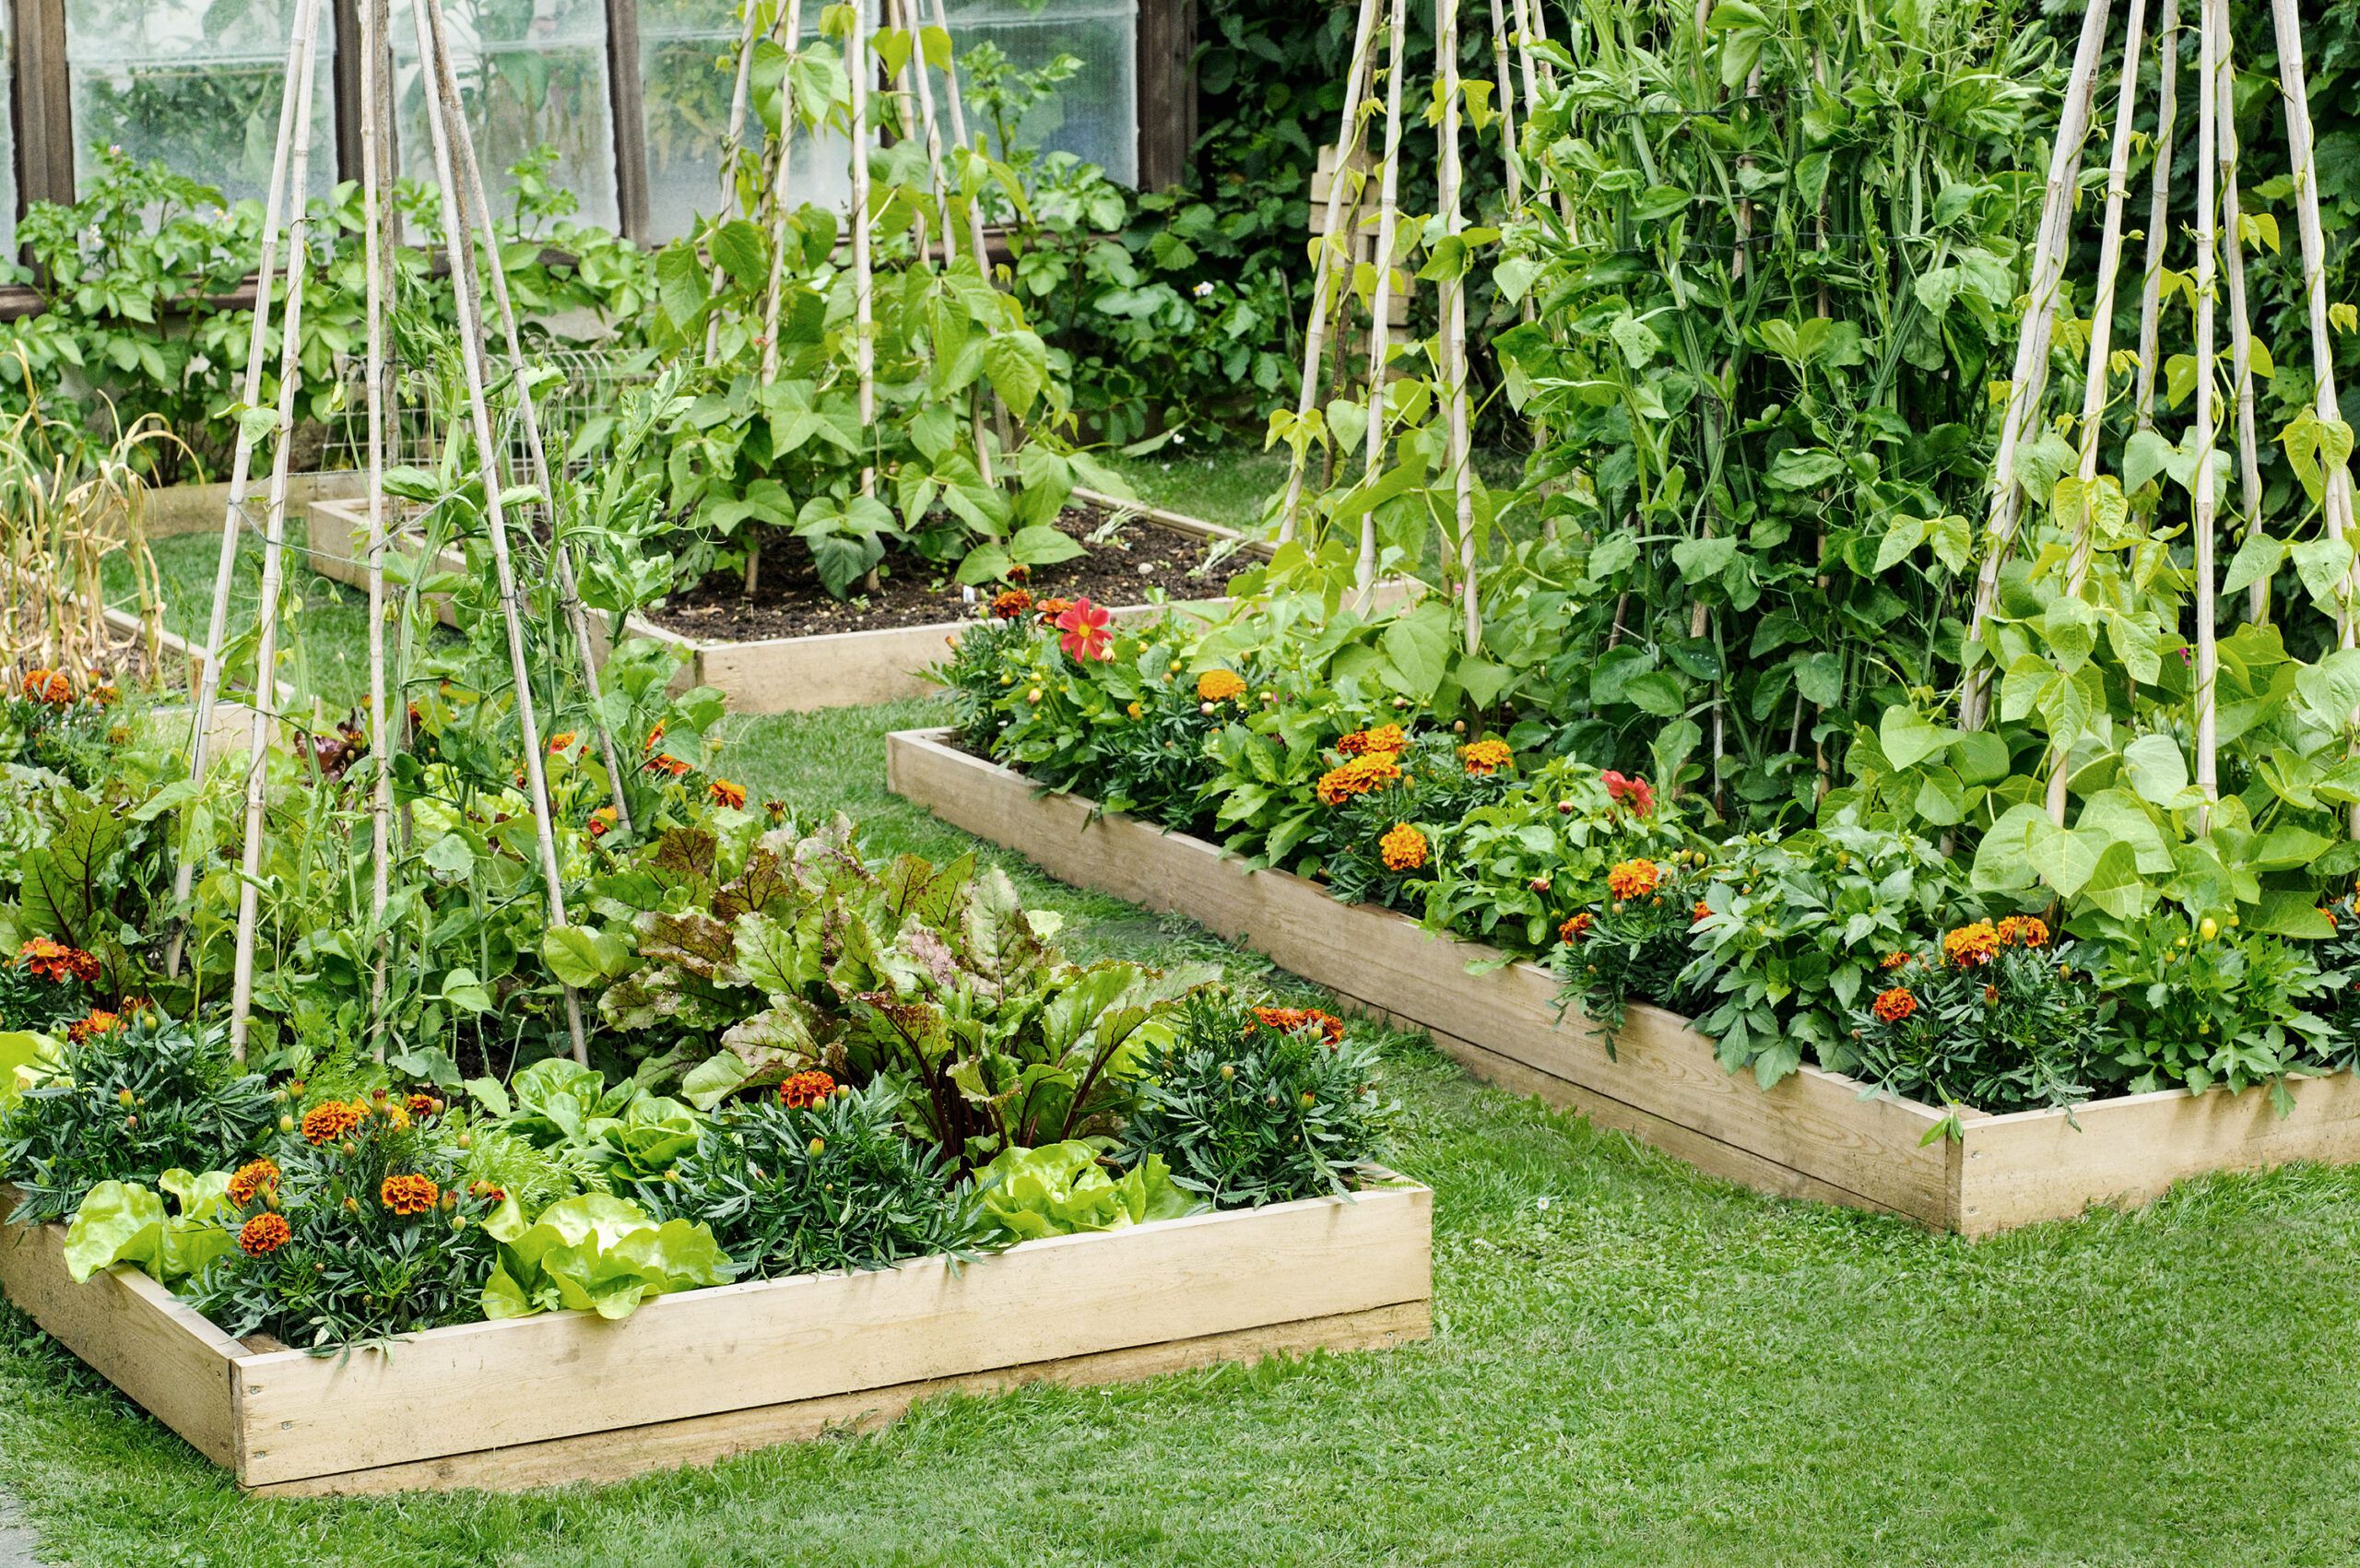
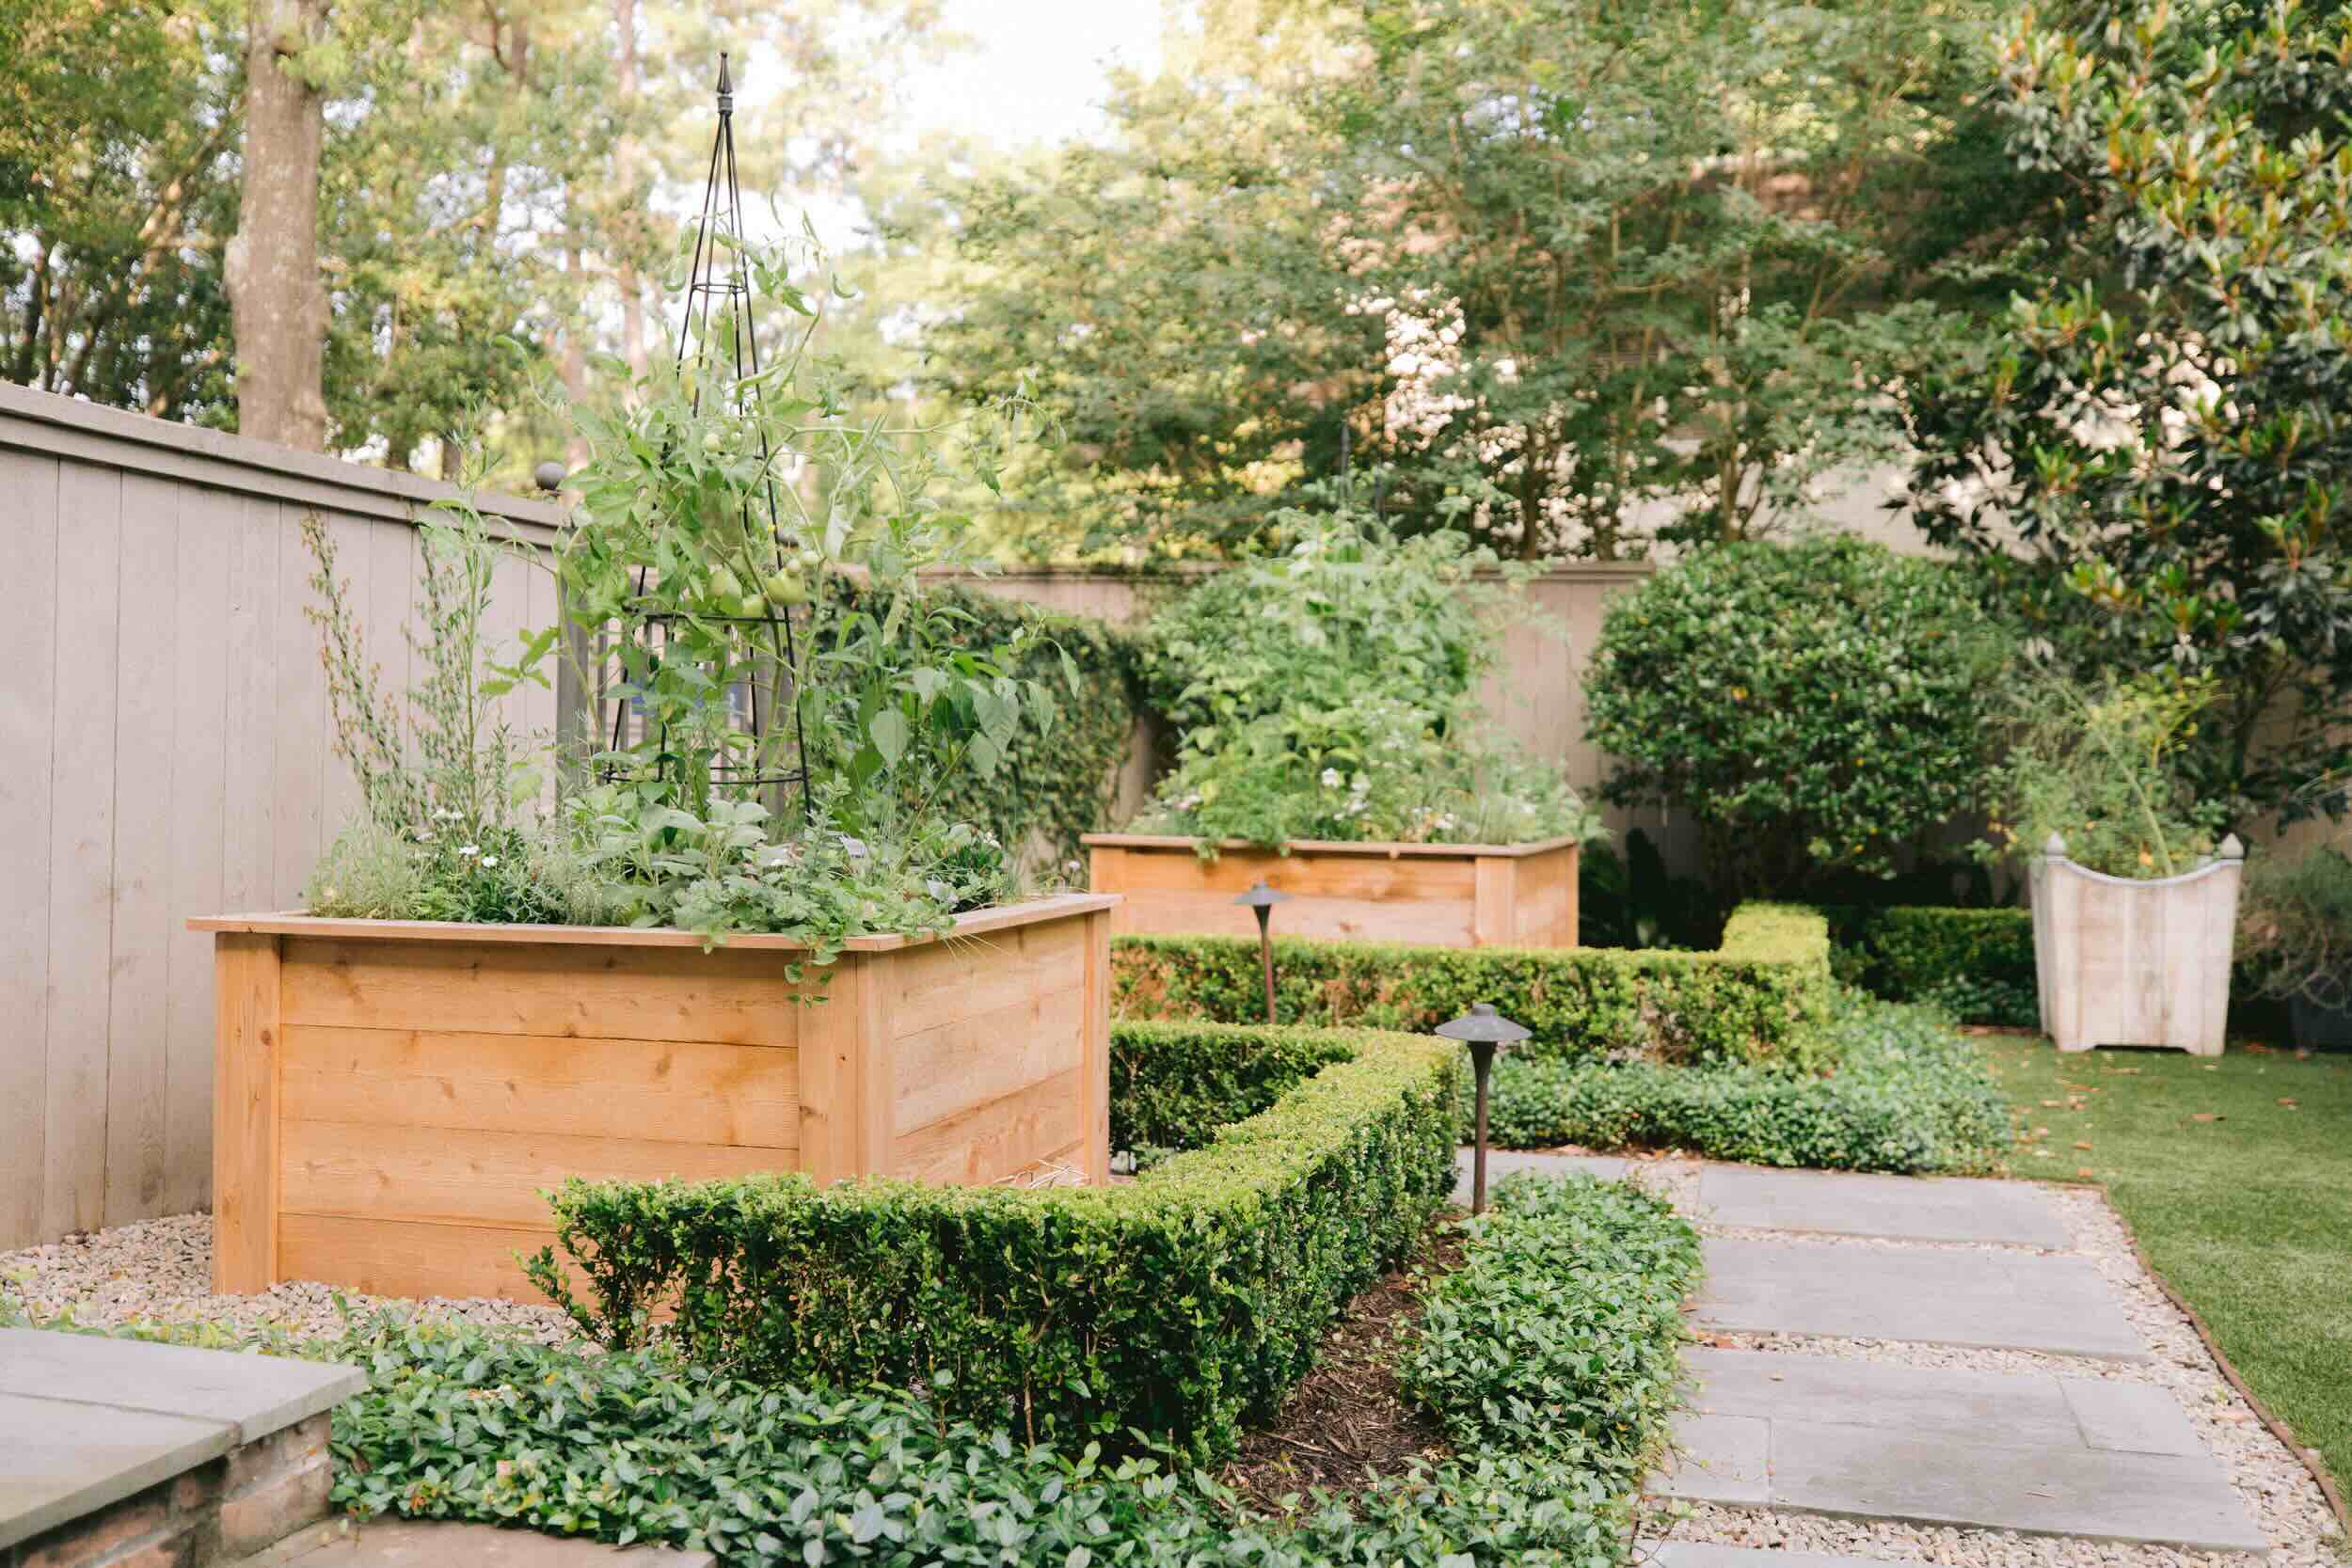
Welcome to the wonderful world of gardening! If you’re looking to create a beautiful, productive garden space, raised garden beds are a fantastic option. Not only do they provide better drainage and easier access, but they also allow for effective soil management and weed control. However, when it comes to filling raised garden beds, the cost of materials can quickly add up.
But don’t fret! In this article, we’ll explore how you can fill your raised garden beds on a budget without compromising on quality or results. By using a combination of cost-effective materials and clever strategies, you’ll have your raised garden beds ready for planting in no time.
Before we dive into the cheap options for filling raised garden beds, let’s take a quick look at selecting the site and choosing the right materials for your raised beds. By paying attention to these initial steps, you’ll set yourself up for success and ensure the longevity of your garden beds.
Key Takeaways:
- Create a Thriving Garden on a Budget
Utilize affordable options like compost, leaf mulch, organic matter, and straw to fill your raised garden beds. Enhance soil fertility and plant health without breaking the bank. - Sustainable Gardening Made Easy
Incorporate vermiculite, perlite, and aged manure into your raised beds for improved soil structure and long-term plant vitality. Embrace cost-effective options for a thriving, budget-friendly garden.
Read more: How To Make A Raised Garden Bed Cheap
Selecting the Site for Raised Garden Beds
Choosing the right location for your raised garden beds is crucial for the success of your plants. Here are a few factors to consider when selecting the site:
- Sunlight: Most vegetables and flowering plants require at least 6-8 hours of direct sunlight per day. Observe your yard throughout the day and choose a location that receives ample sunshine.
- Drainage: Ensure that the chosen site has good drainage. Raised garden beds should not sit in areas prone to waterlogging, as it can lead to root rot and other plant diseases.
- Accessibility: Consider how easily you can access the raised beds for watering, weeding, and harvesting. Aim for a location that is convenient to navigate and aligns with your gardening routine.
- Proximity to water source: It’s essential to have a water source nearby, whether it’s a hose, rain barrel, or irrigation system. This will make it easier to keep your plants hydrated.
- Soil quality: Take note of the existing soil quality in the area. If it’s heavy clay or sandy soil, raised beds can help improve drainage and provide a more suitable growing environment.
Once you’ve selected the ideal spot, it’s time to gather the necessary materials for building your raised garden beds.
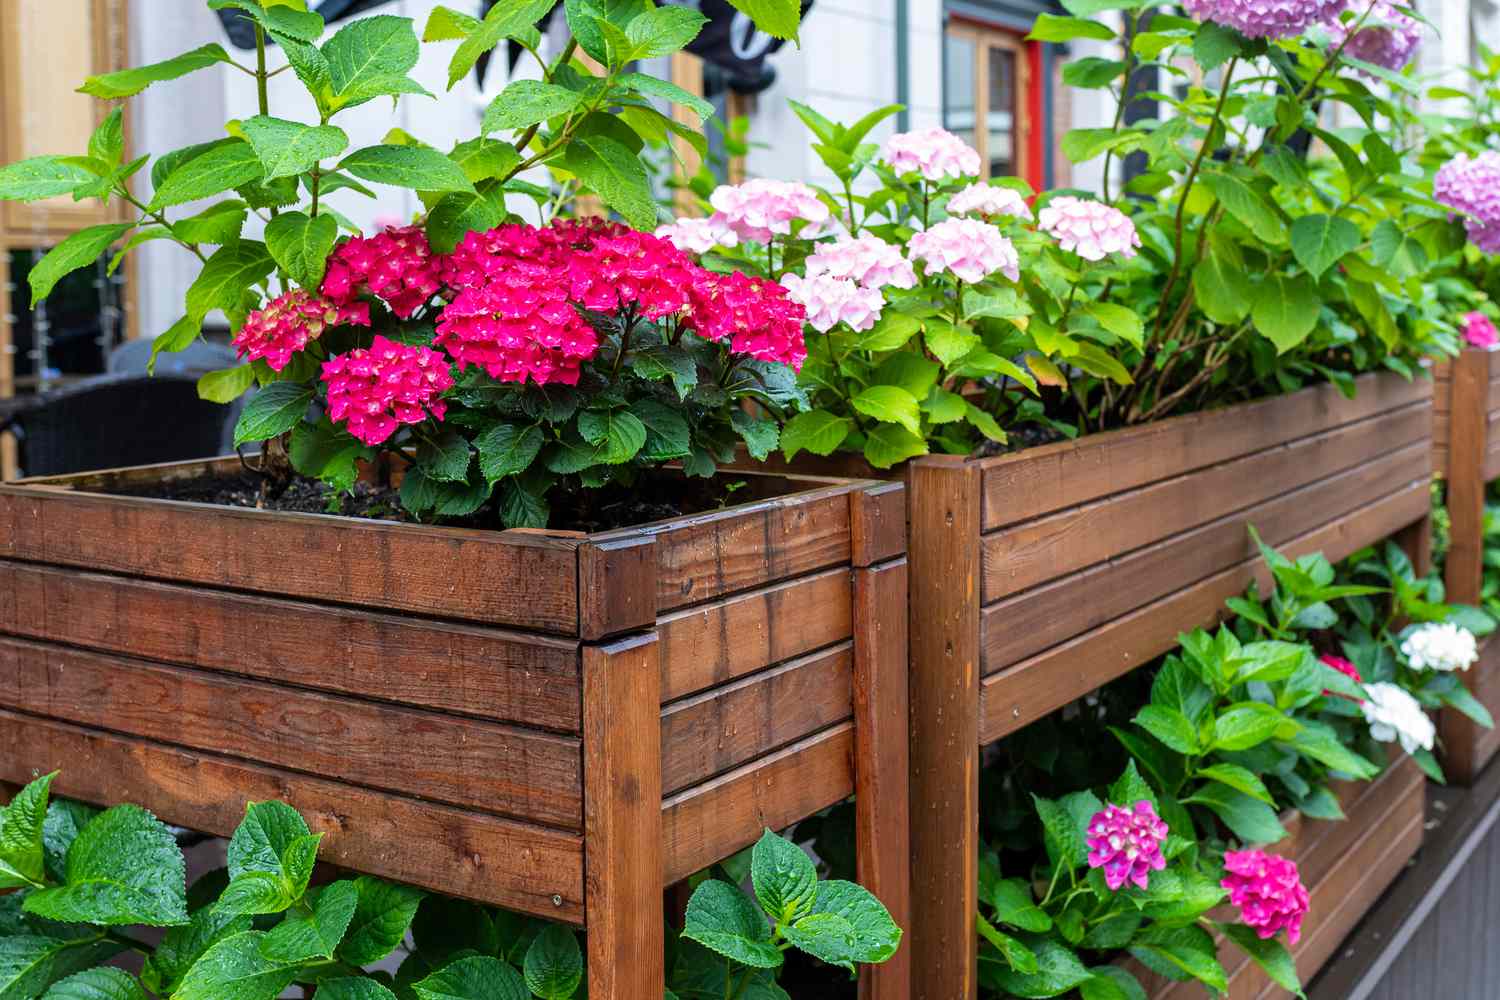
Choosing the Right Materials
When it comes to building your raised garden beds, selecting the right materials is essential for their longevity and functionality. Here are a few options to consider:
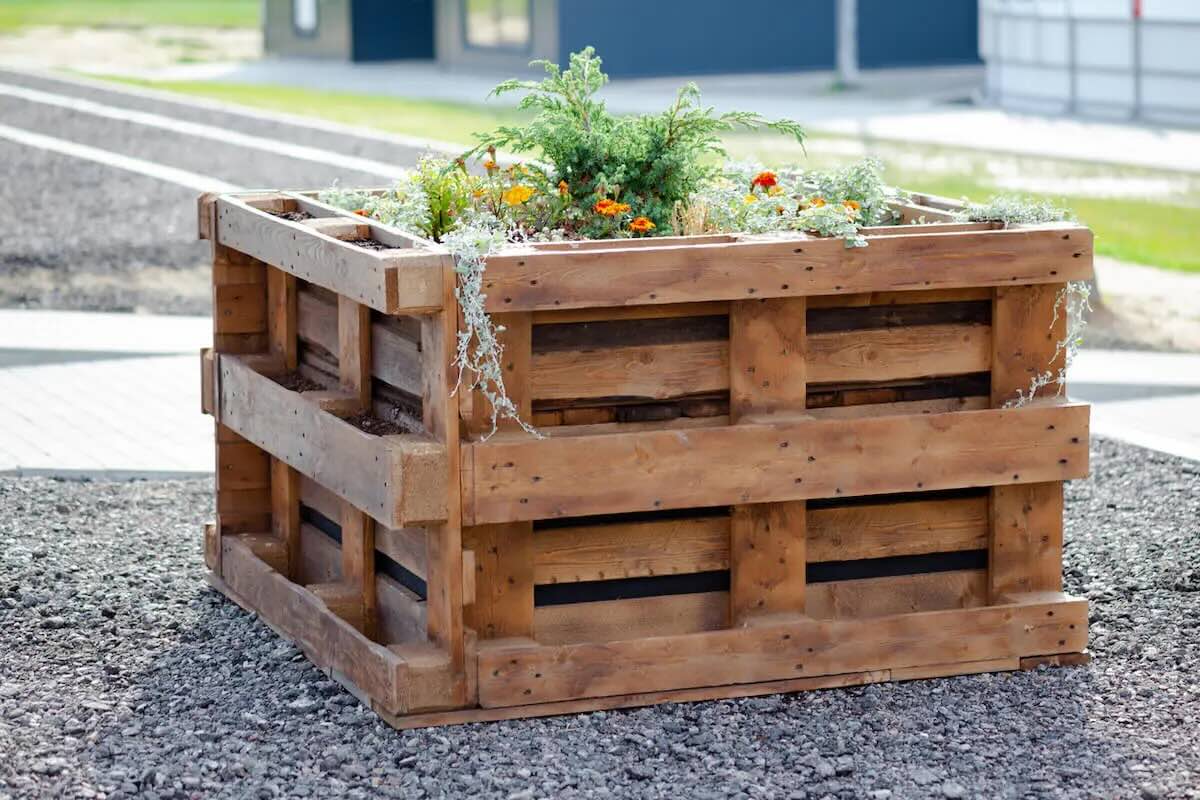
- Wood: Cedar and redwood are popular choices for raised garden beds due to their durability and resistance to rot. Avoid using treated lumber, as it may contain harmful chemicals that can leach into the soil.
- Composite Boards: Composite boards are made from a mixture of wood fibers and recycled plastic. They offer the look of wood but have a longer lifespan and require minimal maintenance.
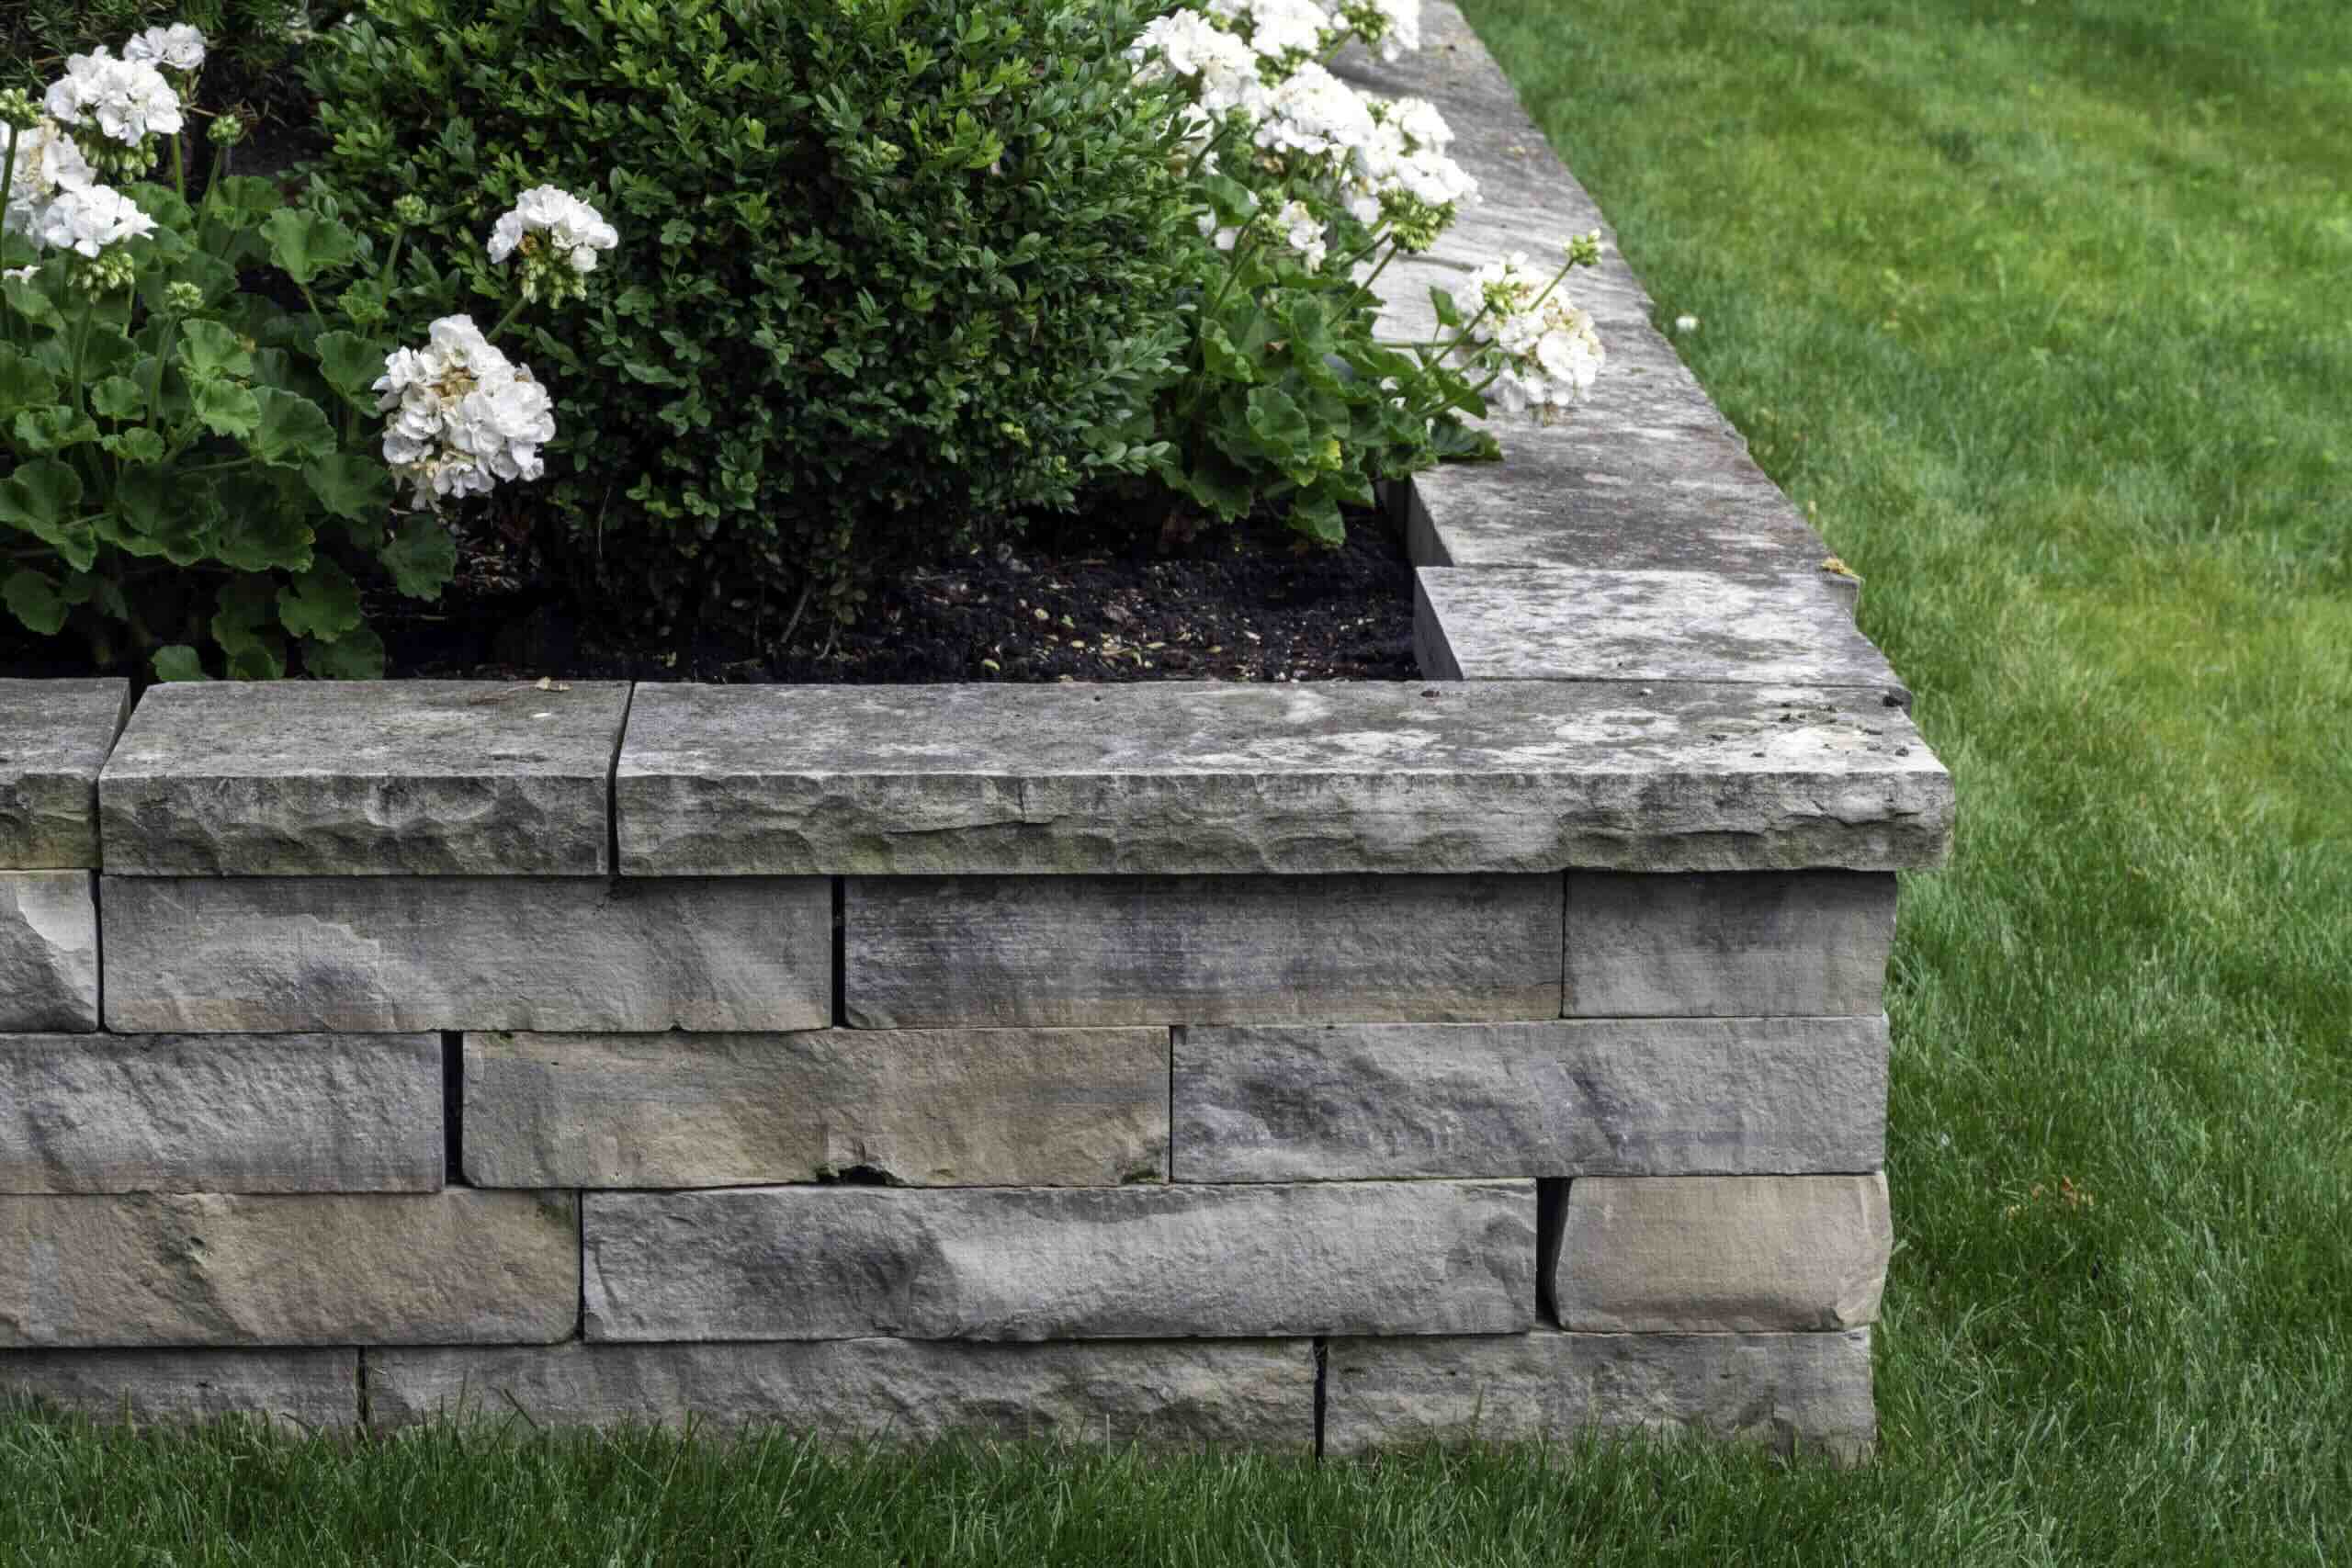
- Cinder Blocks: Cinder blocks provide a sturdy and affordable option for raised beds. However, keep in mind that they can absorb and retain heat, which may affect the soil temperature.
- Garden Bed Kits: If you prefer a hassle-free option, garden bed kits are available in various materials like metal or plastic. These kits come with pre-cut panels and corner brackets, making assembly a breeze.
Consider the size and height of your raised bed, ensuring it is wide enough for the plants to grow and deep enough for their root systems. If you’re building the beds from scratch, make sure to use galvanized or stainless-steel screws or nails to avoid rusting over time.
Now that you have the site and materials sorted, the next step is to prepare the soil before filling your raised garden beds. This is crucial for creating a fertile and nutrient-rich environment for your plants to thrive. Let’s explore the process of soil preparation in the following section.
Preparing the Soil
Preparing the soil is an important step in creating a successful garden in your raised beds. Here are the key steps to follow:
- Clear the Area: Remove any grass, weeds, or debris from the site where your raised beds will be located. Use a shovel or garden fork to loosen the soil.
- Test the Soil: It’s a good idea to test the soil’s pH level and nutrient content before planting. You can purchase a soil testing kit or send a sample to a local agricultural extension service for analysis.
- Amend the Soil: Based on the results of your soil test, you may need to amend the soil to ensure it has the right balance of nutrients. Add organic matter such as compost, well-rotted manure, or aged leaf mulch to improve soil fertility and structure.
- Mix and Till: Once you’ve added amendments, use a shovel or garden tiller to thoroughly mix them into the soil. This will help distribute the organic matter and create a uniform growing medium.
- Level the Surface: Use a rake to level the soil surface in your raised beds, ensuring it’s even and free of any large clumps.
By preparing the soil properly, you create an optimal environment for your plants to grow and thrive. Now that your soil is ready, it’s time to build your raised garden beds. In the next section, we’ll walk through the process of constructing the beds step by step.
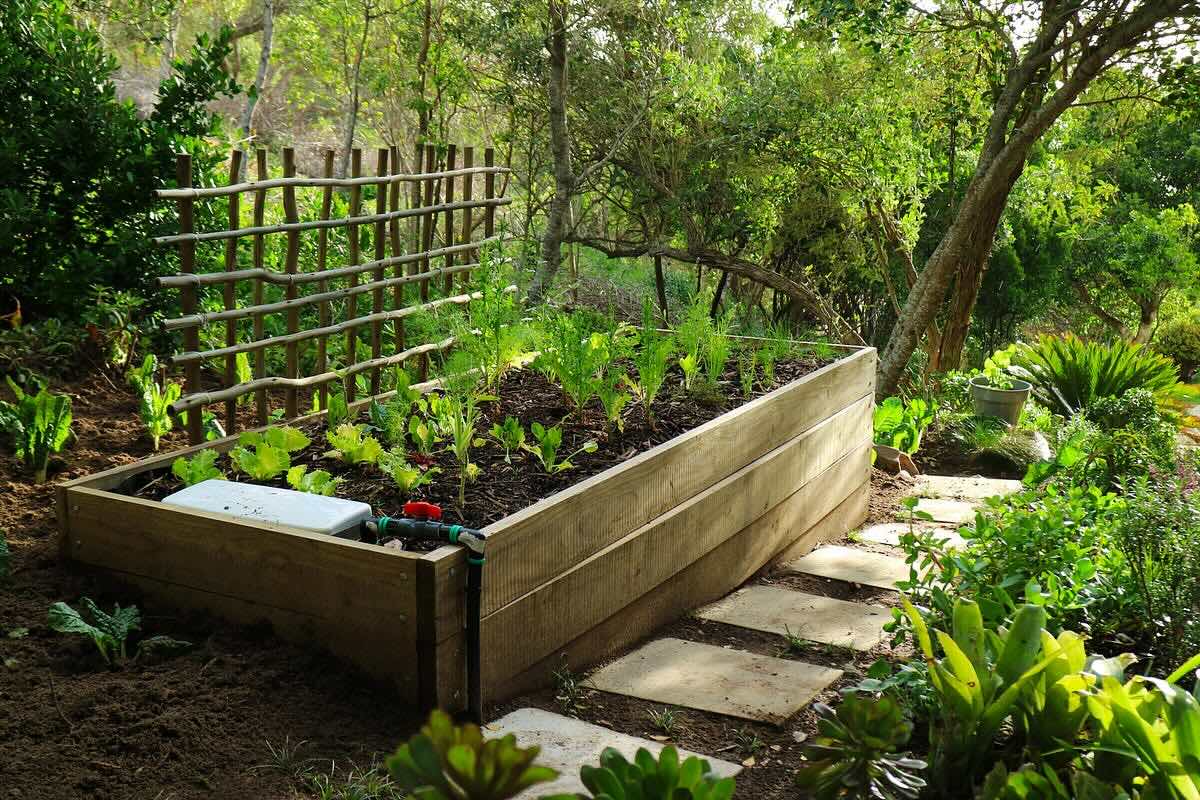
Building the Raised Garden Beds
Building your raised garden beds is an exciting step in the gardening process. Here’s a step-by-step guide to help you construct sturdy and functional beds:
- Measure and Mark: Measure and mark the dimensions of your raised beds using stakes and string. Ensure that the dimensions are suitable for your gardening needs and fit within the available space.
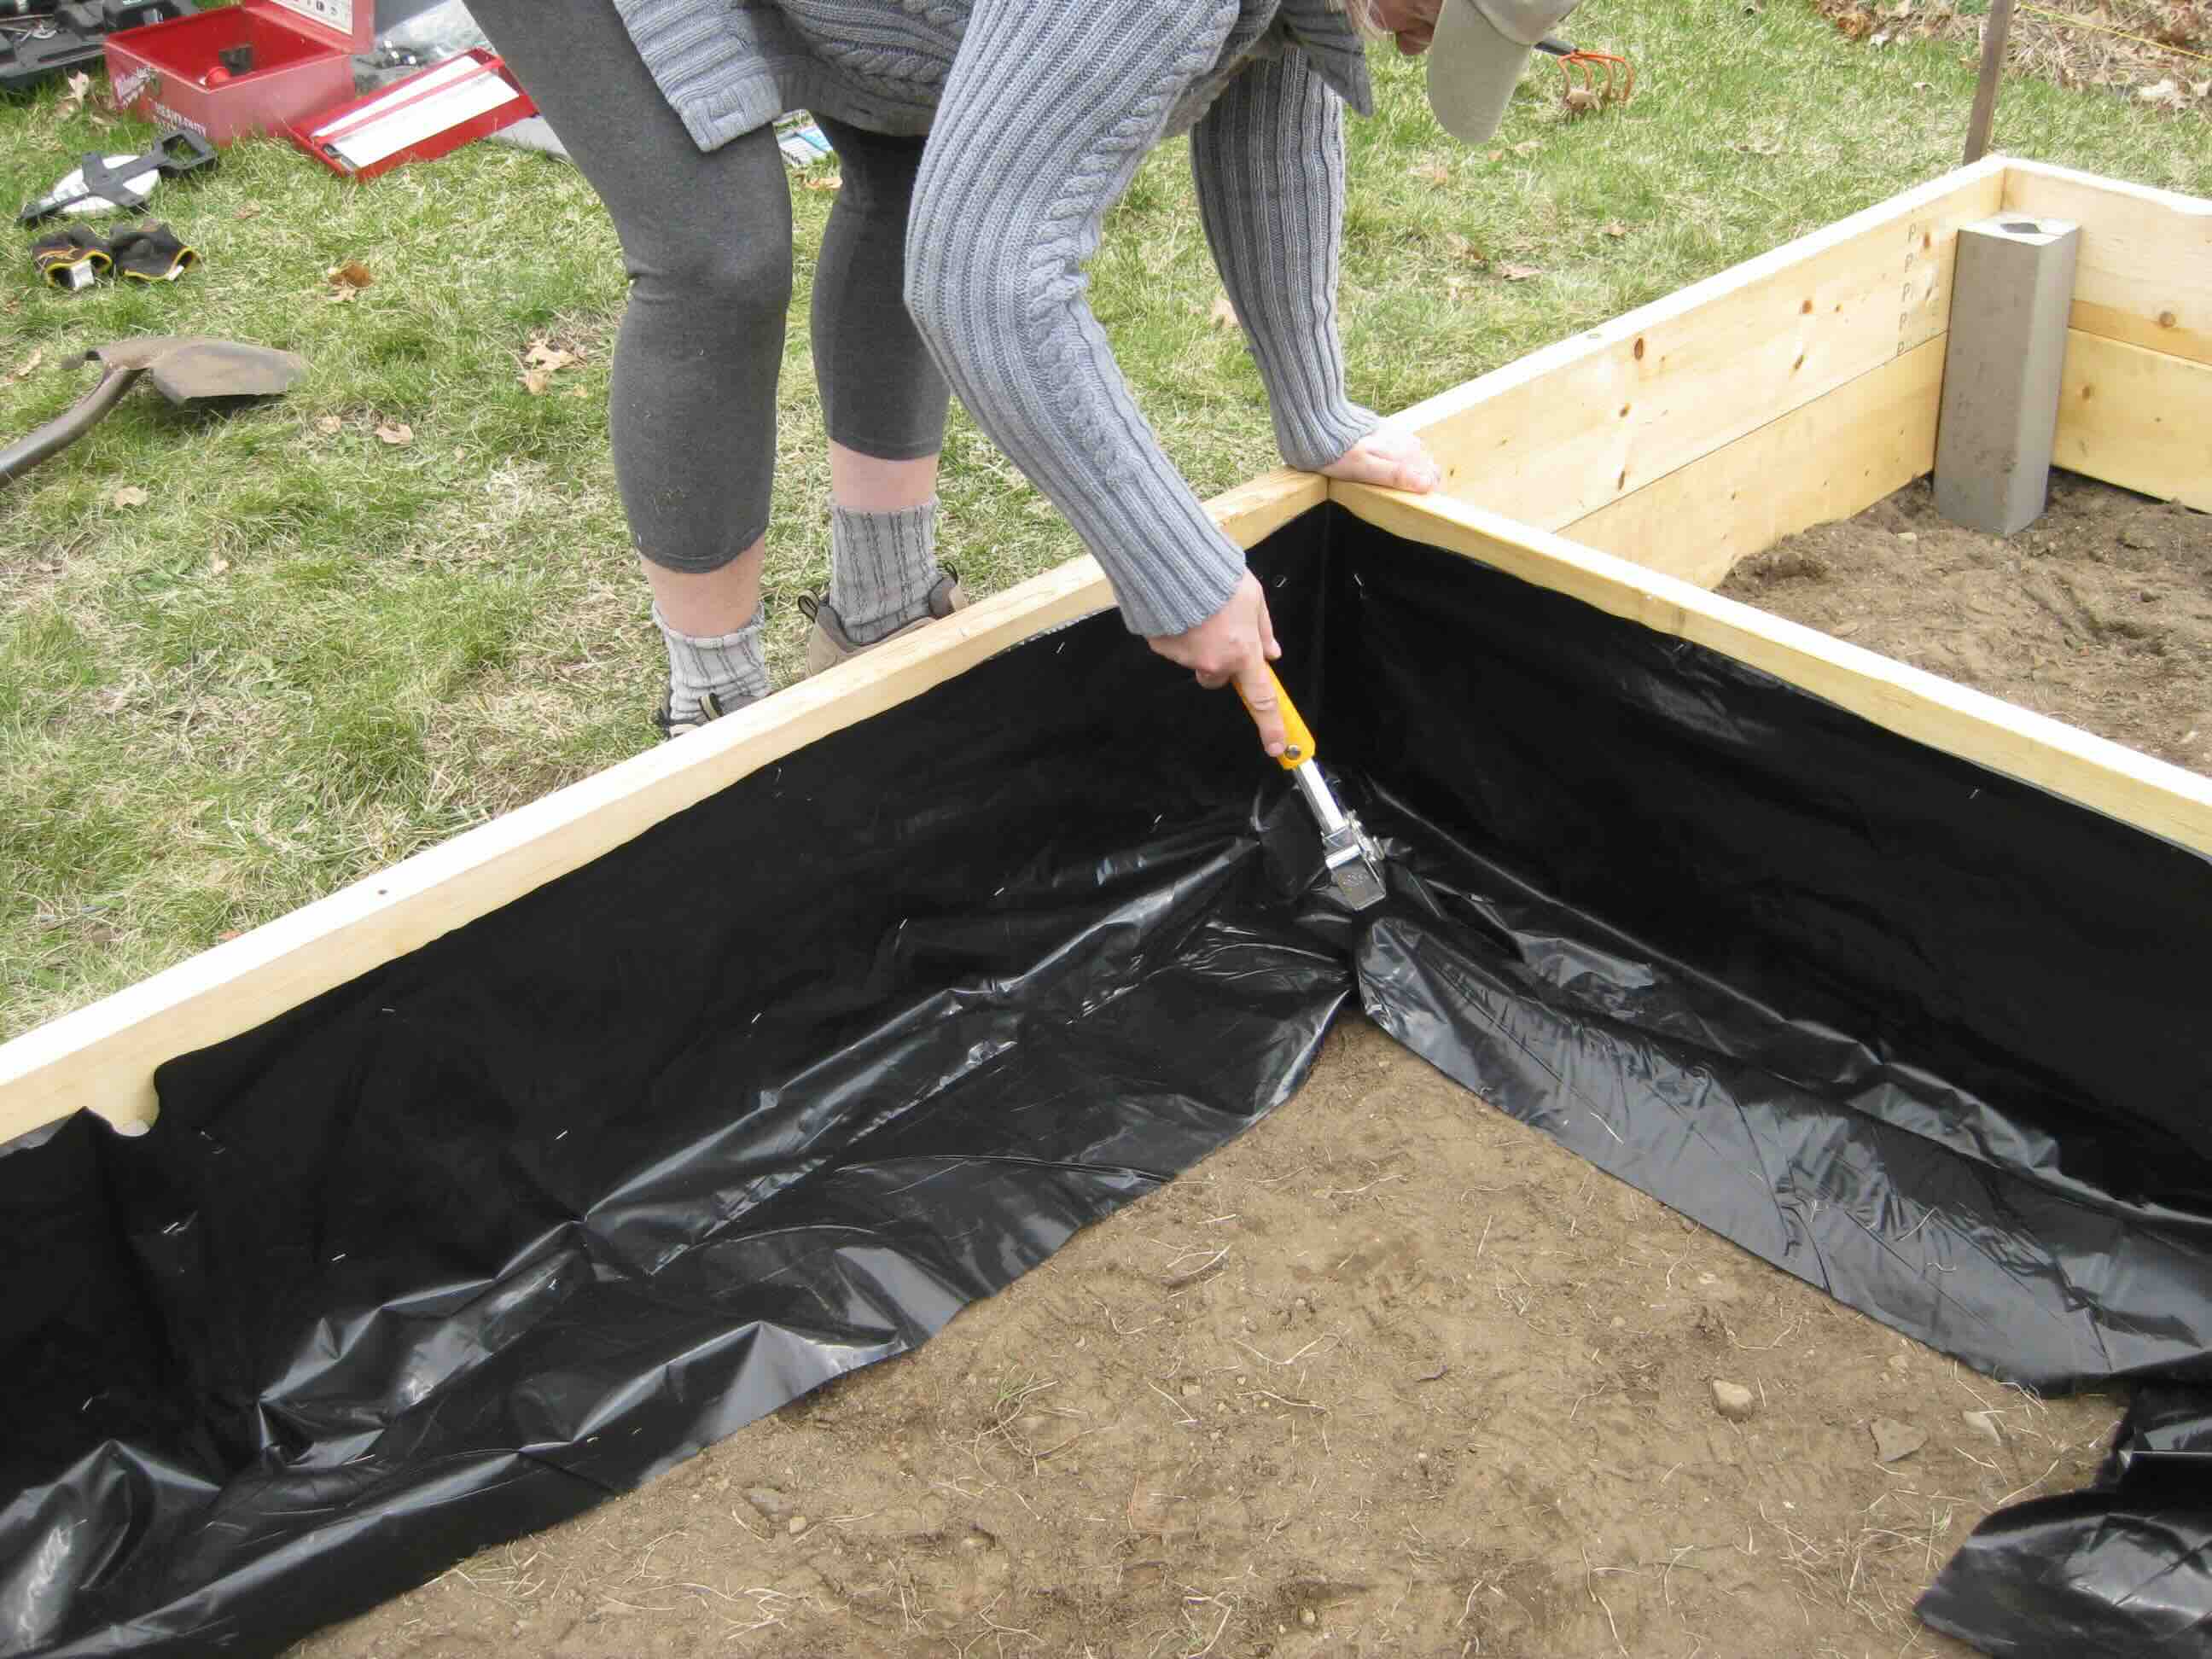
- Level the Ground: Clear any debris or vegetation from the area where the raised beds will be placed. Use a rake or shovel to level the ground, creating a flat surface for the beds.
- Assemble the Bed: Begin by assembling the sides of the raised bed by connecting the boards or blocks. Use screws or nails to secure the corners and ensure stability. Make sure the bed is level and square by using a level and measuring tape.
- Add Cross Braces: For added stability, consider adding cross braces to the sides of the raised bed. This will prevent the sides from bowing out over time. Use additional screws or brackets to attach the cross braces securely.
- Place the Bed: Carefully position the assembled raised bed onto the leveled ground, ensuring it is in the desired location. Double-check that the bed is level before proceeding.
- Fill the Bed: Now it’s time to fill your raised garden beds with soil. In the following sections, we’ll explore some cost-effective options for filling your beds without breaking the bank.
By following these steps, you’ll have a solid foundation for your raised garden beds. Once the beds are built, it’s time to focus on filling them with the right combination of materials to create an ideal growing environment for your plants. Let’s explore some affordable options for filling your raised garden beds in the next section.
Read more: How To Make Cheap Raised Garden Beds
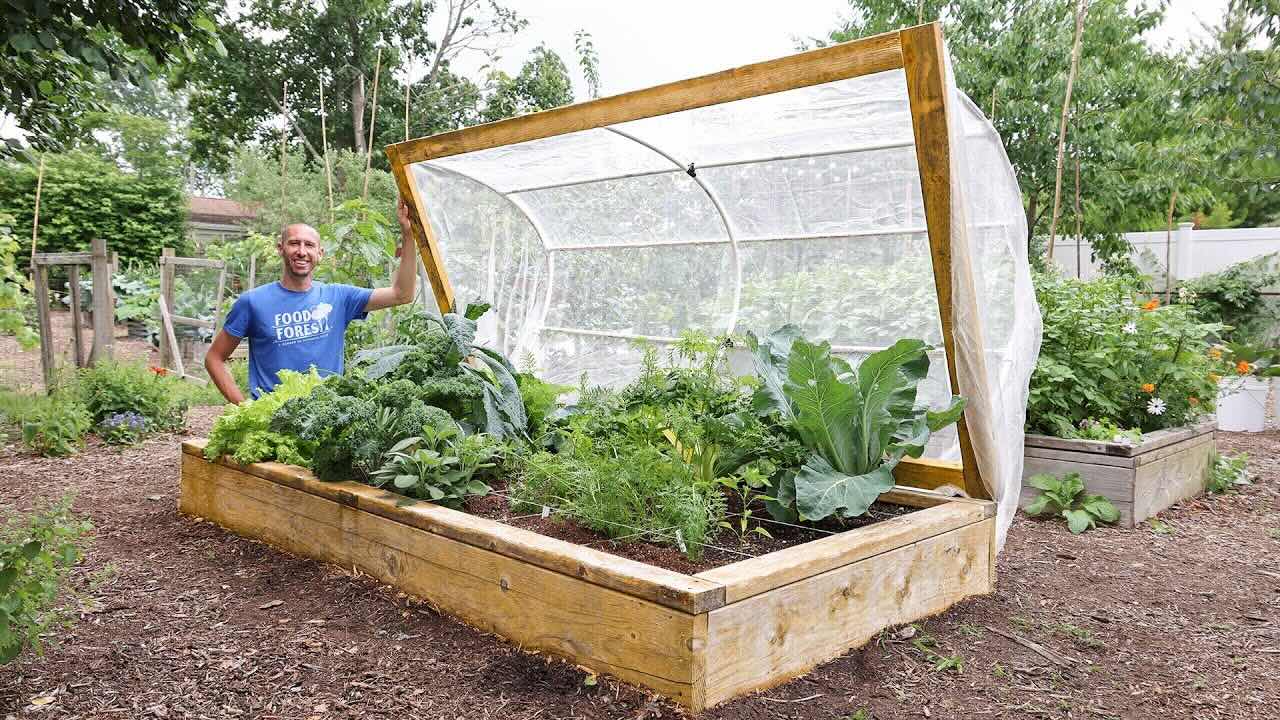
Filling the Raised Garden Beds
When it comes to filling your raised garden beds, you have several options to consider. The goal is to provide a nutrient-rich and well-drained growing medium for your plants. Here are some key factors to keep in mind:
- Determine the Depth: The depth of your raised beds will dictate how much filling material you’ll need. Aim for a depth of at least 12 inches (30 cm) for most plants, but deeper beds may be necessary for root vegetables like carrots or potatoes.
- Layering Technique: One effective approach is to use a layering technique, starting with a base layer of coarse materials for drainage and adding nutrient-rich layers on top.
- Consider Water Retention: Choose materials that retain water well, especially if you live in a dry climate. Proper water retention is essential for healthy plant growth.
- Organic Matter: Incorporating organic matter into the filling mix improves soil structure, fertility, and drainage. Organic matter can include compost, aged manure, leaf mulch, or garden compost.
- Soil Amendments: Depending on the results of your soil test, you may need to add specific soil amendments such as lime for pH adjustment or gypsum for soil compaction issues.
- Avoid Diseased or Weed-infested Materials: Ensure that the materials you use for filling your raised beds are free from diseases, pests, and weeds. This will help prevent the spread of unwanted pests and diseases to your plants.
As you fill your raised garden beds, make sure to compact the soil gently with your hands or a garden tool to remove any air pockets. This will help provide a stable and supportive growing environment for your plants.
Now that you understand the key considerations when filling your raised garden beds, let’s explore some affordable options for filling them without breaking the bank.
Cheap Options for Filling Raised Garden Beds
Filling your raised garden beds on a budget doesn’t mean sacrificing the quality of your soil. With a little creativity and resourcefulness, you can find affordable options that provide the necessary nutrients for your plants. Here are some inexpensive options to consider:
- Using Compost: Compost is a fantastic and cost-effective option for filling raised garden beds. It provides essential nutrients, improves soil structure, and enhances drainage. You can either make your own compost using kitchen scraps and yard waste or purchase it in bulk from local sources.
- Utilizing Leaf Mulch: Fallen leaves can be a valuable resource for filling your raised beds. Collect and shred the leaves, allowing them to decompose over time. Leaf mulch adds organic matter, helps retain moisture, and encourages beneficial microbial activity in the soil.
- Implementing Organic Matter: Incorporating other organic matter like grass clippings, straw, or shredded newspaper can help fill your raised beds at minimal cost. These materials break down slowly, providing nutrients to the plants over time.
- Enhancing Soil with Manure: Well-rotted manure, such as cow or horse manure, is an excellent option for improving soil fertility. It adds organic matter and essential nutrients, making it a budget-friendly choice for filling your raised beds.
- Using Topsoil and Peat Moss Mix: A mix of topsoil and peat moss is an affordable option for filling raised beds. Topsoil provides a base for plant roots, while peat moss improves moisture retention and soil structure.
- Investing in Vermiculite or Perlite: While vermiculite and perlite may require a small investment upfront, they can be mixed with your filling materials to improve aeration and water drainage in the soil. These lightweight and porous materials help create an ideal growing environment for your plants.
- Incorporating Straw or Hay: Straw or hay can be used to create a lower-cost filling option for your raised beds. They provide aeration, retain moisture, and eventually break down to add organic matter to the soil.
By utilizing these cheap options for filling your raised garden beds, you can create a nutrient-rich and productive garden space without breaking the bank.
Now that you’re equipped with cost-effective options for filling your raised beds, it’s time to get your hands dirty and start planting! Remember to choose suitable plants for your garden and provide them with proper care and maintenance throughout the growing season.
With a little effort and creativity, your budget-friendly raised garden beds will flourish with vibrant blooms and bountiful harvests!
Using Compost
Compost is a versatile and valuable resource for filling your raised garden beds. It is a nutrient-rich soil amendment that improves soil fertility, drainage, and overall plant health. Here’s how you can effectively use compost to fill your raised beds:
1. DIY Compost: Making your own compost is a cost-effective and sustainable option. Collect kitchen scraps like fruit and vegetable peels, coffee grounds, and eggshells, along with yard waste such as leaves, grass clippings, and trimmings. Layer these materials in a compost bin or pile, alternating between dry (carbon-rich) and wet (nitrogen-rich) materials. Turn the pile regularly to facilitate decomposition, and in a few months, you’ll have rich, dark compost ready to fill your raised beds.
2. Purchasing Bulk Compost: If you don’t have the resources or space to make your own compost, you can purchase it in bulk from local sources such as municipal composting sites, garden centers, or organic farms. Buying in bulk is often more cost-effective than purchasing small bags, especially if you have large raised beds to fill. Look for compost that is well-aged and fully decomposed for the best results.
3. Applying Compost: When using compost to fill your raised beds, spread a layer of 2-3 inches (5-7.5 cm) across the entire bed. Use a garden fork or rake to evenly distribute the compost and work it into the existing soil, if any. This helps improve soil structure and fertility.
4. Additional Compost Applications: Compost can also be used as a top dressing or side dressing around growing plants. This provides a slow-release source of nutrients and keeps the soil moist as the compost breaks down over time. Avoid placing fresh compost directly in contact with plant stems to prevent the risk of burning or rot.
Using compost in your raised garden beds not only enriches the soil but also enhances its ability to retain moisture, reduces erosion, and promotes beneficial microbial activity. The organic matter in compost improves soil structure, creating a loose and crumbly texture that allows roots to penetrate easily and access nutrients.
Remember to regularly replenish the compost in your raised beds, as it will naturally break down and become incorporated into the soil over time. Adding a fresh layer of compost each year before the growing season helps replenish nutrients and maintain soil fertility.
By incorporating compost into your raised garden beds, you are utilizing a sustainable and affordable option to create a thriving garden space. Enjoy the benefits of healthy plants, bountiful harvests, and a more environmentally friendly approach to gardening!
Consider using inexpensive materials such as compost, leaf mold, and well-rotted manure to fill raised garden beds. These materials provide essential nutrients and improve soil structure at a low cost.
Utilizing Leaf Mulch
When it comes to filling your raised garden beds on a budget, leaf mulch is a fantastic and cost-effective option. It not only helps to fill the beds but also provides numerous benefits to your garden. Here’s how you can effectively utilize leaf mulch:
1. Collecting and Shredding Leaves: Collect fallen leaves from your yard or neighborhood. Avoid using leaves from trees or plants that may harbor diseases or pests. Shred the leaves using a lawn mower, shredder, or by hand to speed up decomposition and create a finer mulch.
2. Adding a Layer of Leaf Mulch: Begin by adding a layer of leaf mulch to the bottom of your raised beds, about 2-3 inches (5-7.5 cm) deep. This layer acts as a natural weed barrier, suppressing weed growth and reducing the need for herbicides or manual weeding.
3. Mixing with Other Materials: To create a well-balanced growing medium, you can mix the leaf mulch with other organic matter such as compost, aged manure, or topsoil. This combination adds nutrients, improves soil structure, and enhances moisture retention.
4. Using Leaf Mulch as Top Dressing: As the growing season progresses, you can use leaf mulch as a top dressing around your plants. Apply a thin layer around the base of the plants, leaving space around the stem to prevent excess moisture retention, which can lead to rot or disease.
5. Incorporating Leaf Mulch into the Soil: At the end of the growing season, you can incorporate the remaining leaf mulch into the soil by gently working it in with a garden fork or hoe. This helps improve soil structure and adds organic matter, ensuring the continued fertility of your raised beds.
Utilizing leaf mulch in your raised garden beds offers several advantages. The mulch acts as an insulating layer, regulating soil temperature, protecting roots from extreme heat or cold, and reducing moisture evaporation. It also prevents weed growth by blocking sunlight and acts as a natural habitat for beneficial organisms, such as earthworms and beneficial insects, that contribute to a healthy garden ecosystem.
Over time, the leaf mulch breaks down, releasing nutrients into the soil and improving its overall fertility. It also improves soil structure by increasing its ability to hold water and nutrients, promoting root development and enhancing microbial activity.
By utilizing leaf mulch in your raised garden beds, you are not only filling them economically but also creating a sustainable and environmentally friendly gardening practice. So, make the most of the fallen leaves and turn them into a valuable resource for your garden!
Read more: What Is A Raised Garden Bed
Implementing Organic Matter
When filling your raised garden beds, incorporating organic matter is a key element to ensure the fertility and health of the soil. By implementing organic matter, you provide essential nutrients, improve soil structure, and enhance moisture retention. Here’s how you can effectively utilize organic matter in your raised garden beds:
1. Compost: Compost is a versatile and valuable source of organic matter. It is created through the decomposition of organic materials such as kitchen scraps, yard waste, and plant matter. Adding compost to your raised beds enriches the soil with a wide range of nutrients and improves its overall structure and drainage.
2. Aged Manure: Aged manure, such as cow, horse, or poultry manure, is another excellent option for incorporating organic matter. Apply well-rotted manure to the raised beds, as fresh manure can be too strong and may burn plant roots. The aged manure not only adds nutrients but also enhances soil fertility and microbial activity.
3. Leaf Mold: Leaf mold is the result of decomposed leaves, which have gone through the process of decomposition without the addition of other materials. It is a rich source of organic matter that improves soil structure, retains moisture, and provides a slow-release of nutrients to plants. Mix leaf mold into your raised beds to enrich the soil and promote healthy plant growth.
4. Garden Compost: Garden compost refers to the organic material that accumulates in your garden over time, such as plant trimmings, fallen leaves, and weeds that have not gone to seed. These materials can be collected, shredded, and incorporated into your raised beds to enhance the organic matter content. Garden compost helps improve soil structure, encourages beneficial microbial activity, and replenishes nutrients.
5. Green Manure: Green manure is a technique where fast-growing cover crops, such as clover, buckwheat, or rye, are grown and then tilled into the soil before they mature. This green manure crop adds organic matter, improves soil fertility, and helps control weeds. It is an effective method to implement organic matter and improve the long-term health of your raised beds.
By implementing organic matter in your raised garden beds, you create a more sustainable and resilient gardening system. Organic matter improves soil structure by increasing its ability to hold water and nutrients, reduces erosion, encourages beneficial soil organisms, and promotes overall plant health and productivity.
Remember to incorporate organic matter evenly throughout the raised beds, ensuring its integration into the existing soil. This will create a uniform environment for root development and nutrient distribution.
Utilizing organic matter in your raised garden beds not only nourishes your plants but also promotes long-term soil health, making your garden more productive and sustainable. So, embrace the power of organic matter and watch your plants thrive!
Enhancing Soil with Manure
One effective and affordable way to fill your raised garden beds with nutrient-rich soil is by enhancing the soil with manure. Manure is a valuable organic material that provides essential nutrients, improves soil structure, and promotes healthy plant growth. Here’s how you can effectively utilize manure to enhance the soil in your raised garden beds:
1. Choosing the Right Type of Manure: There are various types of manure available, including cow, horse, chicken, and sheep manure. Each type has different nutrient compositions, so it’s important to choose the one that aligns with your specific gardening needs. For example, cow manure is high in nitrogen, while chicken manure is richer in phosphorus and potassium.
2. Organic vs. Fresh Manure: Opt for well-rotted or aged manure instead of fresh manure. Fresh manure can be too strong and may contain high levels of ammonia that can burn plant roots. Aged manure has undergone the decomposition process, making it milder and safer to use in your raised beds.
3. Applying Manure: Spread a layer of aged manure evenly across your raised beds, aiming for a depth of around 1-2 inches (2.5-5 cm). Work the manure into the existing soil using a garden fork or rake to ensure it is well incorporated. Avoid piling the manure near the base of plant stems to prevent rotting or burning.
4. Considering the Moisture Content: Manure is naturally rich in moisture, which can affect the overall moisture levels in your raised beds. Be mindful of this and adjust your watering accordingly to prevent oversaturation. Proper moisture management is crucial to maintain a healthy growing environment for your plants.
5. Composting Manure: If you prefer to use fresh manure, you can compost it before applying it to your raised beds. Composting will help break down the manure, eliminate any potential pathogens, and create a more balanced and nutrient-rich compost for your garden.
Enhancing your raised garden beds with manure enriches the soil with essential nutrients like nitrogen, phosphorus, and potassium. These nutrients are crucial for plant growth, root development, and overall health. Manure also improves soil structure by adding organic matter, enhancing moisture retention, and promoting beneficial microbial activity.
As manure decomposes, it releases nutrients slowly, providing a steady supply of nourishment to your plants throughout the growing season. This gradual release helps prevent nutrient leaching and ensures the nutrients are available when the plants need them most.
Remember to source manure from reputable sources that do not contain harmful chemicals or residues. Organic or locally sourced manure is typically a safer choice and aligns with sustainable gardening practices.
By enhancing the soil in your raised garden beds with well-rotted manure, you can create a nutrient-rich and fertile growing environment for your plants. Enjoy the benefits of healthy and thriving plants, abundant yields, and a sustainable approach to gardening!
Using Topsoil and Peat Moss Mix
Creating the ideal growing medium for your raised garden beds can be achieved by using a combination of topsoil and peat moss. This mixture provides a balanced blend of nutrients, improved drainage, and moisture retention. Here’s how you can effectively use a topsoil and peat moss mix to fill your raised beds:
1. Choosing Quality Topsoil: Selecting high-quality topsoil is crucial for the success of your raised beds. Look for topsoil that is rich in organic matter, free of contaminants, and well-draining. Avoid topsoil that is too clayey or sandy, as it may hinder proper root development and drainage.
2. Adding Peat Moss: Peat moss is an excellent addition to the topsoil, as it improves moisture retention and enhances soil structure. Incorporate peat moss into your topsoil at a ratio of approximately 1:1. This will create a well-balanced mixture that holds moisture but still provides proper drainage.
3. Blending the Mixture: Mix the topsoil and peat moss thoroughly, either by hand or using a shovel or garden tiller. Ensure that the components are evenly distributed to create a uniform consistency throughout the raised bed.
4. Filling the Raised Beds: Fill your raised beds with the topsoil and peat moss mixture, leaving enough space for planting. Level the mixture using a rake or garden tool, making sure it is evenly spread and free from any clumps or air pockets.
5. Incorporating Additional Amendments: Depending on the needs of your plants and the quality of your topsoil, you may consider incorporating additional amendments into the mixture. This could include organic matter like compost or well-rotted manure to enrich the soil with additional nutrients and improve overall fertility.
Using a topsoil and peat moss mix in your raised garden beds provides several benefits. The topsoil, rich in minerals and nutrients, provides a solid base for plant roots to establish and grow. Peat moss, on the other hand, enhances moisture retention, preventing the soil from drying out too quickly during hot summer months.
Together, this combination promotes an optimal balance between water drainage and moisture absorption, ensuring that your plants receive the right amount of water for healthy growth. The improved soil structure allows for better root penetration and nutrient uptake, leading to thriving and productive plants in your raised beds.
Remember to periodically monitor the moisture levels in your topsoil and peat moss mix to prevent over-watering or under-watering. Achieving the right moisture balance is crucial for maintaining the health and vitality of your plants.
By utilizing a topsoil and peat moss mix, you’ll create a nutrient-rich and well-drained growing medium in your raised beds. Enjoy the benefits of healthy plants, abundant yields, and a thriving garden!
Investing in Vermiculite or Perlite
When it comes to filling your raised garden beds, investing in vermiculite or perlite can greatly improve soil aeration, drainage, and water retention. These lightweight and porous materials are excellent additions to create an optimal growing environment for your plants. Here’s how you can effectively utilize vermiculite or perlite in your raised beds:
1. Understanding Vermiculite: Vermiculite is a natural mineral that undergoes a heating process, expanding it into lightweight flakes. It absorbs water and nutrients, releasing them slowly to the plant roots. Vermiculite helps with moisture retention in the soil, preventing it from becoming too dry. It also improves soil structure and aeration.
2. Exploring Perlite: Perlite is a volcanic glass that has been heated to create a porous and lightweight material. It improves soil drainage by increasing air space and preventing compaction. Perlite also helps retain some moisture while allowing excess water to drain away. It provides excellent aeration for plant roots and helps prevent root rot.
3. Mixing with Soil: To incorporate vermiculite or perlite into your raised beds, you’ll need to mix them with your existing soil or growing medium. Depending on the soil type, you can add vermiculite or perlite at a ratio of roughly 1:4 (1 part vermiculite or perlite to 4 parts soil). Mix well to ensure even distribution throughout the raised bed.
4. Applying Vermiculite or Perlite: Spread the vermiculite or perlite mixture evenly across the raised bed, ensuring that the layer is about 2-3 inches (5-7.5 cm) thick. Gently work the mixture into the soil using a garden fork or rake, ensuring it is well incorporated.
5. Additional Considerations: Both vermiculite and perlite are reusable and can be mixed into the soil each season. However, they may break down over time, so it’s a good practice to replenish or adjust the ratio accordingly in subsequent years.
Investing in vermiculite or perlite for your raised garden beds provides several benefits. These materials improve soil structure by increasing aeration and preventing soil compaction, allowing plant roots to access oxygen more readily. They enhance drainage, preventing waterlogging and root rot in the raised beds.
In addition, vermiculite and perlite retain moisture in the soil while allowing excess water to drain away. This helps maintain a consistent moisture level, ensuring that plants receive adequate hydration without the risk of drowning their roots.
When paired with quality soil, vermiculite or perlite can significantly improve the growing conditions for your plants, leading to healthier growth, increased nutrient uptake, and higher yields in your raised beds.
Remember to choose a reputable source for vermiculite or perlite to ensure product quality and purity. These materials are widely available at garden centers or can be purchased online.
By investing in vermiculite or perlite, you’re investing in the long-term success of your raised garden beds. Enjoy the benefits of improved soil structure, enhanced drainage, and healthier, more productive plants in your gardening journey!
Read more: Why A Raised Garden Bed
Incorporating Straw or Hay
When it comes to filling your raised garden beds on a budget, incorporating straw or hay can be an effective and economical option. Straw and hay provide a range of benefits such as weed suppression, moisture retention, and organic matter enrichment. Here’s how you can effectively incorporate straw or hay into your raised beds:
1. Choosing Straw or Hay: Straw and hay are commonly available agricultural byproducts. Straw is the stem residue left after grains like wheat, oats, or barley are harvested. Hay, on the other hand, typically consists of grasses and legumes like alfalfa, clover, or timothy that are cut and dried for animal feed. Both can be found at local farms, garden centers or through online suppliers.
2. Weed Suppression: Place a layer of straw or hay at the bottom of your raised beds, around 2-3 inches (5-7.5 cm) thick. This layer acts as a natural mulch, suppressing weed growth by preventing sunlight from reaching the soil surface. It helps reduce the need for frequent weeding and conserves moisture in the soil.
3. Moisture Retention: Straw and hay effectively retain moisture in the soil, preventing rapid evaporation and reducing water loss. This is particularly beneficial during hot and dry periods, as it helps keep the plant roots consistently hydrated. Additionally, the layer of straw or hay acts as a barrier, preventing soil erosion from heavy rainfall.
4. Organic Matter Enrichment: As the straw or hay breaks down over time, they add organic matter to the soil, improving its structure and nutrient content. With regular watering and decomposition, the organic matter nourishes the soil, enhances microbial activity, and enhances the overall fertility of your raised beds.
5. Planting through the Straw/Hay Layer: When it’s time to plant your seeds or transplants, simply push aside the layer of straw or hay and create holes in the soil underneath. Place the plants in the holes, cover the roots with soil, and then gently pull the straw or hay back around the base of the plants. This will help retain moisture, suppress weeds, and insulate the soil.
One important consideration when using straw or hay is to ensure that it is seed-free. Seeds from certain types of hay can sprout and lead to weed problems in your garden. So, it’s always a good practice to inquire about the seed content before incorporating them into your raised garden beds.
By incorporating straw or hay into your raised garden beds, you’ll enjoy the benefits of weed suppression, moisture retention, and soil enrichment at a low cost. This approach promotes a more sustainable and eco-friendly gardening practice, making the most of natural agricultural byproducts.
Remember to replenish the layer of straw or hay as needed throughout the growing season to maintain weed suppression and moisture retention. Over time, the straw or hay will break down and can be turned into the soil at the end of the gardening season, further enriching the soil for future plantings.
So, gather some straw or hay and give your raised garden beds an affordable and functional makeover. Enjoy the convenience of reduced weeds, improved moisture levels, and healthier plants in your bountiful garden!
Conclusion
Congratulations on learning how to fill your raised garden beds on a budget! By implementing the strategies and options we’ve discussed, you can create productive and thriving garden spaces without breaking the bank. Here’s a brief recap of what we’ve covered:
Selecting the Site: Choose a sunny location with good drainage and easy accessibility for your raised garden beds.
Choosing the Right Materials: Consider using wood, composite boards, cinder blocks, or garden bed kits to construct your raised beds.
Preparing the Soil: Clear the area, test the soil, amend it with organic matter, and ensure a level surface before filling your raised beds.
Building the Raised Garden Beds: Measure, mark, assemble, and level the raised bed frames before filling them.
Filling the Raised Garden Beds: Explore various options such as compost, leaf mulch, organic matter, manure, topsoil and peat moss mix, vermiculite or perlite, straw or hay to create a nutrient-rich and well-drained growing medium.
Conclusion: Filling your raised garden beds on a budget doesn’t mean compromising on quality or plant health. By utilizing compost, leaf mulch, organic matter, manure, topsoil and peat moss mix, vermiculite or perlite, and straw or hay, you can create an ideal environment for your plants to thrive while keeping costs down.
Remember to water, fertilize, and maintain your garden beds regularly to support healthy plant growth. Enjoy the beauty and bounty of your raised garden beds as they provide you with fresh produce, vibrant flowers, and the joy of gardening.
Whether you’re a seasoned gardener or a beginner, building and filling your raised garden beds is a rewarding and fulfilling experience. So, roll up your sleeves, get creative, and enjoy the journey as you create a stunning and productive garden space!
Frequently Asked Questions about How To Fill Raised Garden Beds Cheap
Was this page helpful?
At Storables.com, we guarantee accurate and reliable information. Our content, validated by Expert Board Contributors, is crafted following stringent Editorial Policies. We're committed to providing you with well-researched, expert-backed insights for all your informational needs.


0 thoughts on “How To Fill Raised Garden Beds Cheap”