Articles
How To Find Broken Electrical Wire In Wall
Modified: September 2, 2024
Learn how to locate and repair broken electrical wires concealed within walls with our informative articles on electrical troubleshooting and repair.
(Many of the links in this article redirect to a specific reviewed product. Your purchase of these products through affiliate links helps to generate commission for Storables.com, at no extra cost. Learn more)
Introduction
Electrical issues can be a cause for concern in any home or building. One common problem that homeowners may encounter is a broken electrical wire hidden within the walls. Not only can a broken wire affect the performance of your electrical appliances and systems, but it can also pose serious safety hazards such as electrical shock or fire.
Identifying and fixing a broken electrical wire in the wall can be a daunting task for someone who is not familiar with electrical systems. However, with some basic knowledge and the right tools, you can successfully diagnose and address this issue.
In this article, we will guide you through the process of finding a broken electrical wire in the wall. We will provide you with step-by-step instructions and highlight the common signs to look out for. Additionally, we will discuss the necessary tools and safety precautions to ensure a smooth and secure procedure.
It is important to note that electrical work should be approached with caution. If you are unsure or uncomfortable with working with electricity, it is always best to consult a qualified electrician.
Now, let’s explore the signs that indicate a broken wire in the wall and the steps you can take to locate and rectify the problem.
Key Takeaways:
- Identifying common signs of a broken electrical wire, turning off the power, and using a voltage detector or multimeter are crucial steps in safely locating and repairing the issue within the wall.
- Accessing the wall, visually inspecting the wires, and tracing the broken wire are essential for effectively repairing or replacing the damaged section, ensuring the safety and functionality of the electrical system.
Read more: How To Find Electrical Wire In Wall
Common Signs of a Broken Electrical Wire in the Wall
Identifying a broken electrical wire in the wall can be challenging, as the wiring is concealed behind the walls. However, there are several common signs that can indicate a potential issue. By paying attention to these signs, you can narrow down the problem area and take the necessary steps to address it. Here are some of the most common signs of a broken electrical wire in the wall:
- Flickering or dimming lights: If you notice that your lights flicker or become dimmer without any evident reason, it could indicate a problem with the electrical wiring. This could be a sign of a loose or damaged wire.
- Electrical outlets not working: If one or more of your electrical outlets suddenly stop working, it could be due to a broken wire. Test the outlet by plugging in a known working device to determine if the issue is with the outlet or the wiring behind it.
- Circuit breaker tripping frequently: A circuit breaker is designed to protect your home’s electrical system from overload or short circuits. If your circuit breaker trips frequently, it may be a result of a broken wire causing an excessive flow of electricity.
- Burning smell or sparks: A burning smell or the presence of sparks when you plug or unplug a device can indicate a serious electrical problem. It could be a sign of a broken wire coming into contact with other components or insulation.
- Strange noises: If you hear buzzing, crackling, or sizzling sounds coming from the walls, it may signify a damaged wire. These noises can occur when the electricity is not flowing smoothly through the wiring.
It is important to note that these signs can also indicate other electrical issues, so it’s essential to conduct a thorough inspection to confirm the presence of a broken wire. Additionally, if you notice any of these signs, it is crucial to address the problem promptly to prevent further damage or potential hazards.
Tools and Equipment Needed
Before starting the process of finding and repairing a broken electrical wire in the wall, it is important to gather the necessary tools and equipment. Having the right tools will make the task more efficient and help ensure your safety. Here are the essential tools and equipment you will need:
- Voltage detector or multimeter: A voltage detector or a multimeter is crucial for testing the presence of electrical current and identifying live wires. It will help you determine if the wire is broken or if there is an electrical flow.
- Wire cutters and wire strippers: These tools are necessary for cutting and stripping the wire insulation when repairing or replacing the broken wire.
- Electrician’s tape: Electrician’s tape, also known as electrical tape, is used to insulate and secure the connections after repairing the broken wire.
- Flashlight: A flashlight will be helpful in providing additional light while inspecting the walls and the wiring inside.
- Screwdriver set: A set of screwdrivers of various sizes and types will be needed to remove outlet covers, electrical panels, and any other components necessary to access the wires.
- Fish tape or wire snake: If you need to run a new wire through the wall after locating the broken wire, a fish tape or wire snake will be indispensable for guiding the new wire through the electrical conduit.
- Protective gear: To ensure your safety, it is important to wear protective gear such as safety goggles and insulated gloves while working with electricity.
These tools and equipment will provide you with the necessary resources to carry out the task effectively and safely. It is essential to use them properly and follow all safety precautions throughout the process.
Precautions and Safety Measures
Working with electrical systems can be hazardous if proper precautions are not taken. To ensure your safety and the safety of others, it is important to follow these precautions and safety measures when trying to find and repair a broken electrical wire in the wall:
- Turn off the power: Before starting any work, always turn off the power supply to the affected area by switching off the circuit breaker or removing the fuse. This will prevent any accidental electrical shocks or short circuits.
- Use proper safety gear: Wear safety goggles, insulated gloves, and appropriate clothing to protect yourself from electrical shocks and any debris that may be present during the repair process.
- Do not touch exposed wires: Never touch or attempt to repair exposed wires while the power is still on. Contact a qualified electrician for assistance in such situations.
- Inspect for water or moisture: Ensure that the area where you are working is dry. Water and moisture can increase the risk of electrical shock. If you suspect water damage, contact a professional to assess the situation.
- Work in a well-lit area: Use a flashlight or additional lighting to ensure that you can see the wires and components clearly while working inside the wall. This will help prevent accidents and potential damage.
- Do not overload circuits: Avoid plugging multiple devices into the same outlet or overloading the circuit. This can cause overheating and may contribute to wire damage or electrical fires.
- Consult a professional if unsure: If you are unsure or uncomfortable with any aspect of the process, it is always best to seek assistance from a qualified electrician. They have the expertise and experience to handle electrical issues safely and effectively.
These precautions and safety measures are essential for minimizing the risk of electrical accidents and ensuring a secure working environment. Always prioritize safety when working with electricity, and never hesitate to seek professional help when needed.
Step 1: Turn Off the Power
Before beginning any work on electrical systems, it is crucial to turn off the power to the affected area. This will help prevent electrical shocks and ensure your safety throughout the process. Follow these steps to turn off the power:
- Locate the circuit breaker panel: Most homes have a circuit breaker panel located in the basement, garage, or utility room. It contains switches or breakers that control the power supply to different areas or rooms of your house.
- Identify the circuit breaker: Determine which circuit breaker controls the area where you suspect the broken wire is located. You may need to consult a floor plan or ask someone for assistance if you are unsure.
- Switch off the circuit breaker: Once you have identified the correct circuit breaker, flip the switch to the “off” position. This will effectively cut off the power supply to the specific area or room.
- Test the area for power: To ensure that the power is fully turned off, test the outlets or light switches in the affected area using a voltage detector or a multimeter. These tools will indicate whether there is still electrical current present.
- Double-check the power: For added safety, go back to the circuit breaker panel and verify that the switch or breaker for the specific area is in the “off” position. This will provide peace of mind that the power is indeed turned off.
It is important to note that in older homes, the wiring may not be labeled accurately or may not have individual breakers for each area. In such cases, it is advisable to consult a qualified electrician to guide you through the process or to turn off the power to the entire house if necessary.
By following this first step and ensuring that the power is turned off, you can proceed safely with the next steps of locating and repairing the broken electrical wire in the wall.
Read more: How To Extend Electrical Wire In Wall
Step 2: Locate the Problem Area
Once you have turned off the power to the affected area, the next step is to locate the specific area where the broken electrical wire is suspected. Here are the steps to help you locate the problem area:
- Observe the signs: Refer back to the common signs of a broken electrical wire that we discussed earlier. Take note of areas where you have noticed flickering lights, non-working outlets, circuit breaker trips, or any other abnormalities.
- Inspect the outlets: Start by inspecting the outlets in the area. Remove the cover plates from the outlets and visually check the wiring connections. Look for any loose or damaged wires that may indicate a breakage.
- Examine switches and fixtures: Move on to examining light switches, fixtures, and other electrical components in the vicinity. Pay close attention to any visible signs of damage, such as frayed wires, burn marks, or melted insulation.
- Check for electrical boxes: Look for electrical boxes on the walls or ceilings. These boxes typically house outlets, switches, and junctions. Examine the wiring connections inside the boxes for any signs of wear or breakage.
- Follow the circuit: If you are still unable to locate the problem area, try to trace the electrical circuit. Start from an outlet or switch that is not functioning properly and follow the wiring path towards the electrical panel. Inspect any accessible junction boxes along the way.
- Use a stud finder: If necessary, use a stud finder or other wall-scanning tools to locate the position of electrical wires behind the walls. This can be especially helpful if the wiring is not easily visible.
Remember to approach this step with caution and avoid touching any exposed wires. If at any point you are unsure about the wiring or feel uncomfortable, it is better to seek the assistance of a qualified electrician.
By carefully inspecting the outlets, switches, fixtures, and following the electrical circuit, you can narrow down the problem area and move on to the next steps of inspection and testing.
Step 3: Inspect and Test the Outlets
Once you have identified the problem area where the broken electrical wire is suspected, the next step is to inspect and test the outlets in that area. By doing so, you can gather more information and narrow down the location of the break. Follow these steps to inspect and test the outlets:
- Turn off the power: Before proceeding, ensure that the power to the area is turned off at the circuit breaker panel.
- Remove the outlet cover: Use a screwdriver to remove the cover plate from the outlet. Be careful not to touch any exposed wires or metal components.
- Visually inspect the wiring: Take a close look at the wiring connections inside the outlet box. Look for any signs of loose, damaged, or disconnected wires. Pay attention to any burn marks or odor that may indicate electrical overheating.
- Tighten the connections: If you notice any loose wiring, use a screwdriver to tighten the terminal screws or connectors. Ensure that the wires are securely attached and making proper contact.
- Test the outlet: Once the connections are secure, turn on the power to the area and use a voltage detector or a multimeter to test the outlet. Place one probe into the small slot (hot) of the outlet and the other probe into the larger slot (neutral) to check for a voltage reading. If there is no voltage, the broken wire may be located before the outlet.
- Check other outlets in the area: Repeat the same process for other outlets in the vicinity. Inspect the wiring connections and test for voltage. If multiple outlets are not working, there may be a common wire breakage further up the circuit.
- Document your findings: Make note of any findings, including the specific outlets where issues were detected, as well as the presence of any loose or damaged wires. This information will be helpful when tracing and repairing the broken wire.
Remember to always exercise caution when working with electrical components. If you are unsure or uncomfortable with inspecting or testing the outlets, it is best to seek the assistance of a qualified electrician to ensure your safety.
By inspecting and testing the outlets, you can gather valuable information and narrow down the location of the broken electrical wire, bringing you one step closer to resolving the issue.
Use a non-contact voltage tester to check for power in the suspected area. Then, use a multimeter to test for continuity in the wire to locate the break. Be sure to turn off power before attempting any repairs.
Step 4: Check the Circuit Breaker Panel
After inspecting and testing the outlets in the problem area, the next step is to check the circuit breaker panel. The circuit breaker panel is responsible for distributing electrical power throughout your home. Sometimes, a tripped breaker or a faulty circuit can cause issues with the electrical wiring. Follow these steps to check the circuit breaker panel:
- Locate the circuit breaker panel: The circuit breaker panel is typically found in a utility room, basement, or garage. It consists of a series of switches or breakers that control the various electrical circuits in your home.
- Open the panel: Carefully remove the panel cover by unscrewing or unclipping it. Take caution not to touch any live wires or components inside the panel.
- Inspect the breakers: Take a close look at the breakers. Look for any breakers that are in the “off” position or in a position that is different from the rest. This may indicate a tripped breaker or a faulty circuit.
- Reset the breaker: If you find a breaker that is in the “off” position, try resetting it by flipping it to the “on” position. However, if the breaker trips immediately after resetting or if you notice any signs of damage, it may indicate a more significant issue and require professional assistance.
- Identify the affected circuit: If the breaker resets without tripping and power is restored to the affected area, it indicates that the broken wire may be associated with the circuit controlled by that breaker. Make a note of the circuit number or label for later reference.
- Document your findings: Record any observations or findings on a notepad or in a digital document. This information will be useful when troubleshooting and repairing the broken electrical wire.
Remember, if you encounter any sparks, burning smells, or signs of damage in the circuit breaker panel, immediately turn off the main power switch and contact a qualified electrician. Safety should always be your top priority when working with electrical systems.
By checking the circuit breaker panel, you can identify any tripped breakers or faulty circuits that might be contributing to the issue with the electrical wiring in the problem area.
Step 5: Use a Voltage Detector or Multimeter
When dealing with a suspected broken electrical wire, using a voltage detector or a multimeter is essential for accurately testing and identifying the presence of voltage. These tools will help you pinpoint the location of the break and determine whether the wire is live or not. Here is how to use a voltage detector or multimeter:
- Ensure power is off: Before proceeding, make sure the power to the problem area is turned off. This is crucial for your safety while working with electrical components.
- Select the appropriate tool: Decide whether you will use a voltage detector or a multimeter for testing. A voltage detector is a non-contact tool that beeps or lights up to indicate the presence of voltage, while a multimeter can measure voltage, resistance, and continuity.
- Follow the manufacturer’s instructions: Familiarize yourself with the specific instructions for using your chosen tool. Read the user manual or guide provided by the manufacturer to ensure proper usage.
- Perform the test: With the power off, carefully place the voltage detector or multimeter probe near the suspected wire or outlet. For a voltage detector, it will indicate the presence of voltage through a sound or light signal. For a multimeter, set it to the appropriate voltage measurement range and place the probes on the wire or outlet to obtain a reading.
- Record the readings: Note down the readings you obtain from the voltage detector or multimeter. This information will be useful in identifying the location of the broken wire and confirming whether it is live or not.
- Repeat the process: Test multiple points along the suspected wire path or outlets in the area to gather more accurate information about the location of the break.
- Exercise caution: Handle the voltage detector or multimeter carefully, and ensure that you are following safety precautions. If you are unsure about using these tools or interpreting the readings, consult a qualified electrician.
Using a voltage detector or multimeter will help you narrow down the location of the broken wire and determine whether it is live or not. This information is crucial for further repairs or troubleshooting.
Read more: How To Run Electrical Wire On Concrete Wall
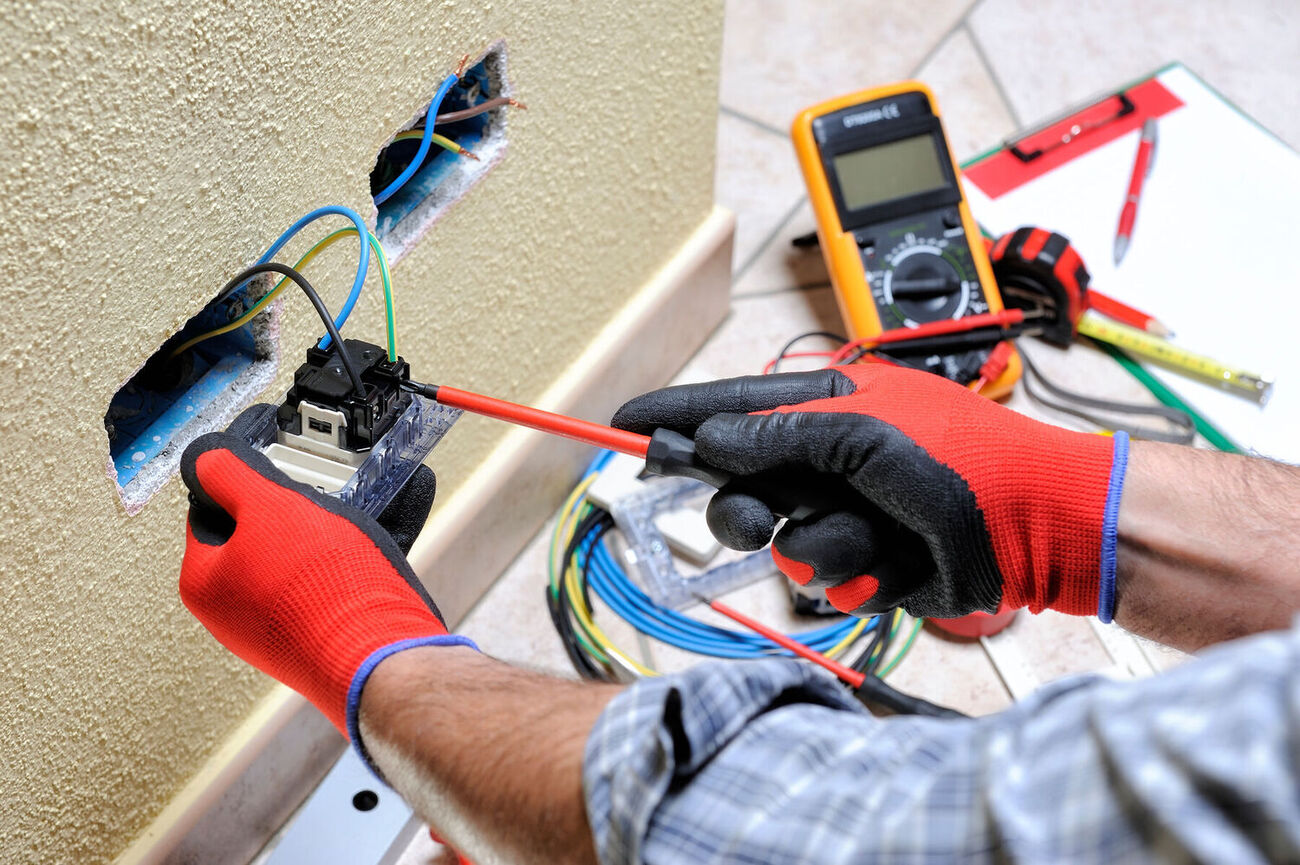
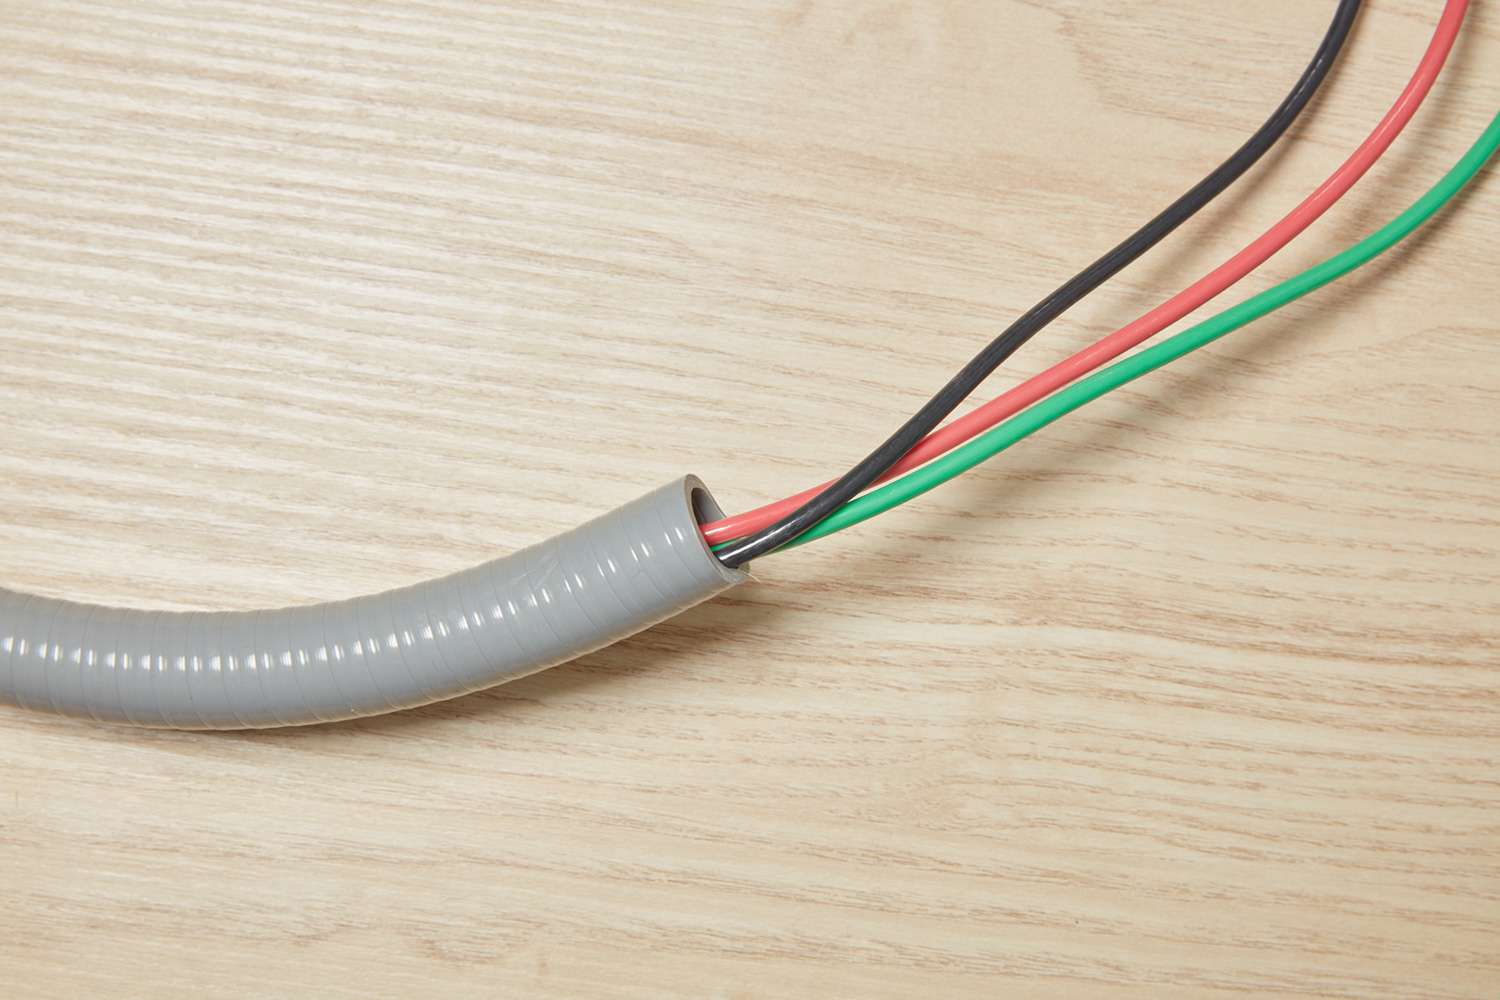
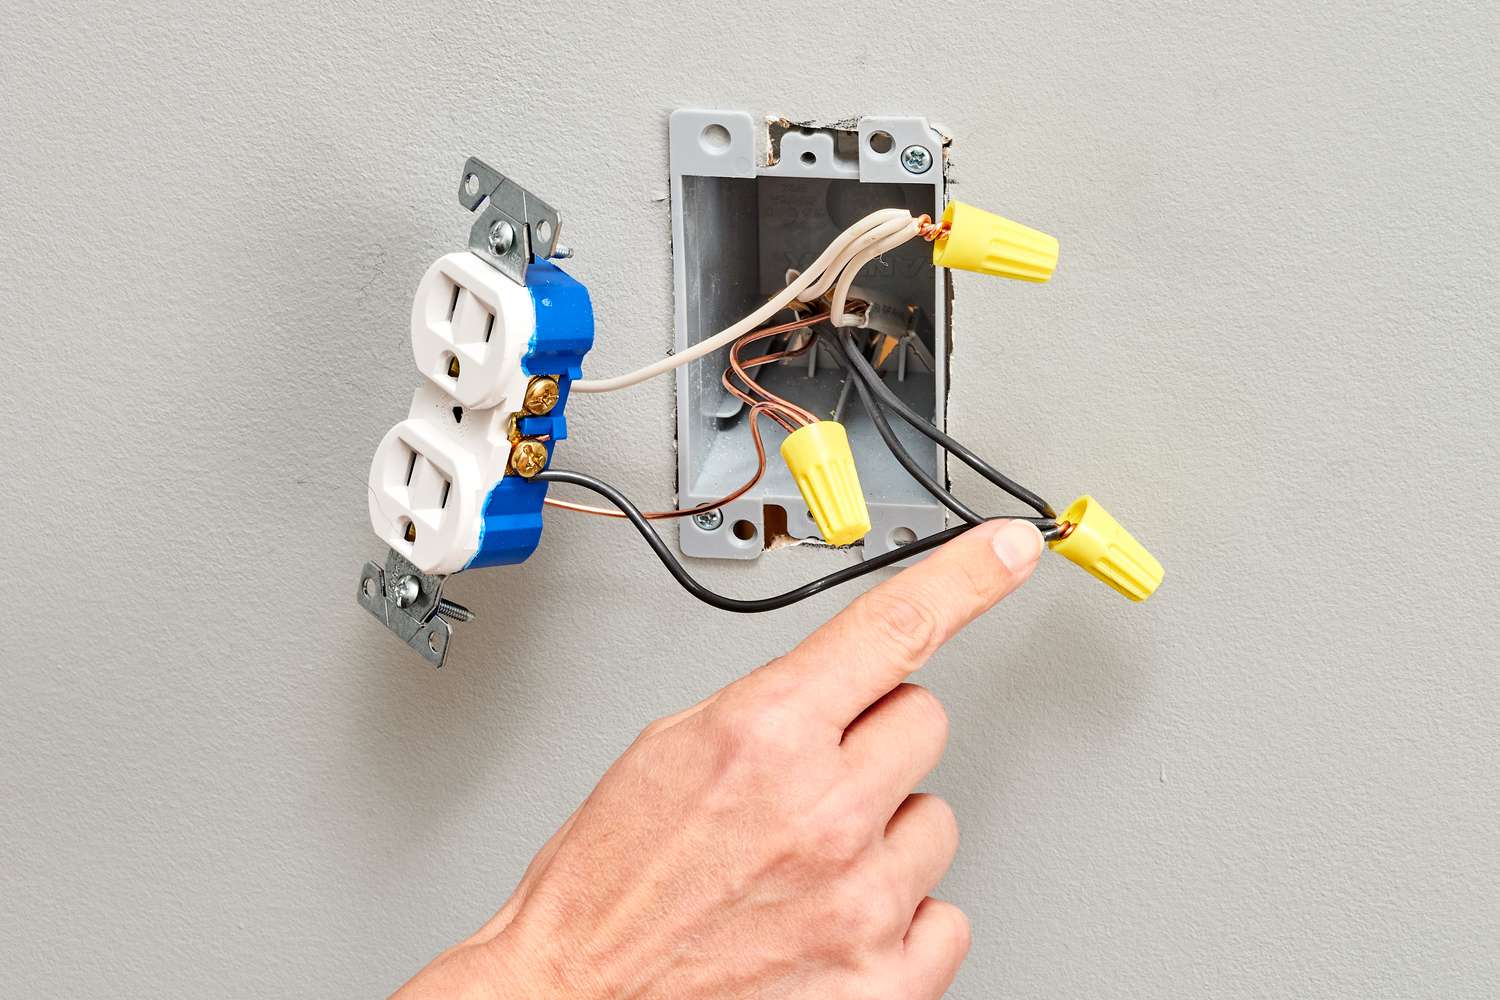
Step 6: Access the Wall
In order to physically inspect and repair the broken electrical wire in the wall, you will need to gain access to the area. Accessing the wall may involve removing drywall, paneling, or other coverings to expose the wiring. Follow these steps to access the wall:
- Turn off the power: Before proceeding, ensure that the power to the affected area is turned off at the circuit breaker panel. This is essential for your safety throughout the process.
- Prepare the workspace: Clear the area around the wall to create a comfortable and safe working space. Remove any furniture, decorations, or obstacles that may hinder your access to the wall.
- Identify the wall covering: Determine the type of covering on the wall, whether it is drywall, paneling, plaster, or any other material. This will help you choose the appropriate tools and techniques for removal.
- Remove the covering: Use the necessary tools, such as a pry bar, utility knife, or screwdriver, to carefully remove the covering from the wall. Start at a corner or edge and work your way across, being mindful not to damage the underlying wires or electrical components.
- Create an opening: Once you have removed the covering, create a small opening in the wall to access the wiring. Use a drywall saw or keyhole saw to carefully cut into the wall. Take caution to avoid cutting or damaging any wires within the wall.
- Inspect the exposed wires: With the wall open, visually inspect the exposed wires. Look for any signs of damage, breaks, loose connections, or other issues that may be causing the electrical problem. Take note of what you observe.
- Document and photograph: It is helpful to take photographs or document the location of the exposed wires and any findings for future reference. This documentation can assist in the repair process and ensure proper reinstallation of the wall covering.
- Exercise caution: Throughout the process of accessing the wall and inspecting the wires, be careful not to touch any live wires, and handle tools and materials safely. If you are unsure or uncomfortable with this step, consult a qualified electrician.
By carefully accessing the wall and exposing the wires, you will be able to inspect the area directly and proceed with the necessary repairs to the broken electrical wire.
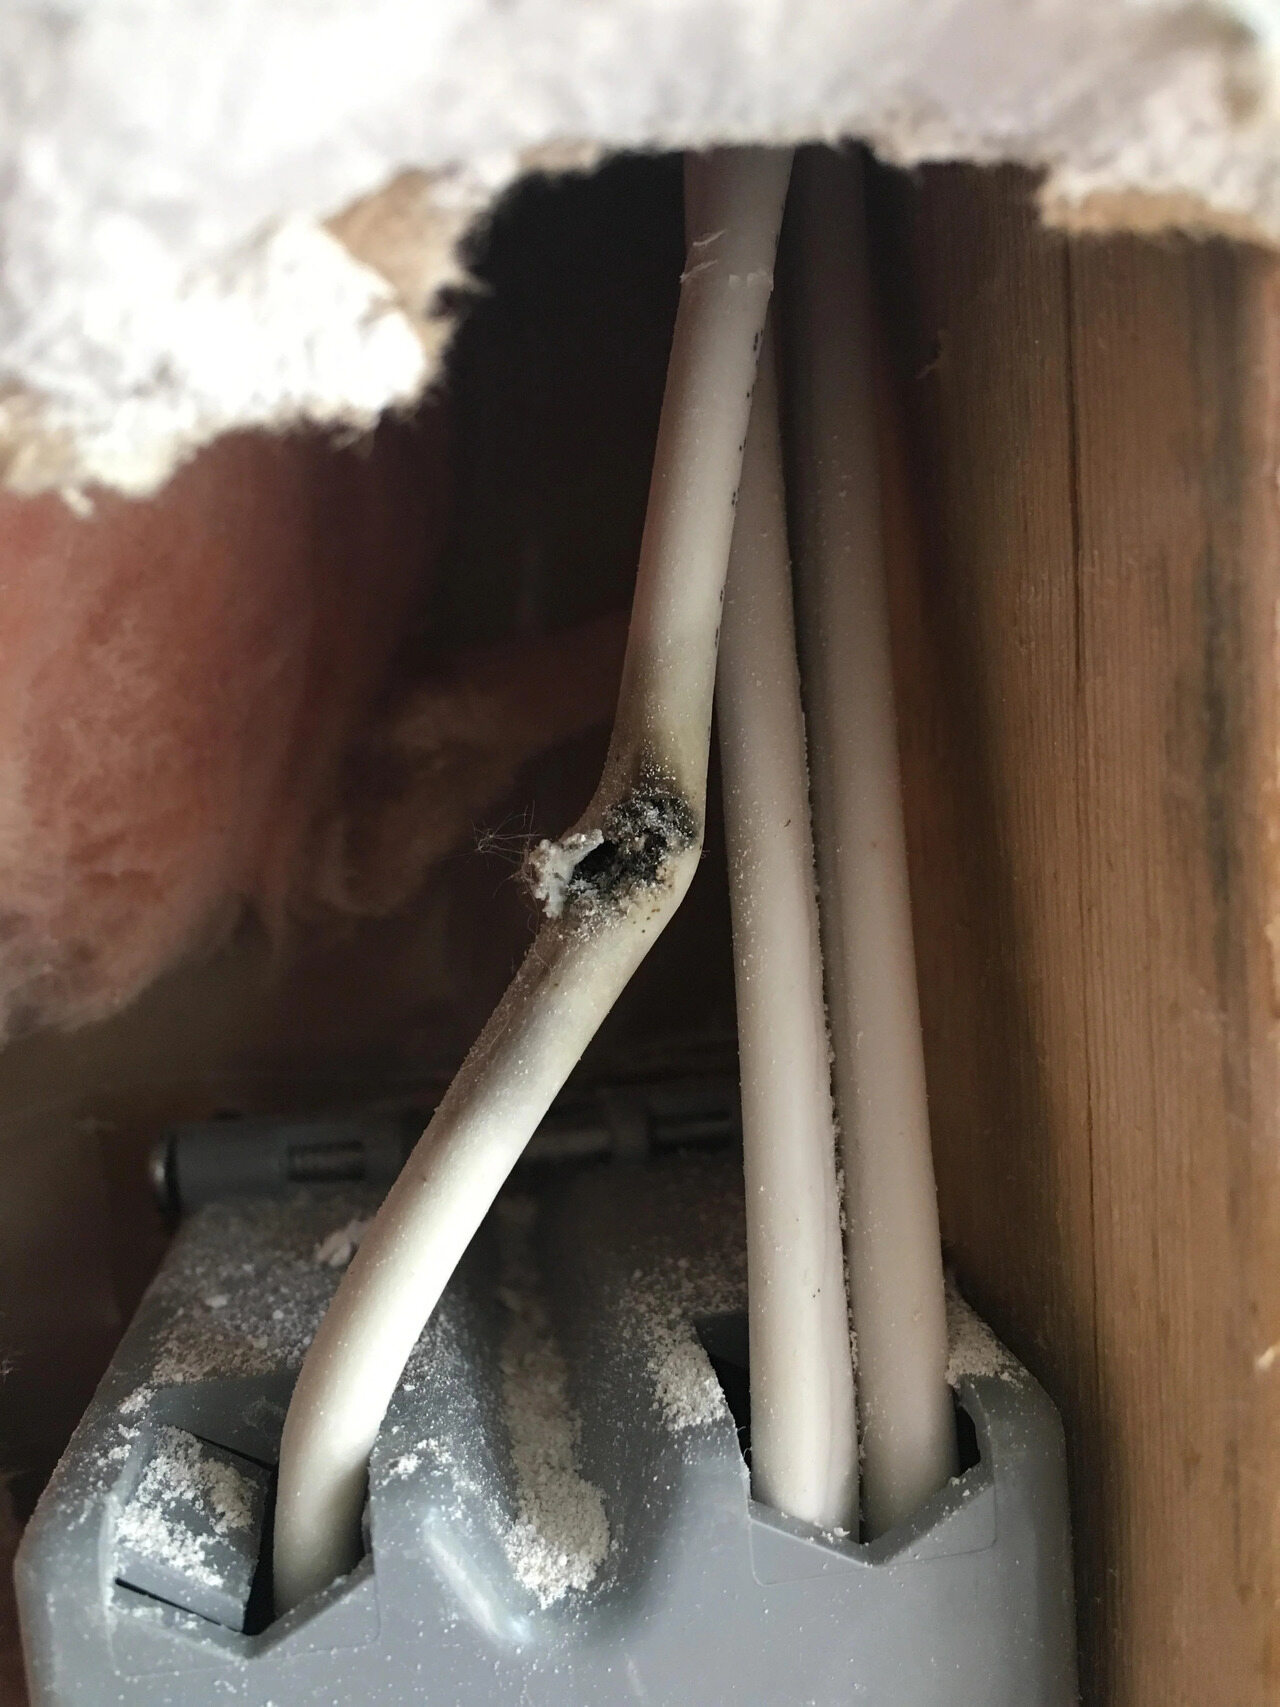
Step 7: Visual Inspection of the Wires
Once you have gained access to the wall and exposed the electrical wires, the next step is to visually inspect them. This inspection will help you identify any visible signs of damage or breaks in the wires. Follow these steps for a thorough visual inspection:
- Ensure power is off: Before proceeding, double-check that the power to the area is turned off at the circuit breaker panel. This is crucial for your safety during the inspection.
- Use proper lighting: Use a flashlight or additional lighting to illuminate the area and ensure clear visibility of the exposed wires. Adequate lighting will help you spot any signs of damage or breaks easily.
- Inspect each wire: Carefully examine each wire visually, looking for any visible signs of wear, fraying, thermal damage, or other indications of a broken wire. Pay attention to the insulation, connectors, and any visible connectors or splices.
- Check for loose connections: Look for any loose connections or terminals along the wires. Loose connections can lead to electrical issues and should be addressed during the repair process.
- Note any findings: Make notes or take photographs of any significant findings during the visual inspection. This documentation will assist you in the repair process and help ensure proper reinstallation of the wires.
- Exercise caution: While inspecting the wires, be cautious not to touch any live wires or components. Avoid any contact that could cause electrical shocks or damage to the system.
- Seek professional assistance if necessary: If you notice significant damage, extensive breaks, or if you are unsure about how to proceed with the repair, it is advisable to seek the assistance of a qualified electrician. They have the expertise to handle complex wire repairs.
By conducting a visual inspection of the wires, you can identify any visible signs of damage or breaks. This information will be crucial in determining the exact location and extent of the repair needed for the broken electrical wire.
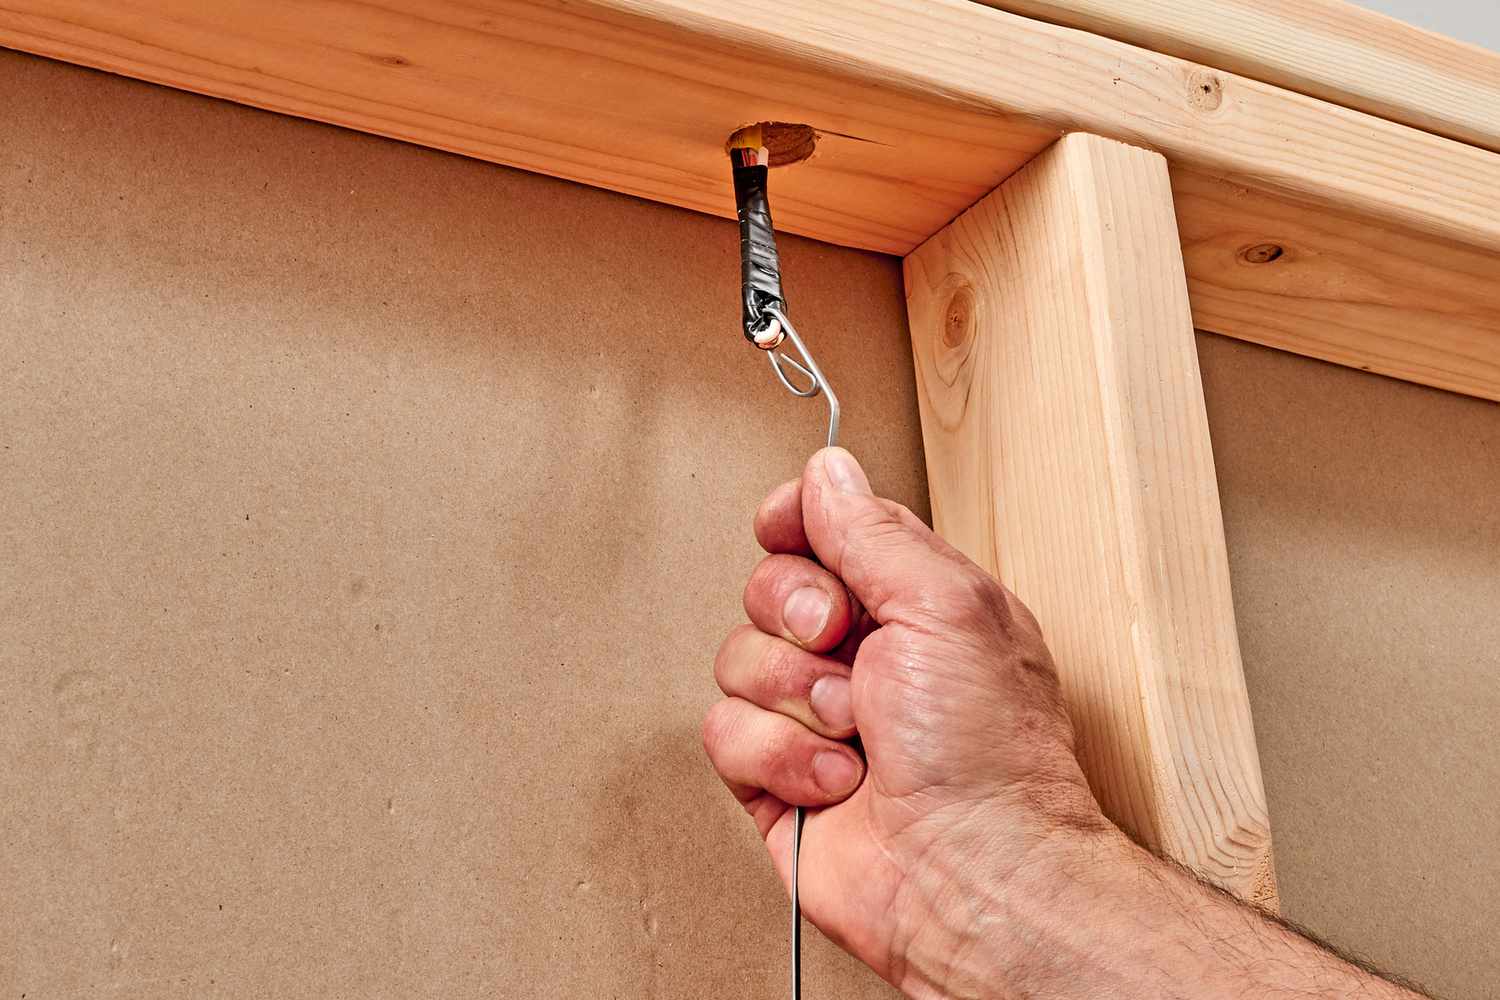
Step 8: Trace and Identify the Broken Wire
After visually inspecting the exposed wires, the next step is to trace and identify the exact location of the broken wire. Tracing the wire will help you pinpoint the area that needs repair or replacement. Follow these steps to trace and identify the broken wire:
- Ensure power is off: Double-check that the power to the affected area is turned off at the circuit breaker panel. This is crucial to prevent any electrical hazards during the tracing process.
- Follow the wire path: Visually trace the path of the wire from the last known functioning connection to the area where the wire is suspected to be broken. Follow the wire through any accessible junction boxes, outlets, switches, or other components along the way.
- Inspect the wire: Examine the wire closely as you trace its path. Look for any signs of damage, cuts, breaks, or other visible issues. Pay attention to areas where the wire may be crimped, pinched, or exposed.
- Use a continuity tester: If the wire is not visibly damaged, use a continuity tester or a multimeter set to the continuity testing function. With the power off, connect the tester to both ends of the wire and check for a continuous flow of electrical current.
- Note the location of the break: Once you have identified the area where the wire is broken, mark the location for repair or replacement. This will guide you during the next step of repairing the wire.
- Document your findings: It is helpful to record your findings, including the specific location of the broken wire, any observed damage, and the wire path, for later reference during the repair process.
- Exercise caution: Throughout the tracing process, be cautious not to touch any live wires or components. Handle the wires and testing equipment safely to prevent accidents or damage to the electrical system.
- Consult a professional if necessary: If you encounter any challenges with tracing the wire or are unsure about the next steps, it is best to consult a qualified electrician for their expertise and guidance.
By carefully tracing and identifying the broken wire, you will have a clear understanding of its location, allowing you to proceed with the necessary repairs effectively.
Step 9: Repair or Replace the Broken Electrical Wire
After locating the exact position of the broken wire, the final step is to repair or replace the damaged section. Depending on the severity of the break, you may be able to repair the wire or you may need to replace it entirely. Consider the following steps for repairing or replacing the broken electrical wire:
- Ensure power is off: Double-check that the power to the affected area is turned off at the circuit breaker panel to ensure your safety throughout the repair process.
- Cut out the damaged section: If the break is minor, you can cut out the damaged section of the wire using wire cutters or wire strippers. Make clean, straight cuts on each end of the damaged section.
- Strip the wire ends: Use wire strippers to remove the insulation from the cut ends of the wire, exposing the bare copper or aluminum strands. Strip approximately 1/2 inch of insulation from each wire end.
- Splice the wires: If you are repairing the wire, carefully twist the stripped wire ends together, matching the corresponding colors or markings. Use wire connectors or electrical tape to secure the splices and insulate them properly.
- Test the connection: Before proceeding with reinstallation, use a continuity tester or a multimeter to test the repaired connection. Ensure that there is continuity and electrical current can flow through the splice without any interruptions.
- Replace the wire (if necessary): If the damage is extensive or if the repaired connection is not reliable, it is best to replace the entire wire. Measure and cut a new piece of wire to the appropriate length, ensuring it is the same gauge and type as the existing wire.
- Connect the new wire: Use wire connectors or approved splicing methods to connect the new wire to the existing wire ends. Follow any applicable electrical codes and ensure the connections are secure and well-insulated.
- Test the repaired or replaced wire: Once the repair or replacement is complete, use a continuity tester or multimeter to confirm that the electrical current flows smoothly through the newly repaired or replaced wire.
- Reinstall the wall covering: With the repair or replacement complete, carefully reinstall the wall covering, ensuring that it is securely fastened without damaging the wires. Take caution to align any electrical boxes or outlets properly.
- Turn on the power: Once the wall covering is back in place, turn on the power at the circuit breaker panel and test the affected outlets, switches, or other electrical components to ensure they are functioning properly.
It is important to note that if you have any doubts or concerns about the repair or replacement process, it is recommended to consult a qualified electrician for their expertise and assistance.
By repairing or replacing the broken electrical wire, you can restore full functionality to your electrical system and ensure the safety and efficiency of your home’s electrical connections.
Read more: How To Run Electrical Wire Through Walls
Conclusion
Dealing with a broken electrical wire in the wall can be a challenging and potentially dangerous situation. However, by following the step-by-step process outlined in this guide, you can successfully locate and repair the issue. Remember to prioritize your safety and exercise caution throughout the entire process.
Throughout the steps, we discussed common signs of a broken wire, the tools and equipment needed for the task, precautions to take, and each step of the process. From turning off the power to accessing the wall, inspecting and testing the outlets, checking the circuit breaker panel, using a voltage detector or multimeter, and finally, tracing and identifying the broken wire before repairing or replacing it.
It is important to remember that working with electrical systems can be complex, and if you encounter any doubts or challenges, it is always best to consult a qualified electrician. They have the expertise and experience to handle electrical repairs safely and effectively.
By successfully locating and repairing the broken electrical wire, you can restore the functionality of your electrical system and ensure the safety of your home. Remember to document your findings, take necessary precautions, and always prioritize safety in all your electrical repair endeavors.
Whether you choose to tackle the repair yourself or seek professional help, addressing a broken electrical wire in the wall promptly is essential to prevent further damage, maintain the smooth operation of your electrical appliances, and provide a secure environment for you and your family.
Have you mastered finding broken electrical wires in walls? Keeping your home in top shape doesn't stop there. Maintain its safety and functionality by diving into our detailed guide on routine upkeep. From checking smoke detectors to cleaning gutters, you'll find practical advice that makes maintaining every corner straightforward and hassle-free. Don't wait for issues to arise; start on a path to proactive home care today!
Frequently Asked Questions about How To Find Broken Electrical Wire In Wall
Was this page helpful?
At Storables.com, we guarantee accurate and reliable information. Our content, validated by Expert Board Contributors, is crafted following stringent Editorial Policies. We're committed to providing you with well-researched, expert-backed insights for all your informational needs.


0 thoughts on “How To Find Broken Electrical Wire In Wall”