Articles
How To Fish Electrical Wire Through Walls
Modified: August 26, 2024
Learn how to fish electrical wire through walls with our informative articles. Find step-by-step guides and tips to help complete your electrical projects efficiently.
(Many of the links in this article redirect to a specific reviewed product. Your purchase of these products through affiliate links helps to generate commission for Storables.com, at no extra cost. Learn more)
Introduction
When it comes to electrical projects, one common task is fishing electrical wire through walls. Whether you’re adding new electrical outlets, installing lighting fixtures, or setting up a home theater system, knowing how to fish wire through walls is essential.
However, it can be a daunting task, especially if you’re not familiar with the process. But fear not! In this article, we’ll guide you through the step-by-step process of fishing electrical wire through walls, enabling you to tackle this DIY project with confidence.
Before we dive into the details, it’s important to note that working with electricity can be dangerous. If you’re not comfortable or experienced with electrical work, it’s always best to hire a licensed electrician to ensure safety and compliance with local building codes. With that said, let’s get started!
Key Takeaways:
- Proper planning and preparation are essential when fishing electrical wire through walls. Identifying the wire path, checking local codes, and understanding the building structure will save time and minimize potential challenges.
- Securing the electrical wire and performing thorough testing are crucial for a safe and reliable electrical installation. Following safety measures, proper termination, and regular inspections ensure a functional and secure outcome.
Tools and Materials Needed
Before you begin fishing electrical wire through walls, it’s essential to gather the necessary tools and materials. Here’s a list of what you’ll need:
- Fish tape or wire pulling tool: This is the main tool you’ll use to guide the wire through the walls. Fish tape is a long, flexible, and flat steel tape that can easily maneuver through tight spaces.
- Drill with a long drill bit: You’ll need a drill to create access holes in the walls for feeding the wire.
- Tape measure: To measure the length of wire needed and determine the path through the walls.
- Pencil or marker: For marking the locations of the access holes and determining the wire path.
- Electrical wire: The type and gauge of wire you’ll need depend on the specific project and local electrical codes. Make sure to select the appropriate wire for the job.
- Electrical boxes and devices: If you’re installing outlets, switches, or other electrical devices, you’ll need the necessary electrical boxes and devices. Choose high-quality ones that meet the local building codes.
- Wire strippers: These allow you to strip the insulation off the wire so that it can be properly connected.
- Electrical tape: Used for securing wire connections and providing insulation.
- Screwdriver: To secure electrical boxes and devices in place.
- Flashlight: A handy tool for illuminating dark spaces and ensuring you can see what’s going on.
- Protective gear: Safety should always be a priority when working with electricity. Wear safety glasses, gloves, and appropriate clothing to protect yourself.
Gather these tools and materials before starting your project. Having everything ready will save you time and make the process smoother.
Planning and Preparation
Before diving into fishing electrical wire through walls, it’s crucial to do some planning and preparation. This step will help you map out the best path for the wire and ensure a successful installation.
Here are some key steps to consider during the planning and preparation phase:
- Identify the locations: Determine where you want to install the electrical outlets, switches, or devices. This will help you visualize the wire path and plan the access holes accordingly.
- Check local codes and regulations: Familiarize yourself with the electrical codes and regulations in your area. Ensure that your project complies with these codes to ensure safety and avoid any potential legal issues.
- Review the building structure: Understand the construction and layout of your walls. Determine if there are any obstructions like studs, pipes, or existing electrical wiring that may affect your wire path. Take note of any potential challenges and plan accordingly.
- Create a wire path diagram: Use a pencil or marker to sketch out the wire path on the walls. Mark the desired location of the outlets or devices, as well as the access holes and the route the wire will take.
- Measure the wire length: Measure the distance from the electrical panel to the outlet or device location. Add a few extra feet for flexibility. This will help you determine the amount of wire needed for the project.
By properly planning and preparing for your wire fishing project, you’ll save time and minimize any potential issues along the way. Remember to take into account the specific needs of your project and adjust your plan accordingly.
Finding the Path for the Wire
Once you’ve completed the planning and preparation phase, it’s time to locate the best path for routing the electrical wire through the walls. This step involves identifying the areas where the wire can be easily hidden and avoiding potential obstacles.
Here are the steps to finding the path for the wire:
- Examine the walls: Carefully inspect the walls where you plan to run the wire. Look for any existing electrical outlets or switches that you can use as reference points. These can serve as starting or ending points for your wire path.
- Avoid obstacles: Take note of any potential obstructions, such as studs, pipes, or insulation within the walls. These can impact the ease of routing the wire and may require adjustments to the planned path.
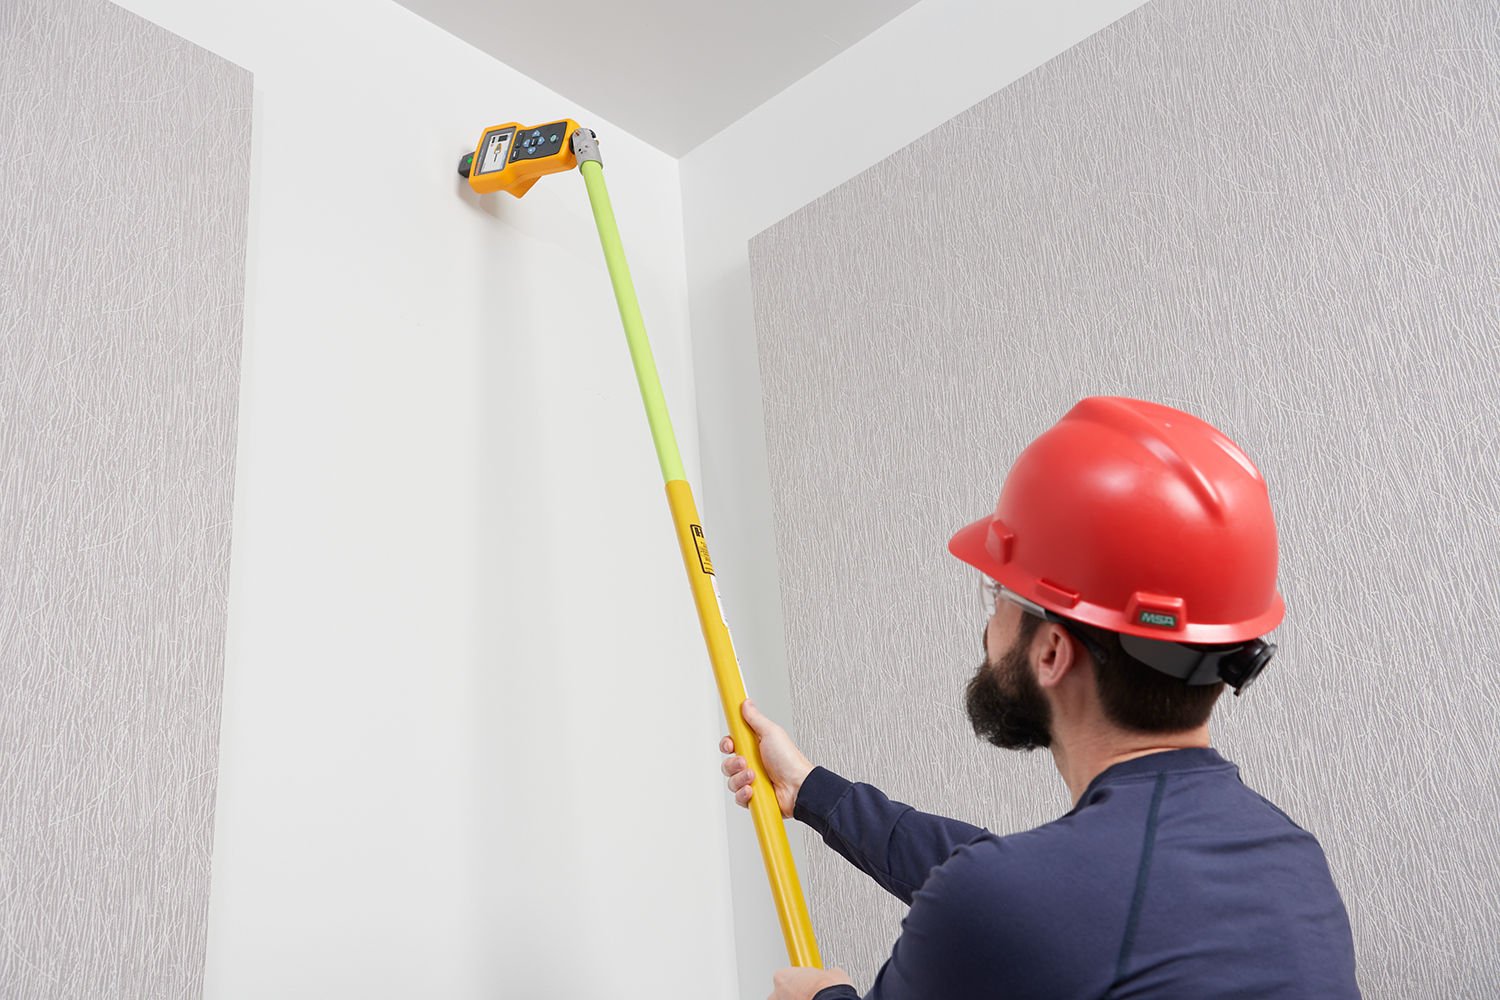
- Use a stud finder: If you’re unsure about the location of studs or obstacles, use a stud finder to locate them accurately. This will help you avoid drilling into them while creating access holes.
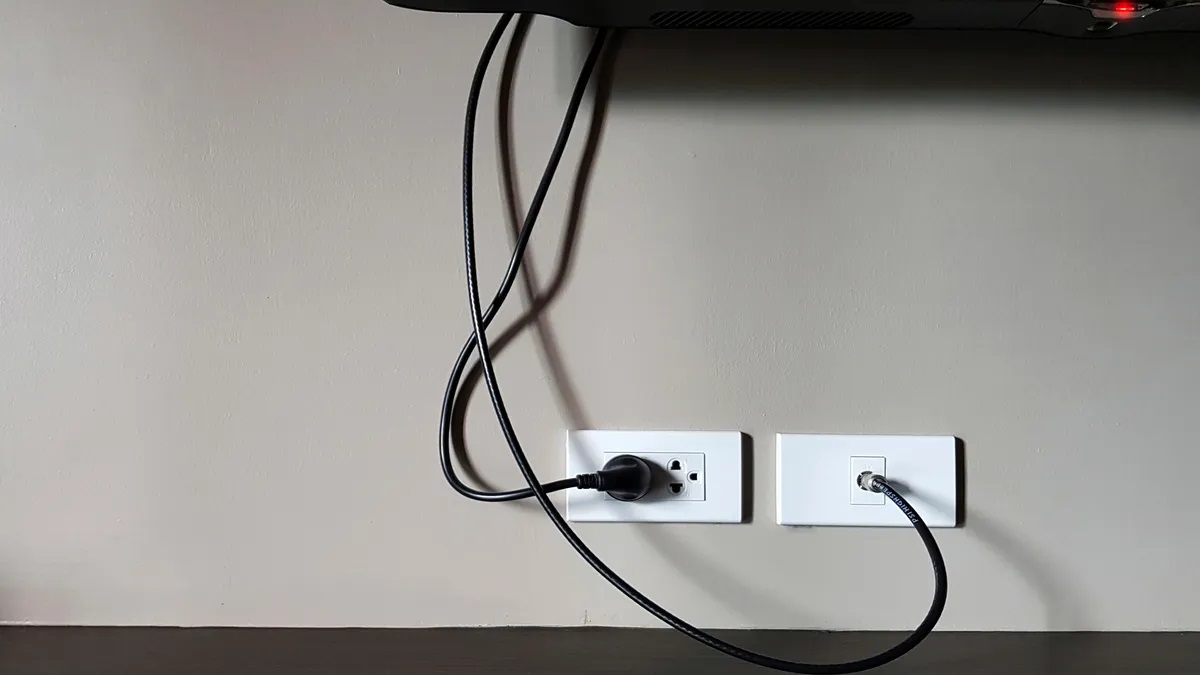
- Consider wall outlets: If possible, route the wire behind furniture or appliances to keep it hidden. This will provide a cleaner look and help prevent accidental damage to the wire.
- Minimize wall damage: If you need to create access holes in the walls, opt for inconspicuous locations such as behind furniture or in corners. This will minimize the impact on the overall aesthetics of the space.
- Ensure proper spacing: For multiple outlets along a wall, plan for equal spacing between them. This will provide a balanced and functional arrangement.
By carefully considering these steps, you’ll be able to find the optimal path for fishing the electrical wire through the walls while minimizing any potential obstacles or damage to the walls. Take your time during this process to ensure a smooth installation.
Drilling Access Holes
Once you have determined the path for your electrical wire, the next step is to drill access holes in the walls. These holes will serve as entry and exit points for the wire as it travels through the walls.
Follow these steps to drill access holes:
- Measure and mark the locations: Use a tape measure and a pencil or marker to measure and mark the exact locations where the access holes need to be drilled. Ensure that the measurements are accurate and align with your wire path diagram.
- Choose the right drill bit: Select a long drill bit that is appropriate for your wall material. The size of the drill bit will depend on the diameter of the wire and the type of wall material you are working with.
- Check for any obstructions: Before drilling, use a stud finder or any other suitable method to verify that there are no obstructions, such as electrical wires, pipes, or studs, in the vicinity of your marked access holes. This will help prevent damaging any existing infrastructure.
- Drill the access holes: Firmly hold the drill and carefully drill at the marked locations. Use steady pressure and a slow speed to avoid damaging the surrounding area. Stop drilling when you have reached the desired depth to create the access hole.
- Remove any debris: After drilling each access hole, use a brush or a vacuum cleaner to remove any debris that may have accumulated in the hole. This will ensure a clear passage for the wire.
It’s important to pay attention to the location and size of the access holes to minimize their visibility and impact on the aesthetics of the room. By following these steps, you’ll be able to create clean and properly positioned access holes for your wire fishing project.
When fishing electrical wire through walls, use a fish tape or fish sticks to guide the wire through tight spaces. Start by creating a clear path and use a stud finder to avoid obstacles.
Read more: How To Run Electrical Wire Through Walls
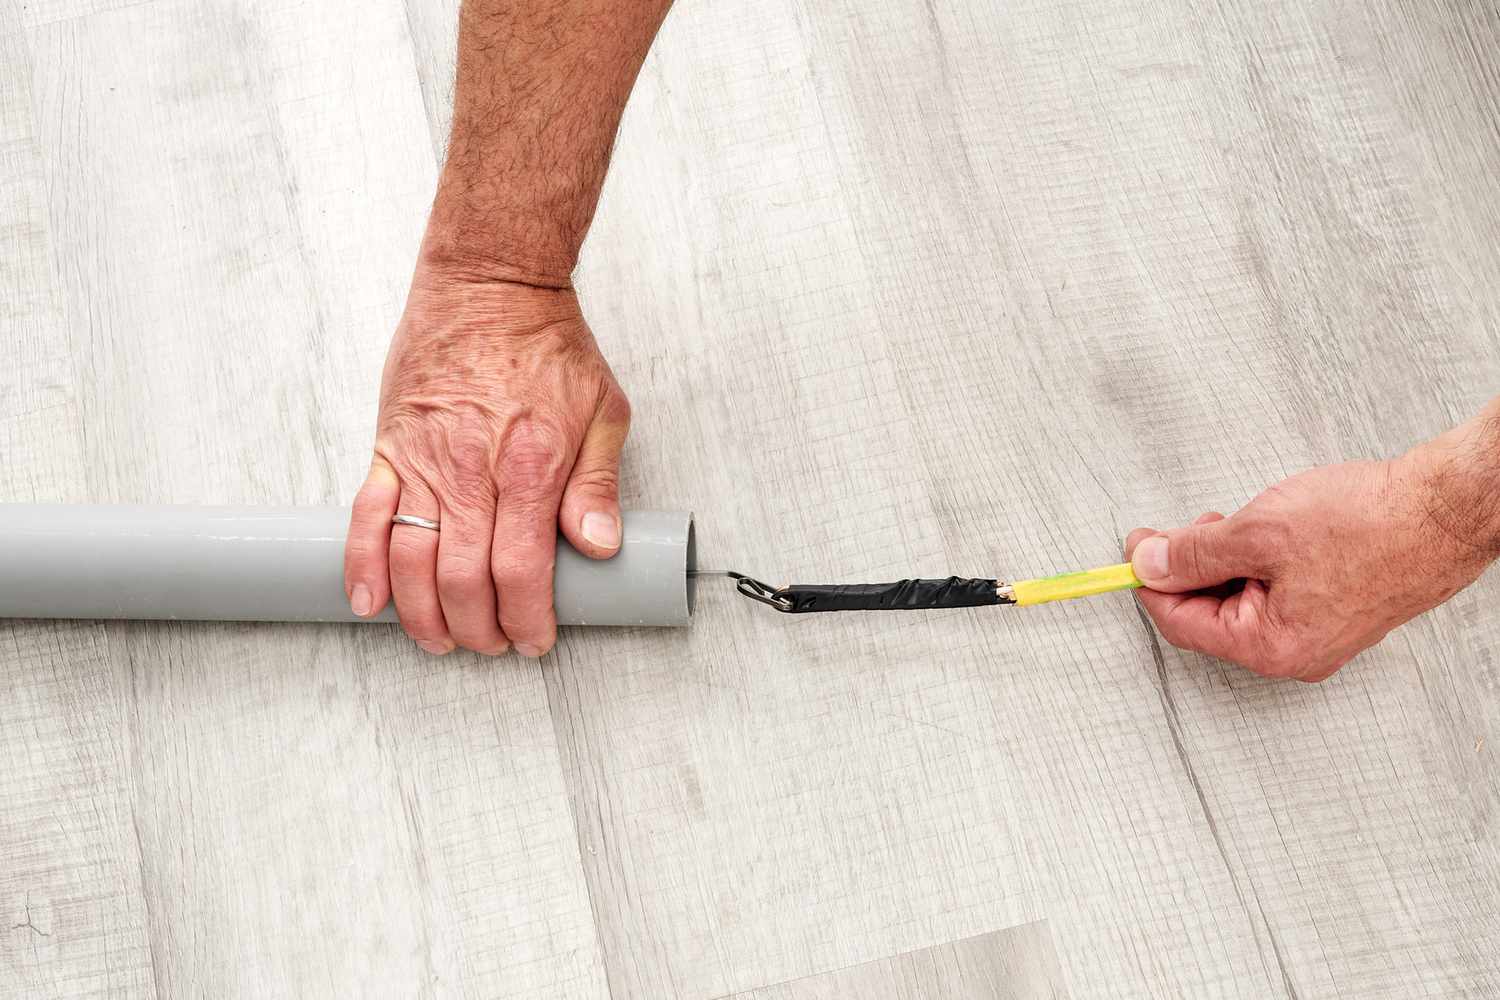
Fish Tape or Wire Pulling Tools
When it comes to fishing electrical wire through walls, having the right tools can make the task much easier. One of the key tools for this job is a fish tape or a wire pulling tool. These tools are designed to help guide the wire through tight spaces and navigate it along the planned path.
Here’s how to use fish tape or wire pulling tools effectively:
- Prepare the fish tape: If you’re using a fish tape, extend it to its full length, ensuring that it is straight and free from any bends or kinks. For wire pulling tools, make sure they are properly assembled and ready for use.
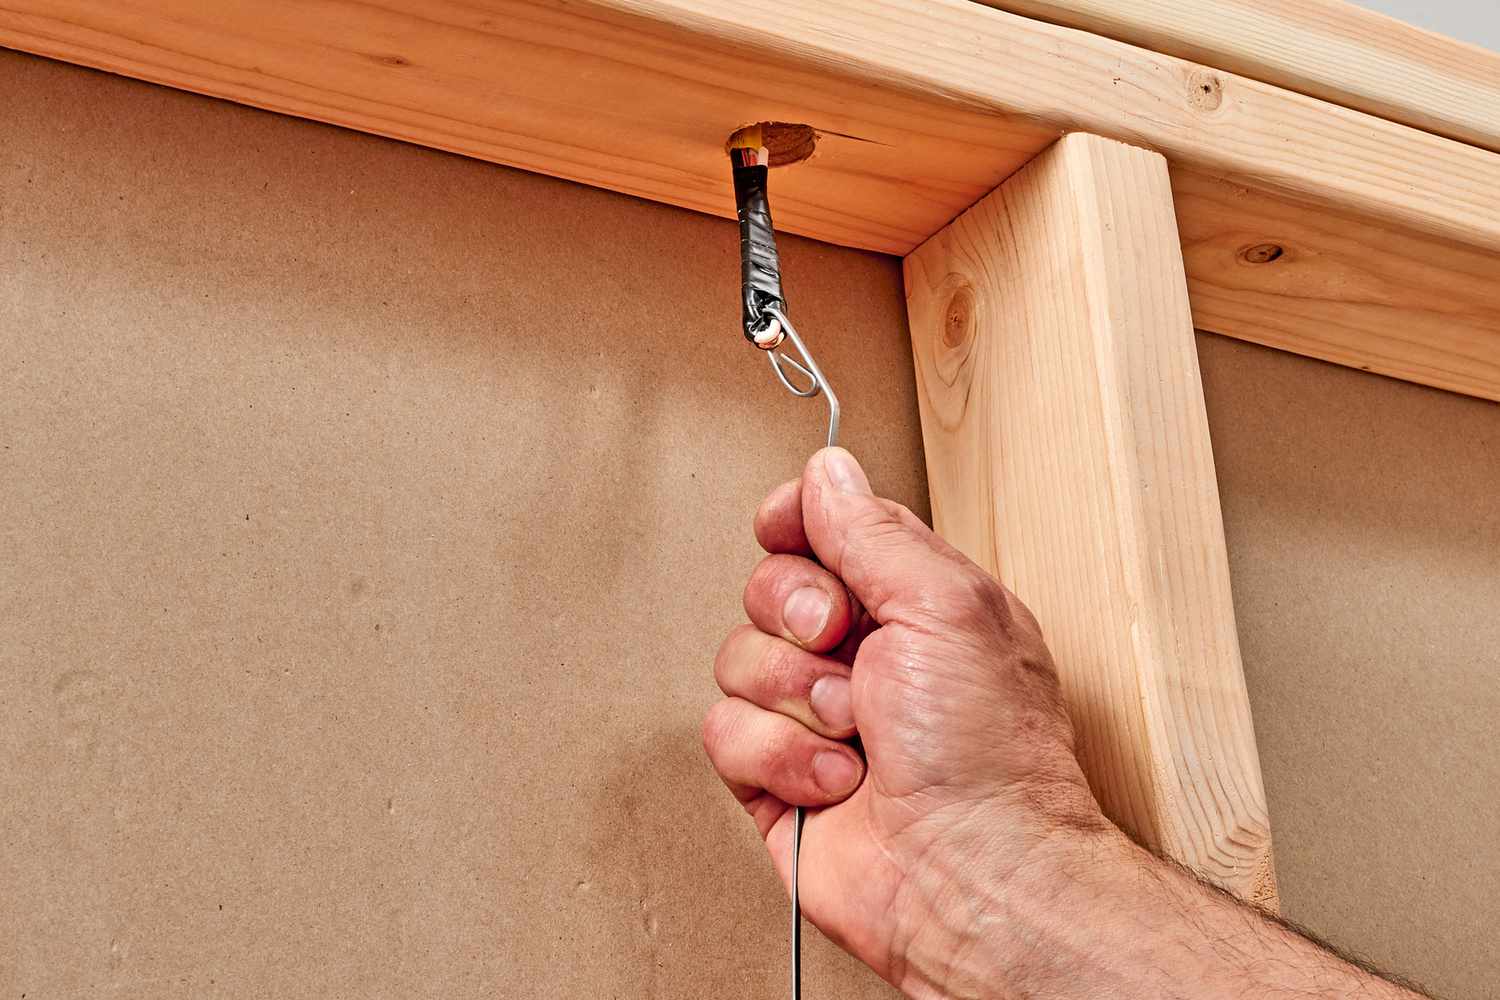
- Insert the fish tape or wire pulling tool: Starting from one of your access holes, carefully insert the fish tape or wire pulling tool through the hole and into the wall cavity, following the planned wire path.
- Push or pull the tape: Depending on the direction of the wire path, gently push or pull the fish tape or wire pulling tool further into the wall. Use a slow and steady motion to avoid damaging the wire or getting it stuck.
- Navigate obstacles: If you encounter any obstacles, such as studs or corners, carefully maneuver the fish tape or wire pulling tool around them. Patience and precision are key to successfully navigating the wire through these tight spots.
- Retrieve the tape: Once the fish tape or wire pulling tool has reached the desired destination, secure the end of the electrical wire to it using electrical tape or other secure means. Slowly retract the fish tape or wire pulling tool while simultaneously feeding the wire into the wall cavity.
- Repeat the process: If you have multiple access holes or need to fish wire through multiple walls, repeat these steps until all wires are successfully routed.
Remember to take your time and be careful during this process to avoid any mishaps or damage to the wire or the walls. Professional electricians often use these tools to make wire fishing a much smoother and efficient process.
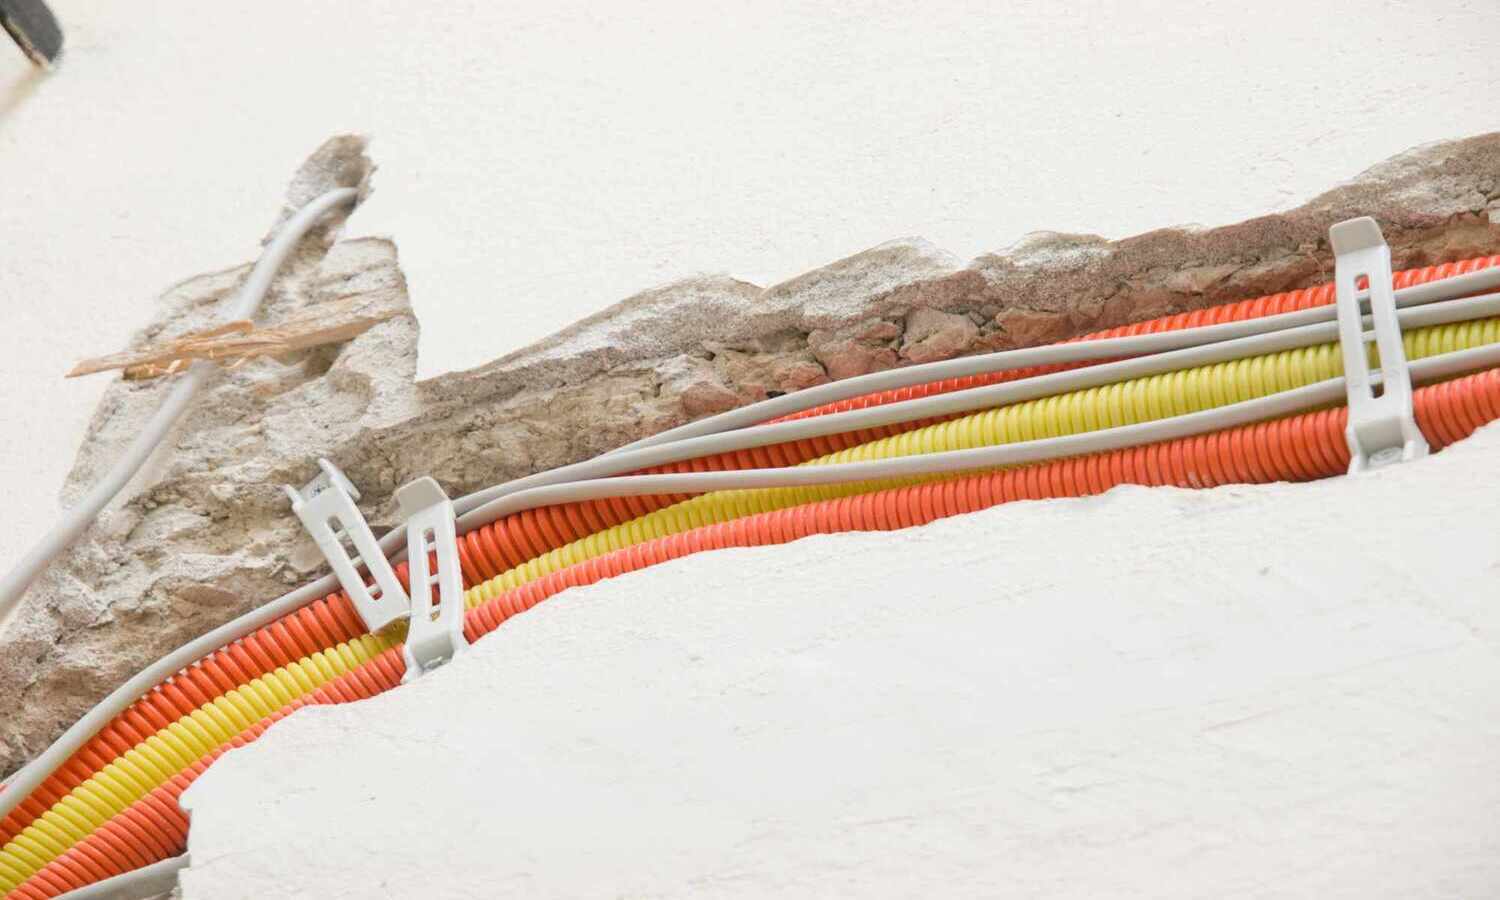
Securing the Electrical Wire
After successfully fishing the electrical wire through the walls, the next step is to secure it properly. This ensures that the wire is safely held in place and minimizes the risk of accidental damage or disconnection.
Here’s how to secure the electrical wire:
- Route the wire to the desired location: Carefully route the wire to the electrical boxes or devices where it will be connected. Ensure that it follows the planned wire path and is free from any tangles or sharp bends.
- Use cable staples or clamps: Along the wire path, use cable staples or clamps to secure the wire to the wall or ceiling. These devices are designed to hold the wire in place and prevent it from moving or shifting over time.
- Space the staples or clamps appropriately: Place the cable staples or clamps every few feet, or as required by local building codes. This will provide adequate support and prevent the wire from sagging or coming loose.
- Avoid over-tightening: When securing the wire with cable staples or clamps, be careful not to overtighten them. Over-tightening can damage the wire insulation or cause it to pinch, affecting the integrity of the electrical connection.
- Leave enough slack: Ensure that you have enough slack in the wire near the electrical boxes or devices for easy connection. A general rule of thumb is to leave at least 6-8 inches of extra wire so that it can be properly terminated.
- Check for any sharp edges or corners: Inspect the wire path and ensure that there are no sharp edges, corners, or rough surfaces that could potentially damage the wire. If necessary, use protective conduit or grommets to cover or cushion these areas.
By securing the electrical wire properly, you’ll ensure that it remains in place and maintains a safe and reliable connection. Remember to follow local electrical codes and guidelines when it comes to wire securing methods and spacing.
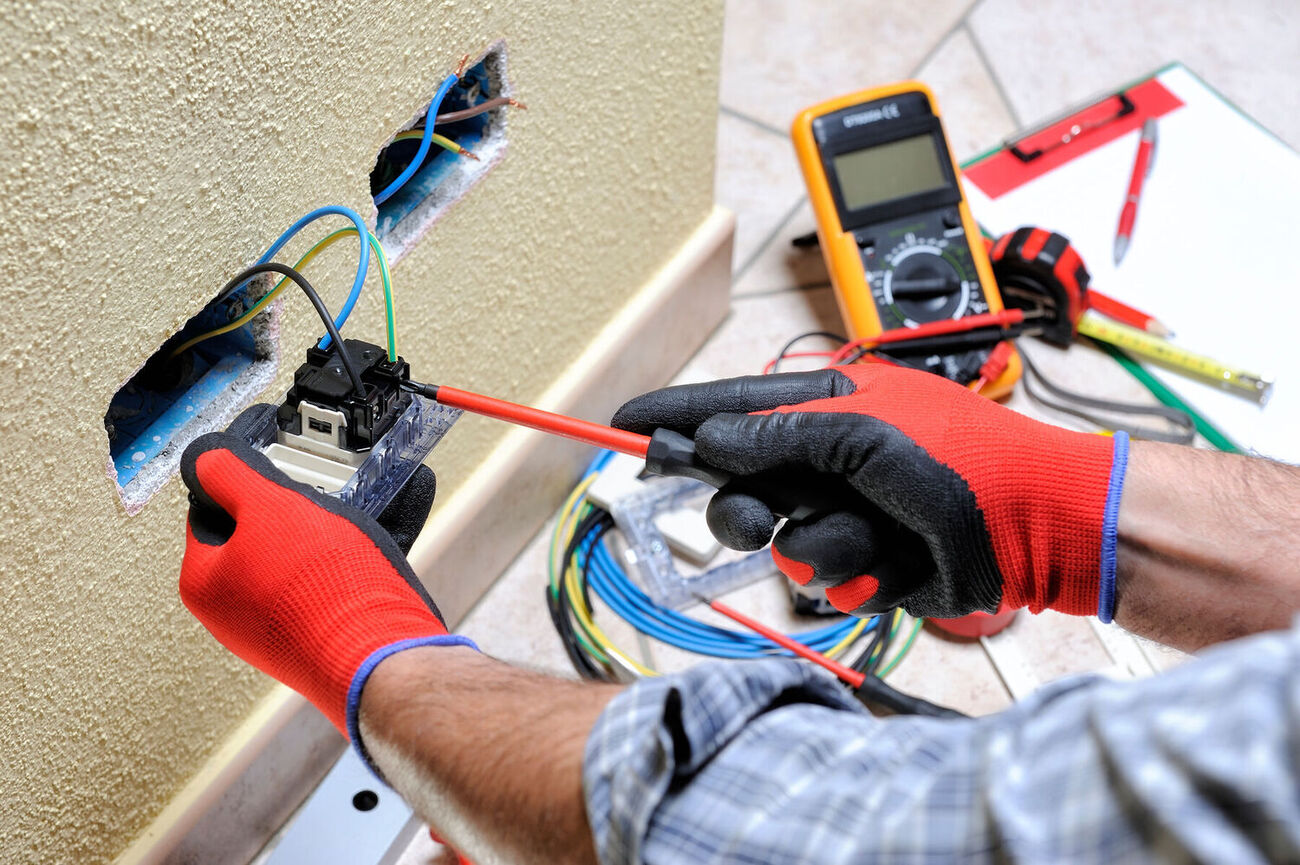
Terminating the Wire
Terminating the electrical wire is the process of making the necessary connections at the ends of the wire to power electrical outlets, switches, or devices. Proper termination ensures a safe and reliable electrical connection.
Here’s how to terminate the wire:
- Strip the wire insulation: Using wire strippers, carefully strip off about ¾ inch of insulation from the end of the wire. Take care not to nick or damage the wire strands, as this can affect the quality of the connection.
- Prepare the electrical box: If you’re connecting the wire to an electrical box, ensure that the box is properly installed and securely mounted in the wall. Follow the manufacturer’s instructions for wire placement and connection.
- Make the wire connections: Depending on the specific project, you’ll need to connect the wire to electrical outlets, switches, or other devices. Follow the wiring diagram or instructions provided with the device, ensuring that you match the appropriate wire colors.
- Use wire nuts or terminal screws: Depending on the type of connection, you’ll use wire nuts or terminal screws to secure the wire to the device. Make sure the connections are tight and secure to prevent any loose or exposed wires.
- Wrap the connections with electrical tape: Once the connections are made, wrap them with electrical tape to provide insulation and added security. This will help protect the connections and prevent accidental contact with live wires.
- Double-check the connections: After terminating the wire, double-check that all connections are secure, properly tightened, and free from any exposed wire strands. This will ensure a safe and reliable electrical connection.
It’s important to note that if you’re not experienced with electrical work, it’s best to hire a licensed electrician to perform the wire termination. This will ensure that the connections are done correctly and in compliance with local electrical codes.
By properly terminating the wire, you’ll have a solid electrical connection that will provide reliable power to your outlets, switches, or devices.
Testing and Safety Measures
Once you’ve completed the installation and termination of the electrical wire, it’s crucial to perform thorough testing to ensure that everything is functioning as expected. Additionally, maintaining safety measures throughout the process is essential to protect yourself and prevent any potential hazards.
Here are some important steps for testing and safety measures:
- Turn off the power: Before conducting any testing or working on electrical connections, ensure that the power to the circuit is turned off at the main electrical panel. This will prevent any risk of electric shock or short circuits.
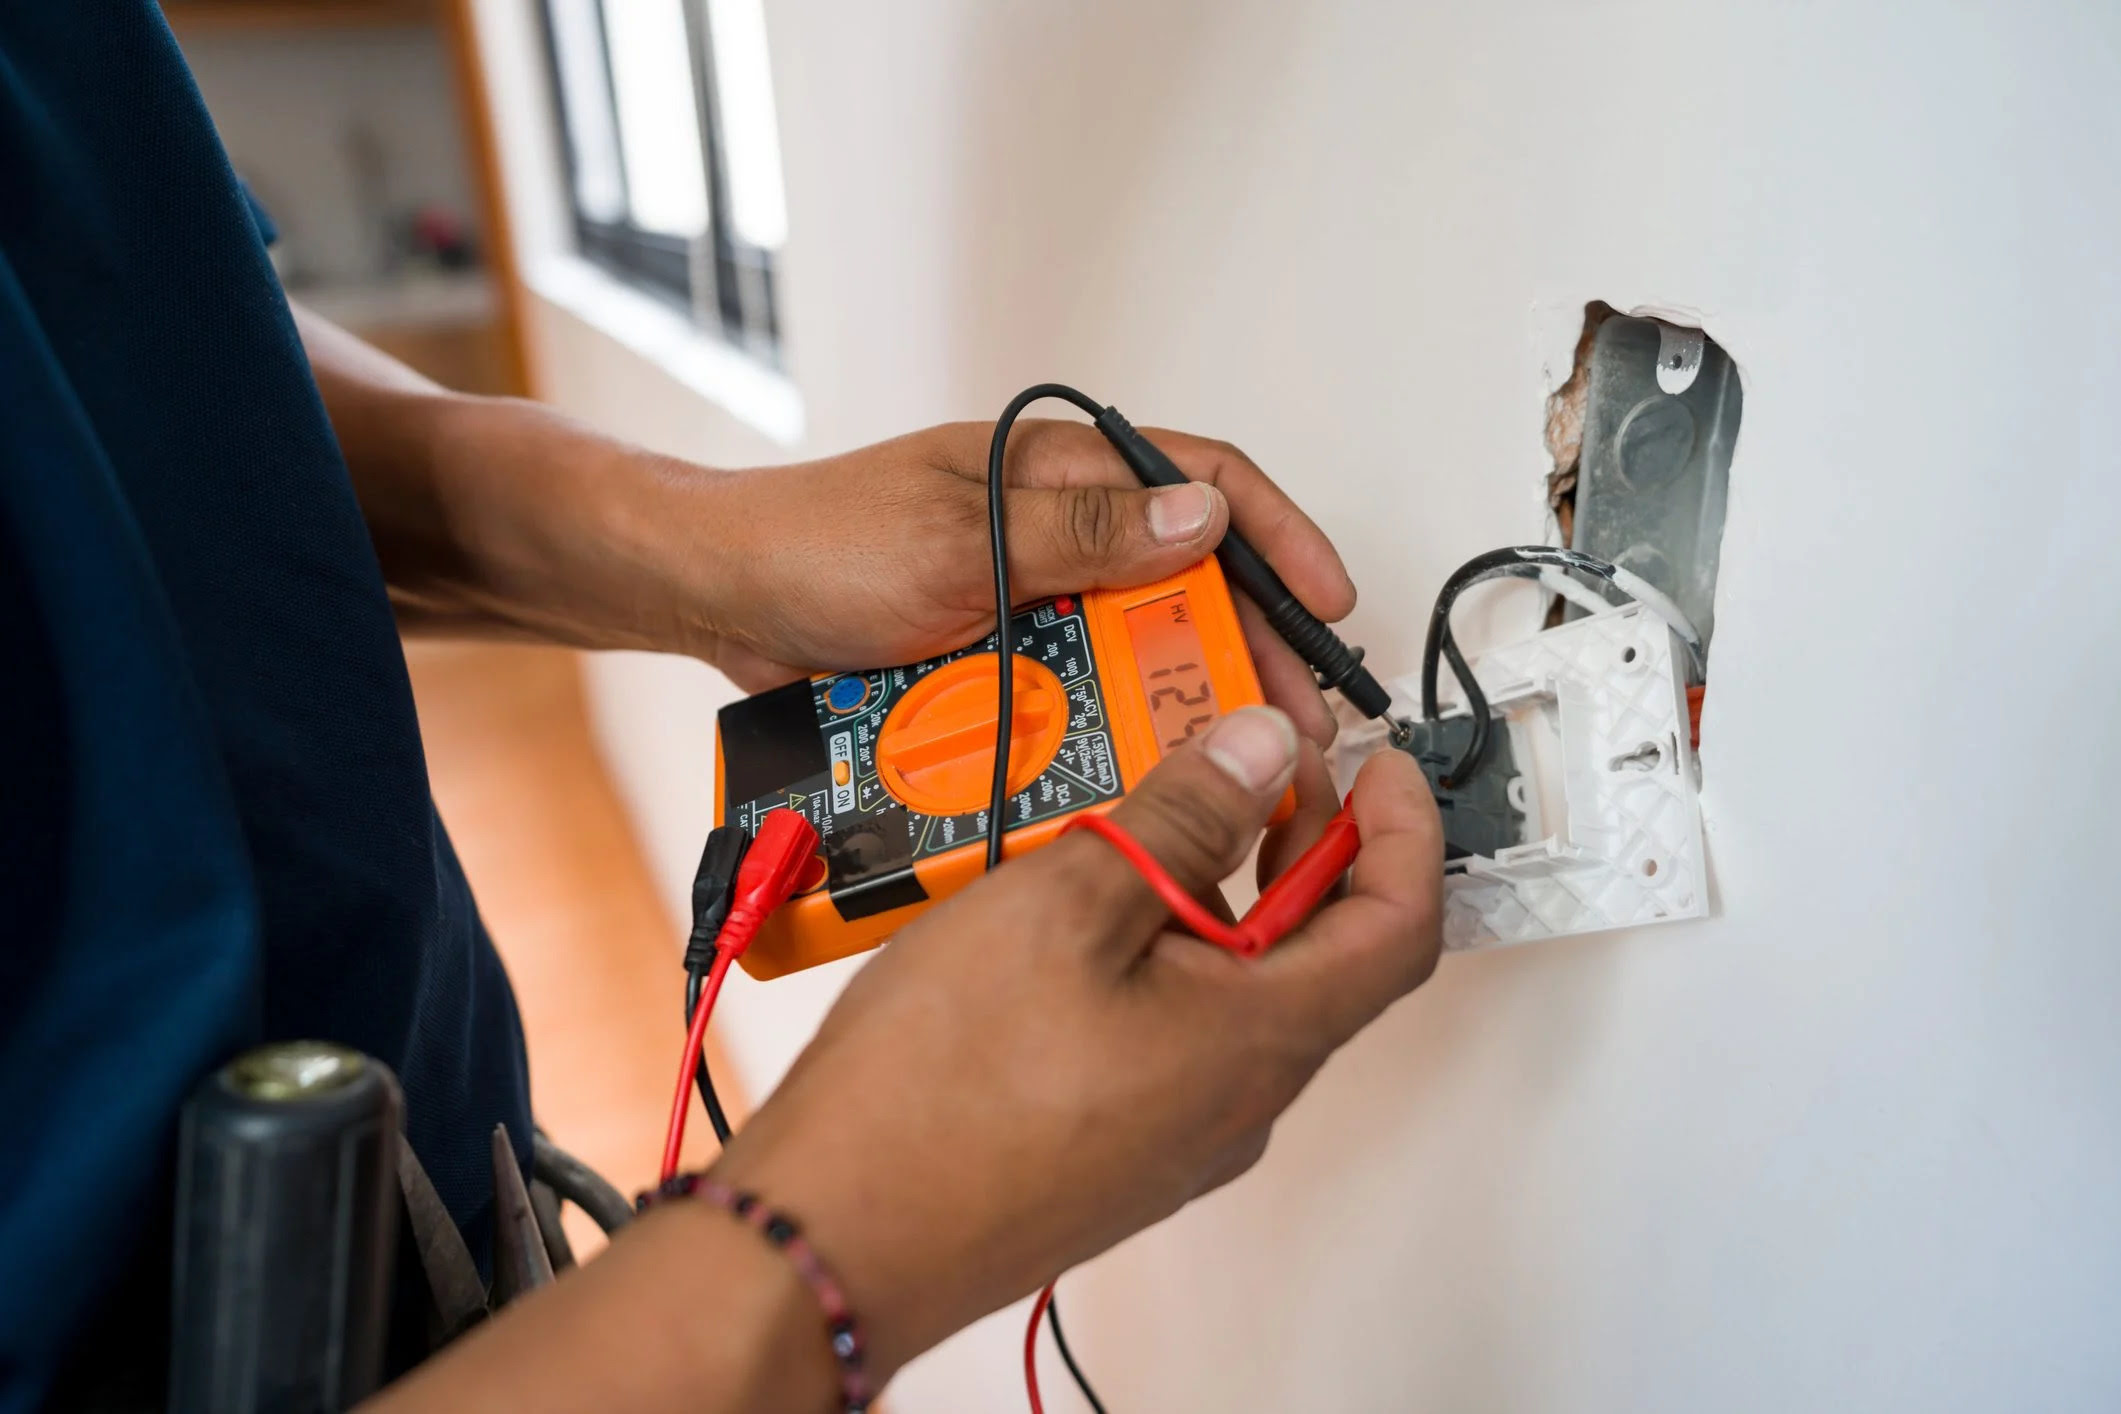
- Verify the power is off: Use a voltage tester or a non-contact voltage detector to confirm that there is no electricity flowing through the wires you’ll be working on. This additional precaution will help ensure your safety.
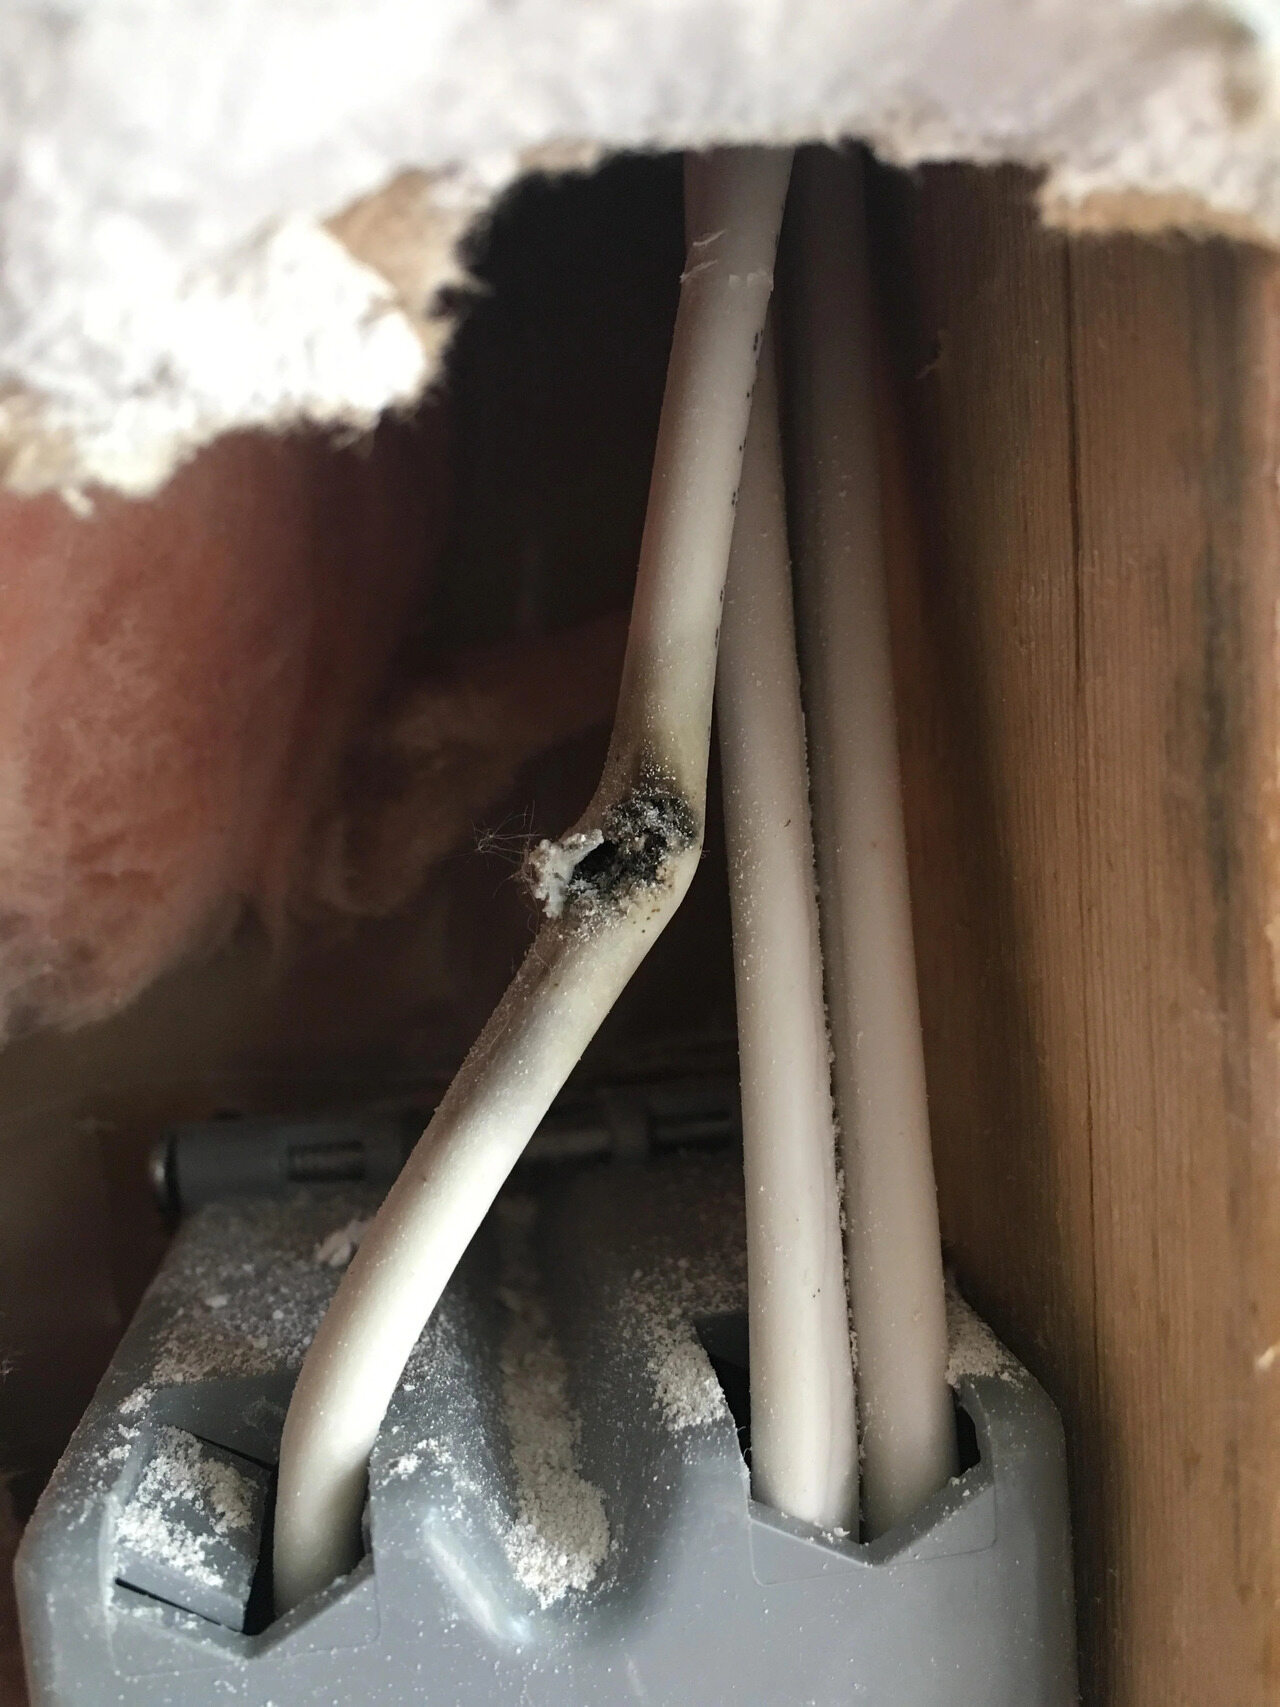
- Inspect the wire connections: Thoroughly inspect all wire connections to make sure they are properly secured, insulated, and free from any exposed wires. Look for any signs of damage, loose connections, or overheating.
- Perform continuity and voltage testing: Use a multimeter or a circuit tester to check for continuity and voltage. This will help identify any faulty connections, breaks in the wire, or voltage irregularities that may require further inspection or correction.
- Test the outlets or devices: Once you’ve verified the wire connections, test the electrical outlets, switches, or devices to ensure they are functioning correctly. Plug in a lamp or use a voltage tester to confirm that power is flowing and the devices are operational.
- Install outlet covers or switch plates: Once everything has been tested and confirmed to be in working order, install outlet covers or switch plates to provide additional safety and protection. These covers prevent accidental contact with exposed wiring.
- Regularly check for any signs of wear or issues: Periodically inspect the wire connections, outlets, and switches for any signs of wear or potential issues. Look out for loose connections, overheating, or unusual functioning. Address any concerns promptly to avoid safety hazards.
- Consult a professional if unsure: If you have any doubts or concerns about the installation, termination, or testing process, don’t hesitate to consult a licensed electrician. They can provide expert guidance and ensure that everything is up to code and safe.
By testing the electrical connections and adhering to safety measures, you can rest assured that your electrical installation is secure and functioning properly. Your safety and the safety of your home should always be a top priority when working with electrical systems.
Read more: How To Pull Electrical Wire Through Conduit
Conclusion
Fishing electrical wire through walls may seem like a daunting task, but with the right knowledge and tools, it can be accomplished successfully. By following the step-by-step process outlined in this article, you can confidently tackle this DIY project and ensure a safe and efficient electrical installation.
Remember to plan and prepare adequately before starting the project. Take the time to identify the best wire path, locate any potential obstacles, and familiarize yourself with local electrical codes. This will help you avoid unnecessary challenges and ensure compliance with regulations.
Using tools like fish tape or wire pulling tools will make the process of guiding the wire through the walls much easier. Take care during installation and termination to secure the wire properly, avoiding any loose connections or exposed wires. Use cable staples or clamps to hold the wire in place, keeping it neat and secure.
Perform thorough testing to ensure that all connections are sound and that power is flowing as expected. Take the necessary safety precautions, such as turning off the power, using voltage testers, and wearing protective gear. Regularly inspect the wire connections and outlets for any signs of wear or issues.
It’s important to note that if you’re unsure or uncomfortable with working on electrical projects, it’s always best to consult a licensed electrician for assistance. They have the expertise to handle complex electrical tasks safely and effectively.
By following these guidelines and prioritizing safety, you can confidently fish electrical wire through walls and successfully complete your electrical installation. Enjoy the convenience and functionality that comes with a well-planned and professionally executed electrical project!
Now that you've mastered fishing electrical wire through walls, why not tackle your next challenge? For those expanding their workspace, learn how to extend electrical wiring to your garage. If a broader scope of projects intrigues you, dive into our comprehensive guide on DIY home improvement for practical, hands-on advice. And for anyone considering upgrading their floors, discover our roundup of the best hardwood floors suitable for home renovation. Each guide offers valuable insights and practical steps to help you enhance your living space effortlessly.
Frequently Asked Questions about How To Fish Electrical Wire Through Walls
Was this page helpful?
At Storables.com, we guarantee accurate and reliable information. Our content, validated by Expert Board Contributors, is crafted following stringent Editorial Policies. We're committed to providing you with well-researched, expert-backed insights for all your informational needs.


0 thoughts on “How To Fish Electrical Wire Through Walls”