Articles
How To Fix A Loose Showerhead Pipe
Modified: March 1, 2024
Learn how to fix a loose showerhead pipe with our informative articles. Get step-by-step instructions and tips from our experts.
(Many of the links in this article redirect to a specific reviewed product. Your purchase of these products through affiliate links helps to generate commission for Storables.com, at no extra cost. Learn more)
Introduction
Having a loose showerhead pipe can be a frustrating and inconvenient problem. Not only does it create a shaky and unstable showering experience, but it can also lead to leaks and water damage if not dealt with promptly. Fortunately, fixing a loose showerhead pipe is a relatively simple task that can be accomplished with just a few tools and materials.
In this article, we will walk you through the step-by-step process of fixing a loose showerhead pipe. Whether you’re a seasoned DIY enthusiast or a novice homeowner, these easy-to-follow instructions will help you get your showerhead back in place and restore stability to your daily routine.
Before we dive into the steps, let’s quickly go over the tools and materials you’ll need for this project:
- Adjustable wrench
- Thread seal tape (also known as plumber’s tape)
- Rag or cloth
Now, let’s get started!
Key Takeaways:
- Fixing a loose showerhead pipe is a manageable DIY task that can restore stability to your daily routine. With the right tools and step-by-step guidance, you can achieve a secure and leak-free connection, saving on potential water damage and enjoying a comfortable shower experience.
- By following the outlined process, you can address the issue of a loose showerhead pipe with confidence and efficiency. Taking the time to properly fix the problem can help you avoid inconvenience, save on water bills, and showcase your DIY skills.
Read more: How To Fix Siding That Is Loose
Step 1: Tools and Materials Required
Before you begin fixing a loose showerhead pipe, it’s important to gather all the necessary tools and materials. Having everything prepared beforehand will save you time and ensure a smooth and efficient repair process. Here’s a list of what you’ll need:
- Adjustable wrench: This tool will be used to tighten and secure the pipe.
- Thread seal tape: Also known as plumber’s tape, this thin adhesive tape is used to create a watertight seal between threaded connections. It’s essential for preventing leaks.
- Rag or cloth: Having a rag or cloth handy will help you clean up any excess water or debris that may be present during the repair.
Ensure that you have these tools and materials readily available before you proceed to the next steps.
Remember, safety should always be a top priority when working on any household project. If you have any concerns or doubts about your ability to complete the repair, it’s best to consult a professional plumber.
Now that you have all the necessary tools and materials prepared, it’s time to move on to the next step: turning off the water supply.
Step 2: Turn Off Water Supply
Before you begin working on the loose showerhead pipe, it’s important to turn off the water supply to prevent any potential leaks or water damage. Here’s how you can do it:
- Locate the shutoff valve: The shutoff valve is typically located near the shower or in the main water supply line of your home. It may be labeled or have a lever or knob that you can turn.
- Turn off the water supply: Rotate the valve clockwise to shut off the water flow. This will effectively stop the water supply to the showerhead.
- Test the water supply: To ensure that the water is completely turned off, turn on the shower faucet to see if any water comes out. If water still flows, double-check the shutoff valve and make sure it is fully closed.
Once you’ve successfully turned off the water supply, you can proceed to the next step of removing the showerhead.
Remember, if you’re unsure about locating or turning off the shutoff valve, it’s best to consult a professional plumber to avoid any potential damage to your plumbing system.
Now that the water supply is turned off, it’s time to move on to the next step: removing the showerhead.
Step 3: Remove Showerhead
With the water supply turned off, it’s now time to remove the showerhead. Follow these steps to safely remove the showerhead:
- Grab hold of the showerhead: Use your hand or an adjustable wrench to grip the base of the showerhead firmly.
- Rotate counterclockwise: Turn the showerhead counterclockwise to loosen it from the pipe. Apply steady pressure and twist until the showerhead is completely detached.
- Remove any residual water: After removing the showerhead, you may notice some residual water inside the pipe. Use a rag or cloth to wipe away any excess water and ensure the area is dry before proceeding.
If the showerhead doesn’t easily twist off, it’s possible that mineral deposits or debris have accumulated and are causing resistance. In such cases, you can employ a gentle application of WD-40 or a similar lubricant to loosen the connection. Allow the lubricant to penetrate for a few minutes before attempting to remove the showerhead again.
Once you have successfully removed the showerhead, set it aside in a safe place. Now, you can move on to the next step: inspecting the pipe for any issues.
Step 4: Inspect the Pipe
Now that the showerhead has been removed, it’s time to inspect the pipe for any visible issues that may be causing the loose connection. Here’s how you can inspect the pipe:
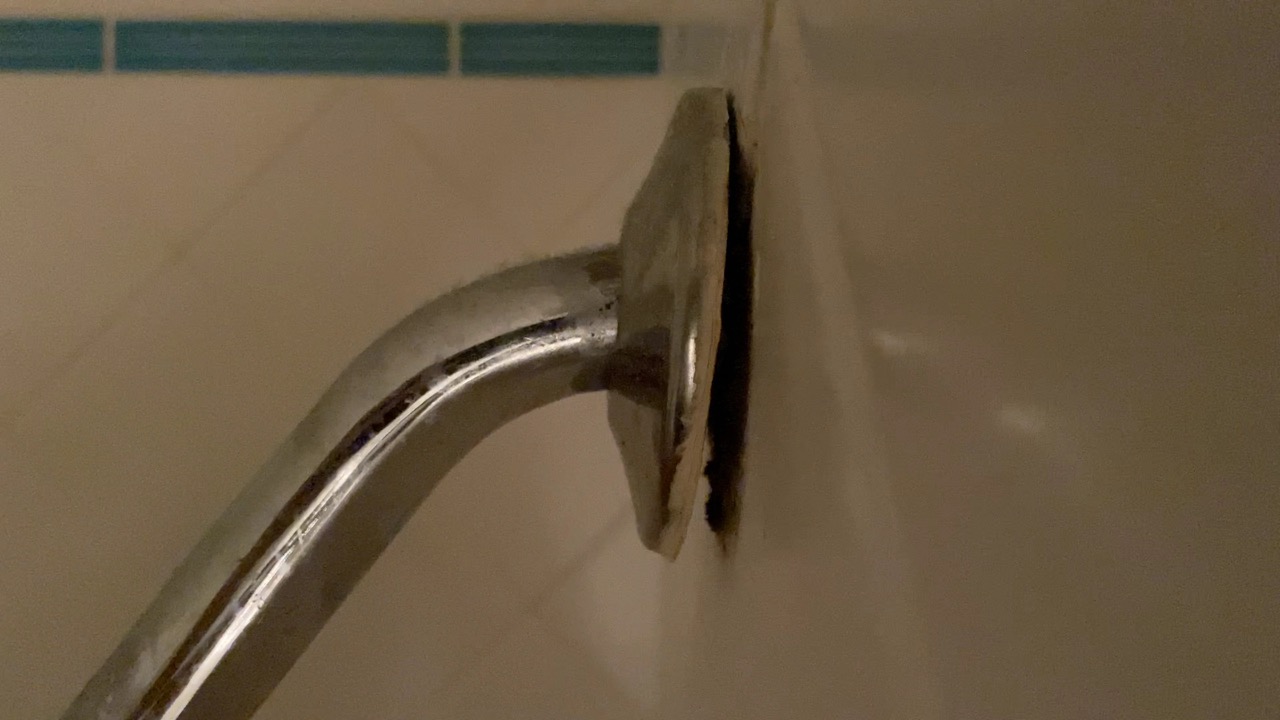
- Visually examine the pipe: Take a close look at the pipe where the showerhead was attached. Look for any signs of damage, such as cracks, dents, or corrosion. These issues can contribute to a loose connection and may need to be addressed.
- Check the threads: Inspect the threads on both the pipe and the showerhead. Look for any signs of wear or stripping that may impact the fitting. Damaged threads can result in a loose connection, so it’s important to identify any issues.
- Clean the pipe: If there is any debris or residue on the pipe or threads, use a cloth or brush to clean it off. This will ensure a better and more secure connection when reattaching the showerhead.
During the inspection, it’s important to handle the pipe and surrounding area with care to avoid causing additional damage. If you notice any significant issues, such as severe corrosion or major pipe damage, it’s best to consult a professional plumber for further assistance.
Once you have inspected the pipe and ensured it’s in good condition, it’s time to move on to the next step: applying thread seal tape.
Use Teflon tape to wrap around the threads of the showerhead pipe before reattaching it. This will create a tighter seal and prevent it from coming loose again.
Read more: How To Fix A Loose Faucet
Step 5: Apply Thread Seal Tape
Applying thread seal tape is an important step in ensuring a secure and leak-free connection between the showerhead and the pipe. Follow these steps to apply thread seal tape correctly:
- Prepare the thread seal tape: Start by cutting a piece of thread seal tape that is long enough to wrap around the threaded end of the pipe a few times.
- Clean the threads: Before applying the tape, make sure the threads on both the pipe and the showerhead are clean and free of debris or residue. Use a cloth or brush to clean them if necessary.
- Begin applying the tape: Hold the end of the thread seal tape against the starting point of the threads on the pipe. Wrap the tape clockwise around the threads, overlapping each previous layer slightly. Be careful not to apply too much pressure, as it may cause the tape to tear.
- Continue wrapping: Continue wrapping the thread seal tape around the entire threaded section of the pipe. Ensure that all the threads are covered, but avoid covering the opening at the end of the pipe.
- Secure the end of the tape: Once you have wrapped the tape around the threads, press the end of the tape against the pipe to secure it in place. Make sure it is firmly adhered.
The thread seal tape creates a tight seal between the threads, helping to prevent leaks and providing a more secure connection. It also helps to lubricate the threads, making it easier to tighten the showerhead onto the pipe.
Now that you have applied the thread seal tape, it’s time to move on to the next step: reattaching the showerhead.
Step 6: Reattach the Showerhead
With the thread seal tape applied, it’s now time to reattach the showerhead to the pipe. Follow these steps to ensure a proper and secure reattachment:
- Position the showerhead: Hold the showerhead over the threaded end of the pipe and align it properly. Make sure the threads on the showerhead are facing in the correct direction to fit onto the pipe.
- Begin screwing on the showerhead: Start by hand-tightening the showerhead onto the pipe. Rotate it clockwise to tighten the connection. Use gentle pressure to avoid cross-threading.
- Use an adjustable wrench if necessary: Once the showerhead is hand-tightened, you can use an adjustable wrench to provide a final secure tightening. Grip the showerhead and the pipe with the wrench, and gently rotate it clockwise to secure the connection. Avoid applying excessive force, as it may damage the threads.
- Ensure a snug fit: Once the showerhead feels secure, give it a gentle tug to ensure it is firmly attached and not loose. If there is any movement or play, further tightening may be required.
It’s important not to overtighten the showerhead, as it can lead to damage or cracking. Tighten it just enough to create a snug and secure fit, without excessive force.
With the showerhead successfully reattached, it’s time to move on to the final step: testing for leaks.
Step 7: Test for Leaks
After reattaching the showerhead, it’s crucial to test for any potential leaks to ensure a successful repair. Follow these steps to test for leaks:
- Turn on the water supply: Gently turn on the water supply to the showerhead. Start with a slow flow and gradually increase the pressure.
- Observe for leaks: Carefully inspect the connections between the pipe and the showerhead, as well as the surrounding area, for any signs of water leakage. Look for dripping, spraying, or any dampness.
- Check for tightness: If you notice any leaks, turn off the water supply and use an adjustable wrench to tighten the showerhead connection further. Repeat the testing process to ensure that the leak has been resolved.
- Dry the area: Once you are certain that there are no leaks, dry off any excess water from the pipe and surrounding area using a clean cloth or towel.
If you still notice leaks even after tightening the showerhead, it’s possible that there may be underlying issues with the pipe or showerhead itself. In such cases, it’s advisable to seek the assistance of a professional plumber to identify and resolve the problem effectively.
By testing for leaks, you can ensure that the loose showerhead pipe has been successfully repaired, and you can enjoy a stable and leak-free shower experience once again.
With the testing complete and no leaks detected, congratulations! You have successfully fixed the loose showerhead pipe.
Conclusion
Fixing a loose showerhead pipe is a task that can be accomplished with relative ease, and it can save you from the inconvenience of a shaky and unstable shower experience. By following the step-by-step process outlined in this article, you can address the issue and restore stability to your daily routine.
From gathering the necessary tools and materials to turning off the water supply, removing the showerhead, inspecting the pipe, applying thread seal tape, reattaching the showerhead, and testing for leaks, each step is crucial in achieving a secure and leak-free connection.
Remember to handle the pipe and surrounding area with care throughout the process to avoid causing any additional damage. If you encounter significant issues or are unsure about any step, it’s always best to consult a professional plumber for assistance.
By taking the time to properly fix a loose showerhead pipe, you can avoid potential water damage, save on water bills, and enjoy a stable and comfortable shower experience once again.
So, roll up your sleeves, gather your tools, and get ready to tackle the issue of a loose showerhead pipe. With the guidance provided in this article, you’ll be able to complete the repair with confidence and efficiency.
Enjoy the benefits of a secure and leak-free showerhead connection, and take pride in your DIY skills!
Frequently Asked Questions about How To Fix A Loose Showerhead Pipe
Was this page helpful?
At Storables.com, we guarantee accurate and reliable information. Our content, validated by Expert Board Contributors, is crafted following stringent Editorial Policies. We're committed to providing you with well-researched, expert-backed insights for all your informational needs.


0 thoughts on “How To Fix A Loose Showerhead Pipe”