Articles
How To Fix Sagging Fence Gate
Modified: December 7, 2023
Learn effective methods and articles to repair a sagging fence gate. Fix the problem easily with expert tips and step-by-step guidance.
(Many of the links in this article redirect to a specific reviewed product. Your purchase of these products through affiliate links helps to generate commission for Storables.com, at no extra cost. Learn more)
Introduction
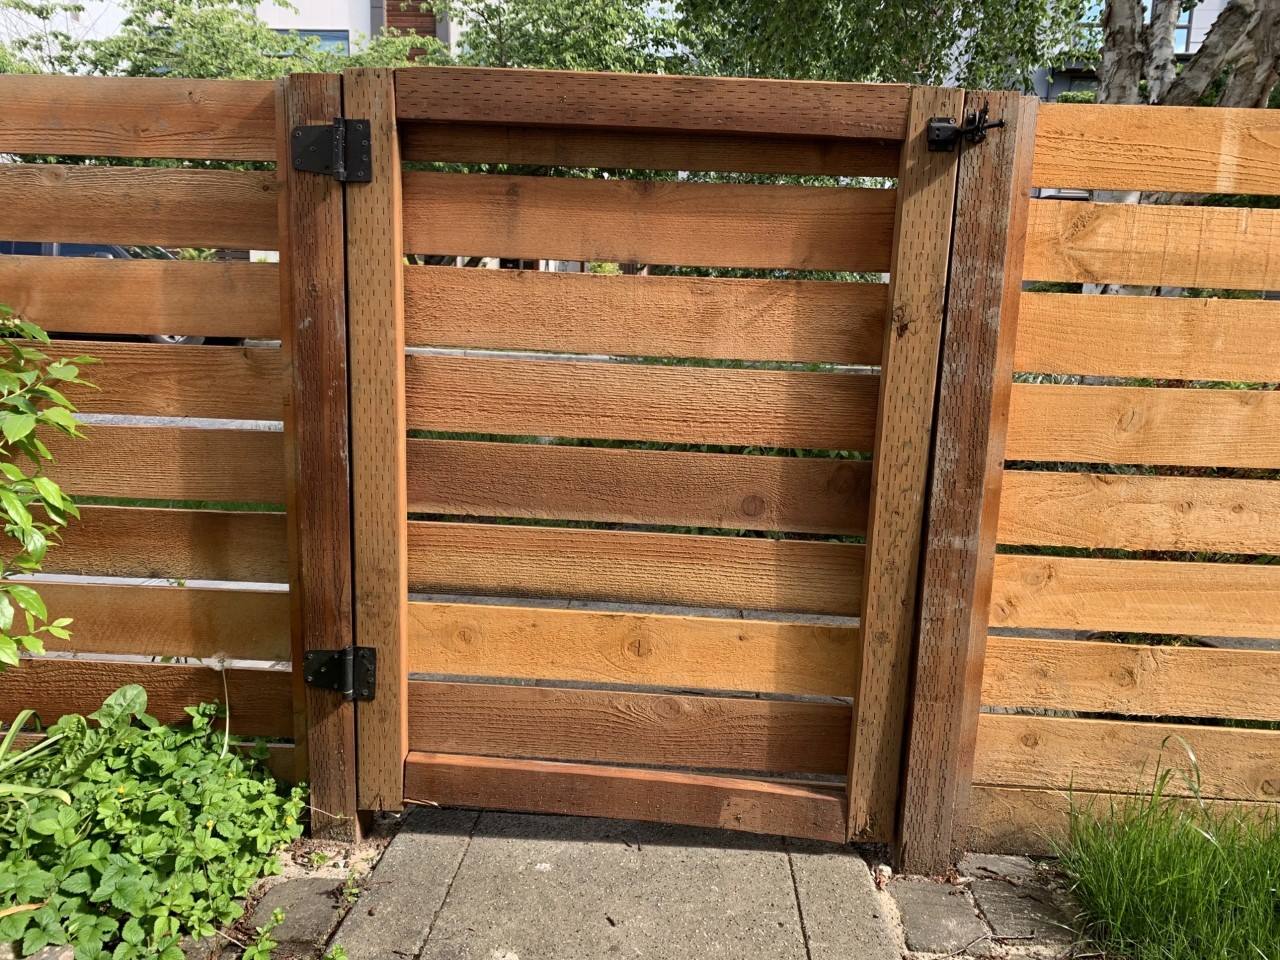
A sagging fence gate can be a frustration for homeowners. Not only does it detract from the overall appearance of the property, but it can also impact the functionality and security of the fence. A gate that no longer swings smoothly or fails to align properly can compromise the privacy and safety of the premises.
Understanding the causes of a sagging fence gate is the first step in finding an effective solution. Over time, weather conditions, wear and tear, and improper installation can all contribute to a gate losing its structural integrity. The constant opening and closing of the gate, combined with exposure to the elements, can lead to hinges becoming loose or damaged, and the gate frame weakening over time.
Evaluating the severity of the sag is crucial in determining the necessary repair measures. In some cases, a slight sag may only require minor adjustments, while a significant sag may require more extensive repairs or even the replacement of certain gate components.
Key Takeaways:
- Properly fixing a sagging fence gate involves steps such as inspecting and repairing hinges, reinforcing the gate frame, aligning and leveling the gate, and implementing preventative measures to avoid future sagging.
- Regular maintenance, care, and attention to detail are essential in prolonging the lifespan and functionality of a fence gate, minimizing the occurrence of sagging, and ensuring long-term stability and durability.
Understanding the Causes of a Sagging Fence Gate
A sagging fence gate can be a common issue that many homeowners encounter. Various factors contribute to this problem, and understanding the causes is crucial in finding the most effective solution.
One of the primary reasons for a sagging fence gate is the natural wear and tear that occurs over time. Constant use, exposure to the elements, and the weight of the gate can gradually weaken the hinges and the gate frame. As the hinges lose their strength, they are no longer able to support the weight of the gate, resulting in sagging.
Weather conditions also play a significant role in causing a fence gate to sag. Extreme heat and cold can cause the wood to expand and contract, leading to warping and weakening of the gate structure. Moisture, in the form of rain or snow, can also impact the integrity of the gate, causing it to warp or rot over time. Additionally, high winds can exert force on the gate, putting strain on the hinges and causing them to loosen or break.
Improper installation of the gate is another factor that can contribute to sagging. If the gate was not initially installed with proper alignment and support, it is more likely to sag over time. Insufficient bracing or not using enough screws or nails to secure the gate can lead to instability and eventual sagging.
Understanding the causes of a sagging fence gate is essential in determining the appropriate repair approach. Whether it requires simple adjustments or more extensive repairs, addressing the underlying cause of the sag is crucial to restoring the functionality and aesthetics of the gate.
Evaluating the Severity of the Sag
When faced with a sagging fence gate, it is important to assess the severity of the sag to determine the appropriate course of action. By evaluating the extent of the sag, you can determine whether simple adjustments or more extensive repairs are necessary.
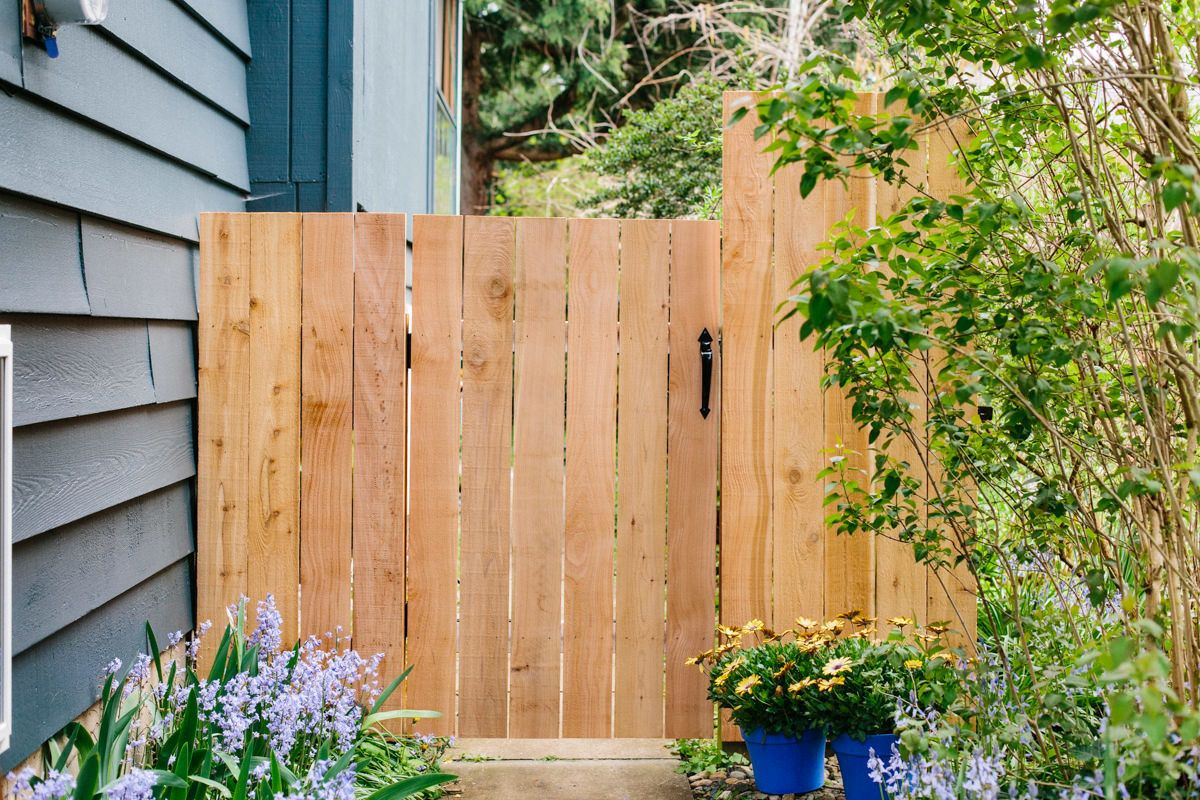
One way to evaluate the severity of the sag is by visually inspecting the gate. Take a step back and assess the gate’s alignment with the fence posts and the ground. Look for any noticeable sagging, misalignment, or gaps between the gate and the fence. A slight sag may be visually apparent, but it might not impact the gate’s functionality or require immediate attention.
Next, try opening and closing the gate to test its functionality. Pay attention to any resistance, dragging, or dragging sounds. If the gate no longer opens and closes smoothly or if it scrapes against the ground or fence posts, the sag may be more significant. This can indicate that the hinges are under strain or that the gate is misaligned, requiring more extensive repairs.
Another way to evaluate the severity of the sag is by physically measuring the amount of sag present. Use a level or a straight board to check the gate’s alignment. Place it vertically against the gate and note if there are any gaps or deviations from a straight line. Repeat this measurement at different points along the gate’s height to get a comprehensive understanding of the sag’s severity.
Consider the age and condition of the gate as well. If the gate is relatively new and has been properly installed, a slight sag might be due to minor adjustments or maintenance rather than significant repairs. However, if the gate is old, weakened, or showing signs of rot or damage, the sag may be a result of more substantial structural issues that require immediate attention.
By evaluating the severity of the sag, you can determine the best course of action to fix the gate. Minor adjustments such as tightening screws or lubricating hinges may be sufficient for a slight sag. However, if the sag is significant or if there are signs of structural damage, it may be necessary to address underlying issues such as replacing hinges, reinforcing the gate frame, or even considering a gate replacement.
Tools and Materials Needed
Before you begin fixing a sagging fence gate, it’s important to gather the necessary tools and materials. Having everything prepared beforehand will help streamline the repair process and ensure you have everything you need for a successful outcome. Here is a list of the tools and materials you may need:
Tools:
- Hammer
- Screwdriver or Drill
- Adjustable Wrench
- Level
- Tape Measure
- Hacksaw or Saw
- Pliers
- Chisel
- Mallet or Rubber Hammer
- Paintbrush (optional)
Read more: How Much For A Fence Gate
Materials:
- New Hinges (if necessary)
- Screws or Nails
- Wood Glue or Epoxy Adhesive
- Wood Shims
- Metal Brackets or Reinforcement Plates
- Wood Filler or Putty
- Sandpaper
- Primer and Paint or Stain (optional)
These tools and materials will help you address various aspects of the repair process, from removing the gate and inspecting the hinges to reinforcing the gate frame and aligning the gate properly. Depending on the specific issues causing the sagging, you may not need to use all of the tools and materials listed above. It’s important to assess the situation and gather the tools and materials that best align with your specific repair needs.
Before starting the repair, it’s also a good idea to have safety equipment on hand, such as gloves and safety goggles, especially if you will be working with power tools or performing tasks that involve sharp objects or potential hazards.
By having the necessary tools and materials ready, you can tackle the repair with confidence and ensure that you have everything you need to restore your fence gate to its proper functionality.
Step-by-Step Guide to Fix a Sagging Fence Gate
Fixing a sagging fence gate requires a systematic approach to ensure a successful repair. Follow these step-by-step instructions to restore your gate’s functionality and address the issue of sagging:
- Removing the Gate: Start by removing the gate from the hinges. Use a screwdriver or drill to remove the screws or nails that secure the hinges to the gate and the fence post. Have someone assist you in lifting the gate off the hinges and set it aside in a safe location.
- Inspecting and Repairing Hinges: Examine the hinges for any signs of damage, rust, or wear. If the hinges are loose, tighten the screws or replace them if necessary. If the hinges are damaged beyond repair, remove them and install new hinges in their place.
- Reinforcing Gate Frame: Inspect the gate frame for any signs of damage, rot, or weakening. If there are weak or damaged areas, reinforce them using metal brackets or reinforcement plates. Apply wood glue or epoxy adhesive to strengthen the joints and ensure a solid connection.
- Aligning and Leveling the Gate: Use a level to check the gate’s alignment and adjust as needed. If the gate is sagging, insert wood shims between the gate and the fence post to level it. Make sure the gate is aligned vertically and horizontally, and adjust the shims accordingly.
- Reinstalling the Gate: Once the gate is aligned and leveled, carefully lift it back onto the hinges. Secure the hinges to the gate and the fence post using screws or nails. Check the gate’s functionality by opening and closing it to ensure it swings smoothly and aligns properly with the fence.
Throughout the repair process, pay attention to any additional issues that may arise. If you notice any areas of the gate frame that are rotten or severely damaged, consider replacing those sections with new wood. Patch up any holes, cracks, or gaps with wood filler or putty, and sand the surface to create a smooth finish.
Depending on your preference, you can also apply a coat of primer and paint or stain to protect the gate from the elements and enhance its appearance.
By following this step-by-step guide, you can effectively address the issue of a sagging fence gate and restore its functionality and visual appeal.
Removing the Gate
Before you can begin fixing a sagging fence gate, the first step is to remove the gate from the hinges. This will allow you to work on the gate more easily and assess any issues that may be causing the sag. Follow these steps to properly remove the gate:
- Gather the necessary tools: You will need a screwdriver or a drill to remove the screws or nails that secure the hinges to the gate and the fence post.
- Assess the gate: Take a moment to visually inspect the gate and identify the hinges and how they are attached to the gate and the fence post. This will give you an understanding of how to remove them.
- Begin removing the hinge screws: Use the appropriate tool, either a screwdriver or a drill, to remove the screws from each hinge. If there are nails instead of screws, use a claw hammer to pry them out. It’s helpful to have someone hold the gate in place while you remove the screws or nails to prevent it from falling.
- Remove the gate: Once all the screws or nails have been removed, gently lift the gate off the hinges. Pay attention to the weight of the gate, as some gates can be heavy. It may be helpful to have another person assist you in lifting the gate safely. Place the gate in a secure location, away from the worksite, to ensure it doesn’t interfere with your repairs.
- Inspect the hinges: With the gate removed, take the opportunity to inspect the hinges for any signs of damage or wear. Look for loose screws, rust, or any other issues that may have contributed to the sagging. If the hinges are damaged beyond repair, note that you may need to replace them during the repair process.
By carefully following these steps, you can safely remove the gate from the hinges and prepare it for further examination and repair. Remember to exercise caution while handling the gate, especially if it is heavy, to avoid any injuries or damage to the gate or yourself.
Inspecting and Repairing Hinges
Once you have removed the gate from the hinges, the next step in fixing a sagging fence gate is to inspect and repair the hinges. Hinges play a critical role in supporting the weight of the gate and ensuring smooth operation. Follow these steps to properly inspect and repair the hinges:
- Assess the condition of the hinges: Take a close look at the hinges and examine them for any signs of damage, such as rust, wear, or bending. Look for loose or missing screws and make note of any issues that need repair.
- Tighten loose screws: If you notice that the hinges have loose screws, use a screwdriver or a drill to tighten them. Ensure that each screw is secure and snug, as loose screws can contribute to the sagging of the gate.
- Replace damaged hinges: If the hinges are severely damaged or beyond repair, they may need to be replaced. Remove the old hinges by unscrewing them from the gate and the fence post. Take note of the hinge size and style to ensure you purchase suitable replacements.
- Install new hinges: Place the new hinges against the gate and the fence post, aligning them with the existing screw holes. Secure the hinges by inserting screws through the holes and tightening them. Make sure the hinges are properly aligned and level with each other to ensure smooth operation of the gate.
- Test the functionality: Once the hinges are repaired or replaced, test the gate’s functionality. Open and close the gate to ensure it swings smoothly and aligns properly with the fence. Check for any resistance, scraping, or misalignment, and make further adjustments if necessary.
Inspecting and repairing the hinges is crucial in ensuring the gate’s stability and proper operation. By addressing any hinge issues, you can contribute to the overall improvement of the gate and help prevent future sagging.
Remember to choose hinges that are suitable for your gate’s weight and size. If you are unsure about the type of hinges to use or need guidance on the repair process, consulting with a professional or a knowledgeable expert can be beneficial.
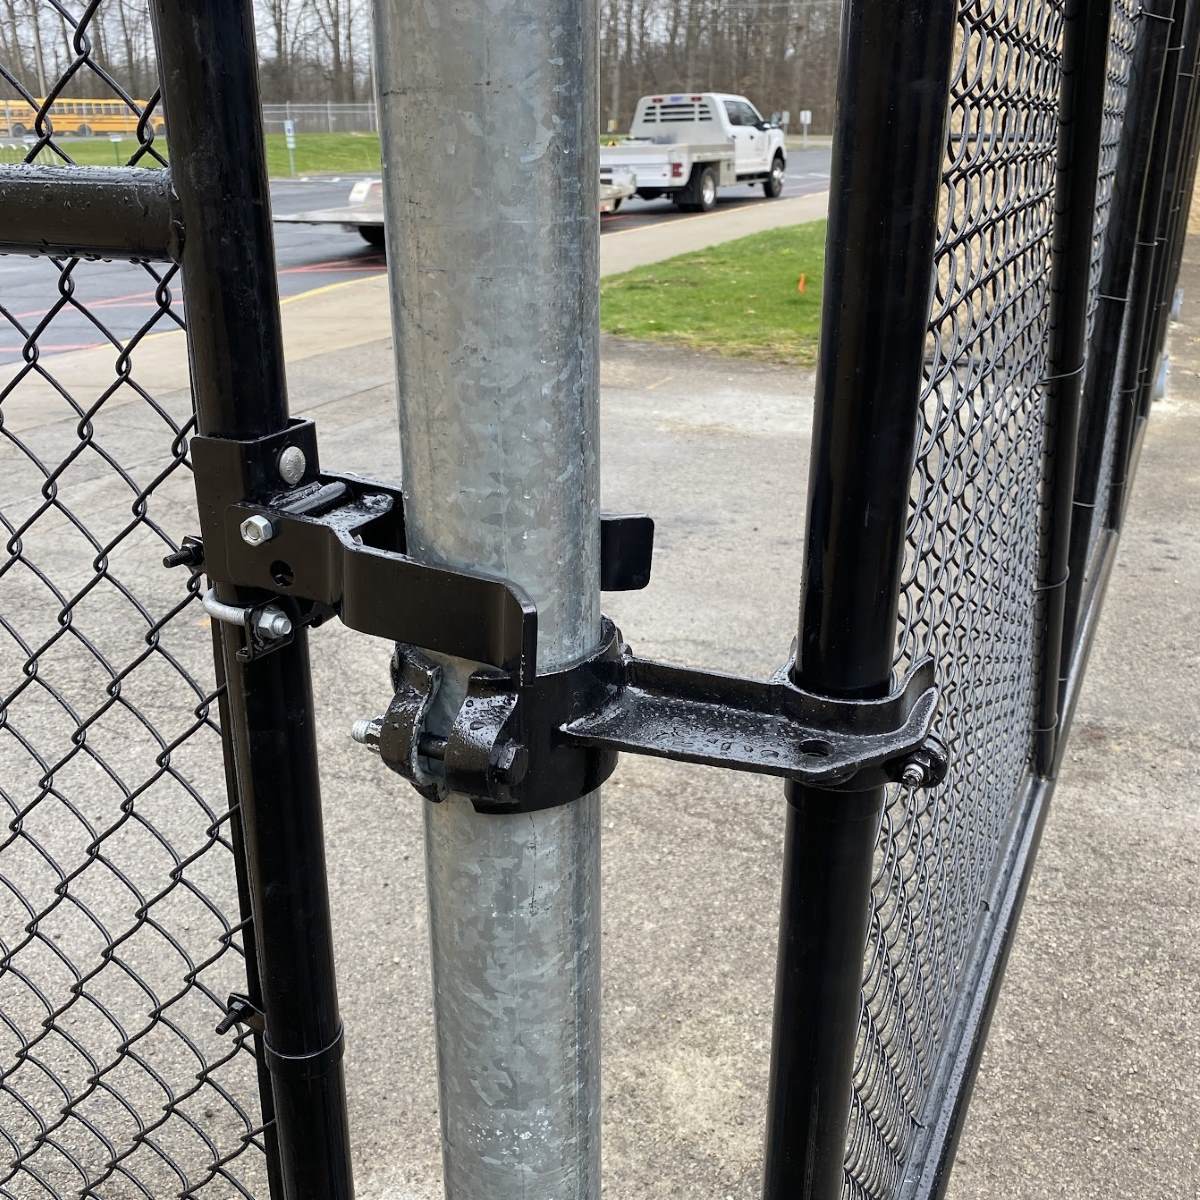
Check the hinges and latch for any damage or wear. Replace any worn out or damaged hardware to ensure the gate can close properly. Adjust the hinges to lift the gate and prevent sagging.
Read more: How To Install Fence Gate
Reinforcing Gate Frame
After inspecting and repairing the hinges, the next step in fixing a sagging fence gate is to reinforce the gate frame. The gate frame provides the necessary support and stability for the gate, and reinforcing it will help prevent future sagging. Follow these steps to properly reinforce the gate frame:
- Identify weak or damaged areas: Carefully examine the gate frame for any signs of weakness, rot, or damage. Common problem areas include the corners, joints, and areas where the frame meets the hinges.
- Apply wood glue or epoxy adhesive: If you identify any weak or damaged areas, apply a generous amount of wood glue or epoxy adhesive to reinforce the joints and connections. This will help restore the strength and stability of the gate frame. Use a paintbrush or a spreader to evenly distribute the adhesive along the affected areas.
- Secure with clamps or apply pressure: Once the adhesive is applied, use clamps or apply pressure to ensure a tight bond between the wood surfaces. This will help the adhesive set properly and strengthen the gate frame.
- Install metal brackets or reinforcement plates: In addition to adhesive, you can further reinforce the gate frame by installing metal brackets or reinforcement plates. These can be placed at the corners or weak areas of the gate frame. Use screws or nails to secure the brackets or plates to the wood, ensuring a secure and sturdy connection.
- Allow the adhesive to dry: Follow the manufacturer’s instructions regarding drying time for the adhesive used. Once the adhesive is fully dry, remove any clamps or pressure applied and check the gate frame for stability.
Reinforcing the gate frame is essential in strengthening the overall structure of the gate and minimizing the chances of future sagging. By addressing weak or damaged areas and applying adhesive and reinforcement plates, you can ensure that the gate frame provides the necessary support to keep the gate properly aligned and functioning smoothly.
Remember to choose a high-quality wood glue or epoxy adhesive suitable for outdoor use. If you are unsure about the best adhesive or reinforcement method to use for your specific gate frame, consulting with a professional or a knowledgeable expert can provide invaluable guidance.
Aligning and Leveling the Gate
Once you have reinforced the gate frame, the next step in fixing a sagging fence gate is to align and level the gate. Proper alignment and leveling will ensure that the gate operates smoothly and prevents any additional strain on the hinges. Follow these steps to properly align and level the gate:
- Gather a level: Use a level, which can be a long straight board or an actual leveling tool, to check the alignment of the gate. A level will help you determine if the gate is straight vertically (for vertical alignment) and horizontally (for horizontal alignment).
- Place the level against the gate: Hold the level vertically against the gate to check if it is straight. Look for any gaps or deviations from a straight line. Repeat this process at different points along the gate’s height to ensure accurate measurements.
- Insert wood shims: If the gate is sagging, use wood shims to level it. Place the shims between the gate and the fence post at the points where the gate is sagging. Gradually insert the shims until the gate is level, both vertically and horizontally.
- Adjust the shims: Once the shims are in place, adjust them as needed to achieve proper alignment. Tap them gently with a mallet or a rubber hammer until the gate is level and aligned with the fence post.
- Check the gate’s swing: Open and close the gate to check if it swings smoothly and aligns properly with the fence. Look for any resistance or scraping that may indicate misalignment. If necessary, make additional adjustments to the shims to achieve optimal gate swing and alignment.
Aligning and leveling the gate is essential to ensure its smooth operation and prevent further sagging. Proper alignment will also help evenly distribute the weight of the gate, reducing stress on the hinges and the overall structure of the fence.
Remember to use high-quality wood shims that are sturdy and suitable for outdoor use. If you are unsure about the correct alignment or the number of shims to use, consulting with a professional or a knowledgeable expert can provide valuable insights and guidance.
Reinstalling the Gate
After aligning and leveling the gate, the final step in fixing a sagging fence gate is to reinstall it. Reinstalling the gate properly will ensure that it is securely attached to the hinges and functions smoothly. Follow these steps to properly reinstall the gate:
- Gather the necessary tools: You will need a screwdriver or a drill to secure the hinges to the gate and the fence post.
- Lift the gate onto the hinges: With the assistance of another person if needed, carefully lift the gate and place it onto the hinges. Make sure the hinges line up with the hinge pins or the hinge plates on the gate and the fence post.
- Secure the hinges: Once the gate is in position, use the appropriate screws to secure the hinges to the gate and the fence post. Start by screwing in one screw for each hinge, then check the alignment and levelness of the gate. Adjust as needed before tightening all the screws.
- Test the functionality: Open and close the gate multiple times to test its functionality. Ensure that it swings smoothly, aligns properly with the fence, and latches securely. Make any necessary adjustments to the hinges or the gate itself to improve its operation.
- Make final adjustments: Once you are satisfied with the gate’s functionality, check the alignment and levelness once again. Use a level to ensure the gate is vertically straight and horizontally even. Make any final adjustments to the hinges or shims to achieve optimal alignment.
Reinstalling the gate correctly is crucial to ensure its stability and proper functioning. Take your time during this step to ensure that all screws are tightened securely and that the gate is aligned and leveled properly.
Remember to choose screws that are suitable for outdoor use and compatible with your gate and hinge materials. If you are unsure about the correct installation process or need guidance on the appropriate hardware to use, consulting with a professional or a knowledgeable expert can provide valuable assistance.
Preventative Measures to Avoid Future Sagging
After fixing a sagging fence gate, it’s important to take preventative measures to avoid future sagging. By implementing these measures, you can maintain the integrity and functionality of the gate over the long term. Here are some preventative measures to consider:
- Maintain regular inspections: Schedule regular inspections of the gate and its components to identify any signs of wear, damage, or potential issues. This will allow you to address any problems early on and prevent them from developing into more significant concerns.
- Keep the gate clean and free of debris: Regularly clean the gate, removing any dirt, leaves, or other debris that may accumulate. This will prevent moisture retention and potential rot, as well as reduce the weight that can strain the hinges and the gate frame.
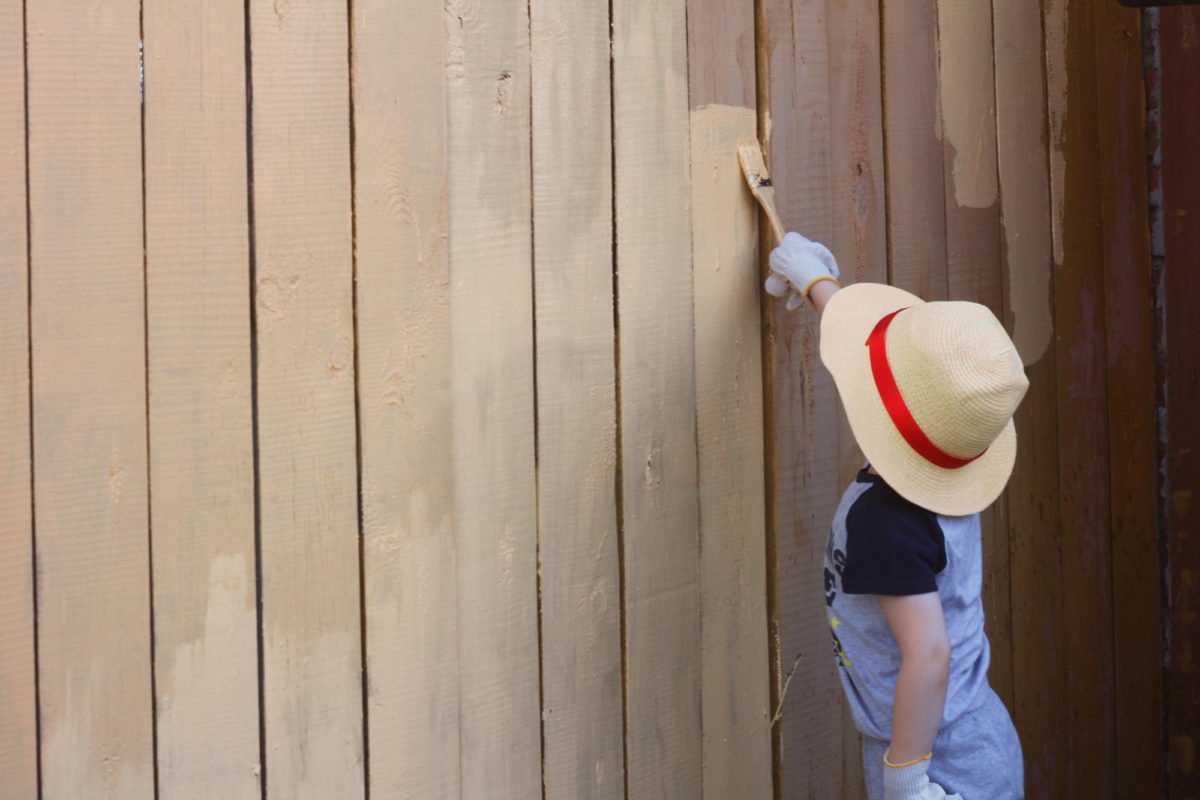
- Apply protective finishes: Apply a protective finish, such as paint, stain, or sealant, to the gate and its components. This will provide a barrier against moisture, UV rays, and other environmental factors that can cause damage or weakening of the gate over time.
- Perform routine maintenance: Carry out routine maintenance tasks, such as lubricating hinges, tightening screws or bolts, and checking for any signs of loosening or damage. By addressing minor issues promptly, you can prevent them from worsening and causing sagging.
- Adjust hinges when needed: Keep an eye on the hinges and adjust them if you notice any signs of misalignment or sagging. Regularly ensure that the hinges are securely fastened and properly aligned to maintain the stability of the gate.
- Consider gate reinforcement: If you anticipate heavy use or have experienced recurring sagging issues, consider reinforcing the gate frame with additional bracing or structural supports. This can provide added strength and stability to prevent future sagging.
- Avoid excessive force: Remind family members and visitors to avoid leaning on or exerting excessive force on the gate. Excessive force can strain the hinges and the gate frame, leading to sagging over time.
Taking preventative measures is crucial in prolonging the lifespan and functionality of your fence gate. By implementing regular inspections, maintenance, and proper care, you can minimize the occurrence of sagging and ensure that your gate remains secure, aligned, and functional for years to come.
Remember, if you notice any substantial or recurring sagging issues, consider seeking professional assistance to assess and address the underlying causes effectively.
Read more: How Wide Is A Fence Gate
Conclusion
Dealing with a sagging fence gate can be a frustrating experience, but with the right approach, it is a problem that can be effectively fixed. By understanding the causes of a sagging gate, evaluating its severity, and following the appropriate steps, you can restore the functionality and appearance of your gate.
Inspecting and repairing the hinges, reinforcing the gate frame, aligning and leveling the gate, and taking preventative measures are essential in ensuring the long-term stability and durability of your fence gate. By addressing any underlying issues and implementing regular maintenance and care, you can minimize the chances of future sagging and prolong the lifespan of your gate.
Remember to gather the necessary tools and materials, follow each step carefully, and seek assistance if needed. Safety should always be a priority, so use appropriate safety equipment and tools when working on your gate.
By taking the time to fix a sagging fence gate properly, you can enhance the security, privacy, and aesthetics of your property. A well-maintained gate not only improves the overall curb appeal but also provides peace of mind knowing that your property is protected.
Lastly, if you encounter any challenges or if the sagging issue persists despite your efforts, consider consulting with a professional for expert guidance and assistance. They can provide valuable insights and recommendations tailored to your specific gate and situation.
With patience, attention to detail, and the willingness to tackle the repair, you can overcome a sagging fence gate and restore it to its full functionality, ensuring years of reliable service and enhancing the overall value of your property.
Frequently Asked Questions about How To Fix Sagging Fence Gate
Was this page helpful?
At Storables.com, we guarantee accurate and reliable information. Our content, validated by Expert Board Contributors, is crafted following stringent Editorial Policies. We're committed to providing you with well-researched, expert-backed insights for all your informational needs.


0 thoughts on “How To Fix Sagging Fence Gate”